How to place images inside widgets in the sidebars in WordPress
•Descargar como PPTX, PDF•
1 recomendación•461 vistas

How to place an image into the sidebar using the image widget or the text widget with the correct code.

Recomendados
Más contenido relacionado
Destacado
Destacado (14)
Similar a How to place images inside widgets in the sidebars in WordPress
Similar a How to place images inside widgets in the sidebars in WordPress (20)
How to place images inside widgets in the sidebars in WordPress
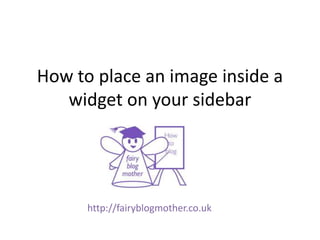
- 1. How to place an image inside a widget on your sidebar http://fairyblogmother.co.uk
- 2. Go to ‘Appearance’ in the left sidebar of the Dashboard and from the menu extension select ‘Widgets’. Alternatively, click on your blog’s name at the top left of the black bar at the top of the page, and select ‘Widgets’ from the drop down menu.
- 3. Select the widget called ‘Image’.
- 4. And drag it into the position you want it to be in you sidebar.
- 5. Once placed into the sidebar, the widget will automatically open up. The first field is for the widget’s title. This will show above the widget when it is placed in the sidebar.
- 6. The second field requires the URL of the image the sidebar will display. Once an image has been uploaded into the Media Library, it is allocated a URL or web address for its own page on the blog. See how to find the image’s URL on the next slide.
- 7. An image’s URL is located by going to the Media Library, finding the correct image, and mousing over the title to bring up the ‘Edit’ link. On the next page look over to the Save menu on the top right to find the URL.
- 8. The third field contains the alternative text, which is a description of the image for the search engines (who cannot read images) and also for partially sighted web users (who require their computers to read for them).
- 9. The fourth field contains the image’s title, which shows up as the little yellow tag when the image is moused over. It should also be descriptive.
- 10. The fifth field contains the caption, which is the description that goes underneath the image. A point to note is that the caption is the second thing most likely to be read after the post’s headline.
- 11. Alignment determines the position of the image within the widget.
- 12. You can change the pixel width and height of your image here.
- 13. And if you want your image to be a link to another destination, write its URL or web address here.
- 14. And don’t forget to save.
- 15. And here’s your picture widget!
- 16. The alternative widget would be the text one, but then you will need to write in some code to make your images show up, like these social media icons here:
- 17. Here is some simple code that allows the images to show in the widget in the sidebar and also directs that image to a web address destination. I will explain it in the next slide.
- 18. The first thing I want you to notice is the image’s URL. It is placed between quotation marks.
- 19. Now it has <img src= in front of it, and /> after it. This simple code tells the widget here is an image that needs to be shown, and where it is kept.
- 20. This code will simply show the image in the text widget aligned on the left. Here it is complete: <img src=“http://alicedesigns.wordpress.com/2009/11/sidebar-twitter.jpg”/> Show this Open This is the blog The date it The name of Close Finish image location where it’s kept was uploaded the jpeg location imag e
- 21. But if you want your image to be a link to somewhere else, you need more code before and after it. Type in the destination URL the image is directed to in front of the image code. It should also be inside quotation marks.
- 22. Now put in <a href= before it immediately in front of the quotation mark. And a > before the <img which you will recognise as the beginning of the image code. You are enclosing the destination URL in between the <>
- 23. But you need to cancel the instructions to redirect the image to another location at the end of the code, so don’t forget to add </a> at the end of all the code. The <a href= and </a> is the code for the link, and the image code is placed inside it. Also note / cancels out an instruction. Now this Twitter image is linked to my Twitter profile.
- 24. Now do the same for the other images and their destinations, and they will sit side by side inside the text widget. NB: It is advantageous to make your images the correct size before uploading and inserting them into your widgets. Sophisticated stuff: If you want your images to be on separate lines, add a <p> in between each of their complete codes. If you want the image to open up on a separate browser page, add this code before the > for the link: target=“_blank”.