SlideShare una empresa de Scribd logo
1 de 113
Descargar para leer sin conexión
226683 PA1
Gebrauchs- und Montageanweisung
Glaskeramik-Kochfeld
Instructions for fitting and use
Glass ceramic hob
Instructions de montage et d’utilisation
Table de cuisson vitrocéramique
Gebruiks- en montage-instructies
Keramische kookplaat
Istruzioni per uso e montaggio
Piano di cottura in vetroceramica
Instrucciones para el uso y montaje
Encimera vitrocerámica
Instruções de uso e de montagem
Placa de cozinhar em vitrocerâmica
2
D
D..................................................................... 2
GB ................................................................ 18
F ................................................................... 34
NL................................................................. 50
I .................................................................... 66
E................................................................... 82
P................................................................... 98
Verpackungs-Entsorgung
Entsorgen Sie die Transportverpackung möglichst umweltge-
recht. Das Rückführen der Verpackungsmaterialien in den Mate-
rialkreislauf spart Rohstoffe und verringert das Müllaufkommen.
Altgeräte-Entsorgung
Das Symbol auf dem Produkt oder seiner Ver-
packung weist darauf hin, dass dieses Produkt
nicht als normaler Haushaltsabfall zu behandeln
ist, sondern an einem Sammelpunkt für das
Recycling von elektrischen und elektronischen
Geräten abgegeben werden muss.
Durch Ihren Beitrag zum korrekten Entsorgen
dieses Produkts schützen Sie die Umwelt und die Gesundheit
Ihrer Mitmenschen. Umwelt und Gesundheit werden durch fal-
sches Entsorgen gefährdet. Weitere Informationen über das
Recycling dieses Produkts erhalten Sie von Ihrem Rathaus, Ihrer
Müllabfuhr oder dem Geschäft, in dem Sie das Produkt gekauft
haben.
Bestimmungsgemäße Verwendung
Das Kochfeld ist nur für die Zubereitung von Speisen im Haushalt
zu benutzen. Es darf nicht zweckentfremdet und nur unter Auf-
sicht verwendet werden.
Hier finden Sie...
Bitte lesen Sie die Informationen in diesem Heft sorgfältig durch
bevor Sie Ihr Kochfeld in Betrieb nehmen. Sie finden hier wich-
tige Hinweise für Ihre Sicherheit, den Gebrauch, die Pflege und
die Wartung des Gerätes, damit sie lange Freude an Ihrem Gerät
haben.
Sollte einmal eine Störung auftreten, sehen Sie bitte erst einmal
im Kapitel „Was tun bei Problemen?“ nach. Kleinere Störungen
können Sie oft selbst beheben und sparen dadurch unnötige Ser-
vicekosten.
Bewahren Sie diese Anleitung sorgfältig auf. Bitte reichen Sie
diese Gebrauchs- und Montageanweisung zur Information und
Sicherheit an neue Besitzer weiter.
Inhaltsverzeichnis
Sicherheitshinweise................................................................. 3
Für Anschluss und Funktion ................................................... 3
Für das Kochfeld..................................................................... 3
Für Personen .......................................................................... 3
Gerätebeschreibung ................................................................ 4
Bedienung durch Sensortasten............................................... 5
Bedienung................................................................................. 6
Betriebsdauerbegrenzung....................................................... 6
Sonstige Funktionen ............................................................... 6
Energiespartipps..................................................................... 6
Kochstufen.............................................................................. 6
Restwärmeanzeige ................................................................. 6
Tastenbetätigung .................................................................... 7
Kochfeld und Kochzone einschalten....................................... 7
Kochzone ausschalten............................................................ 7
Kochfeld abschalten................................................................ 7
Zweikreis-/Dreikreiszuschaltung ............................................ 8
Kindersicherung ..................................................................... 8
Abschaltautomatik (Timer) ..................................................... 9
Kurzzeitwecker (Eier-Uhr) ...................................................... 9
STOP-Funktion .................................................................... 10
Warmhaltefunktion ............................................................... 10
Ankochautomatik ................................................................. 11
Reinigung und Pflege ............................................................ 12
Glaskeramik-Kochfeld........................................................... 12
Spezielle Verschmutzungen ................................................. 12
Was tun bei Problemen? ....................................................... 13
Montageanweisung................................................................ 14
Sicherheitshinweise für den Küchenmöbelmonteur.............. 14
Einbau................................................................................... 14
Elektrischer Anschluss.......................................................... 16
Technische Daten................................................................. 17
Inbetriebnahme..................................................................... 17
Sicherheitshinweise D
3
Sicherheitshinweise
Für Anschluss und Funktion
• Die Geräte werden nach den einschlägigen Sicherheitsbestim-
mungen gebaut.
• Netzanschluss, Wartung und Reparatur der Geräte darf nur
ein autorisierter Fachmann nach den geltenden Sicherheitsbe-
stimmungen vornehmen. Unsachgemäß ausgeführte Arbeiten
gefährden Ihre Sicherheit.
Für das Kochfeld
• Stellen Sie Töpfe und Pfannen nicht leer auf eingeschaltete
Kochzonen. Vermeiden Sie das Leerkochen der Töpfe, da
dabei Überhitzungsgefahr der Töpfe besteht!
• Vorsicht bei der Verwendung von Simmertöpfen. Simmertöpfe
können unbemerkt leerkochen! Dies führt in der Folge zu
Beschädigungen am Topf und am Kochfeld. Hierfür wird keine
Haftung übernommen!
• Überhitzte Fette und Öle können sich selbst entzünden. Spei-
sen mit Fetten und Ölen nur unter Aufsicht zubereiten. Entzün-
dete Fette und Öle niemals mit Wasser löschen! Deckel
auflegen, Kochzone abschalten.
• Die Glaskeramik-Fläche ist sehr widerstandsfähig. Vermeiden
Sie dennoch, dass harte Gegenstände auf die Glaskeramik-
Fläche fallen. Punktförmige Schlagbelastungen können zum
Bruch des Kochfeldes führen.
• Bei Brüchen, Sprüngen, Rissen oder anderen Beschädigun-
gen an der Glaskeramik besteht Stromschlaggefahr. Das
Gerät sofort außer Betrieb setzen. Sofort die Haushalts-Siche-
rung ausschalten und den Kundendienst rufen.
• Sollte sich das Kochfeld durch einen Defekt der Sensorsteue-
rung nicht mehr abschalten lassen, sofort die Haushalts-Siche-
rung ausschalten und den Kundendienst rufen.
• Vorsicht beim Arbeiten mit Haushaltsgeräten! Anschlussleitun-
gen dürfen nicht mit den heißen Kochzonen in Berührung kom-
men.
• Das Glaskeramik-Kochfeld darf nicht als Ablagefläche benutzt
werden.
• Keine Alufolie bzw. Kunststoff auf die Kochzonen legen. Von
der heißen Kochzone alles fernhalten, was schmelzen kann,
z.B. Kunststoffe, Folie, besonders Zucker und stark zuckerhal-
tige Speisen. Zucker sofort im heißen Zustand mit einem spe-
ziellen Glasschaber vollständig von dem Glaskeramik-
Kochfeld entfernen, um Beschädigungen zu vermeiden.
• Keine feuergefährlichen, leicht entzündbaren oder verformba-
ren Gegenstände direkt unter das Kochfeld legen.
• Niemals verschlossene Konservendosen und Verbundschicht-
verpackungen auf Kochzonen erhitzen. Durch Energiezufuhr
könnten diese zerplatzen!
• Die Sensortasten sauber halten, da Verschmutzungen vom
Gerät als Fingerkontakt erkannt werden könnte. Niemals
Gegenstände (Töpfe, Geschirrtücher, etc.) auf die Sensortas-
ten stellen!
• Wenn Töpfe bis über die Sensortasten überkochen, raten wir
dazu, die Aus-Taste zu betätigen.
• Heiße Töpfe und Pfannen dürfen die Sensortasten nicht abde-
cken. In diesem Fall schaltet sich das Gerät automatisch ab.
• Flambieren Sie nie unter einer Dunstabzugshaube - im Filter
befindliches Fett kann dabei in Brand geraten!
• Wiederholtes Festbrennen von Verschmutzungen vermeiden.
Für Personen
• Dieses Gerät ist nicht dafür bestimmt, durch Personen (ein-
schließlich Kinder) mit eingeschränkten physischen, sensori-
schen oder geistigen Fähigkeiten oder mangels Erfahrung
und/oder mangels Wissen benutzt zu werden, es sei denn, sie
werden durch eine für ihre Sicherheit zuständige Person
beaufsichtigt oder erhielten von ihr Anweisungen, wie das
Gerät zu benutzen ist.
Kinder sollten beaufsichtigt werden, um sicherzustellen, dass
sie nicht mit dem Gerät spielen.
• Achtung:
Die Oberflächen an Heiz- und Kochstellen werden bei Betrieb
heiß. Aus diesem Grunde sollten Kleinkinder grundsätzlich
ferngehalten werden.
4
Gerätebeschreibung D
Gerätebeschreibung
Das Dekor kann von den Abbildungen abweichen.
1. Kochzone vorne links
2. Kochzone hinten links
3. Kochzone hinten rechts
4. Kochzone vorne rechts
5. Touch-Control Bedienfeld
6. Glaskeramik-Kochfeld
7. Ein/Aus-Taste
8. Kochzonenauswahl-Taste
9. Symbol zur Zuordnung der Lage der Kochzone auf dem
Glaskeramik-Kochfeld
10. Plus-Taste (erhöhen) / Minus-Taste (verringern)
11. Kochstufen-Anzeige
12. Bereitschaftspunkt
13. Kreiszuschaltungstaste
14. Kontrollleuchte (Kreiszuschaltung)
15. Timer-Selektions-Taste
16. Timer-Anzeige
17. Kontrollleuchte zur Zuordnung der Lage der Kochzone auf
dem Glaskeramik-Kochfeld
18. Kurzzeitwecker-Leuchte
19. STOP-Taste
Gerätebeschreibung D
5
Bedienung durch Sensortasten
Die Bedienung des Glaskeramik-Kochfeldes erfolgt durch Touch-
Control Sensortasten. Die Sensortasten funktionieren wie folgt:
mit der Fingerspitze ein Symbol auf der Glaskeramikoberfläche
kurz berühren. Jede korrekte Betätigung wird durch einen Signal-
ton bestätigt. Nachfolgend wird die Touch-Control Sensortaste
als „Taste” bezeichnet.
Ein/Aus-Taste (7)
Mit dieser Taste wird das gesamte Kochfeld ein- und ausge-
schaltet. Die Taste ist sozusagen der Hauptschalter.
Kochzonenauswahl-Taste; z.B. vorne links (8)
Durch Betätigung einer der zur Verfügung stehenden Kochzo-
nenauswahl-Tasten wird eine Kochzone ausgewählt, für die
anschließend mit der Plus-Taste oder Minus-Taste eine Koch-
stufe eingestellt werden kann.
Plus-Taste / Minus-Taste (10)
Mit diesen Tasten werden die Einstellungen der Kochstufen, der
Abschaltautomatik und des Kurzzeitweckers vorgenommen.
Durch die Minus-Taste wird der Anzeigewert verringert, durch die
Plus-Taste erhöht. Der Anzeigewert kann gelöscht werden,
indem beide Tasten gleichzeitig gedrückt werden.
Kochstufen-Anzeige (11)
Die Kochstufen-Anzeige zeigt die gewählte Kochstufe, oder:
H ............... Restwärme
A................ Ankochautomatik
STOP ........ Stop-Funktion
.............. Warmhaltefunktion
Wenn der Bereitschaftspunkt (12) leuchtet, kann die
Kochzone eingestellt werden.
Kreiszuschaltungstaste (13)
Für die Zuschaltung weiterer Heizkreise.
Timer-Selektions-Taste (15)
Zum Programmieren der Abschaltautomatik oder des Kurzzeit-
weckers.
STOP-Taste (19)
Der Kochvorgang kann kurzzeitig durch die STOP-Funktion
unterbrochen werden.
6
Bedienung D
Bedienung
Betriebsdauerbegrenzung
Das Kochfeld besitzt eine automatische Betriebsdauerbegren-
zung. Die kontinuierliche Nutzungsdauer jeder Kochzone ist
abhängig von der gewählten Kochstufe (siehe Tabelle).
Voraussetzung ist, dass während der Nutzungsdauer keine Ein-
stellungsänderung an der Kochzone vorgenommen wird. Wenn
die Betriebsdauerbegrenzung angesprochen hat, wird die Koch-
zone abgeschaltet, es ertönt ein kurzer Signalton und ein H
erscheint in der Anzeige.
Sonstige Funktionen
Bei längerem oder gleichzeitigem Betätigen von einer oder meh-
reren Sensortasten (z.B. durch einen versehentlich auf die Sen-
sortasten gestellten Topf) erfolgt keine Schaltfunktion.
Es blinkt das Symbol und ein zeitlich begrenzter Dauersignal-
ton ertönt. Nach einigen Sekunden wird abgeschaltet. Bitte den
Gegenstand von den Sensortasten entfernen.
Zum Löschen des Symbols die gleiche Taste betätigen oder
das Kochfeld aus- und einschalten.
Energiespartipps
Nachfolgend finden Sie einige wichtige Hinweise, um energie-
sparend und effizient mit Ihrem neuen Kochfeld und dem Koch-
geschirr umzugehen.
• Der Topfbodendurchmesser sollte gleich groß sein wie der
Kochzonendurchmesser.
• Beim Kauf von Töpfen darauf achten, dass häufig der obere
Topfdurchmesser angegeben wird. Dieser ist meistens größer
als der Topfboden.
• Schnellkochtöpfe sind durch den geschlossenen Garraum und
den Überdruck besonders zeit- und energiesparend. Durch
kurze Gardauer werden Vitamine geschont.
• Immer auf eine ausreichende Menge Flüssigkeit im Schnell-
kochtopf achten, da bei leergekochtem Topf die Kochzone und
der Topf durch Überhitzung beschädigt werden können.
• Kochtöpfe nach Möglichkeit immer mit einem passenden
Deckel verschließen.
• Zu jeder Speisemenge sollte der richtige Topf verwendet wer-
den. Ein großer kaum gefüllter Topf benötigt viel Energie.
Kochstufen
Die Heizleistung der Kochzonen kann in mehreren Stufen einge-
stellt werden. In der Tabelle finden Sie Anwendungsbeispiele für
die einzelnen Stufen.
Restwärmeanzeige
Das Glaskeramik-Kochfeld ist mit einer Restwärmean-
zeige H ausgestattet.
Solange das H nach dem Ausschalten leuchtet, kann
die Restwärme zum Schmelzen und Warmhalten von
Speisen genutzt werden. Nach dem Erlöschen des
Buchstabens H kann die Kochzone noch heiß sein. Es besteht
Verbrennungsgefahr!
Eingestellte Kochstufe
Betriebsdauerbegrenzung
(Stunden)
1
2
3
4
5
6
7
8
9
6
6
5
5
4
1,5
1,5
1,5
1,5
Kochstufe Geeignet für
0
1-2
3
4-5
6
7-8
9
Aus-Stellung, Nachwärmenutzung
Warmhaltefunktion
Fortkochen kleiner Mengen
(niedrigste Leistung)
Fortkochen
Fortkochen großer Mengen, Weiterbra-
ten größerer Stücke
Braten, Einbrenne herstellen
Braten
Ankochen, Anbraten, Braten
(höchste Leistung)
Bedienung D
7
Tastenbetätigung
Die hier beschriebene Steuerung erwartet nach der Betätigung einer (Aus-
wahl-) Taste anschließend die Betätigung einer nachfolgenden Taste.
Die Betätigung der nachfolgenden Taste muss grundsätzlich innerhalb von
10 Sekunden begonnen werden, ansonsten erlischt die Auswahl.
Die Plus-/ Minus-Tasten können einzeln angetippt werden oder permanent
gedrückt gehalten werden.
Kochfeld und Kochzone einschalten
1. Ein/Aus-Taste solange betätigen, bis die Kochstufen-Anzeigen 0
zeigen. Die Bereitschaftspunkte blinken. Die Steuerung ist betriebsbereit.
2. Anschließend eine Kochzonenauswahl-Taste betätigen (z.B. für
vorne links). Der Bereitschaftspunkt der gewählten Kochzone leuchtet.
3. Mit der Plus-Taste oder Minus-Taste eine Kochstufe auswählen.
Durch die Plus-Taste wird die Kochstufe 1 eingeschaltet, durch die
Minus-Taste die Kochstufe 9.
4. Einen Kochtopf auf die Kochzone stellen.
Um zeitgleich auf anderen Kochzonen zu kochen, die Punkte 2 bis 4 wieder-
holt durchführen.
Kochzone ausschalten
5. Bereitschaftspunkt der gewählten Kochzone muss leuchten. Dazu evtl.
Kochzonenauswahl-Taste betätigen (z.B. für vorne links).
6. a) Minus-Taste mehrmals betätigen, bis die Kochstufenanzeige 0
anzeigt, oder
b) Minus-Taste und Plus-Taste gleichzeitig einmal betätigen.
Die Kochzone wird von jeder Kochstufe aus direkt ausgeschaltet, oder
c) Ein/Aus-Taste betätigen. Das gesamte Kochfeld wird abgeschal-
tet (alle Kochzonen werden abgeschaltet).
Kochfeld abschalten
7. Ein/Aus-Taste betätigen. Das Kochfeld wird unabhängig von der
Einstellung vollständig ausgeschaltet.
Kochzonenauswahl-Tasten Bereitschaftspunkt
8
Bedienung D
Zweikreis-/Dreikreiszuschaltung
(Nur Kochzonen mit mehreren Heizkreisen)
Die Zweikreis-/Dreikreiszuschaltung der jeweiligen Kochzone kann nur nach
dem Einschalten der entsprechenden Kochzone erfolgen.
1. Gewünschte Kochstufe von 1-9 wählen.
2. Durch Betätigen der Kreiszuschaltungstaste den zweiten oder drit-
ten Heizkreis zuschalten.
Die Kontroll-Leuchte Zweikreis/Dreikreis leuchtet auf.
3. Durch erneutes Betätigen der Kreiszuschaltungstaste schaltet sich
der äußere Heizkreis aus.
Die Kontroll-Leuchte Zweikreis/Dreikreis erlischt.
Hinweis
• Die manuell zugeschalteten Heizkreise werden automatisch abgewählt,
wenn die Kochzone ausgeschaltet wird.
Kindersicherung
Die Kindersicherung soll verhindern, dass Kinder versehentlich oder absicht-
lich das Kochfeld einschalten. Dazu wird die Bedienung gesperrt.
Kindersicherung einschalten
1. Ein/Aus-Taste betätigen um das Kochfeld einzuschalten.
2. Gleich darauf Plus-Taste und Minus-Taste gleichzeitig betäti-
gen.
3. Anschließend die Plus-Taste betätigen, um die Kindersicherung zu
aktivieren. In den Kochstufen-Anzeigen erscheint ein L für Child-Lock; die
Bedienung ist gesperrt und das Kochfeld schaltet ab.
Kindersicherung ausschalten
4. Ein/Aus-Taste betätigen.
5. Gleich darauf Plus-Taste und Minus-Taste gleichzeitig betäti-
gen.
6. Anschließend die Minus-Taste betätigen, um die Kindersicherung
auszuschalten. Das L erlischt.
Kindersicherung nur für einen Kochvorgang aufheben
Voraussetzung: Die Kindersicherung ist nach Punkt 1-3 eingeschaltet.
• Ein/Aus-Taste betätigen.
• Gleich darauf Plus-Taste und Minus-Taste gleichzeitig betätigen.
Jetzt kann vom Benutzer eine Kochzone eingeschaltet werden (dazu
Kochzone auswählen und Kochstufe einstellen).
Nach dem Ausschalten des Kochfeldes ist die Kindersicherung wieder
aktiv (eingeschaltet).
Hinweis
Bei Netzausfall wird die eingeschaltete Kindersicherung aufgehoben,
d.h. deaktiviert.
Bedienung D
9
Abschaltautomatik (Timer)
Durch die Abschaltautomatik wird jede eingeschaltete Kochzone nach einer
einstellbaren Zeit automatisch abgeschaltet. Es können Kochzeiten von 1 bis
99 Minuten eingestellt werden.
1. Das Kochfeld einschalten. Eine oder mehrere Kochzonen einschalten
und gewünschte Kochstufen wählen.
2. Die Timer-Selektions-Taste betätigen. Der Bereitschaftspunkt der
Abschaltautomatik leuchtet.
Die Taste weiter betätigen, bis die Timer-Kontrollleuchte für die
gewünschte Kochzone blinkt.
Wichtig: Timer-Kontrollleuchten können nur blinken, wenn die Kochzonen
vorher eingeschaltet wurden (Kochstufe größer 0).
3. Gleich darauf durch die Plus-Taste oder Minus-Taste die Koch-
zeit von 1 bis 99 Minuten eingeben.
Durch die Plus-Taste beginnt der Anzeigewert bei 01, durch die Minus-
Taste bei 30.
Durch gleichzeitiges Betätigen der Plus- und Minus-Taste wird die Ein-
stellung zurückgesetzt (00).
4. Zur Programmierung der Abschaltautomatik für eine weitere Kochzone,
die Timer-Selektions-Taste so oft betätigen, bis die Timer-Kontroll-
leuchte für die gewünschte Kochzone blinkt. Anschließend durch die
Plus-Taste oder Minus-Taste die gewünschte Zeit einstellen.
5. Nach Ablauf der Zeit wird die Kochzone ausgeschaltet. Es ertönt ein zeit-
lich begrenzter Signalton, der durch Betätigung einer beliebigen Taste
(ausgenommen Ein/Aus-Taste) abgeschaltet werden kann.
Hinweise
• Zur Kontrolle der abgelaufenen Zeit (Abschaltautomatik) die Timer-Selek-
tions-Taste so oft betätigen, bis die Timer-Kontrollleuchte für die
gewünschte Kochzone blinkt. Der Anzeigewert kann abgelesen und verän-
dert werden.
• Abschaltautomatik vorzeitig löschen: Die jeweilige Kochzone anwählen
(Timer-Kontrollleuchte blinkt) und Plus- und Minus-Taste gleichzeitig ein-
mal betätigen.
Kurzzeitwecker (Eier-Uhr)
1. Das Kochfeld einschalten.
2. Die Timer-Selektions-Taste betätigen, bis die Kurzzeitwecker-
Leuchte über dieser Taste blinkt. Durch die Plus-Taste oder Minus-
Taste die Zeit in Minuten einstellen.
3. Nach Ablauf der Zeit ertönt ein zeitlich begrenzter Signalton, der durch
Betätigung einer beliebigen Taste (ausgenommen Ein/Aus-Taste )
abgeschaltet werden kann.
Hinweis:
• Der Kurzzeitwecker bleibt auch dann in Betrieb, wenn das Glaskeramik-
Kochfeld ausgeschaltet ist. Zum Ändern der Zeit das Kochfeld durch die
Ein/Aus-Taste einschalten.
Timer-Kontrollleuchte
Bereitschaftspunkt der Abschaltautomatik
Kurzzeitwecker-Leuchte
10
Bedienung D
STOP-Funktion
Der Kochvorgang kann kurzzeitig durch die STOP-Funktion unterbrochen
werden, z.B. wenn es an der Haustüre klingelt. Um den Kochvorgang mit den
gleichen Kochstufen fortzusetzen, muss die STOP-Funktion aufgehoben wer-
den. Ein evtl. eingestellter Timer wird angehalten und läuft danach weiter.
Aus Sicherheitsgründen steht diese Funktion nur 10 Minuten zu Verfügung.
Danach wird das Kochfeld ausgeschaltet.
1. Das Kochgeschirr steht auf den Kochzonen und die gewünschten Koch-
stufen sind eingestellt.
2. STOP-Taste betätigen. Anstelle der gewählten Kochstufen, leuchten
nacheinander die Buchstaben S-T-O-P auf.
3. Die Unterbrechung wird beendet, indem zuerst die STOP-Taste
betätigt wird und danach eine beliebige andere Taste (ausgenommen
Ein/Aus-Taste).
Die Betätigung der zweiten Taste muss innerhalb von 10 Sekunden erfol-
gen, ansonsten schaltet das Kochfeld ab.
Warmhaltefunktion
Mit der Warmhaltefunktion können fertige Speisen auf einer Kochzone
warm gehalten werden. Die Kochzone wird mit geringer Leistung betrieben.
1. Kochgeschirr steht auf einer Kochzone und eine Kochstufe (z.B. 3) ist
gewählt.
Der Bereitschaftspunkt der gewählten Kochzone muss leuchten. Dazu
evtl. Kochzonenauswahl-Taste betätigen (z.B. für vorne links).
2. Die Minus-Taste gedrückt halten, um die Kochstufen herunterzu-
schalten (... 3, 2, 1, ). Bei wird gestoppt, die Warmhaltefunktion ist
eingeschaltet.
3. Zum Ausschalten die Minus-Taste einmal betätigen (0).
Die Warmhaltefunktion steht 120 Minuten zur Verfügung, danach wird das
Kochfeld ausgeschaltet.
halten
Bedienung D
11
Ankochautomatik
Bei der Ankochautomatik erfolgt das Ankochen mit Kochstufe 9. Nach einer
bestimmten Zeit wird automatisch auf eine geringere Fortkochstufe (1 bis 8)
zurückgeschaltet.
Bei Anwendung der Ankochautomatik muss lediglich die Fortkochstufe
gewählt werden, mit der das Gargut weitergegart werden soll, weil die Elek-
tronik selbständig zurückschaltet.
Die Ankochautomatik ist geeignet für Gerichte, die kalt aufgesetzt, mit hoher
Leistung erhitzt und auf der Fortkochstufe nicht ständig beobachtet werden
müssen (z.B. das Kochen von Suppenfleisch).
1. Eine Kochzone in Betrieb nehmen. Der Bereitschaftspunkt der gewählten
Kochzone muss leuchten. Dazu evtl. Kochzonenauswahl-Taste betäti-
gen (z.B. für vorne links).
2. Kochstufe 9 einstellen. Durch erneutes Betätigen der Plus-Taste
wird die Ankochautomatik aktiviert.
Die Kochstufenanzeige zeigt abwechselnd A und 9.
3. Gleich darauf durch die Minus-Taste eine geringere Fortkochstufe 1
bis 8 wählen.
A und die gewählte Fortkochstufe blinken abwechselnd.
4. Die Ankochautomatik läuft programmgemäß ab. Nach einer bestimmten
Zeit (siehe Tabelle) wird der Kochvorgang mit der Fortkochstufe fortge-
führt.
Hinweise
• Während der Ankochautomatik kann mit der Plus-Taste die Fortkoch-
stufe erhöht werden. Die Betätigung der Minus-Taste schaltet die
Ankochautomatik ab.
• Belässt man nach Aktivierung der Ankochautomatik die Stufe 9 und wählt
keine geringere Fortkochstufe, so wird die Ankochautomatik nach 10 Sek.
automatisch ausgeschaltet und es bleibt Stufe 9 erhalten.
Eingestellte
Kochstufe
Ankochautomatik
Zeit (Min:Sek)
1
2
3
4
5
6
7
8
9
01:00
03:00
04:48
06:30
08:30
02:30
03:30
04:30
- : -
12
Reinigung und Pflege D
Reinigung und Pflege
• Vor dem Reinigen das Kochfeld ausschalten und abkühlen
lassen.
• Das Glaskeramikkochfeld darf unter keinen Umständen mit
einem Dampfreinigungsgerät oder ähnlichem gereinigt wer-
den!
• Beim Reinigen darauf achten, dass nur kurz über die Ein/Aus-
Taste gewischt wird. Damit wird ein versehentliches Einschal-
ten vermieden!
Glaskeramik-Kochfeld
Wichtig! Verwenden Sie niemals aggressive Reinigungsmittel,
wie z.B. grobe Scheuermittel, kratzende Topfreiniger, Rost- und
Fleckenentferner etc.
Reinigung nach Gebrauch
1. Reinigen Sie das gesamte Kochfeld immer dann, wenn es ver-
schmutzt ist - am besten nach jedem Gebrauch. Benutzen Sie
dazu ein feuchtes Tuch und ein wenig Handspülmittel. Danach
reiben Sie das Kochfeld mit einem sauberen Tuch trocken, so
dass keine Spülmittelrückstände auf der Oberfläche verbleiben.
Wöchentliche Pflege
2. Reinigen und pflegen Sie das gesamte Kochfeld einmal in der
Woche gründlich mit handelsüblichen Glaskeramik-Reinigern.
Beachten Sie unbedingt die Hinweise des jeweiligen Herstellers.
Die Reinigungsmittel erzeugen beim Auftragen einen Schutzfilm,
der wasser- und schmutzabweisend wirkt. Alle Verschmutzungen
bleiben auf dem Film und lassen sich dann anschließend leichter
entfernen. Danach mit einem sauberen Tuch die Fläche trocken-
reiben. Es dürfen keine Reinigungsmittelrückstände auf der
Oberfläche verbleiben, weil sie beim Aufheizen aggressiv wirken
und die Oberfläche verändern.
Spezielle Verschmutzungen
Starke Verschmutzungen und Flecken (Kalkflecken, perlmuttar-
tig glänzende Flecken) sind am besten zu beseitigen, wenn das
Kochfeld noch handwarm ist. Benutzen Sie dazu handelsübliche
Reinigungsmittel. Gehen Sie dabei so vor, wie unter Punkt 2
beschrieben.
Übergekochte Speisen zuerst mit einem nassen Tuch aufwei-
chen und anschließend die Schmutzreste mit einem speziellen
Glasschaber für Glaskeramik-Kochfelder entfernen. Danach die
Fläche wie unter Punkt 2 beschrieben reinigen.
Eingebrannten Zucker und geschmolzenen Kunststoff entfer-
nen Sie sofort - im noch heißen Zustand - mit einem Glasscha-
ber. Danach die Fläche wie unter Punkt 2 beschrieben, reinigen.
Sandkörner, die eventuell beim Kartoffelschälen oder Salatput-
zen auf die Kochfläche fallen, können beim Verschieben von
Töpfen Kratzer erzeugen. Achten Sie deshalb darauf, dass keine
Sandkörner auf der Oberfläche verbleiben.
Farbige Veränderungen des Kochfeldes haben keinen Einfluss
auf die Funktion und Stabilität der Glaskeramik. Es handelt sich
dabei nicht um eine Beschädigung des Kochfeldes, sondern um
nicht entfernte und daher eingebrannte Rückstände.
Glanzstellen entstehen durch Abrieb des Topfbodens, insbeson-
dere bei Verwendung von Kochgeschirr mit Aluminiumböden
oder durch ungeeignete Reinigungsmittel. Sie lassen sich nur
mühsam mit handelsüblichen Reinigungsmitteln beseitigen.
Eventuell die Reinigung mehrmals wiederholen. Durch die Ver-
wendung aggressiver Reinigungsmittel und durch scheuernde
Topfböden wird das Dekor mit der Zeit abgeschmirgelt und es
entstehen dunkle Flecken.
Was tun bei Problemen? D
13
Was tun bei Problemen?
Unqualifizierte Eingriffe und Reparaturen am Gerät sind gefähr-
lich, weil Stromschlag- und Kurzschlussgefahr besteht. Sie sind
zur Vermeidung von Körperschäden und Schäden am Gerät zu
unterlassen. Deshalb solche Arbeiten nur von einem Elektrofach-
mann, wie z.B. einem Technischen Kundendienst, ausführen las-
sen.
Bitte beachten
Sollten an Ihrem Gerät Störungen auftreten, prüfen Sie bitte
anhand dieser Gebrauchsanleitung, ob Sie die Ursachen nicht
selber beheben können.
Nachfolgend finden Sie Tipps zur Behebung von Störungen.
Die Sicherungen lösen mehrfach aus?
• Rufen Sie einen Technischen Kundendienst oder einen Elekt-
roinstallateur!
Das Kochfeld lässt sich nicht einschalten?
• Hat die Sicherung der Hausinstallation (Sicherungskasten)
angesprochen?
• Ist das Netzanschlusskabel angeschlossen?
• Ist die Kindersicherung eingeschaltet, d.h. ein L wird ange-
zeigt?
• Sind die Sensortasten durch ein feuchtes Tuch, Flüssigkeit
oder einen metallischen Gegenstand teilweise bedeckt? Bitte
entfernen.
Das Symbol blinkt und es ertönt ein zeitlich begrenzter
Dauersignalton.
Es liegt eine Dauerbetätigung der Touch-Control Sensortasten
durch übergekochte Speisen, Kochgeschirr oder andere Gegen-
stände vor.
Abhilfe: die Oberfläche reinigen oder den Gegenstand entfernen.
Zum Löschen des Symbols die gleiche Taste betätigen oder
das Kochfeld aus- und einschalten.
Das Kochfeld bzw. die Kochzone ist plötzlich ausgeschaltet
• Haben Sie aus Versehen die Ein/Aus-Taste betätigt?
• Sind die Sensortasten durch ein feuchtes Tuch, Flüssigkeit
oder einen metallischen Gegenstand teilweise bedeckt? Es
ertönt ein zeitlich begrenzter Signalton. Nach einigen Sekun-
den wird abgeschaltet. Bitte den Gegenstand von den Sensor-
tasten entfernen.
• Hat die Sicherheitsabschaltung angesprochen, d.h. eine Koch-
stufe wurde über eine bestimmte Zeit hinaus unverändert
benutzt? Siehe Absatz „Betriebsdauerbegrenzung”.
Abschalten der Kochfläche nicht möglich.
• Elektronisches Bauteil ist defekt.
Sicherung ausschalten und Kundendienst rufen.
Die Kochfläche heizt nicht auf.
• Kochfläche defekt. Kundendienst rufen.
• Innerer Kreis einer Mehrkreis-Kochzone defekt.
Funktionierenden äußeren Kreis auf keinen Fall weiterbetrei-
ben. Sofort den Kundendienst rufen.
Das Kochfeld gibt Geräusche ab (Klick- bzw. Knackge-
räusch) oder beim Einschalten der Kochfläche tritt ein Sum-
men auf?
• Das ist technisch bedingt und hat auf Qualität und Funktion
keinen Einfluss.
LED-Anzeige für Kochstufen bzw. Restwärmeanzeige H
leuchtet nicht oder nur teilweise.
• LED-Anzeige defekt. Kundendienst rufen.
Verbrennungsgefahr, da Warnung vor Temperatur nicht
gewährleistet ist.
Das Kochfeld hat Risse oder Brüche?
• Bei Brüchen, Sprüngen, Rissen oder anderen Beschädigun-
gen an der Glaskeramik besteht Stromschlaggefahr. Das
Gerät sofort außer Betrieb setzen. Sofort die Haushalts-Siche-
rung ausschalten und den Kundendienst rufen.
14
Montageanweisung D
Montageanweisung
Sicherheitshinweise für den
Küchenmöbelmonteur
• Furniere, Kleber bzw. Kunststoffbeläge der angrenzenden
Möbel müssen temperaturbeständig sein (>75°C). Sind die
Furniere und Beläge nicht genügend temperaturbeständig,
können sie sich verformen.
• Der Berührungsschutz muss durch den Einbau gewährleistet
sein.
• Die Verwendung von Wandabschlussleisten aus Massivholz
auf der Arbeitsplatte hinter dem Kochfeld ist zulässig, sofern
die Mindestabstände gemäß den Einbauskizzen eingehalten
werden.
• Die Mindestabstände der Muldenausschnitte nach hinten
gemäß der Einbauskizze sind einzuhalten.
• Bei Einbau direkt neben einem Hochschrank ist ein Sicher-
heitsabstand von mindestens 40 mm einzuhalten. Die Seiten-
fläche des Hochschrankes muss mit wärmefestem Material
verkleidet werden. Aus arbeitstechnischen Gründen sollte der
Abstand jedoch mindestens 300 mm betragen.
• Der Abstand zwischen Kochfeld und Dunstabzugshaube muss
mindestens so groß sein, wie in der Montageanleitung der
Dunstabzugshaube vorgegeben ist.
• Die Verpackungsmaterialien (Plastikfolien, Styropor, Nägel,
etc.) müssen aus der Reichweite von Kindern gebracht wer-
den, da diese Teile mögliche Gefahrenquellen darstellen.
Kleinteile könnten verschluckt werden und von Folien geht
Erstickungsgefahr aus.
Einbau
Wichtige Hinweise
• Liegt das Kochfeld über Möbelteilen (Seitenwände, Schubkäs-
ten, etc.), so muss ein Zwischenboden, im Mindestabstand
von 20 mm zur Kochfeldunterseite eingebaut werden, sodass
eine zufällige Berührung nicht möglich ist. Der Zwischenboden
darf nur mit Werkzeugen entfernbar sein.
• Es ist dafür zu sorgen, dass wegen Brandgefahr keine feuer-
gefährlichen, leicht entzündbaren oder durch Wärme verform-
bare Gegenstände direkt neben dem Kochfeld angeordnet
bzw. gelegt werden.
Kochfelddichtung
Vor dem Einbau ist die beiliegende Kochfelddichtung lückenlos
einzulegen.
• Es muss verhindert werden, dass Flüssigkeiten zwischen
Kochfeldrand und Arbeitsplatte oder zwischen Arbeitsplatte
und Wand in evtl. darunter eingebaute Elektrogeräte eindrin-
gen können.
• Bei Einbau des Kochfeldes in eine unebene Arbeitsplatte, z.B.
mit einem keramischen oder ähnlichem Belag (Kacheln etc.)
ist die evtl. an dem Kochfeld befindliche Dichtung zu entfernen
und die Abdichtung der Kochfläche gegenüber der Arbeits-
platte durch plastische Dichtungsmaterialien (Kitt) vorzuneh-
men.
• Das Kochfeld auf keinen Fall mit Silikon einkleben! Ein
späterer zerstörungsfreier Ausbau des Kochfeldes ist dann
nicht mehr möglich.
Arbeitsplattenausschnitt
Der Ausschnitt in der Arbeitsplatte sollte möglichst exakt mit
einem guten, geraden Sägeblatt oder einer Oberfräse vorgenom-
men werden. Die Schnittflächen sollten danach versiegelt wer-
den, damit keine Feuchtigkeit eindringen kann.
Der Kochfeldausschnitt wird entsprechend den Abbildungen
angefertigt.
Die Glaskeramik-Kochfläche muss unbedingt eben und bündig
aufliegen. Ein Verspannen kann zum Bruch der Glasplatte füh-
ren.
Die Dichtung der Kochfläche auf einwandfreien Sitz und lücken-
lose Auflage prüfen.
Montageanweisung D
15
Lasche
• Das Kochfeld einsetzen und ausrichten.
• Von unten die Laschen mit Schrauben an den vorgesehenen
Befestigungslöchern einsetzen, ausrichten und festziehen.
• Die Schrauben nur mit einem Schraubendreher von Hand
anziehen; keinen Akkuschrauber verwenden.
• Auf die richtige Lage der Lasche bei dünnen Arbeitsplatten
achten.
Wichtig:
Durch schiefe Auflage oder Verspannen besteht beim Ein-
bau des Glaskeramik-Kochfeldes Bruchgefahr!
Mindestabstand zu benachbarten Wänden
Ausschnittmaß
Kochfeldaussenmaß
Kabeldurchführung in Rückwand
EinbauhöheAusschnitt nach Schablone
Maße in mm
Ausschnitt nach Schablone
16
Montageanweisung D
Elektrischer Anschluss
• Der elektrische Anschluss darf nur von einem autorisier-
ten Fachmann vorgenommen werden!
• Die gesetzlichen Vorschriften und Anschlussbedingungen des
örtlichen Elektroversorgungsunternehmens müssen vollstän-
dig eingehalten werden.
• Bei Anschluss des Gerätes ist eine Einrichtung vorzusehen,
die es ermöglicht, das Gerät mit einer Kontakt-Öffnungsweite
von mindestens 3 mm allpolig vom Netz zu trennen. Als geeig-
nete Trennvorrichtung gelten LS-Schalter, Sicherungen und
Schütze.
Bei Anschluss und Reparatur Gerät mit einer dieser Einrich-
tungen stromlos machen.
• Der Schutzleiter muss so lang bemessen sein, dass er bei
Versagen der Zugentlastung erst nach den stromführenden
Adern des Anschlusskabels auf Zug beansprucht wird.
• Die überschüssige Kabellänge muss aus dem Einbaubereich
unterhalb des Gerätes herausgezogen werden.
• Bitte beachten Sie, dass die vorhandene Netzspannung mit
der auf dem Typenschild übereinstimmt.
• Der vollständige Berührungsschutz muss durch den Einbau
sichergestellt sein.
• Achtung: Falschanschluss kann zur Zerstörung der Leis-
tungselektronik führen.
Keine Anschlussleitung werkseitig vorhanden
• Zum Anschluss muss der Deckel der Anschlussdose auf der
Geräteunterseite gelöst werden, um an die Anschlussklemme
zu gelangen. Nach dem Anschluss muss der Deckel wieder
befestigt und die Anschlussleitung mit der Zugentlastungs-
schelle gesichert werden.
• Die Anschlussleitung muss mindestens dem Typ H05 RR-F
entsprechen.
Anschlussmöglichkeiten: 5-poliger Anschluss
* Achtung! Sonderanschluss 220 - 240 V 3~ !
** Diese Anschlussvariante ist in der Schweiz durch den SEV nicht zuge-
lassen.
Anschlussmöglichkeiten: 6-poliger Anschluss
** Diese Anschlussvariante ist in der Schweiz durch den SEV nicht zuge-
lassen
Montageanweisung D
17
Anschlussleitung werkseitig vorhanden
• Das Kochfeld ist werkseitig mit einer temperaturbeständigen
Anschlussleitung ausgestattet.
• Der Netzanschluss wird gemäß dem Anschlussschema vorge-
nommen, ausgenommen die Anschlussleitung ist bereits mit
einem Stecker ausgestattet.
• Wenn die Netzanschlussleitung dieses Gerätes beschädigt
wird, muss sie durch eine besondere Anschlussleitung ersetzt
werden. Um Gefährdungen zu vermeiden, darf dieses nur
durch den Hersteller oder seinen Kundendienst erfolgen.
Anschlussmöglichkeiten
* Achtung! Sonderanschluss 220 - 240 V 3~ !
** Diese Anschlussvariante ist in der Schweiz durch den SEV nicht zuge-
lassen
Anschlussmöglichkeiten
* Achtung! Sonderanschluss 220 - 240 V 3~ !
Technische Daten
Inbetriebnahme
Nach dem Einbau des Feldes und nach dem Anlegen der Versor-
gungsspannung (Netzanschluss) erfolgt zuerst ein Selbst-Test
der Steuerung und es wird eine Serviceinformation für den Kun-
dendienst angezeigt.
Wichtig: Zum Netzanschluss dürfen keine Gegenstände auf den
Touch-Control Sensortasten sein!
Mit einem Schwamm und Spülwasser kurz über die Oberfläche
des Kochfeldes wischen und anschließend trockenreiben.
grün-gelb
grün-gelb
weiss
grau
braun
schwarz
blau
grün-gelb
grün-gelb
weiss
grau
braun
schwarz
blau
grün-gelb
grün-gelb
weiss
grau
braun
schwarz
blau
grün-gelb
grün-gelb
weiss
grau
braun
schwarz
blau
grün-gelb
grün-gelb
weiss
grau
braun
schwarz
blau
grün-gelb
grün-gelb
weiss
grau
braun
schwarz
blau
grün-gelb
grün-gelb
weiss
grau
braun
schwarz
blau
grün-gelb
grün-gelb
weiss
grau
braun
schwarz
blau
Kochfeld
Kochzonen
vorne links . . . . . . . . . Ø cm / kW
hinten links. . . . . . . . . Ø cm / kW
hinten rechts . . . . . . . Ø cm / kW
vorne rechts. . . . . . . . Ø cm / kW
21;17,5;12 / 2,3
18;12,5 / 1,7
18 / 1,8
18 / 1,8
Kochfeld gesamt . . . . . . . . . kW 7,6
Anschlusswerte
Netzspannung . . . . . . . . . . . . . . . . 380-415V 2N~, 50-60 Hz
Komponentennennspannung. . . . . 220 - 240V
Kochfeld
Kochzonen
links . . . . . . . . . . . . . . Ø cm / kW
Mitte. . . . . . . . . . . . . . Ø cm / kW
rechts. . . . . . . . . . . . . Ø cm / kW
21;12 / 2,2
27; 21; 14,5 / 2,7
18;12/1,7
Kochfeld gesamt . . . . . . . . . kW 6,6
Anschlusswerte
Netzspannung . . . . . . . . . . . . . . . . 380-415V 2N~, 50-60 Hz
Komponentennennspannung. . . . . 220 - 240V
18
GB
Disposing of the packaging
Please ensure the environmentally-friendly disposal of the
packaging that came with your appliance. Recycling the
packaging material saves on resources and cuts down on waste.
Disposing of old appliances
The symbol on the product or on its packaging
indicates that this product may not be treated as
household waste. Instead it must be handed
over to a collection point for the recycling of
electrical and electronic equipment.
By ensuring that this product is disposed of
correctly you will help to protect the environment
and human health, which could otherwise be harmed through the
inappropriate disposal of this product. For more detailed
information about recycling this product, please contact your
local city office, your household waste disposal service or the
shop where you purchased the product.
Appropriate use
The hob is to be used solely for preparing food in the home. It
may not be used for any other purpose and may only be used
under supervision.
For your information...
Please read this manual carefully before using your appliance. It
contains important information on safety and on how to use and
look after your appliance so that it will provide you with many
years of reliable service.
Should your appliance develop a fault, please first consult the
section on “What to do if trouble occurs?” You can often rectify
minor problems yourself, without having to call in a service
engineer.
Please keep this manual in a safe place and pass it on to new
owners for their information and safety.
Contents
Safety instructions................................................................. 19
Connection and operation..................................................... 19
Concerning the hob............................................................... 19
Concerning persons.............................................................. 19
Appliance description............................................................ 20
Operating the hob with the sensor keys................................ 21
Operation ................................................................................ 22
Operation time limit............................................................... 22
Other functions...................................................................... 22
How to cut power consumption............................................. 22
Power settings ...................................................................... 22
Residual heat display............................................................ 22
Operating the keys................................................................ 23
Switching on the hob and cooking zones.............................. 23
Switching off a cooking zone ................................................ 23
Switching off the hob............................................................. 23
Two-circuit / three-circuit connection ................................... 24
Childproof lock ..................................................................... 24
Automatic switch-off (timer) ................................................. 25
Minute minder (egg timer) .................................................... 25
STOP function ...................................................................... 26
Keep-warm function ............................................................. 26
Automatic boost function ...................................................... 27
Cleaning and care .................................................................. 28
Glass ceramic hob ................................................................ 28
Specific soiling ...................................................................... 28
What to do if trouble occurs ................................................. 29
Assembly instructions........................................................... 30
Safety instructions for kitchen unit fitters .............................. 30
Installation............................................................................. 30
Electrical connection............................................................. 32
Technical data....................................................................... 33
Start of operation .................................................................. 33
Safety instructions GB
19
Safety instructions
Connection and operation
• The appliances are constructed in accordance with the
relevant safety regulations.
• Connecting the appliance to the mains and repairing and
servicing the appliance may only be carried out by a qualified
electrician according to currently-valid safety regulations. For
your own safety, do not allow anyone other than a qualified
service technician to install, service or repair this appliance.
Concerning the hob
• Do not place empty pots and pans on cooking zones which
have been switched on. Avoid boiling the pots dry as there is a
risk of the pots overheating!
• Take care when using simmering pans as simmering water
may dry up unnoticed, resulting in damage to the pot and to
the hob for which no liability will be assumed.
• Overheated fats and oils may spontaneously ignite. Always
supervise the preparation of food with fats and oils. Never
extinguish ignited fats and oils with water! Put the lid on the
pan and switch off the cooking zone.
• The glass ceramic surface of the hob is extremely robust. You
should, however, avoid dropping hard objects onto the glass
ceramic hob. Sharp objects which fall onto your hob might
break it.
• There is a risk of electric shocks if the glass ceramic hob
develops fractures, cracks, tears or damage of any other kind.
Immediately switch off the appliance. Disconnect the fuse
immediately and call Customer Service.
• If the hob cannot be switched off due to a defect in the sensor
control immediately disconnect your appliance and call
Customer Service.
• Take care when working with home appliances! Connecting
cables must not come into contact with hot cooking zones.
• The glass ceramic hob should not be used as a storage area.
• Do not put aluminium foil or plastic onto the cooking zones.
Keep everything which could melt, such as plastics, foil and in
particular sugar and sugary foods away from hot cooking
zones. Use a special glass scraper to immediately remove any
sugar from the ceramic hob (when it is still hot) in order to
avoid damaging the hob.
• Do not place combustible, volatile or heat deformable objects
directly underneath the hob.
• Never use the cooking zones to heat up unopened tins of food
or packaging made of material compounds. The power supply
may cause them to burst!
• Keep the sensor keys clean since the appliance may consider
dirt to be finger contact. Never put anything (pans, tea towels
etc.) onto the sensor keys!
• If food boils over onto the sensor keys, we advise you to
activate the OFF key.
• Hot pans should not cover the sensor keys, since this will
cause the appliance to switch off automatically.
• Never flambé under the cooker hood - the fat in the filter can
ignite!
• Avoid repeated burning of contaminations.
Concerning persons
• This appliance is not intended to be used by persons
(including children) with physical, mental or sensory
impairments or by persons (including children) who lack the
required experience or know-how, unless such persons are
supervised by a person responsible for their safety or have
been given instructions on how to use the appliance by a
person responsible for their safety.
Children should be supervised in order to ensure that they do
not play with the appliance.
• Attention!
The surfaces of the heating and cooking zones become hot
during use. Keep small children away at all times.
20
Appliance description GB
Appliance description
The decorative design may deviate from the illustrations.
1. Front left cooking zone
2. Back left cooking zone
3. Back right cooking zone
4. Front right cooking zone
5. Touch-control operating panel
6. Glass ceramic hob
7. ON/OFF key
8. Cooking zone selection key
9. Symbol for locating the position of a cooking zone on the
glass ceramic hob
10. Plus key (raise) / Minus key (lower)
11. Power setting display
12. Stand-by dot
13. Circuit activation key
14. Multi-circuit control lamp
15. Timer selection key
16. Timer display
17. Control lamp for locating the position of a cooking zone on
the glass ceramic hob
18. Minute minder lamp
19. STOP key
Appliance description GB
21
Operating the hob with the sensor keys
The ceramic glass hob is operated with touch control sensor
keys. The sensor keys are operated as follows: lightly touch a
symbol on the surface of the ceramic glass plate. A buzzer will
indicate when the controls have been operated correctly. The
touch control sensor key will then be indicated as “key”.
ON/OFF key (7)
This key is used to switch the entire hob on and off. It is, as it
were, the main switch.
Cooking zone selection key; e.g. front left (8)
Pressing one of the cooking zone selection keys available will
select a cooking zone, for which the Plus key or the Minus key
may be used to set the cooking level.
Minus key / Plus key (10)
These keys are used to set the cooking levels, the automatic
switch-off device and the minute minder. The Minus key reduces
the setting and the Plus key raises it. The setting can be deleted
by pressing both keys simultaneously.
Power setting display (11)
The power setting display shows the power setting which has
been selected, or:
H ............... Residual heat
A................ Automatic boost function
STOP ........ Stop function
.............. Keep-warm function
A cooking zone can be switched on when the stand-by dot (12)
lights up.
Circuit activation key (13)
To activate other heating circuits.
Timer selection key (15)
For programming the automatic switch-off device (timer) and the
minute minder.
STOP key (19)
The STOP function can be used to briefly stop the cooking
process.
22
Operation GB
Operation
Operation time limit
The hob has an automatic time limit function. The duration of
continuous use of each cooking zone depends on the cooking
level selected (see chart),
provided that the setting of a respective cooking zone is not
adjusted during use. If the operation time limit has been
activated, the cooking zone will switch off, a short signal will
sound and an H will appear in the display.
Other functions
If two or more sensors are pressed at the same time – e.g. when
a pan is mistakenly put onto a sensor button – no function is
activated.
The symbol will blink and a time-limited continuous signal will
sound. After a few seconds the appliance will switch off. Please
remove the item located in front of the sensor buttons.
To delete the symbol press the same button or switch the hob
off and on.
How to cut power consumption
The following are a few useful hints to help you cut your
consumption of energy and use your new hob and the cookware
efficiently.
• The base of your cooking pots should be the same size as the
cooking zone.
• When buying cooking pots, note that it is frequently the
diameter of the top of the pot that it indicated. This is usually
larger than the base of a pot.
• Pressure cookers are particularly low on energy and time
required thanks to the pressure and the fact that they are
tightly closed. Short cooking times mean that vitamins are
preserved.
• Always make sure that there is sufficient fluid in your pressure
cooker since the cooking zone and the cooker may be
damaged as a result of overheating if the pressure cooker
boils dry.
• Always close cooking pots with a suitable lid.
• Use the right pot for the quantity of food you are cooking.
A large pot which is hardly filled will use up a lot of energy.
Power settings
The heating power of the cooking zones can be set at various
power levels. In the chart you will find examples of how to use
each setting.
Residual heat display
The glass ceramic hob is equipped with an H as a
residual heat display.
As long as the H lights up after the cooking zone has
been switched off, the residual heat can be used for
melting food or for keeping food warm. The cooking
zone may still be hot when the letter H no longer lights up. Risk of
burns!
Power
setting
Operation time limit
(hours)
1
2
3
4
5
6
7
8
9
6
6
5
5
4
1,5
1,5
1,5
1,5
Setting Suitable for
0
1-2
3
4-5
6
7-8
9
Off, using remaining heat
Keep-warm function
Simmering small portions
(lowest setting)
Simmering
Simmering larger quantities or roasting
larger pieces of meat until they are
cooked through
Roasting, getting juices
Roasting
Bringing to the boil, browning, roasting
(highest setting)
Operation GB
23
Operating the keys
The controls described here expect the pressing of a (selection) key to be
followed by the pressing of a subsequent key.
The next key will need to be pressed within 10 seconds, otherwise the
selection will be deleted.
The Plus/ Minus keys can be touched individually or be permanently pressed.
Switching on the hob and cooking zones
1. Press the ON/OFF key until the power setting 0 appears. The stand-
by dots will blink. The controls are ready for operation.
2. Then press a cooking zone selection key (e.g. for front left). The
stand-by dot of the cooking zone selected will light up.
3. Use the Plus key or Minus key to select a cooking level.
The Plus key will activate power setting 1 and the Minus key power
setting 9.
4. Put a cooking pot onto the cooking zone.
Repeat items 2 to 4 in order to cook on other cooking zones at the same time.
Switching off a cooking zone
5. The stand-by dot of the cooking zone selected must light up. It may be
necessary to press a cooking zone selection key (e.g. for front left).
6. a) Press the Minus key several times until the power setting display
shows 0, or
b) press the Minus key and the Plus key once at the same time.
The cooking zone is switched off direct irrespective of the power setting
or
c) press the ON/OFF key . The entire hob will be switched off (all of
the cooking zones are switched off).
Switching off the hob
7. Press the ON/OFF key . The hob will be completely switched off, irre-
spective of any settings.
Cooking zone selection keys Stand-by dot
24
Operation GB
Two-circuit / three-circuit connection
(only for cooking zones with several circuits)
Two-circuit / three-circuit connection of the respective cooking zone can only
be effected after the corresponding cooking zone has been switched on.
1. Select the desired cooking level 1-9.
2. Switch on the second or third heating circuit with the circuit activation
key .
The control lamp for dual circuit/triple circuit will light up.
3. The outer heating circuit will be switched off when the circuit activation
key is pressed again.
The control lamp for dual circuit/triple circuit will go off.
Note
• Manually activated heating circuits will automatically be deselected when
the cooking zone is switched off.
Childproof lock
The childproof lock serves the purpose of preventing children from switching
on the hob either accidentally or intentionally. The controls are blocked.
Switching on the childproof lock
1. Press the ON/OFF key in order to switch on the childproof lock.
2. Then immediately press the Plus key and the Minus key simul-
taneously.
3. Then press the Plus key in order to activate the childproof lock. The
power setting displays will indicate an L for child lock, the controls will be
inaccessible and the hob will switch off.
Switching off the childproof lock
4. Press the ON/OFF key .
5. Then immediately press the Plus key and the Minus key simul-
taneously.
6. Then press the Minus key in order to deactivate the childproof lock.
The L will go off.
De-activating the childproof lock for one cooking procedure only
This is only possible if the childproof lock has been switched on in
accordance with items 1-3.
• Press the ON/OFF key .
• Then immediately press the Plus key and the Minus key
simultaneously.
Now the user will be able to switch on a cooking zone (to do so, select a
cooking zone and set the power level).
When the hob is switched off the childproof lock will be activated again
(switched on).
Note
In the event of a power cut the childproof lock will be cancelled, i.e.
deactivated.
Operation GB
25
Automatic switch-off (timer)
The automatic switch-off device is used to automatically switch off any
cooking zone after a stipulated period of time. Cooking times ranging from
1 minute to 99 minutes can be set.
1. Switch on the hob. Switch on one or more cooking zones and set the
required power settings.
2. Press the timer selection key . The stand-by dot of the timer will light
up.
Press the key again until the timer indicator lamp of the required cooking
zone blinks.
Important: Timer indicator lamps can only blink if the cooking zones have
already been switched on (power setting higher than 0).
3. Then immediately use the Plus key or the Minus key to set the
cooking time at between 1 and 99 minutes.
With the Plus key the display will commence at 01, and with the Minus
key it will commence at 30.
The setting will be reset if the Plus and Minus keys are pressed simulta-
neously (00).
4. In order to program the automatic-switch-off device for another cooking
zone, press the timer selection key repeatedly until the timer indica-
tor lamp for the required cooking zone blinks. Then use the Minus key
or the Plus key to set the required time.
5. The cooking zone will be switched off when the time has lapsed. A signal
will sound for a while and can be switched off by pressing any key (except
for the ON/OFF key).
Notes
• In order to check the time that has lapsed (automatic-switch-off device)
press the timer selection key repeatedly until the timer indicator lamp
for the required cooking zone blinks. The setting displayed can be read and
changed.
• Terminating the function of the timer: select the respective cooking zone
(timer indicator lamp blinks) and press the Plus and Minus keys once at the
same time.
Minute minder (egg timer)
1. Switch on the hob.
2. Press the timer selection key until the minute minder lamp blinks
with this key. Use the Plus key or the Minus key to set the time
in minutes.
3. Once the time has lapsed a signal will sound for a while and can be
switched off by pressing any key (except for the ON/OFF key ).
Note:
• The minute minder remains in operation when the glass ceramic hob is
switched off. Switch the hob on with the ON/OFF key to adjust the
time.
Timer indicator lamp
Stand-by dot for the
Minute minder lamp
automatic switch-off device
26
Operation GB
STOP function
The cooking process can be briefly interrupted with the STOP function, e.g. if
the doorbell rings. The STOP function must be released in order to continue
cooking at the same power level. If a timer has been set it will pause and will
then continue.
This function is only available for 10 minutes for reasons of safety. The hob
will then be switched off.
1. Pots and pans are on the cooking zones and the required power levels
have been set.
2. Press the STOP key . The letters S-T-O-P will be shown one after
another instead of the cooking levels previously selected.
3. The interruption is ended by firstly pressing the STOP key and then
pressing any other key (except the ON/OFF key).
The second key must be pressed within 10 seconds, otherwise the hob
will switch off.
Keep-warm function
With the keep-warm function you can use one of the cooking zones to
keep food warm. The respective cooking zone is operated at a low power
level.
1. Cookware is placed on a cooking zone and a power level (e.g. 3) is
selected.
The stand-by dot of the cooking zone selected must light up. It may be
necessary to press a cooking zone selection key (e.g. for front left).
2. Keep the Minus key pressed to switch the power settings down
( ... 3, 2, 1, ). The setting will stop at and the warming function will
have been activated.
3. Press the Minus key once to de-activate the function (0).
The keep-warm function is available for 120 minutes, after which the hob will
be switched off.
keep pressed
Operation GB
27
Automatic boost function
Parboiling takes place at power level 9 with the automatic boost function.
After a certain time the power level will switch down automatically to a lower
simmering setting (1 to 8).
When using the automatic boost function only the simmering setting with
which the food is to be cooked through needs to be selected since the
electronic unit switches down automatically.
The automatic boost function is suitable for dishes which are cold initially and
are then heated up at high power. These dishes do not need to be constantly
monitored when simmering (e.g. boiling meat for soups).
1. Switch a cooking zone on. The stand-by dot of the cooking zone selected
must light up. It may be necessary to press a cooking zone selection
key (e.g. for front left).
2. Select power setting 9. Pressing the Plus key again will activate the
automatic boost function.
The power level setting will indicate A and 9 alternately.
3. Then immediately use the Minus key to select a lower simmering
setting from 1 to 8.
A and the selected simmering setting will blink alternately.
4. The automatic boost function will operate as programmed. After a certain
time (see chart) the cooking process will be continued with the simmering
setting.
Notes
• While the automatic boost function is in operation, the Plus key can be
used to raise the simmering power setting. Pressing the Minus key will
switch the automatic boost function off.
• If, after activating the automatic boost function, the power level is left at
level 9 and no lower simmering setting is selected, the automatic boost
function will be switched off automatically after 10 seconds and the cooking
level will remain at 9.
Power setting
Automatic boost function
Time (min:sec)
1
2
3
4
5
6
7
8
9
01:00
03:00
04:48
06:30
08:30
02:30
03:30
04:30
- : -
28
Cleaning and care GB
Cleaning and care
• Switch the hob off and let it cool down before you clean it.
• Never clean the glass ceramic hob with a steam cleaner or
similar appliance!
• When cleaning make sure that you only wipe lightly over the
ON/OFF key. The hob may otherwise be accidentally switched
on!
Glass ceramic hob
Important! Never use aggressive cleaning agents such as rough
scouring agents, abrasive saucepan cleaners, rust and stain
removers etc.
Cleaning after use
1. Always clean the entire hob when it has become soiled. It is
recommended that you do so every time the hob is used. Use a
damp cloth and a little washing up liquid for cleaning. Then dry
the hob with a clean dry cloth to ensure that there is no detergent
left on the surface of the hob.
Weekly clean
2. Clean the entire hob thoroughly once a week with commercial
glass ceramic cleaning agents.
Please follow the manufacturer's instructions carefully.
When applied, the cleaning agent will coat the hob in a protective
film which is resistant to water and dirt. All the dirt will remain on
the film and can then easily be removed. Then rub the hob dry
with a clean cloth. Make sure that no cleaning agent remains on
the surface of the hob since this will react aggressively when the
hob is heated up and will change the surface.
Specific soiling
Heavy soiling and stains (limescaling and shiny, mother-of-
pearl-type stains) can best be removed when the hob is still
slightly warm. Use commercial cleaning agents to clean the hob.
Proceed as outlined under Item 2.
First soak food which has boiled over with a wet cloth and then
remove remaining soiling with a special glass scraper for glass
ceramic hobs. Then clean the hob again as described under
Item 2.
Burnt sugar and melted plastic must be removed immediately,
when they are still hot, with a glass scraper. Then clean the hob
again as described under Item 2.
Grains of sand which may get onto the hob when you peel pota-
toes or clean lettuce may scratch the surface of the hob when
you move pots around. Make sure that no grains of sand are left
on the hob.
Changes in the colour of the hob will not affect the function and
the stability of the glass ceramic material. These colour changes
are not changes in the material but food residues which were not
removed and which have burnt into the surface.
Shiny spots result when the base of the cookware rubs on the
surface of the hob, particularly when cookware with an aluminium
base or unsuitable cleaning agents are used. They are difficult to
remove with standard cleaning agents. You may need to repeat
the cleaning process several times. In time, the decoration will
wear off and dark stains will appear as a result of using aggres-
sive cleaning agents and faulty pan bases.
What to do if trouble occurs GB
29
What to do if trouble occurs
Interference with and repairs to the appliance by unqualified
persons are dangerous as they can result in an electric shock or
a short circuit. Do not interfere with or try to repair the appliance;
this could cause injury to persons and damage to the appliance.
Always have such work done by an expert, e.g. a Customer
Service technician.
Please note
If your appliance is faulty, please check whether you can rectify
the problem yourself by consulting these instructions for use.
You may be able to rectify some problems yourself. They are
described below.
The fuses blow regularly?
• Contact a technical customer service or an electrician!
You can't switch your hob on?
• Has the wiring system (fuse box) in the house blown a fuse?
• Has the hob been connected to the mains?
• Is the childproof lock activated, i.e. does the display show an
“L”?
• Are the sensor keys partly covered by a damp cloth, fluid or a
metallic object? Please rectify.
The symbol will blink and a time-limited continuous
signal will sound.
Food which has boiled over, cookware or other items are causing
the touch control sensor buttons to be consistently operated.
Remedy: clean the surface or remove the item.
To delete the symbol press the same button or switch the hob
off and on.
The hob or a cooking zone has suddenly switched off
• Did you accidentally press the ON/OFF key?
• Are the sensor keys partly covered by a damp cloth, fluid or a
metallic object? A buzzer will sound briefly. After a few
seconds the appliance will switch off. Please remove the item
located in front of the sensor keys.
• Has the safety cut-off device been activated, i.e. was a
cooking setting operated unchanged beyond a specific period
of time? See the section on “operation time limit”.
Cooking zone cannot be switched off.
• Faulty electronic component.
Disconnect the fuse, call Customer Service.
Cooking zone does not heat up.
• Cooking zone defective. Call Customer Service.
• Inner circuit of a multi-circuit cooking zone defective.
Under no circumstances continue to use the outer circuit which
is still working! Immediately call Customer Service.
Does the hob make noises (clicking or cracking noises) or
can a buzzing sound be heard when the hob is switched on?
• This is design-specific and has no influence on quality and
operation.
LED display for cooking settings and residual heat display H
does not come on or only partially.
• LED display defective. Call Customer Service.
Risk of burning, as the temperature warning is not guaranteed.
Does the hob have tears or cracks?
• There is a risk of electric shocks if the glass ceramic hob
develops fractures, cracks, tears or damage of any other kind.
Immediately switch off the appliance. Disconnect the fuse
immediately and call Customer Service.
30
Assembly instructions GB
Assembly instructions
Safety instructions for kitchen unit fitters
• Veneers, adhesives and plastic surfaces of surrounding
furniture must be temperature resistant (>75°C). If the veneers
and surfaces are not sufficiently heat resistant they can
become deformed.
• Ensure that all live connections are safely insulated when
installing the hob.
• Cover strips between the wall and the worktop behind the hob
which are made of solid wood are permissible as long as
minimum clearances in accordance with the installation
diagrams are maintained.
• Minimum clearances of the hob cut-out towards the rear are to
be maintained in accordance with the installation diagram.
• For installation directly next to a tall cupboard, a safety
distance of at least 40 mm must be ensured. The side surface
of the tall cupboard should be fitted with heat resistant
material. Due to working requirements, however, the distance
should be at least 300 mm.
• The clearance between the hob and an extraction hood must
be at least as large as that stipulated in the assembly
instructions for the cooker hood.
• The packaging materials (plastic foil, polystyrene, nails etc.)
must be kept out of reach of children as these parts are
potentially dangerous. Small parts can be swallowed and there
is a danger of plastic sheeting causing suffocation.
Installation
Important
• If the cooking surface is located above furniture parts (side
panels, drawers, etc.), then an intermediate shelf must be
inserted at a minimum distance of 20 mm in order to prevent
accidental contact with the underside of the cooking surface.
The intermediate shelf may only be removed with tools.
• To avoid danger of fire, make sure that no combustible objects
which could easily catch fire or become deformed on exposure
to heat are placed directly next to or above the hob.
Sealing of the hob
Before installation, correctly insert the sealing unit delivered with
the hob.
• No liquids may penetrate between the edge of the hob and the
worktop or between the hob and the wall and come into
contact with any electrical appliances.
• When installing a hob into an uneven worktop, e.g. with a
ceramic or similar covering (tiles etc.), the seal on the hob is to
be removed and the seal between the hob and worktop made
with plastic sealing materials (putty).
• The hob must under no circumstances be sealed with
silicone sealant! This would make it impossible to remove the
hob at a later date without damaging it.
Working surface cut-out
Cut out the worktop recess accurately with a good, straight saw
blade or recessing machine. The cut edges should then be
sealed so that no moisture can penetrate.
The area is cut out as illustrated.
The glass ceramic hob must have a level and flush bearing. Any
distortion may lead to fracture of the glass panel.
Make sure that the sealing of the hob is properly seated.
Assembly instructions GB
31
Bracket
• Insert the hob and align it.
• From the bottom, insert the brackets with screws in the holes
provided for fastening the brackets, align the brackets and
screw them tight.
• Tighten the screws with a hand screw driver only; do not use a
battery-operated screw driver.
• In the case of thin worktops make sure that the brackets are
correctly positioned.
Important:
There is a risk of breakage if the hob is canted or subjected to
stress during installation!
Minimum distance to adjacent walls
Opening dimensions
Outer dimensions of the hob
Cable routing in rear wall
Installation height
Cut-out according to the template
Dimensions in mm
Cut-out according
to the template
32
Assembly instructions GB
Electrical connection
• The electrical connection must be carried out by a quali-
fied electrician who is authorised to carry out such work!
• Statutory regulations and the connection specifications issued
by the local power supply company must be strictly observed.
• When connecting the appliance it must be ensured that there
is a device which makes it possible to disconnect it from the
mains at all poles with a contact opening width of at least
3 mm. Line-protecting switches, fuses or contactors are
suitable cut-out devices.
When connecting and repairing the appliance disconnect it
from the electricity supply with one of these devices.
• The earth wire must be sufficiently long so that if the strain
relief fails, the live wires of the connecting cable are subjected
to tension before the earth wire.
• Any superfluous cable must be removed from the installation
area beneath the appliance.
• Make sure that the local mains voltage is the same as the
voltage on the rating label.
• Full protection against accidental contact must be ensured on
installation.
• Important! Incorrect connection may result in the power
electronics unit being destroyed.
No mains cable present in the factory
• To connect the appliance, unscrew the cover of the connection
socket on the underside of the appliance in order to be able to
access the terminal. After connecting the appliance, replace
the cover and secure the connection cable with the strain relief
clamp.
• The connection cable must be at least H05 RR-F.
Electrical connections: 5-pole connection
* Attention! Special power supply 220 - 240 V 3~ !
Electrical connections: 6-pole connection
Assembly instructions GB
33
Mains cable available in the factory
• The hob has been fitted with a temperature-resistant
connection cable in the factory.
• Connection to the mains is carried out in accordance with the
circuit diagram, unless the connection cable is already fitted
with a plug.
• If the mains cable of this appliance is damaged it will need to
be replaced with a special connection cable. In order to avoid
any risks, this must be carried out by the manufacturer or his
Customer Service.
Electrical connections
* Attention! Special power supply 220 - 240 V 3~ !
Electrical connections
* Attention! Special power supply 220 - 240 V 3~ !
Technical data
Start of operation
Once the hob has been installed and the power supply has been
provided (mains connected) an automatic test of the controls will
be carried out and information for Customer Service will be
indicated.
Important: No items may be on the touch control sensor keys
when the appliance is being connected!
Briefly wipe over the surface of the hob with a sponge and soapy
water and then dry with a clean cloth.
green-yellow
green-yellow
white
grey
brown
black
blue
green-yellow
green-yellow
white
grey
brown
black
blue
green-yellow
green-yellow
white
grey
brown
black
blue
green-yellow
green-yellow
white
grey
brown
black
blue
white
blue
green-yellow
green-yellow
white
grey
brown
black
blue
green-yellow
green-yellow
white
grey
brown
black
blue
green-yellow
green-yellow
white
grey
brown
black
blue
green-yellow
green-yellow
white
grey
brown
black
blue
Hob
Cooking zones
front left . . . . . . . . . . . .Ø cm / kW
back left . . . . . . . . . . . .Ø cm / kW
back right. . . . . . . . . . .Ø cm / kW
front right . . . . . . . . . . .Ø cm / kW
21;17.5;12 / 2.3
18;12.5 / 1.7
18 / 1.8
18 / 1.8
Hob total . . . . . . . . . . . . . . . . kW 7.6
Power supply
Mains voltage. . . . . . . . . . . . . . . . . 380-415V 2N~, 50-60 Hz
Component rated voltage . . . . . . . 220 - 240V
Hob
Cooking zones
left . . . . . . . . . . . . . . . .Ø cm / kW
center. . . . . . . . . . . . . .Ø cm / kW
right . . . . . . . . . . . . . . .Ø cm / kW
21;12 / 2.2
27; 21; 14.5 / 2.7
18;12/1.7
Hob total . . . . . . . . . . . . . . . . kW 6.6
Power supply
Mains voltage. . . . . . . . . . . . . . . . . 380-415V 2N~, 50-60 Hz
Component rated voltage . . . . . . . 220 - 240V
34
F
Elimination de l’emballage
Eliminez le plus écologiquement possible l’emballage de trans-
port. Le recyclage des matériaux d’emballage permet d’économi-
ser des matières premières et de réduire le volume des déchets.
Elimination des appareils hors
service
Le symbole sur le produit ou son emballage
indique que ce produit ne peut être traité
comme déchet ménager. Il doit plutôt être remis
au point de ramassage concerné, se chargeant
du recyclage du matériel électrique et électroni-
que.
Votre contribution à une élimination correcte de
ce produit permet de protéger l’environnement et la santé de vos
contemporains. Une élimination incorrecte est une menace pour
l’environnement et la santé. Pour obtenir plus de détails sur le
recyclage de ce produit, veuillez prendre contact avec le bureau
municipal de votre région, votre service de récupération des
déchets ménagers ou le magasin où vous avez acheté le produit.
Installation conforme
La table de cuisson ne doit être utilisée qu’à la préparation des
repas de tous les jours, c’est-à-dire, elle est conçue pour une uti-
lisation domestique. Ne jamais utiliser l’appareil pour des appli-
cations non appropriées et toujours l’utiliser sous surveillance.
Ce que vous trouverez ici...
Lisez soigneusement les informations portées dans ce manuel
avant de mettre votre table de cuisson en service. Vous y trouve-
rez des remarques importantes concernant votre sécurité, l’utili-
sation, l’entretien et la maintenance de votre appareil qui vous
permettront d’en profiter longtemps.
En cas de panne, consultez d’abord le chapitre «Que faire en cas
d’anomalie?». Vous pouvez souvent remédier vous-même aux
pannes mineures et économiser ainsi des frais d’intervention inu-
tiles.
Conservez soigneusement cette notice. Remettez-la aux nou-
veaux propriétaires de l’appareil, pour leur sécurité et leur infor-
mation.
Sommaire
Consignes de sécurité........................................................... 35
Pour le raccordement et le fonctionnement .......................... 35
Pour la table de cuisson........................................................ 35
Pour les personnes............................................................... 35
Description de l’appareil ....................................................... 36
Commande par touches sensitives....................................... 37
Utilisation................................................................................ 38
Limitation de la durée de fonctionnement............................. 38
Autres fonctions .................................................................... 38
Conseils pour économiser de l’énergie................................. 38
Positions de cuisson ............................................................. 38
Indicateur de chaleur résiduelle............................................ 38
Utilisation des touches.......................................................... 39
Mettre en marche la table de cuisson
et la zone de cuisson ............................................................ 39
Arrêter la zone de cuisson .................................................... 39
Arrêter la table de cuisson .................................................... 39
Commutation du deuxième / troisième circuit ...................... 40
Sécurité enfants ................................................................... 40
Arrêt automatique (minuterie) ............................................. 41
Minuterie (sablier) ................................................................ 41
Fonction STOP .................................................................... 42
Fonction de maintien au chaud ............................................ 42
Précuisson automatique ...................................................... 43
Nettoyage et entretien ........................................................... 44
Table de cuisson vitrocéramique .......................................... 44
Salissures résistantes........................................................... 44
Que faire en cas d’anomalie?............................................... 45
Montage et installation .......................................................... 46
Consignes de sécurité pour l’installateur
des meubles de cuisine ........................................................ 46
Montage................................................................................ 46
Raccordement électrique...................................................... 48
Caractéristiques techniques.................................................. 49
Mise en service..................................................................... 49
Consignes de sécurité F
35
Consignes de sécurité
Pour le raccordement et le fonctionnement
• Les appareils ont été conçus selon les normes de sécurité en
vigueur.
• Le raccordement au secteur, l’entretien et la réparation de
l’appareil ne doivent être effectués que par un professionnel
agréé, conformément aux standards de sécurité en vigueur.
Les travaux effectués de façon non conforme mettent votre
sécurité en danger.
Pour la table de cuisson
• Ne placez jamais de casseroles ou de poêles vides sur une
zone de cuisson activée. Evitez de chauffer des récipients à
vide (danger de surchauffe des récipients!).
• Attention, lors de l’utilisation de la casserole bain-marie. Les
casseroles bain-marie peuvent chauffer à vide, sans aucun
avertissement! Ceci endommage le récipient et la zone de
cuisson. Dans ce cas, la responsabilité du fabricant ne pourra
être engagée!
• Les graisses et les huiles surchauffées peuvent s’enflammer
spontanément. Ne pas préparer de mets ou de plats avec de
l’huile ou de la graisses sans surveillance. N’éteignez jamais
de l’huile ou de la graisse enflammée avec de l’eau! Posez un
couvercle et arrêtez la zone de cuisson.
• La surface en vitrocéramique est très résistante. Evitez toute-
fois d’y faire tomber des objets durs. Les impacts en forme de
point peuvent entraîner la rupture de la table de cuisson.
• Risque de choc électrique en cas de brisure, de fissure ou
d’autres endommagements de la vitrocéramique. Mettez aus-
sitôt l’appareil hors service. Coupez immédiatement le fusible
domestique et appelez le Service Après-Vente.
• S’il n’est plus possible d’arrêter la table de cuisson (touches
sensitives défectueuses), coupez immédiatement le fusible
domestique et appelez le Service Après-Vente.
• Attention, en travaillant avec des appareils ménagers! Ne
posez jamais les câbles à proximité des zones de cuisson
chaudes.
• N’utilisez jamais la table de cuisson vitrocéramique pour y
déposer des objets.
• Ne déposez pas de feuille d’aluminium ou de film plastique sur
les zones de cuisson. Eloignez de la zone de cuisson chaude
tout ce qui risque de fondre, p.ex. objets ou films en plastique,
sucre et mets contenant beaucoup de sucre. Du sucre ren-
versé sur la plaque vitrocéramique doit être retiré immédiate-
ment, tant qu’il est chaud et ce, avec un grattoir spécial verre,
afin d’éviter tout endommagement de la table de cuisson.
• Ne jamais déposer directement sous la table de cuisson, des
objets sensibles au feu, facilement inflammables ou déforma-
bles.
• Ne faites jamais chauffer des boites de conserves fermées, ni
d’emballages stratifiés sur les zones de cuisson. L’alimenta-
tion en énergie pourrait les faire éclater!
• Maintenez les touches sensitives propres, car des salissures
sur l’appareil pourraient être détectées comme effleurement
d’un doigt. Ne posez jamais d’objets, tels que casseroles, tor-
chons, etc., sur les touches sensitives!
• Au cas où les aliments déborderaient sur les touches sensiti-
ves, nous conseillons d’actionner la touche Arrêt!
• Les casseroles et les poêles chaudes ne doivent pas recouvrir
la zone des touches sensitives. Dans ce cas, l’appareil s’arrête
automatiquement.
• Ne faites jamais flamber une préparation sous une hotte aspi-
rante – les résidus de graisse contenus dans le filtre pourraient
s’enflammer!
• Evitez de laisser brûler à nouveau les encrassements.
Pour les personnes
• Cet appareil ne doit pas être utilisé par des personnes (y com-
pris des enfants), avec des capacités physiques, sensorielles
ou mentales limitées ou manquant d¡¯expérience et/ou de
connaissances, à moins qu’elles soient surveillées par une
personne responsable de leur sécurité ou qu’elles aient reçu
des instructions de la part de cette personne, comment utiliser
l’appareil.
Les enfants devraient être surveillés, afin d’éviter qu’ils ne
jouent avec l’appareil.
• Attention!
Les surfaces des plaques de cuisson et des éléments thermi-
ques sont brûlantes pendant le fonctionnement. Il convient
donc de tenir les enfants éloignés.
36
Description de l’appareil F
Description de l’appareil
Le décor peut être différent de celui illustré.
1. Zone de cuisson avant gauche
2. Zone de cuisson arrière gauche
3. Zone de cuisson arrière droite
4. Zone de cuisson avant droite
5. Bandeau de commande Touch-Control
6. Table de cuisson vitrocéramique
7. Touche Marche/Arrêt
8. Touche de sélection zone de cuisson
9. Symbole pour l’attribution de l’emplacement de la zone de
cuisson sur la table vitrocéramique
10. Touche Plus (augmenter) / Touche Moins (réduire)
11. Affichage des positions de cuisson
12. Point de disponibilité
13. Touche Multicircuits
14. Voyant de contrôle (mise en circuit de circuits
supplémentaires)
15. Touche de sélection minuterie
16. Affichage minuterie
17. Témoin d’attribution de la zone de cuisson sur la
table vitrocéramique
18. Témoin lumineux minuterie (sablier)
19. Touche STOP
Description de l’appareil F
37
Commande par touches sensitives
La commande de la table vitrocéramique se fait via les touches
sensitives Touch-Control. Les touches sensitives fonctionnent de
la manière suivante: effleurez brièvement, avec la pointe du
doigt, un symbole sur la surface vitrocéramique. Chaque toucher
correctement effectué est confirmé par un signal sonore. Par la
suite, la touche sensitive Touch-Control est appelée «touche».
Touche Marche/Arrêt (7)
Avec cette touche, toute la table de cuisson est mise en marche
ou arrêtée. Il s’agit du commutateur principal.
Touche de sélection zone de cuisson; p.ex. avant gauche
(8)
L’appui sur l’une des touches de sélection zones de cuisson,
vous permet de sélectionner une zone de cuisson à disposition,
pour la laquelle, ensuite, avec la touche Plus ou Moins vous pou-
vez régler une position de cuisson.
Touche Plus / Touche Moins (10)
Ces touches permettent de régler les positions de cuisson, l’arrêt
automatique et la minuterie (sablier). Avec la touche Moins, vous
diminuez la valeur affichée, avec la touche Plus vous l’augmen-
tez. La valeur affichée peut être effacée en appuyant simultané-
ment sur les deux touches.
Affichage de la position de cuisson (11)
L’affichage indique la position de cuisson sélectionnée, ou:
H ............... Chaleur résiduelle
A................ Précuisson automatique
STOP ........ Fonction Stop
.............. Fonction de maintien au chaud
Lorsque le point de disponibilité (12) est allumé, la zone
de cuisson peut être réglée.
Touche Multicircuits (13)
Pour la mise en circuit d’autres circuits de chauffe.
Touche de sélection minuterie (15)
Pour programmer l’arrêt automatique ou la minuterie (sablier).
Touche Stop (19)
Le déroulement de la cuisson peut être interrompu momentané-
ment à l’aide de la fonction STOP.
38
Utilisation F
Utilisation
Limitation de la durée de fonctionnement
La table de cuisson possède une limitation automatique de la
durée de fonctionnement. La durée de fonctionnement en con-
tinu de chacune des zones de cuisson dépend de la position de
cuisson sélectionnée (voir tableau).
Condition: pas de modification de réglage au niveau de la zone
de cuisson pendant la durée de fonctionnement. Lorsque la limi-
tation de la durée de fonctionnement a déclenché, la zone de
cuisson est arrêtée, un bref signal sonore retentit et un H est indi-
qué dans l’affichage.
Autres fonctions
Lorsque vous actionnez simultanément deux ou plusieurs tou-
ches sensitives – ce qui peut être le cas, par exemple, lorsque
vous posez un récipient sur une touche – celles-ci ne répondent
pas.
Le symbole clignote et un signal sonore, limité dans le temps,
retentit. L’arrêt se fait après quelques secondes. Retirer l’objet
posé sur les touches sensitives.
Pour effacer le symbole , appuyer sur la même touche ou
mettre en marche ou arrêter la zone de cuisson.
Conseils pour économiser de l’énergie
Vous trouvez, ci-après, quelques conseils importants concernant
l’utilisation économique et efficace de votre nouvelle table de
cuisson et les ustensiles de cuisson adaptés.
• Le diamètre du fond de la casserole devrait correspondre à
celui de la zone de cuisson.
• Veillez au moment de l’achat de casseroles au diamètre du
fond; parfois les indications données par le fabricant corres-
pondent au diamètre du bord supérieur. Ce dernier est sou-
vent plus grand que le fond de la casserole.
• Les cocottes minutes sont particulièrement économiques en
terme de temps de cuisson et de consommation d’énergie,
grâce à leur fermeture hermétique et la surpression de vapeur
à l’intérieur de la casserole. Les temps de cuisson rapides pro-
tègent les vitamines.
• Veillez toujours à une quantité suffisante de liquide dans la
cocotte-minute; celle-ci, ainsi que la zone de cuisson pour-
raient être endommagées par la surchauffe d’une casserole
vide.
• Dans la mesure du possible, fermez toujours les casseroles à
l’aide d’un couvercle adapté.
• Utilisez de préférence une casserole de taille bien adaptée à la
quantité des aliments à cuire. Une casserole trop grande avec
peu d’aliments nécessite beaucoup d’énergie.
Positions de cuisson
La puissance de chauffe des zones de cuisson peut être réglée
sur plusieurs positions. Le tableau vous indique des exemples de
cuisson dans les différentes positions.
Indicateur de chaleur résiduelle
La table de cuisson est équipée d’un indicateur de cha-
leur résiduelle H.
Tant que le H reste allumé, une fois la zone de cuisson
arrêtée, la chaleur résiduelle peut être utilisée pour
faire fondre ou pour maintenir les plats au chaud. Une
fois la lettre H éteinte, la zone de cuisson peut encore être
chaude. Risque de brûlures!
Position de cuisson
sélectionnée
Limitation de la durée de
fonctionnement (heures)
1
2
3
4
5
6
7
8
9
6
6
5
5
4
1,5
1,5
1,5
1,5
Positions de
cuisson
Indiquée pour
0
1-2
3
4-5
6
7-8
9
Position Arrêt
Fonction de maintien au chaud
Continuer la cuisson de petites quantités
(puissance réduite)
Continuer la cuisson
Continuer la cuisson de quantités
importantes, terminer de rôtir de gros
morceaux de viande
Rôtir, préparer un roux
Rôtir
Démarrer la cuisson, saisir, rôtir
(puissance max.)
Utilisation F
39
Utilisation des touches
Dans la commande décrite ici, l’appui d’une touche de sélection doit être
suivi par l’appui d’une autre touche.
L’appui de la touche suivante doit toujours avoir lieu sous 10 secondes,
dans le cas contraire, la sélection s’efface.
Les touches Plus/Moins peuvent être effleurées individuellement ou être
maintenues appuyées.
Mettre en marche la table de cuisson et la zone de
cuisson
1. Appuyez sur la touche Marche/Arrêt jusqu’à ce que les affichages
des positions de cuisson indiquent 0. Les points de disponibilité cligno-
tent. La commande est prête à fonctionner.
2. Ensuite, appuyez sur une touche de sélection zone de cuisson (p.ex.
pour la zone avant gauche). Le point de disponibilité de la zone
sélectionnée s’allume.
3. Sélectionnez une position de cuisson avec les touches Plus ou
Moins .
Avec la touche Plus, la position de cuisson 1 est activée, avec la touche
Moins, la position de cuisson 9.
4. Posez une casserole sur la zone de cuisson.
Pour cuisiner simultanément sur d’autres zones de cuisson, répétez les
points 2 à 4.
Arrêter la zone de cuisson
5. Le point de disponibilité de la zone de cuisson sélectionnée doit être
allumé. Ensuite, appuyez sur une touche de sélection zone de cuisson
(p.ex. pour la zone avant gauche).
6. a) Actionnez plusieurs fois la touche Moins jusqu’à ce que l’affi-
chage de la position de cuisson indique 0 ou
b) actionnez une fois simultanément les touches Moins et Plus .
La zone de cuisson peut être arrêtée directement de n’importe quelle
position de cuisson ou
c) en appuyant sur la touche Marche/Arrêt . Toute la table de cuis-
son est arrêtée (toutes les zones de cuisson sont arrêtées).
Arrêter la table de cuisson
7. Appuyez sur la touche Marche/Arrêt . La table de cuisson est com-
plètement arrêtée, indépendamment de son réglage.
Touches de sélection Point de disponibilité
zones de cuisson
40
Utilisation F
Commutation du deuxième / troisième circuit
(Seulement pour les zones de cuisson avec plusieurs cercles de chauffe)
Il n'est possible de commuter le deuxième / troisième circuit d'une zone don-
née qu'après avoir mis en route celle-ci.
1. Sélectionnez l’intensité souhaitée entre 1 et 9.
2. Mettez en marche le deuxième ou troisième circuit de cuisson en activant
la touche Multicircuits .
Le voyant de contrôle Deuxième /troisième circuit s’allume.
3. En pressant de nouveau la touche Multicircuits , vous déconnectez
le circuit externe.
Le voyant de contrôle Deuxième / troisième circuit s’éteint.
Remarque
• Les circuits de chauffe mis en circuit manuellement sont automatiquement
arrêtés lorsque la zone de cuisson est arrêtée.
Sécurité enfants
La sécurité enfants évite que la table de cuisson soit mise en marche involon-
tairement ou volontairement par des enfants. Toute commande est bloquée.
Activer la sécurité enfants
1. Appuyez sur la touche Marche/Arrêt pour mettre la table de cuis-
son en marche.
2. Tout de suite après, appuyez simultanément sur les touches Plus et
Moins .
3. Ensuite, appuyez sur la touche Plus , afin d’activer la sécurité
enfants. L’affichage des positions de cuisson indique un L pour Child-
Lock; la commande est bloquée et la table de cuisson s’arrête.
Désactiver la sécurité enfants
4. Appuyez sur la touche Marche/Arrêt .
5. Tout de suite après, appuyez simultanément sur les touches Plus et
Moins .
6. Ensuite, appuyez sur la touche Moins , afin de désactiver la sécurité
enfants. Le L disparaît.
Annuler la sécurité enfants pour une seule cuisson
Condition: La sécurité enfants a été activée suivant les indications données
sous les points 1 à 3.
• Appuyez sur la touche Marche/Arrêt .
• Tout de suite après, appuyez simultanément sur les touches Plus et
Moins .
Maintenant, vous pouvez mettre en marche une zone de cuisson (pour
cela, sélectionner la zone de cuisson et régler la position de cuisson).
Une fois la table de cuisson arrêtée, la sécurité enfants est de nouveau
activée (en marche).
Remarque
En cas de coupure de courant, la sécurité enfants activée est suppri-
mée, c’est-à-dire, elle est désactivée.
Utilisation F
41
Arrêt automatique (minuterie)
L’arrêt automatique permet d’arrêter automatiquement chaque zone de cuis-
son en fonctionnement après une durée de cuisson réglable. Vous pouvez
régler des temps de cuisson entre 1 à 99 minutes.
1. Mettez en marche la table de cuisson. Mettez en marche une ou plu-
sieurs zones de cuisson et sélectionnez la(les) position(s) de cuisson
souhaitée(s).
2. Appuyez sur la touche de sélection minuterie . Le point de disponi-
bilité de l’arrêt automatique s’allume.
Continuez à appuyer sur la touche, jusqu’à ce que le témoin lumineux de
la minuterie de la zone de cuisson souhaitée clignote.
Important: les témoins lumineux des minuteries ne peuvent clignoter que
lorsque les zones de cuisson ont été mises en marche au préalable
(position de cuisson supérieure à 0).
3. Tout de suite après, entrez à l’aide des touches Plus ou Moins
la durée de cuisson réglable entre 1 à 99 minutes.
Avec la touche Plus, la valeur affichée commence à 01, avec la touche
Moins à 30.
En appuyant simultanément sur les touches Plus et Moins, le réglage est
remis à zéro (00).
4. Pour la programmation de l’arrêt automatique pour une autre zone de
cuisson, appuyez plusieurs fois sur la touche de sélection minuterie
, jusqu’à ce que le témoin lumineux de la minuterie de la zone de
cuisson souhaitée clignote. Ensuite, réglez le temps souhaité en
appuyant sur la touche Plus ou la touche Moins .
5. Une fois la durée de cuisson écoulée, la zone de cuisson est arrêtée. Un
signal sonore retentit; il est limité dans le temps et peut être arrêté en
appuyant sur n’importe quelle touche (à l’exception de la touche Marche/
Arrêt).
Conseils!
• Pour la programmation de l’arrêt automatique pour une autre zone de cuis-
son, appuyez plusieurs fois sur la touche de sélection minuterie ,
jusqu’à ce que le témoin lumineux de la minuterie de la zone de cuisson
souhaitée clignote. La valeur affichée peut être lue et modifiée.
• Pour désactiver l’arrêt automatique avant la fin de cuisson : sélectionnez la
zone de cuisson concernée (le témoin lumineux minuterie clignote) et
appuyez simultanément une fois sur les touches Plus et Moins.
Minuterie (sablier)
1. Mettez en marche la table de cuisson.
2. Appuyez sur la touche de sélection minuterie , jusqu’à ce que le
voyant minuterie (sablier) clignote au-dessus de cette touche. La touche
Plus ou Moins permet de régler le temps en minutes.
3. Une fois le temps écoulé, un signal sonore retentit; celui-ci est limité dans
le temps et peut être arrêté en appuyant sur n’importe quelle touche (à
l’exception de la touche Marche/Arrêt ).
Remarque:
• La minuterie (sablier) reste activée, même quand la table de cuisson vitro-
céramique est arrêtée. Pour modifier le temps, mettre la table de cuisson
en marche en appuyant sur la touche Marche/Arrêt .
Témoin lumineux minuterie
Point de disponibilité arrêt automatique
Témoin lumineux minuterie (sablier)
42
Utilisation F
Fonction STOP
Le déroulement de la cuisson peut être interrompu momentanément à l’aide
de la fonction STOP, p.ex. lorsque quelqu’un sonne à la porte. Pour continuer
la cuisson avec les mêmes positions de cuisson, la fonction STOP doit être
annulée. Une minuterie programmée sera arrêtée et continuera ensuite à
décompter.
Pour des raisons de sécurité, la disponibilité de cette fonction est limitée à
10 minutes. Ce délai dépassé, la table de cuisson est arrêtée.
1. Les récipients de cuisson sont posés sur les zones de cuisson et les
positions de cuisson souhaitées sont réglées.
2. Activez la touche STOP . A la place des positions de cuisson sélec-
tionnées, les lettres S-T-O-P s’allument successivement.
3. L’interruption sera terminée, lorsque d’abord la touche STOP sera
appuyée, puis ensuite n’importe quelle autre touche (à l’exception de
la touche Marche/Arrêt).
L’appui sur la deuxième touche doit être effectué dans les 10 secondes,
sinon la table de cuisson s’arrête.
Fonction de maintien au chaud
Avec la fonction de maintien au chaud , vous pouvez maintenir au chaud
un plat cuit sur une zone de cuisson. La zone de cuisson est alors utilisée
avec une puissance réduite.
1. Le récipient de cuisson est posé sur une zone de cuisson et une intensité
de cuisson (p. ex. 3) est sélectionnée.
Le point de disponibilité de la zone de cuisson sélectionnée doit être
allumé. Ensuite, appuyez sur une touche de sélection zone de cuisson
(p.ex. pour la zone avant gauche).
2. Maintenez la touche Moins actionnée pour réduire l’intensité de
cuisson (… 3, 2, 1, ). L’affichage s’arrête à , la fonction de maintien
au chaud est activée.
3. Pour couper la fonction, actionnez une fois la touche Moins (0).
La fonction de maintien au chaud est à disposition durant 120 minutes,
ensuite la table de cuisson est arrêtée.
maintenir
Utilisation F
43
Précuisson automatique
Avec la précuisson automatique, la précuisson se fait sur position 9. Après un
certain temps, le réglage est ramené automatiquement sur une position infé-
rieure (1 à 8) pour terminer la cuisson.
En utilisant la précuisson automatique, réglez seulement la position de cuis-
son à laquelle la cuisson doit être continuée, car c’est l’électronique qui pas-
sera la zone de cuisson de la position précuisson automatiquement à la
position plus basse.
La précuisson automatique est adaptée à la cuisson de plats, permettant un
démarrage de la cuisson à froid, chauffés rapidement à forte puissance et
dont la cuisson est terminée en douceur, sans surveillance permanente
(p.ex. pot au feu).
1. Mettez une zone de cuisson en marche. Le point de disponibilité de la
zone de cuisson sélectionnée doit être allumé. Ensuite, appuyez sur une
touche de sélection zone de cuisson (p.ex. pour la zone avant
gauche).
2. Réglez la zone de cuisson sur position 9. Appuyez de nouveau sur la
touche Plus pour activer la précuisson automatique.
L’affichage de la position de cuisson indique alternativement A et 9.
3. Tout de suite après, sélectionnez la position souhaitée pour terminer la
cuisson à l’aide de la touche Moins (position 1 à 8).
A et la position de cuisson sélectionnée clignotent en alternance.
4. La précuisson automatique se déroule conforme à la programmation.
Après un certain temps (voir tableau), la cuisson continue sur la position
de cuisson réduite.
Conseils!
• Pendant la précuisson, la touche Plus permet d’augmenter la position
pour continuer la cuisson. En appuyant sur la touche Moins , la pré-
cuisson automatique s’arrête.
• Si, après l’activation de la précuisson, la position 9 est maintenue pour ter-
miner la cuisson, la précuisson automatique est arrêtée automatiquement
après 10 secondes et la cuisson continue sur position 9.
Position de
cuisson
sélectionnée
Précuisson automatique
Temps (min:sec)
1
2
3
4
5
6
7
8
9
01:00
03:00
04:48
06:30
08:30
02:30
03:30
04:30
- : -
Encimera Teka VR TC 95 4I

Más contenido relacionado

La actualidad más candente (15)

Manual siemens horno hb74ab520e
Manual siemens   horno hb74ab520eManual siemens   horno hb74ab520e
Manual siemens horno hb74ab520e
 
Manual balay horno 3hw469xc
Manual balay   horno 3hw469xcManual balay   horno 3hw469xc
Manual balay horno 3hw469xc
 
Manual balay horno 3hw440xc
Manual balay   horno 3hw440xcManual balay   horno 3hw440xc
Manual balay horno 3hw440xc
 
Horno BOSCH HBC84H501
Horno BOSCH HBC84H501Horno BOSCH HBC84H501
Horno BOSCH HBC84H501
 
Manual siemens horno hb74ar521e
Manual siemens   horno hb74ar521eManual siemens   horno hb74ar521e
Manual siemens horno hb74ar521e
 
Manual siemens horno hb76bc552e
Manual siemens   horno hb76bc552eManual siemens   horno hb76bc552e
Manual siemens horno hb76bc552e
 
Manual bosch encimera pie375 n14e
Manual bosch   encimera pie375 n14eManual bosch   encimera pie375 n14e
Manual bosch encimera pie375 n14e
 
Encimera BOSCH PKU375FB1E
Encimera BOSCH PKU375FB1EEncimera BOSCH PKU375FB1E
Encimera BOSCH PKU375FB1E
 
Manual siemens horno hb78lu571e
Manual siemens   horno hb78lu571eManual siemens   horno hb78lu571e
Manual siemens horno hb78lu571e
 
Horno BOSCH HBG673BS1F
Horno BOSCH HBG673BS1FHorno BOSCH HBG673BS1F
Horno BOSCH HBG673BS1F
 
Encimera Balay 3EB987LQ
Encimera Balay 3EB987LQ Encimera Balay 3EB987LQ
Encimera Balay 3EB987LQ
 
Horno Balay 3HW441NC
Horno Balay 3HW441NC Horno Balay 3HW441NC
Horno Balay 3HW441NC
 
Horno Balay 3HW441NC
Horno Balay 3HW441NCHorno Balay 3HW441NC
Horno Balay 3HW441NC
 
Encimera Balay 3EB918MQ
Encimera Balay 3EB918MQEncimera Balay 3EB918MQ
Encimera Balay 3EB918MQ
 
Encimera Balay 3EB997LQ
Encimera Balay 3EB997LQEncimera Balay 3EB997LQ
Encimera Balay 3EB997LQ
 

Similar a Encimera Teka VR TC 95 4I

Similar a Encimera Teka VR TC 95 4I (20)

Manual balay encimera 3eb725l
Manual balay   encimera 3eb725lManual balay   encimera 3eb725l
Manual balay encimera 3eb725l
 
Encimera Balay 3EB7030LS
Encimera Balay 3EB7030LSEncimera Balay 3EB7030LS
Encimera Balay 3EB7030LS
 
Manual balay encimera 3eb950m
Manual balay   encimera 3eb950mManual balay   encimera 3eb950m
Manual balay encimera 3eb950m
 
Manual balay encimera 3eb795lq
Manual balay   encimera 3eb795lqManual balay   encimera 3eb795lq
Manual balay encimera 3eb795lq
 
Encimera Balay 3EB929LQ
Encimera Balay 3EB929LQEncimera Balay 3EB929LQ
Encimera Balay 3EB929LQ
 
Manual balay encimera 3eb712lr
Manual balay   encimera 3eb712lrManual balay   encimera 3eb712lr
Manual balay encimera 3eb712lr
 
Manual balay encimera 3eb720lr
Manual balay   encimera 3eb720lrManual balay   encimera 3eb720lr
Manual balay encimera 3eb720lr
 
Manual balay encimera 3eb714lr
Manual balay   encimera 3eb714lrManual balay   encimera 3eb714lr
Manual balay encimera 3eb714lr
 
Manual balay encimera 3eb721xr
Manual balay   encimera 3eb721xrManual balay   encimera 3eb721xr
Manual balay encimera 3eb721xr
 
Manual balay encimera 3eb721lr
Manual balay   encimera 3eb721lrManual balay   encimera 3eb721lr
Manual balay encimera 3eb721lr
 
Manual balay encimera 3eb715xr
Manual balay   encimera 3eb715xrManual balay   encimera 3eb715xr
Manual balay encimera 3eb715xr
 
Manual balay encimera 3eb715lr
Manual balay   encimera 3eb715lrManual balay   encimera 3eb715lr
Manual balay encimera 3eb715lr
 
Manual balay encimera 3eb714er
Manual balay   encimera 3eb714erManual balay   encimera 3eb714er
Manual balay encimera 3eb714er
 
Manual balay encimera 3eb720xr
Manual balay   encimera 3eb720xrManual balay   encimera 3eb720xr
Manual balay encimera 3eb720xr
 
Manual balay encimera 3eb714xr
Manual balay   encimera 3eb714xrManual balay   encimera 3eb714xr
Manual balay encimera 3eb714xr
 
Manual balay encimera 3eb716lq
Manual balay   encimera 3eb716lqManual balay   encimera 3eb716lq
Manual balay encimera 3eb716lq
 
Manual balay encimera 3eb715xq
Manual balay   encimera 3eb715xqManual balay   encimera 3eb715xq
Manual balay encimera 3eb715xq
 
Manual balay encimera 3eb715lq
Manual balay   encimera 3eb715lqManual balay   encimera 3eb715lq
Manual balay encimera 3eb715lq
 
Encimera Balay 3EB915BR
Encimera Balay 3EB915BREncimera Balay 3EB915BR
Encimera Balay 3EB915BR
 
Manual balay encimera 3eb729f
Manual balay   encimera 3eb729fManual balay   encimera 3eb729f
Manual balay encimera 3eb729f
 

Más de Alsako Electrodomésticos

Más de Alsako Electrodomésticos (20)

Lavavajillas ZANUSSI ZDI22001XA
Lavavajillas ZANUSSI ZDI22001XALavavajillas ZANUSSI ZDI22001XA
Lavavajillas ZANUSSI ZDI22001XA
 
Secadora ZANUSSI ZDH8333PZ
Secadora ZANUSSI ZDH8333PZSecadora ZANUSSI ZDH8333PZ
Secadora ZANUSSI ZDH8333PZ
 
Congelador ZANUSSI ZFC1040WA
Congelador ZANUSSI ZFC1040WACongelador ZANUSSI ZFC1040WA
Congelador ZANUSSI ZFC1040WA
 
Nevera ZANUSSI ZUA14020SA
Nevera ZANUSSI ZUA14020SANevera ZANUSSI ZUA14020SA
Nevera ZANUSSI ZUA14020SA
 
Nevera ZANUSSI ZBB28460SA
Nevera ZANUSSI ZBB28460SANevera ZANUSSI ZBB28460SA
Nevera ZANUSSI ZBB28460SA
 
Encimera ZANUSSI ZGG66424XA
Encimera ZANUSSI ZGG66424XAEncimera ZANUSSI ZGG66424XA
Encimera ZANUSSI ZGG66424XA
 
Encimera ZANUSSI ZGO65414BA
Encimera ZANUSSI ZGO65414BAEncimera ZANUSSI ZGO65414BA
Encimera ZANUSSI ZGO65414BA
 
Encimera ZANUSSI ZEV6330FBA
Encimera ZANUSSI ZEV6330FBAEncimera ZANUSSI ZEV6330FBA
Encimera ZANUSSI ZEV6330FBA
 
Encimera ZANUSSI ZEI6840FBA
Encimera ZANUSSI ZEI6840FBAEncimera ZANUSSI ZEI6840FBA
Encimera ZANUSSI ZEI6840FBA
 
Encimera ZANUSSI ZEL6633FBA
Encimera ZANUSSI ZEL6633FBAEncimera ZANUSSI ZEL6633FBA
Encimera ZANUSSI ZEL6633FBA
 
Encimera ZANUSSI ZEV6040XBA
Encimera ZANUSSI ZEV6040XBAEncimera ZANUSSI ZEV6040XBA
Encimera ZANUSSI ZEV6040XBA
 
Encimera ZANUSSI ZEV6041XBA
Encimera ZANUSSI ZEV6041XBAEncimera ZANUSSI ZEV6041XBA
Encimera ZANUSSI ZEV6041XBA
 
Horno ZANUSSI ZZU10301WK
Horno ZANUSSI ZZU10301WKHorno ZANUSSI ZZU10301WK
Horno ZANUSSI ZZU10301WK
 
Horno ZANUSSI ZZU10301XK
Horno ZANUSSI ZZU10301XKHorno ZANUSSI ZZU10301XK
Horno ZANUSSI ZZU10301XK
 
Horno ZANUSSI ZOB20301XK
Horno ZANUSSI ZOB20301XKHorno ZANUSSI ZOB20301XK
Horno ZANUSSI ZOB20301XK
 
Horno ZANUSSI ZZB21601XV
Horno ZANUSSI ZZB21601XVHorno ZANUSSI ZZB21601XV
Horno ZANUSSI ZZB21601XV
 
Horno ZANUSSI ZOP37922XK
Horno ZANUSSI ZOP37922XKHorno ZANUSSI ZOP37922XK
Horno ZANUSSI ZOP37922XK
 
Horno ZANUSSI ZOP37912XK
Horno ZANUSSI ZOP37912XKHorno ZANUSSI ZOP37912XK
Horno ZANUSSI ZOP37912XK
 
Horno ZANUSSI ZOP37932XA
Horno ZANUSSI ZOP37932XAHorno ZANUSSI ZOP37932XA
Horno ZANUSSI ZOP37932XA
 
Lavadora Zanussi ZWF81243W
Lavadora Zanussi ZWF81243WLavadora Zanussi ZWF81243W
Lavadora Zanussi ZWF81243W
 

Encimera Teka VR TC 95 4I

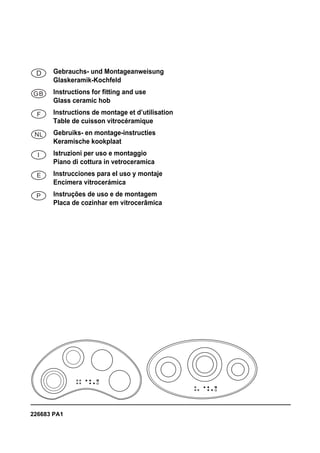
  • 1. 226683 PA1 Gebrauchs- und Montageanweisung Glaskeramik-Kochfeld Instructions for fitting and use Glass ceramic hob Instructions de montage et d’utilisation Table de cuisson vitrocéramique Gebruiks- en montage-instructies Keramische kookplaat Istruzioni per uso e montaggio Piano di cottura in vetroceramica Instrucciones para el uso y montaje Encimera vitrocerámica Instruções de uso e de montagem Placa de cozinhar em vitrocerâmica
  • 2. 2 D D..................................................................... 2 GB ................................................................ 18 F ................................................................... 34 NL................................................................. 50 I .................................................................... 66 E................................................................... 82 P................................................................... 98 Verpackungs-Entsorgung Entsorgen Sie die Transportverpackung möglichst umweltge- recht. Das Rückführen der Verpackungsmaterialien in den Mate- rialkreislauf spart Rohstoffe und verringert das Müllaufkommen. Altgeräte-Entsorgung Das Symbol auf dem Produkt oder seiner Ver- packung weist darauf hin, dass dieses Produkt nicht als normaler Haushaltsabfall zu behandeln ist, sondern an einem Sammelpunkt für das Recycling von elektrischen und elektronischen Geräten abgegeben werden muss. Durch Ihren Beitrag zum korrekten Entsorgen dieses Produkts schützen Sie die Umwelt und die Gesundheit Ihrer Mitmenschen. Umwelt und Gesundheit werden durch fal- sches Entsorgen gefährdet. Weitere Informationen über das Recycling dieses Produkts erhalten Sie von Ihrem Rathaus, Ihrer Müllabfuhr oder dem Geschäft, in dem Sie das Produkt gekauft haben. Bestimmungsgemäße Verwendung Das Kochfeld ist nur für die Zubereitung von Speisen im Haushalt zu benutzen. Es darf nicht zweckentfremdet und nur unter Auf- sicht verwendet werden. Hier finden Sie... Bitte lesen Sie die Informationen in diesem Heft sorgfältig durch bevor Sie Ihr Kochfeld in Betrieb nehmen. Sie finden hier wich- tige Hinweise für Ihre Sicherheit, den Gebrauch, die Pflege und die Wartung des Gerätes, damit sie lange Freude an Ihrem Gerät haben. Sollte einmal eine Störung auftreten, sehen Sie bitte erst einmal im Kapitel „Was tun bei Problemen?“ nach. Kleinere Störungen können Sie oft selbst beheben und sparen dadurch unnötige Ser- vicekosten. Bewahren Sie diese Anleitung sorgfältig auf. Bitte reichen Sie diese Gebrauchs- und Montageanweisung zur Information und Sicherheit an neue Besitzer weiter. Inhaltsverzeichnis Sicherheitshinweise................................................................. 3 Für Anschluss und Funktion ................................................... 3 Für das Kochfeld..................................................................... 3 Für Personen .......................................................................... 3 Gerätebeschreibung ................................................................ 4 Bedienung durch Sensortasten............................................... 5 Bedienung................................................................................. 6 Betriebsdauerbegrenzung....................................................... 6 Sonstige Funktionen ............................................................... 6 Energiespartipps..................................................................... 6 Kochstufen.............................................................................. 6 Restwärmeanzeige ................................................................. 6 Tastenbetätigung .................................................................... 7 Kochfeld und Kochzone einschalten....................................... 7 Kochzone ausschalten............................................................ 7 Kochfeld abschalten................................................................ 7 Zweikreis-/Dreikreiszuschaltung ............................................ 8 Kindersicherung ..................................................................... 8 Abschaltautomatik (Timer) ..................................................... 9 Kurzzeitwecker (Eier-Uhr) ...................................................... 9 STOP-Funktion .................................................................... 10 Warmhaltefunktion ............................................................... 10 Ankochautomatik ................................................................. 11 Reinigung und Pflege ............................................................ 12 Glaskeramik-Kochfeld........................................................... 12 Spezielle Verschmutzungen ................................................. 12 Was tun bei Problemen? ....................................................... 13 Montageanweisung................................................................ 14 Sicherheitshinweise für den Küchenmöbelmonteur.............. 14 Einbau................................................................................... 14 Elektrischer Anschluss.......................................................... 16 Technische Daten................................................................. 17 Inbetriebnahme..................................................................... 17
  • 3. Sicherheitshinweise D 3 Sicherheitshinweise Für Anschluss und Funktion • Die Geräte werden nach den einschlägigen Sicherheitsbestim- mungen gebaut. • Netzanschluss, Wartung und Reparatur der Geräte darf nur ein autorisierter Fachmann nach den geltenden Sicherheitsbe- stimmungen vornehmen. Unsachgemäß ausgeführte Arbeiten gefährden Ihre Sicherheit. Für das Kochfeld • Stellen Sie Töpfe und Pfannen nicht leer auf eingeschaltete Kochzonen. Vermeiden Sie das Leerkochen der Töpfe, da dabei Überhitzungsgefahr der Töpfe besteht! • Vorsicht bei der Verwendung von Simmertöpfen. Simmertöpfe können unbemerkt leerkochen! Dies führt in der Folge zu Beschädigungen am Topf und am Kochfeld. Hierfür wird keine Haftung übernommen! • Überhitzte Fette und Öle können sich selbst entzünden. Spei- sen mit Fetten und Ölen nur unter Aufsicht zubereiten. Entzün- dete Fette und Öle niemals mit Wasser löschen! Deckel auflegen, Kochzone abschalten. • Die Glaskeramik-Fläche ist sehr widerstandsfähig. Vermeiden Sie dennoch, dass harte Gegenstände auf die Glaskeramik- Fläche fallen. Punktförmige Schlagbelastungen können zum Bruch des Kochfeldes führen. • Bei Brüchen, Sprüngen, Rissen oder anderen Beschädigun- gen an der Glaskeramik besteht Stromschlaggefahr. Das Gerät sofort außer Betrieb setzen. Sofort die Haushalts-Siche- rung ausschalten und den Kundendienst rufen. • Sollte sich das Kochfeld durch einen Defekt der Sensorsteue- rung nicht mehr abschalten lassen, sofort die Haushalts-Siche- rung ausschalten und den Kundendienst rufen. • Vorsicht beim Arbeiten mit Haushaltsgeräten! Anschlussleitun- gen dürfen nicht mit den heißen Kochzonen in Berührung kom- men. • Das Glaskeramik-Kochfeld darf nicht als Ablagefläche benutzt werden. • Keine Alufolie bzw. Kunststoff auf die Kochzonen legen. Von der heißen Kochzone alles fernhalten, was schmelzen kann, z.B. Kunststoffe, Folie, besonders Zucker und stark zuckerhal- tige Speisen. Zucker sofort im heißen Zustand mit einem spe- ziellen Glasschaber vollständig von dem Glaskeramik- Kochfeld entfernen, um Beschädigungen zu vermeiden. • Keine feuergefährlichen, leicht entzündbaren oder verformba- ren Gegenstände direkt unter das Kochfeld legen. • Niemals verschlossene Konservendosen und Verbundschicht- verpackungen auf Kochzonen erhitzen. Durch Energiezufuhr könnten diese zerplatzen! • Die Sensortasten sauber halten, da Verschmutzungen vom Gerät als Fingerkontakt erkannt werden könnte. Niemals Gegenstände (Töpfe, Geschirrtücher, etc.) auf die Sensortas- ten stellen! • Wenn Töpfe bis über die Sensortasten überkochen, raten wir dazu, die Aus-Taste zu betätigen. • Heiße Töpfe und Pfannen dürfen die Sensortasten nicht abde- cken. In diesem Fall schaltet sich das Gerät automatisch ab. • Flambieren Sie nie unter einer Dunstabzugshaube - im Filter befindliches Fett kann dabei in Brand geraten! • Wiederholtes Festbrennen von Verschmutzungen vermeiden. Für Personen • Dieses Gerät ist nicht dafür bestimmt, durch Personen (ein- schließlich Kinder) mit eingeschränkten physischen, sensori- schen oder geistigen Fähigkeiten oder mangels Erfahrung und/oder mangels Wissen benutzt zu werden, es sei denn, sie werden durch eine für ihre Sicherheit zuständige Person beaufsichtigt oder erhielten von ihr Anweisungen, wie das Gerät zu benutzen ist. Kinder sollten beaufsichtigt werden, um sicherzustellen, dass sie nicht mit dem Gerät spielen. • Achtung: Die Oberflächen an Heiz- und Kochstellen werden bei Betrieb heiß. Aus diesem Grunde sollten Kleinkinder grundsätzlich ferngehalten werden.
  • 4. 4 Gerätebeschreibung D Gerätebeschreibung Das Dekor kann von den Abbildungen abweichen. 1. Kochzone vorne links 2. Kochzone hinten links 3. Kochzone hinten rechts 4. Kochzone vorne rechts 5. Touch-Control Bedienfeld 6. Glaskeramik-Kochfeld 7. Ein/Aus-Taste 8. Kochzonenauswahl-Taste 9. Symbol zur Zuordnung der Lage der Kochzone auf dem Glaskeramik-Kochfeld 10. Plus-Taste (erhöhen) / Minus-Taste (verringern) 11. Kochstufen-Anzeige 12. Bereitschaftspunkt 13. Kreiszuschaltungstaste 14. Kontrollleuchte (Kreiszuschaltung) 15. Timer-Selektions-Taste 16. Timer-Anzeige 17. Kontrollleuchte zur Zuordnung der Lage der Kochzone auf dem Glaskeramik-Kochfeld 18. Kurzzeitwecker-Leuchte 19. STOP-Taste
  • 5. Gerätebeschreibung D 5 Bedienung durch Sensortasten Die Bedienung des Glaskeramik-Kochfeldes erfolgt durch Touch- Control Sensortasten. Die Sensortasten funktionieren wie folgt: mit der Fingerspitze ein Symbol auf der Glaskeramikoberfläche kurz berühren. Jede korrekte Betätigung wird durch einen Signal- ton bestätigt. Nachfolgend wird die Touch-Control Sensortaste als „Taste” bezeichnet. Ein/Aus-Taste (7) Mit dieser Taste wird das gesamte Kochfeld ein- und ausge- schaltet. Die Taste ist sozusagen der Hauptschalter. Kochzonenauswahl-Taste; z.B. vorne links (8) Durch Betätigung einer der zur Verfügung stehenden Kochzo- nenauswahl-Tasten wird eine Kochzone ausgewählt, für die anschließend mit der Plus-Taste oder Minus-Taste eine Koch- stufe eingestellt werden kann. Plus-Taste / Minus-Taste (10) Mit diesen Tasten werden die Einstellungen der Kochstufen, der Abschaltautomatik und des Kurzzeitweckers vorgenommen. Durch die Minus-Taste wird der Anzeigewert verringert, durch die Plus-Taste erhöht. Der Anzeigewert kann gelöscht werden, indem beide Tasten gleichzeitig gedrückt werden. Kochstufen-Anzeige (11) Die Kochstufen-Anzeige zeigt die gewählte Kochstufe, oder: H ............... Restwärme A................ Ankochautomatik STOP ........ Stop-Funktion .............. Warmhaltefunktion Wenn der Bereitschaftspunkt (12) leuchtet, kann die Kochzone eingestellt werden. Kreiszuschaltungstaste (13) Für die Zuschaltung weiterer Heizkreise. Timer-Selektions-Taste (15) Zum Programmieren der Abschaltautomatik oder des Kurzzeit- weckers. STOP-Taste (19) Der Kochvorgang kann kurzzeitig durch die STOP-Funktion unterbrochen werden.
  • 6. 6 Bedienung D Bedienung Betriebsdauerbegrenzung Das Kochfeld besitzt eine automatische Betriebsdauerbegren- zung. Die kontinuierliche Nutzungsdauer jeder Kochzone ist abhängig von der gewählten Kochstufe (siehe Tabelle). Voraussetzung ist, dass während der Nutzungsdauer keine Ein- stellungsänderung an der Kochzone vorgenommen wird. Wenn die Betriebsdauerbegrenzung angesprochen hat, wird die Koch- zone abgeschaltet, es ertönt ein kurzer Signalton und ein H erscheint in der Anzeige. Sonstige Funktionen Bei längerem oder gleichzeitigem Betätigen von einer oder meh- reren Sensortasten (z.B. durch einen versehentlich auf die Sen- sortasten gestellten Topf) erfolgt keine Schaltfunktion. Es blinkt das Symbol und ein zeitlich begrenzter Dauersignal- ton ertönt. Nach einigen Sekunden wird abgeschaltet. Bitte den Gegenstand von den Sensortasten entfernen. Zum Löschen des Symbols die gleiche Taste betätigen oder das Kochfeld aus- und einschalten. Energiespartipps Nachfolgend finden Sie einige wichtige Hinweise, um energie- sparend und effizient mit Ihrem neuen Kochfeld und dem Koch- geschirr umzugehen. • Der Topfbodendurchmesser sollte gleich groß sein wie der Kochzonendurchmesser. • Beim Kauf von Töpfen darauf achten, dass häufig der obere Topfdurchmesser angegeben wird. Dieser ist meistens größer als der Topfboden. • Schnellkochtöpfe sind durch den geschlossenen Garraum und den Überdruck besonders zeit- und energiesparend. Durch kurze Gardauer werden Vitamine geschont. • Immer auf eine ausreichende Menge Flüssigkeit im Schnell- kochtopf achten, da bei leergekochtem Topf die Kochzone und der Topf durch Überhitzung beschädigt werden können. • Kochtöpfe nach Möglichkeit immer mit einem passenden Deckel verschließen. • Zu jeder Speisemenge sollte der richtige Topf verwendet wer- den. Ein großer kaum gefüllter Topf benötigt viel Energie. Kochstufen Die Heizleistung der Kochzonen kann in mehreren Stufen einge- stellt werden. In der Tabelle finden Sie Anwendungsbeispiele für die einzelnen Stufen. Restwärmeanzeige Das Glaskeramik-Kochfeld ist mit einer Restwärmean- zeige H ausgestattet. Solange das H nach dem Ausschalten leuchtet, kann die Restwärme zum Schmelzen und Warmhalten von Speisen genutzt werden. Nach dem Erlöschen des Buchstabens H kann die Kochzone noch heiß sein. Es besteht Verbrennungsgefahr! Eingestellte Kochstufe Betriebsdauerbegrenzung (Stunden) 1 2 3 4 5 6 7 8 9 6 6 5 5 4 1,5 1,5 1,5 1,5 Kochstufe Geeignet für 0 1-2 3 4-5 6 7-8 9 Aus-Stellung, Nachwärmenutzung Warmhaltefunktion Fortkochen kleiner Mengen (niedrigste Leistung) Fortkochen Fortkochen großer Mengen, Weiterbra- ten größerer Stücke Braten, Einbrenne herstellen Braten Ankochen, Anbraten, Braten (höchste Leistung)
  • 7. Bedienung D 7 Tastenbetätigung Die hier beschriebene Steuerung erwartet nach der Betätigung einer (Aus- wahl-) Taste anschließend die Betätigung einer nachfolgenden Taste. Die Betätigung der nachfolgenden Taste muss grundsätzlich innerhalb von 10 Sekunden begonnen werden, ansonsten erlischt die Auswahl. Die Plus-/ Minus-Tasten können einzeln angetippt werden oder permanent gedrückt gehalten werden. Kochfeld und Kochzone einschalten 1. Ein/Aus-Taste solange betätigen, bis die Kochstufen-Anzeigen 0 zeigen. Die Bereitschaftspunkte blinken. Die Steuerung ist betriebsbereit. 2. Anschließend eine Kochzonenauswahl-Taste betätigen (z.B. für vorne links). Der Bereitschaftspunkt der gewählten Kochzone leuchtet. 3. Mit der Plus-Taste oder Minus-Taste eine Kochstufe auswählen. Durch die Plus-Taste wird die Kochstufe 1 eingeschaltet, durch die Minus-Taste die Kochstufe 9. 4. Einen Kochtopf auf die Kochzone stellen. Um zeitgleich auf anderen Kochzonen zu kochen, die Punkte 2 bis 4 wieder- holt durchführen. Kochzone ausschalten 5. Bereitschaftspunkt der gewählten Kochzone muss leuchten. Dazu evtl. Kochzonenauswahl-Taste betätigen (z.B. für vorne links). 6. a) Minus-Taste mehrmals betätigen, bis die Kochstufenanzeige 0 anzeigt, oder b) Minus-Taste und Plus-Taste gleichzeitig einmal betätigen. Die Kochzone wird von jeder Kochstufe aus direkt ausgeschaltet, oder c) Ein/Aus-Taste betätigen. Das gesamte Kochfeld wird abgeschal- tet (alle Kochzonen werden abgeschaltet). Kochfeld abschalten 7. Ein/Aus-Taste betätigen. Das Kochfeld wird unabhängig von der Einstellung vollständig ausgeschaltet. Kochzonenauswahl-Tasten Bereitschaftspunkt
  • 8. 8 Bedienung D Zweikreis-/Dreikreiszuschaltung (Nur Kochzonen mit mehreren Heizkreisen) Die Zweikreis-/Dreikreiszuschaltung der jeweiligen Kochzone kann nur nach dem Einschalten der entsprechenden Kochzone erfolgen. 1. Gewünschte Kochstufe von 1-9 wählen. 2. Durch Betätigen der Kreiszuschaltungstaste den zweiten oder drit- ten Heizkreis zuschalten. Die Kontroll-Leuchte Zweikreis/Dreikreis leuchtet auf. 3. Durch erneutes Betätigen der Kreiszuschaltungstaste schaltet sich der äußere Heizkreis aus. Die Kontroll-Leuchte Zweikreis/Dreikreis erlischt. Hinweis • Die manuell zugeschalteten Heizkreise werden automatisch abgewählt, wenn die Kochzone ausgeschaltet wird. Kindersicherung Die Kindersicherung soll verhindern, dass Kinder versehentlich oder absicht- lich das Kochfeld einschalten. Dazu wird die Bedienung gesperrt. Kindersicherung einschalten 1. Ein/Aus-Taste betätigen um das Kochfeld einzuschalten. 2. Gleich darauf Plus-Taste und Minus-Taste gleichzeitig betäti- gen. 3. Anschließend die Plus-Taste betätigen, um die Kindersicherung zu aktivieren. In den Kochstufen-Anzeigen erscheint ein L für Child-Lock; die Bedienung ist gesperrt und das Kochfeld schaltet ab. Kindersicherung ausschalten 4. Ein/Aus-Taste betätigen. 5. Gleich darauf Plus-Taste und Minus-Taste gleichzeitig betäti- gen. 6. Anschließend die Minus-Taste betätigen, um die Kindersicherung auszuschalten. Das L erlischt. Kindersicherung nur für einen Kochvorgang aufheben Voraussetzung: Die Kindersicherung ist nach Punkt 1-3 eingeschaltet. • Ein/Aus-Taste betätigen. • Gleich darauf Plus-Taste und Minus-Taste gleichzeitig betätigen. Jetzt kann vom Benutzer eine Kochzone eingeschaltet werden (dazu Kochzone auswählen und Kochstufe einstellen). Nach dem Ausschalten des Kochfeldes ist die Kindersicherung wieder aktiv (eingeschaltet). Hinweis Bei Netzausfall wird die eingeschaltete Kindersicherung aufgehoben, d.h. deaktiviert.
  • 9. Bedienung D 9 Abschaltautomatik (Timer) Durch die Abschaltautomatik wird jede eingeschaltete Kochzone nach einer einstellbaren Zeit automatisch abgeschaltet. Es können Kochzeiten von 1 bis 99 Minuten eingestellt werden. 1. Das Kochfeld einschalten. Eine oder mehrere Kochzonen einschalten und gewünschte Kochstufen wählen. 2. Die Timer-Selektions-Taste betätigen. Der Bereitschaftspunkt der Abschaltautomatik leuchtet. Die Taste weiter betätigen, bis die Timer-Kontrollleuchte für die gewünschte Kochzone blinkt. Wichtig: Timer-Kontrollleuchten können nur blinken, wenn die Kochzonen vorher eingeschaltet wurden (Kochstufe größer 0). 3. Gleich darauf durch die Plus-Taste oder Minus-Taste die Koch- zeit von 1 bis 99 Minuten eingeben. Durch die Plus-Taste beginnt der Anzeigewert bei 01, durch die Minus- Taste bei 30. Durch gleichzeitiges Betätigen der Plus- und Minus-Taste wird die Ein- stellung zurückgesetzt (00). 4. Zur Programmierung der Abschaltautomatik für eine weitere Kochzone, die Timer-Selektions-Taste so oft betätigen, bis die Timer-Kontroll- leuchte für die gewünschte Kochzone blinkt. Anschließend durch die Plus-Taste oder Minus-Taste die gewünschte Zeit einstellen. 5. Nach Ablauf der Zeit wird die Kochzone ausgeschaltet. Es ertönt ein zeit- lich begrenzter Signalton, der durch Betätigung einer beliebigen Taste (ausgenommen Ein/Aus-Taste) abgeschaltet werden kann. Hinweise • Zur Kontrolle der abgelaufenen Zeit (Abschaltautomatik) die Timer-Selek- tions-Taste so oft betätigen, bis die Timer-Kontrollleuchte für die gewünschte Kochzone blinkt. Der Anzeigewert kann abgelesen und verän- dert werden. • Abschaltautomatik vorzeitig löschen: Die jeweilige Kochzone anwählen (Timer-Kontrollleuchte blinkt) und Plus- und Minus-Taste gleichzeitig ein- mal betätigen. Kurzzeitwecker (Eier-Uhr) 1. Das Kochfeld einschalten. 2. Die Timer-Selektions-Taste betätigen, bis die Kurzzeitwecker- Leuchte über dieser Taste blinkt. Durch die Plus-Taste oder Minus- Taste die Zeit in Minuten einstellen. 3. Nach Ablauf der Zeit ertönt ein zeitlich begrenzter Signalton, der durch Betätigung einer beliebigen Taste (ausgenommen Ein/Aus-Taste ) abgeschaltet werden kann. Hinweis: • Der Kurzzeitwecker bleibt auch dann in Betrieb, wenn das Glaskeramik- Kochfeld ausgeschaltet ist. Zum Ändern der Zeit das Kochfeld durch die Ein/Aus-Taste einschalten. Timer-Kontrollleuchte Bereitschaftspunkt der Abschaltautomatik Kurzzeitwecker-Leuchte
  • 10. 10 Bedienung D STOP-Funktion Der Kochvorgang kann kurzzeitig durch die STOP-Funktion unterbrochen werden, z.B. wenn es an der Haustüre klingelt. Um den Kochvorgang mit den gleichen Kochstufen fortzusetzen, muss die STOP-Funktion aufgehoben wer- den. Ein evtl. eingestellter Timer wird angehalten und läuft danach weiter. Aus Sicherheitsgründen steht diese Funktion nur 10 Minuten zu Verfügung. Danach wird das Kochfeld ausgeschaltet. 1. Das Kochgeschirr steht auf den Kochzonen und die gewünschten Koch- stufen sind eingestellt. 2. STOP-Taste betätigen. Anstelle der gewählten Kochstufen, leuchten nacheinander die Buchstaben S-T-O-P auf. 3. Die Unterbrechung wird beendet, indem zuerst die STOP-Taste betätigt wird und danach eine beliebige andere Taste (ausgenommen Ein/Aus-Taste). Die Betätigung der zweiten Taste muss innerhalb von 10 Sekunden erfol- gen, ansonsten schaltet das Kochfeld ab. Warmhaltefunktion Mit der Warmhaltefunktion können fertige Speisen auf einer Kochzone warm gehalten werden. Die Kochzone wird mit geringer Leistung betrieben. 1. Kochgeschirr steht auf einer Kochzone und eine Kochstufe (z.B. 3) ist gewählt. Der Bereitschaftspunkt der gewählten Kochzone muss leuchten. Dazu evtl. Kochzonenauswahl-Taste betätigen (z.B. für vorne links). 2. Die Minus-Taste gedrückt halten, um die Kochstufen herunterzu- schalten (... 3, 2, 1, ). Bei wird gestoppt, die Warmhaltefunktion ist eingeschaltet. 3. Zum Ausschalten die Minus-Taste einmal betätigen (0). Die Warmhaltefunktion steht 120 Minuten zur Verfügung, danach wird das Kochfeld ausgeschaltet. halten
  • 11. Bedienung D 11 Ankochautomatik Bei der Ankochautomatik erfolgt das Ankochen mit Kochstufe 9. Nach einer bestimmten Zeit wird automatisch auf eine geringere Fortkochstufe (1 bis 8) zurückgeschaltet. Bei Anwendung der Ankochautomatik muss lediglich die Fortkochstufe gewählt werden, mit der das Gargut weitergegart werden soll, weil die Elek- tronik selbständig zurückschaltet. Die Ankochautomatik ist geeignet für Gerichte, die kalt aufgesetzt, mit hoher Leistung erhitzt und auf der Fortkochstufe nicht ständig beobachtet werden müssen (z.B. das Kochen von Suppenfleisch). 1. Eine Kochzone in Betrieb nehmen. Der Bereitschaftspunkt der gewählten Kochzone muss leuchten. Dazu evtl. Kochzonenauswahl-Taste betäti- gen (z.B. für vorne links). 2. Kochstufe 9 einstellen. Durch erneutes Betätigen der Plus-Taste wird die Ankochautomatik aktiviert. Die Kochstufenanzeige zeigt abwechselnd A und 9. 3. Gleich darauf durch die Minus-Taste eine geringere Fortkochstufe 1 bis 8 wählen. A und die gewählte Fortkochstufe blinken abwechselnd. 4. Die Ankochautomatik läuft programmgemäß ab. Nach einer bestimmten Zeit (siehe Tabelle) wird der Kochvorgang mit der Fortkochstufe fortge- führt. Hinweise • Während der Ankochautomatik kann mit der Plus-Taste die Fortkoch- stufe erhöht werden. Die Betätigung der Minus-Taste schaltet die Ankochautomatik ab. • Belässt man nach Aktivierung der Ankochautomatik die Stufe 9 und wählt keine geringere Fortkochstufe, so wird die Ankochautomatik nach 10 Sek. automatisch ausgeschaltet und es bleibt Stufe 9 erhalten. Eingestellte Kochstufe Ankochautomatik Zeit (Min:Sek) 1 2 3 4 5 6 7 8 9 01:00 03:00 04:48 06:30 08:30 02:30 03:30 04:30 - : -
  • 12. 12 Reinigung und Pflege D Reinigung und Pflege • Vor dem Reinigen das Kochfeld ausschalten und abkühlen lassen. • Das Glaskeramikkochfeld darf unter keinen Umständen mit einem Dampfreinigungsgerät oder ähnlichem gereinigt wer- den! • Beim Reinigen darauf achten, dass nur kurz über die Ein/Aus- Taste gewischt wird. Damit wird ein versehentliches Einschal- ten vermieden! Glaskeramik-Kochfeld Wichtig! Verwenden Sie niemals aggressive Reinigungsmittel, wie z.B. grobe Scheuermittel, kratzende Topfreiniger, Rost- und Fleckenentferner etc. Reinigung nach Gebrauch 1. Reinigen Sie das gesamte Kochfeld immer dann, wenn es ver- schmutzt ist - am besten nach jedem Gebrauch. Benutzen Sie dazu ein feuchtes Tuch und ein wenig Handspülmittel. Danach reiben Sie das Kochfeld mit einem sauberen Tuch trocken, so dass keine Spülmittelrückstände auf der Oberfläche verbleiben. Wöchentliche Pflege 2. Reinigen und pflegen Sie das gesamte Kochfeld einmal in der Woche gründlich mit handelsüblichen Glaskeramik-Reinigern. Beachten Sie unbedingt die Hinweise des jeweiligen Herstellers. Die Reinigungsmittel erzeugen beim Auftragen einen Schutzfilm, der wasser- und schmutzabweisend wirkt. Alle Verschmutzungen bleiben auf dem Film und lassen sich dann anschließend leichter entfernen. Danach mit einem sauberen Tuch die Fläche trocken- reiben. Es dürfen keine Reinigungsmittelrückstände auf der Oberfläche verbleiben, weil sie beim Aufheizen aggressiv wirken und die Oberfläche verändern. Spezielle Verschmutzungen Starke Verschmutzungen und Flecken (Kalkflecken, perlmuttar- tig glänzende Flecken) sind am besten zu beseitigen, wenn das Kochfeld noch handwarm ist. Benutzen Sie dazu handelsübliche Reinigungsmittel. Gehen Sie dabei so vor, wie unter Punkt 2 beschrieben. Übergekochte Speisen zuerst mit einem nassen Tuch aufwei- chen und anschließend die Schmutzreste mit einem speziellen Glasschaber für Glaskeramik-Kochfelder entfernen. Danach die Fläche wie unter Punkt 2 beschrieben reinigen. Eingebrannten Zucker und geschmolzenen Kunststoff entfer- nen Sie sofort - im noch heißen Zustand - mit einem Glasscha- ber. Danach die Fläche wie unter Punkt 2 beschrieben, reinigen. Sandkörner, die eventuell beim Kartoffelschälen oder Salatput- zen auf die Kochfläche fallen, können beim Verschieben von Töpfen Kratzer erzeugen. Achten Sie deshalb darauf, dass keine Sandkörner auf der Oberfläche verbleiben. Farbige Veränderungen des Kochfeldes haben keinen Einfluss auf die Funktion und Stabilität der Glaskeramik. Es handelt sich dabei nicht um eine Beschädigung des Kochfeldes, sondern um nicht entfernte und daher eingebrannte Rückstände. Glanzstellen entstehen durch Abrieb des Topfbodens, insbeson- dere bei Verwendung von Kochgeschirr mit Aluminiumböden oder durch ungeeignete Reinigungsmittel. Sie lassen sich nur mühsam mit handelsüblichen Reinigungsmitteln beseitigen. Eventuell die Reinigung mehrmals wiederholen. Durch die Ver- wendung aggressiver Reinigungsmittel und durch scheuernde Topfböden wird das Dekor mit der Zeit abgeschmirgelt und es entstehen dunkle Flecken.
  • 13. Was tun bei Problemen? D 13 Was tun bei Problemen? Unqualifizierte Eingriffe und Reparaturen am Gerät sind gefähr- lich, weil Stromschlag- und Kurzschlussgefahr besteht. Sie sind zur Vermeidung von Körperschäden und Schäden am Gerät zu unterlassen. Deshalb solche Arbeiten nur von einem Elektrofach- mann, wie z.B. einem Technischen Kundendienst, ausführen las- sen. Bitte beachten Sollten an Ihrem Gerät Störungen auftreten, prüfen Sie bitte anhand dieser Gebrauchsanleitung, ob Sie die Ursachen nicht selber beheben können. Nachfolgend finden Sie Tipps zur Behebung von Störungen. Die Sicherungen lösen mehrfach aus? • Rufen Sie einen Technischen Kundendienst oder einen Elekt- roinstallateur! Das Kochfeld lässt sich nicht einschalten? • Hat die Sicherung der Hausinstallation (Sicherungskasten) angesprochen? • Ist das Netzanschlusskabel angeschlossen? • Ist die Kindersicherung eingeschaltet, d.h. ein L wird ange- zeigt? • Sind die Sensortasten durch ein feuchtes Tuch, Flüssigkeit oder einen metallischen Gegenstand teilweise bedeckt? Bitte entfernen. Das Symbol blinkt und es ertönt ein zeitlich begrenzter Dauersignalton. Es liegt eine Dauerbetätigung der Touch-Control Sensortasten durch übergekochte Speisen, Kochgeschirr oder andere Gegen- stände vor. Abhilfe: die Oberfläche reinigen oder den Gegenstand entfernen. Zum Löschen des Symbols die gleiche Taste betätigen oder das Kochfeld aus- und einschalten. Das Kochfeld bzw. die Kochzone ist plötzlich ausgeschaltet • Haben Sie aus Versehen die Ein/Aus-Taste betätigt? • Sind die Sensortasten durch ein feuchtes Tuch, Flüssigkeit oder einen metallischen Gegenstand teilweise bedeckt? Es ertönt ein zeitlich begrenzter Signalton. Nach einigen Sekun- den wird abgeschaltet. Bitte den Gegenstand von den Sensor- tasten entfernen. • Hat die Sicherheitsabschaltung angesprochen, d.h. eine Koch- stufe wurde über eine bestimmte Zeit hinaus unverändert benutzt? Siehe Absatz „Betriebsdauerbegrenzung”. Abschalten der Kochfläche nicht möglich. • Elektronisches Bauteil ist defekt. Sicherung ausschalten und Kundendienst rufen. Die Kochfläche heizt nicht auf. • Kochfläche defekt. Kundendienst rufen. • Innerer Kreis einer Mehrkreis-Kochzone defekt. Funktionierenden äußeren Kreis auf keinen Fall weiterbetrei- ben. Sofort den Kundendienst rufen. Das Kochfeld gibt Geräusche ab (Klick- bzw. Knackge- räusch) oder beim Einschalten der Kochfläche tritt ein Sum- men auf? • Das ist technisch bedingt und hat auf Qualität und Funktion keinen Einfluss. LED-Anzeige für Kochstufen bzw. Restwärmeanzeige H leuchtet nicht oder nur teilweise. • LED-Anzeige defekt. Kundendienst rufen. Verbrennungsgefahr, da Warnung vor Temperatur nicht gewährleistet ist. Das Kochfeld hat Risse oder Brüche? • Bei Brüchen, Sprüngen, Rissen oder anderen Beschädigun- gen an der Glaskeramik besteht Stromschlaggefahr. Das Gerät sofort außer Betrieb setzen. Sofort die Haushalts-Siche- rung ausschalten und den Kundendienst rufen.
  • 14. 14 Montageanweisung D Montageanweisung Sicherheitshinweise für den Küchenmöbelmonteur • Furniere, Kleber bzw. Kunststoffbeläge der angrenzenden Möbel müssen temperaturbeständig sein (>75°C). Sind die Furniere und Beläge nicht genügend temperaturbeständig, können sie sich verformen. • Der Berührungsschutz muss durch den Einbau gewährleistet sein. • Die Verwendung von Wandabschlussleisten aus Massivholz auf der Arbeitsplatte hinter dem Kochfeld ist zulässig, sofern die Mindestabstände gemäß den Einbauskizzen eingehalten werden. • Die Mindestabstände der Muldenausschnitte nach hinten gemäß der Einbauskizze sind einzuhalten. • Bei Einbau direkt neben einem Hochschrank ist ein Sicher- heitsabstand von mindestens 40 mm einzuhalten. Die Seiten- fläche des Hochschrankes muss mit wärmefestem Material verkleidet werden. Aus arbeitstechnischen Gründen sollte der Abstand jedoch mindestens 300 mm betragen. • Der Abstand zwischen Kochfeld und Dunstabzugshaube muss mindestens so groß sein, wie in der Montageanleitung der Dunstabzugshaube vorgegeben ist. • Die Verpackungsmaterialien (Plastikfolien, Styropor, Nägel, etc.) müssen aus der Reichweite von Kindern gebracht wer- den, da diese Teile mögliche Gefahrenquellen darstellen. Kleinteile könnten verschluckt werden und von Folien geht Erstickungsgefahr aus. Einbau Wichtige Hinweise • Liegt das Kochfeld über Möbelteilen (Seitenwände, Schubkäs- ten, etc.), so muss ein Zwischenboden, im Mindestabstand von 20 mm zur Kochfeldunterseite eingebaut werden, sodass eine zufällige Berührung nicht möglich ist. Der Zwischenboden darf nur mit Werkzeugen entfernbar sein. • Es ist dafür zu sorgen, dass wegen Brandgefahr keine feuer- gefährlichen, leicht entzündbaren oder durch Wärme verform- bare Gegenstände direkt neben dem Kochfeld angeordnet bzw. gelegt werden. Kochfelddichtung Vor dem Einbau ist die beiliegende Kochfelddichtung lückenlos einzulegen. • Es muss verhindert werden, dass Flüssigkeiten zwischen Kochfeldrand und Arbeitsplatte oder zwischen Arbeitsplatte und Wand in evtl. darunter eingebaute Elektrogeräte eindrin- gen können. • Bei Einbau des Kochfeldes in eine unebene Arbeitsplatte, z.B. mit einem keramischen oder ähnlichem Belag (Kacheln etc.) ist die evtl. an dem Kochfeld befindliche Dichtung zu entfernen und die Abdichtung der Kochfläche gegenüber der Arbeits- platte durch plastische Dichtungsmaterialien (Kitt) vorzuneh- men. • Das Kochfeld auf keinen Fall mit Silikon einkleben! Ein späterer zerstörungsfreier Ausbau des Kochfeldes ist dann nicht mehr möglich. Arbeitsplattenausschnitt Der Ausschnitt in der Arbeitsplatte sollte möglichst exakt mit einem guten, geraden Sägeblatt oder einer Oberfräse vorgenom- men werden. Die Schnittflächen sollten danach versiegelt wer- den, damit keine Feuchtigkeit eindringen kann. Der Kochfeldausschnitt wird entsprechend den Abbildungen angefertigt. Die Glaskeramik-Kochfläche muss unbedingt eben und bündig aufliegen. Ein Verspannen kann zum Bruch der Glasplatte füh- ren. Die Dichtung der Kochfläche auf einwandfreien Sitz und lücken- lose Auflage prüfen.
  • 15. Montageanweisung D 15 Lasche • Das Kochfeld einsetzen und ausrichten. • Von unten die Laschen mit Schrauben an den vorgesehenen Befestigungslöchern einsetzen, ausrichten und festziehen. • Die Schrauben nur mit einem Schraubendreher von Hand anziehen; keinen Akkuschrauber verwenden. • Auf die richtige Lage der Lasche bei dünnen Arbeitsplatten achten. Wichtig: Durch schiefe Auflage oder Verspannen besteht beim Ein- bau des Glaskeramik-Kochfeldes Bruchgefahr! Mindestabstand zu benachbarten Wänden Ausschnittmaß Kochfeldaussenmaß Kabeldurchführung in Rückwand EinbauhöheAusschnitt nach Schablone Maße in mm Ausschnitt nach Schablone
  • 16. 16 Montageanweisung D Elektrischer Anschluss • Der elektrische Anschluss darf nur von einem autorisier- ten Fachmann vorgenommen werden! • Die gesetzlichen Vorschriften und Anschlussbedingungen des örtlichen Elektroversorgungsunternehmens müssen vollstän- dig eingehalten werden. • Bei Anschluss des Gerätes ist eine Einrichtung vorzusehen, die es ermöglicht, das Gerät mit einer Kontakt-Öffnungsweite von mindestens 3 mm allpolig vom Netz zu trennen. Als geeig- nete Trennvorrichtung gelten LS-Schalter, Sicherungen und Schütze. Bei Anschluss und Reparatur Gerät mit einer dieser Einrich- tungen stromlos machen. • Der Schutzleiter muss so lang bemessen sein, dass er bei Versagen der Zugentlastung erst nach den stromführenden Adern des Anschlusskabels auf Zug beansprucht wird. • Die überschüssige Kabellänge muss aus dem Einbaubereich unterhalb des Gerätes herausgezogen werden. • Bitte beachten Sie, dass die vorhandene Netzspannung mit der auf dem Typenschild übereinstimmt. • Der vollständige Berührungsschutz muss durch den Einbau sichergestellt sein. • Achtung: Falschanschluss kann zur Zerstörung der Leis- tungselektronik führen. Keine Anschlussleitung werkseitig vorhanden • Zum Anschluss muss der Deckel der Anschlussdose auf der Geräteunterseite gelöst werden, um an die Anschlussklemme zu gelangen. Nach dem Anschluss muss der Deckel wieder befestigt und die Anschlussleitung mit der Zugentlastungs- schelle gesichert werden. • Die Anschlussleitung muss mindestens dem Typ H05 RR-F entsprechen. Anschlussmöglichkeiten: 5-poliger Anschluss * Achtung! Sonderanschluss 220 - 240 V 3~ ! ** Diese Anschlussvariante ist in der Schweiz durch den SEV nicht zuge- lassen. Anschlussmöglichkeiten: 6-poliger Anschluss ** Diese Anschlussvariante ist in der Schweiz durch den SEV nicht zuge- lassen
  • 17. Montageanweisung D 17 Anschlussleitung werkseitig vorhanden • Das Kochfeld ist werkseitig mit einer temperaturbeständigen Anschlussleitung ausgestattet. • Der Netzanschluss wird gemäß dem Anschlussschema vorge- nommen, ausgenommen die Anschlussleitung ist bereits mit einem Stecker ausgestattet. • Wenn die Netzanschlussleitung dieses Gerätes beschädigt wird, muss sie durch eine besondere Anschlussleitung ersetzt werden. Um Gefährdungen zu vermeiden, darf dieses nur durch den Hersteller oder seinen Kundendienst erfolgen. Anschlussmöglichkeiten * Achtung! Sonderanschluss 220 - 240 V 3~ ! ** Diese Anschlussvariante ist in der Schweiz durch den SEV nicht zuge- lassen Anschlussmöglichkeiten * Achtung! Sonderanschluss 220 - 240 V 3~ ! Technische Daten Inbetriebnahme Nach dem Einbau des Feldes und nach dem Anlegen der Versor- gungsspannung (Netzanschluss) erfolgt zuerst ein Selbst-Test der Steuerung und es wird eine Serviceinformation für den Kun- dendienst angezeigt. Wichtig: Zum Netzanschluss dürfen keine Gegenstände auf den Touch-Control Sensortasten sein! Mit einem Schwamm und Spülwasser kurz über die Oberfläche des Kochfeldes wischen und anschließend trockenreiben. grün-gelb grün-gelb weiss grau braun schwarz blau grün-gelb grün-gelb weiss grau braun schwarz blau grün-gelb grün-gelb weiss grau braun schwarz blau grün-gelb grün-gelb weiss grau braun schwarz blau grün-gelb grün-gelb weiss grau braun schwarz blau grün-gelb grün-gelb weiss grau braun schwarz blau grün-gelb grün-gelb weiss grau braun schwarz blau grün-gelb grün-gelb weiss grau braun schwarz blau Kochfeld Kochzonen vorne links . . . . . . . . . Ø cm / kW hinten links. . . . . . . . . Ø cm / kW hinten rechts . . . . . . . Ø cm / kW vorne rechts. . . . . . . . Ø cm / kW 21;17,5;12 / 2,3 18;12,5 / 1,7 18 / 1,8 18 / 1,8 Kochfeld gesamt . . . . . . . . . kW 7,6 Anschlusswerte Netzspannung . . . . . . . . . . . . . . . . 380-415V 2N~, 50-60 Hz Komponentennennspannung. . . . . 220 - 240V Kochfeld Kochzonen links . . . . . . . . . . . . . . Ø cm / kW Mitte. . . . . . . . . . . . . . Ø cm / kW rechts. . . . . . . . . . . . . Ø cm / kW 21;12 / 2,2 27; 21; 14,5 / 2,7 18;12/1,7 Kochfeld gesamt . . . . . . . . . kW 6,6 Anschlusswerte Netzspannung . . . . . . . . . . . . . . . . 380-415V 2N~, 50-60 Hz Komponentennennspannung. . . . . 220 - 240V
  • 18. 18 GB Disposing of the packaging Please ensure the environmentally-friendly disposal of the packaging that came with your appliance. Recycling the packaging material saves on resources and cuts down on waste. Disposing of old appliances The symbol on the product or on its packaging indicates that this product may not be treated as household waste. Instead it must be handed over to a collection point for the recycling of electrical and electronic equipment. By ensuring that this product is disposed of correctly you will help to protect the environment and human health, which could otherwise be harmed through the inappropriate disposal of this product. For more detailed information about recycling this product, please contact your local city office, your household waste disposal service or the shop where you purchased the product. Appropriate use The hob is to be used solely for preparing food in the home. It may not be used for any other purpose and may only be used under supervision. For your information... Please read this manual carefully before using your appliance. It contains important information on safety and on how to use and look after your appliance so that it will provide you with many years of reliable service. Should your appliance develop a fault, please first consult the section on “What to do if trouble occurs?” You can often rectify minor problems yourself, without having to call in a service engineer. Please keep this manual in a safe place and pass it on to new owners for their information and safety. Contents Safety instructions................................................................. 19 Connection and operation..................................................... 19 Concerning the hob............................................................... 19 Concerning persons.............................................................. 19 Appliance description............................................................ 20 Operating the hob with the sensor keys................................ 21 Operation ................................................................................ 22 Operation time limit............................................................... 22 Other functions...................................................................... 22 How to cut power consumption............................................. 22 Power settings ...................................................................... 22 Residual heat display............................................................ 22 Operating the keys................................................................ 23 Switching on the hob and cooking zones.............................. 23 Switching off a cooking zone ................................................ 23 Switching off the hob............................................................. 23 Two-circuit / three-circuit connection ................................... 24 Childproof lock ..................................................................... 24 Automatic switch-off (timer) ................................................. 25 Minute minder (egg timer) .................................................... 25 STOP function ...................................................................... 26 Keep-warm function ............................................................. 26 Automatic boost function ...................................................... 27 Cleaning and care .................................................................. 28 Glass ceramic hob ................................................................ 28 Specific soiling ...................................................................... 28 What to do if trouble occurs ................................................. 29 Assembly instructions........................................................... 30 Safety instructions for kitchen unit fitters .............................. 30 Installation............................................................................. 30 Electrical connection............................................................. 32 Technical data....................................................................... 33 Start of operation .................................................................. 33
  • 19. Safety instructions GB 19 Safety instructions Connection and operation • The appliances are constructed in accordance with the relevant safety regulations. • Connecting the appliance to the mains and repairing and servicing the appliance may only be carried out by a qualified electrician according to currently-valid safety regulations. For your own safety, do not allow anyone other than a qualified service technician to install, service or repair this appliance. Concerning the hob • Do not place empty pots and pans on cooking zones which have been switched on. Avoid boiling the pots dry as there is a risk of the pots overheating! • Take care when using simmering pans as simmering water may dry up unnoticed, resulting in damage to the pot and to the hob for which no liability will be assumed. • Overheated fats and oils may spontaneously ignite. Always supervise the preparation of food with fats and oils. Never extinguish ignited fats and oils with water! Put the lid on the pan and switch off the cooking zone. • The glass ceramic surface of the hob is extremely robust. You should, however, avoid dropping hard objects onto the glass ceramic hob. Sharp objects which fall onto your hob might break it. • There is a risk of electric shocks if the glass ceramic hob develops fractures, cracks, tears or damage of any other kind. Immediately switch off the appliance. Disconnect the fuse immediately and call Customer Service. • If the hob cannot be switched off due to a defect in the sensor control immediately disconnect your appliance and call Customer Service. • Take care when working with home appliances! Connecting cables must not come into contact with hot cooking zones. • The glass ceramic hob should not be used as a storage area. • Do not put aluminium foil or plastic onto the cooking zones. Keep everything which could melt, such as plastics, foil and in particular sugar and sugary foods away from hot cooking zones. Use a special glass scraper to immediately remove any sugar from the ceramic hob (when it is still hot) in order to avoid damaging the hob. • Do not place combustible, volatile or heat deformable objects directly underneath the hob. • Never use the cooking zones to heat up unopened tins of food or packaging made of material compounds. The power supply may cause them to burst! • Keep the sensor keys clean since the appliance may consider dirt to be finger contact. Never put anything (pans, tea towels etc.) onto the sensor keys! • If food boils over onto the sensor keys, we advise you to activate the OFF key. • Hot pans should not cover the sensor keys, since this will cause the appliance to switch off automatically. • Never flambé under the cooker hood - the fat in the filter can ignite! • Avoid repeated burning of contaminations. Concerning persons • This appliance is not intended to be used by persons (including children) with physical, mental or sensory impairments or by persons (including children) who lack the required experience or know-how, unless such persons are supervised by a person responsible for their safety or have been given instructions on how to use the appliance by a person responsible for their safety. Children should be supervised in order to ensure that they do not play with the appliance. • Attention! The surfaces of the heating and cooking zones become hot during use. Keep small children away at all times.
  • 20. 20 Appliance description GB Appliance description The decorative design may deviate from the illustrations. 1. Front left cooking zone 2. Back left cooking zone 3. Back right cooking zone 4. Front right cooking zone 5. Touch-control operating panel 6. Glass ceramic hob 7. ON/OFF key 8. Cooking zone selection key 9. Symbol for locating the position of a cooking zone on the glass ceramic hob 10. Plus key (raise) / Minus key (lower) 11. Power setting display 12. Stand-by dot 13. Circuit activation key 14. Multi-circuit control lamp 15. Timer selection key 16. Timer display 17. Control lamp for locating the position of a cooking zone on the glass ceramic hob 18. Minute minder lamp 19. STOP key
  • 21. Appliance description GB 21 Operating the hob with the sensor keys The ceramic glass hob is operated with touch control sensor keys. The sensor keys are operated as follows: lightly touch a symbol on the surface of the ceramic glass plate. A buzzer will indicate when the controls have been operated correctly. The touch control sensor key will then be indicated as “key”. ON/OFF key (7) This key is used to switch the entire hob on and off. It is, as it were, the main switch. Cooking zone selection key; e.g. front left (8) Pressing one of the cooking zone selection keys available will select a cooking zone, for which the Plus key or the Minus key may be used to set the cooking level. Minus key / Plus key (10) These keys are used to set the cooking levels, the automatic switch-off device and the minute minder. The Minus key reduces the setting and the Plus key raises it. The setting can be deleted by pressing both keys simultaneously. Power setting display (11) The power setting display shows the power setting which has been selected, or: H ............... Residual heat A................ Automatic boost function STOP ........ Stop function .............. Keep-warm function A cooking zone can be switched on when the stand-by dot (12) lights up. Circuit activation key (13) To activate other heating circuits. Timer selection key (15) For programming the automatic switch-off device (timer) and the minute minder. STOP key (19) The STOP function can be used to briefly stop the cooking process.
  • 22. 22 Operation GB Operation Operation time limit The hob has an automatic time limit function. The duration of continuous use of each cooking zone depends on the cooking level selected (see chart), provided that the setting of a respective cooking zone is not adjusted during use. If the operation time limit has been activated, the cooking zone will switch off, a short signal will sound and an H will appear in the display. Other functions If two or more sensors are pressed at the same time – e.g. when a pan is mistakenly put onto a sensor button – no function is activated. The symbol will blink and a time-limited continuous signal will sound. After a few seconds the appliance will switch off. Please remove the item located in front of the sensor buttons. To delete the symbol press the same button or switch the hob off and on. How to cut power consumption The following are a few useful hints to help you cut your consumption of energy and use your new hob and the cookware efficiently. • The base of your cooking pots should be the same size as the cooking zone. • When buying cooking pots, note that it is frequently the diameter of the top of the pot that it indicated. This is usually larger than the base of a pot. • Pressure cookers are particularly low on energy and time required thanks to the pressure and the fact that they are tightly closed. Short cooking times mean that vitamins are preserved. • Always make sure that there is sufficient fluid in your pressure cooker since the cooking zone and the cooker may be damaged as a result of overheating if the pressure cooker boils dry. • Always close cooking pots with a suitable lid. • Use the right pot for the quantity of food you are cooking. A large pot which is hardly filled will use up a lot of energy. Power settings The heating power of the cooking zones can be set at various power levels. In the chart you will find examples of how to use each setting. Residual heat display The glass ceramic hob is equipped with an H as a residual heat display. As long as the H lights up after the cooking zone has been switched off, the residual heat can be used for melting food or for keeping food warm. The cooking zone may still be hot when the letter H no longer lights up. Risk of burns! Power setting Operation time limit (hours) 1 2 3 4 5 6 7 8 9 6 6 5 5 4 1,5 1,5 1,5 1,5 Setting Suitable for 0 1-2 3 4-5 6 7-8 9 Off, using remaining heat Keep-warm function Simmering small portions (lowest setting) Simmering Simmering larger quantities or roasting larger pieces of meat until they are cooked through Roasting, getting juices Roasting Bringing to the boil, browning, roasting (highest setting)
  • 23. Operation GB 23 Operating the keys The controls described here expect the pressing of a (selection) key to be followed by the pressing of a subsequent key. The next key will need to be pressed within 10 seconds, otherwise the selection will be deleted. The Plus/ Minus keys can be touched individually or be permanently pressed. Switching on the hob and cooking zones 1. Press the ON/OFF key until the power setting 0 appears. The stand- by dots will blink. The controls are ready for operation. 2. Then press a cooking zone selection key (e.g. for front left). The stand-by dot of the cooking zone selected will light up. 3. Use the Plus key or Minus key to select a cooking level. The Plus key will activate power setting 1 and the Minus key power setting 9. 4. Put a cooking pot onto the cooking zone. Repeat items 2 to 4 in order to cook on other cooking zones at the same time. Switching off a cooking zone 5. The stand-by dot of the cooking zone selected must light up. It may be necessary to press a cooking zone selection key (e.g. for front left). 6. a) Press the Minus key several times until the power setting display shows 0, or b) press the Minus key and the Plus key once at the same time. The cooking zone is switched off direct irrespective of the power setting or c) press the ON/OFF key . The entire hob will be switched off (all of the cooking zones are switched off). Switching off the hob 7. Press the ON/OFF key . The hob will be completely switched off, irre- spective of any settings. Cooking zone selection keys Stand-by dot
  • 24. 24 Operation GB Two-circuit / three-circuit connection (only for cooking zones with several circuits) Two-circuit / three-circuit connection of the respective cooking zone can only be effected after the corresponding cooking zone has been switched on. 1. Select the desired cooking level 1-9. 2. Switch on the second or third heating circuit with the circuit activation key . The control lamp for dual circuit/triple circuit will light up. 3. The outer heating circuit will be switched off when the circuit activation key is pressed again. The control lamp for dual circuit/triple circuit will go off. Note • Manually activated heating circuits will automatically be deselected when the cooking zone is switched off. Childproof lock The childproof lock serves the purpose of preventing children from switching on the hob either accidentally or intentionally. The controls are blocked. Switching on the childproof lock 1. Press the ON/OFF key in order to switch on the childproof lock. 2. Then immediately press the Plus key and the Minus key simul- taneously. 3. Then press the Plus key in order to activate the childproof lock. The power setting displays will indicate an L for child lock, the controls will be inaccessible and the hob will switch off. Switching off the childproof lock 4. Press the ON/OFF key . 5. Then immediately press the Plus key and the Minus key simul- taneously. 6. Then press the Minus key in order to deactivate the childproof lock. The L will go off. De-activating the childproof lock for one cooking procedure only This is only possible if the childproof lock has been switched on in accordance with items 1-3. • Press the ON/OFF key . • Then immediately press the Plus key and the Minus key simultaneously. Now the user will be able to switch on a cooking zone (to do so, select a cooking zone and set the power level). When the hob is switched off the childproof lock will be activated again (switched on). Note In the event of a power cut the childproof lock will be cancelled, i.e. deactivated.
  • 25. Operation GB 25 Automatic switch-off (timer) The automatic switch-off device is used to automatically switch off any cooking zone after a stipulated period of time. Cooking times ranging from 1 minute to 99 minutes can be set. 1. Switch on the hob. Switch on one or more cooking zones and set the required power settings. 2. Press the timer selection key . The stand-by dot of the timer will light up. Press the key again until the timer indicator lamp of the required cooking zone blinks. Important: Timer indicator lamps can only blink if the cooking zones have already been switched on (power setting higher than 0). 3. Then immediately use the Plus key or the Minus key to set the cooking time at between 1 and 99 minutes. With the Plus key the display will commence at 01, and with the Minus key it will commence at 30. The setting will be reset if the Plus and Minus keys are pressed simulta- neously (00). 4. In order to program the automatic-switch-off device for another cooking zone, press the timer selection key repeatedly until the timer indica- tor lamp for the required cooking zone blinks. Then use the Minus key or the Plus key to set the required time. 5. The cooking zone will be switched off when the time has lapsed. A signal will sound for a while and can be switched off by pressing any key (except for the ON/OFF key). Notes • In order to check the time that has lapsed (automatic-switch-off device) press the timer selection key repeatedly until the timer indicator lamp for the required cooking zone blinks. The setting displayed can be read and changed. • Terminating the function of the timer: select the respective cooking zone (timer indicator lamp blinks) and press the Plus and Minus keys once at the same time. Minute minder (egg timer) 1. Switch on the hob. 2. Press the timer selection key until the minute minder lamp blinks with this key. Use the Plus key or the Minus key to set the time in minutes. 3. Once the time has lapsed a signal will sound for a while and can be switched off by pressing any key (except for the ON/OFF key ). Note: • The minute minder remains in operation when the glass ceramic hob is switched off. Switch the hob on with the ON/OFF key to adjust the time. Timer indicator lamp Stand-by dot for the Minute minder lamp automatic switch-off device
  • 26. 26 Operation GB STOP function The cooking process can be briefly interrupted with the STOP function, e.g. if the doorbell rings. The STOP function must be released in order to continue cooking at the same power level. If a timer has been set it will pause and will then continue. This function is only available for 10 minutes for reasons of safety. The hob will then be switched off. 1. Pots and pans are on the cooking zones and the required power levels have been set. 2. Press the STOP key . The letters S-T-O-P will be shown one after another instead of the cooking levels previously selected. 3. The interruption is ended by firstly pressing the STOP key and then pressing any other key (except the ON/OFF key). The second key must be pressed within 10 seconds, otherwise the hob will switch off. Keep-warm function With the keep-warm function you can use one of the cooking zones to keep food warm. The respective cooking zone is operated at a low power level. 1. Cookware is placed on a cooking zone and a power level (e.g. 3) is selected. The stand-by dot of the cooking zone selected must light up. It may be necessary to press a cooking zone selection key (e.g. for front left). 2. Keep the Minus key pressed to switch the power settings down ( ... 3, 2, 1, ). The setting will stop at and the warming function will have been activated. 3. Press the Minus key once to de-activate the function (0). The keep-warm function is available for 120 minutes, after which the hob will be switched off. keep pressed
  • 27. Operation GB 27 Automatic boost function Parboiling takes place at power level 9 with the automatic boost function. After a certain time the power level will switch down automatically to a lower simmering setting (1 to 8). When using the automatic boost function only the simmering setting with which the food is to be cooked through needs to be selected since the electronic unit switches down automatically. The automatic boost function is suitable for dishes which are cold initially and are then heated up at high power. These dishes do not need to be constantly monitored when simmering (e.g. boiling meat for soups). 1. Switch a cooking zone on. The stand-by dot of the cooking zone selected must light up. It may be necessary to press a cooking zone selection key (e.g. for front left). 2. Select power setting 9. Pressing the Plus key again will activate the automatic boost function. The power level setting will indicate A and 9 alternately. 3. Then immediately use the Minus key to select a lower simmering setting from 1 to 8. A and the selected simmering setting will blink alternately. 4. The automatic boost function will operate as programmed. After a certain time (see chart) the cooking process will be continued with the simmering setting. Notes • While the automatic boost function is in operation, the Plus key can be used to raise the simmering power setting. Pressing the Minus key will switch the automatic boost function off. • If, after activating the automatic boost function, the power level is left at level 9 and no lower simmering setting is selected, the automatic boost function will be switched off automatically after 10 seconds and the cooking level will remain at 9. Power setting Automatic boost function Time (min:sec) 1 2 3 4 5 6 7 8 9 01:00 03:00 04:48 06:30 08:30 02:30 03:30 04:30 - : -
  • 28. 28 Cleaning and care GB Cleaning and care • Switch the hob off and let it cool down before you clean it. • Never clean the glass ceramic hob with a steam cleaner or similar appliance! • When cleaning make sure that you only wipe lightly over the ON/OFF key. The hob may otherwise be accidentally switched on! Glass ceramic hob Important! Never use aggressive cleaning agents such as rough scouring agents, abrasive saucepan cleaners, rust and stain removers etc. Cleaning after use 1. Always clean the entire hob when it has become soiled. It is recommended that you do so every time the hob is used. Use a damp cloth and a little washing up liquid for cleaning. Then dry the hob with a clean dry cloth to ensure that there is no detergent left on the surface of the hob. Weekly clean 2. Clean the entire hob thoroughly once a week with commercial glass ceramic cleaning agents. Please follow the manufacturer's instructions carefully. When applied, the cleaning agent will coat the hob in a protective film which is resistant to water and dirt. All the dirt will remain on the film and can then easily be removed. Then rub the hob dry with a clean cloth. Make sure that no cleaning agent remains on the surface of the hob since this will react aggressively when the hob is heated up and will change the surface. Specific soiling Heavy soiling and stains (limescaling and shiny, mother-of- pearl-type stains) can best be removed when the hob is still slightly warm. Use commercial cleaning agents to clean the hob. Proceed as outlined under Item 2. First soak food which has boiled over with a wet cloth and then remove remaining soiling with a special glass scraper for glass ceramic hobs. Then clean the hob again as described under Item 2. Burnt sugar and melted plastic must be removed immediately, when they are still hot, with a glass scraper. Then clean the hob again as described under Item 2. Grains of sand which may get onto the hob when you peel pota- toes or clean lettuce may scratch the surface of the hob when you move pots around. Make sure that no grains of sand are left on the hob. Changes in the colour of the hob will not affect the function and the stability of the glass ceramic material. These colour changes are not changes in the material but food residues which were not removed and which have burnt into the surface. Shiny spots result when the base of the cookware rubs on the surface of the hob, particularly when cookware with an aluminium base or unsuitable cleaning agents are used. They are difficult to remove with standard cleaning agents. You may need to repeat the cleaning process several times. In time, the decoration will wear off and dark stains will appear as a result of using aggres- sive cleaning agents and faulty pan bases.
  • 29. What to do if trouble occurs GB 29 What to do if trouble occurs Interference with and repairs to the appliance by unqualified persons are dangerous as they can result in an electric shock or a short circuit. Do not interfere with or try to repair the appliance; this could cause injury to persons and damage to the appliance. Always have such work done by an expert, e.g. a Customer Service technician. Please note If your appliance is faulty, please check whether you can rectify the problem yourself by consulting these instructions for use. You may be able to rectify some problems yourself. They are described below. The fuses blow regularly? • Contact a technical customer service or an electrician! You can't switch your hob on? • Has the wiring system (fuse box) in the house blown a fuse? • Has the hob been connected to the mains? • Is the childproof lock activated, i.e. does the display show an “L”? • Are the sensor keys partly covered by a damp cloth, fluid or a metallic object? Please rectify. The symbol will blink and a time-limited continuous signal will sound. Food which has boiled over, cookware or other items are causing the touch control sensor buttons to be consistently operated. Remedy: clean the surface or remove the item. To delete the symbol press the same button or switch the hob off and on. The hob or a cooking zone has suddenly switched off • Did you accidentally press the ON/OFF key? • Are the sensor keys partly covered by a damp cloth, fluid or a metallic object? A buzzer will sound briefly. After a few seconds the appliance will switch off. Please remove the item located in front of the sensor keys. • Has the safety cut-off device been activated, i.e. was a cooking setting operated unchanged beyond a specific period of time? See the section on “operation time limit”. Cooking zone cannot be switched off. • Faulty electronic component. Disconnect the fuse, call Customer Service. Cooking zone does not heat up. • Cooking zone defective. Call Customer Service. • Inner circuit of a multi-circuit cooking zone defective. Under no circumstances continue to use the outer circuit which is still working! Immediately call Customer Service. Does the hob make noises (clicking or cracking noises) or can a buzzing sound be heard when the hob is switched on? • This is design-specific and has no influence on quality and operation. LED display for cooking settings and residual heat display H does not come on or only partially. • LED display defective. Call Customer Service. Risk of burning, as the temperature warning is not guaranteed. Does the hob have tears or cracks? • There is a risk of electric shocks if the glass ceramic hob develops fractures, cracks, tears or damage of any other kind. Immediately switch off the appliance. Disconnect the fuse immediately and call Customer Service.
  • 30. 30 Assembly instructions GB Assembly instructions Safety instructions for kitchen unit fitters • Veneers, adhesives and plastic surfaces of surrounding furniture must be temperature resistant (>75°C). If the veneers and surfaces are not sufficiently heat resistant they can become deformed. • Ensure that all live connections are safely insulated when installing the hob. • Cover strips between the wall and the worktop behind the hob which are made of solid wood are permissible as long as minimum clearances in accordance with the installation diagrams are maintained. • Minimum clearances of the hob cut-out towards the rear are to be maintained in accordance with the installation diagram. • For installation directly next to a tall cupboard, a safety distance of at least 40 mm must be ensured. The side surface of the tall cupboard should be fitted with heat resistant material. Due to working requirements, however, the distance should be at least 300 mm. • The clearance between the hob and an extraction hood must be at least as large as that stipulated in the assembly instructions for the cooker hood. • The packaging materials (plastic foil, polystyrene, nails etc.) must be kept out of reach of children as these parts are potentially dangerous. Small parts can be swallowed and there is a danger of plastic sheeting causing suffocation. Installation Important • If the cooking surface is located above furniture parts (side panels, drawers, etc.), then an intermediate shelf must be inserted at a minimum distance of 20 mm in order to prevent accidental contact with the underside of the cooking surface. The intermediate shelf may only be removed with tools. • To avoid danger of fire, make sure that no combustible objects which could easily catch fire or become deformed on exposure to heat are placed directly next to or above the hob. Sealing of the hob Before installation, correctly insert the sealing unit delivered with the hob. • No liquids may penetrate between the edge of the hob and the worktop or between the hob and the wall and come into contact with any electrical appliances. • When installing a hob into an uneven worktop, e.g. with a ceramic or similar covering (tiles etc.), the seal on the hob is to be removed and the seal between the hob and worktop made with plastic sealing materials (putty). • The hob must under no circumstances be sealed with silicone sealant! This would make it impossible to remove the hob at a later date without damaging it. Working surface cut-out Cut out the worktop recess accurately with a good, straight saw blade or recessing machine. The cut edges should then be sealed so that no moisture can penetrate. The area is cut out as illustrated. The glass ceramic hob must have a level and flush bearing. Any distortion may lead to fracture of the glass panel. Make sure that the sealing of the hob is properly seated.
  • 31. Assembly instructions GB 31 Bracket • Insert the hob and align it. • From the bottom, insert the brackets with screws in the holes provided for fastening the brackets, align the brackets and screw them tight. • Tighten the screws with a hand screw driver only; do not use a battery-operated screw driver. • In the case of thin worktops make sure that the brackets are correctly positioned. Important: There is a risk of breakage if the hob is canted or subjected to stress during installation! Minimum distance to adjacent walls Opening dimensions Outer dimensions of the hob Cable routing in rear wall Installation height Cut-out according to the template Dimensions in mm Cut-out according to the template
  • 32. 32 Assembly instructions GB Electrical connection • The electrical connection must be carried out by a quali- fied electrician who is authorised to carry out such work! • Statutory regulations and the connection specifications issued by the local power supply company must be strictly observed. • When connecting the appliance it must be ensured that there is a device which makes it possible to disconnect it from the mains at all poles with a contact opening width of at least 3 mm. Line-protecting switches, fuses or contactors are suitable cut-out devices. When connecting and repairing the appliance disconnect it from the electricity supply with one of these devices. • The earth wire must be sufficiently long so that if the strain relief fails, the live wires of the connecting cable are subjected to tension before the earth wire. • Any superfluous cable must be removed from the installation area beneath the appliance. • Make sure that the local mains voltage is the same as the voltage on the rating label. • Full protection against accidental contact must be ensured on installation. • Important! Incorrect connection may result in the power electronics unit being destroyed. No mains cable present in the factory • To connect the appliance, unscrew the cover of the connection socket on the underside of the appliance in order to be able to access the terminal. After connecting the appliance, replace the cover and secure the connection cable with the strain relief clamp. • The connection cable must be at least H05 RR-F. Electrical connections: 5-pole connection * Attention! Special power supply 220 - 240 V 3~ ! Electrical connections: 6-pole connection
  • 33. Assembly instructions GB 33 Mains cable available in the factory • The hob has been fitted with a temperature-resistant connection cable in the factory. • Connection to the mains is carried out in accordance with the circuit diagram, unless the connection cable is already fitted with a plug. • If the mains cable of this appliance is damaged it will need to be replaced with a special connection cable. In order to avoid any risks, this must be carried out by the manufacturer or his Customer Service. Electrical connections * Attention! Special power supply 220 - 240 V 3~ ! Electrical connections * Attention! Special power supply 220 - 240 V 3~ ! Technical data Start of operation Once the hob has been installed and the power supply has been provided (mains connected) an automatic test of the controls will be carried out and information for Customer Service will be indicated. Important: No items may be on the touch control sensor keys when the appliance is being connected! Briefly wipe over the surface of the hob with a sponge and soapy water and then dry with a clean cloth. green-yellow green-yellow white grey brown black blue green-yellow green-yellow white grey brown black blue green-yellow green-yellow white grey brown black blue green-yellow green-yellow white grey brown black blue white blue green-yellow green-yellow white grey brown black blue green-yellow green-yellow white grey brown black blue green-yellow green-yellow white grey brown black blue green-yellow green-yellow white grey brown black blue Hob Cooking zones front left . . . . . . . . . . . .Ø cm / kW back left . . . . . . . . . . . .Ø cm / kW back right. . . . . . . . . . .Ø cm / kW front right . . . . . . . . . . .Ø cm / kW 21;17.5;12 / 2.3 18;12.5 / 1.7 18 / 1.8 18 / 1.8 Hob total . . . . . . . . . . . . . . . . kW 7.6 Power supply Mains voltage. . . . . . . . . . . . . . . . . 380-415V 2N~, 50-60 Hz Component rated voltage . . . . . . . 220 - 240V Hob Cooking zones left . . . . . . . . . . . . . . . .Ø cm / kW center. . . . . . . . . . . . . .Ø cm / kW right . . . . . . . . . . . . . . .Ø cm / kW 21;12 / 2.2 27; 21; 14.5 / 2.7 18;12/1.7 Hob total . . . . . . . . . . . . . . . . kW 6.6 Power supply Mains voltage. . . . . . . . . . . . . . . . . 380-415V 2N~, 50-60 Hz Component rated voltage . . . . . . . 220 - 240V
  • 34. 34 F Elimination de l’emballage Eliminez le plus écologiquement possible l’emballage de trans- port. Le recyclage des matériaux d’emballage permet d’économi- ser des matières premières et de réduire le volume des déchets. Elimination des appareils hors service Le symbole sur le produit ou son emballage indique que ce produit ne peut être traité comme déchet ménager. Il doit plutôt être remis au point de ramassage concerné, se chargeant du recyclage du matériel électrique et électroni- que. Votre contribution à une élimination correcte de ce produit permet de protéger l’environnement et la santé de vos contemporains. Une élimination incorrecte est une menace pour l’environnement et la santé. Pour obtenir plus de détails sur le recyclage de ce produit, veuillez prendre contact avec le bureau municipal de votre région, votre service de récupération des déchets ménagers ou le magasin où vous avez acheté le produit. Installation conforme La table de cuisson ne doit être utilisée qu’à la préparation des repas de tous les jours, c’est-à-dire, elle est conçue pour une uti- lisation domestique. Ne jamais utiliser l’appareil pour des appli- cations non appropriées et toujours l’utiliser sous surveillance. Ce que vous trouverez ici... Lisez soigneusement les informations portées dans ce manuel avant de mettre votre table de cuisson en service. Vous y trouve- rez des remarques importantes concernant votre sécurité, l’utili- sation, l’entretien et la maintenance de votre appareil qui vous permettront d’en profiter longtemps. En cas de panne, consultez d’abord le chapitre «Que faire en cas d’anomalie?». Vous pouvez souvent remédier vous-même aux pannes mineures et économiser ainsi des frais d’intervention inu- tiles. Conservez soigneusement cette notice. Remettez-la aux nou- veaux propriétaires de l’appareil, pour leur sécurité et leur infor- mation. Sommaire Consignes de sécurité........................................................... 35 Pour le raccordement et le fonctionnement .......................... 35 Pour la table de cuisson........................................................ 35 Pour les personnes............................................................... 35 Description de l’appareil ....................................................... 36 Commande par touches sensitives....................................... 37 Utilisation................................................................................ 38 Limitation de la durée de fonctionnement............................. 38 Autres fonctions .................................................................... 38 Conseils pour économiser de l’énergie................................. 38 Positions de cuisson ............................................................. 38 Indicateur de chaleur résiduelle............................................ 38 Utilisation des touches.......................................................... 39 Mettre en marche la table de cuisson et la zone de cuisson ............................................................ 39 Arrêter la zone de cuisson .................................................... 39 Arrêter la table de cuisson .................................................... 39 Commutation du deuxième / troisième circuit ...................... 40 Sécurité enfants ................................................................... 40 Arrêt automatique (minuterie) ............................................. 41 Minuterie (sablier) ................................................................ 41 Fonction STOP .................................................................... 42 Fonction de maintien au chaud ............................................ 42 Précuisson automatique ...................................................... 43 Nettoyage et entretien ........................................................... 44 Table de cuisson vitrocéramique .......................................... 44 Salissures résistantes........................................................... 44 Que faire en cas d’anomalie?............................................... 45 Montage et installation .......................................................... 46 Consignes de sécurité pour l’installateur des meubles de cuisine ........................................................ 46 Montage................................................................................ 46 Raccordement électrique...................................................... 48 Caractéristiques techniques.................................................. 49 Mise en service..................................................................... 49
  • 35. Consignes de sécurité F 35 Consignes de sécurité Pour le raccordement et le fonctionnement • Les appareils ont été conçus selon les normes de sécurité en vigueur. • Le raccordement au secteur, l’entretien et la réparation de l’appareil ne doivent être effectués que par un professionnel agréé, conformément aux standards de sécurité en vigueur. Les travaux effectués de façon non conforme mettent votre sécurité en danger. Pour la table de cuisson • Ne placez jamais de casseroles ou de poêles vides sur une zone de cuisson activée. Evitez de chauffer des récipients à vide (danger de surchauffe des récipients!). • Attention, lors de l’utilisation de la casserole bain-marie. Les casseroles bain-marie peuvent chauffer à vide, sans aucun avertissement! Ceci endommage le récipient et la zone de cuisson. Dans ce cas, la responsabilité du fabricant ne pourra être engagée! • Les graisses et les huiles surchauffées peuvent s’enflammer spontanément. Ne pas préparer de mets ou de plats avec de l’huile ou de la graisses sans surveillance. N’éteignez jamais de l’huile ou de la graisse enflammée avec de l’eau! Posez un couvercle et arrêtez la zone de cuisson. • La surface en vitrocéramique est très résistante. Evitez toute- fois d’y faire tomber des objets durs. Les impacts en forme de point peuvent entraîner la rupture de la table de cuisson. • Risque de choc électrique en cas de brisure, de fissure ou d’autres endommagements de la vitrocéramique. Mettez aus- sitôt l’appareil hors service. Coupez immédiatement le fusible domestique et appelez le Service Après-Vente. • S’il n’est plus possible d’arrêter la table de cuisson (touches sensitives défectueuses), coupez immédiatement le fusible domestique et appelez le Service Après-Vente. • Attention, en travaillant avec des appareils ménagers! Ne posez jamais les câbles à proximité des zones de cuisson chaudes. • N’utilisez jamais la table de cuisson vitrocéramique pour y déposer des objets. • Ne déposez pas de feuille d’aluminium ou de film plastique sur les zones de cuisson. Eloignez de la zone de cuisson chaude tout ce qui risque de fondre, p.ex. objets ou films en plastique, sucre et mets contenant beaucoup de sucre. Du sucre ren- versé sur la plaque vitrocéramique doit être retiré immédiate- ment, tant qu’il est chaud et ce, avec un grattoir spécial verre, afin d’éviter tout endommagement de la table de cuisson. • Ne jamais déposer directement sous la table de cuisson, des objets sensibles au feu, facilement inflammables ou déforma- bles. • Ne faites jamais chauffer des boites de conserves fermées, ni d’emballages stratifiés sur les zones de cuisson. L’alimenta- tion en énergie pourrait les faire éclater! • Maintenez les touches sensitives propres, car des salissures sur l’appareil pourraient être détectées comme effleurement d’un doigt. Ne posez jamais d’objets, tels que casseroles, tor- chons, etc., sur les touches sensitives! • Au cas où les aliments déborderaient sur les touches sensiti- ves, nous conseillons d’actionner la touche Arrêt! • Les casseroles et les poêles chaudes ne doivent pas recouvrir la zone des touches sensitives. Dans ce cas, l’appareil s’arrête automatiquement. • Ne faites jamais flamber une préparation sous une hotte aspi- rante – les résidus de graisse contenus dans le filtre pourraient s’enflammer! • Evitez de laisser brûler à nouveau les encrassements. Pour les personnes • Cet appareil ne doit pas être utilisé par des personnes (y com- pris des enfants), avec des capacités physiques, sensorielles ou mentales limitées ou manquant d¡¯expérience et/ou de connaissances, à moins qu’elles soient surveillées par une personne responsable de leur sécurité ou qu’elles aient reçu des instructions de la part de cette personne, comment utiliser l’appareil. Les enfants devraient être surveillés, afin d’éviter qu’ils ne jouent avec l’appareil. • Attention! Les surfaces des plaques de cuisson et des éléments thermi- ques sont brûlantes pendant le fonctionnement. Il convient donc de tenir les enfants éloignés.
  • 36. 36 Description de l’appareil F Description de l’appareil Le décor peut être différent de celui illustré. 1. Zone de cuisson avant gauche 2. Zone de cuisson arrière gauche 3. Zone de cuisson arrière droite 4. Zone de cuisson avant droite 5. Bandeau de commande Touch-Control 6. Table de cuisson vitrocéramique 7. Touche Marche/Arrêt 8. Touche de sélection zone de cuisson 9. Symbole pour l’attribution de l’emplacement de la zone de cuisson sur la table vitrocéramique 10. Touche Plus (augmenter) / Touche Moins (réduire) 11. Affichage des positions de cuisson 12. Point de disponibilité 13. Touche Multicircuits 14. Voyant de contrôle (mise en circuit de circuits supplémentaires) 15. Touche de sélection minuterie 16. Affichage minuterie 17. Témoin d’attribution de la zone de cuisson sur la table vitrocéramique 18. Témoin lumineux minuterie (sablier) 19. Touche STOP
  • 37. Description de l’appareil F 37 Commande par touches sensitives La commande de la table vitrocéramique se fait via les touches sensitives Touch-Control. Les touches sensitives fonctionnent de la manière suivante: effleurez brièvement, avec la pointe du doigt, un symbole sur la surface vitrocéramique. Chaque toucher correctement effectué est confirmé par un signal sonore. Par la suite, la touche sensitive Touch-Control est appelée «touche». Touche Marche/Arrêt (7) Avec cette touche, toute la table de cuisson est mise en marche ou arrêtée. Il s’agit du commutateur principal. Touche de sélection zone de cuisson; p.ex. avant gauche (8) L’appui sur l’une des touches de sélection zones de cuisson, vous permet de sélectionner une zone de cuisson à disposition, pour la laquelle, ensuite, avec la touche Plus ou Moins vous pou- vez régler une position de cuisson. Touche Plus / Touche Moins (10) Ces touches permettent de régler les positions de cuisson, l’arrêt automatique et la minuterie (sablier). Avec la touche Moins, vous diminuez la valeur affichée, avec la touche Plus vous l’augmen- tez. La valeur affichée peut être effacée en appuyant simultané- ment sur les deux touches. Affichage de la position de cuisson (11) L’affichage indique la position de cuisson sélectionnée, ou: H ............... Chaleur résiduelle A................ Précuisson automatique STOP ........ Fonction Stop .............. Fonction de maintien au chaud Lorsque le point de disponibilité (12) est allumé, la zone de cuisson peut être réglée. Touche Multicircuits (13) Pour la mise en circuit d’autres circuits de chauffe. Touche de sélection minuterie (15) Pour programmer l’arrêt automatique ou la minuterie (sablier). Touche Stop (19) Le déroulement de la cuisson peut être interrompu momentané- ment à l’aide de la fonction STOP.
  • 38. 38 Utilisation F Utilisation Limitation de la durée de fonctionnement La table de cuisson possède une limitation automatique de la durée de fonctionnement. La durée de fonctionnement en con- tinu de chacune des zones de cuisson dépend de la position de cuisson sélectionnée (voir tableau). Condition: pas de modification de réglage au niveau de la zone de cuisson pendant la durée de fonctionnement. Lorsque la limi- tation de la durée de fonctionnement a déclenché, la zone de cuisson est arrêtée, un bref signal sonore retentit et un H est indi- qué dans l’affichage. Autres fonctions Lorsque vous actionnez simultanément deux ou plusieurs tou- ches sensitives – ce qui peut être le cas, par exemple, lorsque vous posez un récipient sur une touche – celles-ci ne répondent pas. Le symbole clignote et un signal sonore, limité dans le temps, retentit. L’arrêt se fait après quelques secondes. Retirer l’objet posé sur les touches sensitives. Pour effacer le symbole , appuyer sur la même touche ou mettre en marche ou arrêter la zone de cuisson. Conseils pour économiser de l’énergie Vous trouvez, ci-après, quelques conseils importants concernant l’utilisation économique et efficace de votre nouvelle table de cuisson et les ustensiles de cuisson adaptés. • Le diamètre du fond de la casserole devrait correspondre à celui de la zone de cuisson. • Veillez au moment de l’achat de casseroles au diamètre du fond; parfois les indications données par le fabricant corres- pondent au diamètre du bord supérieur. Ce dernier est sou- vent plus grand que le fond de la casserole. • Les cocottes minutes sont particulièrement économiques en terme de temps de cuisson et de consommation d’énergie, grâce à leur fermeture hermétique et la surpression de vapeur à l’intérieur de la casserole. Les temps de cuisson rapides pro- tègent les vitamines. • Veillez toujours à une quantité suffisante de liquide dans la cocotte-minute; celle-ci, ainsi que la zone de cuisson pour- raient être endommagées par la surchauffe d’une casserole vide. • Dans la mesure du possible, fermez toujours les casseroles à l’aide d’un couvercle adapté. • Utilisez de préférence une casserole de taille bien adaptée à la quantité des aliments à cuire. Une casserole trop grande avec peu d’aliments nécessite beaucoup d’énergie. Positions de cuisson La puissance de chauffe des zones de cuisson peut être réglée sur plusieurs positions. Le tableau vous indique des exemples de cuisson dans les différentes positions. Indicateur de chaleur résiduelle La table de cuisson est équipée d’un indicateur de cha- leur résiduelle H. Tant que le H reste allumé, une fois la zone de cuisson arrêtée, la chaleur résiduelle peut être utilisée pour faire fondre ou pour maintenir les plats au chaud. Une fois la lettre H éteinte, la zone de cuisson peut encore être chaude. Risque de brûlures! Position de cuisson sélectionnée Limitation de la durée de fonctionnement (heures) 1 2 3 4 5 6 7 8 9 6 6 5 5 4 1,5 1,5 1,5 1,5 Positions de cuisson Indiquée pour 0 1-2 3 4-5 6 7-8 9 Position Arrêt Fonction de maintien au chaud Continuer la cuisson de petites quantités (puissance réduite) Continuer la cuisson Continuer la cuisson de quantités importantes, terminer de rôtir de gros morceaux de viande Rôtir, préparer un roux Rôtir Démarrer la cuisson, saisir, rôtir (puissance max.)
  • 39. Utilisation F 39 Utilisation des touches Dans la commande décrite ici, l’appui d’une touche de sélection doit être suivi par l’appui d’une autre touche. L’appui de la touche suivante doit toujours avoir lieu sous 10 secondes, dans le cas contraire, la sélection s’efface. Les touches Plus/Moins peuvent être effleurées individuellement ou être maintenues appuyées. Mettre en marche la table de cuisson et la zone de cuisson 1. Appuyez sur la touche Marche/Arrêt jusqu’à ce que les affichages des positions de cuisson indiquent 0. Les points de disponibilité cligno- tent. La commande est prête à fonctionner. 2. Ensuite, appuyez sur une touche de sélection zone de cuisson (p.ex. pour la zone avant gauche). Le point de disponibilité de la zone sélectionnée s’allume. 3. Sélectionnez une position de cuisson avec les touches Plus ou Moins . Avec la touche Plus, la position de cuisson 1 est activée, avec la touche Moins, la position de cuisson 9. 4. Posez une casserole sur la zone de cuisson. Pour cuisiner simultanément sur d’autres zones de cuisson, répétez les points 2 à 4. Arrêter la zone de cuisson 5. Le point de disponibilité de la zone de cuisson sélectionnée doit être allumé. Ensuite, appuyez sur une touche de sélection zone de cuisson (p.ex. pour la zone avant gauche). 6. a) Actionnez plusieurs fois la touche Moins jusqu’à ce que l’affi- chage de la position de cuisson indique 0 ou b) actionnez une fois simultanément les touches Moins et Plus . La zone de cuisson peut être arrêtée directement de n’importe quelle position de cuisson ou c) en appuyant sur la touche Marche/Arrêt . Toute la table de cuis- son est arrêtée (toutes les zones de cuisson sont arrêtées). Arrêter la table de cuisson 7. Appuyez sur la touche Marche/Arrêt . La table de cuisson est com- plètement arrêtée, indépendamment de son réglage. Touches de sélection Point de disponibilité zones de cuisson
  • 40. 40 Utilisation F Commutation du deuxième / troisième circuit (Seulement pour les zones de cuisson avec plusieurs cercles de chauffe) Il n'est possible de commuter le deuxième / troisième circuit d'une zone don- née qu'après avoir mis en route celle-ci. 1. Sélectionnez l’intensité souhaitée entre 1 et 9. 2. Mettez en marche le deuxième ou troisième circuit de cuisson en activant la touche Multicircuits . Le voyant de contrôle Deuxième /troisième circuit s’allume. 3. En pressant de nouveau la touche Multicircuits , vous déconnectez le circuit externe. Le voyant de contrôle Deuxième / troisième circuit s’éteint. Remarque • Les circuits de chauffe mis en circuit manuellement sont automatiquement arrêtés lorsque la zone de cuisson est arrêtée. Sécurité enfants La sécurité enfants évite que la table de cuisson soit mise en marche involon- tairement ou volontairement par des enfants. Toute commande est bloquée. Activer la sécurité enfants 1. Appuyez sur la touche Marche/Arrêt pour mettre la table de cuis- son en marche. 2. Tout de suite après, appuyez simultanément sur les touches Plus et Moins . 3. Ensuite, appuyez sur la touche Plus , afin d’activer la sécurité enfants. L’affichage des positions de cuisson indique un L pour Child- Lock; la commande est bloquée et la table de cuisson s’arrête. Désactiver la sécurité enfants 4. Appuyez sur la touche Marche/Arrêt . 5. Tout de suite après, appuyez simultanément sur les touches Plus et Moins . 6. Ensuite, appuyez sur la touche Moins , afin de désactiver la sécurité enfants. Le L disparaît. Annuler la sécurité enfants pour une seule cuisson Condition: La sécurité enfants a été activée suivant les indications données sous les points 1 à 3. • Appuyez sur la touche Marche/Arrêt . • Tout de suite après, appuyez simultanément sur les touches Plus et Moins . Maintenant, vous pouvez mettre en marche une zone de cuisson (pour cela, sélectionner la zone de cuisson et régler la position de cuisson). Une fois la table de cuisson arrêtée, la sécurité enfants est de nouveau activée (en marche). Remarque En cas de coupure de courant, la sécurité enfants activée est suppri- mée, c’est-à-dire, elle est désactivée.
  • 41. Utilisation F 41 Arrêt automatique (minuterie) L’arrêt automatique permet d’arrêter automatiquement chaque zone de cuis- son en fonctionnement après une durée de cuisson réglable. Vous pouvez régler des temps de cuisson entre 1 à 99 minutes. 1. Mettez en marche la table de cuisson. Mettez en marche une ou plu- sieurs zones de cuisson et sélectionnez la(les) position(s) de cuisson souhaitée(s). 2. Appuyez sur la touche de sélection minuterie . Le point de disponi- bilité de l’arrêt automatique s’allume. Continuez à appuyer sur la touche, jusqu’à ce que le témoin lumineux de la minuterie de la zone de cuisson souhaitée clignote. Important: les témoins lumineux des minuteries ne peuvent clignoter que lorsque les zones de cuisson ont été mises en marche au préalable (position de cuisson supérieure à 0). 3. Tout de suite après, entrez à l’aide des touches Plus ou Moins la durée de cuisson réglable entre 1 à 99 minutes. Avec la touche Plus, la valeur affichée commence à 01, avec la touche Moins à 30. En appuyant simultanément sur les touches Plus et Moins, le réglage est remis à zéro (00). 4. Pour la programmation de l’arrêt automatique pour une autre zone de cuisson, appuyez plusieurs fois sur la touche de sélection minuterie , jusqu’à ce que le témoin lumineux de la minuterie de la zone de cuisson souhaitée clignote. Ensuite, réglez le temps souhaité en appuyant sur la touche Plus ou la touche Moins . 5. Une fois la durée de cuisson écoulée, la zone de cuisson est arrêtée. Un signal sonore retentit; il est limité dans le temps et peut être arrêté en appuyant sur n’importe quelle touche (à l’exception de la touche Marche/ Arrêt). Conseils! • Pour la programmation de l’arrêt automatique pour une autre zone de cuis- son, appuyez plusieurs fois sur la touche de sélection minuterie , jusqu’à ce que le témoin lumineux de la minuterie de la zone de cuisson souhaitée clignote. La valeur affichée peut être lue et modifiée. • Pour désactiver l’arrêt automatique avant la fin de cuisson : sélectionnez la zone de cuisson concernée (le témoin lumineux minuterie clignote) et appuyez simultanément une fois sur les touches Plus et Moins. Minuterie (sablier) 1. Mettez en marche la table de cuisson. 2. Appuyez sur la touche de sélection minuterie , jusqu’à ce que le voyant minuterie (sablier) clignote au-dessus de cette touche. La touche Plus ou Moins permet de régler le temps en minutes. 3. Une fois le temps écoulé, un signal sonore retentit; celui-ci est limité dans le temps et peut être arrêté en appuyant sur n’importe quelle touche (à l’exception de la touche Marche/Arrêt ). Remarque: • La minuterie (sablier) reste activée, même quand la table de cuisson vitro- céramique est arrêtée. Pour modifier le temps, mettre la table de cuisson en marche en appuyant sur la touche Marche/Arrêt . Témoin lumineux minuterie Point de disponibilité arrêt automatique Témoin lumineux minuterie (sablier)
  • 42. 42 Utilisation F Fonction STOP Le déroulement de la cuisson peut être interrompu momentanément à l’aide de la fonction STOP, p.ex. lorsque quelqu’un sonne à la porte. Pour continuer la cuisson avec les mêmes positions de cuisson, la fonction STOP doit être annulée. Une minuterie programmée sera arrêtée et continuera ensuite à décompter. Pour des raisons de sécurité, la disponibilité de cette fonction est limitée à 10 minutes. Ce délai dépassé, la table de cuisson est arrêtée. 1. Les récipients de cuisson sont posés sur les zones de cuisson et les positions de cuisson souhaitées sont réglées. 2. Activez la touche STOP . A la place des positions de cuisson sélec- tionnées, les lettres S-T-O-P s’allument successivement. 3. L’interruption sera terminée, lorsque d’abord la touche STOP sera appuyée, puis ensuite n’importe quelle autre touche (à l’exception de la touche Marche/Arrêt). L’appui sur la deuxième touche doit être effectué dans les 10 secondes, sinon la table de cuisson s’arrête. Fonction de maintien au chaud Avec la fonction de maintien au chaud , vous pouvez maintenir au chaud un plat cuit sur une zone de cuisson. La zone de cuisson est alors utilisée avec une puissance réduite. 1. Le récipient de cuisson est posé sur une zone de cuisson et une intensité de cuisson (p. ex. 3) est sélectionnée. Le point de disponibilité de la zone de cuisson sélectionnée doit être allumé. Ensuite, appuyez sur une touche de sélection zone de cuisson (p.ex. pour la zone avant gauche). 2. Maintenez la touche Moins actionnée pour réduire l’intensité de cuisson (… 3, 2, 1, ). L’affichage s’arrête à , la fonction de maintien au chaud est activée. 3. Pour couper la fonction, actionnez une fois la touche Moins (0). La fonction de maintien au chaud est à disposition durant 120 minutes, ensuite la table de cuisson est arrêtée. maintenir
  • 43. Utilisation F 43 Précuisson automatique Avec la précuisson automatique, la précuisson se fait sur position 9. Après un certain temps, le réglage est ramené automatiquement sur une position infé- rieure (1 à 8) pour terminer la cuisson. En utilisant la précuisson automatique, réglez seulement la position de cuis- son à laquelle la cuisson doit être continuée, car c’est l’électronique qui pas- sera la zone de cuisson de la position précuisson automatiquement à la position plus basse. La précuisson automatique est adaptée à la cuisson de plats, permettant un démarrage de la cuisson à froid, chauffés rapidement à forte puissance et dont la cuisson est terminée en douceur, sans surveillance permanente (p.ex. pot au feu). 1. Mettez une zone de cuisson en marche. Le point de disponibilité de la zone de cuisson sélectionnée doit être allumé. Ensuite, appuyez sur une touche de sélection zone de cuisson (p.ex. pour la zone avant gauche). 2. Réglez la zone de cuisson sur position 9. Appuyez de nouveau sur la touche Plus pour activer la précuisson automatique. L’affichage de la position de cuisson indique alternativement A et 9. 3. Tout de suite après, sélectionnez la position souhaitée pour terminer la cuisson à l’aide de la touche Moins (position 1 à 8). A et la position de cuisson sélectionnée clignotent en alternance. 4. La précuisson automatique se déroule conforme à la programmation. Après un certain temps (voir tableau), la cuisson continue sur la position de cuisson réduite. Conseils! • Pendant la précuisson, la touche Plus permet d’augmenter la position pour continuer la cuisson. En appuyant sur la touche Moins , la pré- cuisson automatique s’arrête. • Si, après l’activation de la précuisson, la position 9 est maintenue pour ter- miner la cuisson, la précuisson automatique est arrêtée automatiquement après 10 secondes et la cuisson continue sur position 9. Position de cuisson sélectionnée Précuisson automatique Temps (min:sec) 1 2 3 4 5 6 7 8 9 01:00 03:00 04:48 06:30 08:30 02:30 03:30 04:30 - : -