SlideShare a Scribd company logo
1 of 8
Download to read offline
Excel 2007
Printing


Printing                                      Print Preview displays your worksheet as it
                                              will look when printed. When your
                                              document opens in Print Preview, a
Preparing to Print a Workbook
                                              separate Print Preview ribbon displays.
In Excel, you can print an entire workbook
or the individual worksheets within the
workbook. Preparing to print an Excel
workbook or worksheet can be a
complicated process. The information
below provides help with the complex
formatting sometimes involved in printing a
worksheet.
                                              The Print Preview tab contains several
                                              options for adjusting the way your
Print Preview                                 document will print.
Print Preview shows you what your printed     Print
document will look like when printed.
Additionally, Print Preview provides access   Click Print to print your worksheet as
to Page Setup and printing options.           displayed on the screen.

To preview your document using Print          Page Setup
Preview, click the Microsoft Office Button
and choose Print | Print Preview.             Page Setup provides access to the Page
                                              Setup dialog box.


                                              The Page Setup dialog box provides access
                                              to most of the features needed to print
                                              your worksheet to your specifications.


Excel 2007 – Printing
Page tab

Feature            Description
Orientation        Switch between Portrait and
                   Landscape page orientation.
Scaling            Adjust to – Use the Adjust to
                   settings to print the
                   worksheet’s text at a
                   percentage of the original size.
                   For example, choose 100% to
                   print the worksheet data the
                   same size as it is displayed on
                   your screen at 100% zoom.
                   Fit to – Use Fit to to make the           Use the Top, Right, Bottom and Left
                   worksheet fit on the desired              dropdowns to set the appropriate margins.
                   number of pages. For
                   example, Fit to 1 page tall by 1          Use the Header and Footer dropdowns to
                   page wide will shrink or                  set the distance from the edge of the sheet
                   enlarge the worksheet’s                   for the header and footer to begin.
                   contents until they are
                   displayed on a single page.               Use the Center on Page options to center
Paper size         Use the Paper size dropdown               the spreadsheet data horizontally and/or
                   to choose the appropriate                 vertically on the printed page.
                   size.
Print quality      Use the Print quality
                                                             Click Options to access the Printer Options
                   dropdown to print at a higher             for your printer.
                   or lower resolution.
                                                             Header/Footer
First page         Use the First page number
number             field to set an appropriate first
                   page number. Leave at Auto
                   for the first page to be
                   counted as 1.
Options            Click Options to access the
                   Printer Options for your
                   printer.

Margins


Excel 2007 – Printing                                  -2-
Feature             Description                            Sheet
Header              Use the Header dropdown to
                    apply a preset header to your
                    worksheet.
Footer              Use the Footer dropdown to
                    apply a preset footer to your
                    worksheet.
Custom        Click the Custom Header or
Header/Custom Custom Footer buttons to
Footer        create a custom header or
              footer for your worksheet.
Different odd       Check the Different odd and
and even pages      even pages checkbox to set             NOTE: Several of the options on the Sheet
                    different headers and footers                tab are not available when accessed
                    for odd and even pages.
                                                                 through Print Preview. For access
Different first     Check the Different first                    to all options, click the dialog box
page                page checkbox to set a                       launcher in the Page Setup group of
                    different first page header or
                                                                 the Page Layout tab.
                    footer. Use this option to
                    “suppress” the first page
                                                           Feature          Description
                    number.
                                                           Print area       Click the Print Area button to
Scale with          Check the Scale with
                                                                            select and set the print area
document            document checkbox to
                                                                            for the worksheet. This option
                    enlarge/decrease the header
                                                                            is not available through Print
                    and footer with the
                                                                            Preview.
                    document.
                                                           Rows to          Click the Rows to repeat at
Align with page     Check the Align with page
                                                           repeat at top    top button to select the rows
margins             margins checkbox to use the
                                                                            to print at the top of each
                    same margins in the header
                                                                            page. This option is not
                    and footer as on the page.
                                                                            available through Print
                                                                            Preview.
                                                           Columns to       Click the Columns to repeat at
                                                           repeat at left   left button to select the
                                                                            columns to print at the left of
                                                                            each page. This option is not
                                                                            available through Print
                                                                            Preview.
                                                           Gridlines        Check the Gridlines checkbox
                                                                            to print gridlines on the
                                                                            worksheet.
                                                           Black and        Check the Black and white
                                                           white            checkbox to print the
                                                                            spreadsheet in black and
                                                                            white.


Excel 2007 – Printing                                -3-
Draft quality      Check the Draft quality                Page Setup
                   checkbox to print the
                   spreadsheet at a lower quality         Feature           Description
                   and faster speed.                      Margins           Click the Margins dropdown to
Row and            Check the Row and column                                 select from Excel’s predefined
column             headings checkbox to print                               margins or to create your own
headings           row (1, 2, 3 etc.) and column                            custom margins.
                   (A, B, C etc.) on each sheet.          Orientation       Click the Orientation
Comments           Use the Comments dropdown                                dropdown to switch between
                   to choose how comments are                               Portrait and Landscape
                   displayed in the printed                                 orientations.
                   worksheet. This option is not          Size              Click the Size dropdown to
                   available from Print Preview.                            select the appropriate page
Cell errors as     Use the Cell errors as                                   size.
                   dropdown to choose how cell            Print Area        Click the Print Area dropdown
                   errors are displayed in the                              to set or clear the print area.
                   printed worksheet.
                                                          Breaks            Click the Breaks dropdown to
Page order         Use Page order to choose the                             insert or remove page breaks.
                   appropriate order for printing
                                                          Background        Click the Background button
                   your worksheet. Choose
                                                                            to insert a logo, image or
                   Down then over for long
                                                                            clipart as a background for the
                   worksheets. Choose Over
                                                                            spreadsheet. Backgrounds are
                   then down for wide
                                                                            only visible on screen and will
                   worksheets.
                                                                            not print.
                                                          Print Titles      Click Print Titles to access
Page Layout Tab                                                             Sheet options including Row
                                                                            and Column headings.
The Page Layout tab contains many of the
                                                          Page Setup        Click the Page Setup dialog
functions that are essential to formatting                Dialog Box        box launcher to access all
your worksheet for printing.                              Launcher          Page Setup options. All Page
                                                                            Setup options are available
Themes                                                                      when accessed this way.

Use the options in the Themes group to
                                                          Scale to Fit
apply color and font themes to your
spreadsheet.                                              Width

                                                          •      Select the appropriate width from the
                                                                 dropdown. Automatic is the default
                                                                 and will print to the width of the
                                                                 spreadsheet as displayed at 100% on
                                                                 screen.


Excel 2007 – Printing                               -4-
Height                                               Feature     Description
                                                     Bring to    Select Bring to Front from the
•   Select the appropriate height from the           Front       dropdown to move the selected
    dropdown. Automatic is the default                           item to the front of the stack.
    and will print to the height of the                          Select Bring Forward from the
    spreadsheet as displayed at 100% on                          dropdown to move the selected
    screen.                                                      item forward one layer.
                                                     Send to     Select Send to Back from the
Scale                                                Back        dropdown to move the selected
                                                                 item to the back of the stack.
•   Use Scale to scale the worksheet to a                        Select Send Backward to move the
    percentage of the displayed worksheet.                       selected item back one layer.
                                                     Selection   Click Selection Pane to toggle the
Dialog Box Launcher                                  Pane        selection pane. The Selection Pane
                                                                 provides access to all objects in the
•   Use the dialog box launcher to access                        spreadsheet. All objects can be
    the Page Setup options.                                      selected and hidden/viewed from
                                                                 this pane.
Sheet Options

Gridlines

•   View – Check to view on screen.

•   Print – Check to print.

Headings
                                                     Align       Select the appropriate alignment
•   View – Check to view on screen.
                                                                 option from the Align dropdown to
                                                                 align the selected object in the
•   Print – Check to print.
                                                                 desired way.
Arrange                                              Group       Select the objects to group and
                                                                 select Group from the Group
                                                                 dropdown. To ungroup, click the
                                                                 grouped objects and select
                                                                 Ungroup from the dropdown.
                                                     Rotate      Select the object to rotate. Select
                                                                 the appropriate rotation option
                                                                 from the dropdown. The object
Objects can be layered or stacked in Excel.                      rotates as desired.
They can be moved backwards or forwards
in layers, or can be sent all the way to the
back or front of the stack.


Excel 2007 – Printing                          -5-
Page Break Preview                                   2. Drag the solid line to the desired
                                                        location. The Print Area is changed.
Page Break Preview is the easiest way to                The Print Area can only be made
manipulate how your spreadsheet will                    smaller using this option.
print.

To access Page Break Preview, click the              Page Layout View
Page Break Preview button on the View
                                                     Page Layout view displays the worksheet on
menu at the bottom right of the Excel                pages showing the header, footer as well as
screen.                                              a basic representation of how the
                                                     spreadsheet will look when printed.

Page Break Preview displays your
spreadsheet with dotted blue lines denoting
page breaks and sold blue lines noting the
edge of the Print Area.                              Unlike Print Preview, Page Layout view
                                                     provides access to all Excel features. You
                                                     can still enter data, use formulas and work
                                                     in the spreadsheet as you normally would
                                                     but with access to many of the Page Layout
                                                     options.

                                                     Working with Headers and Footers

                                                     Headers and Footers can be accessed in two
                                                     ways in Excel; using the Header/Footer tab
To adjust a page break,
                                                     of the Page Setup dialog and via the Page
1. Click the page break (dotted line).               Layout view.
   Notice that your cursor changes to a
                                                     Header/Footer Tab
   double ended arrow.
                                                     To access the Header/Footer tab, click the
                                                     Page Setup dialog box launcher in the Page
                                                     Setup group of the Page Layout tab. Click
2. Drag the dotted line to move the page
                                                     the Header/Footer tab.
   break to the desired location. The page
   break is moved.

To adjust the Print Area,

1. Click the print area border (solid line).
   Notice that your cursor changes to a
   double ended arrow.


Excel 2007 – Printing                          -6-
Built-in Headers and Footers                        1. Click in the Left section field.

To use any of Excel’s pre-defined headers
and footers, choose the desired option from
the Header and Footer dropdowns.

Custom Headers and Footers
                                                    2. Click the Insert Picture button.
To create a custom header or footer, click
the Custom Header or Custom Footer
button.                                             3. Browse to the location of the logo.


The Custom Header or Custom Footer
screen opens. In the example below, we
will work with the Header screen.


                                                    4. Select the logo and click Insert. The Left
                                                       section displays Excel’s code for the
                                                       logo.


Excel divides the header and footer into
three sections. Using the options on the
Header or Footer screen, we can add any
information we would like.
                                                       Next we’ll add the title of the worksheet
Let’s suppose we want to setup a header                to the center section of the header.
that contains a company logo in the left               To add a title to the center section,
section, the title of the worksheet in the          5. Click in the Center section.
center section and the date in the right            6. Type the title of the worksheet.
section.

First, we’ll work on the left section. To
insert a logo into the left section of the
header,

                                                    7. Highlight the title and click the Format
                                                       Text button.


Excel 2007 – Printing                         -7-
8. Choose the appropriate formatting
    options and click OK. The text is
    formatted.
    Finally, we’ll add the date to the right
    section.
    To add the date to the right section,
9. Click in the Right section.
10. Click the Insert Date button.


    The Right section displays Excel’s code
    for the date.


    Once the Left, Center and Right
    components are added, click OK. To
    view the header, view the document in
    Print Preview. Headers and footers are
    not visible in Excel’s Normal view.


Excel 2007 – Printing                          -8-

More Related Content

Similar to Excel 2007 - Printing

Lesson 7 Printing Workbooks
Lesson 7   Printing WorkbooksLesson 7   Printing Workbooks
Lesson 7 Printing Workbooksguevarra_2000
 
Excel Printing Tips2007
Excel Printing Tips2007Excel Printing Tips2007
Excel Printing Tips2007simply_coool
 
Editing calendar in publisher & number line in word
Editing calendar in publisher & number line in wordEditing calendar in publisher & number line in word
Editing calendar in publisher & number line in wordJOHNY NATAD
 
Editing calendar in publisher & number line in word
Editing calendar in publisher & number line in wordEditing calendar in publisher & number line in word
Editing calendar in publisher & number line in wordJOHNY NATAD
 
Les15 Modifying Page Layout
Les15 Modifying Page LayoutLes15 Modifying Page Layout
Les15 Modifying Page Layoutguevarra_2000
 
Customize Word Environment
Customize Word EnvironmentCustomize Word Environment
Customize Word EnvironmentCik Na Shohaili
 
Presentation on MS Excel
Presentation on MS ExcelPresentation on MS Excel
Presentation on MS ExcelamitaYadav40
 
MS WORD LEARNING
MS WORD LEARNINGMS WORD LEARNING
MS WORD LEARNINGABC Company
 
Spreadsheets Page Setup And Printing
Spreadsheets Page Setup And PrintingSpreadsheets Page Setup And Printing
Spreadsheets Page Setup And PrintingLois Lindemann
 
Lecture 05 (Word Processing).pptx
Lecture 05 (Word Processing).pptxLecture 05 (Word Processing).pptx
Lecture 05 (Word Processing).pptxMwangaPrayGod
 
Word processing part 2 lecture and assignment updated
Word processing part 2 lecture and assignment updatedWord processing part 2 lecture and assignment updated
Word processing part 2 lecture and assignment updatedShouaQureshi
 
Overview Of Page Setup
Overview Of Page SetupOverview Of Page Setup
Overview Of Page SetupCooter513
 
Microsoft office word 2003
Microsoft office word 2003Microsoft office word 2003
Microsoft office word 2003sasika fernando
 

Similar to Excel 2007 - Printing (20)

Lesson 7 Printing Workbooks
Lesson 7   Printing WorkbooksLesson 7   Printing Workbooks
Lesson 7 Printing Workbooks
 
Excel Printing Tips2007
Excel Printing Tips2007Excel Printing Tips2007
Excel Printing Tips2007
 
04 Excel Tips
04 Excel Tips04 Excel Tips
04 Excel Tips
 
2010 09 Format Pages
2010 09  Format Pages2010 09  Format Pages
2010 09 Format Pages
 
Editing calendar in publisher & number line in word
Editing calendar in publisher & number line in wordEditing calendar in publisher & number line in word
Editing calendar in publisher & number line in word
 
Editing calendar in publisher & number line in word
Editing calendar in publisher & number line in wordEditing calendar in publisher & number line in word
Editing calendar in publisher & number line in word
 
Word07presentation
Word07presentationWord07presentation
Word07presentation
 
Form 1 Term 2 Week 4.1
Form 1   Term 2   Week 4.1Form 1   Term 2   Week 4.1
Form 1 Term 2 Week 4.1
 
Les15 Modifying Page Layout
Les15 Modifying Page LayoutLes15 Modifying Page Layout
Les15 Modifying Page Layout
 
Customize Word Environment
Customize Word EnvironmentCustomize Word Environment
Customize Word Environment
 
Presentation on MS Excel
Presentation on MS ExcelPresentation on MS Excel
Presentation on MS Excel
 
MS WORD LEARNING
MS WORD LEARNINGMS WORD LEARNING
MS WORD LEARNING
 
Spreadsheets Page Setup And Printing
Spreadsheets Page Setup And PrintingSpreadsheets Page Setup And Printing
Spreadsheets Page Setup And Printing
 
Formatting Pages
Formatting PagesFormatting Pages
Formatting Pages
 
Introduction to microsoft word 2007
Introduction to microsoft word 2007Introduction to microsoft word 2007
Introduction to microsoft word 2007
 
Lecture 05 (Word Processing).pptx
Lecture 05 (Word Processing).pptxLecture 05 (Word Processing).pptx
Lecture 05 (Word Processing).pptx
 
Word processing part 2 lecture and assignment updated
Word processing part 2 lecture and assignment updatedWord processing part 2 lecture and assignment updated
Word processing part 2 lecture and assignment updated
 
Week 2 ms word ait
Week 2 ms word   aitWeek 2 ms word   ait
Week 2 ms word ait
 
Overview Of Page Setup
Overview Of Page SetupOverview Of Page Setup
Overview Of Page Setup
 
Microsoft office word 2003
Microsoft office word 2003Microsoft office word 2003
Microsoft office word 2003
 

Recently uploaded

"Subclassing and Composition – A Pythonic Tour of Trade-Offs", Hynek Schlawack
"Subclassing and Composition – A Pythonic Tour of Trade-Offs", Hynek Schlawack"Subclassing and Composition – A Pythonic Tour of Trade-Offs", Hynek Schlawack
"Subclassing and Composition – A Pythonic Tour of Trade-Offs", Hynek SchlawackFwdays
 
SALESFORCE EDUCATION CLOUD | FEXLE SERVICES
SALESFORCE EDUCATION CLOUD | FEXLE SERVICESSALESFORCE EDUCATION CLOUD | FEXLE SERVICES
SALESFORCE EDUCATION CLOUD | FEXLE SERVICESmohitsingh558521
 
Moving Beyond Passwords: FIDO Paris Seminar.pdf
Moving Beyond Passwords: FIDO Paris Seminar.pdfMoving Beyond Passwords: FIDO Paris Seminar.pdf
Moving Beyond Passwords: FIDO Paris Seminar.pdfLoriGlavin3
 
Training state-of-the-art general text embedding
Training state-of-the-art general text embeddingTraining state-of-the-art general text embedding
Training state-of-the-art general text embeddingZilliz
 
Gen AI in Business - Global Trends Report 2024.pdf
Gen AI in Business - Global Trends Report 2024.pdfGen AI in Business - Global Trends Report 2024.pdf
Gen AI in Business - Global Trends Report 2024.pdfAddepto
 
"ML in Production",Oleksandr Bagan
"ML in Production",Oleksandr Bagan"ML in Production",Oleksandr Bagan
"ML in Production",Oleksandr BaganFwdays
 
Transcript: New from BookNet Canada for 2024: Loan Stars - Tech Forum 2024
Transcript: New from BookNet Canada for 2024: Loan Stars - Tech Forum 2024Transcript: New from BookNet Canada for 2024: Loan Stars - Tech Forum 2024
Transcript: New from BookNet Canada for 2024: Loan Stars - Tech Forum 2024BookNet Canada
 
Transcript: New from BookNet Canada for 2024: BNC CataList - Tech Forum 2024
Transcript: New from BookNet Canada for 2024: BNC CataList - Tech Forum 2024Transcript: New from BookNet Canada for 2024: BNC CataList - Tech Forum 2024
Transcript: New from BookNet Canada for 2024: BNC CataList - Tech Forum 2024BookNet Canada
 
"Debugging python applications inside k8s environment", Andrii Soldatenko
"Debugging python applications inside k8s environment", Andrii Soldatenko"Debugging python applications inside k8s environment", Andrii Soldatenko
"Debugging python applications inside k8s environment", Andrii SoldatenkoFwdays
 
Time Series Foundation Models - current state and future directions
Time Series Foundation Models - current state and future directionsTime Series Foundation Models - current state and future directions
Time Series Foundation Models - current state and future directionsNathaniel Shimoni
 
unit 4 immunoblotting technique complete.pptx
unit 4 immunoblotting technique complete.pptxunit 4 immunoblotting technique complete.pptx
unit 4 immunoblotting technique complete.pptxBkGupta21
 
TrustArc Webinar - How to Build Consumer Trust Through Data Privacy
TrustArc Webinar - How to Build Consumer Trust Through Data PrivacyTrustArc Webinar - How to Build Consumer Trust Through Data Privacy
TrustArc Webinar - How to Build Consumer Trust Through Data PrivacyTrustArc
 
Take control of your SAP testing with UiPath Test Suite
Take control of your SAP testing with UiPath Test SuiteTake control of your SAP testing with UiPath Test Suite
Take control of your SAP testing with UiPath Test SuiteDianaGray10
 
The Ultimate Guide to Choosing WordPress Pros and Cons
The Ultimate Guide to Choosing WordPress Pros and ConsThe Ultimate Guide to Choosing WordPress Pros and Cons
The Ultimate Guide to Choosing WordPress Pros and ConsPixlogix Infotech
 
Tampa BSides - Chef's Tour of Microsoft Security Adoption Framework (SAF)
Tampa BSides - Chef's Tour of Microsoft Security Adoption Framework (SAF)Tampa BSides - Chef's Tour of Microsoft Security Adoption Framework (SAF)
Tampa BSides - Chef's Tour of Microsoft Security Adoption Framework (SAF)Mark Simos
 
DevoxxFR 2024 Reproducible Builds with Apache Maven
DevoxxFR 2024 Reproducible Builds with Apache MavenDevoxxFR 2024 Reproducible Builds with Apache Maven
DevoxxFR 2024 Reproducible Builds with Apache MavenHervé Boutemy
 
TeamStation AI System Report LATAM IT Salaries 2024
TeamStation AI System Report LATAM IT Salaries 2024TeamStation AI System Report LATAM IT Salaries 2024
TeamStation AI System Report LATAM IT Salaries 2024Lonnie McRorey
 
What's New in Teams Calling, Meetings and Devices March 2024
What's New in Teams Calling, Meetings and Devices March 2024What's New in Teams Calling, Meetings and Devices March 2024
What's New in Teams Calling, Meetings and Devices March 2024Stephanie Beckett
 
What is DBT - The Ultimate Data Build Tool.pdf
What is DBT - The Ultimate Data Build Tool.pdfWhat is DBT - The Ultimate Data Build Tool.pdf
What is DBT - The Ultimate Data Build Tool.pdfMounikaPolabathina
 
How to write a Business Continuity Plan
How to write a Business Continuity PlanHow to write a Business Continuity Plan
How to write a Business Continuity PlanDatabarracks
 

Recently uploaded (20)

"Subclassing and Composition – A Pythonic Tour of Trade-Offs", Hynek Schlawack
"Subclassing and Composition – A Pythonic Tour of Trade-Offs", Hynek Schlawack"Subclassing and Composition – A Pythonic Tour of Trade-Offs", Hynek Schlawack
"Subclassing and Composition – A Pythonic Tour of Trade-Offs", Hynek Schlawack
 
SALESFORCE EDUCATION CLOUD | FEXLE SERVICES
SALESFORCE EDUCATION CLOUD | FEXLE SERVICESSALESFORCE EDUCATION CLOUD | FEXLE SERVICES
SALESFORCE EDUCATION CLOUD | FEXLE SERVICES
 
Moving Beyond Passwords: FIDO Paris Seminar.pdf
Moving Beyond Passwords: FIDO Paris Seminar.pdfMoving Beyond Passwords: FIDO Paris Seminar.pdf
Moving Beyond Passwords: FIDO Paris Seminar.pdf
 
Training state-of-the-art general text embedding
Training state-of-the-art general text embeddingTraining state-of-the-art general text embedding
Training state-of-the-art general text embedding
 
Gen AI in Business - Global Trends Report 2024.pdf
Gen AI in Business - Global Trends Report 2024.pdfGen AI in Business - Global Trends Report 2024.pdf
Gen AI in Business - Global Trends Report 2024.pdf
 
"ML in Production",Oleksandr Bagan
"ML in Production",Oleksandr Bagan"ML in Production",Oleksandr Bagan
"ML in Production",Oleksandr Bagan
 
Transcript: New from BookNet Canada for 2024: Loan Stars - Tech Forum 2024
Transcript: New from BookNet Canada for 2024: Loan Stars - Tech Forum 2024Transcript: New from BookNet Canada for 2024: Loan Stars - Tech Forum 2024
Transcript: New from BookNet Canada for 2024: Loan Stars - Tech Forum 2024
 
Transcript: New from BookNet Canada for 2024: BNC CataList - Tech Forum 2024
Transcript: New from BookNet Canada for 2024: BNC CataList - Tech Forum 2024Transcript: New from BookNet Canada for 2024: BNC CataList - Tech Forum 2024
Transcript: New from BookNet Canada for 2024: BNC CataList - Tech Forum 2024
 
"Debugging python applications inside k8s environment", Andrii Soldatenko
"Debugging python applications inside k8s environment", Andrii Soldatenko"Debugging python applications inside k8s environment", Andrii Soldatenko
"Debugging python applications inside k8s environment", Andrii Soldatenko
 
Time Series Foundation Models - current state and future directions
Time Series Foundation Models - current state and future directionsTime Series Foundation Models - current state and future directions
Time Series Foundation Models - current state and future directions
 
unit 4 immunoblotting technique complete.pptx
unit 4 immunoblotting technique complete.pptxunit 4 immunoblotting technique complete.pptx
unit 4 immunoblotting technique complete.pptx
 
TrustArc Webinar - How to Build Consumer Trust Through Data Privacy
TrustArc Webinar - How to Build Consumer Trust Through Data PrivacyTrustArc Webinar - How to Build Consumer Trust Through Data Privacy
TrustArc Webinar - How to Build Consumer Trust Through Data Privacy
 
Take control of your SAP testing with UiPath Test Suite
Take control of your SAP testing with UiPath Test SuiteTake control of your SAP testing with UiPath Test Suite
Take control of your SAP testing with UiPath Test Suite
 
The Ultimate Guide to Choosing WordPress Pros and Cons
The Ultimate Guide to Choosing WordPress Pros and ConsThe Ultimate Guide to Choosing WordPress Pros and Cons
The Ultimate Guide to Choosing WordPress Pros and Cons
 
Tampa BSides - Chef's Tour of Microsoft Security Adoption Framework (SAF)
Tampa BSides - Chef's Tour of Microsoft Security Adoption Framework (SAF)Tampa BSides - Chef's Tour of Microsoft Security Adoption Framework (SAF)
Tampa BSides - Chef's Tour of Microsoft Security Adoption Framework (SAF)
 
DevoxxFR 2024 Reproducible Builds with Apache Maven
DevoxxFR 2024 Reproducible Builds with Apache MavenDevoxxFR 2024 Reproducible Builds with Apache Maven
DevoxxFR 2024 Reproducible Builds with Apache Maven
 
TeamStation AI System Report LATAM IT Salaries 2024
TeamStation AI System Report LATAM IT Salaries 2024TeamStation AI System Report LATAM IT Salaries 2024
TeamStation AI System Report LATAM IT Salaries 2024
 
What's New in Teams Calling, Meetings and Devices March 2024
What's New in Teams Calling, Meetings and Devices March 2024What's New in Teams Calling, Meetings and Devices March 2024
What's New in Teams Calling, Meetings and Devices March 2024
 
What is DBT - The Ultimate Data Build Tool.pdf
What is DBT - The Ultimate Data Build Tool.pdfWhat is DBT - The Ultimate Data Build Tool.pdf
What is DBT - The Ultimate Data Build Tool.pdf
 
How to write a Business Continuity Plan
How to write a Business Continuity PlanHow to write a Business Continuity Plan
How to write a Business Continuity Plan
 

Excel 2007 - Printing

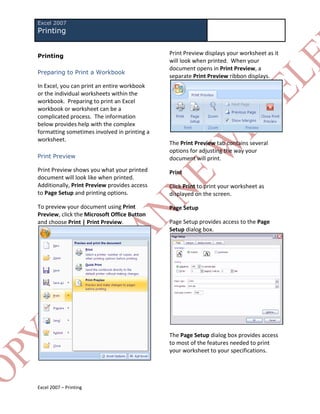
  • 1. Excel 2007 Printing Printing Print Preview displays your worksheet as it will look when printed. When your document opens in Print Preview, a Preparing to Print a Workbook separate Print Preview ribbon displays. In Excel, you can print an entire workbook or the individual worksheets within the workbook. Preparing to print an Excel workbook or worksheet can be a complicated process. The information below provides help with the complex formatting sometimes involved in printing a worksheet. The Print Preview tab contains several options for adjusting the way your Print Preview document will print. Print Preview shows you what your printed Print document will look like when printed. Additionally, Print Preview provides access Click Print to print your worksheet as to Page Setup and printing options. displayed on the screen. To preview your document using Print Page Setup Preview, click the Microsoft Office Button and choose Print | Print Preview. Page Setup provides access to the Page Setup dialog box. The Page Setup dialog box provides access to most of the features needed to print your worksheet to your specifications. Excel 2007 – Printing
  • 2. Page tab Feature Description Orientation Switch between Portrait and Landscape page orientation. Scaling Adjust to – Use the Adjust to settings to print the worksheet’s text at a percentage of the original size. For example, choose 100% to print the worksheet data the same size as it is displayed on your screen at 100% zoom. Fit to – Use Fit to to make the Use the Top, Right, Bottom and Left worksheet fit on the desired dropdowns to set the appropriate margins. number of pages. For example, Fit to 1 page tall by 1 Use the Header and Footer dropdowns to page wide will shrink or set the distance from the edge of the sheet enlarge the worksheet’s for the header and footer to begin. contents until they are displayed on a single page. Use the Center on Page options to center Paper size Use the Paper size dropdown the spreadsheet data horizontally and/or to choose the appropriate vertically on the printed page. size. Print quality Use the Print quality Click Options to access the Printer Options dropdown to print at a higher for your printer. or lower resolution. Header/Footer First page Use the First page number number field to set an appropriate first page number. Leave at Auto for the first page to be counted as 1. Options Click Options to access the Printer Options for your printer. Margins Excel 2007 – Printing -2-
  • 3. Feature Description Sheet Header Use the Header dropdown to apply a preset header to your worksheet. Footer Use the Footer dropdown to apply a preset footer to your worksheet. Custom Click the Custom Header or Header/Custom Custom Footer buttons to Footer create a custom header or footer for your worksheet. Different odd Check the Different odd and and even pages even pages checkbox to set NOTE: Several of the options on the Sheet different headers and footers tab are not available when accessed for odd and even pages. through Print Preview. For access Different first Check the Different first to all options, click the dialog box page page checkbox to set a launcher in the Page Setup group of different first page header or the Page Layout tab. footer. Use this option to “suppress” the first page Feature Description number. Print area Click the Print Area button to Scale with Check the Scale with select and set the print area document document checkbox to for the worksheet. This option enlarge/decrease the header is not available through Print and footer with the Preview. document. Rows to Click the Rows to repeat at Align with page Check the Align with page repeat at top top button to select the rows margins margins checkbox to use the to print at the top of each same margins in the header page. This option is not and footer as on the page. available through Print Preview. Columns to Click the Columns to repeat at repeat at left left button to select the columns to print at the left of each page. This option is not available through Print Preview. Gridlines Check the Gridlines checkbox to print gridlines on the worksheet. Black and Check the Black and white white checkbox to print the spreadsheet in black and white. Excel 2007 – Printing -3-
  • 4. Draft quality Check the Draft quality Page Setup checkbox to print the spreadsheet at a lower quality Feature Description and faster speed. Margins Click the Margins dropdown to Row and Check the Row and column select from Excel’s predefined column headings checkbox to print margins or to create your own headings row (1, 2, 3 etc.) and column custom margins. (A, B, C etc.) on each sheet. Orientation Click the Orientation Comments Use the Comments dropdown dropdown to switch between to choose how comments are Portrait and Landscape displayed in the printed orientations. worksheet. This option is not Size Click the Size dropdown to available from Print Preview. select the appropriate page Cell errors as Use the Cell errors as size. dropdown to choose how cell Print Area Click the Print Area dropdown errors are displayed in the to set or clear the print area. printed worksheet. Breaks Click the Breaks dropdown to Page order Use Page order to choose the insert or remove page breaks. appropriate order for printing Background Click the Background button your worksheet. Choose to insert a logo, image or Down then over for long clipart as a background for the worksheets. Choose Over spreadsheet. Backgrounds are then down for wide only visible on screen and will worksheets. not print. Print Titles Click Print Titles to access Page Layout Tab Sheet options including Row and Column headings. The Page Layout tab contains many of the Page Setup Click the Page Setup dialog functions that are essential to formatting Dialog Box box launcher to access all your worksheet for printing. Launcher Page Setup options. All Page Setup options are available Themes when accessed this way. Use the options in the Themes group to Scale to Fit apply color and font themes to your spreadsheet. Width • Select the appropriate width from the dropdown. Automatic is the default and will print to the width of the spreadsheet as displayed at 100% on screen. Excel 2007 – Printing -4-
  • 5. Height Feature Description Bring to Select Bring to Front from the • Select the appropriate height from the Front dropdown to move the selected dropdown. Automatic is the default item to the front of the stack. and will print to the height of the Select Bring Forward from the spreadsheet as displayed at 100% on dropdown to move the selected screen. item forward one layer. Send to Select Send to Back from the Scale Back dropdown to move the selected item to the back of the stack. • Use Scale to scale the worksheet to a Select Send Backward to move the percentage of the displayed worksheet. selected item back one layer. Selection Click Selection Pane to toggle the Dialog Box Launcher Pane selection pane. The Selection Pane provides access to all objects in the • Use the dialog box launcher to access spreadsheet. All objects can be the Page Setup options. selected and hidden/viewed from this pane. Sheet Options Gridlines • View – Check to view on screen. • Print – Check to print. Headings Align Select the appropriate alignment • View – Check to view on screen. option from the Align dropdown to align the selected object in the • Print – Check to print. desired way. Arrange Group Select the objects to group and select Group from the Group dropdown. To ungroup, click the grouped objects and select Ungroup from the dropdown. Rotate Select the object to rotate. Select the appropriate rotation option from the dropdown. The object Objects can be layered or stacked in Excel. rotates as desired. They can be moved backwards or forwards in layers, or can be sent all the way to the back or front of the stack. Excel 2007 – Printing -5-
  • 6. Page Break Preview 2. Drag the solid line to the desired location. The Print Area is changed. Page Break Preview is the easiest way to The Print Area can only be made manipulate how your spreadsheet will smaller using this option. print. To access Page Break Preview, click the Page Layout View Page Break Preview button on the View Page Layout view displays the worksheet on menu at the bottom right of the Excel pages showing the header, footer as well as screen. a basic representation of how the spreadsheet will look when printed. Page Break Preview displays your spreadsheet with dotted blue lines denoting page breaks and sold blue lines noting the edge of the Print Area. Unlike Print Preview, Page Layout view provides access to all Excel features. You can still enter data, use formulas and work in the spreadsheet as you normally would but with access to many of the Page Layout options. Working with Headers and Footers Headers and Footers can be accessed in two ways in Excel; using the Header/Footer tab To adjust a page break, of the Page Setup dialog and via the Page 1. Click the page break (dotted line). Layout view. Notice that your cursor changes to a Header/Footer Tab double ended arrow. To access the Header/Footer tab, click the Page Setup dialog box launcher in the Page Setup group of the Page Layout tab. Click 2. Drag the dotted line to move the page the Header/Footer tab. break to the desired location. The page break is moved. To adjust the Print Area, 1. Click the print area border (solid line). Notice that your cursor changes to a double ended arrow. Excel 2007 – Printing -6-
  • 7. Built-in Headers and Footers 1. Click in the Left section field. To use any of Excel’s pre-defined headers and footers, choose the desired option from the Header and Footer dropdowns. Custom Headers and Footers 2. Click the Insert Picture button. To create a custom header or footer, click the Custom Header or Custom Footer button. 3. Browse to the location of the logo. The Custom Header or Custom Footer screen opens. In the example below, we will work with the Header screen. 4. Select the logo and click Insert. The Left section displays Excel’s code for the logo. Excel divides the header and footer into three sections. Using the options on the Header or Footer screen, we can add any information we would like. Next we’ll add the title of the worksheet Let’s suppose we want to setup a header to the center section of the header. that contains a company logo in the left To add a title to the center section, section, the title of the worksheet in the 5. Click in the Center section. center section and the date in the right 6. Type the title of the worksheet. section. First, we’ll work on the left section. To insert a logo into the left section of the header, 7. Highlight the title and click the Format Text button. Excel 2007 – Printing -7-
  • 8. 8. Choose the appropriate formatting options and click OK. The text is formatted. Finally, we’ll add the date to the right section. To add the date to the right section, 9. Click in the Right section. 10. Click the Insert Date button. The Right section displays Excel’s code for the date. Once the Left, Center and Right components are added, click OK. To view the header, view the document in Print Preview. Headers and footers are not visible in Excel’s Normal view. Excel 2007 – Printing -8-