SlideShare una empresa de Scribd logo
1 de 7
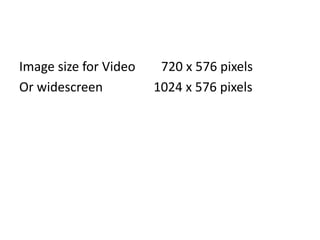
Image size for Video        720 x 576 pixels Or widescreen 			  1024 x 576 pixels
Making images the right size for  video 1. zoom tool at bottom of  toolbar           (keyboard shortcut = control + /  control -) 2. Image size –  image menu     720 x 576  pixels    	rectangle marquee (selection tool)style: fixed size    width 720 px   height 576 px 	click on image to select area 3. edit menu > copy   /  file menu > new  > OK / edit menu>  paste 4. Image menu >mode > check RGB is selected 5. Save image 6. Close original image and don’t save 7. Repeat for your first five images
Selection tools / Layers / Transform Select a circle 1. elipical marquee tool  	press shift key and drag cursor 	Edit menu > cut  or  copy(keyboard shortcut=  control X and control C) - Using the tabs at top of image window to move to another image - select edit menu > paste (keyboard shortcut = control V) Layers layers window on right of screen (or select from windows menu) - Pasting into an image creates a new layer - Double click on name to rename a layer - Use pointer toolto position your circle. (Make sure that you have selected the layer you want to move in the layers window.) ,[object Object],[object Object]
Manipulating layers Move layers nearer to front of image Click and drag layers in layers window to re-arrange order.  - the layer at the top of the layers window is at the front of the image window. Merge a layer with the one below. Make sure the layers you want to merge are next to each other in layers window - Select a layer - Layer menu > merge down Change the transparency of a layer  - Select a layer in the layers window, use the opacity slider to change transparency. To make a new layer – layer menu > new > layer To get rid of halo of pixels - layer menu > matting > defringe
Paint and Draw tools Paintbrush tool / drawing tool Options menu – select brush type colour palette > select a colour Use cursor to draw Select a colour from your image with eye dropper tool Making changes to whole layers, or whole image Image menu > adjustments> try brightness & contrast / hue & saturation Filters menu >  try different filters  (don’t over use them, they are very obviously photoshop effects.)
Save all images for Premiere & Web File menu > Save as > .psd  > name +v2 File menu > Save as > .jpeg > new folder “flattened images” > name image e.g. “imagenamev2flat” Images for web Image menu> image size> width = 500   resolution=72dpi File menu> save for Web & Devices > select jpeg > save > new folder (name it “webimages”) > save Remember to save to the network and to your USB drive. Double check you have saved all your work, then delete from the desktop
Photoshop

Más contenido relacionado

La actualidad más candente

Photo retouching tips and tricks in photoshop
Photo retouching tips and tricks in photoshopPhoto retouching tips and tricks in photoshop
Photo retouching tips and tricks in photoshopRemon Mia
 
Christine rose nd. tipones [gr. 11 abm, caritas]
Christine rose nd. tipones [gr. 11  abm, caritas]Christine rose nd. tipones [gr. 11  abm, caritas]
Christine rose nd. tipones [gr. 11 abm, caritas]Virgilio Galemba
 
Montage Effects
Montage EffectsMontage Effects
Montage EffectsDamo Ward
 
Presentation for posterising technique
Presentation for posterising techniquePresentation for posterising technique
Presentation for posterising techniquecedannatt
 
Presentation for posterising technique
Presentation for posterising techniquePresentation for posterising technique
Presentation for posterising techniquecedannatt
 
Menggunakan Radial blur
Menggunakan Radial blurMenggunakan Radial blur
Menggunakan Radial blurasyarifaisal
 
Create a canvas banner in photoshop
Create a canvas banner in photoshopCreate a canvas banner in photoshop
Create a canvas banner in photoshopNaomiPB
 
GIMP Tutorial by Juan Rodrigo Badiola
GIMP Tutorial by Juan Rodrigo BadiolaGIMP Tutorial by Juan Rodrigo Badiola
GIMP Tutorial by Juan Rodrigo BadiolaJuanRodrigoBadiola
 
PowerApps - Canvas Screen with Tabs
PowerApps - Canvas Screen with TabsPowerApps - Canvas Screen with Tabs
PowerApps - Canvas Screen with TabsPeter Heffner
 
Wd133 unit 3 module 2 working with the color picker and swatches palette
Wd133 unit 3 module 2 working with the color picker and swatches paletteWd133 unit 3 module 2 working with the color picker and swatches palette
Wd133 unit 3 module 2 working with the color picker and swatches palettekateridrex
 
Dig imag unit 3 module 2 working with the color picker and swatches palette
Dig imag unit 3 module 2 working with the color picker and swatches paletteDig imag unit 3 module 2 working with the color picker and swatches palette
Dig imag unit 3 module 2 working with the color picker and swatches palettekateridrex
 
adobe Photoshop
adobe Photoshop adobe Photoshop
adobe Photoshop FariK1
 
4 use colors and add text and shapes
4 use colors and add text and shapes4 use colors and add text and shapes
4 use colors and add text and shapesMarty Sison
 
Marie christine joyce buena
Marie christine joyce buenaMarie christine joyce buena
Marie christine joyce buenaVirgilio Galemba
 
Photoshop booklet 2016
Photoshop booklet 2016Photoshop booklet 2016
Photoshop booklet 2016missfcmay
 
Wd133 unit 8 module 2 creating and saving alpha channels
Wd133 unit 8 module 2 creating and saving alpha channelsWd133 unit 8 module 2 creating and saving alpha channels
Wd133 unit 8 module 2 creating and saving alpha channelskateridrex
 
Photoshop editing booklet 2019
Photoshop editing booklet 2019Photoshop editing booklet 2019
Photoshop editing booklet 2019missfcmay
 

La actualidad más candente (20)

Photo retouching tips and tricks in photoshop
Photo retouching tips and tricks in photoshopPhoto retouching tips and tricks in photoshop
Photo retouching tips and tricks in photoshop
 
Christine rose nd. tipones [gr. 11 abm, caritas]
Christine rose nd. tipones [gr. 11  abm, caritas]Christine rose nd. tipones [gr. 11  abm, caritas]
Christine rose nd. tipones [gr. 11 abm, caritas]
 
Montage Effects
Montage EffectsMontage Effects
Montage Effects
 
Presentation for posterising technique
Presentation for posterising techniquePresentation for posterising technique
Presentation for posterising technique
 
Presentation for posterising technique
Presentation for posterising techniquePresentation for posterising technique
Presentation for posterising technique
 
Edgy Colors
Edgy ColorsEdgy Colors
Edgy Colors
 
Menggunakan Radial blur
Menggunakan Radial blurMenggunakan Radial blur
Menggunakan Radial blur
 
Create a canvas banner in photoshop
Create a canvas banner in photoshopCreate a canvas banner in photoshop
Create a canvas banner in photoshop
 
Editing process
Editing processEditing process
Editing process
 
GIMP Tutorial by Juan Rodrigo Badiola
GIMP Tutorial by Juan Rodrigo BadiolaGIMP Tutorial by Juan Rodrigo Badiola
GIMP Tutorial by Juan Rodrigo Badiola
 
Adobe photoshop
Adobe photoshopAdobe photoshop
Adobe photoshop
 
PowerApps - Canvas Screen with Tabs
PowerApps - Canvas Screen with TabsPowerApps - Canvas Screen with Tabs
PowerApps - Canvas Screen with Tabs
 
Wd133 unit 3 module 2 working with the color picker and swatches palette
Wd133 unit 3 module 2 working with the color picker and swatches paletteWd133 unit 3 module 2 working with the color picker and swatches palette
Wd133 unit 3 module 2 working with the color picker and swatches palette
 
Dig imag unit 3 module 2 working with the color picker and swatches palette
Dig imag unit 3 module 2 working with the color picker and swatches paletteDig imag unit 3 module 2 working with the color picker and swatches palette
Dig imag unit 3 module 2 working with the color picker and swatches palette
 
adobe Photoshop
adobe Photoshop adobe Photoshop
adobe Photoshop
 
4 use colors and add text and shapes
4 use colors and add text and shapes4 use colors and add text and shapes
4 use colors and add text and shapes
 
Marie christine joyce buena
Marie christine joyce buenaMarie christine joyce buena
Marie christine joyce buena
 
Photoshop booklet 2016
Photoshop booklet 2016Photoshop booklet 2016
Photoshop booklet 2016
 
Wd133 unit 8 module 2 creating and saving alpha channels
Wd133 unit 8 module 2 creating and saving alpha channelsWd133 unit 8 module 2 creating and saving alpha channels
Wd133 unit 8 module 2 creating and saving alpha channels
 
Photoshop editing booklet 2019
Photoshop editing booklet 2019Photoshop editing booklet 2019
Photoshop editing booklet 2019
 

Destacado

Musumeci M.B. Inquadramento Sindromico - UTIC. ASMaD 2013
Musumeci M.B. Inquadramento Sindromico - UTIC. ASMaD 2013Musumeci M.B. Inquadramento Sindromico - UTIC. ASMaD 2013
Musumeci M.B. Inquadramento Sindromico - UTIC. ASMaD 2013Gianfranco Tammaro
 
Praanjung Bahasa (Kumpulan 4)
Praanjung Bahasa (Kumpulan 4)Praanjung Bahasa (Kumpulan 4)
Praanjung Bahasa (Kumpulan 4)Rozaiman Makmun
 
Desmontaje del case
Desmontaje    del    caseDesmontaje    del    case
Desmontaje del casealtayr1505
 
Sorà F. Il Ponatinib nella Real Life, l'esperienza nell'uso compassionevole. ...
Sorà F. Il Ponatinib nella Real Life, l'esperienza nell'uso compassionevole. ...Sorà F. Il Ponatinib nella Real Life, l'esperienza nell'uso compassionevole. ...
Sorà F. Il Ponatinib nella Real Life, l'esperienza nell'uso compassionevole. ...Gianfranco Tammaro
 
Abruzzese E. Esperienza Clinica su Ponatinib attraverso lo Studio PACE. ASMaD...
Abruzzese E. Esperienza Clinica su Ponatinib attraverso lo Studio PACE. ASMaD...Abruzzese E. Esperienza Clinica su Ponatinib attraverso lo Studio PACE. ASMaD...
Abruzzese E. Esperienza Clinica su Ponatinib attraverso lo Studio PACE. ASMaD...Gianfranco Tammaro
 
Petrucci F. La Chirurgia nel Terzo Millennio: cosa è cambiato e cosa bisogna ...
Petrucci F. La Chirurgia nel Terzo Millennio: cosa è cambiato e cosa bisogna ...Petrucci F. La Chirurgia nel Terzo Millennio: cosa è cambiato e cosa bisogna ...
Petrucci F. La Chirurgia nel Terzo Millennio: cosa è cambiato e cosa bisogna ...Gianfranco Tammaro
 
Tombesi A. La Reumatologia nel Terzo Millennio: cosa è cambiato e cosa bisogn...
Tombesi A. La Reumatologia nel Terzo Millennio: cosa è cambiato e cosa bisogn...Tombesi A. La Reumatologia nel Terzo Millennio: cosa è cambiato e cosa bisogn...
Tombesi A. La Reumatologia nel Terzo Millennio: cosa è cambiato e cosa bisogn...Gianfranco Tammaro
 

Destacado (12)

Musumeci M.B. Inquadramento Sindromico - UTIC. ASMaD 2013
Musumeci M.B. Inquadramento Sindromico - UTIC. ASMaD 2013Musumeci M.B. Inquadramento Sindromico - UTIC. ASMaD 2013
Musumeci M.B. Inquadramento Sindromico - UTIC. ASMaD 2013
 
Praanjung Bahasa (Kumpulan 4)
Praanjung Bahasa (Kumpulan 4)Praanjung Bahasa (Kumpulan 4)
Praanjung Bahasa (Kumpulan 4)
 
Mapa mental nucleo
Mapa mental nucleoMapa mental nucleo
Mapa mental nucleo
 
Rosario
RosarioRosario
Rosario
 
Quien necesita un_auto
Quien necesita un_autoQuien necesita un_auto
Quien necesita un_auto
 
Desmontaje del case
Desmontaje    del    caseDesmontaje    del    case
Desmontaje del case
 
Mono
MonoMono
Mono
 
Sorà F. Il Ponatinib nella Real Life, l'esperienza nell'uso compassionevole. ...
Sorà F. Il Ponatinib nella Real Life, l'esperienza nell'uso compassionevole. ...Sorà F. Il Ponatinib nella Real Life, l'esperienza nell'uso compassionevole. ...
Sorà F. Il Ponatinib nella Real Life, l'esperienza nell'uso compassionevole. ...
 
Abruzzese E. Esperienza Clinica su Ponatinib attraverso lo Studio PACE. ASMaD...
Abruzzese E. Esperienza Clinica su Ponatinib attraverso lo Studio PACE. ASMaD...Abruzzese E. Esperienza Clinica su Ponatinib attraverso lo Studio PACE. ASMaD...
Abruzzese E. Esperienza Clinica su Ponatinib attraverso lo Studio PACE. ASMaD...
 
Elbarrioysusinstitucionessociales
ElbarrioysusinstitucionessocialesElbarrioysusinstitucionessociales
Elbarrioysusinstitucionessociales
 
Petrucci F. La Chirurgia nel Terzo Millennio: cosa è cambiato e cosa bisogna ...
Petrucci F. La Chirurgia nel Terzo Millennio: cosa è cambiato e cosa bisogna ...Petrucci F. La Chirurgia nel Terzo Millennio: cosa è cambiato e cosa bisogna ...
Petrucci F. La Chirurgia nel Terzo Millennio: cosa è cambiato e cosa bisogna ...
 
Tombesi A. La Reumatologia nel Terzo Millennio: cosa è cambiato e cosa bisogn...
Tombesi A. La Reumatologia nel Terzo Millennio: cosa è cambiato e cosa bisogn...Tombesi A. La Reumatologia nel Terzo Millennio: cosa è cambiato e cosa bisogn...
Tombesi A. La Reumatologia nel Terzo Millennio: cosa è cambiato e cosa bisogn...
 

Similar a Photoshop

Ppt
PptPpt
Pptlkpd
 
How to Edit in Photoshop (Part 1): Inserting, Cropping, and Fixing Images
How to Edit in Photoshop (Part 1): Inserting, Cropping, and Fixing ImagesHow to Edit in Photoshop (Part 1): Inserting, Cropping, and Fixing Images
How to Edit in Photoshop (Part 1): Inserting, Cropping, and Fixing ImagesMaria Eloisa Blanza
 
217 quick guide to photoshop cs6
217 quick guide to photoshop cs6217 quick guide to photoshop cs6
217 quick guide to photoshop cs6Rodel Morales
 
Introduction- The Basics of Photoshop CS6
Introduction- The Basics of Photoshop CS6Introduction- The Basics of Photoshop CS6
Introduction- The Basics of Photoshop CS6Crest TechnoSoft
 
Presentation on Adobe Photoshop
Presentation on Adobe PhotoshopPresentation on Adobe Photoshop
Presentation on Adobe PhotoshopOpenDev
 
Adobe photoshop cs6
Adobe photoshop cs6Adobe photoshop cs6
Adobe photoshop cs6Ila Azmil
 
Adobe photoshop cs6
Adobe photoshop cs6Adobe photoshop cs6
Adobe photoshop cs6ilaazmil2
 
Adobe photoshop cs6 tutorial
Adobe photoshop cs6 tutorialAdobe photoshop cs6 tutorial
Adobe photoshop cs6 tutorialAgung Yuwono
 
Digital work station intro
Digital work station introDigital work station intro
Digital work station introWhitney Brooks
 
Adobe photoshop
Adobe photoshopAdobe photoshop
Adobe photoshopHappy You
 
Presentation on Adobe Photoshop
Presentation on Adobe PhotoshopPresentation on Adobe Photoshop
Presentation on Adobe PhotoshopMohak Jain
 

Similar a Photoshop (20)

Photoshop
PhotoshopPhotoshop
Photoshop
 
Photoshop basics
Photoshop basicsPhotoshop basics
Photoshop basics
 
Ppt
PptPpt
Ppt
 
Adobe photoshop
Adobe photoshopAdobe photoshop
Adobe photoshop
 
Adobe photoshop
Adobe photoshopAdobe photoshop
Adobe photoshop
 
How to Edit in Photoshop (Part 1): Inserting, Cropping, and Fixing Images
How to Edit in Photoshop (Part 1): Inserting, Cropping, and Fixing ImagesHow to Edit in Photoshop (Part 1): Inserting, Cropping, and Fixing Images
How to Edit in Photoshop (Part 1): Inserting, Cropping, and Fixing Images
 
217 quick guide to photoshop cs6
217 quick guide to photoshop cs6217 quick guide to photoshop cs6
217 quick guide to photoshop cs6
 
Introduction- The Basics of Photoshop CS6
Introduction- The Basics of Photoshop CS6Introduction- The Basics of Photoshop CS6
Introduction- The Basics of Photoshop CS6
 
Presentation on Adobe Photoshop
Presentation on Adobe PhotoshopPresentation on Adobe Photoshop
Presentation on Adobe Photoshop
 
Adobe photoshop cs6
Adobe photoshop cs6Adobe photoshop cs6
Adobe photoshop cs6
 
Adobe photoshop cs6
Adobe photoshop cs6Adobe photoshop cs6
Adobe photoshop cs6
 
Adobe photoshop cs6 tutorial
Adobe photoshop cs6 tutorialAdobe photoshop cs6 tutorial
Adobe photoshop cs6 tutorial
 
Digital work station intro
Digital work station introDigital work station intro
Digital work station intro
 
Advanced Digital Photography
Advanced Digital PhotographyAdvanced Digital Photography
Advanced Digital Photography
 
Tools
ToolsTools
Tools
 
Adobe photoshop
Adobe photoshopAdobe photoshop
Adobe photoshop
 
Adobe photoshop
Adobe photoshopAdobe photoshop
Adobe photoshop
 
Adobe photoshop
Adobe photoshopAdobe photoshop
Adobe photoshop
 
Presentation on Adobe Photoshop
Presentation on Adobe PhotoshopPresentation on Adobe Photoshop
Presentation on Adobe Photoshop
 
P.KARTHICK
P.KARTHICKP.KARTHICK
P.KARTHICK
 

Photoshop

  • 1. Image size for Video 720 x 576 pixels Or widescreen 1024 x 576 pixels
  • 2. Making images the right size for video 1. zoom tool at bottom of toolbar (keyboard shortcut = control + / control -) 2. Image size – image menu 720 x 576 pixels rectangle marquee (selection tool)style: fixed size width 720 px height 576 px click on image to select area 3. edit menu > copy / file menu > new > OK / edit menu> paste 4. Image menu >mode > check RGB is selected 5. Save image 6. Close original image and don’t save 7. Repeat for your first five images
  • 3.
  • 4. Manipulating layers Move layers nearer to front of image Click and drag layers in layers window to re-arrange order. - the layer at the top of the layers window is at the front of the image window. Merge a layer with the one below. Make sure the layers you want to merge are next to each other in layers window - Select a layer - Layer menu > merge down Change the transparency of a layer - Select a layer in the layers window, use the opacity slider to change transparency. To make a new layer – layer menu > new > layer To get rid of halo of pixels - layer menu > matting > defringe
  • 5. Paint and Draw tools Paintbrush tool / drawing tool Options menu – select brush type colour palette > select a colour Use cursor to draw Select a colour from your image with eye dropper tool Making changes to whole layers, or whole image Image menu > adjustments> try brightness & contrast / hue & saturation Filters menu > try different filters (don’t over use them, they are very obviously photoshop effects.)
  • 6. Save all images for Premiere & Web File menu > Save as > .psd > name +v2 File menu > Save as > .jpeg > new folder “flattened images” > name image e.g. “imagenamev2flat” Images for web Image menu> image size> width = 500 resolution=72dpi File menu> save for Web & Devices > select jpeg > save > new folder (name it “webimages”) > save Remember to save to the network and to your USB drive. Double check you have saved all your work, then delete from the desktop