"Subclassing and Composition – A Pythonic Tour of Trade-Offs", Hynek Schlawack
Can stirling engine
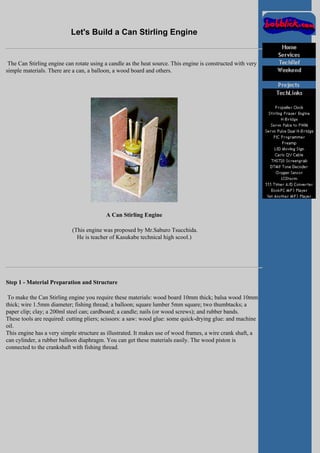
1. Let's Build a Can Stirling Engine
The Can Stirling engine can rotate using a candle as the heat source. This engine is constructed with very
simple materials. There are a can, a balloon, a wood board and others.
A Can Stirling Engine
(This engine was proposed by Mr.Saburo Tsucchida.
He is teacher of Kasukabe technical high scool.)
Step 1 - Material Preparation and Structure
To make the Can Stirling engine you require these materials: wood board 10mm thick; balsa wood 10mm
thick; wire 1.5mm diameter; fishing thread; a balloon; square lumber 5mm square; two thumbtacks; a
paper clip; clay; a 200ml steel can; cardboard; a candle; nails (or wood screws); and rubber bands.
These tools are required: cutting pliers; scissors: a saw: wood glue: some quick-drying glue: and machine
oil.
This engine has a very simple structure as illustrated. It makes use of wood frames, a wire crank shaft, a
can cylinder, a rubber balloon diaphragm. You can get these materials easily. The wood piston is
connected to the crankshaft with fishing thread.
2. View of a Can Stirling Engine
Step 2 - Cut a Wood Board
As illustrated in the following figure, you must make two side boards, two boards to fix to the can, and a
bottom board, all of 10mm thickness.
You must make the holes for the crank somewhat bigger to reduce friction.
Cut a Wood Board
Step 3 - Make a Wood Piston
3. Fit the pieces of cut balsa together with wood glue. Attach a length of fishing line to the center of the
piston with quick-drying glue.
CAUTION: The diameter of the can which I used is about 50mm. The height of the can is about 100mm.
If you use an other-sized can the diameter and the height of the wood piston must be fitted to the can.
Clearance should be 2 or 3mm.
Make a Wood Piston
Step 4 - Make a Diaphragm
You will make a diaphragm using a rubber balloon. As shown in the following figure, cut the balloon and
reinforce it by pasting the cardboards. Make a hole in the center of the diaphgram and pass through a
fishing thread. Be careful to make a close-fitting hole - not a big hole.
Make a Diaphgram
4. Step 5 - Make Connecting Rods and a Crank Shaft
As illustrated in the following figure, make two connecting rods using lumber that is 5 mm square. Make
the holes for the crank shaft somewhat bigger to reduce friction. Bend a wire of1.5 mm. diameter. Put on
the connecting rods before bending the wire.
Connecting Rods and Crank Shaft
Step 6 - Construct a Diaphragm and Crank Mechanism
As illustrated in the following figure, attach the diaphgram and the connecting rods with two thumbtacks.
Construct a Diaphgram and Crank Mechanism
5. Step 7 - Construct the Frame
You will construct the wood frame (See the Step 2). When you construct the frame, you must make sure
that the crank shaft can rotate with a very small friction loss.
Construct the Frame
Step 8 - Construct a Wood Piston and Crank Mechanism
After you pass the fishing thread through the hole in the diaphragm, You must tie the thread to a paper clip
attached to the crankshaft.
Construct a Wood Piston and Crank Mechanism