
Recomendados
Más contenido relacionado
La actualidad más candente
La actualidad más candente (20)
Destacado
Destacado (20)
Similar a Exporting a Local WordPress Site to Live with MAMP
Similar a Exporting a Local WordPress Site to Live with MAMP (20)
Último
Último (20)
Exporting a Local WordPress Site to Live with MAMP
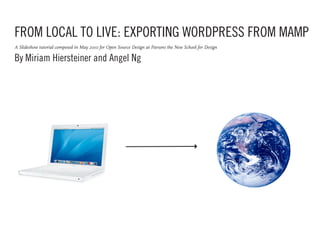
- 1. FROM LOCAL TO LIVE: EXPORTING WORDPRESS FROM MAMP A Slideshow tutorial composed in May 2010 for Open Source Design at Parsons the New School for Design By Miriam Hiersteiner and Angel Ng
- 2. Step 1: Start Local Start by opening MAMP on your local computer. Once the program opens and loads, you will see this dashboard box. Click on “Open start page”.
- 3. Step 2 You will be taken to your MAMP webpage. Click on “phpMyAdmin”.
- 4. Step 3 This is your phpMyAdmin page. On the lefthand side of the page, you will see a small list. Find the name of your database. Mine is called “Wordpress”.
- 5. Step 4 You want to click on “Export”. What you are doing when you export is saving all of your wordpress settings into a .SQL document. Later in this tutorial, the .SQL document you export will be uploaded to your live site and all of your posts, plugins etc will transfer from local to live. This is an important time saving step.
- 6. Step 5 This is the page you will be taken to after clicking “Export”. Here you are faced with a number of choices for the settings of your .SQL export. Almost all of the settings are already in place. Check your settings against the settings below and make sure they match. You can name your document anything and save it anywhere on your computer.
- 7. Step 6: IMPORTANT! Find the .SQL document you saved in Step 5 and open that file in your preferred text editor. Using the “Find and Replace” function (ctrl+f) to replace every occurance of your local server with your live server. My local server is called “http://localhost:8888/wordpress/”. Your local url is what is in the address field when you look at your local site in a web browser. Your live server is the address of your live site. (For instance, my live site is www. miriamhiersteiner.com.) Once you have replaced all of the references to your local URL, SAVE THE DOCUMENT. This step is very important because it will tell your server to look to your live url instead of your local url.
- 8. Step 7: LET’S GET LIVE! If you have not done so already, install wordpress on your live server. Using your preferred FTP access program (I use Cyberduck), locate the “wp-config.php” file. Download this file to your computer. The config file determines the configuration of your live wordpress site. The danger is that, later in this tutorial, we will be replacing the wordpress files that exist on your server with the wordpress files from your local development. Your local files have a different configuration (wp_config). In order for your live site to work, you need the wp_config to remain the same (the file that exists on your server when you install wordpress). In this step, you are removing the CORRECT wp_config file so that you can upload it later and overwrite the local wp_config file. This will make more sense later.
- 9. Step 8: LET’S GET LIVE! Okay, take a deep breath. Using your FTP software, upload the local “wp-content” folder onto the live server. You will be overwriting the wp-content folder that is already on the server. This is importing your new childtheme onto the live site. After you have done this, re-load the wp_config file you downloaded in Step 7.
- 10. Step 9: Now you need to access the phpMyAdmin page for your live site. I use Dreamhost, so I go to dreamhost.com, sign in, and go to “Goodies” in the left navigation menu, then click on “MySql Database”. There, I will see a link for php- MyAdmin. The phpMyAdmin page for my live site looks almost identical to my local MAMP phpMyAdmin page. In the left navigation menu, I see the database for my live site, “miriamhiersteiner_com(11)”. I click on this link. (An issue that I encountered on this step was an inability to access my phpMyAdmin page through dreamhost. If you are having trouble with this, please see this post http://a.parsons.edu/~zeravivm/s10/osd/miriam/05/01/dreamhostnightmare-host/) For general hosting problems, please contact your specific hosting company.
- 11. Step 10: IMPORTANT This is what your database will look like. For safety reasons, you should always back-up your database at this step just in case something happens (you drop the wrong database, for instance). To back-up, you want to create another .SQL file for your live site the way that you did during Step 4 for your local site. Follow the same directions for step 4 and save your live .SQL file on your computer but be sure to GIVE THE LIVE .SQL A DIFFERENT NAME FROM YOUR LOCAL .SQL FILE.
- 12. Step 10: IMPORTANT This is what your database will look like. For safety reasons, you should always back-up your database at this step just in case something happens (you drop the wrong database, for instance). To back-up, you want to create another .SQL file for your live site the way that you did during Step 4 for your local site. Follow the same directions for step 4 and save your live .SQL file on your computer but be sure to GIVE THE LIVE .SQL A DIFFERENT NAME FROM YOUR LOCAL .SQL FILE.
- 13. Step 11 Click on “Check All” to select all of the files on the database. Then go to the dropdown menu that says “With se- lected” and chose “Drop”. You will be taken to a confirmation page. Confirm the drop and go back to your database. It should be empty now.
- 14. Step 13 Now is the time to import the .SQL file you created in step 4 from your local site. Click on import and select the file from your computer. Now your database should be full again, but this time it is full with the files from your local wordpress site.
- 15. Step 14: LIVE AT LAST Visit your live URL. Amazing, right? You should be live now. If you are not, please post your problem as a com- ment to this post. Let’s fix it!