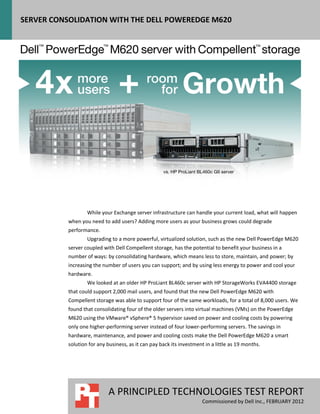
Server consolidation with the Dell PowerEdge M620

Better performance and lower costs are driving factors in the hardware you choose for your data center. In choosing a newer server and storage solution, you can acquire enough power to virtualize older servers and consolidate them onto the new solution, which can increase performance dramatically while keeping costs down. In our tests, the Dell PowerEdge M620 server with Compellent storage was able to take the place of four older HP ProLiant BL460c G6 servers by supporting the same 2,000-user workload as the older four combined, while also upgrading to the newest version of Exchange Server 2010. In addition to supporting four workloads, the Dell PowerEdge M620 was also more power efficient, supporting 59.5 percent more users per watt than the HP ProLiant BL460c G6. With such increases in performance and decreases in power consumption, the Dell PowerEdge M620 can deliver payback in as little as 19 months, providing an affordable consolidation platform for your business.

Recommended
Recommended
More Related Content
What's hot
What's hot (19)
Similar to Server consolidation with the Dell PowerEdge M620
Similar to Server consolidation with the Dell PowerEdge M620 (20)
More from Principled Technologies
More from Principled Technologies (20)
Server consolidation with the Dell PowerEdge M620
- 1. SERVER CONSOLIDATION WITH THE DELL POWEREDGE M620 While your Exchange server infrastructure can handle your current load, what will happen when you need to add users? Adding more users as your business grows could degrade performance. Upgrading to a more powerful, virtualized solution, such as the new Dell PowerEdge M620 server coupled with Dell Compellent storage, has the potential to benefit your business in a number of ways: by consolidating hardware, which means less to store, maintain, and power; by increasing the number of users you can support; and by using less energy to power and cool your hardware. We looked at an older HP ProLiant BL460c server with HP StorageWorks EVA4400 storage that could support 2,000 mail users, and found that the new Dell PowerEdge M620 with Compellent storage was able to support four of the same workloads, for a total of 8,000 users. We found that consolidating four of the older servers into virtual machines (VMs) on the PowerEdge M620 using the VMware® vSphere® 5 hypervisor saved on power and cooling costs by powering only one higher-performing server instead of four lower-performing servers. The savings in hardware, maintenance, and power and cooling costs make the Dell PowerEdge M620 a smart solution for any business, as it can pay back its investment in a little as 19 months. A PRINCIPLED TECHNOLOGIES TEST REPORT Commissioned by Dell Inc., FEBRUARY 2012
- 2. CONSOLIDATE AND SAVE Upgrading your current servers that run only one application instance to a new server and storage solution with multiple application instances in virtual machines has the potential not only to increase your performance and server utilization, but also to save you money. Furthermore, upgrading your applications from the older 2007 version to Microsoft Exchange Server 2010 also lets you benefit from the latest features available for your mail server. Four times the mailboxes, more users per watt As Figure 1 shows, the Dell PowerEdge M620 was able to run four virtual machines each running a 2,000-user Microsoft Exchange Server 2010 workload, while the HP ProLiant BL460c G6 server ran one 2,000-user Exchange Server 2007 workload. Exchange users supported 9,000 Figure 1: The superior 8,000 performance that the Dell 7,000 2,000 PowerEdge M620 delivers 6,000 means that you can 5,000 Users 2,000 consolidate four 2,000-user 4,000 workloads into just one server 3,000 2,000 and support the same number of users. 2,000 1,000 2,000 2,000 0 Dell PowerEdge M620 HP ProLiant BL460c G6 Supporting a high number of users is important, but so is the response time the server provides for those users. Not only was the Dell PowerEdge M620 able to support more users, it also provided better response times for those users – up to 70.1 percent better response time than the HP ProLiant BL460c G6. Figure 2 shows the average response time (MSExchangeISRPC Average Latency counter), in milliseconds for the two servers. (It is worth noting that Microsoft recommends that for best performance the MSExchangeISRPC Average Latency counter stay below 10 milliseconds on Exchange 2010 and below 20 milliseconds on Exchange 2007.) Dell PowerEdge M620 server HP ProLiant BL460c G6 server VM 1 VM 2 VM 3 VM 4 Response time (ms) 2.42 3.90 2.35 3.94 7.85 Figure 2: Response times, in milliseconds, for the two servers. Lower times are better. Server consolidation with the Dell PowerEdge M620 A Principled Technologies test report 2
- 3. Figure 3 shows the calculated power consumption for each blade, both idle (though the Dell PowerEdge M620 was supporting VMs) at peak workload. The Dell PowerEdge M620 server supported 59.5 percent more users per watt than the HP ProLiant BL460c G6. (Note: We calculated the power each blade server used by recording the power consumption of one server and the chassis, calculating the power usage for the chassis and blade server individually. We divided the blade chassis wattage by the number of servers it holds, 16, to determine the chassis power for an individual blade. We then added the blade power and 1/16th of the chassis power together. In that way, we are able to ensure the measurement actually reflects what one blade and its share of the chassis consumes.) Power (W) Users/watt Users/watt VMs running no workloads All VMs running workloads percentage win Dell PowerEdge M620 125.6 299.7 26.7 59.5% HP ProLiant BL460c G6 105.6 119.5 16.7 Figure 3: Power statistics for the two servers. ACHIEVE PAYBACK IN AS LITTLE AS 19 MONTHS BY CONSOLIDATING WITH THE DELL POWEREDGE M620 Tests in our labs using the LoadGen benchmark show that one Dell PowerEdge M620 running Microsoft Exchange Server 2010 can run four of the same 2,000-user workloads of four existing HP ProLiant BL460c G6 servers running Microsoft Exchange Server 2007 and still maintain room for growth. To illustrate the cost savings this consolidation can provide, we calculated the costs for a hypothetical enterprise planning this migration and compared those costs to those of retaining the existing servers. We found that, thanks to savings in software and hardware support, server administration, and data center costs for energy, ports, and space, the Dell PowerEdge M620 can pay back the investment in hardware and the migration effort in as little as 19 months. Figure 4 summarizes the three-year total cost of ownership (TCO) for the two solutions. Server consolidation with the Dell PowerEdge M620 A Principled Technologies test report 3
- 4. Three-year TCO $60,000 $49,686 Year 3 $50,000 operational costs $40,000 $34,197 US dollars Figure 4: Despite the initial Year 2 acquisition cost, the Dell $30,000 operational PowerEdge M620 saves on costs annual operational costs. $20,000 Year 1 $10,000 operational costs $0 Acquisition Dell PowerEdge HP ProLiant costs M620 solution BL460c G6 solution Figure 5 shows that the Dell PowerEdge M620 solution breaks even in 19 months. The Dell PowerEdge M620 solution can deliver payback in 19 months $60,000 $50,000 Dell PowerEdge Figure 5: The Dell PowerEdge $40,000 Acquisition M620 solution US dollars M620 delivers payback on cost of your investment in just 19 $30,000 $17,077.40 months. $20,000 Break even in HP ProLiant 19 months BL460c G6 $10,000 solution $0 0 3 6 9 12 15 18 21 24 27 30 33 36 Months WHAT WE TESTED To test the configuration’s mail server performance, we used the Microsoft Load Generator 2010 (LoadGen) benchmark, which performs tasks to simulate a standard user generating mail activity. We simulated 2,000 users for each bare-metal instance or VM, and used the following settings: Mailbox Profile: 100MB mailboxes Action Profile: Average Client Type: Outlook 2007 Cached Server consolidation with the Dell PowerEdge M620 A Principled Technologies test report 4
- 5. LoadGen simulates the mail activity for the 2,000 users and then reports a PASS/FAIL rating, which is based on acceptable response times. For more details about LoadGen, see http://www.microsoft.com/downloads/details.aspx?FamilyId=DDEC1642-F6E3-4D66- A82F-8D3062C6FA98&displaylang=en. IN CONCLUSION Better performance and lower costs are driving factors in the hardware you choose for your data center. In choosing a newer server and storage solution, you can acquire enough power to virtualize older servers and consolidate them onto the new solution, which can increase performance dramatically while keeping costs down. In our tests, the Dell PowerEdge M620 server with Compellent storage was able to take the place of four older HP ProLiant BL460c G6 servers by supporting the same 2,000-user workload as the older four combined, while also upgrading to the newest version of Exchange Server 2010. In addition to supporting four workloads, the Dell PowerEdge M620 was also more power efficient, supporting 59.5 percent more users per watt than the HP ProLiant BL460c G6. With such increases in performance and decreases in power consumption, the Dell PowerEdge M620 can deliver payback in as little as 19 months, providing an affordable consolidation platform for your business. Server consolidation with the Dell PowerEdge M620 A Principled Technologies test report 5
- 6. APPENDIX A – SERVER CONFIGURATION INFORMATION Figure 6 provides detailed configuration information for the test servers, and Figure 7 provides configuration information for the storage arrays. System Dell PowerEdge M620 HP ProLiant BL460c G6 Power supplies Total number 6 6 Vendor and model number Dell A236P-00 HP HSTNS-PR16 Wattage of each (W) 2,360 2450 Cooling fans Total number 9 10 Vendor and model number Dell YK776 Rev. X50 HP T35530-HP Dimensions (h x w) of each 3.1” x 3.5” 4” x 4” Volts 12 12 Amps 7.0 16.5 General Number of processor packages 2 2 Number of cores per processor 8 4 Number of hardware threads per 2 2 core System power management policy Balanced Balanced CPU Vendor Intel Intel Name Xeon Xeon Model number E5-2660 E5540 Stepping 6 D0 Socket type LGA2011 LGA1366 Core frequency (GHz) 2.20 2.53 Bus frequency 8.0 GT/s 5.8 GT/s L1 cache 32 KB + 32 KB (per core) 32 KB + 32KB (per core) L2 cache 256 KB (per core) 256 KB (per core) L3 cache (MB) 20 8 Platform Vendor and model number Dell PowerEdge M620 HP ProLiant BL460c G6 Motherboard model number 0GVN4C ICH10R BIOS name and version Dell 0.3.37 HP I24 BIOS settings Power Management set to OS Control Power Management set to OS Control Memory module(s) Total RAM in system (GB) 64 12 Vendor and model number M393B1K70BH1-CH9 Hynix HMT125U7BFR8C-H9 Type PC3-10600R PC3-10600E Speed (MHz) 1,333 1,333 Speed running in the system (MHz) 1,333 1,333 Server consolidation with the Dell PowerEdge M620 A Principled Technologies test report 6
- 7. System Dell PowerEdge M620 HP ProLiant BL460c G6 Timing/Latency (tCL-tRCD-tRP- 9-9-9-24 7-7-7-20 tRASmin) Size (GB) 8 12 Number of RAM module(s) 8 6 Chip organization Double-sided Double-sided Rank Dual Dual Operating system Name VMware ESXi 5.0.0 Windows Server 2008 R2 SP1 Build number 515841 7601 File system EXT3 NTFS Kernel 5.0.0 ACPI x64-based PC Language English English Graphics Vendor and model number Matrox® G200e Standard VGA Graphics Adapter Graphics memory (MB) 8 64 RAID controller Vendor and model number PERC H310 Mini HP Smart Array P410 Firmware version 2.120.14.1312 6.12.6.65 Cache size 1 GB 0 Hard drive Vendor and model number Seagate ST9300605SS MBC2073RC Number of disks in system 2 2 Size (GB) 300 72 Buffer size (MB) 64 16 RPM 10,000 15,000 Type SAS SAS Ethernet adapters First network adapter HP NC532i Dual Port 10GbE Vendor and model number Broadcom® Gigabit Ethernet BCM57810 Multifunction adapter Type Integrated Internal Second network adapter Broadcom NetXtreme II 10 Gigabit Vendor and model number N/A Ethernet Type Mezzanine card N/A Optical drive(s) Vendor and model number N/A N/A Type N/A N/A USB ports Number 2 external, 1 internal 0 Type 2.0 N/A Figure 6: Configuration information for the servers we tested. Server consolidation with the Dell PowerEdge M620 A Principled Technologies test report 7
- 8. Storage array Dell Compellent EB-2425 HP StorageWorks EVA4400 Number of active storage controllers 1 2 Number of active storage ports 4 4 Firmware revision 05.05.03.114.03 10001000 Model/firmware/type PowerConnect 8024F/ 3.1.4.5 /10GbE PowerConnect 8024F/ 3.1.4.5 /10GbE Tray 1 Number of disks 24 12 Disk vendor and model number Seagate ST9146852SS HP BF146DA47AA Disk size (GB) 146 146 Disk buffer size (MB) 16 16 Disk RPM 15,000 15,000 Disk type SAS SCSI Firmware revision XRB4 HP01 Tray 2 Disk type 1 Number of disks 6 12 Disk vendor and model number Seagate ST3600057SS HP BF146DA47AA Disk size (GB) 600 146 Disk buffer size (MB) 16 16 Disk RPM 15,000 15,000 Disk type SAS SCSI Firmware revision XREC HP01 Disk type 2 Number of disks 6 N/A Disk vendor and model number Seagate ST31000424SS N/A Disk size (TB) 1 N/A Disk buffer size (MB) 16 N/A Disk RPM 7,200 N/A Disk type SAS N/A Firmware revision XRMA N/A Figure 7: Detailed configuration information for the storage arrays. Server consolidation with the Dell PowerEdge M620 A Principled Technologies test report 8
- 9. APPENDIX B - HOW WE TESTED Configuring the Dell PowerEdge M620 Figure 8 illustrates our Dell test bed setup. For comparison purposes, we configured each VM as a standalone Exchange server environment with all roles included on each. This approach allowed us a modular method to determine an exact increase in identical virtual machines. Results in your specific environment will vary. We used a separate server for Active Directory on each VM configuration. In Figure 8, VM1 connects to AD1 and uses client 1, VM2 connects to AD2 and uses client 2, and so forth. We connected the M620 to the 10 GbE through iSCSI using a PowerConnect M8024F switch. We configured the Dell Compellent EB-2425 storage with one RAID 10 disk group with 30 disks. We created four 10GB volumes for Exchange logs, which we connected using iSCSI connection assigned in ESX. We created four 500GB volumes in the same disk group, which we connected to the ESX server and assigned to each VM in ESX. Figure 8: The Dell PowerEdge M620 test bed we used. Server consolidation with the Dell PowerEdge M620 A Principled Technologies test report 9
- 10. Adjusting BIOS settings We used the latest released BIOS updates on all systems, and adjusted the default BIOS settings. We changed the power profile to OS Control on the Dell system, and Balanced Power and Performance with OS Control for Power Regulation on the HP system. This ensured that the systems used the same power settings. Installing VMware vSphere 5 (ESXi) 1. Insert the disk, and select Boot from disk. 2. On the Welcome screen, press Enter. 3. On the End User License Agreement (EULA) screen, press F11. 4. On the Select a Disk to Install or Upgrade Screen, select the relevant volume to install ESXi on, and press Enter. 5. On the Please Select a Keyboard Layout screen, press Enter. 6. On the Enter a Root Password Screen, assign a root password and confirm it by entering it again. Press Enter to continue. 7. On the Confirm Install Screen, press F11 to install. 8. On the Installation complete screen, press Enter to reboot. Configuring ESXi after Installation 1. On the 5.0.0 ESXi screen, press F2, enter the root password, and press Enter. 2. On the System Customization screen, select troubleshooting options, and press Enter. 3. On the Troubleshooting Mode Options screen: a. Select Enable ESXi Shell, and press Enter. b. Select Enable SSH, press Enter, and press ESC. 4. On the System Customization screen, select Configure Management Network. 5. On the Configure Management Network screen, select IP Configuration. 6. On the IP Configuration screen, select set static IP, enter an IP address, subnet mask, and default gateway, and press Enter. 7. On the Configure Management Network screen, press Esc. When asked if you want to apply the changes, press Y. Updating ESXi to the latest build 1. Download the latest ESXi build from VMware. 2. Using the vSphere client from another machine, connect to the ESXi server. 3. Select the Configuration tab, and select Storage under the Hardware heading. 4. Right-click the OS datastore, and select Browse Datastore. 5. Click the upload button, and select the build update ZIP file. 6. Using a telnet/ssh client from another machine, connect to the ESXi server using root credentials. 7. Run the following command using the path and name of the ESXi update: esxcli software vib update –d /vmfs/volumes/OS/ ESXi500-201112001.zip 8. Repeat steps 6 and 7 for any subsequent systems. Configuring iSCSI networking We followed the steps from VMware’s document, iSCSI SAN Configuration Guide version 4.1, as a guide for our configuration of iSCSI on VMware vSphere 5. However, we performed most steps in the VMware vSphere 5 client UI as opposed to the command line, as VMware has added the relevant features to the UI in vSphere 5. 1. Using the vSphere client from another machine, connect to the ESXi server. 2. Add the necessary vSwitches: a. Click the host, click the Configuration tab, and click Networking. b. Click Add Networking. Server consolidation with the Dell PowerEdge M620 A Principled Technologies test report 10
- 11. c. Choose VMkernel, and click Next. d. Choose create a vSphere standard switch. e. Choose the first NIC associated with iSCSI traffic. f. Assign the network label, and assign IP settings. g. Click Finish. h. Repeat steps b through g for the second NIC assigned to iSCSI traffic. 3. Add the iSCSI software storage adapter: a. Click the host, click the Configuration tab, and click Storage adapters. b. Click Add. c. Click Add software iSCSI adapter. d. Click OK. 4. Configure the iSCSI software storage adapter: a. Right-click the iSCSI adapter that was just added to the system, choose Properties, and ensure it is enabled. b. Inside the iSCSI adapter Properties window, click the Network Configuration tab. c. Under VMkernel port bindings, click Add and add both VMkernel adapters to the VMkernel port bindings list. 5. Enable jumbo frames in ESXi: a. Click the host, click the Configuration tab, and click Networking. b. On the first vSwitch used for iSCSI, click Properties. c. Select the vSwitch. d. Click Edit. e. Modify the MTU to 9,000. f. Click OK. g. In the vSwitch Properties window, choose the VMkernel port. h. Click Edit. i. Modify the MTU to 9,000. j. Click OK. k. Click Yes if warned about datastore access. l. Click Close. m. Repeat steps b through l for each of the remaining three NICs dedicated to iSCSI traffic. 6. Access provisioned Dell Compellent storage: a. In the vSphere client, click the host, click the Configuration tab, and click Storage adapters. b. Right-click the iSCSI software storage adapter. c. Click Dynamic discovery. d. Click Add. e. Enter the Dell EqualLogic group IP address. f. Click Close. g. Click Yes when prompted to rescan the HBA. Configuring VM networking 1. Using the vSphere client from another machine, connect to the ESXi server. 2. Add the necessary vSwitch for the network that LoadGen traffic will use: a. Click the host, click the Configuration tab, and click Networking. b. Click Add Networking. c. Choose Virtual Machine, and click Next. d. Choose create a vSphere standard switch. e. Choose the NIC associated with VM traffic. f. Assign the network label and assign IP settings. Server consolidation with the Dell PowerEdge M620 A Principled Technologies test report 11
- 12. g. Click Finish. Configuring the external volumes 1. In the vSphere client, select the host. 2. Click the Configuration tab. 3. Click Storage, and click Add Storage… 4. Choose Disk/LUN. 5. Select the disk, and click Next. 6. Accept the default of VMFS-5 for the file system. 7. Review the disk layout, and click Next. 8. Enter the datastore name, and click Next. 9. Accept the default of using maximum capacity, and click Next. 10. Click Finish. 11. Repeat steps 3 through 10 for the remaining LUNs. Creating the first VM 1. In the vSphere client, connect to the ESXi host. 2. Click the Virtual Machines tab. 3. Right-click, and choose New Virtual Machine. 4. Choose Custom, and click Next. 5. Assign a name to the virtual machine, and click Next. 6. Select the first assigned OS Datastore on the external storage, and click Next. 7. Choose Virtual Machine Version 8, and click Next. 8. Choose Windows, and choose Microsoft Windows Server 2008 R2 (64-bit), and click Next. 9. Choose 1 virtual socket, and 8 virtual processors per core, and click Next. 10. Choose 12GB RAM, and click Next. 11. Click 1 for the number of NICs, select vmxnet3, and click Next. 12. Leave the default virtual storage controller, and click Next. 13. Choose to create a new virtual disk, and click Next. 14. Make the OS virtual disk size 30 GB, choose thick-provisioned lazy zeroed, specify the OS datastore on the external storage, and click Next. 15. Keep the default virtual device node (0:0), and click Next. 16. Click Finish. 17. Right-click the VM, and choose Edit Settings. 18. On the Hardware tab, click Add… 19. Click Hard Disk, and click Next. 20. Click Create a new virtual disk, and click Next. 21. Specify 30GB for the virtual disk size, choose thick-provisioned lazy zeroed, and specify the DB datastore. 22. Choose SCSI(1:0) for the device node, and click Next. 23. On the Hardware tab, click Add… 24. Click Hard Disk, and click Next. 25. Click Create a new virtual disk, and click Next. 26. Specify 30GB for the virtual disk size, choose thick-provisioned lazy zeroed, and specify the Logs datastore. 27. Choose SCSI(1:1) for the device node, and click Next. 28. Click SCSI Controller 1, and choose Change Type. 29. Choose VMware Paravirtual, and click OK. 30. Click Finish, and click OK. 31. Start the VM. 32. Attach the Windows Server 2008 R2 SP1 ISO image to the VM and install Windows Server 2008 R2 on your VM. Server consolidation with the Dell PowerEdge M620 A Principled Technologies test report 12
- 13. Installing the operating system on the VM 1. Insert the installation DVD for Windows Server 2008 R2 SP1 Enterprise into the DVD drive, and attach the physical DVD drive to the VM. Alternatively, use an ISO image and connect to the ISO image from the VM console. 2. Open the VM console on vSphere. 3. At the Language Selection Screen, click Next. 4. Click Install Now. 5. Select Windows Server 2008 R2 Enterprise (Full Installation), and click Next. 6. Click the I accept the license terms check box, and click Next. 7. Click Custom. 8. Click Next. 9. At the User’s password must be changed before logging on warning screen, click OK. 10. Enter the desired password for the administrator in both fields, and click the arrow to continue. 11. At the Your password has been changed screen, click OK. 12. Install the latest VMware Tools package on the VM. Restart as necessary. 13. Connect the machine to the Internet, and install all available Windows updates. Restart as necessary. 14. Enable remote desktop access. 15. Change the hostname and reboot when the installation prompts you. 16. Create a shared folder to store test script files. Set permissions as needed. 17. Set up networking: a. Click StartControl Panel, right-click Network Connections, and choose Open. b. Right-click the VM traffic NIC, and choose Properties. c. Select TCP/IP (v4), and choose Properties. d. Set the IP address, subnet, gateway, and DNS server for the virtual NIC, which will handle outgoing server traffic. Click OK, and click Close. 18. Repeat steps 1 through 17 to install the operating system on the other VMs. Adding the external volumes to the VMs in VMware vSphere 5 1. In the vSphere client, right-click the first VM. 2. Click Edit Settings. 3. Select the Hardware tab and click Add… 4. Choose Hard Disk from the Device Type list, and click Next. 5. Choose Raw Device Mapping, and click Next. 6. Select the LUN and click Next. 7. At the Select a datastore screen select Store with Virtual Machine radio and click Next. 8. Select the compatibly to Physical and click Next. 9. At the advanced options select SCSI (1:0) from the Virtual Device Node drop-down box, and click Next. 10. Review the Ready to Complete summary, and click Finish. 11. Repeat steps 1 through 10 for the remaining volumes. 12. In the VM, add the iSCSI storage: a. Start the VM, and click the Server Manager icon in the taskbar. b. In the left pane, expand Storage, and click Disk Management. c. Right-click the first volume, and choose Online. d. Right-click the first volume, and choose Initialize Disk. e. Select GPT (GUID Partition Table) for the partition style, and click OK. f. In the right pane, right-click the volume and choose New Simple VoIume… g. At the Welcome screen, click Next. Server consolidation with the Dell PowerEdge M620 A Principled Technologies test report 13
- 14. h. At the Specify Volume Size screen, leave the default selection, and click Next. i. At the Assign Drive Letter or Path screen, choose a drive letter, and click Next. j. At the Format Partition screen, leave the default selection, and click Next. k. At the Completing the New Simple Volume Wizard screen, click Finish. l. Repeat steps c through k for the remaining VM volumes. 13. Repeat steps 1-12 for the remaining VMs and attach the appropriate volumes. Installing Exchange 2010 SP2 prerequisites on VM1 After completing the following steps for VM1, repeat them for VM2, VM3, and VM4. 1. Select StartAdministrative ToolsServer Manager. 2. Click Add Roles. 3. At the Before You Begin screen, click Next. 4. At the Select Server Roles screen, click Web Server (IIS). 5. If prompted by an Add features required for Web Server (IIS) pop-up window, click Add Required Features. 1. Click Next. 2. At the Web Server (IIS) screen, click Next. 3. At the Select Role Services screen, select the IIS 6 Metabase Compatibility, IIS WMI Compatibility, HTTP Errors, HTTP Redirection, IIS 6 Management Console, Basic Authentication, Windows Authentication, Tracing, Digest Authentication, and Dynamic and Static content Compression checkboxes, and click Next. 4. At the Confirm Installation Selections screen, click Install. 5. At the Installation Results screen, click Close. 6. Select StartAdministrative ToolsServer Manager. 7. Click Features. 8. Click Add Features. 9. Select .NET Framework 3.5.1 Features. 10. When the Add Features Wizard pop-up window prompts you, click Add Required Role Services. 11. Click Next. 12. At the Introduction to Web Server (IIS) screen, click Next. 13. At the Select Role Services screen, click Next. 14. Click Install. 15. At the Installation Results screen, click Close. 16. Download the Microsoft Filter Pack 2.0. (http://www.microsoft.com/downloads/en/details.aspx?FamilyID=5cd4dcd7-d3e6-4970-875e-aba93459fbee ) 17. Run FilterPackx64.EXE. 18. Click Next. 19. Click I accept the terms in the License Agreement, and click Next. 20. Click OK once installation is complete. 21. Click StartAdministrative ToolsServices. 22. Right-click the Net.Tcp Port Sharing service, and click Properties. 23. Change the Net.Tcp Port Sharing startup type to Automatic, and click OK. 24. Open command prompt, type ServerManagerCmd –i RSAT-ADDS, and press Enter. 25. Reboot the server. Installing Exchange Server 2010 SP2 on VM1 After completing the following steps for VM1, repeat them for the other VMs. 1. Insert the Exchange Server 2010 installation DVD, and capture the DVD drive in the VM session. When the Autoplay window appears, click Run Setup.EXE. Server consolidation with the Dell PowerEdge M620 A Principled Technologies test report 14
- 15. 2. The installer should consider steps 1 and 2 to be complete (they appear grayed out). Click the link to Step 3: Choose Exchange Language Option. 3. Click Install only languages from the DVD. 4. Click the link to Step 4: Install Microsoft Exchange Server. 5. To go past the introduction screen, click Next. 6. Accept the license agreement, and click Next. 7. Select No for error reporting, and click Next. 8. Select Typical Exchange Server Installation, and click Next. 9. Leave the organization name at default (First Organization), and click Next. 10. At the question about client computers running Outlook 2003 or Entourage, select No, and click Next. 11. To accept defaults for Configure Client Access server external domain, click Next. 12. At the Customer Experience Improvement Program screen, select I don’t wish to join the program at this time, and click Next. 13. Click Install to start the installation process. 14. Once the installation has completed, click Finish. Exchange should automatically open the Exchange Management Console. Configuring LoadGen 2010 clients We installed Windows Server 2008 R2 SP1 on all clients. We installed the latest updates on as of 1/17/2012. Configuring client 1 1. Change the Computer name to Client 1 2. Set NIC to the following: IP address: 192.168.10.120 Subnet mask: 255.255.255.0 Default Gateway: 192.168.10.110 3. Join the domain Dell.Lear.com. 4. Reboot when necessary. Installing .Net 3.5.1 A prerequisite for LoadGen is that you have .NET 3.5.1 Installed on the client. Repeat these steps for each client after joining the domain. 1. On Client1, click Server Manager. 2. On Server Manager, expand Features. 3. At Features, click Add. 4. At the Features screen, check .Net Framework 3.5.1. 5. At the Add Features Wizard, click Add Required Role Services. 6. At the Select Features screen, click Next. 7. At the Web Server (ISS), screen click Next. 8. At the Select Role Services screen, click Next. 9. At the Confirm Installation Selections screen, click Install. Installing LoadGen 2010 Repeat this for each client after joining the domain. 1. Double click loadgen2010.exe. 2. At the Welcome screen, click Next. 3. At the EULA screen, accept, and click Next. 4. At the Select Installation Folder screen, click Next. Server consolidation with the Dell PowerEdge M620 A Principled Technologies test report 15
- 16. 5. At the Confirm Installation screen, click Next 6. At the Installation Complete screen, click Close. 7. At the Restart Your System prompt, click Yes. Configuring client 2 1. Change the Computer name to Client 2. 2. Set a NIC to the following: IP address: 192.168.20.120 Subnet mask: 255.255.255.0 Default Gateway: 192.168.20.110 3. Join the domain Dell2.lear2.com. Configuring client 3 1. Change the Computer name to Client 3. 2. Set a NIC to the following: IP address: 192.168.30.120 Subnet mask: 255.255.255.0 Default Gateway: 192.168.30.110 3. Join the domain Dell3.lear.com. Configuring client 4 1. Change the Computer name to Client 4. 2. Set a NIC to the following: IP address: 192.168.40.120 Subnet mask: 255.255.255.0 Default Gateway: 192.168.40.110 3. Join the domain Dell4.lear.com. Preparing LoadGen on the clients 1. Select StartAll ProgramsMicrosoft ExchangeExchange Load Generator. 2. When the Load Generator window appears, select Start a new test. 3. Select Create a new test configuration, and click Continue. 4. In the Specify test settings window, type Password1 as the Directory Access Password and Mailbox Account Master Password, and click Continue with recipient management. 5. Make 2,000 users in the Mailbox Database, and click Continue. 6. To accept defaults for Advanced recipient settings, click Continue. 7. In the Specify test user groups window, select the plus sign (+) to add a user group. 8. Change the Client Type to Outlook 2007 Cached and the Action Profile to Average, 100MB and click Continue. 9. Leave defaults in Remote configurations, and click Continue. 10. Click Save the configuration file as, and name it 100x2000.cfg 11. Click Start the initialization phase (recommended before running the test) to start initialization. The initialization process might take a few hours. Backing up the mail database on clients On the test server, once you have set up LoadGen and created its initial mail database, you need to back up that database and logs so you can have clean copies for each test. Use this process to back up that database: 1. Select StartAll ProgramsMicrosoft Exchange Server 2010Exchange Management Console in the mail server. 2. In the left pane, under Server Configuration, click Mailbox. 3. In the right pane, right-click Mailbox Database, and select Dismount Database from the menu. Server consolidation with the Dell PowerEdge M620 A Principled Technologies test report 16
- 17. 4. At the Do you want to continue? pop-up message, click Yes. 5. Right-click Public Folder Database, and select Dismount Database from the menu. 6. At the Do you want to continue? pop-up message, click Yes. The red arrow appears when you have dismounted the Public Folder Store. 7. Using Windows Explorer, create two new folders: C:backupmailstore and C:backuppublicstore. 8. With Windows Explorer, copy all files from D:DBMailboxFirst Storage Group to D:backup. This process may take several minutes. 9. Close Windows Explorer. 10. In Exchange Management Console, right-click Mailbox Database, and select Mount Database from the menu. 11. Right-click the Public Folder Database, and select Mount Database from the menu. 12. Close Exchange System Manager. Configuring the HP ProLiant BL460c G6 Figure 8 illustrates our HP test bed setup. We configured the HP ProLiant BL460c G6 as a standalone Exchange server environment with all roles included. We used separate virtualized servers for Active Directory and LoadGen client. We connected the HP server to the HP StorageWorks Storage via two 4 Gb/s Fibre Channel cables. We configured the storage with one RAID 10 disk group with 24 disks. We created one 10GB volume for the Exchange logs, which we connected to the HP and assigned to one FC port. We created one 1TB volume in the same disk group, which we connected to the HP server and assigned to another FC port. Server consolidation with the Dell PowerEdge M620 A Principled Technologies test report 17
- 18. Figure 9: The HP ProLiant BL460c G6 test bed we used. We used the BIOS RAID configuration utility to create one two-disk RAID 1 for the operating system and external storage for the LoadGen databases. We installed Windows Server 2008 R2 SP1 with the latest updates as of 1/9/2012. Setting the computer name 1. Click StartAdministrative ToolsServer Manager. 2. In the right pane, click Change System Properties. 3. Under the Computer Name tab, click Change… 4. Change the Computer name to BL460c 5. Reboot the system. Adding DB drives to Windows 1. Click Start right-click My Computer, and select Manage. 2. Expand Storage, and select disk management. 3. Select the Offline Drive, and right-click and select Online 4. Right-click the volume, and select New Simple Volume. 5. Name the new volume DB and click OK. Setting up the network configuration on the server 1. Click StartNetwork. Server consolidation with the Dell PowerEdge M620 A Principled Technologies test report 18
- 19. 2. Click Network and Sharing Center. 3. Click Manage Network Connections. 4. Right-click Local Area Connection. 5. Click Properties. 6. Click Internet Protocol Version 4 (TCP/IPv4), and click Properties. 7. Select Use the following IP Address, and input the following numbers: IP address: 192.168.5.105 Subnet mask: 255.255.255.0 8. Click OK to close the window. 9. At the Local Area Connection Properties window, click Close. 10. Close the Network Connection window. Joining the domain 1. Click Startright-click My ComputerProperties. 2. Click Change settings. 3. On the System Properties screen, click Change. 4. On the Computer Name/domain changes screen, click Domain radio, and type HP.lear 5. Enter in the credentials to the AD machine. 6. At the welcome prompt, click OK. 7. Close the computer Name/Domain Changes screen. 8. At the reboot prompt, click Yes. Installing Exchange Server 2007 SP3 1. Select Start Administrative Tools Server Manager. 2. Click Add Roles. 3. At the Before You Begin screen, click Next. 4. At the Select Server Roles screen, click Web Server (IIS). 5. If prompted by an Add features required for Web Server (IIS) pop-up window, click Add Required Features. 6. Click Next. 7. At the Web Server (IIS) screen, click Next. 8. At the Select Role Services screen, select the IIS 6 Metabase Compatibility, IIS 6 Management Console, Basic Authentication, Windows Authentication, Digest Authentication, Static and Dynamic content Compression checkboxes, Static Content, Directory Browsing, HTTP Logging, Request Filtering and click Next. 9. At the Confirm Installation Selections screen, click Install. 10. At the Installation Results screen, click Close. 11. Select StartAdministrative ToolServer Manager. 12. Click Features. 13. Click Add Features. 14. Select .NET Framework 3.5.1 Features. 15. When the Add Features Wizard pop-up window prompts you, click Add Required Role Services. 16. Click Next. 17. At the Introduction to Web Server (IIS) screen, click Next. 18. At the Select Role Services screen, click Next. 19. Click Install. 20. At the Installation Results screen, click Close. 21. Download the Microsoft Filter Pack 2.0. (http://www.microsoft.com/downloads/en/details.aspx?FamilyID=5cd4dcd7-d3e6-4970-875e-aba93459fbee) 22. Run FilterPackx64.EXE. 23. Click Next. Server consolidation with the Dell PowerEdge M620 A Principled Technologies test report 19
- 20. 24. Click I accept the terms in the License Agreement, and click Next. 25. Click OK once installation is complete. 26. Click StartAdministrative ToolServices. 27. Right-click the Net.Tcp Port Sharing service, and click Properties. 28. Change the Net.Tcp Port Sharing startup type to Automatic, and click OK. 29. Open command prompt and type ServerManagerCmd –i RSAT-ADDS, and hit Enter. 30. Reboot the server. 31. Insert the Exchange Server 2007 SP3 installation DVD, and capture the DVD drive in the VM session. When the Autoplay window appears, click Run Setup.EXE. 32. The installer should consider steps 1 and 2 to be complete (they appear grayed out). Click the link to Step 3: Choose Exchange Language Option. 33. Click Install only languages from the DVD. 34. Click the link to Step 4: Install Microsoft Exchange Server. 35. To go past the introduction screen, click Next. 36. Accept the license agreement, and click Next. 37. Select No for error reporting, and click Next. 38. Select Typical Exchange Server Installation, and click Next. 39. Leave the organization name at default (First Organization), and click Next. 40. At the question about client computers running Outlook 2003 or Entourage, select No and click Next. 41. To accept defaults for Configure Client Access server external domain, click Next. 42. At the Customer Experience Improvement Program screen, select I don’t wish to join the program at this time, and click Next. 43. Click Install to start the installation process. 44. Once the installation has completed, click Finish. Exchange should automatically open the Exchange Management Console. 45. If Exchange does not automatically open the Exchange Management Console, click Start All Programs Microsoft Exchange Server 2007 Exchange Management Console. Enabling circular logging 1. Click StartAll ProgramsMicrosoft Exchange Server 2007Exchange Management Console. 2. Expand Server Configuration, and click Mailbox. 3. Right-click First Storage Group, and click Properties. 4. Check the box beside Enable circular logging, and click OK. Disabling Maintenance Schedule 5. Click StartAll ProgramsMicrosoft Exchange Server 2007Exchange Management Console. 6. Expand Server Configuration, and click Mailbox. 7. Right-click Mailbox Database, and click Properties. 8. Click Customize. 9. Double-click the empty gray box above Sunday. 10. Ensure that all cells on the graph turn white, and click OK. 11. Click OK. Disabling Microsoft Search Indexer Service 1. Click StartAdministrator ToolsServices. 2. Select Microsoft Exchange Search Indexer, and right-click Properties. 3. On the properties screen Startup Type change to Disabled, and click Stop. 4. Click OK, and close the Services screen. Server consolidation with the Dell PowerEdge M620 A Principled Technologies test report 20
- 21. Changing the default Mailbox Database drive location 1. Click Start, and click Exchange Management Console. 2. Right-click Mailbox Database. 3. Select Move Database Path. 4. Click Browse, navigate to E:Database, and click Save. 5. Click Move. 6. When the application prompts you to dismount the mailbox database, click Yes. 7. Click Finish. Installing LoadGen 2010 on HP Client On a client with Windows Server 2008 R2 SP2 that is already part of the domain, perform the following steps: 1. Select StartAdministrative ToolServer Manager. 2. Click Features. 3. Click Add Features. 4. Select .NET Framework 3.5.1 Features. 5. When the Add Features Wizard pop-up window prompts you, click Add Required Role Services. 6. Click Next. 7. At the Introduction to Web Server (IIS) screen, click Next. 8. At the Select Role Services screen, click Next. 9. Click Install. 10. At the Installation Results screen, click Close. 11. Select the Loadgen2010 .EXE 12. At the welcome screen, click Next. 13. Accept the EULA, and click Next. 14. On the Select Installation Folder, click Next. 15. At the installation confirmation, click Next. 16. At the Installation complete screen, click Next. 17. On the Restart your systems prompt, click Yes. Preparing LoadGen 1. Select StartAll ProgramsMicrosoft ExchangeExchange Load Generator. 2. When the Load Generator window appears, select Start a new test. 3. Select Create a new test configuration, and click Continue. 4. In the Specify test settings window, type Password1 as the Directory Access Password and Mailbox Account Master Password, and click Continue with recipient management. 5. Make 2,000 users in the Mailbox Database, and click Continue. 6. To accept defaults for Advanced recipient settings, click Continue. 7. In the Specify test user groups window, select the plus sign (+) to add a user group. 8. Change the Client Type to Outlook 2007 Cached and the Action Profile to Average, 100MB and click Continue. 9. Leave defaults in Remote configurations, and click Continue. 10. Click Save the configuration file as, and name it 100x2000.cfg 11. Click Start the initialization phase (recommended before running the test) to start initialization. The initialization process might take a few hours. Backing up the mail database on the HP ProLiant BL460c G6 On the test server, once you have set up LoadGen and created its initial mail database, you need to back up that database and log files so you can have clean copies for each test. Use this process to back up that database: Server consolidation with the Dell PowerEdge M620 A Principled Technologies test report 21
- 22. 1. Select StartAll ProgramsMicrosoft Exchange Server 2007Exchange Management Console in the mail server. 2. In the left pane, under Server Configuration, click Mailbox. 3. In the right pane, right-click Mailbox Database, and select Dismount Database from the menu. 4. At the Do you want to continue? pop-up message, click Yes. 5. Right-click Public Folder Database, and select Dismount Database from the menu. 6. At the Do you want to continue? pop-up message, click Yes. The red arrow appears when you have dismounted the Public Folder Store. 7. Using Windows Explorer, create two new folders: C:backupmailstore and C:backuppublicstore. 8. With Windows Explorer, copy all files from D:DBMailboxFirst Storage Group to D:backup. This process may take several minutes. 9. Close Windows Explorer. 10. In Exchange Management Console, right-click Mailbox Database, and select Mount Database from the menu. 11. Right-click the Public Folder Database, and select Mount Database from the menu. 12. Close Exchange System Manager. Server consolidation with the Dell PowerEdge M620 A Principled Technologies test report 22
- 23. APPENDIX C - TCO DETAILS In this section, we detail the assumptions we used to calculate TCO for the two solutions. Figure 10 presents a breakdown of the costs for the two solutions. Dell PowerEdge M620 HP ProLiant BL460c G6 solution solution Acquisition costs Hardware purchase $9,187.00 Software cost - VMware vSphere5 Standard $1,990.00 Migration (planning and setup) $5,900.40 Total acquisition costs $17,077.40 Annual operational costs OS Software support Windows Server 2008 R2 Enterprise Edition (per server) $589.50 $2,358.00 VMware vSphere 5 Standard with Basic Support and Subscription (licensed per processor) $646.00 N/A Exchange software support (Windows Exchange Standard Edition - 2007 for legacy, 2010 for 12G) $708.00 $708.00 Hardware support $599.67 $1,226.68 Administration costs $2,324.18 $10,226.40 Energy costs $277.10 $794.20 Port costs (2 ports per server) $500.00 $1,000.00 Data center space costs $62.14 $248.56 Total annual operational costs $5,706.59 $16,561.84 Total 3-year operational costs $17,119.77 $49,685.52 Total costs $34,197.17 $49,685.52 Figure 10: Three-year acquisition and operating costs for each solution. Lower costs are better. Hardware costs Dell provided us with hardware costs for the Dell PowerEdge M620, which had not been released at the time of this report. Our testing was on a pre-release model. Costs do not include discounts, shipping, or taxes. Dell quoted a price of $9,187.00 for the configuration we tested (see Appendix A). Migration costs We assume that the migration from the existing servers to the Dell PowerEdge M620 will take 120 hours. Migration includes the staff costs of planning the migration, ordering the hardware, setting up the server, and migrating software and databases. We estimate this cost at $5,900.40 based on 120 hours of a server administrator with an hourly cost of $49.17. To calculate the hourly rate, we used the mean annual wage of $72,200 for a network and computer systems administrator as reported in the Bureau of Labor Statistics Occupational Employment and Wages for May 2010. 1 We added an additional 41.64 percent to cover benefits for total annual salary cost of $102,264.08, which would have 1 http://www.bls.gov/oes/current/oes151142.htm Server consolidation with the Dell PowerEdge M620 A Principled Technologies test report 23
- 24. an equivalent hourly full time wage equivalent of $49.17. We estimated the benefits rate using data in another Bureau of Labor Statistics report: Employer Costs for Employee Compensation – September 2011.2 Software licenses For each solution, we assume the enterprise maintains current Microsoft Software Assurance on the Microsoft Windows Server software and Microsoft Exchange software and that their licensing allows them to migrate the software between servers. We also assume they can renew the Software Assurance agreements for the three years in this analysis. We assume the existing solution runs Windows Server 2008 R2 Enterprise using per-server licensing. This license model requires CAL licenses. We do not include CAL costs in this analysis because the number of users or devices and therefore Windows CALS would be the same for both solutions. We used software pricing from the Microsoft License Advisor tool 3 and used the Quick Quote option there to find the single license price for a Microsoft Open License for corporate organizations with the No Level pricing level. The prices quoted there are $2,358 per Windows Server 2008 R2 Enterprise Edition and $708 per Microsoft Exchange 2010 Standard Edition. Annual Software Assurance is one-fourth the license cost. We assign the savings of the Software Assurance payments to the Dell PowerEdge M620 solution for any existing licenses that that solution doesn’t need. We assume our hypothetical enterprise paid for the original license upfront and makes annual Microsoft Software Assurance payments. We also assume they can either cancel the Software Assurance agreements for licenses that the Dell PowerEdge M620 solution does not need or can use the licenses elsewhere. The Dell PowerEdge M620 solution requires only one Windows Server 2008 R2 Enterprise Edition license. One license supports an instance of the server software in one physical and four virtual operating system environments. The existing environment also needed one license per server, for a total of four. The Dell PowerEdge M620 solution uses only one of the four licenses on the existing model. The Microsoft Exchange Server 2010 Standard Edition supports up to five mail stores and the Enterprise edition supports more. The Standard edition is the choice for the single database used by the hypothetical enterprise. Microsoft Exchange Standard Edition per-license costs are the same for the two solutions. Microsoft Software Assurance includes upgrade options that will allow an upgrade from Microsoft Exchange 2007 to Microsoft Exchange 2010 at no additional license cost. List prices and costs for Software Assurance coverage were the same for Windows Exchange Server 2007 as they are for Windows Exchange Server 2010. Microsoft Exchange Server is priced on a per-instance basis. We assume the enterprise would migrate and upgrade the Microsoft Exchange licenses from the existing servers to the Dell PowerEdge M620 server. As a result, the four physical instances on the existing solution and the four virtual machine instances on the Dell PowerEdge M620 solution both have the same license count and same ongoing Software Assurance cost. 2 http://www.bls.gov/news.release/ecec.t05.htm, Bureau of Labor Statistics report: Employer Costs –September 2011, Table 5. Private industry, by major occupational group and bargaining status, Management, Professional and Related column. That report estimates that salary is 70.6 percent and benefits are 29.4 percent of total compensation for Management, Professional and Related employees in private industry. Using those numbers we calculate benefits as 41.64% of salary. 3 http://www.microsoft.com/licensing/mla/default.aspx Server consolidation with the Dell PowerEdge M620 A Principled Technologies test report 24
- 25. The Dell PowerEdge M620 solution requires VMware vSphere 5 Standard Edition licensing for virtualization, which costs $995 per processor, for a total of $1,990 for the two-socket PowerEdge M620. Hardware support Dell provided a quote of $1,799 for three-year support for the Dell PowerEdge M620 server. We base the HP support estimate on the support for the HP ProLiant BL460c G6 on the three-year support cost listed on the HP Store for the HP ProLiant BL460c G6 models. Figure 11 shows the hardware support costs for each solution. 3-year 1-year Annual cost per solution HP Support: HP Care Pack 3-year, 6-Hour, Call-to-Repair BL4xxc Server Blade Hardware Support - electronic $920.00 $306.67 $1,226.68 Dell Support: 3 Year ProSupport and Mission Critical 4HR 7x24 Onsite Pack $1,799.00 $599.67 $599.67 Figure 11: Hardware support for the two solutions. Energy costs Figure 12 shows the calculations for the annual energy cost estimates. Annual costs - Energy costs Dell PowerEdge M620 HP ProLiant BL460c G6 Cost per kWh 0.1039 0.1039 Typical watts 169.14 109.08 Annual kWh per server 1481.67 955.50 Multiplier for cooling 1.8 2.0 Total kWh for power and cooling one server 2667.0 1911.0 Annual energy cost per server $277 $199 Annual energy cost for solution $277 $794 Figure 12: Energy cost calculations for the two solutions. Rack and space costs We assume each server has two ports out and that the data center charges an annual per port cost of $250. For data center space, each server uses 1/16th of 10u or .63u. Because one u of space costs $98.64, the data center space for each server costs approximately $62.14. Server consolidation with the Dell PowerEdge M620 A Principled Technologies test report 25
- 26. ABOUT PRINCIPLED TECHNOLOGIES We provide industry-leading technology assessment and fact-based marketing services. We bring to every assignment extensive experience with and expertise in all aspects of technology testing and analysis, from researching new technologies, to developing new methodologies, to testing with existing and new tools. Principled Technologies, Inc. 1007 Slater Road, Suite 300 When the assessment is complete, we know how to present the results to a Durham, NC, 27703 www.principledtechnologies.com broad range of target audiences. We provide our clients with the materials they need, from market-focused data to use in their own collateral to custom sales aids, such as test reports, performance assessments, and white papers. Every document reflects the results of our trusted independent analysis. We provide customized services that focus on our clients’ individual requirements. Whether the technology involves hardware, software, Web sites, or services, we offer the experience, expertise, and tools to help our clients assess how it will fare against its competition, its performance, its market readiness, and its quality and reliability. Our founders, Mark L. Van Name and Bill Catchings, have worked together in technology assessment for over 20 years. As journalists, they published over a thousand articles on a wide array of technology subjects. They created and led the Ziff-Davis Benchmark Operation, which developed such industry-standard benchmarks as Ziff Davis Media’s Winstone and WebBench. They founded and led eTesting Labs, and after the acquisition of that company by Lionbridge Technologies were the head and CTO of VeriTest. Principled Technologies is a registered trademark of Principled Technologies, Inc. All other product names are the trademarks of their respective owners. Disclaimer of Warranties; Limitation of Liability: PRINCIPLED TECHNOLOGIES, INC. HAS MADE REASONABLE EFFORTS TO ENSURE THE ACCURACY AND VALIDITY OF ITS TESTING, HOWEVER, PRINCIPLED TECHNOLOGIES, INC. SPECIFICALLY DISCLAIMS ANY WARRANTY, EXPRESSED OR IMPLIED, RELATING TO THE TEST RESULTS AND ANALYSIS, THEIR ACCURACY, COMPLETENESS OR QUALITY, INCLUDING ANY IMPLIED WARRANTY OF FITNESS FOR ANY PARTICULAR PURPOSE. ALL PERSONS OR ENTITIES RELYING ON THE RESULTS OF ANY TESTING DO SO AT THEIR OWN RISK, AND AGREE THAT PRINCIPLED TECHNOLOGIES, INC., ITS EMPLOYEES AND ITS SUBCONTRACTORS SHALL HAVE NO LIABILITY WHATSOEVER FROM ANY CLAIM OF LOSS OR DAMAGE ON ACCOUNT OF ANY ALLEGED ERROR OR DEFECT IN ANY TESTING PROCEDURE OR RESULT. IN NO EVENT SHALL PRINCIPLED TECHNOLOGIES, INC. BE LIABLE FOR INDIRECT, SPECIAL, INCIDENTAL, OR CONSEQUENTIAL DAMAGES IN CONNECTION WITH ITS TESTING, EVEN IF ADVISED OF THE POSSIBILITY OF SUCH DAMAGES. IN NO EVENT SHALL PRINCIPLED TECHNOLOGIES, INC.’S LIABILITY, INCLUDING FOR DIRECT DAMAGES, EXCEED THE AMOUNTS PAID IN CONNECTION WITH PRINCIPLED TECHNOLOGIES, INC.’S TESTING. CUSTOMER’S SOLE AND EXCLUSIVE REMEDIES ARE AS SET FORTH HEREIN. Server consolidation with the Dell PowerEdge M620 A Principled Technologies test report 26