How to Straw Bale Garden ~ Chicago
•
1 recomendación•346 vistas

How to Straw Bale Garden ~ Chicago Community

Recomendados
Recomendados
Más contenido relacionado
Más de S7W1X
Más de S7W1X (20)
Último
Último (20)
How to Straw Bale Garden ~ Chicago
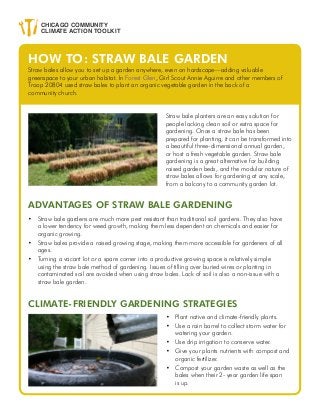
- 1. HOW TO: STRAW BALE GARDEN Straw bales allow you to set up a garden anywhere, even on hardscape—adding valuable greenspace to your urban habitat. In Forest Glen, Girl Scout Annie Aguirre and other members of Troop 20804 used straw bales to plant an organic vegetable garden in the back of a community church. Straw bale planters are an easy solution for people lacking clean soil or extra space for gardening. Once a straw bale has been prepared for planting, it can be transformed into a beautiful three-dimensional annual garden, or host a fresh vegetable garden. Straw bale gardening is a great alternative for building raised garden beds, and the modular nature of straw bales allows for gardening at any scale, from a balcony to a community garden lot. ADVANTAGES OF STRAW BALE GARDENING CLIMATE-FRIENDLY GARDENING STRATEGIES • Straw bale gardens are much more pest resistant than traditional soil gardens. They also have a lower tendency for weed growth, making them less dependent on chemicals and easier for organic growing. • Straw bales provide a raised growing stage, making them more accessible for gardeners of all ages. • Turning a vacant lot or a spare corner into a productive growing space is relatively simple using the straw bale method of gardening. Issues of tilling over buried wires or planting in contaminated soil are avoided when using straw bales. Lack of soil is also a non-issue with a straw bale garden. • Plant native and climate-friendly plants. • Use a rain barrel to collect storm water for watering your garden. • Use drip irrigation to conserve water. • Give your plants nutrients with compost and organic fertilizer. • Compost your garden waste as well as the bales when their 2- year garden life span is up. CHICAGO COMMUNITY CLIMATE ACTION TOOLKIT
- 2. CHOOSE A LOCATION GETTING STARTED: Straw bale gardens have a unique preparation process. Decide on the location and arrangement of your straw bales and put them in place before you begin the preparation process. The bales will be too heavy to move once you have started watering. Make sure to choose a location with plenty of direct sunlight. Place the bales downhill and away from any foundations, to avoid leakage. For cleanliness, if gardening on your deck, porch or balcony, keep bales in a shallow container (such as an under-the-bed sized storage bin). PREPARING THE BALES DAY 1 DAY 2 DAY 3 DAY 4 DAY 5 DAY 6 DAY 7 water thoroughly and keep wet water thoroughly and keep wet water thoroughly and keep wet spinkle bale with 1/2 cup fertilizer, water thoroughly spinkle bale with 1/2 cup fertilizer, water thoroughly spinkle bale with 1/2 cup fertilizer, water thoroughly spinkle bale with 1/4 cup fertilizer, water thoroughly DAY 8 DAY 9 DAY 10 DAY 11 spinkle bale with 1/4 cup fertilizer, water thoroughly spinkle bale with 1/4 cup fertilizer, water thoroughly sprinkle bale with 1 cup of plant food, water thoroughly transplant annuals and vegetables into bale IT TAKES 10 DAYS TO PREPARE STRAW BALES FOR PLANTING wheat or oat straw bales (with synthetic twine preferably) 2.25 cups of organic nitrogren fertilizer and 1 cup organic plant food per bale.
- 3. Transplant directly into bale. Pull open a hole and put plant in. No need for extra soil, but compost will be helpful. Be sure to stake tall growing plants and to support sides of bale if needed. PLANTING THE GARDEN: Most vegetables and annuals will grow in the straw bale medium. The two standard sizes of straw bales are 3 ft x 1 ft and 4 ft x 18 in. With this amount of space, you can plan for about 5 lettuce plants per bale, or 3 tomoato plants. CHICAGO COMMUNITY CLIMATE ACTION TOOLKIT Find this and other climate action tools at climatechicago.fieldmuseum.org © The Field Museum, ECCo, 2012 RESOURCES: http://www.grobergreen.com/straw- bale-gardening/ http://www.no-dig-vegetablegarden. com/straw-bale-gardening.html http://www.growandmake.com/ straw_bale_garden