
Recomendados
Recomendados
Más contenido relacionado
Último
Último (9)
Destacado
Destacado (20)
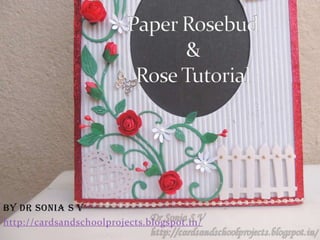
Paper rose and rosebud tutorial
- 1. by Dr Sonia S V http://cardsandschoolprojects.blogspot.in/
- 2. by Dr Sonia S V http://cardsandschoolprojects.blogspot.in/
- 3. Materials required Thin paper Craft punches Scissors Glue Embossing pad or Mouse pad Embossing tool or Rounded end of pen by Dr Sonia S V http://cardsandschoolprojects.blogspot.in/
- 4. •Place the punched flower on a mouse pad /embossing pad •Emboss the punched flower using the embossing tool or the rounded tip of a pen. •Drag the tool from the edge of the petal inwards http://cardsandschoolprojects.blogspot.in/
- 5. To make a rose bud you need 2 flowers embossed into a cup shape by Dr Sonia S V http://cardsandschoolprojects.blogspot.in/
- 6. Cup one punched flower as shown with the petals overlapping by Dr Sonia S V http://cardsandschoolprojects.blogspot.in/
- 7. Overlap & cup the petals so that one edge of the petal is inside a neighboring petal and the other edge is outside its neighboring petal by Dr Sonia S V http://cardsandschoolprojects.blogspot.in/
- 8. Cup the overlapped petals to close the flower into a bud
- 9. Release and let it spring open again
- 10. Apply a little glue on the edge of each petal which is being overlapped atop by another so that on cupping again the glue portions fall inside the rosebud by Dr Sonia S V http://cardsandschoolprojects.blogspot.in/
- 11. Alternately apply a ring of glue on the inside of the petals and cup them into shape again
- 12. Cup the flower petals back into a bud giving a rolling movement with the fingers-be gentle so as to not squish the bud by Dr Sonia S V http://cardsandschoolprojects.blogspot.in/
- 13. On drying the inner bud is formed .If glue stains are visible outside sponge with red ink or even ignore as another layer of petals will cover it by Dr Sonia S V http://cardsandschoolprojects.blogspot.in/
- 14. Apply glue on the center & on the lower half of the petals of the 2nd punched flower and stick the bud by Dr Sonia S V http://cardsandschoolprojects.blogspot.in/
- 15. Cup the outer flower onto the inner bud .Overlap its petals too if desired. Hold for a few seconds for the glue to dry applying pressure at the lower part of the bud as shown by Dr Sonia S V http://cardsandschoolprojects.blogspot.in/
- 16. Your rosebud is nearly ready by Dr Sonia S V http://cardsandschoolprojects.blogspot.in/
- 17. Make a calyx for your rosebud using a pointed petal punched flower from green paper Cut in between 2 petals to the center of the flower by Dr Sonia S V http://cardsandschoolprojects.blogspot.in/
- 18. Emboss the flower into a cup shape by Dr Sonia S V http://cardsandschoolprojects.blogspot.in/
- 19. Optional–Pinch the tips of the petals. Apply glue on one petal and stick the by Dr Sonia S V adjacent petal over it http://cardsandschoolprojects.blogspot.in/
- 20. When an adjacent petal is stuck over one petal you get a 4 pronged calyx by Dr Sonia S V http://cardsandschoolprojects.blogspot.in/
- 21. Apply glue inside the calyx and stick over your rosebud by Dr Sonia S V http://cardsandschoolprojects.blogspot.in/
- 22. Rosebuds by Dr Sonia S V http://cardsandschoolprojects.blogspot.in/
- 23. To make roses use 5-6 punched flowers or even more if you want a fuller flower Emboss all the flowers into cup shape by Dr Sonia S V http://cardsandschoolprojects.blogspot.in/
- 24. Make a rosebud with 2 of the flowers. Apply glue on the center and lower half of all the petals of a 3rd flower by Dr Sonia S V http://cardsandschoolprojects.blogspot.in/
- 25. Wrap it around the rosebud
- 26. You get a fuller rosebud now. Keep layering flowers in a similar fashion to get a fuller rose by Dr Sonia S V http://cardsandschoolprojects.blogspot.in/
- 27. Mini Rose /Bud made with 4 flowers by Dr Sonia S V http://cardsandschoolprojects.blogspot.in/
- 28. To flare the outer petals you can apply glue just at the center of the outer most flower and layer the rose over it
- 29. Apply glue only in the central part of the outer flowers so as to get a bit of flare. Stick the bud , cup and hold for a few seconds to dry by Dr Sonia S V http://cardsandschoolprojects.blogspot.in/
- 30. Thank you by Dr Sonia S V http://cardsandschoolprojects.blogspot.in/