
Recomendados
Más contenido relacionado
La actualidad más candente
La actualidad más candente (19)
Destacado
Destacado (9)
Similar a Sound Slide Tutorial
Similar a Sound Slide Tutorial (20)
Último
Último (20)
Sound Slide Tutorial
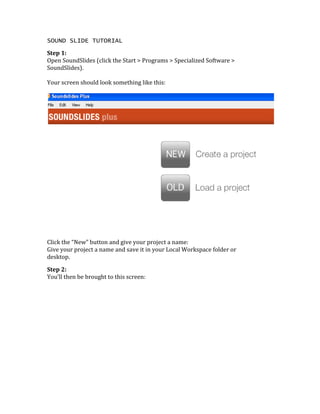
- 1. SOUND SLIDE TUTORIAL Step 1: Open SoundSlides (click the Start > Programs > Specialized Software > SoundSlides). Your screen should look something like this: Click the “New” button and give your project a name: Give your project a name and save it in your Local Workspace folder or desktop. Step 2: You’ll then be brought to this screen: Here’s where you’ll be instructed to import two things: 1) Your photos – JPG button 2) Your audio – SND button Click the JPG button and browse to the folder where your photos are stored in the Local Workspace folder. The program will then import your photos. When it’s done importing the JPG button will have a green checkmark on it. Next, click the Sound button to import your audio. Browse to your file in the Cleveland Exercise folder and choose “audio.mp3.” SoundSlides will then import your audio and open your slideshow. Your screen will look something like this: You’ll see your pictures as thumbnails on the right. The selected photo will appear enlarged on the left. You can drag and drop the thumbnails on the right to reorder your photos. To add additional photos to your slideshow you would hit “ADD IMAGE.” To remove photos, drag the thumbnail to the “OUT” folder. Note the timeline at the bottom of the screen. We’ll make some changes to it later. There are also buttons that allow you to Play, Test and Export your slideshow, as well as a menu and tabs at the top of the screen for changing various settings. Step 3 At this point, you have more photos than you need for your slideshow. Scroll through them and decide which you will keep and which you will discard. Your goal is to CREATE A STORY, with a beginning, middle and end. To remove photos, drag the thumbnail to the “Out” folder. Edit your photos down to a maximum of 10. Tip: To read the captions on each photo, click the “SLIDE INFO” tab: Step 4: Once you have selected your 10 photos, you need to clean up the captions. They’ve come in “raw” from the wires and are much too long to be used in your slideshow. Edit them down to a sentence or two. Select a “look and feel for your slideshow using the settings under the “Template” tab. Note that you can change the colors of your show, set it to play or show captions automatically, select different fonts, etc. You can also change the transitions between the slides, so for instance you can have one picture fade out as another fades in: Once you’re happy with your “look and feel” (tip: click the Test or play button on your timeline to preview), click “Project Info” to put a headline and a credit on your slideshow: Check your timing. Look at your timeline. The length of your slideshow is ALWAYS determined by the length of our audio track, in this case 1 minute. If you want some pictures to appear on the screen longer, mouse to the right edge of the photo in the timeline and drag it to the right to play longer, or the left to play for a shorter time. Step 7: Exporting Your Slideshow When you’re done tweaking your slideshow you’ll have to save it in a format that you can use on a web site. To do that, click the “Export” button. The program will then save a copy of your slideshow in the folder that you specified when you first started the program. Note: Your files will be stored in a folder called “Publish to Web.” To use the slideshow in a web site, you’ll need to move a copy of the Publish to Web folder into the same folder as your web site. Be sure to copy over the ENTIRE folder.