

Recomendados
Más contenido relacionado
Destacado
Destacado (16)
Similar a Getting started-with-qlikview-part-i
Similar a Getting started-with-qlikview-part-i (20)
Más de Amit Sharma
Más de Amit Sharma (20)
Último
Último (20)
Getting started-with-qlikview-part-i
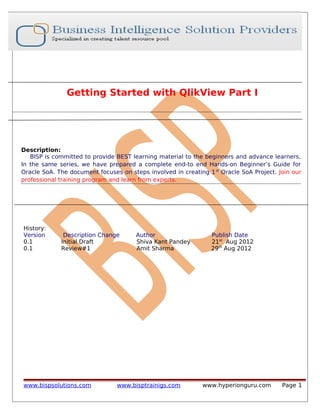
- 1. Getting Started with QlikView Part I Description: BISP is committed to provide BEST learning material to the beginners and advance learners. In the same series, we have prepared a complete end-to end Hands-on Beginner’s Guide for Oracle SoA. The document focuses on steps involved in creating 1 st Oracle SoA Project. Join our professional training program and learn from experts. History: Version 0.1 0.1 Description Change Initial Draft Review#1 www.bispsolutions.com Author Shiva Kant Pandey Amit Sharma www.bisptrainigs.com Publish Date 21st Aug 2012 29th Aug 2012 www.hyperionguru.com Page 1
- 2. 1) Introduction ……………………………………………………… 3 2) Architecture ……………………………………………………… 5 3) Building data model in QlikView ……………………….. 9 4) Creating chart in QlikView ………………………………… 39 www.bispsolutions.com www.bisptrainigs.com www.hyperionguru.com Page 2
- 3. Introduction QlikTech was founded in 1993 as a software company in business intelligence (BI). Its PCbased desktop tool was called QuikView. "Quik" stood for "Quality, Understanding, Interaction, Knowledge." Initially the software was sold only in Sweden. QlikView is the most flexible Business Intelligence platform for turning data into knowledge. More than 24,000 organizations worldwide have enabled their users to easily consolidate, search, and visually analyze all their data for unprecedented business insight using QlikView’s simplicity. QlikView create endless possibilities for making ad hoc queries without requiring tediously defined structures and hierarchies, as is typical in other data analysis tools. QlikView promotes unrestricted analysis of application data, helping users make time-saving and accurate decisions. Main features and benefits of QlikView: Use of an in-memory data model Allows instant, in memory, manipulation of massive datasets Does not require high cost hardware Automated data integration and a graphical analytical environment attractive for customers Fast and powerful visualization capabilities Ease of use - end users require almost no training Highly scalable - near instant response time on very huge data volumes Fast implementation - customers are live in less than one month, and most in a week Flexible - allows unlimited dimensions and measures and can be modified in seconds Integrated - all in one solution: dashboards, power analysis and simply reporting on a single architecture Low cost - shorter implementations result in cost saving and fast return on in vestment Risk free - available as a fully-functional free trial download www.bispsolutions.com www.bisptrainigs.com www.hyperionguru.com Page 3
- 4. ARCHITECTURE OVERVIEW Front end User Documents QlikView qvw QlikView Server QVP or HTTPS Source Documents Back end QLIKVIEW DESKTOP www.bispsolutions.com www.bisptrainigs.com www.hyperionguru.com Page 4
- 5. QlikView QlikView qvw Desktop and qvd file structure Infrastructur e resource QlikView Publisher Directory Catalogue (Active NAS/SAN Storage Directory, E-Directory) www.bispsolutions.com www.bisptrainigs.com Data Source www.hyperionguru.com Page 5
- 6. QLIKVIEW DESKTOP When approaching a decision to implement and deploy QlikView, it’s important to first understand the roles of the various products that comprise a QlikView deployment. QlikView deployments have three main infrastructure components: QlikView Developer, QlikView Server (QVS) QlikView Publisher. QlikView Developer is a Windows-based desktop tool that is used by designers and developers to create. 1) A data extract and transformation model and 2) To create the graphical user interface (presentation layer) QlikView Server (QVS) handles the communication between clients and the QlikView applications. It loads QlikView applications into memory and calculates and presents user selections in real time. QlikView Publisher loads data from different data sources (OLEDB/ODBC, XML, XLS), reduces the QlikView application and distributes to a QVS because differently it’s considered a best practice to separate these two components on different servers. BackEnd (Including Infrastructure source) This is where QlikView source documents, created using the QlikView Developer, reside. These source files contain either a) scripts within QVW files to extract data from the various data sources (e.g. data warehouses, Excel files, SAP, Salesforce.com) or b) the actual binary data extracts themselves within QVD files. The main QlikView product component that resides on the Back End is the QlikView Publisher: the Publisher is responsible for data loads and distribution. Within the Back End, the Windows file system is always in charge of authorization (i.e. QlikView is not responsible for access privileges). FrontEnd The Front End is where end users interact with the documents and data that they are authorized to see via the QlikView Server. It contains the QlikView user documents that have been created via the QlikView Publisher on the back end. The file types seen on the FrontEnd are QVW, .meta and .shared documents. All communication between the client and server occurs here and is handled either via HTTPS (in the case of the AJAX client) or via the QlikView proprietary QVP protocol (in the case of the plugin or Windows client). Within the Front End, the QVS is responsible for client security. Associative In Memory Technology’s QlikView uses an associative in-memory technology to allow users to analyze and process data very quickly. Unique entries are only stored once in-memory: everything else are pointers to the parent data. That’s why QlikView is faster and stores more data in memory than traditional cubes. Memory and CPU sizing is very important for QlikView, end user experience is directly connected to the hardware QlikView is running on. The main performance factors are data model complexity, www.bispsolutions.com www.bisptrainigs.com www.hyperionguru.com Page 6
- 7. amount of unique data, UI design and concurrent users. Building Data Model A data model documents and organizes data, how it is stored and accessed, and the relationships among different types of data. The model may be abstract or concrete. A data model explicitly determines the structure of data. These are the steps of creating data model using QlikView Step1 For creating data model firstly install the QlikView then we can open the QlikView from start-> click on QlikView11. Step2: Then the Icon will responding to start QlikView www.bispsolutions.com www.bisptrainigs.com www.hyperionguru.com Page 7
- 8. Step3: QlikView window will open for accessing the QlikView. Click on New button to create a new dashboard. This window open for loading data from external sources like Excel, etc.. Click on “Cancel”, so that we can save the document with the blank datamodel and dashboard. Step4: To save the created document, click on the “Save” icon as shown below. Save the document anywhere on the local machine. www.bispsolutions.com www.bisptrainigs.com www.hyperionguru.com Page 8
- 9. Provide the File name as “QlikView Demo” Step 5 For loading the tables into the QlikView datamodel, we need to open the Script editor (“Edit Script”) as shown below. Once opened, the Script Editor window will appear with some default set statements. These Set statements will tell QlikView what should be the default number settings to be followed throughout its use in the document. www.bispsolutions.com www.bisptrainigs.com www.hyperionguru.com Page 9
- 10. Step 6 Now the data records as in the form of access or excel sheet this covers the procedure extract which is the fundamental procedure of datawarehousing by connect option we import the access file in which records are saved. Select the Database connection type from Data tab in the Edit Script window as shown below : Now the popup window appear “Data Link Properties”, Then we will need to select the data base “OLE DB..” then the type of OLE DB we want to use then click on “Next”. www.bispsolutions.com www.bisptrainigs.com www.hyperionguru.com Page 10
- 11. Select the data provider under Provider tab, then “Next”. Browse the file or MS Access datadase which we want to import into QlikView. We will select the file “Salesman1.mdb” which is already available in local machine. www.bispsolutions.com www.bisptrainigs.com www.hyperionguru.com Page 11
- 12. Enter the username/pwd to connect to the database and then click on the test connection. A popup window appear with message connection is succeeded. Now that we have successfully connected to the Access database, we can see the connection details in the Script Editor window. www.bispsolutions.com www.bisptrainigs.com www.hyperionguru.com Page 12
- 13. Step 7: Next we have to Load the fields of the MS Access table in the Datamodel. Click on “Select” button as shown below : www.bispsolutions.com www.bisptrainigs.com www.hyperionguru.com Page 13
- 14. Create Select Statement window will appear, displaying all the tables (with fields), views, synonyms & aliases available in the database. Here the fields are shown available in the database By default, the “*” is selected and the default SQL script is displayed in the Script tab, as shown above. We can always have the privilege to select individual fields as required. And the SQL script is automatically generated by QlikView in the Script tab. www.bispsolutions.com www.bisptrainigs.com www.hyperionguru.com Page 14
- 15. Click on OK, to proceed further. Now, in the below “Edit Script” window we can see that we have 2 things : 1) Connection link to the datasource 2) Selected Fields to be loaded into QlikView datamodel. www.bispsolutions.com www.bisptrainigs.com www.hyperionguru.com Page 15
- 16. Step 8 : Now its time to load this data into QlikView. Click on “Reload” button as shown below : Once loaded, we can see all the fields are now available in QlikView datamodel. Select all fields and Add all fields onto Right www.bispsolutions.com www.bisptrainigs.com www.hyperionguru.com Page 16
- 17. Click on “OK”. Now we can see that all the fields are now available as list boxes in QlikView dashboard. www.bispsolutions.com www.bisptrainigs.com www.hyperionguru.com Page 17
- 18. These are the fields Step 9 : Joining more tables of different format. Open Script Editor (Ctrl + E), Click on “Table Files” under Data tab. www.bispsolutions.com www.bisptrainigs.com www.hyperionguru.com Page 18
- 19. Select the “Transaction Table1.xls” > Open “File Wizard : Type” pop-up window will open. The File has been automatically identified by QlikView as “.xls” and all the available fields in the sheet are previewed / displayed. www.bispsolutions.com www.bisptrainigs.com www.hyperionguru.com Page 19
- 20. Click on “Finish”. Now, we can see the load statement is created with all the fields from the excel file in the script editor window. Step 10 : In this step we will see the Generation of keys and relation between them and will join these 2 tables loaded from 2 different sources. Database “salesman1” and table “transactiontable1” contains one field in common. www.bispsolutions.com www.bisptrainigs.com www.hyperionguru.com Page 20
- 21. 1) If one of the field in both tables are same then QlikView automatically generates the relation between both tables and will merge the keys. Here the salesman id field as well as values are same so the relation automatic ally generated From here you can select those keys which you wants to display in listbox by double clicking the key. Select more fields to the right, to be displayed in dashboard. www.bispsolutions.com www.bisptrainigs.com www.hyperionguru.com Page 21
- 23. In the above table, we can see only one “Distributor ID” column, as it the key between the 2 tables. Now we look at the Table Viewer in QlikView to see how the 2 tables are joined and represented. To navigate to Table Viewer, Click on below shown icon or Ctrl + T Table The two tables automatically containing the join due to the same key field which is “Salesman Viewer ID” www.bispsolutions.com www.bisptrainigs.com www.hyperionguru.com Page 23
- 24. 2) We now have another scenario, in which the field format / name is little bit different but contains the value same between tables.In this case join will not be automatically created as the field names are not matching. But we have to establish join between those fields. To sort this out, we will now import one more database / table (customer table.xlxs) into QlikView datamodel to see how we can fix this. Below are the fields of the table “customer table.xlxs” www.bispsolutions.com www.bisptrainigs.com www.hyperionguru.com Page 24
- 25. We will now directly import this into the datamodel. Click Finish. Click Reload. Now looking at the Sheet Properties window which pops-up automatically after the reload is done. Here the two fields are shown : First one is “customer ID” from transactiontable1.xls Another one is “Customer ID” from customertable.xlxs. www.bispsolutions.com www.bisptrainigs.com www.hyperionguru.com Page 25
- 26. The difference is the “c” in both the fields / columns. “c” in one table exsist in uppercase or in another exists in lowercase. This mean key is not allowed / possible. QlikView Rule : To have join between a common field in 2 tables, the column names should be similar, as QlikView is case-sensitive. Now when we see in the Table Viewer, there isn’t any join created between the 2 tables, just because of the “c” is in different case in both the column names. www.bispsolutions.com www.bisptrainigs.com www.hyperionguru.com Page 26
- 27. so the solution is that we have to do editing in scripting section where all the three database's script are already loaded. With the "as" keyword we will establish the relation and show that both fields are same and will rename the column name in “Customer table.xlxs” load statement in Script Editor. Load [customer ID] as [Customer ID] www.bispsolutions.com www.bisptrainigs.com www.hyperionguru.com Page 27
- 28. Now we can see the two keys start containing the relation ship between three tables. www.bispsolutions.com www.bisptrainigs.com www.hyperionguru.com Page 28
- 29. Step 11 : Now we will see how to add new list boxes / fields in the QlikView dashboard as and when required. Rightclick ->new sheet object->list box www.bispsolutions.com www.bisptrainigs.com www.hyperionguru.com Page 29
- 30. This will open the popup window, from where we can select the desired field from the “Field” drop down. We will now select the “product Id” field. www.bispsolutions.com www.bisptrainigs.com www.hyperionguru.com Page 30
- 31. Creating a Chart : www.bispsolutions.com www.bisptrainigs.com www.hyperionguru.com Page 31
- 32. Creating chart using table in which the graph can be implemented between two values / fields, one can be taken in the X-axis and another one on the Y-axis. Before creating the chart, we will do some formatting and clean up of the fields/ list boxes available on the dashboard. We can change the view of field / list box from horizontal to vertical by Ignoring or de-selecting the option “single column”. Now we can see how the values in the “Sales” list box are transposed from Vertical to Horizontal view. www.bispsolutions.com www.bisptrainigs.com www.hyperionguru.com Page 32
- 33. For creating the chart : rightclick on screen->New Sheet Object->Chart www.bispsolutions.com www.bisptrainigs.com www.hyperionguru.com Page 33
- 34. Select the type of chart you want to use Requirement : “Average Sales Vs. Year “ in bar chart format www.bispsolutions.com www.bisptrainigs.com www.hyperionguru.com Page 34
- 35. select chart Choose the fields (Year) with which we have to plot a chart include them by “Add” option www.bispsolutions.com www.bisptrainigs.com www.hyperionguru.com Page 35
- 36. By clicking next the popup window will appear in which you can prefer which type of Expression you want to perform with data. www.bispsolutions.com www.bisptrainigs.com www.hyperionguru.com Page 36
- 37. We can create an expression from a varied choices of available functions. By clicking “Paste” button the expression will be copied in the blank area. The expression we have selected is the “Avg (sales)” www.bispsolutions.com www.bisptrainigs.com www.hyperionguru.com Page 37
- 39. Click on “Finish”. The chart is created which shows the six year Average sales report. www.bispsolutions.com www.bisptrainigs.com www.hyperionguru.com Page 39