
Recomendados
Más contenido relacionado
Destacado
Destacado (18)
Similar a Señalización en emergencias guía y salva
Similar a Señalización en emergencias guía y salva (20)
Último
Último (20)
Señalización en emergencias guía y salva
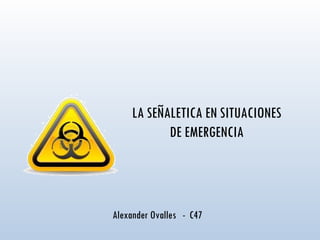
- 1. LA SEÑALETICA EN SITUACIONES DE EMERGENCIA Alexander Ovalles - C47
- 2. La intención de un sistema de códigos visuales es guiar u orientar, como es el caso de las señales de tránsito; o informar como lo es el caso de las señales dispuestas en las grandes tiendas. El objetivo de estas señales puede ser evitar una simple confusión o un lamentable accidente.
- 3. Aunque el término señalética es novedoso, la comunicación visual ha venido realizándose desde hace mucho tiempo para preservar la salud o salvar vidas. ¿Puede reconocer estos ejemplos?
- 4. Pero… Si no se puede predecir cuándo ocurrirá un desastre, ¿Cómo nos ayudará la comunicación visual a conservar la salud y la vida ante tal situación?
- 5. Aunque nunca estaremos suficientemente preparados para una situación de emergencia…
- 6. … la experiencia nos ha demostrado que una adecuada comunicación, antes, durantes y después de estos eventos, puede evitar sufrimiento y daños físicos mayores…
- 7. ¿Cómo? Comunicando para el cuidado: Prevención La señalización para identificar zonas de peligro juega un papel importante en la prevención de situaciones de emergencia.
- 8. Comunicando durante la crisis: Señales que parecen estar “de adorno” juegan un papel elemental en el momento de la crisis: ¿Cómo?
- 9. ¡Gracias!
Notas del editor
- Animated tab slides over five headers (Intermediate) Tip: You will need to use drawing guides to position the shapes and text on the slide. To display and set the drawing guides, do the following: On the Home tab, in the Slides group, click Layout , and then click Blank . R ight-click the slide background area, and then click Grid and Guides . In the Grid and Guides dialog box, under Guide settings , select Display drawing guides on screen . (Note: One horizontal and one vertical guide will display on the slide at 0.00, the default position. As you drag the guides, the cursor will display the new position.) On the slide, do the following: Press and hold CTRL, select the vertical guide, and then drag it left to the 3.50 position. Press and hold CTRL, select the vertical guide, and then drag it left to the 1.75 position. Press and hold CTRL, select the vertical guide, and then drag it right to the 1.75 position. Press and hold CTRL, select the vertical guide, and then drag it right to the 3.50 position. To reproduce the long, thin rectangle on this slide, do the following: On the Home tab, in the Drawing group, click Shapes , and then under Rectangles click Rectangle (first option from the left). On the slide, drag to draw a rectangle. Select the rectangle. Under Drawing Tools , on the Format tab, in the Size group, do the following: In the Shape Height box, enter 0.05” . In the Shape Width box, enter 10” . Under Drawing Tools , on the Format tab, in the bottom right corner of the Shape Styles group, click the Format Shape dialog box launcher. In the Format Shape dialog box, in the left pane, click Line Color . In the Line Color pane, select No line . Also in the Format Shape dialog box, in the left pane, click Shadow . In the Shadow pane, click the button next to Presets , under Outer click Offset Bottom (first row, second option from the left), and then do the following: In the Transparency box, enter 68% . In the Blur box, enter 3.5 pt . In the Distance box, enter 2.2 pt . Also in the Format Shape dialog box, in the left pane, click 3-D Format . In the 3-D Format pane, do the following: Under Bevel , click the button next to Top , and then under Bevel click Circle (first row, first option from the left). Next to Top , in the Width box, enter 15 pt , and in the Height box, enter 3 pt . Under Surface , click the button next to Lighting , and then under Neutral click Balance (first row, second option from the left). In the Angle box, enter 145° . On the slide, drag the rectangle about 0.25” above the 0.00 horizontal drawing guide. (Note: To view the ruler, on the View tab, in the Show/Hide group, select Ruler .) On the Home tab, in the Drawing group, click Arrange , point to Align , and then do the following: Click Align to Slide . Click Align Center . To reproduce the tab (rounded rectangle) on this slide, do the following: On the Home tab, in the Drawing group, click the More arrow to expand the shapes gallery, and then under Rectangles click Round Same Side Corner Rectangle (eighth option from the left). On the slide, drag to draw a rounded rectangle. On the slide, select the rounded rectangle. Under Drawing Tools , on the Format tab, in the Size group, do the following: In the Shape Height box, enter 0.58” . In the Shape Width box, enter 1.33” . Under Drawing Tools , on the Format tab, in the bottom right corner of the Shape Styles group, click the Format Shape dialog box launcher. In the Format Shape dialog box, in the left pane, click Line Color . In the Line Color pane, select No line . Also in the Format Shape dialog box, in the left pane, click Shadow . In the Shadow pane, click the button next to Presets , under Outer click Offset Bottom (first row, second option from the left), and then do the following: In the Transparency box, enter 68% . In the Blur box, enter 3.5 pt . In the Distance box, enter 2.2 pt . Also in the Format Shape dialog box, in the left pane, click 3-D Format . In the 3-D Format pane, do the following: Under Bevel , click the button next to Top , and then under Bevel click Circle (first row, first option from the left). Next to Top , in the Width box, enter 4 pt , and in the Height box, enter 4 pt . Under Surface , click the button next to Lighting , and then under Neutral click Balance (first row, second option from the left). In the Angle box, enter 145° . On the slide, drag the rounded rectangle until the bottom edge touches the top edge of the long, thin rectangle and it is centered on the 3.50 left vertical drawing guide. To reproduce the first text box on this slide, do the following: On the Insert tab, in the Text group, click Text Box . On the slide, drag to draw a text box. Enter TAB ONE , and then select the text. On the Home tab, in the Font group, do the following: In the Font list, select TW Cen MT Condensed . In the Font Size box, enter 22 pt . On the Home tab, in the Paragraph group, click Center to center the text in the text box. On the slide, drag the text box onto the rounded rectangle until the bottom edge of the text is 0.5” above the 0.00 horizontal drawing guide and it is centered on the 3.50 left vertical drawing guide. To reproduce the other text boxes on this slide, do the following: On the slide, select the first text box. On the Home tab, in the Clipboard group, click the arrow under Copy , and then click Duplicate . Repeat this process three more times for a total of five text boxes. Click in one of the duplicate text boxes, delete TAB ONE , and then enter TAB TWO . Drag the second text box until the bottom edge of the text is 0.5” above the 0.00 horizontal drawing guide and it is centered on the 1.75 left vertical drawing guide. Click in another duplicate text box, delete TAB ONE , and then enter TAB THREE . Drag the third text box until the bottom edge of the text is 0.5” above the 0.00 horizontal drawing guide and it is centered on the 0.00 vertical drawing guide. Click in another duplicate text box, delete TAB ONE , and then enter TAB FOUR . Drag the fourth text box until the bottom edge of the text is 0.5” above the 0.00 horizontal drawing guide and it is centered on the 1.75 right vertical drawing guide. Click in the last duplicate text box, delete TAB ONE , and then enter TAB FIVE . Drag the fifth text box until the bottom edge of the text is 0.5” above the 0.00 horizontal drawing guide and it is centered on the 3.50 right vertical drawing guide. Select the text in the first text box. On the Home tab, in the Font group, click the arrow next to Font Color , and then under Theme Colors click White, Background 1 (first row, first option from the left). Repeat this process for each of the other text boxes. To reproduce the animation effects on this slide, do the following: On the Animations tab, in the Advanced Animations group, click Animation Pane . On the Home tab, in the Editing group, click Select , and then click Selection Pane . In the Selection and Visibility task pane, select the rounded rectangle (“Round Same Side Corner Rectangle” object). In the Animation group, click the More arrow to expand the effects gallery, then under Motion Paths , click Lines . In the Animation group, click Effect Options and under Direction , click Right . On the slide, point to the endpoint (red arrow) of the selected motion path until the cursor becomes a two-headed arrow. Press and hold SHIFT, and then drag the endpoint to the 1.75 left vertical drawing guide. In the Selection and Visibility task pane, select the rounded rectangle again. In the Advanced Animation group, click Add Animation , and under Motion Paths , click Lines . In the Animation group, click Effect Options and under Direction , click Right . In the Animation Pane , select the second animation effect (right motion path for the rounded rectangle). On the slide, point to the endpoint (red arrow) of the selected motion path until the cursor becomes a two-headed arrow. Press and hold SHIFT, and then drag the endpoint to the 0.00 vertical drawing guide. On the slide, point to the starting point (green arrow) of the selected motion path until the cursor becomes a two-headed arrow. Press and hold SHIFT, and then drag the starting point to the 1.75 left vertical drawing guide. In the Selection and Visibility task pane, select the rounded rectangle again. In the Advanced Animation group, click Add Animation , and under Motion Paths , click Lines . In the Animation group, click Effect Options and under Direction , click Right . In the Custom Animation task pane, select the third animation effect (right motion path for the rounded rectangle). On the slide, point to the endpoint (red arrow) of the selected motion path until the cursor becomes a two-headed arrow. Press and hold SHIFT, and then drag the endpoint to the 1.75 right vertical drawing guide. On the slide, point to the starting point (green arrow) of the selected motion path until the cursor becomes a two-headed arrow. Press and hold SHIFT, and then drag the starting point to the 0.00 vertical drawing guide. In the Selection and Visibility task pane, select the rounded rectangle again. In the Advanced Animation group, click Add Animation , and under Motion Paths , click Lines . In the Animation group, click Effect Options and under Direction , click Right . In the Custom Animation task pane, select the fourth animation effect (right motion path for the rounded rectangle). On the slide, point to the endpoint (red arrow) of the selected motion path until the cursor becomes a two-headed arrow. Press and hold SHIFT, and then drag the endpoint to the 3.50 right vertical drawing guide. On the slide, point to the starting point (green arrow) of the selected motion path until the cursor becomes a two-headed arrow. Press and hold SHIFT, and then drag the starting point to the 1.75 right vertical drawing guide. In the Animation Pane , press and hold down CTRL and select all four animation effects. On the Animations tab, in the Timing group, do the following: In the Start list, select On Click . In the Duration list, enter 01.00 . On the View tab, in the Show group, clear Ruler and clear Guides . To reproduce the background effects on this slide, do the following: Right-click the slide background area, and then click Format Background . In the Format Background dialog box, click Fill in the left pane, select Gradient fill in the Fill pane, and then do the following: In the Type list, select Linear . Click the button next to Direction , and then click Linear Up (second row, second option from the left). Under Gradient stops , click Add or Remove until two stops appear on the slider, and customize the gradient stops as follows: Select Stop 1 on the slider, and then do the following: In the Position box, enter 65% . Click the button next to Color , and under Theme Colors , click White, Background 1 (first row, first option from the left). Select Stop 2 on the slider, and then do the following: In the Position box, enter 100% . Click the button next to Color, and under Theme Colors , click Blue, Accent 1, Lighter 60% (third row, fifth option from the left).
- Animated tab slides over five headers (Intermediate) Tip: You will need to use drawing guides to position the shapes and text on the slide. To display and set the drawing guides, do the following: On the Home tab, in the Slides group, click Layout , and then click Blank . R ight-click the slide background area, and then click Grid and Guides . In the Grid and Guides dialog box, under Guide settings , select Display drawing guides on screen . (Note: One horizontal and one vertical guide will display on the slide at 0.00, the default position. As you drag the guides, the cursor will display the new position.) On the slide, do the following: Press and hold CTRL, select the vertical guide, and then drag it left to the 3.50 position. Press and hold CTRL, select the vertical guide, and then drag it left to the 1.75 position. Press and hold CTRL, select the vertical guide, and then drag it right to the 1.75 position. Press and hold CTRL, select the vertical guide, and then drag it right to the 3.50 position. To reproduce the long, thin rectangle on this slide, do the following: On the Home tab, in the Drawing group, click Shapes , and then under Rectangles click Rectangle (first option from the left). On the slide, drag to draw a rectangle. Select the rectangle. Under Drawing Tools , on the Format tab, in the Size group, do the following: In the Shape Height box, enter 0.05” . In the Shape Width box, enter 10” . Under Drawing Tools , on the Format tab, in the bottom right corner of the Shape Styles group, click the Format Shape dialog box launcher. In the Format Shape dialog box, in the left pane, click Line Color . In the Line Color pane, select No line . Also in the Format Shape dialog box, in the left pane, click Shadow . In the Shadow pane, click the button next to Presets , under Outer click Offset Bottom (first row, second option from the left), and then do the following: In the Transparency box, enter 68% . In the Blur box, enter 3.5 pt . In the Distance box, enter 2.2 pt . Also in the Format Shape dialog box, in the left pane, click 3-D Format . In the 3-D Format pane, do the following: Under Bevel , click the button next to Top , and then under Bevel click Circle (first row, first option from the left). Next to Top , in the Width box, enter 15 pt , and in the Height box, enter 3 pt . Under Surface , click the button next to Lighting , and then under Neutral click Balance (first row, second option from the left). In the Angle box, enter 145° . On the slide, drag the rectangle about 0.25” above the 0.00 horizontal drawing guide. (Note: To view the ruler, on the View tab, in the Show/Hide group, select Ruler .) On the Home tab, in the Drawing group, click Arrange , point to Align , and then do the following: Click Align to Slide . Click Align Center . To reproduce the tab (rounded rectangle) on this slide, do the following: On the Home tab, in the Drawing group, click the More arrow to expand the shapes gallery, and then under Rectangles click Round Same Side Corner Rectangle (eighth option from the left). On the slide, drag to draw a rounded rectangle. On the slide, select the rounded rectangle. Under Drawing Tools , on the Format tab, in the Size group, do the following: In the Shape Height box, enter 0.58” . In the Shape Width box, enter 1.33” . Under Drawing Tools , on the Format tab, in the bottom right corner of the Shape Styles group, click the Format Shape dialog box launcher. In the Format Shape dialog box, in the left pane, click Line Color . In the Line Color pane, select No line . Also in the Format Shape dialog box, in the left pane, click Shadow . In the Shadow pane, click the button next to Presets , under Outer click Offset Bottom (first row, second option from the left), and then do the following: In the Transparency box, enter 68% . In the Blur box, enter 3.5 pt . In the Distance box, enter 2.2 pt . Also in the Format Shape dialog box, in the left pane, click 3-D Format . In the 3-D Format pane, do the following: Under Bevel , click the button next to Top , and then under Bevel click Circle (first row, first option from the left). Next to Top , in the Width box, enter 4 pt , and in the Height box, enter 4 pt . Under Surface , click the button next to Lighting , and then under Neutral click Balance (first row, second option from the left). In the Angle box, enter 145° . On the slide, drag the rounded rectangle until the bottom edge touches the top edge of the long, thin rectangle and it is centered on the 3.50 left vertical drawing guide. To reproduce the first text box on this slide, do the following: On the Insert tab, in the Text group, click Text Box . On the slide, drag to draw a text box. Enter TAB ONE , and then select the text. On the Home tab, in the Font group, do the following: In the Font list, select TW Cen MT Condensed . In the Font Size box, enter 22 pt . On the Home tab, in the Paragraph group, click Center to center the text in the text box. On the slide, drag the text box onto the rounded rectangle until the bottom edge of the text is 0.5” above the 0.00 horizontal drawing guide and it is centered on the 3.50 left vertical drawing guide. To reproduce the other text boxes on this slide, do the following: On the slide, select the first text box. On the Home tab, in the Clipboard group, click the arrow under Copy , and then click Duplicate . Repeat this process three more times for a total of five text boxes. Click in one of the duplicate text boxes, delete TAB ONE , and then enter TAB TWO . Drag the second text box until the bottom edge of the text is 0.5” above the 0.00 horizontal drawing guide and it is centered on the 1.75 left vertical drawing guide. Click in another duplicate text box, delete TAB ONE , and then enter TAB THREE . Drag the third text box until the bottom edge of the text is 0.5” above the 0.00 horizontal drawing guide and it is centered on the 0.00 vertical drawing guide. Click in another duplicate text box, delete TAB ONE , and then enter TAB FOUR . Drag the fourth text box until the bottom edge of the text is 0.5” above the 0.00 horizontal drawing guide and it is centered on the 1.75 right vertical drawing guide. Click in the last duplicate text box, delete TAB ONE , and then enter TAB FIVE . Drag the fifth text box until the bottom edge of the text is 0.5” above the 0.00 horizontal drawing guide and it is centered on the 3.50 right vertical drawing guide. Select the text in the first text box. On the Home tab, in the Font group, click the arrow next to Font Color , and then under Theme Colors click White, Background 1 (first row, first option from the left). Repeat this process for each of the other text boxes. To reproduce the animation effects on this slide, do the following: On the Animations tab, in the Advanced Animations group, click Animation Pane . On the Home tab, in the Editing group, click Select , and then click Selection Pane . In the Selection and Visibility task pane, select the rounded rectangle (“Round Same Side Corner Rectangle” object). In the Animation group, click the More arrow to expand the effects gallery, then under Motion Paths , click Lines . In the Animation group, click Effect Options and under Direction , click Right . On the slide, point to the endpoint (red arrow) of the selected motion path until the cursor becomes a two-headed arrow. Press and hold SHIFT, and then drag the endpoint to the 1.75 left vertical drawing guide. In the Selection and Visibility task pane, select the rounded rectangle again. In the Advanced Animation group, click Add Animation , and under Motion Paths , click Lines . In the Animation group, click Effect Options and under Direction , click Right . In the Animation Pane , select the second animation effect (right motion path for the rounded rectangle). On the slide, point to the endpoint (red arrow) of the selected motion path until the cursor becomes a two-headed arrow. Press and hold SHIFT, and then drag the endpoint to the 0.00 vertical drawing guide. On the slide, point to the starting point (green arrow) of the selected motion path until the cursor becomes a two-headed arrow. Press and hold SHIFT, and then drag the starting point to the 1.75 left vertical drawing guide. In the Selection and Visibility task pane, select the rounded rectangle again. In the Advanced Animation group, click Add Animation , and under Motion Paths , click Lines . In the Animation group, click Effect Options and under Direction , click Right . In the Custom Animation task pane, select the third animation effect (right motion path for the rounded rectangle). On the slide, point to the endpoint (red arrow) of the selected motion path until the cursor becomes a two-headed arrow. Press and hold SHIFT, and then drag the endpoint to the 1.75 right vertical drawing guide. On the slide, point to the starting point (green arrow) of the selected motion path until the cursor becomes a two-headed arrow. Press and hold SHIFT, and then drag the starting point to the 0.00 vertical drawing guide. In the Selection and Visibility task pane, select the rounded rectangle again. In the Advanced Animation group, click Add Animation , and under Motion Paths , click Lines . In the Animation group, click Effect Options and under Direction , click Right . In the Custom Animation task pane, select the fourth animation effect (right motion path for the rounded rectangle). On the slide, point to the endpoint (red arrow) of the selected motion path until the cursor becomes a two-headed arrow. Press and hold SHIFT, and then drag the endpoint to the 3.50 right vertical drawing guide. On the slide, point to the starting point (green arrow) of the selected motion path until the cursor becomes a two-headed arrow. Press and hold SHIFT, and then drag the starting point to the 1.75 right vertical drawing guide. In the Animation Pane , press and hold down CTRL and select all four animation effects. On the Animations tab, in the Timing group, do the following: In the Start list, select On Click . In the Duration list, enter 01.00 . On the View tab, in the Show group, clear Ruler and clear Guides . To reproduce the background effects on this slide, do the following: Right-click the slide background area, and then click Format Background . In the Format Background dialog box, click Fill in the left pane, select Gradient fill in the Fill pane, and then do the following: In the Type list, select Linear . Click the button next to Direction , and then click Linear Up (second row, second option from the left). Under Gradient stops , click Add or Remove until two stops appear on the slider, and customize the gradient stops as follows: Select Stop 1 on the slider, and then do the following: In the Position box, enter 65% . Click the button next to Color , and under Theme Colors , click White, Background 1 (first row, first option from the left). Select Stop 2 on the slider, and then do the following: In the Position box, enter 100% . Click the button next to Color, and under Theme Colors , click Blue, Accent 1, Lighter 60% (third row, fifth option from the left).