SlideShare una empresa de Scribd logo
1 de 56
Descargar para leer sin conexión
Swing™
EN	   Instructions for use
DE	   Gebrauchsanweisung
FR	   Mode d’emploi
IT	   Istruzioni per l’uso
NL	   Gebruiksaanwijzing
EN	 Parts List
DE	 Teileliste
FR	 Liste des pièces
IT	 Elenco componenti
NL	 Onderdelenlijst


 i                      k   l   m


a

                                    b


c


                                    d

e


                                    f


g


h
EN	 Parts List
DE	 Teileliste                                                                       EN
FR	 Liste des pièces                                                                 4–13


IT	 Elenco componenti
NL	 Onderdelenlijst


a 	 810.7084                                g 	 811.0021

EN	    PersonalFit™ Breastshield 24mm   EN	     Bottle
DE	    PersonalFit™ Brusthaube          DE	     Flasche
FR	    PersonalFit™ Téterelle           FR	     Biberon
IT	    Coppa per il seno PersonalFit™   IT	     Poppatoio
                                                                                     DE
NL	    PersonalFit™ Borstschild         NL	     Melkflesje
                                                                                     14	–	23

 b 	   800.0836                          h 	    810.0462
EN	    PVC tubing                       EN	     Bottle stand
DE	    PVC Schlauch                     DE	     Standfuss
FR	    Tuyau en PVC                     FR	     Support
IT	    Tubicino in PVC                  IT	     Supporto
NL	    PVC Slang                        NL	     Standaard

 c 	   800.7196                          i 	    200.2714
                                                                                     FR
EN     2-Component Connector            EN	     Calma Multi-Lid                      24	–	33
DE	    2-Komponenten Verbindungsstück   DE	     Calma Multi-Deckel
FR	    Connecteur à 2 Composants        FR	     Multi-Couvercles Calma
IT	    Connettore in due parti          IT	     Tappo Calma
NL	    2-componenten aansluiting        NL	     Calma Multi-deksel

d 	 800.0475                                k   800.0838
EN     Valve Head                       EN	     Swing storing bag
DE	    Ventilkopf                       DE	     Swing Aufbewahrungsbeutel
FR     Valve                            FR	     Sachet de conservation Swing         IT
IT	    Testa della valvola              IT	     Sacchetto per conservare Swing       34	–	43
NL	    Vacuümklep                       NL	     Swing bewaarzak

e 	 820.7013                                l   800.0734
EN	    Valve Membrane                   EN	     Sling
DE	    Ventilmembrane                   DE	     Hängeband
FR	    Membrane                         FR	     Lanière
IT	    Membrana                         IT	     Tracolla
NL	    Membraan                         NL	     Draagband
                                                                                     NL
 f 	 600.0975                           m       920.0044 (EURO)/920.0046 (UK)        44	–	53

EN	    Motor unit                       	       920.0043 (US/JP)/920.0045 (AUS/NZ)
DE	    Motoreinheit                     EN	     Mains adapter
FR	    Bloc-moteur                      DE	     Netzadapter
IT	    Unitá motore                     FR	     Adapteur
NL	    Motoreenheid                     IT	     Tasformatore
                                        NL	     Netstroomadapter
Thank you for choosing the Swing Breastpump. Breastmilk is the natural choice for your
4
    baby, but there are reasons and situations where breastfeeding is not possible. For over
    50 years, it has been Medela’s conviction that these mothers and babies can be support-
    ed. In close co-operation with breastfeeding experts, Medela, one of the market leaders,
    has researched and developed breast pumps that perfectly meet breastfeeding mothers
    needs. For mothers who insist on the best for their babies and themselves. Because
    you care.


    Why Swing™?
    Swing is the best solution, if you want to nourish your baby with your milk and remain
    flexible and mobile. The innovative 2-Phase technology enables you to pump efficiently
    and effectively. Moreover Swing is easy to handle, light to transport, perfect for the
    dynamic mother.


                                   What	is	2-Phase	Expression®?	
                                   Medela has been the first company worldwide to deeply
                                   research babies and their feeding behaviour. The results
                                   have led to the development of the 2-Phase-Expression-
                                   Technology. 2-Phase-Expression is based on the natural
                                   sucking rhythm of the baby: Short, stimulating movements
                                   (Stimulation) are followed by longer, more intensive ones
                                   (Expression), ensuring an optimal milkflow. Thus, more
                                   milk can be expressed in a shorter time – and more
                                   comfortably.


    Indications for use
    Swing is an electric or battery powered breastpump for supporting breastfeeding mothers.
    Swing is ideal:
    I	 To help overcome mother or baby breastfeeding problems
       – To relieve sore and cracked nipples
       – To bring out flat or inverted nipples
Important safeguards                                                                       5


When using electrical devices, basic safety precautions should always be followed,
including the following: Read all instructions before use.

Product
I	 Keep appliance dry and do not place in direct sunlight.
I	 Do not get the product wet.
I	 Do not place in or drop motor unit into water or other liquid.
I	 Do not spray or pour liquid directly onto the pump.
I	 Check pump kit components for wear or damage.
I	 This is a single user product. Use by more than one person may present
   a health risk.
I	 There are no user-serviceable parts inside the Swing.
   Do not attempt to repair the Swing Breastpump yourself.

Electrical	parts
I	 Only use the mains adapter that comes with the Swing Breastpump.
I	 Make sure the voltage of the mains adapter is compatible with the power source.
I	 Plug the mains adapter into the Swing Breastpump first and then into the wall socket.
I	 Always unplug electrical devices immediately after using.
I	 Separation from the mains is only assured through the disconnection
   of the mains adapter from the wall socket outlet.
I	 Keep the mains adapter away from heated surfaces.
I	 Do not reach for any electrical device if it has fallen into water.
   Unplug immediately.

Use	
I	   Use the product only for its intended use as described in this instruction manual.
I	   Pump only with the device in an upright position.
I	   Use Medela original accessories only.
I	   Never operate an electrical device if it has a damaged cord or plug,
     if it is not working properly, if it has been dropped or damaged,
     or dropped into water.
I	   The product should never be left unattended when plugged into a
     power source.
I	   Do not use outdoors.
I	   Do not use while bathing or showering.
I	   Do not use while sleeping or overly drowsy.
I	   Supervision is necessary when this product is used in the vicinity of children.
I	   If problems or pain occur, consult your lactation consultant or physician.
I	   Equipment not suitable for use in the presence of explosive atmospheres.
I	   Equipment not suitable for use in the presence of a flammable anaesthetic
     mixture with air or with oxygen or nitrous oxide.
I	 Portable and mobile radio frequency communications equipment can affect
6
       the Swing Breastpump.
    I	 The Swing Breastpump needs special precautions regarding EMC
       (Electromagnetic compatibility) and needs to be installed and put into service
       according to the EMC information provided in these instructions for use.


    SAVE THIS INSTRUCTION MANUAL.
How to clean Swing pump set                                                                7


Please follow these handling and cleaning instructions. Use drinking water quality only.
Disassemble all parts prior to cleaning.


     a                   b                 c       d           e        g              i


  Part                                         a       b   c       d    e      g       i

  Clean	prior	to	first	and	once	daily

  Firstly rinse with hot water by hand,
  second wash with warm soapy water,
                                               ✓       ✓   ✓       ✓    ✓      ✓      ✓
  finally rinse in clean hot water.
  Medela also recommends

  covering with cold water in a saucepan
                                               ✓       ✓   ✓       ✓    ✓      ✓      ✓
  and boiling out for 5 min.

  or washing in top rack of dishwasher         ✓       ✓   ✓       ✓    ✓      ✓      ✓

  or with Quick Clean Microwave Bag            ✓       –   ✓       ✓    ✓      ✓      ✓

  or with b-well Steam Steriliser              ✓       –   ✓       ✓    ✓      ✓      ✓

  Clean	immediately	after	each	use	

  Firstly rinse with hot water by hand,
  second wash with warm soapy water,           ✓       ✓   ✓       ✓    ✓      ✓      ✓
  finally rinse in clean hot water.


Note: Food colourings may discolour components which will not affect performance.
Medela assumes no liability for improper handling.
You can find more information at: www.medela.com
8
    How to prepare your breastpump

       Electrical	operation            Battery	operation


       Firstly, plug the adapter cable Open the cover of the battery   Insert the AA Mignon LR6 bat-
       into the pump, then connect to compartment in the direction     teries and close it again.
       the power socket.               of the arrow.


    Note: The batteries do not need to be removed if the main adapter is used for pumping.
How to assemble your                                                                            9


Swing pump kit


 Push the breastshield onto the then place the membrane on   and push the valve onto
 connector,                     the valve head               the connector.
                                                             Note: ensure sidewise
                                                             position of valve head.


 Screw the connector onto      Insert the tubing into the    Insert the other end of the tub-
 the bottle.                   connector.                    ing into the tubing port
                                                             on the motor unit.
10
     How to use your Swing

                                                         1	 On/Off button
     1                                                   2	 Vacuum decrease button (-)
                                                         3	 Vacuum increase button (+)
     2                                                   4	 Let-down button
                                                         5	 LED
     5
                                                             lights up  On
     3                                                       does not light up  Off
                                                             regular flashing  Stimulation Phase
                                                             light constantly on  Expression Phase
     4                                                       rapid flashing  Min./Max.


     Note: If the pump has been running for 30 minutes without any manipulations,
     the Swing will automatically switch off.


      Centre breastshield over        Switch on the breastpump         Adjust the vacuum strength by
      your nipple.                    by pressing 1.                   pressing 2/3.
                                      Now the Stimulation
                                      Phase starts.


      Once your milk starts to flow, press 4 to switch to
      the Expression Phase.
      After two minutes the pump will automatically switch
      from the Stimulation to the Expression Phase.
How to store/thaw breastmilk                                                                 11


Medela recommends using the following guidelines for storing and thawing
breastmilk. These apply to healthy, full-term babies.


                           Room		         Refrigerator    Refrigerator	    Freezer
                           temperature                    freezer		
                                                          compartment
   Freshly	expressed	      Do not store   3-5 days        6 months at      12 months at
   breastmilk              at room        at 4°C          approx. -16°C    approx. -18°C
                           temperature

   Thawed	breastmilk		     Do not store   10 hours          Do not refreeze after thawing!
   (previously	frozen)


I	 Never fill bottles/bags more than ¾ full to allow space for possible expansion.
I	 Do not thaw frozen breastmilk in a microwave oven or in a pan of boiling water
   (danger of burning).
12
     Troubleshooting

      Problem                        Solution

      If	the	motor	is	not	running    Check presence of mains current. Check the position of the
                                     batteries in the battery compartment.

      If	the	pump	suction		          Verify the valve head and membrane are clean and not
      is	too	weak	or	there	is		      damaged. Make sure the white membrane is laying flat
      no	suction                     against the valve head.
                                     Ensure sideways position of valve.
                                     Check all connections of the kit and breastpump.
                                     Check the ends of the tubing are fit securely into the back of
                                     the breastshield and into the port on the breastpump.
                                     Take care not to kink tubing.
                                     Ensure the breastshield forms a complete seal around the
                                     breast.

      If	condensation	appears	       Rinse out the tubing. Shake out water droplets and hang
      in	the	tubing                  tubing to air-dry.

      If	milk	gets	into	the	tubing   Turn off the pump and unplug from power source.
                                     Remove and clean the tubing.
                                     Shake out water droplets and hang to air-dry.

      If	milk	accidentally	gets		    Turn off the pump and unplug from power source.
      into	the	pump                  1. Open the battery cover, remove the small, black foam
                                        piece from bottom of pump. Rince the foam piece with
                                        clear, lukewarm water and squeeze out well. Allow to dry
                                        thoroughly.
                                     2. Pour about 2 dl of warm soapy water into a container.
                                     3. Connect the tubing and the power cable onto the pump.
                                     4. Hold the device with the control button upwards over a dry
                                        flushing bath and switch on. Press 4 and by pressing 2
                                        multiple times/twice, ensure that the lowest vacuum level
                                        is set.
                                     5. Hold the end of the tubing that is not connected to the
                                        pump in the container with the soapy water.
                                     6. The water is pumped through the tubing into the device.
                                        Allow it to pump until all the water has been flushed
                                        through.
                                     7. Then leave the device switched on for 3 minutes, until the
                                        pump is completely dry.
                                     8. As soon as the expanded-plastic liner is dry, put it in place
                                        again and close the battery cover.
                                     9. If necessary, clean pump kit according to the instructions
                                        „Prior to first use and once daily“.
Warranty                                                                                 13


In the "International Warranty" booklet you find all information about the warranty.


Disposal
The unit is made of various metal and plastics. Before disposal, the device is to be
rendered unusable and it must not be disposed of as unsorted municipal waste in
accordance with local regulations. Use your local return and collection system for
waste electrical and electronic equipment (incl. batteries). Improper disposal may
have harmful effects on the environment and on public health.


....one more question...
Am	I	using	the	right	size	breastshield?
… Every mother is different and needs her personal size, therefore Medela offers
five different sizes of PersonalFit breastshield. Answer a few short questions at
www.medela.com/IW/en/breastfeeding/good-to-know/right-size-of-breastshield.html
to find out if the available size fits.

Visit our website at www.medela.com. Here you will find answers to all your questions.
Herzlichen Dank, dass Sie sich für die Swing Milchpumpe entschieden haben. Muttermilch
     ist an sich das Beste für ihr Baby, doch es gibt viele Gründe, weshalb Stillen nicht immer
     möglich ist. Als einer der Marktführer setzt sich Medela seit über 50 Jahren mit Über-
     zeugung für das Wohl von Babys und Müttern ein. In Zusammenarbeit mit Stillexperten und
     mit führenden Forschern hat Medela Milchpumpen entwickelt, die optimal auf die
     Bedürfnisse stillender Frauen abgestimmt sind. Für Mütter, die das Beste für ihr Baby und
     sich wollen. «Because you care».


14
     Warum Swing™?
     Möchten Sie flexibel und mobil bleiben und trotzdem Ihr Baby mit Muttermilch ernähren?
     Dann ist Swing die richtige Wahl für Sie. Die innovative 2-Phase Expression Technologie
     ermöglicht es Ihnen effizient abzupumpen. Sie können diese kleine elektrische Milchpumpe
     bequem und diskret überall mitnehmen. Ausserdem ist Swing einfach zu bedienen, leicht
     und leise also perfekt für dynamische Mütter.


                                    Was	ist	2-Phase	Expression®?	
                                    Als weltweit erstes Unternehmen hat Medela das Verhalten
                                    von Babys an der Mutterbrust durch jahrelange
                                    Forschungsarbeit in die 2-Phase Expression Technologie
                                    einfliessen lassen. Diese beruht auf dem natürlichen
                                    Saugrythmus des Babys: Auf kurze, stimulierende
                                    (Stimulationsphase) folgen lange intensive Bewegungen
                                    (Abpumphase), die für optimalen Milchfluss sorgen.
                                    Damit kann auf angenehme Art mehr Milch in weniger
                                    Zeit abgepumpt werden.


     Verwendungszweck
     Die elektrische Milchpumpe Swing dient zum Abpumpen von Muttermilch.
     Swing eignet sich:
     I	 Um Stillschwierigkeiten seitens der Mutter oder des Babys zu lindern/zu überwinden
        – Zur Entlastung von Verletzten und blutenden Mamillen
        – Um Flach- und Hohlwarzen hervorzuholen
Wichtige Sicherheitshinweise
Bei der Verwendung elektrischer Geräte ist stets auf die Einhaltung der grundlegenden
Sicherheitsvorkehrungen zu achten, einschliesslich der Folgenden: Lesen Sie bitte alle
Anweisungen vor dem Gebrauch.

Produkt
I	 Das Gerät trocken halten und nicht direktem Sonnenlicht aussetzen.
I	 Das Gerät nicht nass werden lassen.
I	 Den Motor nicht in Wasser oder andere Flüssigkeiten legen oder fallen lassen.               15
I	 Keine Flüssigkeit direkt auf den Motor sprühen oder schütten.
I	 Die Teile des Pumpsets auf Abnutzung oder Beschädigung überprüfen.
I	 Dieses Produkt ist für nur eine Benutzerin bestimmt. Die Benutzung durch
   verschiedene Personen kann ein Gesundheitsrisiko darstellen.
I	 Swing enthält keine Teile, die vom Kunden zu warten sind. Versuchen Sie nicht,
   die Milchpumpe selbst zu reparieren.

Elektrische	Teile
I	 Ausschliesslich den mit der Milchpumpe Swing gelieferten Netzadapter verwenden.
I	 Sicherstellen, dass die Spannung des Netzadapters mit der Stromquelle kompatibel ist.
I	 Den Netzadapter zuerst in die Milchpumpe Swing und dann in die Steckdose
   einstecken.
I	 Elektrische Geräte nach der Verwendung immer von der Stromversorgung trennen.
I	 Die Trennung vom Versorgungsnetz ist nur durch Trennen des Netzadapters
   von der Steckdose gewährleistet.
I	 Den Netzadapter von heissen Oberflächen fern halten.
I	 Niemals nach einem ins Wasser gefallenen elektrischen Gerät greifen, ohne zuvor
   den Netzadapter herauszuziehen.

Verwendung	
I	 Das Produkt ausschliesslich für den in dieser Gebrauchsanweisung beschriebenen
   Verwendungszweck benutzen.
I	 Nur abpumpen, wenn das Gerät aufrecht steht.
I	 Nur Originalzubehör von Medela verwenden.
I	 Ein elektrisches Gerät nie in Betrieb nehmen, wenn der Netzadapter beschädigt ist,
   wenn es nicht korrekt funktioniert, wenn es heruntergefallen, beschädigt oder ins
   Wasser gefallen ist.
I	 Das Gerät niemals unbeaufsichtigt lassen, wenn es an einer Stromquelle angeschlossen ist.
I	 Gerät nicht im Freien verwenden.
I	 Nicht beim Baden oder Duschen verwenden.
I	 Gerät nicht verwenden, wenn Sie schlafen oder übermässig müde sind.
I	 Bei Verwendung dieses Produkts in der Nähe von Kindern ist eine entsprechende
   Beaufsichtigung notwendig.
I	 Wenn Probleme oder Schmerzen auftreten, wenden Sie sich bitte an Ihre Stillberaterin
   oder Ihren Arzt.
I	 Das Gerät ist nicht für den Betrieb in explosionsgefährdeten Bereichen geeignet.
I	 Gerät nicht in der Nähe entflammbarer Narkosemittelmischungen mit Luft, Sauerstoff
        oder Stickoxid betreiben.
     I	 Tragbare und mobile Radiofrequenz-Kommunikationsgeräte können die Milchpumpe
        Swing beeinflussen.
     I	 Die Milchpumpe Swing erfordert besondere Vorsichtsmassnahmen in Bezug auf EMV
        (Elektromagnetische Verträglichkeit) und muss entsprechend den in dieser
        Gebrauchsanweisung gegebenen EMV-Informationen installiert und in Betrieb
        genommen werden.


16
     BEWAHREN SIE DIESE GEBRAUCHSANWEISUNG SORGFÄLTIG AUF.
Wie Sie Ihr Swing Zubehör reinigen
Beachten Sie bitte die folgenden Hinweise und verwenden Sie nur Trinkwasserqualität.
Vor dem Reinigen nehmen Sie bitte die Teile auseinander.


                                                                                       17


     a                   b                c       d           e       g            i


  Teile                                       a       b   c       d   e     g      i

  Reinigung	vor	dem	ersten	Gebrauch	und	einmal	täglich

  Von Hand mit heissem Wasser abspülen;
  mit warmem Seifenwasser reinigen;
                                              ✓       ✓   ✓       ✓   ✓    ✓      ✓
  mit klarem heissem Wasser spülen.
  Zusätzlich empfiehlt Medela

  in einem Topf mit kaltem Wasser bede-
                                              ✓       ✓   ✓       ✓   ✓    ✓      ✓
  cken und für 5 Min. auskochen.

  oder im oberen Korb des Geschirr-
                                              ✓       ✓   ✓       ✓   ✓    ✓      ✓
  spülers reinigen

  oder mit Quick Clean
                                              ✓       –   ✓       ✓   ✓    ✓      ✓
  Mikrowellen-Beuteln

  oder mit b-well Dampfsterilisator           ✓       –   ✓       ✓   ✓    ✓      ✓

  Reinigung	sofort	nach	jedem	Gebrauch	

  Von Hand mit heissem Wasser abspülen;
  mit warmem Seifenwasser reinigen;           ✓       ✓   ✓       ✓   ✓    ✓      ✓
  mit klarem heissem Wasser spülen.


Hinweis: Farbstoffe von Lebensmitteln können Teile verfärben, was jedoch keinen
Einfluss auf die Funktion hat.
Medela übernimmt keine Haftung für unsachgemässe Reinigung.
Detaillierte Reinigungshinweise finden Sie unter: www.medela.com
Wie Sie die Milchpumpe
     vorbereiten
        Netzbetrieb                   Akkubetrieb


18


        Stecken Sie das Netz-         Öffnen Sie das Batteriefach   Legen Sie die Batterien
        adapterkabel zuerst in die    in Pfeilrichtung.             AA Mignon LR6 ein und
        Pumpe ein, dann an die                                      schliessen es wieder.
        Netzsteckdose anschliessen.


     Hinweis: Beim Abpumpen mit dem Netzadapter müssen die Batterien nicht heraus-
     genommen werden.
Wie Sie das Pumpset
zusammensetzen


                                                                                            19


 Stecken Sie die Brusthaube   dann setzen Sie die Membrane und stecken das Ventil auf das
 auf das Verbindungsstück,    auf den Ventilkopf           Verbindungsstück.
                                                           Hinweis: Positionieren Sie den
                                                           Ventilkopf seitlich.


 Schrauben Sie das            Schliessen Sie den Schlauch   Führen Sie das andere Ende
 Verbindungsstück auf die     an das Verbindungsstück.      des Schlauchs in den
 Flasche.                                                   Schlauchanschluss der
                                                            Motoreinheit ein.
Wie Sie Ihre Swing verwenden

                                                           1	 Ein-/Aus-Taste
     1                                                     2	 Taste um Vakuum zu reduzieren (-)
                                                           3	 Taste um Vakuum zu erhöhen (+)
     2                                                     4	 Abpumptaste
                                                           5	 LED
20   5
                                                              leuchtet  On
     3                                                        leuchtet nicht  Off
                                                              gleichmässiges Blinken  Stimulationsphase
                                                              permanentes Leuchten  Abpumpphase
     4                                                        schnelles Blinken  Min./Max.


     Hinweis: Nach 30 Minuten Bedienungspause schaltet sich Swing automatisch ab.


         Nehmen Sie die Brusthaube        Schalten Sie die Milchpumpe    Drücken Sie die Taste 2/3,
         so an die Brust, dass die        durch Drücken der Taste 1 ein. um die Vakuumstärke
         Brustwarze im Tunnel der         Nun startet die Stimulations-  einzustellen.
         Brusthaube gut zentriert ist.    phase.


         Sobald die Milch zu fliessen beginnt, drücken Sie die Taste 4,
         um in die Abpumpphase zu wechseln.
         Nach 2 Minuten wechselt die Pumpe automatisch von der
         Stimulation in die Abpumpphase.
Wie Sie die Muttermilch
aufbewahren
Medela empfiehlt, die folgenden Richtlinien für das Aufbewahren und Auftauen von
Muttermilch einzuhalten. Diese gelten für gesunde, termingeborene Babys.


                          Raum-	          Kühlschrank   Tiefkühlfach	    Tiefkühltruhe
                          temperatur                    des	Kühl-                        21
                                                        schranks
   Frisch	abgepumpte	     Nicht bei       3–5 Tage      6 Monate         12 Monate bei
   Muttermilch            Raumtem-        bei 4°C       bei ca. -16°C    ca. -18°C
                          peratur
                          stehen lassen
   Aufgetaute	Muttermilch	 Nicht          10 Stunden          Nicht wieder einfrieren
   (vorher	eingefroren)    aufbewahren


I	 Beim Einfrieren Milchflaschen/Beutel nur zu 3/4 füllen, um Platz für Ausdehnung
   zu lassen.
I	 Gefrorene Milch nie im Mikrowellenofen oder in einem Topf mit kochendem Wasser
   auftauen (Verbrennungsgefahr).
Störungen beheben

      Störung                  Lösung

      Motor	läuft	nicht        Vorhandensein des Netzstroms kontrollieren. Position der
                               Batterien im Batteriefach prüfen.
22    Die	Pumpe	saugt	zu	      Membrane und Ventilkopf auf Sauberkeit und Unversehrt-
      schwach	oder	gar	nicht   heit prüfen.
                               Membrane korrekt auf den Ventilkopf stecken.
                               Seitliche Positionierung des Ventils prüfen.
                               Alle Verbindungen prüfen.
                               Schlauch mit Verbindungsstück und Anschluss der Motor-
                               einheit fest verbinden.
                               Schlauch während des Abpumpens nicht knicken.
                               Brusthaube korrekt zusammensetzen und gut anliegend an
                               die Brust nehmen.

      Kondenswasser	bildet	    Schlauch durchspülen. Wassertröpfchen herausschütteln,
      sich	im	Schlauch         Schlauch aufhängen und an der Luft trocknen lassen.

      Milch	gelangt	in	den	    Milchpumpe ausschalten und den Stecker aus der Steckdose
      Schlauch                 ziehen.
                               Schlauch abziehen und reinigen.
                               Wassertröpfchen herausschütteln und an der Luft trocknen
                               lassen.

      Milch	gelangt	in	die	    Gerät ausschalten und den Stecker aus der Steckdose ziehen.
      Pumpe                    1. Batteriedeckel öffnen und die Schaumstoffeinlage entfernen.
                                  Diese gründlich mit klarem lauwarmem Wasser waschen
                                  und danach ausdrücken. Gut trocknen lassen.
                               2. Einen Behälter mit ca. 2 dl warmem Seifenwasser füllen.
                               3. Den Schlauch und das Stromkabel an die Pumpe
                                  anschliessen.
                               4. Gerät horizontal mit den Bedienschaltern nach oben über
                                  ein Spülbecken halten und einschalten. Taste 4 drücken und
                                  durch mehrmaliges/zweimaliges Drücken der Taste 2 sicher-
                                  stellen, dass die niedrigste Vakuumstufe eingestellt ist.
                               5. Das Ende des Schlauches, das nicht an der Pumpe ange-
                                  schlossen ist, in den Behälter mit dem Seifenwasser halten.
                               6. Das Wasser wird durch den Schlauch in das Gerät gepumpt.
                                  So lange pumpen lassen, bis das ganze Wasser durch-
                                  gespült ist.
                               7. Danach das Gerät 3 min. eingeschaltet lassen, bis die
                                  Pumpe vollständig trocken ist.
                               8. Sobald die Schaumstoffeinlage trocken ist, diese wieder ein-
                                  setzen und den Batteriedeckel schliessen.
                               9. Wenn notwendig, das Pumpset entsprechend den
                                  Reinigungsanweisungen "Vor dem ersten Gebrauch und ein-
                                  mal täglich" reinigen.
Garantie
In der Broschüre "Internationale Gewährleistung" finden Sie detaillierte Informationen
zur Garantie.


Entsorgung
Das Gerät besteht aus verschiedenen Metall- und Kunststoffelementen. Es ist vor der
Entsorgung unbrauchbar zu machen und darf nicht als Siedlungsabfall, sondern muss            23
gemäss lokalen Vorschriften entsorgt werden. Nutzen Sie daher die an Ihrem Wohnort
eingerichteten Rückgabe- und Sammelsysteme für die Entsorgung von elektrischen und
elektronischen Altgeräten (inkl. Akku). Die unsachgemässe Entsorgung kann schädliche
Auswirkungen auf die Umwelt und die Gesundheit haben.


... noch eine Frage ...
Hat	die	Brusthaube	die	richtige	Grösse	für	mich?
… Jede Frau benötigt ihre individuelle Passform, darum bietet Medela fünf unterschiedliche
PersonalFit Brusthaubengrössen an. Beantworten Sie unter
http://www.medela.com/DE/de/breastfeeding/good-to-know/right-size-of-breastshield.html
einige kurze Fragen, um festzustellen ob die vorhandene Grösse passt.

Besuchen Sie unsere Website unter www.medela.com. Hier finden Sie Antworten auf all
Ihre Fragen.
Medela vous remercie d’avoir acheté un tire-lait Swing. Le lait maternel est le meilleur
     aliment pour votre enfant, mais il existe de nombreuses raisons et circonstances pour
     lesquelles l’allaitement au sein n’est pas possible. Depuis plus de 50 ans, l’objectif de
     Medela, un des leaders sur le marché des tire-laits et accessoires pour l’allaitement, est
     de soutenir le bien-être des mamans et de leur bébé. Medela a développé des tire-laits
     qui répondent de façon optimale aux besoins des mamans allaitantes, en collaboration
     avec des experts de l’allaitement et des chercheurs avant-gardistes. Pour les mamans
     qui ne veulent que le meilleur pour elles et pour leur bébé. „Because you care“.


     Pourquoi utiliser le Swing™ ?
     Vous souhaitez allaiter votre bébé tout en préservant une certaine flexibilité dans votre
     quotidien ? Swing est la solution qui vous convient. La technologie d’expression à
     2 phases vous permet d’exprimer votre lait de façon plus efficace. Ce petit tire-lait
     électrique, maniable, léger et silencieux est idéal pour une utilisation fréquente. Discret
     et facile à transporter, le Swing est donc l’appareil parfait pour une maman dynamique.


24
                                     Qu’est-ce	que	la	technologie	d’expression		
                                     à	2	phases	(2-Phase	Expression®)?	
                                     Medela est la première entreprise au monde à concentrer
                                     sa recherche sur la succion du nourrisson pendant l’allaite-
                                     ment au sein. Les résultats ont abouti au développement
                                     de la technologie d’expression à 2 phases. Cette technolo-
                                     gie se base sur le rythme naturel de succion de l’enfant :
                                     les mouvements brefs et rapides	(phase	de	stimulation)
                                     sont suivis de mouvements plus longs et intensifs (phase	
                                     d’expression), qui permettent d’obtenir un débit optimal
                                     du lait. Le lait est ainsi exprimé plus rapidement, de
                                     manière douce et efficace.


     Mode d’emploi
     Le tire-lait électrique Swing permet d’exprimer le lait maternel.
     Le Swing est adapté pour les situations suivantes :
     I	 Pour réduire/surmonter les problèmes d’allaitement pouvant être liés à la maman
        ou au bébé.
        - Pour aider à soulager et réduire les crevasses des mamelons
        - Pour aider à faire ressortir les mamelons plats ou ombiliqués
Mesures importantes de sécurité
Pendant l’utilisation d’appareils électriques, il convient toujours d’observer les précautions
de sécurité de base, y compris les suivantes : lire les instructions avant l’emploi.

Produit
I	 Maintenir l’appareil au sec et ne pas l’exposer à l’action directe des rayons du soleil.
I	 Ne pas mouiller le produit.
I	 Ne pas immerger ni laisser tomber le bloc-moteur dans l’eau ou tout autre liquide.
I	 Ne pas vaporiser, ni verser un liquide directement sur le bloc-moteur.
I	 Contrôler l’éventuelle usure ou défectuosité des différentes pièces du set
   d’accessoires du tire-lait. (téterelle, tuyau, valve/membrane, biberon…)
I	 Ce produit doit être utilisé par un seul utilisateur. L’utilisation de ce produit
   par plusieurs personnes présente un risque pour la santé.
I	 Dans le tire-lait Swing, aucune pièce ne peut être réparée par le client.
   Ne tentez pas de le réparer par vous-même.

Éléments	électriques
I	 Utilisez exclusivement l’adaptateur fourni avec le tire-lait Swing.
I	 Assurez-vous que la tension de l’adaptateur soit compatible avec                              25
   l’alimentation électrique.
I	 Branchez préalablement l’adaptateur dans le tire-lait Swing, puis dans
   la prise de courant.
I	 Débrancher toujours les appareils électriques immédiatement après leur utilisation.
I	 Le débranchement du réseau n’est assuré que par le retrait de l’adaptateur
   de la prise de courant.
I	 Gardez l’adaptateur loin des surfaces chaudes.
I	 Ne tentez pas de récupérer un appareil électrique tombé à l’eau.
   Débranchez immédiatement la prise.

Utilisation	
I	 Ne destinez le produit qu’à l’usage pour lequel il est prévu, tel que le décrit
   le mode d’emploi.
I	 N’actionnez le tire-lait que lorsque le moteur est orienté vers le haut.
I	 N’utilisez que les accessoires originaux Medela.
I	 N’utilisez jamais un appareil électrique si un câble ou une prise est endommagée,
   s’il ne fonctionne pas bien, s’il est tombé ou abîmé ou s’il est tombé dans l’eau.
I	 Ce produit ne doit jamais être laissé sans surveillance lorsqu’il est branché à une
   prise de courant.
I	 Ne pas l’utiliser à l’extérieur (selon réglementation).
I	 Ne pas l’utiliser pendant le bain ou la douche.
I	 Ne pas l’utiliser lorsque vous êtes très fatigué (risque d’endormissement pendant
   l’utilisation) ou que vous êtes trop somnolent.
I	 Une supervision est nécessaire, si le produit est utilisé à proximité d’enfants.
I	 Si des problèmes ou des douleurs apparaissent, consultez votre conseiller
        en allaitement ou votre médecin.
     I	 Ne pas utiliser l’appareil dans une zone à risque d’explosion.
     I	 Ne pas utiliser l’appareil en présence d’un mélange anesthésique inflammable
        avec de l’air, de l’oxygène ou de l’oxyde nitreux.
     I	 Les appareils de communication à radiofréquences, portables ou mobiles,
        peuvent perturber le fonctionnement du tire-lait Swing.
     I	 Le tire-lait Swing exige des précautions spéciales concernant la CEM
        (compatibilité électromagnétique) et doit être installé et mis en service en
        conformité avec les informations relatives à la CEM contenues dans le
        présent mode d’emploi.


     CONSERVER LE PRÉSENT MODE D’EMPLOI.


26
Comment nettoyer et stériliser
votre tire-lait Swing
Suivre les instructions suivantes. N’utiliser que de l’eau potable.
Démonter et désassembler toutes les pièces (sauf bloc moteur)
du set d’accessoires du tire-lait (téterelle, tuyau, valve/membrane, biberon…).


       a                     b              c        d            e       g              i


  Éléments                                      a        b    c       d   e       g      i

  Nettoyage	avant	la	première	utilisation,	puis	1	fois/jour                                  27

  Rincer manuellement à l’eau chaude,
  puis nettoyer à l’eau chaude et savon-
                                                ✓        ✓    ✓       ✓   ✓       ✓      ✓
  neuse ; rincer à l’eau chaude claire.
  Medela recommande également :

  dans une casserole, de couvrir d’eau
                                                ✓        ✓    ✓       ✓   ✓       ✓      ✓
  froide et d’ébouillanter pendant 5 min

  ou de laver dans le panier supérieur
                                                ✓        ✓    ✓       ✓   ✓       ✓      ✓
  du lave-vaisselle

  ou d’utiliser un sachet pour micro-ondes
                                                ✓        –    ✓       ✓   ✓       ✓      ✓
  Quick Clean (désinfection vapeur)

  ou d’utiliser le stérilisateur
                                                ✓        –    ✓       ✓   ✓       ✓      ✓
  à vapeur b-well

  Nettoyage	immédiatement	après	chaque	utilisation	

  Rincer manuellement à l’eau chaude,
  nettoyer à l’eau chaude et savonneuse ;       ✓        ✓    ✓       ✓   ✓       ✓      ✓
  rincer à l’eau chaude claire.


Remarque : les colorants des aliments peuvent décolorer les pièces sans en
compromettre le fonctionnement.
Medela décline toute responsabilité en cas d’utilisation inappropriée des indications.
Les informations détaillées se trouvent sur le site www.medela.com.
Comment préparer le
     bloc-moteur de votre Swing
        Fonctionnement	électrique        Fonctionnement	avec	piles


        Insérer le câble de l’adaptateur Ouvrir le couvercle du       Insérer les piles AA Mignon
        dans l’orifice du bloc moteur    compartiment à piles         LR6, refermer.
        prévu à cet effet. Insérer       dans le sens de la flèche.
        ensuite la fiche dans la prise
        d’alimentation.

28

     Remarque : il n’est pas nécessaire d’extraire les piles lorsqu’on utilise l’adaptateur
     sur secteur.
Comment monter votre Swing


 Assembler le connecteur   Insérer la membrane sur         Assembler la valve au
 à la téterelle.           la valve.                       connecteur.
                                                           Remarque : assurer la
                                                           position latérale de la valve.


                                                                                            29


 Visser le biberon au      Insérer l’extrémité du tuyau    Insérer l’autre extrémité du
 connecteur.               dans l’orifice du connecteur.   tuyau dans le bloc-moteur.
Comment utiliser votre Swing

                                                          1	 Bouton    On / Off
     1                                                    2	 Bouton    de réduction du vide (-)
                                                          3	 Bouton    d’augmentation du vide (+)
     2                                                    4	 Bouton    d’expression du lait
                                                          5	 LED
     5
                                                             allumée  On
     3                                                       éteinte  Off
                                                             Clignote de manière uniforme et régulière
                                                              Phase de stimulation
     4                                                       Allumée constamment (sans clignoter)
                                                              Phase d’extraction
                                                             Clignote rapidement  Min./Max.

     Remarque : après 30 min. sans aucune manipulation pendant l’usage,
     Swing s’éteint automatiquement.


30


         Placer le mamelon au centre     Appuyer sur le bouton 1          Appuyer sur 2 ou 3 pour régler
         du conduit dans la téterelle.   pour allumer le tire-lait.       le niveau de vide.
                                         À ce moment, la phase
                                         de stimulation s’enclenche.


         Lorsque le lait commence à s’écouler, appuyer sur 4 pour
         passer de la phase de stimulation à la phase d’expression.
         Après deux minutes, l’appareil passe automatiquement
         à la phase d’expression.
Comment conserver le lait maternel
Medela recommande d’observer les indications suivantes pour la conservation et la décon-
gélation du lait maternel. Celles-ci sont valables pour les enfants sains et nés à terme.


                            Température	   Réfrigérateur   Compartiment	 Congélateur
                            ambiante                       de	congélation	
                                                           du	réfrigérateur
   Lait	maternel		          Ne pas         3-5 jours à     6 mois à        12 mois à
   fraîchement	recueilli    conserver à    4° C            -16° C          -18° C
                            température
                            ambiante
   Lait	maternel	déconge-   Ne pas         10 heures              Ne pas recongeler!
   lé	(précédemment	        conserver
   congelé)


                                                                                            31


I	 Pour congeler, ne pas remplir les biberons ou les sachets à plus des ¾,
   de façon à laisser de la place pour la dilatation du lait.
I	 Ne pas décongeler le lait maternel dans un four à micro-ondes,
   ni dans une casserole d’eau bouillante (risque de brûlure).
Résolution des problèmes

      Panne                         Solution

      Le	moteur	ne		                Contrôler la présence de courant. Vérifier la position des
      fonctionne	pas                piles dans le compartiment à piles.

      Le	tire-lait	est	faible		     Contrôler que la membrane et la valve soient propres et
      Ou	n’aspire	pas               non endommagées.
                                    S’assurer que la membrane soit correctement insérée
                                    sur la valve.
                                    Contrôler la position latérale de la valve.
                                    Vérifier que toutes les pièces soient bien assemblées de
                                    manière à ne pas avoir de perte d’air.
                                    S’assurer que les extrémités du tuyau soient insérées
                                    dans les encoches prévues à cet effet.
                                    Ne pas plier le tuyau.
                                    Assembler correctement la téterelle, la faire adhérer au sein.

32    Il	y	a	de	la	condensation	    Après avoir terminé l’expression du lait, retirer et nettoyer
      dans	le	tuyau                 le tuyau. Le secouer pour éliminer les gouttes d’eau
                                    et le laisser sécher.

      Du	lait	entre	dans	le	tuyau   Éteindre le tire-lait, débrancher la fiche de la prise.
                                    Retirer et nettoyer le tuyau.
                                    Le secouer pour éliminer les gouttes d’eau et le laisser
                                    sécher.

      Du	lait	entre	dans	le		       Éteindre l’appareil et le débrancher du secteur.
      tire-lait                     1. Ouvrir le couvercle du compartiment à piles, retirer la mousse
                                       grise, bien la laver et l’essorer de façon à ce qu’elle sèche
                                       complètement.
                                    2. Dans un récipient, verser environ 2 dl d’eau chaude et
                                       savonneuse.
                                    3. Insérer le tuyau, raccorder le câble d’alimentation au tire-lait.
                                    4. Maintenir le tire-lait en position horizontale, les boutons de
                                       commande vers le haut sur un évier et allumer l’appareil.
                                       Appuyer sur le bouton 4 et tout en appuyant deux ou plu-
                                       sieurs fois sur le bouton 2, s’assurer que l’intensité du vide
                                       soit au minimum.
                                    5. Immerger l’extrémité du tuyau non raccordé au tire-lait dans
                                       le récipient d’eau.
                                    6. L’eau est aspirée par le tuyau dans l’appareil. Faire fonction-
                                       ner le tire-lait jusqu’à ce que toute l’eau soit passée.
                                    7. Faire fonctionner l’appareil à vide pendant environ 3 minutes
                                       jusqu’à ce qu’il soit complètement sec.
                                    8. Dès que la mousse grise est sèche, la replacer et fermer
                                       le couvercle du compartiment à piles.
                                    9. Si nécessaire, nettoyer les éléments du set d’accessoires
                                       du tire-lait conformément aux indications « Nettoyage avant
                                       la première utilisation, puis 1 fois/jour ».
Garantie
Les informations détaillées relatives à la garantie se trouvent dans le livret
« Garantie internationale ».


Elimination des déchets
L’ensemble est constitué de divers éléments en métal et en plastique. Avant son
élimination, l’appareil doit être rendu inutilisable et ne doit pas être jeté avec les
ordures ménagères, conformément aux réglementations locales. Utilisez le système
local pour la récupération et la collecte d’appareils électriques et électroniques usagés
(y compris les piles). L’élimination incorrecte des déchets peut avoir des effets nocifs
sur l’environnement et la santé publique.


...Encore une question...
                                                                                            33
La	téterelle	est-elle	à	ma	taille ?
...Chaque femme présente une forme de sein personnelle, c’est pour cette raison
que Medela offre cinq tailles différentes de téterelles PersonalFit™. Sur le site
http://www.medela.com, rubrique allaitement, puis bon à savoir, vous trouverez les
indications nécessaires pour choisir la bonne taille, en répondant à une simple question.

Visitez notre site www.medela.com, vous trouverez les réponses à chacune
de vos questions.
Medela La ringrazia per aver acquistato il tiralatte Swing. Il latte materno è il nutrimento
     migliore per il suo bimbo ma spesso ci sono motivi e circostanze per cui l’allattamento al
     seno non è possibile. Per oltre 50 anni la convinzione di Medela, uno dei leader del mercato,
     è stata sempre quella di voler sostenere il benessere delle mamme e dei loro bimbi. Medela
     ha sviluppato, in collaborazione con esperti della lattazione e con i ricercatori più all’avan-
     guardia, tiralatte che rispondono in maniera ottimale ai bisogni delle mamme che allattano.
     Per le mamme che vogliono solo il meglio per sé e i loro bimbi. „Because you care“.


     Perché Swing™?
     Desidera allattare il suo bimbo senza rinunciare alla sua flessibilità e alla sua mobilità?
     Allora Swing è la risposta giusta per Lei. La tecnologia 2-Phase Expression Le permette di
     pompare in maniera più efficiente. Questo piccolo tiralatte elettrico, maneggevole, leggero
     e silenzioso, è ideale per un uso frequente. Swing discreto e comodo da trasportare è per-
     ciò perfetto per una mamma dinamica.


                                      Che	cosa	è	2-Phase	Expression®?	
                                      Medela è stata la prima società al mondo a concentrare
                                      la ricerca sulla suzione del bimbo durante l’allattamento
                                      al seno.I risultati hanno portato allo sviluppo della tecnolo-
                                      gia 2-Phase Expression. Questa tecnologia si basa sul
                                      naturale ritmo di suzione del bimbo: a movimenti brevi e
                                      stimolanti (fase di stimolazione), seguono movimenti più
                                      lunghi e intensivi (fase di estrazione), che provvedono ad
                                      un ottimale flusso del latte. Così in modo piacevole viene
34                                    pompato più latte in minor tempo.


     Istruzioni per l’uso
     Il tiralatte elettrico Swing serve a pompare latte materno.
     Swing è adatto:
     I	 per alleviare/superare problemi di allattamento da parte della mamma o del bimbo
         – per alleviare ferite e capezzoli sanguinanti
         – per far fuoriuscire capezzoli piatti o rientrati
Importanti misure di sicurezza
Durante l’utilizzo di apparecchi elettrici, occorre sempre osservare le precauzioni basilari
di sicurezza, comprese le seguenti: Leggere le istruzioni prima dell’uso.

Prodotto
I	 Mantenere l’apparecchio asciutto e non esporlo all’azione diretta dei raggi solari.
I	 Non bagnare il prodotto.
I	 Non mettere o non fare cadere in acqua o altro liquido l’unità motore.
I	 Non spruzzare o versare liquidi direttamente sull’unità motore.
I	 Controllare l’eventuale usura o danneggiamento dei componenti del kit del tiralatte.
I	 Questo è un prodotto che deve essere utilizzato da un singolo utente. L’uso da
   parte di più persone presenta un rischio per la salute.
I	 Nel tiralatte Swing non vi sono parti riparabili dal cliente. Non cercare di ripararlo
   da soli.

Elementi	elettrici
I	 Usare solo il trasformatore fornito con il tiralatte Swing.
I	 Assicurarsi che la tensione del trasformatore sia compatibile con
   l’alimentazione elettrica.
I	 Collegare il trasformatore prima nel tiralatte Swing e poi nella presa di corrente.
I	 Staccare sempre gli apparecchi elettrici subito dopo l’uso.
I	 Il distacco dalla rete è assicurato solo dall’estrazione del trasformatore dalla
   presa di corrente.
I	 Tenere il trasformatore lontano da superfici riscaldate.
I	 Non cercare di recuperare un apparecchio elettrico caduto in acqua.Staccare
   subito la spina.

Uso	
                                                                                                35
I	   Usare il prodotto solo per l’uso a cui è destinato, descritto nel manuale di istruzioni.
I	   Azionare il tiralatte solo con il motore rivolto verso l’alto.
I	   Utilizzare solamente accessori originali Medela.
I	   Non usare mai un apparecchio elettrico se ha un cavo o una spina danneggiati,
     se non funziona bene, se è caduto o danneggiato o se è caduto in acqua.
I	   Il prodotto non deve mai essere lasciato incustodito mentre è collegato ad
     una presa di corrente.
I	   Non utilizzarlo all’aperto.
I	   Non utilizzarlo durante il bagno o la doccia.
I	   Non utilizzarlo quando si dorme o si è troppo assopite.
I	   È necessaria una supervisione, se il prodotto viene usato in prossimità di bambini.
I	   Se compaiono problemi o dolori, consultare il proprio consulente per l’allattamento
     o il medico.
I	   Non utilizzare l’apparecchio in zone a rischio di esplosione.
I	   Non utilizzare l’apparecchiatura in presenza di miscele infiammabili anestetiche
     con aria, ossigeno o ossido nitroso.
I	 Gli apparecchi di comunicazione a radiofrequenza, portatili o mobili, possono
        disturbare il tiralatte Swing.
     I	 Il tiralatte Swing richiede precauzioni speciali riguardanti l’EMC (compatibilità
        elettromagnetica) e deve essere installato e messo in servizio in conformità alle
        informazioni sull’EMC contenute in queste istruzioni per l’uso.


     CONSERVARE QUESTO MANUALE D’ISTRUZIONI.


36
Come pulire e sterilizzare il
suo tiralatte Swing
Seguire le seguenti istruzioni. Utilizzare solo acqua potabile.
Smontare tutte le parti del kit.


      a                  b                  c       d           e       g           i


  Componenti                                    a       b   c       d   e    g      i

  Pulizia	prima	del	primo	impiego,	1	volta/giorno

  Sciacquare a mano con acqua calda,
  lavare con acqua calda saponata;
                                                ✓       ✓   ✓       ✓   ✓    ✓      ✓
  risciacquare con acqua calda pulita.
  Medela consiglia inoltre,

  in una casseruola coprire con acqua
                                                ✓       ✓   ✓       ✓   ✓    ✓      ✓
  fredda e bollire per 5 min.

  o lavaggio nel cestello superiore della
                                                ✓       ✓   ✓       ✓   ✓    ✓      ✓
  lavastoviglie

  o con sacca per microonde Quick Clean         ✓       –   ✓       ✓   ✓    ✓      ✓
                                                                                        37
  o con sterilizzatore a vapore b-well          ✓       –   ✓       ✓   ✓    ✓      ✓

  Pulizia	subito	dopo	ogni	impiego	

  Sciacquare a mano con acqua calda,
  lavare con acqua calda saponata;              ✓       ✓   ✓       ✓   ✓    ✓      ✓
  risciacquare con acqua calda pulita.


Nota: le colorazioni dei cibi possono scolorire i componenti senza comprometterne
il funzionamento.
Medela non si assume alcuna responsabilità per un uso non corretto delle indicazioni.
Informazioni più dettagliate si trovano sul sito www.medela.com.
Come preparare l’unità motore
     del suo Swing
        Funzionamento	elettrico             Funzionamento	della		
                                            batteria


        Inserire il cavo del trasformato-   Aprire il coperchio del   Inserire le batterie AA Mignon
        re nell’apposito foro dell’unità    comparto batteria nel     LR6, richiudere.
        motore. Inserire poi la presa       senso della freccia.
        al jack di alimentazione.


     Nota: Non è necessario rimuovere le pile se si usa l’adattatore di corrente.


38
Come assemblare il suo Swing


 Assemblare il connettore   Inserire la membrana       Assemblare la valvola al
 alla coppa per il seno.    sulla valvola.             connettore.
                                                       Nota: Assicurare la posizione
                                                       laterale della valvola.


 Avvitare il poppatoio      Inserire l’estremità del   Inserire l’altra estremità del
 al connettore.             tubicino nell’apertura     tubicino nell’unità motore.
                            del connettore.
                                                                                        39
Come usare il suo Swing

                                                           1	 Tasto   On / Off
     1                                                     2	 Tasto   riduzione vuoto (-)
                                                           3	 Tasto   aumento vuoto (+)
     2                                                     4	 Tasto   estrazione latte
                                                           5	 LED
     5
                                                             acceso  On
     3                                                       spento  Off
                                                             lampeggio uniforme e regolare  fase di
                                                             stimolazione
     4                                                       costantemente acceso  fase di estrazione
                                                             lampeggio veloce  Min./Max.


     Nota: Dopo 30 min. senza alcuna manipolazione durante l’utilizzo,
     Swing si spegne automaticamente.


40

         Centrare il capezzolo nel       Premere il tasto 1 per            Premere 2/3 per regolare
         condotto della coppa            accendere la pompa.               il livello di vuoto.
         del seno.                       A questo punto si avvia
                                         la fase di stimolazione.


         Appena il latte comincia a defluire, premere 4 per passare
         dalla fase di stimolazione a quella di estrazione.
         Dopo due minuti la pompa passerà automaticamente alla
         fase di estrazione.
Come conservare il latte materno
Medela consiglia di osservare le seguenti indicazioni per la conservazione e il
decongelamento del latte materno. Queste sono valide per i bambini sani e nati a termine.


                           Temperatura	     Frigorifero   Scomparto	       Congelatore
                           ambiente                       congelatore	del	
                                                          frigorifero
   Latte	materno	appena	   Non lasciare a   3-5 giorni    6 mesi a ca.    12 mesi
   estratto                temperatura      a 4°C         -16°C           a -18°C
                           ambiente

   Latte	materno	sconge-   Non              10 ore                 Non ricongelare
   lato	(in	precedenza		   conservare
   congelato)


I	 Nel congelare non riempire i poppatoi/le sacche per più di ¾, in modo da lasciare
   spazio per la dilatazione.
I	 Non scongelare il latte materno in un forno a microonde né in una pentola di
   acqua bollente (pericolo di bruciature).


                                                                                            41
Risoluzione dei problemi

      Difetto                     Soluzione

      Il	motore	non	funziona      Controllare la presenza di corrente. Verificare la posizione
                                  delle batterie nel vano batterie.

      Il	tiralatte	è	debole		     Controllare che la membrana e la valvola siano pulite e
      o	non	pompa                 non danneggiate.
                                  Assicurarsi che la membrana sia inserita correttamente
                                  sulla valvola.
                                  Controllare la posizione laterale della valvola.
                                  Assicurare tutte le connessioni.
                                  Assicurarsi che le estremità del tubicino siano inserite
                                  negli appositi alvei.
                                  Non piegare il tubicino.
                                  Assemblare correttamente la coppa, farla aderire bene al
                                  seno.

      Nel	tubicino	c’è	condensa   Dopo aver completato il pompaggio, togliere e pulire il
                                  tubicino. Scuoterlo per eliminare le goccioline d’acqua
                                  e farlo asciugare all’aria.

      Nel	tubicino	entra	latte    Spegnere il tiralatte, staccare la spina dalla presa.
                                  Togliere e pulire il tubicino.
                                  Scuoterlo per eliminare le goccioline d’acqua e farlo
                                  asciugare all’aria.

      Nel	tiralatte	entra	latte   Spegnere l’apparecchio e staccarlo dalla rete elettrica.
                                  1. Aprire il coperchio della batteria, togliere la fodera di
                                     plastica espansa, lavarla e strizzarla bene in modo
42                                   che si asciughi completamente.
                                  2. In un contenitore versare circa 2 dl di acqua calda saponata.
                                  3. Inserire il tubicino, collegare il cavo di alimentazione al tiralatte.
                                  4. Tenere il tiralatte orizzontale con i tasti di comando verso l’alto
                                     su un lavandino e accendere l’apparecchio. Premere il tasto
                                     4 e, premendo due o più volte il tasto 2, assicurarsi che
                                     l’intensità del vuoto sia al minimo.
                                  5. Immergere l’estremità del tubicino non collegato al tiralatte
                                     nel contenitore con l’acqua.
                                  6. L’acqua viene pompata attraverso il tubicino nell’apparecchio.
                                     Fare funzionare il tiralatte finché non è passata tutta l’acqua.
                                  7. Far funzionare l’apparecchio a vuoto per ca.3 minuti fino
                                     a completa asciugatura.
                                  8. Appena la fodera di plastica espansa è asciutta,
                                     riposizionarla e chiudere il coperchio della batteria.
                                  9. Se necessario pulire i componenti del kit di pompaggio
                                     secondo le indicazioni „ Pulizia prima del primo impiego,
                                     1 volta/giorno“.
Garanzia
Informazioni dettagliate in merito alla garanzia si trovano nel libretto “Garanzia
Internazionale”.


Smaltimento
L’unità è costituita da vari elementi di metallo e plastica. Prima dello smaltimento,
l’apparecchio deve essere reso inutilizzabile e non deve essere smaltito come rifiuto
urbano generico, in conformità alle direttive locali. Utilizzare il sistema locale per il
recupero e la raccolta delle apparecchiature elettriche ed elettroniche di scarto
(comprese le batterie). Uno smaltimento improprio può avere effetti nocivi per
l’ambiente e la salute pubblica.


…Ancora una domanda….
La	coppa	per	il	seno	è	della	misura	giusta	per	me?
… Ogni donna ha una forma del seno tutta personale, per questo Medela offre
cinque misure diverse di coppa per il seno PersonalFitTM. Sul sito
www.medela.com/IT/it/breastfeeding/good-to-know/right-size-of-breastshield.html
troverà le indicazioni per scegliere la misura giusta, rispondendo a una semplice domanda.

Visiti il nostro sito www.medela.com, troverà le risposte a ogni sua domanda.

                                                                                             43
Hartelijk dank dat u voor de Swing borstkolf hebt gekozen. Moedermelk is het beste voor
     uw baby, maar er zijn situaties waarin borstvoeding geven niet altijd mogelijk is. Als een
     van de marktleiders op dit gebied zet Medela zich al meer dan 50 jaar vol overtuiging in
     voor het welzijn van baby’s en moeders. In samenwerking met deskundigen op het gebied
     van borstvoeding en vooraanstaande onderzoekers heeft Medela borstkolven ontwikkeld
     die optimaal zijn afgestemd op de behoeften van vrouwen die borstvoeding geven.
     Voor moeders die het beste voor hun baby en zichzelf willen. „Uit liefde“.


     Waarom Swing™?
     Wilt u flexibel blijven en toch uw baby met moedermelk voeden? Dan is Swing de juiste
     keuze voor u. De innovatieve 2-Phase Expression technologie maakt efficiënt afkolven
     mogelijk. U kunt deze kleine elektrische borstkolf gemakkelijk en onopvallend overal mee
     naartoe nemen. Bovendien is Swing eenvoudig te bedienen, licht en discreet en dus per-
     fect voor dynamische moeders.


                                    Wat	is	2-Phase	Expression®?	
                                    Als eerste ter wereld heeft Medela het drinkgedrag van
                                    baby’s aan de moederborst door middel van jarenlange
                                    onderzoeken geïntegreerd in de 2-Phase Expression
                                    technologie. Deze berust op het natuurlijke zuigritme van
                                    de baby: een snel, stimulerend zuigritme	(stimulatiefase)
                                    wordt gevolgd door langzamer, intensiever zuigen (afkolffa-
                                    se), dat voor een optimale melkstroom zorgt. Kolven die
                                    met deze technologie zijn uitgerust, worden 2-Fase borst-
                                    kolven genoemd. Daarmee kan op aangename wijze meer
                                    melk in minder tijd worden afgekolfd.


44
     Beoogd gebruik
     De elektrische borstkolf Swing is bedoeld voor het afkolven van moedermelk.
     Swing is geschikt:
     I	 Om problemen met het geven van borstvoeding bij de moeder of de baby
        te verminderen/weg te nemen
        – Ter verlichting van geïrriteerde en bloedende tepels,
        – Om ingetrokken en ingezonken tepels naar buiten te trekken.
Belangrijke veiligheidsinstructies
Bij het gebruik van elektrische apparaten moeten altijd de fundamentele
voorzorgsmaatregelen in acht worden genomen wat betreft uw veiligheid.
Dit betekent ook dat u vóór gebruik alle instructies dient te lezen.

Product
I	 H
   	 et apparaat droog houden en niet blootstellen aan direct zonlicht.
I	 H
   	 et apparaat niet nat laten worden.
I	 D
   	 e motor niet in water of andere vloeistoffen leggen of laten vallen.
I	 G
   	 een vloeistof direct op de motor spatten of gieten.
I	 D
   	 e onderdelen van de pompset op slijtage of beschadiging controleren.
I	 D
   	 it product is slechts voor één gebruiker bestemd. Gebruik door meerdere
   personen kan een gezondheidsrisico inhouden.
I	 	 wing bevat geen onderdelen die door de klant onderhouden kunnen worden.
   S
   Probeer de pomp niet zelf te repareren.

Elektrische	onderdelen
I	 	 ebruik uitsluitend de bij de Swing borstkolf meegeleverde netstroomadapter.
   G
I	 	 org ervoor dat de spanning van de netstroomadapter overeenstemt met de stroombron.
   Z
I	 	 e netstroomadapter eerst op de Swing borstkolf aansluiten en dan pas in het
   D
   stopcontact steken.
I	 	 lektrische apparaten na gebruik altijd loskoppelen van het lichtnet.
   E
I	 	 koppelt het apparaat los van het lichtnet door de stekker van de netstroomadapter
   U
   uit het stopcontact te halen.
I	 	 e netstroomadapter uit de buurt van hete oppervlakken houden.
   D
I	 	 ooit naar een in het water gevallen elektrisch apparaat grijpen zonder eerst de
   N
   netstroomadapter uit het stopcontact te trekken.

Gebruik	
I	 	 et product uitsluitend gebruiken voor het in deze gebruiksaanwijzing beschreven
   H
   beoogde gebruik.
I	 	 lleen afkolven indien het apparaat rechtop staat.
   A
I	 	 itsluitend originele toebehoren van Medela gebruiken.
   U
I	 	 en elektrisch apparaat nooit inschakelen wanneer de netstroomadapter beschadigd is,
   E
   wanneer het apparaat niet goed functioneert, wanneer het op de grond of in het water
   gevallen is of wanneer het beschadigd is geraakt.
I	 	 et apparaat nooit zonder toezicht achterlaten, indien het op een stroombron
   H
   aangesloten is.                                                                         45
I	 	 et apparaat is niet geschikt voor buitengebruik.
   H
I	 	 iet bij het baden of douchen gebruiken.
   N
I	 	 pparaat niet gebruiken wanneer u slaapt of erg moe bent.
   A
I	 	 ij gebruik van dit product in de buurt van kinderen voldoende toezicht houden
   B
   op het apparaat.
I	 	ndien problemen of pijn optreden, contact opnemen met uw borstvoedingsdeskundige
   I
   of arts.
I	 	 et apparaat is niet geschikt voor gebruik op plaatsen waar explosiegevaar bestaat.
        H
     I	 Apparaat niet gebruiken in de buurt van brandbare anesthesiemengsels met lucht,
        zuurstof of stikstofoxiden.
     I	 	 raagbare en mobiele communicatieapparaten die gebruikmaken van radiogolven
        D
        kunnen de Swing borstkolf beïnvloeden.
     I	 	 e borstkolf Swing vereist speciale voorzorgsmaatregelen in verband met de elektro-
        D
        magnetische compatibiliteit (EMC) en moet volgens de in deze gebruikshandleiding
        opgenomen EMC-gegevens worden geïnstalleerd en in bedrijf genomen.


     BEWAAR DEZE GEBRUIKSHANDLEIDING ZORGVULDIG.


46
Uw Swing reinigen
Neem de volgende instructies in acht en gebruik uitsluitend water van drinkwaterkwaliteit.
Haal vóór het reinigen de onderdelen uit elkaar.


     a                   b                c       d           e        g              i


  Onderdelen                                  a       b   c       d    e      g       i

  Reiniging	voor	het	eerste	gebruik	en	daarna	eenmaal	dagelijks

  Met de hand afspoelen met heet water;
  met warm zeepwater reinigen; met
                                              ✓       ✓   ✓       ✓    ✓      ✓      ✓
  schoon heet water afspoelen.
  Daarnaast beveelt Medela aan

  In een pan met koud water
  onderdompelen en gedurende                  ✓       ✓   ✓       ✓    ✓      ✓      ✓
  5 min. uitkoken.

  of reinigen in het bovenste rek
                                              ✓       ✓   ✓       ✓    ✓      ✓      ✓
  van de vaatwasmachine

  of met Quick Clean
                                              ✓       –   ✓       ✓    ✓      ✓      ✓
  Magnetronzakken

  of met B-well stoomsterilisator             ✓       –   ✓       ✓    ✓      ✓      ✓

  Direct	na	ieder	gebruiken	reinigen	

  Met de hand met heet water afspoelen;
  met warm zeepwater reinigen; met            ✓       ✓   ✓       ✓    ✓      ✓      ✓
  schoon heet water afspoelen.


Opmerking: kleurstoffen van levensmiddelen kunnen kleur afgeven op onderdelen;               47
dit heeft geen invloed op de werking.
Medela is niet aansprakelijk voor de gevolgen van ongeschikte reinigingsmethoden.
Gedetailleerde reinigingsinstructies vindt u op: www.medela.com
De borstkolf voorbereiden

        Gebruik	met	netstroom          Gebruik	met	batterijen


        Sluit de netstroomadapter      Open het batterijvak in de   Plaats batterijen van het
        eerst aan op de borstkolf      richting van de pijl.        type AA Mignon LR6 en
        en steek dan pas de stekker in                              sluit het vak.
        het stopcontact.


     Opmerking: bij afkolven met de netstroomadapter hoeven de batterijen
     niet verwijderd te worden.


48
De pompset in elkaar zetten


 Plaats het borstschild   plaats vervolgens het      en plaats het klephuis
 op de connector,         membraan op het klephuis   op de connector.
                                                     Opmerking: plaats het
                                                     klephuis zijwaarts.


 Schroef de connector     Sluit de slang aan op de   Steek het andere uiteinde
 op het melkflesje.       connector.                 van de slang in de slangaan-
                                                     sluiting van de motor.


                                                                                    49
Uw Swing gebruiken

                                                       1	 Aan-/uit-knop
     1                                                 2	 Knop om vacuüm te verminderen (-)
                                                       3	 Knop om vacuüm te verhogen (+)
     2                                                 4	 Afkolfknop
                                                       5	 LED
     5
                                                          brandt  Aan
     3                                                    brandt niet  Uit
                                                          gelijkmatig knipperen  Stimulatiefase
                                                          permanent branden  Afkolffase
     4                                                    snel knipperen  Min./max.


     Opmerking:	wanneer de Swing gedurende 30 minuten niet bediend is,
     schakelt het apparaat automatisch uit.


         Plaats het borstschild zo     Schakel de borstkolf in        Druk op knop 2/3 om de vacu-
         aan de borst dat de tepel     door op knop 1 te drukken.     umsterkte in te stellen.
         zich goed in het midden       De stimulatiefase wordt
         van de tunnel van het         gestart.
         borstschild bevindt.


50


         Zodra de melk begint te stromen op knop 4 drukken om
         naar de afkolffase over te schakelen.
         Na 2 minuten schakelt de borstkolf automatisch over
         van de stimulatie- naar de afkolffase.
De moedermelk bewaren
Medela beveelt aan om de volgende richtlijnen voor het bewaren en ontdooien van
moedermelk in acht te nemen. Deze gelden voor gezonde, à terme geboren baby’s.


                             Kamer-	        Koelkast         Diepvriesvak	    Diepvriezer
                             temperatuur                     van	koelkast

   Vers	afgekolfde	melk      Niet bij       3–5 dagen        6 maanden        12 maanden
                             kamertempe-    bij 4 °C         bij ca. -16 °C   bij ca. -18 °C
                             ratuur laten
                             staan
   Ontdooide	moedermelk	 Niet bewaren       10 uur                 Niet opnieuw invriezen!
   (voorheen	ingevroren)


I	 Bij invriezen melkflesjes/-zakjes slechts tot 3/4 vullen om ruimte te laten voor uitzetting.
I	 Bevroren melk nooit in de magnetron of in een pan met kokend water ontdooien
   (verbrandingsgevaar).


                                                                                                  51
Storingen oplossen

      Storing                    Oplossing

      Motor	loopt	niet           Controleren of het stopcontact goed werkt. Controleren
                                 of de batterijen goed in het batterijvak zitten.

      De	borstkolf	zuigt		       Controleren of membraan en klephuis schoon en intact zijn.
      te	zwak	of	helemaal	niet   Membraan goed op klephuis plaatsen.
                                 Zijwaartse positie van klephuis controleren.
                                 Alle aansluitingen controleren.
                                 Slang met connector en aansluiting op de motor unit goed
                                 vastmaken.
                                 Slang tijdens afkolven niet knikken.
                                 Borstschild correct in elkaar zetten en goed laten aansluiten
                                 op de borst.

      Er	ontstaat	condens		      Slang doorspoelen. Waterdruppels eruit schudden, slang
      in	de	slang                ophangen en aan de lucht laten drogen.

      Melk	komt	in	de	slang	     Borstkolf uitschakelen en de stekker uit het stopcontact
      terecht                    halen.
                                 Slang lostrekken en reinigen.
                                 Waterdruppels eruit schudden en aan de lucht laten drogen.

      Melk	komt	in	de		          Apparaat uitschakelen en de stekker uit het stopcontact halen.
      motor	terecht              1. Batterijdeksel openen en schuimrubber sponsje verwijderen.
                                    Sponsje grondig met schoon, lauwwarm water wassen en
                                    daarna zacht uitwringen. Goed laten drogen.
                                 2. Een bak vullen met ca. 2 dl warm zeepwater.
                                 3. De slang en de adapter op de motor aansluiten.
                                 4. Apparaat horizontaal, met de bedieningsknoppen naar
                                    boven gericht boven een gootsteen houden en inschakelen.
                                    Druk op knop 4 en zorg er door twee of meer keren op knop
                                    2 te drukken voor dat het laagste vacuümniveau ingesteld is.
                                 5. Het uiteinde dat niet op de motor aangesloten is in de bak
                                    met zeepwater houden.
                                 6. Het water wordt door de slang naar het apparaat gepompt.
                                    Zo lang laten pompen totdat al het water erdoorheen
                                    is gespoeld.
                                 7. Vervolgens het apparaat 3 min. ingeschakeld laten tot
52                                  de motor volledig droog is.
                                 8. Zodra het schuimrubber sponsje droog is, dit opnieuw
                                    in het batterijvak plaatsen en het batterijdeksel sluiten.
                                 9. Indien nodig, de pompset reinigen volgens de
                                    reinigingsinstructies „Reiniging voor het eerste gebruik
                                    en daarna eenmaal dagelijks“.
Garantie
In de brochure "Internationale garantie" vindt u gedetailleerde informatie over de garantie.


Verwijdering als afval
Het apparaat bestaat uit verschillende metalen en kunststof elementen. Het apparaat
moet vóór het weggooien onbruikbaar worden gemaakt en mag niet als huisvuil afgevoerd
worden; het moet daarentegen verwerkt worden overeenkomstig de lokale voorschriften.
Gebruik daarvoor de in uw woonplaats ingevoerde recycling- en inzamelsystemen voor de
verwijdering van afgedankte elektrische en elektronische apparaten (incl. batterij).
Onjuiste verwijdering kan schadelijke gevolgen hebben voor het milieu en de gezondheid.


... nog een vraag ...
Heeft	het	borstschild	de	juiste	maat	voor	mij?
… Geen vrouw is hetzelfde, daarom biedt Medela het PersonalFit Borstschild in vijf
verschillende maten aan. Als u op
http://www.medela.com/BX/nl/breastfeeding/good-to-know/right-size-of-breastshield.html
een paar korte vragen beantwoordt, kunt u zien of uw borstschild de juiste maat heeft.

Bezoek onze website op www.medela.com. Hier vindt u antwoord op al uw vragen.


                                                                                               53
EMC / Technical Description
Electromagnetic Compatibility (EMC, IEC 60601-1-2:2001)


IEC 60601-1-2, Table 201


    Electromagnetic	Emissions

    The Swing is intended for use in the electromagnetic environment specified below.
    The customer or the user of the Swing should assure that it is used in such environment.

    Emission	Tests           Compliance           Electromagnetic	environment	-	guidance

                                                  The Swing uses RF energy only for its internal function.
    RF emissions                                  Therefore, its RF emissions are very low and are not
                             Group 1
    CISPR 11                                      likely to cause any interference in nearby electronic
                                                  equipment.
    RF emissions
                             Class B
    CISPR 11
                                                  The Swing is suitable for use in all establishments,
    Harmonic emissions                            including domestic establishments and those directly
                             Class A              connected to the public low-voltage power supply
    IEC 61000-3-2
                                                  network that supplies buildings used for domestic
    Voltage fluctuations /                        purposes.
    flicker emissions        Complies
    IEC 60000-3-3


Warning – The use of accessories and cables other than those specified may result in increased emis-
sions or decreased immunity of the Swing breastpump.
The Swing breastpump should not be used adjacent to or stacked with other equipment. If adjacent or
stacked use is necessary, the Swing breastpump should be observed to verify normal operation in the
configuration in which it will be used.
The Swing breastpump was found to have no essential performance by a risk analysis and thus, was
not tested for immunity to electro magnetic disturbances (IEC60601-1-2:2001, 6.8.3.201 i)
EN	 Technical specifications
DE	 Technische Daten
FR	 Caractéristiques techniques
IT	 Caratteristiche tecniche
NL	 Technische gegevens


                  vacuum (approx.)
                  -50 … -250 mmHg
                  -7 … -33 kPa
                  45 … 120 cpm
                                  In           Out
                                  Euro 230 V
                                  UK           4.8 V
                  50 Hz
                              �   AUS 240 V    0.8 A
                                  NZ
                                  US 120 V     alternating current
                  60Hz
                          �       JP           direct current


                  AA Mignon LR6
                  4 x 1.5 V


                  121 x 121 x 57


                  300 g
       kg
                  200 g

            +40   Operation
                  Betrieb
+10               En Service
                  Utilizzo
°C                Gebruik

            +50   Transport / Storage
                  Transport / Lagerung
-20               Transport / Stockage
                  Transport / Stoccaggio
°C                Transport / Opslag
                                                                     Please see accompanying papers
            80    Operation                                          Begleitpapiere beachten
                  Betrieb                                            Respecter les consignes des documents
                  En Service                                         d’accompagnement
20                Utilizzo                                           Consultare la documentazione allegata
                  Gebruik                                            Zie bijgevoegde documenten

            95    Transport / Storage
                  Transport / Lagerung
                  Transport / Stockage
20                Transport / Stoccaggio
                  Transport / Opslag
                                                                     Must not be disposed of together with household
            106                                                      refuse
                                                                     Darf nicht zusammen mit Hausmüll entsorgt werden
                                                                     Ne doit pas être éliminé avec les ordures ménagères
70                                                                   Non deve essere smaltito con i rifiuti domestici
                  kPa                                                Mag niet samen met huisvuil weggegooid worden


        S
      AS
 CL               Protection class II
                  Type BF


                  FDA (GMP)                                          SWING BREASTPUMP
                  ISO 9001                                           WITH RESPECT TO ELECTRIC SHOCK FIRE, AND
                  ISO 13485                                          MECHANICAL HAZARDS ONLY IN ACCORDANCE
                  CE (93/42/EEC)                                     WITH UL60601-1/CAN/CSA C22.2 No. 601.1 22PL
www.medela.com


Medela AG                            Germany	&	Austria                   Switzerland
Lättichstrasse 4b                    Medela Medizintechnik               Medela AG, Medical Technology
6341 Baar, Switzerland               GmbH & Co. Handels KG               Lättichstrasse 4b
www.medela.com                       Postfach 1148                       6341 Baar
                                     85386 Eching                        Switzerland
                                     Germany                             Phone +41 (0)848 633 352
International	Sales                  Phone +49 (0)89 31 97 59-0          Fax      +41 (0)41 769 51 00
Medela AG                            Fax     +49 (0)89 31 97 59 99       contact@medela.ch
Lättichstrasse 4b                    info@medela.de                      www.medela.ch
6341 Baar                            www.medela.de
Switzerland                                                              United	Kingdom
Phone +41 (0)41 769 51 51            Italy                               Medela UK Ltd.
Fax      +41 (0)41 769 51 00         Medela Italia Srl                   Huntsman Drive
ism@medela.ch                        Via Turrini, 19 - Loc. Bargellino   Northbank Industrial Park
www.medela.com                       40012 Calderara di Reno (BO)        Irlam, Manchester M44 5EG
                                     Italy                               United Kingdom
Australia                            Phone + 39 051 72 76 88             Phone +44 870 950 5994
Medela Pty Ltd, Medical Technology   Fax      + 39 051 72 76 89          Fax     +44 870 389 2233
3 Arco Lane, Heatherton              info@medela.it                      info@medela.co.uk
Vic 3202                             www.medela.it                       www.medela.co.uk
Australia
Phone +61 (0) 3 9552 8600            Netherlands/Belgium
Fax      +61 (0) 3 9552 8699         Medela Benelux BV
contact@medela.com.au                Uilenwaard 31
www.medela.com.au                    5236 WB ’s-Hertogenbosch
                                     Netherlands
France                               Phone +31 73 690 40 40
Medela France Sarl                   Fax     +31 73 690 40 44
14, rue de la Butte Cordière         info@medela.nl
91154 Etampes cedex                  info@medela.be
France                               www.medela.nl
Phone +33 (0)1 69 16 10 30           www.medela.be
Fax      +33 (0)1 69 16 10 32
                                                                                                         ©Medela AG/200.4102/2011-11/A


info@medela.fr
www.medela.fr

Más contenido relacionado

Destacado

Destacado (8)

Besafe autostoel bij Babyplezier
Besafe autostoel bij BabyplezierBesafe autostoel bij Babyplezier
Besafe autostoel bij Babyplezier
 
Autostoeltjes Test 2011 ANWB
Autostoeltjes Test 2011 ANWBAutostoeltjes Test 2011 ANWB
Autostoeltjes Test 2011 ANWB
 
Autostoeltjes test 2012 ANWB
Autostoeltjes test 2012 ANWBAutostoeltjes test 2012 ANWB
Autostoeltjes test 2012 ANWB
 
Voertuiglijst voor de HTS BeSafe Combi isofix
Voertuiglijst voor de HTS BeSafe Combi isofixVoertuiglijst voor de HTS BeSafe Combi isofix
Voertuiglijst voor de HTS BeSafe Combi isofix
 
ECE R44 autostoeltjes gewichtsklasse overzicht
ECE R44 autostoeltjes gewichtsklasse overzichtECE R44 autostoeltjes gewichtsklasse overzicht
ECE R44 autostoeltjes gewichtsklasse overzicht
 
I-Move Chicco Auto Fix Autostoeltje handleiding
I-Move Chicco Auto Fix Autostoeltje handleidingI-Move Chicco Auto Fix Autostoeltje handleiding
I-Move Chicco Auto Fix Autostoeltje handleiding
 
Handleiding Chicco I-Move reiswieg
Handleiding Chicco I-Move reiswiegHandleiding Chicco I-Move reiswieg
Handleiding Chicco I-Move reiswieg
 
CYBEX autostoelen overzicht
CYBEX autostoelen overzichtCYBEX autostoelen overzicht
CYBEX autostoelen overzicht
 

Similar a Medela Swing borstkolf

Benutzerhandbuch led poolwandbeleuchtung - Intex Pool Shop
Benutzerhandbuch led poolwandbeleuchtung - Intex Pool ShopBenutzerhandbuch led poolwandbeleuchtung - Intex Pool Shop
Benutzerhandbuch led poolwandbeleuchtung - Intex Pool ShopBalint Kocsis
 
Benutzerhandbuch wood grain-frame-pool - Intex Pool Shop
Benutzerhandbuch wood grain-frame-pool - Intex Pool ShopBenutzerhandbuch wood grain-frame-pool - Intex Pool Shop
Benutzerhandbuch wood grain-frame-pool - Intex Pool ShopBalint Kocsis
 
Intex instandhaltungsset - Intex Pool Shop
Intex instandhaltungsset - Intex Pool ShopIntex instandhaltungsset - Intex Pool Shop
Intex instandhaltungsset - Intex Pool ShopBalint Kocsis
 
Benutzerhandbuch filter 638_g - Intex Pool Shop
Benutzerhandbuch filter 638_g - Intex Pool ShopBenutzerhandbuch filter 638_g - Intex Pool Shop
Benutzerhandbuch filter 638_g - Intex Pool ShopBalint Kocsis
 
Benutzerhandbuch filter 638_g - Intex Pool Shop
Benutzerhandbuch filter 638_g - Intex Pool ShopBenutzerhandbuch filter 638_g - Intex Pool Shop
Benutzerhandbuch filter 638_g - Intex Pool Shopintexpoolshop
 
Handbuch ultra-frame-pool - Intex Pool Shop
Handbuch ultra-frame-pool - Intex Pool ShopHandbuch ultra-frame-pool - Intex Pool Shop
Handbuch ultra-frame-pool - Intex Pool ShopBalint Kocsis
 
Sandfilteranlage benutzerhandbuch - Intex Pool Shop
Sandfilteranlage benutzerhandbuch - Intex Pool ShopSandfilteranlage benutzerhandbuch - Intex Pool Shop
Sandfilteranlage benutzerhandbuch - Intex Pool ShopBalint Kocsis
 
Benutzerhandbuch filterpumpe 636_g - Intex Pool Shop
Benutzerhandbuch filterpumpe 636_g - Intex Pool ShopBenutzerhandbuch filterpumpe 636_g - Intex Pool Shop
Benutzerhandbuch filterpumpe 636_g - Intex Pool ShopBalint Kocsis
 
Benutzerhandbuch metal frame_pool - Intex Pool Shop
Benutzerhandbuch metal frame_pool - Intex Pool ShopBenutzerhandbuch metal frame_pool - Intex Pool Shop
Benutzerhandbuch metal frame_pool - Intex Pool ShopBalint Kocsis
 
Benutzerhandbuch oval frame_pool - Intex Pool Shop
Benutzerhandbuch oval frame_pool - Intex Pool ShopBenutzerhandbuch oval frame_pool - Intex Pool Shop
Benutzerhandbuch oval frame_pool - Intex Pool ShopBalint Kocsis
 
Handbuch filterpumpe model636-t - Intex Pool Shop
Handbuch filterpumpe model636-t - Intex Pool ShopHandbuch filterpumpe model636-t - Intex Pool Shop
Handbuch filterpumpe model636-t - Intex Pool ShopBalint Kocsis
 

Similar a Medela Swing borstkolf (12)

Benutzerhandbuch led poolwandbeleuchtung - Intex Pool Shop
Benutzerhandbuch led poolwandbeleuchtung - Intex Pool ShopBenutzerhandbuch led poolwandbeleuchtung - Intex Pool Shop
Benutzerhandbuch led poolwandbeleuchtung - Intex Pool Shop
 
Benutzerhandbuch wood grain-frame-pool - Intex Pool Shop
Benutzerhandbuch wood grain-frame-pool - Intex Pool ShopBenutzerhandbuch wood grain-frame-pool - Intex Pool Shop
Benutzerhandbuch wood grain-frame-pool - Intex Pool Shop
 
Intex instandhaltungsset - Intex Pool Shop
Intex instandhaltungsset - Intex Pool ShopIntex instandhaltungsset - Intex Pool Shop
Intex instandhaltungsset - Intex Pool Shop
 
Benutzerhandbuch filter 638_g - Intex Pool Shop
Benutzerhandbuch filter 638_g - Intex Pool ShopBenutzerhandbuch filter 638_g - Intex Pool Shop
Benutzerhandbuch filter 638_g - Intex Pool Shop
 
Benutzerhandbuch filter 638_g - Intex Pool Shop
Benutzerhandbuch filter 638_g - Intex Pool ShopBenutzerhandbuch filter 638_g - Intex Pool Shop
Benutzerhandbuch filter 638_g - Intex Pool Shop
 
Handbuch ultra-frame-pool - Intex Pool Shop
Handbuch ultra-frame-pool - Intex Pool ShopHandbuch ultra-frame-pool - Intex Pool Shop
Handbuch ultra-frame-pool - Intex Pool Shop
 
Sandfilteranlage benutzerhandbuch - Intex Pool Shop
Sandfilteranlage benutzerhandbuch - Intex Pool ShopSandfilteranlage benutzerhandbuch - Intex Pool Shop
Sandfilteranlage benutzerhandbuch - Intex Pool Shop
 
Benutzerhandbuch filterpumpe 636_g - Intex Pool Shop
Benutzerhandbuch filterpumpe 636_g - Intex Pool ShopBenutzerhandbuch filterpumpe 636_g - Intex Pool Shop
Benutzerhandbuch filterpumpe 636_g - Intex Pool Shop
 
Benutzerhandbuch metal frame_pool - Intex Pool Shop
Benutzerhandbuch metal frame_pool - Intex Pool ShopBenutzerhandbuch metal frame_pool - Intex Pool Shop
Benutzerhandbuch metal frame_pool - Intex Pool Shop
 
Benutzerhandbuch oval frame_pool - Intex Pool Shop
Benutzerhandbuch oval frame_pool - Intex Pool ShopBenutzerhandbuch oval frame_pool - Intex Pool Shop
Benutzerhandbuch oval frame_pool - Intex Pool Shop
 
Handbuch filterpumpe model636-t - Intex Pool Shop
Handbuch filterpumpe model636-t - Intex Pool ShopHandbuch filterpumpe model636-t - Intex Pool Shop
Handbuch filterpumpe model636-t - Intex Pool Shop
 
Bedienungsanleitung
BedienungsanleitungBedienungsanleitung
Bedienungsanleitung
 

Medela Swing borstkolf

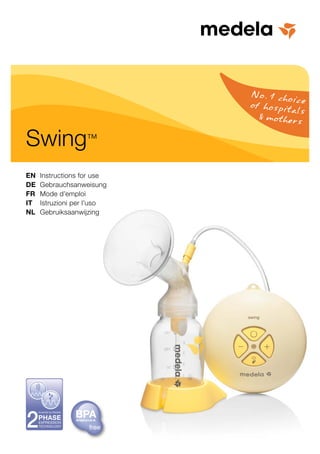
  • 1. Swing™ EN Instructions for use DE Gebrauchsanweisung FR Mode d’emploi IT Istruzioni per l’uso NL Gebruiksaanwijzing
  • 2. EN Parts List DE Teileliste FR Liste des pièces IT Elenco componenti NL Onderdelenlijst i k l m a b c d e f g h
  • 3. EN Parts List DE Teileliste EN FR Liste des pièces 4–13 IT Elenco componenti NL Onderdelenlijst a 810.7084 g 811.0021 EN PersonalFit™ Breastshield 24mm EN Bottle DE PersonalFit™ Brusthaube DE Flasche FR PersonalFit™ Téterelle FR Biberon IT Coppa per il seno PersonalFit™ IT Poppatoio DE NL PersonalFit™ Borstschild NL Melkflesje 14 – 23 b 800.0836 h 810.0462 EN PVC tubing EN Bottle stand DE PVC Schlauch DE Standfuss FR Tuyau en PVC FR Support IT Tubicino in PVC IT Supporto NL PVC Slang NL Standaard c 800.7196 i 200.2714 FR EN 2-Component Connector EN Calma Multi-Lid 24 – 33 DE 2-Komponenten Verbindungsstück DE Calma Multi-Deckel FR Connecteur à 2 Composants FR Multi-Couvercles Calma IT Connettore in due parti IT Tappo Calma NL 2-componenten aansluiting NL Calma Multi-deksel d 800.0475 k 800.0838 EN Valve Head EN Swing storing bag DE Ventilkopf DE Swing Aufbewahrungsbeutel FR Valve FR Sachet de conservation Swing IT IT Testa della valvola IT Sacchetto per conservare Swing 34 – 43 NL Vacuümklep NL Swing bewaarzak e 820.7013 l 800.0734 EN Valve Membrane EN Sling DE Ventilmembrane DE Hängeband FR Membrane FR Lanière IT Membrana IT Tracolla NL Membraan NL Draagband NL f 600.0975 m 920.0044 (EURO)/920.0046 (UK) 44 – 53 EN Motor unit 920.0043 (US/JP)/920.0045 (AUS/NZ) DE Motoreinheit EN Mains adapter FR Bloc-moteur DE Netzadapter IT Unitá motore FR Adapteur NL Motoreenheid IT Tasformatore NL Netstroomadapter
  • 4. Thank you for choosing the Swing Breastpump. Breastmilk is the natural choice for your 4 baby, but there are reasons and situations where breastfeeding is not possible. For over 50 years, it has been Medela’s conviction that these mothers and babies can be support- ed. In close co-operation with breastfeeding experts, Medela, one of the market leaders, has researched and developed breast pumps that perfectly meet breastfeeding mothers needs. For mothers who insist on the best for their babies and themselves. Because you care. Why Swing™? Swing is the best solution, if you want to nourish your baby with your milk and remain flexible and mobile. The innovative 2-Phase technology enables you to pump efficiently and effectively. Moreover Swing is easy to handle, light to transport, perfect for the dynamic mother. What is 2-Phase Expression®? Medela has been the first company worldwide to deeply research babies and their feeding behaviour. The results have led to the development of the 2-Phase-Expression- Technology. 2-Phase-Expression is based on the natural sucking rhythm of the baby: Short, stimulating movements (Stimulation) are followed by longer, more intensive ones (Expression), ensuring an optimal milkflow. Thus, more milk can be expressed in a shorter time – and more comfortably. Indications for use Swing is an electric or battery powered breastpump for supporting breastfeeding mothers. Swing is ideal: I To help overcome mother or baby breastfeeding problems – To relieve sore and cracked nipples – To bring out flat or inverted nipples
  • 5. Important safeguards 5 When using electrical devices, basic safety precautions should always be followed, including the following: Read all instructions before use. Product I Keep appliance dry and do not place in direct sunlight. I Do not get the product wet. I Do not place in or drop motor unit into water or other liquid. I Do not spray or pour liquid directly onto the pump. I Check pump kit components for wear or damage. I This is a single user product. Use by more than one person may present a health risk. I There are no user-serviceable parts inside the Swing. Do not attempt to repair the Swing Breastpump yourself. Electrical parts I Only use the mains adapter that comes with the Swing Breastpump. I Make sure the voltage of the mains adapter is compatible with the power source. I Plug the mains adapter into the Swing Breastpump first and then into the wall socket. I Always unplug electrical devices immediately after using. I Separation from the mains is only assured through the disconnection of the mains adapter from the wall socket outlet. I Keep the mains adapter away from heated surfaces. I Do not reach for any electrical device if it has fallen into water. Unplug immediately. Use I Use the product only for its intended use as described in this instruction manual. I Pump only with the device in an upright position. I Use Medela original accessories only. I Never operate an electrical device if it has a damaged cord or plug, if it is not working properly, if it has been dropped or damaged, or dropped into water. I The product should never be left unattended when plugged into a power source. I Do not use outdoors. I Do not use while bathing or showering. I Do not use while sleeping or overly drowsy. I Supervision is necessary when this product is used in the vicinity of children. I If problems or pain occur, consult your lactation consultant or physician. I Equipment not suitable for use in the presence of explosive atmospheres. I Equipment not suitable for use in the presence of a flammable anaesthetic mixture with air or with oxygen or nitrous oxide.
  • 6. I Portable and mobile radio frequency communications equipment can affect 6 the Swing Breastpump. I The Swing Breastpump needs special precautions regarding EMC (Electromagnetic compatibility) and needs to be installed and put into service according to the EMC information provided in these instructions for use. SAVE THIS INSTRUCTION MANUAL.
  • 7. How to clean Swing pump set 7 Please follow these handling and cleaning instructions. Use drinking water quality only. Disassemble all parts prior to cleaning. a b c d e g i Part a b c d e g i Clean prior to first and once daily Firstly rinse with hot water by hand, second wash with warm soapy water, ✓ ✓ ✓ ✓ ✓ ✓ ✓ finally rinse in clean hot water. Medela also recommends covering with cold water in a saucepan ✓ ✓ ✓ ✓ ✓ ✓ ✓ and boiling out for 5 min. or washing in top rack of dishwasher ✓ ✓ ✓ ✓ ✓ ✓ ✓ or with Quick Clean Microwave Bag ✓ – ✓ ✓ ✓ ✓ ✓ or with b-well Steam Steriliser ✓ – ✓ ✓ ✓ ✓ ✓ Clean immediately after each use Firstly rinse with hot water by hand, second wash with warm soapy water, ✓ ✓ ✓ ✓ ✓ ✓ ✓ finally rinse in clean hot water. Note: Food colourings may discolour components which will not affect performance. Medela assumes no liability for improper handling. You can find more information at: www.medela.com
  • 8. 8 How to prepare your breastpump Electrical operation Battery operation Firstly, plug the adapter cable Open the cover of the battery Insert the AA Mignon LR6 bat- into the pump, then connect to compartment in the direction teries and close it again. the power socket. of the arrow. Note: The batteries do not need to be removed if the main adapter is used for pumping.
  • 9. How to assemble your 9 Swing pump kit Push the breastshield onto the then place the membrane on and push the valve onto connector, the valve head the connector. Note: ensure sidewise position of valve head. Screw the connector onto Insert the tubing into the Insert the other end of the tub- the bottle. connector. ing into the tubing port on the motor unit.
  • 10. 10 How to use your Swing 1 On/Off button 1 2 Vacuum decrease button (-) 3 Vacuum increase button (+) 2 4 Let-down button 5 LED 5 lights up  On 3 does not light up  Off regular flashing  Stimulation Phase light constantly on  Expression Phase 4 rapid flashing  Min./Max. Note: If the pump has been running for 30 minutes without any manipulations, the Swing will automatically switch off. Centre breastshield over Switch on the breastpump Adjust the vacuum strength by your nipple. by pressing 1. pressing 2/3. Now the Stimulation Phase starts. Once your milk starts to flow, press 4 to switch to the Expression Phase. After two minutes the pump will automatically switch from the Stimulation to the Expression Phase.
  • 11. How to store/thaw breastmilk 11 Medela recommends using the following guidelines for storing and thawing breastmilk. These apply to healthy, full-term babies. Room Refrigerator Refrigerator Freezer temperature freezer compartment Freshly expressed Do not store 3-5 days 6 months at 12 months at breastmilk at room at 4°C approx. -16°C approx. -18°C temperature Thawed breastmilk Do not store 10 hours Do not refreeze after thawing! (previously frozen) I Never fill bottles/bags more than ¾ full to allow space for possible expansion. I Do not thaw frozen breastmilk in a microwave oven or in a pan of boiling water (danger of burning).
  • 12. 12 Troubleshooting Problem Solution If the motor is not running Check presence of mains current. Check the position of the batteries in the battery compartment. If the pump suction Verify the valve head and membrane are clean and not is too weak or there is damaged. Make sure the white membrane is laying flat no suction against the valve head. Ensure sideways position of valve. Check all connections of the kit and breastpump. Check the ends of the tubing are fit securely into the back of the breastshield and into the port on the breastpump. Take care not to kink tubing. Ensure the breastshield forms a complete seal around the breast. If condensation appears Rinse out the tubing. Shake out water droplets and hang in the tubing tubing to air-dry. If milk gets into the tubing Turn off the pump and unplug from power source. Remove and clean the tubing. Shake out water droplets and hang to air-dry. If milk accidentally gets Turn off the pump and unplug from power source. into the pump 1. Open the battery cover, remove the small, black foam piece from bottom of pump. Rince the foam piece with clear, lukewarm water and squeeze out well. Allow to dry thoroughly. 2. Pour about 2 dl of warm soapy water into a container. 3. Connect the tubing and the power cable onto the pump. 4. Hold the device with the control button upwards over a dry flushing bath and switch on. Press 4 and by pressing 2 multiple times/twice, ensure that the lowest vacuum level is set. 5. Hold the end of the tubing that is not connected to the pump in the container with the soapy water. 6. The water is pumped through the tubing into the device. Allow it to pump until all the water has been flushed through. 7. Then leave the device switched on for 3 minutes, until the pump is completely dry. 8. As soon as the expanded-plastic liner is dry, put it in place again and close the battery cover. 9. If necessary, clean pump kit according to the instructions „Prior to first use and once daily“.
  • 13. Warranty 13 In the "International Warranty" booklet you find all information about the warranty. Disposal The unit is made of various metal and plastics. Before disposal, the device is to be rendered unusable and it must not be disposed of as unsorted municipal waste in accordance with local regulations. Use your local return and collection system for waste electrical and electronic equipment (incl. batteries). Improper disposal may have harmful effects on the environment and on public health. ....one more question... Am I using the right size breastshield? … Every mother is different and needs her personal size, therefore Medela offers five different sizes of PersonalFit breastshield. Answer a few short questions at www.medela.com/IW/en/breastfeeding/good-to-know/right-size-of-breastshield.html to find out if the available size fits. Visit our website at www.medela.com. Here you will find answers to all your questions.
  • 14. Herzlichen Dank, dass Sie sich für die Swing Milchpumpe entschieden haben. Muttermilch ist an sich das Beste für ihr Baby, doch es gibt viele Gründe, weshalb Stillen nicht immer möglich ist. Als einer der Marktführer setzt sich Medela seit über 50 Jahren mit Über- zeugung für das Wohl von Babys und Müttern ein. In Zusammenarbeit mit Stillexperten und mit führenden Forschern hat Medela Milchpumpen entwickelt, die optimal auf die Bedürfnisse stillender Frauen abgestimmt sind. Für Mütter, die das Beste für ihr Baby und sich wollen. «Because you care». 14 Warum Swing™? Möchten Sie flexibel und mobil bleiben und trotzdem Ihr Baby mit Muttermilch ernähren? Dann ist Swing die richtige Wahl für Sie. Die innovative 2-Phase Expression Technologie ermöglicht es Ihnen effizient abzupumpen. Sie können diese kleine elektrische Milchpumpe bequem und diskret überall mitnehmen. Ausserdem ist Swing einfach zu bedienen, leicht und leise also perfekt für dynamische Mütter. Was ist 2-Phase Expression®? Als weltweit erstes Unternehmen hat Medela das Verhalten von Babys an der Mutterbrust durch jahrelange Forschungsarbeit in die 2-Phase Expression Technologie einfliessen lassen. Diese beruht auf dem natürlichen Saugrythmus des Babys: Auf kurze, stimulierende (Stimulationsphase) folgen lange intensive Bewegungen (Abpumphase), die für optimalen Milchfluss sorgen. Damit kann auf angenehme Art mehr Milch in weniger Zeit abgepumpt werden. Verwendungszweck Die elektrische Milchpumpe Swing dient zum Abpumpen von Muttermilch. Swing eignet sich: I Um Stillschwierigkeiten seitens der Mutter oder des Babys zu lindern/zu überwinden – Zur Entlastung von Verletzten und blutenden Mamillen – Um Flach- und Hohlwarzen hervorzuholen
  • 15. Wichtige Sicherheitshinweise Bei der Verwendung elektrischer Geräte ist stets auf die Einhaltung der grundlegenden Sicherheitsvorkehrungen zu achten, einschliesslich der Folgenden: Lesen Sie bitte alle Anweisungen vor dem Gebrauch. Produkt I Das Gerät trocken halten und nicht direktem Sonnenlicht aussetzen. I Das Gerät nicht nass werden lassen. I Den Motor nicht in Wasser oder andere Flüssigkeiten legen oder fallen lassen. 15 I Keine Flüssigkeit direkt auf den Motor sprühen oder schütten. I Die Teile des Pumpsets auf Abnutzung oder Beschädigung überprüfen. I Dieses Produkt ist für nur eine Benutzerin bestimmt. Die Benutzung durch verschiedene Personen kann ein Gesundheitsrisiko darstellen. I Swing enthält keine Teile, die vom Kunden zu warten sind. Versuchen Sie nicht, die Milchpumpe selbst zu reparieren. Elektrische Teile I Ausschliesslich den mit der Milchpumpe Swing gelieferten Netzadapter verwenden. I Sicherstellen, dass die Spannung des Netzadapters mit der Stromquelle kompatibel ist. I Den Netzadapter zuerst in die Milchpumpe Swing und dann in die Steckdose einstecken. I Elektrische Geräte nach der Verwendung immer von der Stromversorgung trennen. I Die Trennung vom Versorgungsnetz ist nur durch Trennen des Netzadapters von der Steckdose gewährleistet. I Den Netzadapter von heissen Oberflächen fern halten. I Niemals nach einem ins Wasser gefallenen elektrischen Gerät greifen, ohne zuvor den Netzadapter herauszuziehen. Verwendung I Das Produkt ausschliesslich für den in dieser Gebrauchsanweisung beschriebenen Verwendungszweck benutzen. I Nur abpumpen, wenn das Gerät aufrecht steht. I Nur Originalzubehör von Medela verwenden. I Ein elektrisches Gerät nie in Betrieb nehmen, wenn der Netzadapter beschädigt ist, wenn es nicht korrekt funktioniert, wenn es heruntergefallen, beschädigt oder ins Wasser gefallen ist. I Das Gerät niemals unbeaufsichtigt lassen, wenn es an einer Stromquelle angeschlossen ist. I Gerät nicht im Freien verwenden. I Nicht beim Baden oder Duschen verwenden. I Gerät nicht verwenden, wenn Sie schlafen oder übermässig müde sind. I Bei Verwendung dieses Produkts in der Nähe von Kindern ist eine entsprechende Beaufsichtigung notwendig. I Wenn Probleme oder Schmerzen auftreten, wenden Sie sich bitte an Ihre Stillberaterin oder Ihren Arzt. I Das Gerät ist nicht für den Betrieb in explosionsgefährdeten Bereichen geeignet.
  • 16. I Gerät nicht in der Nähe entflammbarer Narkosemittelmischungen mit Luft, Sauerstoff oder Stickoxid betreiben. I Tragbare und mobile Radiofrequenz-Kommunikationsgeräte können die Milchpumpe Swing beeinflussen. I Die Milchpumpe Swing erfordert besondere Vorsichtsmassnahmen in Bezug auf EMV (Elektromagnetische Verträglichkeit) und muss entsprechend den in dieser Gebrauchsanweisung gegebenen EMV-Informationen installiert und in Betrieb genommen werden. 16 BEWAHREN SIE DIESE GEBRAUCHSANWEISUNG SORGFÄLTIG AUF.
  • 17. Wie Sie Ihr Swing Zubehör reinigen Beachten Sie bitte die folgenden Hinweise und verwenden Sie nur Trinkwasserqualität. Vor dem Reinigen nehmen Sie bitte die Teile auseinander. 17 a b c d e g i Teile a b c d e g i Reinigung vor dem ersten Gebrauch und einmal täglich Von Hand mit heissem Wasser abspülen; mit warmem Seifenwasser reinigen; ✓ ✓ ✓ ✓ ✓ ✓ ✓ mit klarem heissem Wasser spülen. Zusätzlich empfiehlt Medela in einem Topf mit kaltem Wasser bede- ✓ ✓ ✓ ✓ ✓ ✓ ✓ cken und für 5 Min. auskochen. oder im oberen Korb des Geschirr- ✓ ✓ ✓ ✓ ✓ ✓ ✓ spülers reinigen oder mit Quick Clean ✓ – ✓ ✓ ✓ ✓ ✓ Mikrowellen-Beuteln oder mit b-well Dampfsterilisator ✓ – ✓ ✓ ✓ ✓ ✓ Reinigung sofort nach jedem Gebrauch Von Hand mit heissem Wasser abspülen; mit warmem Seifenwasser reinigen; ✓ ✓ ✓ ✓ ✓ ✓ ✓ mit klarem heissem Wasser spülen. Hinweis: Farbstoffe von Lebensmitteln können Teile verfärben, was jedoch keinen Einfluss auf die Funktion hat. Medela übernimmt keine Haftung für unsachgemässe Reinigung. Detaillierte Reinigungshinweise finden Sie unter: www.medela.com
  • 18. Wie Sie die Milchpumpe vorbereiten Netzbetrieb Akkubetrieb 18 Stecken Sie das Netz- Öffnen Sie das Batteriefach Legen Sie die Batterien adapterkabel zuerst in die in Pfeilrichtung. AA Mignon LR6 ein und Pumpe ein, dann an die schliessen es wieder. Netzsteckdose anschliessen. Hinweis: Beim Abpumpen mit dem Netzadapter müssen die Batterien nicht heraus- genommen werden.
  • 19. Wie Sie das Pumpset zusammensetzen 19 Stecken Sie die Brusthaube dann setzen Sie die Membrane und stecken das Ventil auf das auf das Verbindungsstück, auf den Ventilkopf Verbindungsstück. Hinweis: Positionieren Sie den Ventilkopf seitlich. Schrauben Sie das Schliessen Sie den Schlauch Führen Sie das andere Ende Verbindungsstück auf die an das Verbindungsstück. des Schlauchs in den Flasche. Schlauchanschluss der Motoreinheit ein.
  • 20. Wie Sie Ihre Swing verwenden 1 Ein-/Aus-Taste 1 2 Taste um Vakuum zu reduzieren (-) 3 Taste um Vakuum zu erhöhen (+) 2 4 Abpumptaste 5 LED 20 5 leuchtet  On 3 leuchtet nicht  Off gleichmässiges Blinken  Stimulationsphase permanentes Leuchten  Abpumpphase 4 schnelles Blinken  Min./Max. Hinweis: Nach 30 Minuten Bedienungspause schaltet sich Swing automatisch ab. Nehmen Sie die Brusthaube Schalten Sie die Milchpumpe Drücken Sie die Taste 2/3, so an die Brust, dass die durch Drücken der Taste 1 ein. um die Vakuumstärke Brustwarze im Tunnel der Nun startet die Stimulations- einzustellen. Brusthaube gut zentriert ist. phase. Sobald die Milch zu fliessen beginnt, drücken Sie die Taste 4, um in die Abpumpphase zu wechseln. Nach 2 Minuten wechselt die Pumpe automatisch von der Stimulation in die Abpumpphase.
  • 21. Wie Sie die Muttermilch aufbewahren Medela empfiehlt, die folgenden Richtlinien für das Aufbewahren und Auftauen von Muttermilch einzuhalten. Diese gelten für gesunde, termingeborene Babys. Raum- Kühlschrank Tiefkühlfach Tiefkühltruhe temperatur des Kühl- 21 schranks Frisch abgepumpte Nicht bei 3–5 Tage 6 Monate 12 Monate bei Muttermilch Raumtem- bei 4°C bei ca. -16°C ca. -18°C peratur stehen lassen Aufgetaute Muttermilch Nicht 10 Stunden Nicht wieder einfrieren (vorher eingefroren) aufbewahren I Beim Einfrieren Milchflaschen/Beutel nur zu 3/4 füllen, um Platz für Ausdehnung zu lassen. I Gefrorene Milch nie im Mikrowellenofen oder in einem Topf mit kochendem Wasser auftauen (Verbrennungsgefahr).
  • 22. Störungen beheben Störung Lösung Motor läuft nicht Vorhandensein des Netzstroms kontrollieren. Position der Batterien im Batteriefach prüfen. 22 Die Pumpe saugt zu Membrane und Ventilkopf auf Sauberkeit und Unversehrt- schwach oder gar nicht heit prüfen. Membrane korrekt auf den Ventilkopf stecken. Seitliche Positionierung des Ventils prüfen. Alle Verbindungen prüfen. Schlauch mit Verbindungsstück und Anschluss der Motor- einheit fest verbinden. Schlauch während des Abpumpens nicht knicken. Brusthaube korrekt zusammensetzen und gut anliegend an die Brust nehmen. Kondenswasser bildet Schlauch durchspülen. Wassertröpfchen herausschütteln, sich im Schlauch Schlauch aufhängen und an der Luft trocknen lassen. Milch gelangt in den Milchpumpe ausschalten und den Stecker aus der Steckdose Schlauch ziehen. Schlauch abziehen und reinigen. Wassertröpfchen herausschütteln und an der Luft trocknen lassen. Milch gelangt in die Gerät ausschalten und den Stecker aus der Steckdose ziehen. Pumpe 1. Batteriedeckel öffnen und die Schaumstoffeinlage entfernen. Diese gründlich mit klarem lauwarmem Wasser waschen und danach ausdrücken. Gut trocknen lassen. 2. Einen Behälter mit ca. 2 dl warmem Seifenwasser füllen. 3. Den Schlauch und das Stromkabel an die Pumpe anschliessen. 4. Gerät horizontal mit den Bedienschaltern nach oben über ein Spülbecken halten und einschalten. Taste 4 drücken und durch mehrmaliges/zweimaliges Drücken der Taste 2 sicher- stellen, dass die niedrigste Vakuumstufe eingestellt ist. 5. Das Ende des Schlauches, das nicht an der Pumpe ange- schlossen ist, in den Behälter mit dem Seifenwasser halten. 6. Das Wasser wird durch den Schlauch in das Gerät gepumpt. So lange pumpen lassen, bis das ganze Wasser durch- gespült ist. 7. Danach das Gerät 3 min. eingeschaltet lassen, bis die Pumpe vollständig trocken ist. 8. Sobald die Schaumstoffeinlage trocken ist, diese wieder ein- setzen und den Batteriedeckel schliessen. 9. Wenn notwendig, das Pumpset entsprechend den Reinigungsanweisungen "Vor dem ersten Gebrauch und ein- mal täglich" reinigen.
  • 23. Garantie In der Broschüre "Internationale Gewährleistung" finden Sie detaillierte Informationen zur Garantie. Entsorgung Das Gerät besteht aus verschiedenen Metall- und Kunststoffelementen. Es ist vor der Entsorgung unbrauchbar zu machen und darf nicht als Siedlungsabfall, sondern muss 23 gemäss lokalen Vorschriften entsorgt werden. Nutzen Sie daher die an Ihrem Wohnort eingerichteten Rückgabe- und Sammelsysteme für die Entsorgung von elektrischen und elektronischen Altgeräten (inkl. Akku). Die unsachgemässe Entsorgung kann schädliche Auswirkungen auf die Umwelt und die Gesundheit haben. ... noch eine Frage ... Hat die Brusthaube die richtige Grösse für mich? … Jede Frau benötigt ihre individuelle Passform, darum bietet Medela fünf unterschiedliche PersonalFit Brusthaubengrössen an. Beantworten Sie unter http://www.medela.com/DE/de/breastfeeding/good-to-know/right-size-of-breastshield.html einige kurze Fragen, um festzustellen ob die vorhandene Grösse passt. Besuchen Sie unsere Website unter www.medela.com. Hier finden Sie Antworten auf all Ihre Fragen.
  • 24. Medela vous remercie d’avoir acheté un tire-lait Swing. Le lait maternel est le meilleur aliment pour votre enfant, mais il existe de nombreuses raisons et circonstances pour lesquelles l’allaitement au sein n’est pas possible. Depuis plus de 50 ans, l’objectif de Medela, un des leaders sur le marché des tire-laits et accessoires pour l’allaitement, est de soutenir le bien-être des mamans et de leur bébé. Medela a développé des tire-laits qui répondent de façon optimale aux besoins des mamans allaitantes, en collaboration avec des experts de l’allaitement et des chercheurs avant-gardistes. Pour les mamans qui ne veulent que le meilleur pour elles et pour leur bébé. „Because you care“. Pourquoi utiliser le Swing™ ? Vous souhaitez allaiter votre bébé tout en préservant une certaine flexibilité dans votre quotidien ? Swing est la solution qui vous convient. La technologie d’expression à 2 phases vous permet d’exprimer votre lait de façon plus efficace. Ce petit tire-lait électrique, maniable, léger et silencieux est idéal pour une utilisation fréquente. Discret et facile à transporter, le Swing est donc l’appareil parfait pour une maman dynamique. 24 Qu’est-ce que la technologie d’expression à 2 phases (2-Phase Expression®)? Medela est la première entreprise au monde à concentrer sa recherche sur la succion du nourrisson pendant l’allaite- ment au sein. Les résultats ont abouti au développement de la technologie d’expression à 2 phases. Cette technolo- gie se base sur le rythme naturel de succion de l’enfant : les mouvements brefs et rapides (phase de stimulation) sont suivis de mouvements plus longs et intensifs (phase d’expression), qui permettent d’obtenir un débit optimal du lait. Le lait est ainsi exprimé plus rapidement, de manière douce et efficace. Mode d’emploi Le tire-lait électrique Swing permet d’exprimer le lait maternel. Le Swing est adapté pour les situations suivantes : I Pour réduire/surmonter les problèmes d’allaitement pouvant être liés à la maman ou au bébé. - Pour aider à soulager et réduire les crevasses des mamelons - Pour aider à faire ressortir les mamelons plats ou ombiliqués
  • 25. Mesures importantes de sécurité Pendant l’utilisation d’appareils électriques, il convient toujours d’observer les précautions de sécurité de base, y compris les suivantes : lire les instructions avant l’emploi. Produit I Maintenir l’appareil au sec et ne pas l’exposer à l’action directe des rayons du soleil. I Ne pas mouiller le produit. I Ne pas immerger ni laisser tomber le bloc-moteur dans l’eau ou tout autre liquide. I Ne pas vaporiser, ni verser un liquide directement sur le bloc-moteur. I Contrôler l’éventuelle usure ou défectuosité des différentes pièces du set d’accessoires du tire-lait. (téterelle, tuyau, valve/membrane, biberon…) I Ce produit doit être utilisé par un seul utilisateur. L’utilisation de ce produit par plusieurs personnes présente un risque pour la santé. I Dans le tire-lait Swing, aucune pièce ne peut être réparée par le client. Ne tentez pas de le réparer par vous-même. Éléments électriques I Utilisez exclusivement l’adaptateur fourni avec le tire-lait Swing. I Assurez-vous que la tension de l’adaptateur soit compatible avec 25 l’alimentation électrique. I Branchez préalablement l’adaptateur dans le tire-lait Swing, puis dans la prise de courant. I Débrancher toujours les appareils électriques immédiatement après leur utilisation. I Le débranchement du réseau n’est assuré que par le retrait de l’adaptateur de la prise de courant. I Gardez l’adaptateur loin des surfaces chaudes. I Ne tentez pas de récupérer un appareil électrique tombé à l’eau. Débranchez immédiatement la prise. Utilisation I Ne destinez le produit qu’à l’usage pour lequel il est prévu, tel que le décrit le mode d’emploi. I N’actionnez le tire-lait que lorsque le moteur est orienté vers le haut. I N’utilisez que les accessoires originaux Medela. I N’utilisez jamais un appareil électrique si un câble ou une prise est endommagée, s’il ne fonctionne pas bien, s’il est tombé ou abîmé ou s’il est tombé dans l’eau. I Ce produit ne doit jamais être laissé sans surveillance lorsqu’il est branché à une prise de courant. I Ne pas l’utiliser à l’extérieur (selon réglementation). I Ne pas l’utiliser pendant le bain ou la douche. I Ne pas l’utiliser lorsque vous êtes très fatigué (risque d’endormissement pendant l’utilisation) ou que vous êtes trop somnolent. I Une supervision est nécessaire, si le produit est utilisé à proximité d’enfants.
  • 26. I Si des problèmes ou des douleurs apparaissent, consultez votre conseiller en allaitement ou votre médecin. I Ne pas utiliser l’appareil dans une zone à risque d’explosion. I Ne pas utiliser l’appareil en présence d’un mélange anesthésique inflammable avec de l’air, de l’oxygène ou de l’oxyde nitreux. I Les appareils de communication à radiofréquences, portables ou mobiles, peuvent perturber le fonctionnement du tire-lait Swing. I Le tire-lait Swing exige des précautions spéciales concernant la CEM (compatibilité électromagnétique) et doit être installé et mis en service en conformité avec les informations relatives à la CEM contenues dans le présent mode d’emploi. CONSERVER LE PRÉSENT MODE D’EMPLOI. 26
  • 27. Comment nettoyer et stériliser votre tire-lait Swing Suivre les instructions suivantes. N’utiliser que de l’eau potable. Démonter et désassembler toutes les pièces (sauf bloc moteur) du set d’accessoires du tire-lait (téterelle, tuyau, valve/membrane, biberon…). a b c d e g i Éléments a b c d e g i Nettoyage avant la première utilisation, puis 1 fois/jour 27 Rincer manuellement à l’eau chaude, puis nettoyer à l’eau chaude et savon- ✓ ✓ ✓ ✓ ✓ ✓ ✓ neuse ; rincer à l’eau chaude claire. Medela recommande également : dans une casserole, de couvrir d’eau ✓ ✓ ✓ ✓ ✓ ✓ ✓ froide et d’ébouillanter pendant 5 min ou de laver dans le panier supérieur ✓ ✓ ✓ ✓ ✓ ✓ ✓ du lave-vaisselle ou d’utiliser un sachet pour micro-ondes ✓ – ✓ ✓ ✓ ✓ ✓ Quick Clean (désinfection vapeur) ou d’utiliser le stérilisateur ✓ – ✓ ✓ ✓ ✓ ✓ à vapeur b-well Nettoyage immédiatement après chaque utilisation Rincer manuellement à l’eau chaude, nettoyer à l’eau chaude et savonneuse ; ✓ ✓ ✓ ✓ ✓ ✓ ✓ rincer à l’eau chaude claire. Remarque : les colorants des aliments peuvent décolorer les pièces sans en compromettre le fonctionnement. Medela décline toute responsabilité en cas d’utilisation inappropriée des indications. Les informations détaillées se trouvent sur le site www.medela.com.
  • 28. Comment préparer le bloc-moteur de votre Swing Fonctionnement électrique Fonctionnement avec piles Insérer le câble de l’adaptateur Ouvrir le couvercle du Insérer les piles AA Mignon dans l’orifice du bloc moteur compartiment à piles LR6, refermer. prévu à cet effet. Insérer dans le sens de la flèche. ensuite la fiche dans la prise d’alimentation. 28 Remarque : il n’est pas nécessaire d’extraire les piles lorsqu’on utilise l’adaptateur sur secteur.
  • 29. Comment monter votre Swing Assembler le connecteur Insérer la membrane sur Assembler la valve au à la téterelle. la valve. connecteur. Remarque : assurer la position latérale de la valve. 29 Visser le biberon au Insérer l’extrémité du tuyau Insérer l’autre extrémité du connecteur. dans l’orifice du connecteur. tuyau dans le bloc-moteur.
  • 30. Comment utiliser votre Swing 1 Bouton On / Off 1 2 Bouton de réduction du vide (-) 3 Bouton d’augmentation du vide (+) 2 4 Bouton d’expression du lait 5 LED 5 allumée  On 3 éteinte  Off Clignote de manière uniforme et régulière  Phase de stimulation 4 Allumée constamment (sans clignoter)  Phase d’extraction Clignote rapidement  Min./Max. Remarque : après 30 min. sans aucune manipulation pendant l’usage, Swing s’éteint automatiquement. 30 Placer le mamelon au centre Appuyer sur le bouton 1 Appuyer sur 2 ou 3 pour régler du conduit dans la téterelle. pour allumer le tire-lait. le niveau de vide. À ce moment, la phase de stimulation s’enclenche. Lorsque le lait commence à s’écouler, appuyer sur 4 pour passer de la phase de stimulation à la phase d’expression. Après deux minutes, l’appareil passe automatiquement à la phase d’expression.
  • 31. Comment conserver le lait maternel Medela recommande d’observer les indications suivantes pour la conservation et la décon- gélation du lait maternel. Celles-ci sont valables pour les enfants sains et nés à terme. Température Réfrigérateur Compartiment Congélateur ambiante de congélation du réfrigérateur Lait maternel Ne pas 3-5 jours à 6 mois à 12 mois à fraîchement recueilli conserver à 4° C -16° C -18° C température ambiante Lait maternel déconge- Ne pas 10 heures Ne pas recongeler! lé (précédemment conserver congelé) 31 I Pour congeler, ne pas remplir les biberons ou les sachets à plus des ¾, de façon à laisser de la place pour la dilatation du lait. I Ne pas décongeler le lait maternel dans un four à micro-ondes, ni dans une casserole d’eau bouillante (risque de brûlure).
  • 32. Résolution des problèmes Panne Solution Le moteur ne Contrôler la présence de courant. Vérifier la position des fonctionne pas piles dans le compartiment à piles. Le tire-lait est faible Contrôler que la membrane et la valve soient propres et Ou n’aspire pas non endommagées. S’assurer que la membrane soit correctement insérée sur la valve. Contrôler la position latérale de la valve. Vérifier que toutes les pièces soient bien assemblées de manière à ne pas avoir de perte d’air. S’assurer que les extrémités du tuyau soient insérées dans les encoches prévues à cet effet. Ne pas plier le tuyau. Assembler correctement la téterelle, la faire adhérer au sein. 32 Il y a de la condensation Après avoir terminé l’expression du lait, retirer et nettoyer dans le tuyau le tuyau. Le secouer pour éliminer les gouttes d’eau et le laisser sécher. Du lait entre dans le tuyau Éteindre le tire-lait, débrancher la fiche de la prise. Retirer et nettoyer le tuyau. Le secouer pour éliminer les gouttes d’eau et le laisser sécher. Du lait entre dans le Éteindre l’appareil et le débrancher du secteur. tire-lait 1. Ouvrir le couvercle du compartiment à piles, retirer la mousse grise, bien la laver et l’essorer de façon à ce qu’elle sèche complètement. 2. Dans un récipient, verser environ 2 dl d’eau chaude et savonneuse. 3. Insérer le tuyau, raccorder le câble d’alimentation au tire-lait. 4. Maintenir le tire-lait en position horizontale, les boutons de commande vers le haut sur un évier et allumer l’appareil. Appuyer sur le bouton 4 et tout en appuyant deux ou plu- sieurs fois sur le bouton 2, s’assurer que l’intensité du vide soit au minimum. 5. Immerger l’extrémité du tuyau non raccordé au tire-lait dans le récipient d’eau. 6. L’eau est aspirée par le tuyau dans l’appareil. Faire fonction- ner le tire-lait jusqu’à ce que toute l’eau soit passée. 7. Faire fonctionner l’appareil à vide pendant environ 3 minutes jusqu’à ce qu’il soit complètement sec. 8. Dès que la mousse grise est sèche, la replacer et fermer le couvercle du compartiment à piles. 9. Si nécessaire, nettoyer les éléments du set d’accessoires du tire-lait conformément aux indications « Nettoyage avant la première utilisation, puis 1 fois/jour ».
  • 33. Garantie Les informations détaillées relatives à la garantie se trouvent dans le livret « Garantie internationale ». Elimination des déchets L’ensemble est constitué de divers éléments en métal et en plastique. Avant son élimination, l’appareil doit être rendu inutilisable et ne doit pas être jeté avec les ordures ménagères, conformément aux réglementations locales. Utilisez le système local pour la récupération et la collecte d’appareils électriques et électroniques usagés (y compris les piles). L’élimination incorrecte des déchets peut avoir des effets nocifs sur l’environnement et la santé publique. ...Encore une question... 33 La téterelle est-elle à ma taille ? ...Chaque femme présente une forme de sein personnelle, c’est pour cette raison que Medela offre cinq tailles différentes de téterelles PersonalFit™. Sur le site http://www.medela.com, rubrique allaitement, puis bon à savoir, vous trouverez les indications nécessaires pour choisir la bonne taille, en répondant à une simple question. Visitez notre site www.medela.com, vous trouverez les réponses à chacune de vos questions.
  • 34. Medela La ringrazia per aver acquistato il tiralatte Swing. Il latte materno è il nutrimento migliore per il suo bimbo ma spesso ci sono motivi e circostanze per cui l’allattamento al seno non è possibile. Per oltre 50 anni la convinzione di Medela, uno dei leader del mercato, è stata sempre quella di voler sostenere il benessere delle mamme e dei loro bimbi. Medela ha sviluppato, in collaborazione con esperti della lattazione e con i ricercatori più all’avan- guardia, tiralatte che rispondono in maniera ottimale ai bisogni delle mamme che allattano. Per le mamme che vogliono solo il meglio per sé e i loro bimbi. „Because you care“. Perché Swing™? Desidera allattare il suo bimbo senza rinunciare alla sua flessibilità e alla sua mobilità? Allora Swing è la risposta giusta per Lei. La tecnologia 2-Phase Expression Le permette di pompare in maniera più efficiente. Questo piccolo tiralatte elettrico, maneggevole, leggero e silenzioso, è ideale per un uso frequente. Swing discreto e comodo da trasportare è per- ciò perfetto per una mamma dinamica. Che cosa è 2-Phase Expression®? Medela è stata la prima società al mondo a concentrare la ricerca sulla suzione del bimbo durante l’allattamento al seno.I risultati hanno portato allo sviluppo della tecnolo- gia 2-Phase Expression. Questa tecnologia si basa sul naturale ritmo di suzione del bimbo: a movimenti brevi e stimolanti (fase di stimolazione), seguono movimenti più lunghi e intensivi (fase di estrazione), che provvedono ad un ottimale flusso del latte. Così in modo piacevole viene 34 pompato più latte in minor tempo. Istruzioni per l’uso Il tiralatte elettrico Swing serve a pompare latte materno. Swing è adatto: I per alleviare/superare problemi di allattamento da parte della mamma o del bimbo – per alleviare ferite e capezzoli sanguinanti – per far fuoriuscire capezzoli piatti o rientrati
  • 35. Importanti misure di sicurezza Durante l’utilizzo di apparecchi elettrici, occorre sempre osservare le precauzioni basilari di sicurezza, comprese le seguenti: Leggere le istruzioni prima dell’uso. Prodotto I Mantenere l’apparecchio asciutto e non esporlo all’azione diretta dei raggi solari. I Non bagnare il prodotto. I Non mettere o non fare cadere in acqua o altro liquido l’unità motore. I Non spruzzare o versare liquidi direttamente sull’unità motore. I Controllare l’eventuale usura o danneggiamento dei componenti del kit del tiralatte. I Questo è un prodotto che deve essere utilizzato da un singolo utente. L’uso da parte di più persone presenta un rischio per la salute. I Nel tiralatte Swing non vi sono parti riparabili dal cliente. Non cercare di ripararlo da soli. Elementi elettrici I Usare solo il trasformatore fornito con il tiralatte Swing. I Assicurarsi che la tensione del trasformatore sia compatibile con l’alimentazione elettrica. I Collegare il trasformatore prima nel tiralatte Swing e poi nella presa di corrente. I Staccare sempre gli apparecchi elettrici subito dopo l’uso. I Il distacco dalla rete è assicurato solo dall’estrazione del trasformatore dalla presa di corrente. I Tenere il trasformatore lontano da superfici riscaldate. I Non cercare di recuperare un apparecchio elettrico caduto in acqua.Staccare subito la spina. Uso 35 I Usare il prodotto solo per l’uso a cui è destinato, descritto nel manuale di istruzioni. I Azionare il tiralatte solo con il motore rivolto verso l’alto. I Utilizzare solamente accessori originali Medela. I Non usare mai un apparecchio elettrico se ha un cavo o una spina danneggiati, se non funziona bene, se è caduto o danneggiato o se è caduto in acqua. I Il prodotto non deve mai essere lasciato incustodito mentre è collegato ad una presa di corrente. I Non utilizzarlo all’aperto. I Non utilizzarlo durante il bagno o la doccia. I Non utilizzarlo quando si dorme o si è troppo assopite. I È necessaria una supervisione, se il prodotto viene usato in prossimità di bambini. I Se compaiono problemi o dolori, consultare il proprio consulente per l’allattamento o il medico. I Non utilizzare l’apparecchio in zone a rischio di esplosione. I Non utilizzare l’apparecchiatura in presenza di miscele infiammabili anestetiche con aria, ossigeno o ossido nitroso.
  • 36. I Gli apparecchi di comunicazione a radiofrequenza, portatili o mobili, possono disturbare il tiralatte Swing. I Il tiralatte Swing richiede precauzioni speciali riguardanti l’EMC (compatibilità elettromagnetica) e deve essere installato e messo in servizio in conformità alle informazioni sull’EMC contenute in queste istruzioni per l’uso. CONSERVARE QUESTO MANUALE D’ISTRUZIONI. 36
  • 37. Come pulire e sterilizzare il suo tiralatte Swing Seguire le seguenti istruzioni. Utilizzare solo acqua potabile. Smontare tutte le parti del kit. a b c d e g i Componenti a b c d e g i Pulizia prima del primo impiego, 1 volta/giorno Sciacquare a mano con acqua calda, lavare con acqua calda saponata; ✓ ✓ ✓ ✓ ✓ ✓ ✓ risciacquare con acqua calda pulita. Medela consiglia inoltre, in una casseruola coprire con acqua ✓ ✓ ✓ ✓ ✓ ✓ ✓ fredda e bollire per 5 min. o lavaggio nel cestello superiore della ✓ ✓ ✓ ✓ ✓ ✓ ✓ lavastoviglie o con sacca per microonde Quick Clean ✓ – ✓ ✓ ✓ ✓ ✓ 37 o con sterilizzatore a vapore b-well ✓ – ✓ ✓ ✓ ✓ ✓ Pulizia subito dopo ogni impiego Sciacquare a mano con acqua calda, lavare con acqua calda saponata; ✓ ✓ ✓ ✓ ✓ ✓ ✓ risciacquare con acqua calda pulita. Nota: le colorazioni dei cibi possono scolorire i componenti senza comprometterne il funzionamento. Medela non si assume alcuna responsabilità per un uso non corretto delle indicazioni. Informazioni più dettagliate si trovano sul sito www.medela.com.
  • 38. Come preparare l’unità motore del suo Swing Funzionamento elettrico Funzionamento della batteria Inserire il cavo del trasformato- Aprire il coperchio del Inserire le batterie AA Mignon re nell’apposito foro dell’unità comparto batteria nel LR6, richiudere. motore. Inserire poi la presa senso della freccia. al jack di alimentazione. Nota: Non è necessario rimuovere le pile se si usa l’adattatore di corrente. 38
  • 39. Come assemblare il suo Swing Assemblare il connettore Inserire la membrana Assemblare la valvola al alla coppa per il seno. sulla valvola. connettore. Nota: Assicurare la posizione laterale della valvola. Avvitare il poppatoio Inserire l’estremità del Inserire l’altra estremità del al connettore. tubicino nell’apertura tubicino nell’unità motore. del connettore. 39
  • 40. Come usare il suo Swing 1 Tasto On / Off 1 2 Tasto riduzione vuoto (-) 3 Tasto aumento vuoto (+) 2 4 Tasto estrazione latte 5 LED 5 acceso  On 3 spento  Off lampeggio uniforme e regolare  fase di stimolazione 4 costantemente acceso  fase di estrazione lampeggio veloce  Min./Max. Nota: Dopo 30 min. senza alcuna manipolazione durante l’utilizzo, Swing si spegne automaticamente. 40 Centrare il capezzolo nel Premere il tasto 1 per Premere 2/3 per regolare condotto della coppa accendere la pompa. il livello di vuoto. del seno. A questo punto si avvia la fase di stimolazione. Appena il latte comincia a defluire, premere 4 per passare dalla fase di stimolazione a quella di estrazione. Dopo due minuti la pompa passerà automaticamente alla fase di estrazione.
  • 41. Come conservare il latte materno Medela consiglia di osservare le seguenti indicazioni per la conservazione e il decongelamento del latte materno. Queste sono valide per i bambini sani e nati a termine. Temperatura Frigorifero Scomparto Congelatore ambiente congelatore del frigorifero Latte materno appena Non lasciare a 3-5 giorni 6 mesi a ca. 12 mesi estratto temperatura a 4°C -16°C a -18°C ambiente Latte materno sconge- Non 10 ore Non ricongelare lato (in precedenza conservare congelato) I Nel congelare non riempire i poppatoi/le sacche per più di ¾, in modo da lasciare spazio per la dilatazione. I Non scongelare il latte materno in un forno a microonde né in una pentola di acqua bollente (pericolo di bruciature). 41
  • 42. Risoluzione dei problemi Difetto Soluzione Il motore non funziona Controllare la presenza di corrente. Verificare la posizione delle batterie nel vano batterie. Il tiralatte è debole Controllare che la membrana e la valvola siano pulite e o non pompa non danneggiate. Assicurarsi che la membrana sia inserita correttamente sulla valvola. Controllare la posizione laterale della valvola. Assicurare tutte le connessioni. Assicurarsi che le estremità del tubicino siano inserite negli appositi alvei. Non piegare il tubicino. Assemblare correttamente la coppa, farla aderire bene al seno. Nel tubicino c’è condensa Dopo aver completato il pompaggio, togliere e pulire il tubicino. Scuoterlo per eliminare le goccioline d’acqua e farlo asciugare all’aria. Nel tubicino entra latte Spegnere il tiralatte, staccare la spina dalla presa. Togliere e pulire il tubicino. Scuoterlo per eliminare le goccioline d’acqua e farlo asciugare all’aria. Nel tiralatte entra latte Spegnere l’apparecchio e staccarlo dalla rete elettrica. 1. Aprire il coperchio della batteria, togliere la fodera di plastica espansa, lavarla e strizzarla bene in modo 42 che si asciughi completamente. 2. In un contenitore versare circa 2 dl di acqua calda saponata. 3. Inserire il tubicino, collegare il cavo di alimentazione al tiralatte. 4. Tenere il tiralatte orizzontale con i tasti di comando verso l’alto su un lavandino e accendere l’apparecchio. Premere il tasto 4 e, premendo due o più volte il tasto 2, assicurarsi che l’intensità del vuoto sia al minimo. 5. Immergere l’estremità del tubicino non collegato al tiralatte nel contenitore con l’acqua. 6. L’acqua viene pompata attraverso il tubicino nell’apparecchio. Fare funzionare il tiralatte finché non è passata tutta l’acqua. 7. Far funzionare l’apparecchio a vuoto per ca.3 minuti fino a completa asciugatura. 8. Appena la fodera di plastica espansa è asciutta, riposizionarla e chiudere il coperchio della batteria. 9. Se necessario pulire i componenti del kit di pompaggio secondo le indicazioni „ Pulizia prima del primo impiego, 1 volta/giorno“.
  • 43. Garanzia Informazioni dettagliate in merito alla garanzia si trovano nel libretto “Garanzia Internazionale”. Smaltimento L’unità è costituita da vari elementi di metallo e plastica. Prima dello smaltimento, l’apparecchio deve essere reso inutilizzabile e non deve essere smaltito come rifiuto urbano generico, in conformità alle direttive locali. Utilizzare il sistema locale per il recupero e la raccolta delle apparecchiature elettriche ed elettroniche di scarto (comprese le batterie). Uno smaltimento improprio può avere effetti nocivi per l’ambiente e la salute pubblica. …Ancora una domanda…. La coppa per il seno è della misura giusta per me? … Ogni donna ha una forma del seno tutta personale, per questo Medela offre cinque misure diverse di coppa per il seno PersonalFitTM. Sul sito www.medela.com/IT/it/breastfeeding/good-to-know/right-size-of-breastshield.html troverà le indicazioni per scegliere la misura giusta, rispondendo a una semplice domanda. Visiti il nostro sito www.medela.com, troverà le risposte a ogni sua domanda. 43
  • 44. Hartelijk dank dat u voor de Swing borstkolf hebt gekozen. Moedermelk is het beste voor uw baby, maar er zijn situaties waarin borstvoeding geven niet altijd mogelijk is. Als een van de marktleiders op dit gebied zet Medela zich al meer dan 50 jaar vol overtuiging in voor het welzijn van baby’s en moeders. In samenwerking met deskundigen op het gebied van borstvoeding en vooraanstaande onderzoekers heeft Medela borstkolven ontwikkeld die optimaal zijn afgestemd op de behoeften van vrouwen die borstvoeding geven. Voor moeders die het beste voor hun baby en zichzelf willen. „Uit liefde“. Waarom Swing™? Wilt u flexibel blijven en toch uw baby met moedermelk voeden? Dan is Swing de juiste keuze voor u. De innovatieve 2-Phase Expression technologie maakt efficiënt afkolven mogelijk. U kunt deze kleine elektrische borstkolf gemakkelijk en onopvallend overal mee naartoe nemen. Bovendien is Swing eenvoudig te bedienen, licht en discreet en dus per- fect voor dynamische moeders. Wat is 2-Phase Expression®? Als eerste ter wereld heeft Medela het drinkgedrag van baby’s aan de moederborst door middel van jarenlange onderzoeken geïntegreerd in de 2-Phase Expression technologie. Deze berust op het natuurlijke zuigritme van de baby: een snel, stimulerend zuigritme (stimulatiefase) wordt gevolgd door langzamer, intensiever zuigen (afkolffa- se), dat voor een optimale melkstroom zorgt. Kolven die met deze technologie zijn uitgerust, worden 2-Fase borst- kolven genoemd. Daarmee kan op aangename wijze meer melk in minder tijd worden afgekolfd. 44 Beoogd gebruik De elektrische borstkolf Swing is bedoeld voor het afkolven van moedermelk. Swing is geschikt: I Om problemen met het geven van borstvoeding bij de moeder of de baby te verminderen/weg te nemen – Ter verlichting van geïrriteerde en bloedende tepels, – Om ingetrokken en ingezonken tepels naar buiten te trekken.
  • 45. Belangrijke veiligheidsinstructies Bij het gebruik van elektrische apparaten moeten altijd de fundamentele voorzorgsmaatregelen in acht worden genomen wat betreft uw veiligheid. Dit betekent ook dat u vóór gebruik alle instructies dient te lezen. Product I H et apparaat droog houden en niet blootstellen aan direct zonlicht. I H et apparaat niet nat laten worden. I D e motor niet in water of andere vloeistoffen leggen of laten vallen. I G een vloeistof direct op de motor spatten of gieten. I D e onderdelen van de pompset op slijtage of beschadiging controleren. I D it product is slechts voor één gebruiker bestemd. Gebruik door meerdere personen kan een gezondheidsrisico inhouden. I wing bevat geen onderdelen die door de klant onderhouden kunnen worden. S Probeer de pomp niet zelf te repareren. Elektrische onderdelen I ebruik uitsluitend de bij de Swing borstkolf meegeleverde netstroomadapter. G I org ervoor dat de spanning van de netstroomadapter overeenstemt met de stroombron. Z I e netstroomadapter eerst op de Swing borstkolf aansluiten en dan pas in het D stopcontact steken. I lektrische apparaten na gebruik altijd loskoppelen van het lichtnet. E I koppelt het apparaat los van het lichtnet door de stekker van de netstroomadapter U uit het stopcontact te halen. I e netstroomadapter uit de buurt van hete oppervlakken houden. D I ooit naar een in het water gevallen elektrisch apparaat grijpen zonder eerst de N netstroomadapter uit het stopcontact te trekken. Gebruik I et product uitsluitend gebruiken voor het in deze gebruiksaanwijzing beschreven H beoogde gebruik. I lleen afkolven indien het apparaat rechtop staat. A I itsluitend originele toebehoren van Medela gebruiken. U I en elektrisch apparaat nooit inschakelen wanneer de netstroomadapter beschadigd is, E wanneer het apparaat niet goed functioneert, wanneer het op de grond of in het water gevallen is of wanneer het beschadigd is geraakt. I et apparaat nooit zonder toezicht achterlaten, indien het op een stroombron H aangesloten is. 45 I et apparaat is niet geschikt voor buitengebruik. H I iet bij het baden of douchen gebruiken. N I pparaat niet gebruiken wanneer u slaapt of erg moe bent. A I ij gebruik van dit product in de buurt van kinderen voldoende toezicht houden B op het apparaat. I ndien problemen of pijn optreden, contact opnemen met uw borstvoedingsdeskundige I of arts.
  • 46. I et apparaat is niet geschikt voor gebruik op plaatsen waar explosiegevaar bestaat. H I Apparaat niet gebruiken in de buurt van brandbare anesthesiemengsels met lucht, zuurstof of stikstofoxiden. I raagbare en mobiele communicatieapparaten die gebruikmaken van radiogolven D kunnen de Swing borstkolf beïnvloeden. I e borstkolf Swing vereist speciale voorzorgsmaatregelen in verband met de elektro- D magnetische compatibiliteit (EMC) en moet volgens de in deze gebruikshandleiding opgenomen EMC-gegevens worden geïnstalleerd en in bedrijf genomen. BEWAAR DEZE GEBRUIKSHANDLEIDING ZORGVULDIG. 46
  • 47. Uw Swing reinigen Neem de volgende instructies in acht en gebruik uitsluitend water van drinkwaterkwaliteit. Haal vóór het reinigen de onderdelen uit elkaar. a b c d e g i Onderdelen a b c d e g i Reiniging voor het eerste gebruik en daarna eenmaal dagelijks Met de hand afspoelen met heet water; met warm zeepwater reinigen; met ✓ ✓ ✓ ✓ ✓ ✓ ✓ schoon heet water afspoelen. Daarnaast beveelt Medela aan In een pan met koud water onderdompelen en gedurende ✓ ✓ ✓ ✓ ✓ ✓ ✓ 5 min. uitkoken. of reinigen in het bovenste rek ✓ ✓ ✓ ✓ ✓ ✓ ✓ van de vaatwasmachine of met Quick Clean ✓ – ✓ ✓ ✓ ✓ ✓ Magnetronzakken of met B-well stoomsterilisator ✓ – ✓ ✓ ✓ ✓ ✓ Direct na ieder gebruiken reinigen Met de hand met heet water afspoelen; met warm zeepwater reinigen; met ✓ ✓ ✓ ✓ ✓ ✓ ✓ schoon heet water afspoelen. Opmerking: kleurstoffen van levensmiddelen kunnen kleur afgeven op onderdelen; 47 dit heeft geen invloed op de werking. Medela is niet aansprakelijk voor de gevolgen van ongeschikte reinigingsmethoden. Gedetailleerde reinigingsinstructies vindt u op: www.medela.com
  • 48. De borstkolf voorbereiden Gebruik met netstroom Gebruik met batterijen Sluit de netstroomadapter Open het batterijvak in de Plaats batterijen van het eerst aan op de borstkolf richting van de pijl. type AA Mignon LR6 en en steek dan pas de stekker in sluit het vak. het stopcontact. Opmerking: bij afkolven met de netstroomadapter hoeven de batterijen niet verwijderd te worden. 48
  • 49. De pompset in elkaar zetten Plaats het borstschild plaats vervolgens het en plaats het klephuis op de connector, membraan op het klephuis op de connector. Opmerking: plaats het klephuis zijwaarts. Schroef de connector Sluit de slang aan op de Steek het andere uiteinde op het melkflesje. connector. van de slang in de slangaan- sluiting van de motor. 49
  • 50. Uw Swing gebruiken 1 Aan-/uit-knop 1 2 Knop om vacuüm te verminderen (-) 3 Knop om vacuüm te verhogen (+) 2 4 Afkolfknop 5 LED 5 brandt  Aan 3 brandt niet  Uit gelijkmatig knipperen  Stimulatiefase permanent branden  Afkolffase 4 snel knipperen  Min./max. Opmerking: wanneer de Swing gedurende 30 minuten niet bediend is, schakelt het apparaat automatisch uit. Plaats het borstschild zo Schakel de borstkolf in Druk op knop 2/3 om de vacu- aan de borst dat de tepel door op knop 1 te drukken. umsterkte in te stellen. zich goed in het midden De stimulatiefase wordt van de tunnel van het gestart. borstschild bevindt. 50 Zodra de melk begint te stromen op knop 4 drukken om naar de afkolffase over te schakelen. Na 2 minuten schakelt de borstkolf automatisch over van de stimulatie- naar de afkolffase.
  • 51. De moedermelk bewaren Medela beveelt aan om de volgende richtlijnen voor het bewaren en ontdooien van moedermelk in acht te nemen. Deze gelden voor gezonde, à terme geboren baby’s. Kamer- Koelkast Diepvriesvak Diepvriezer temperatuur van koelkast Vers afgekolfde melk Niet bij 3–5 dagen 6 maanden 12 maanden kamertempe- bij 4 °C bij ca. -16 °C bij ca. -18 °C ratuur laten staan Ontdooide moedermelk Niet bewaren 10 uur Niet opnieuw invriezen! (voorheen ingevroren) I Bij invriezen melkflesjes/-zakjes slechts tot 3/4 vullen om ruimte te laten voor uitzetting. I Bevroren melk nooit in de magnetron of in een pan met kokend water ontdooien (verbrandingsgevaar). 51
  • 52. Storingen oplossen Storing Oplossing Motor loopt niet Controleren of het stopcontact goed werkt. Controleren of de batterijen goed in het batterijvak zitten. De borstkolf zuigt Controleren of membraan en klephuis schoon en intact zijn. te zwak of helemaal niet Membraan goed op klephuis plaatsen. Zijwaartse positie van klephuis controleren. Alle aansluitingen controleren. Slang met connector en aansluiting op de motor unit goed vastmaken. Slang tijdens afkolven niet knikken. Borstschild correct in elkaar zetten en goed laten aansluiten op de borst. Er ontstaat condens Slang doorspoelen. Waterdruppels eruit schudden, slang in de slang ophangen en aan de lucht laten drogen. Melk komt in de slang Borstkolf uitschakelen en de stekker uit het stopcontact terecht halen. Slang lostrekken en reinigen. Waterdruppels eruit schudden en aan de lucht laten drogen. Melk komt in de Apparaat uitschakelen en de stekker uit het stopcontact halen. motor terecht 1. Batterijdeksel openen en schuimrubber sponsje verwijderen. Sponsje grondig met schoon, lauwwarm water wassen en daarna zacht uitwringen. Goed laten drogen. 2. Een bak vullen met ca. 2 dl warm zeepwater. 3. De slang en de adapter op de motor aansluiten. 4. Apparaat horizontaal, met de bedieningsknoppen naar boven gericht boven een gootsteen houden en inschakelen. Druk op knop 4 en zorg er door twee of meer keren op knop 2 te drukken voor dat het laagste vacuümniveau ingesteld is. 5. Het uiteinde dat niet op de motor aangesloten is in de bak met zeepwater houden. 6. Het water wordt door de slang naar het apparaat gepompt. Zo lang laten pompen totdat al het water erdoorheen is gespoeld. 7. Vervolgens het apparaat 3 min. ingeschakeld laten tot 52 de motor volledig droog is. 8. Zodra het schuimrubber sponsje droog is, dit opnieuw in het batterijvak plaatsen en het batterijdeksel sluiten. 9. Indien nodig, de pompset reinigen volgens de reinigingsinstructies „Reiniging voor het eerste gebruik en daarna eenmaal dagelijks“.
  • 53. Garantie In de brochure "Internationale garantie" vindt u gedetailleerde informatie over de garantie. Verwijdering als afval Het apparaat bestaat uit verschillende metalen en kunststof elementen. Het apparaat moet vóór het weggooien onbruikbaar worden gemaakt en mag niet als huisvuil afgevoerd worden; het moet daarentegen verwerkt worden overeenkomstig de lokale voorschriften. Gebruik daarvoor de in uw woonplaats ingevoerde recycling- en inzamelsystemen voor de verwijdering van afgedankte elektrische en elektronische apparaten (incl. batterij). Onjuiste verwijdering kan schadelijke gevolgen hebben voor het milieu en de gezondheid. ... nog een vraag ... Heeft het borstschild de juiste maat voor mij? … Geen vrouw is hetzelfde, daarom biedt Medela het PersonalFit Borstschild in vijf verschillende maten aan. Als u op http://www.medela.com/BX/nl/breastfeeding/good-to-know/right-size-of-breastshield.html een paar korte vragen beantwoordt, kunt u zien of uw borstschild de juiste maat heeft. Bezoek onze website op www.medela.com. Hier vindt u antwoord op al uw vragen. 53
  • 54. EMC / Technical Description Electromagnetic Compatibility (EMC, IEC 60601-1-2:2001) IEC 60601-1-2, Table 201 Electromagnetic Emissions The Swing is intended for use in the electromagnetic environment specified below. The customer or the user of the Swing should assure that it is used in such environment. Emission Tests Compliance Electromagnetic environment - guidance The Swing uses RF energy only for its internal function. RF emissions Therefore, its RF emissions are very low and are not Group 1 CISPR 11 likely to cause any interference in nearby electronic equipment. RF emissions Class B CISPR 11 The Swing is suitable for use in all establishments, Harmonic emissions including domestic establishments and those directly Class A connected to the public low-voltage power supply IEC 61000-3-2 network that supplies buildings used for domestic Voltage fluctuations / purposes. flicker emissions Complies IEC 60000-3-3 Warning – The use of accessories and cables other than those specified may result in increased emis- sions or decreased immunity of the Swing breastpump. The Swing breastpump should not be used adjacent to or stacked with other equipment. If adjacent or stacked use is necessary, the Swing breastpump should be observed to verify normal operation in the configuration in which it will be used. The Swing breastpump was found to have no essential performance by a risk analysis and thus, was not tested for immunity to electro magnetic disturbances (IEC60601-1-2:2001, 6.8.3.201 i)
  • 55. EN Technical specifications DE Technische Daten FR Caractéristiques techniques IT Caratteristiche tecniche NL Technische gegevens vacuum (approx.) -50 … -250 mmHg -7 … -33 kPa 45 … 120 cpm In Out Euro 230 V UK 4.8 V 50 Hz � AUS 240 V 0.8 A NZ US 120 V alternating current 60Hz � JP direct current AA Mignon LR6 4 x 1.5 V 121 x 121 x 57 300 g kg 200 g +40 Operation Betrieb +10 En Service Utilizzo °C Gebruik +50 Transport / Storage Transport / Lagerung -20 Transport / Stockage Transport / Stoccaggio °C Transport / Opslag Please see accompanying papers 80 Operation Begleitpapiere beachten Betrieb Respecter les consignes des documents En Service d’accompagnement 20 Utilizzo Consultare la documentazione allegata Gebruik Zie bijgevoegde documenten 95 Transport / Storage Transport / Lagerung Transport / Stockage 20 Transport / Stoccaggio Transport / Opslag Must not be disposed of together with household 106 refuse Darf nicht zusammen mit Hausmüll entsorgt werden Ne doit pas être éliminé avec les ordures ménagères 70 Non deve essere smaltito con i rifiuti domestici kPa Mag niet samen met huisvuil weggegooid worden S AS CL Protection class II Type BF FDA (GMP) SWING BREASTPUMP ISO 9001 WITH RESPECT TO ELECTRIC SHOCK FIRE, AND ISO 13485 MECHANICAL HAZARDS ONLY IN ACCORDANCE CE (93/42/EEC) WITH UL60601-1/CAN/CSA C22.2 No. 601.1 22PL
  • 56. www.medela.com Medela AG Germany & Austria Switzerland Lättichstrasse 4b Medela Medizintechnik Medela AG, Medical Technology 6341 Baar, Switzerland GmbH & Co. Handels KG Lättichstrasse 4b www.medela.com Postfach 1148 6341 Baar 85386 Eching Switzerland Germany Phone +41 (0)848 633 352 International Sales Phone +49 (0)89 31 97 59-0 Fax +41 (0)41 769 51 00 Medela AG Fax +49 (0)89 31 97 59 99 contact@medela.ch Lättichstrasse 4b info@medela.de www.medela.ch 6341 Baar www.medela.de Switzerland United Kingdom Phone +41 (0)41 769 51 51 Italy Medela UK Ltd. Fax +41 (0)41 769 51 00 Medela Italia Srl Huntsman Drive ism@medela.ch Via Turrini, 19 - Loc. Bargellino Northbank Industrial Park www.medela.com 40012 Calderara di Reno (BO) Irlam, Manchester M44 5EG Italy United Kingdom Australia Phone + 39 051 72 76 88 Phone +44 870 950 5994 Medela Pty Ltd, Medical Technology Fax + 39 051 72 76 89 Fax +44 870 389 2233 3 Arco Lane, Heatherton info@medela.it info@medela.co.uk Vic 3202 www.medela.it www.medela.co.uk Australia Phone +61 (0) 3 9552 8600 Netherlands/Belgium Fax +61 (0) 3 9552 8699 Medela Benelux BV contact@medela.com.au Uilenwaard 31 www.medela.com.au 5236 WB ’s-Hertogenbosch Netherlands France Phone +31 73 690 40 40 Medela France Sarl Fax +31 73 690 40 44 14, rue de la Butte Cordière info@medela.nl 91154 Etampes cedex info@medela.be France www.medela.nl Phone +33 (0)1 69 16 10 30 www.medela.be Fax +33 (0)1 69 16 10 32 ©Medela AG/200.4102/2011-11/A info@medela.fr www.medela.fr