2. Your
Challenge:
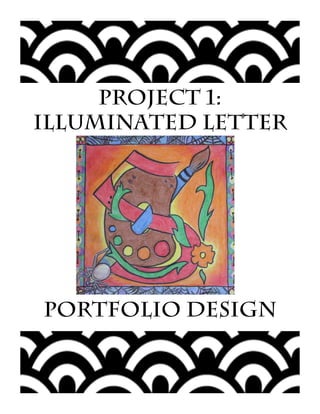
cREATE AN
ILLUMINATED LETTER
THAT REPRESENTS
YOU, IN THE STYLE OF
A MEDIEVAL
ILLUMINATION
3.
4.
5.
6.
7.
8.
9.
10.
11.
12.
13.
14.
15.
16.
17. Step one
IDEA
BRAINSTORM IMAGES TO
INCLUDE ON YOUR
ILLUMINATED LETTER
DESIGN. NO CLICHES! BE
MORE CREATIVE THAN
THAT! sketch A MINIMUM
OF 5 (AIM FOR 8 IMAGES)
MEANINGFUL IMAGES
Don’t draw the design
for your letter
yet….JUST THE IMAGES YOU
WANT TO INCLUDE
18. Step TWO: plan
TRACE TEMPLATE into sketchbook
twice FOR THUMBNAIL SIZE.
Create two completely
different plans for your
illuminated letter
pICK A LETTERING STYLE FROM THE
PACKET OR FROM THE BLOG, DRAW
IN YOUR LETTER
dECIDE ON A BORDER SHAPE/STYLE
BEGIN TO INTEGRATE IN YOUR
IMAGES TO YOUR LETTER, ADD IN
PATTERNS, ETC. Everything from
your requirements list
19. dESIGN rEQUIREMENTS
-YOUR INITIAL (OF FIRST NAME
OR LAST NAME) (USE THE SITES
LINKED ON THE BLOG FOR FONT
IDEAS)
-A very INTRICATE, DETAILED
BORDER
-different TYPES OF LINE (zig-
zag, curly, curvy, straight,
thick, thin, wavy, erratic,
etc.)
20. dESIGN rEQUIREMENTS
-at least 3 UNIQUE PATTERNS
-AREAS OF OVERLAP
-Integrate youR
BRAINSTORMED IMAGES INTO
YOUR DESIGN. WRAP THEM
AROUND YOUR INITIAL, TIE
THEM TO THE BORDER, MAKE
THEM INTO A PATTERN, Enlarge
portions of an object, ETC.
Be inventive!!
31. BEFORE YOU GO ON
pLEASE SHOW ME
YOUR 2
THUMBNAILS
BEFORE YOU
CONTINUE ON
TO STEP 3.
32. Materials Workshop
crayon
Please open to a new half of
a page in your sketchbook,
immediately after the
section where you’ve been
planning your illuminated
letter
Label the area: materials
workshop – crayon
33. Materials Workshop
CRAYON
-light value (light
pressure)
-dark value (heavy pressure)
-layered color
-gradation (fade from
light to dark
-Fade (from one color to
another)
34. Step three
refine
Choose your best thumbnail
sketch to enlarge and
refine.
A. trace the template #2 in your
sketchbook.
b. ENLARGE YOUR BEST THUMBNAIL
TO FILL THE SQUARE.
C. Make it your best drawing
possible – as you will trace your
final from this drawing
35. Step FOUR
PRACTICE
PLAN FOR THE NEXT STAGES OF
YOUR DRAWING.
A. CHOOSE A COLOR SCHEME FOR YOUR
DRAWING
B. PLAN YOUR COLORS ON YOUR DRAFT
VERSION. THIS IS A DRAFT SO IT DOESN’T
NEED TO BE PERFECT – SHOW ME YOU
KNOW HOW TO USE DIFFERENT
BLENDING AND SHADING TECHNIQUES
AND PLAN THE LOCATION OF COLORS
c. Keep your colors balanced. Think
about what you want to emphasize!
36. STEP FIVE
Trace/ trANSFER to
your final paper
a. ASK THE TEACHER FOR A
PIECE OF FINAL PAPER. tRACE
YOUR DRAFT VERSION USING
THE LIGHT-TABLE OR THE
WINDOW
b. OR re-draw your template
#2 draft version onto
final paper. DRAW LIGHTLY!
37. STEP six
detailing
Refine your drawing with
those little extras and details
A. Add in extra embellishments,
details, lines, patterns, etc. to
make your drawing extremely
embellished.
b. SHOW HOW ATTENTIVE TO
CRAFTSMANSHIP YOU ARE! EXERCISE
ORIGINALITY AND PRIDE IN YOUR WORK
BY BEING DILIGENT AND PRECISE
c. gO OVER YOUR LINES WITH A
THIN SHARPIE MARKER
38.
39. STEP seven
COLORING
Use crayons like paint to ADD IN
COLOR TO TRULY ILLUMINATE YOUR
LETTER
A. REFERENCE YOUR DRAFT VERSION FOR COLORING
YOUR FINAL DRAWING.
b. LAYER AND MIX COLORS ATOP LIGHT Layers of
color to create new colors
C. Use areas of transition, blending and
fading of colors (orange transitioning to
orange yellow transitioning into yellow)
d. inCLUDE VALUE CHANGES (LIGHT GREEN FADING
TO DARK GREEN) AND SHOW DEPTH OF YOUR
OBJECTS THROUGH THE USE OF VALUE TO MAKE
THINGS APPEAR ROUND AND TOUCHABLE
43. reflection
A. Circle what number you think you deserve on the rubric. Circle a number; not a whole
square! Be honest! Make at least one meaningful comment in the appropriate blank box on
the rubric’s right side.
B. Answer the following questions in complete sentences on the back of your rubric!
1.Describe how you integrated at least 3 of your objects into your illuminated
letter (ex: wrapping them around your letter; as a pattern, etc.)
Ex: I used my pencil to form the letter C. I also incorporated the
ribbons to my ballet shoes by having them wrap around the letter C and trailing
off into the border. My dinner plate was incorporated by enlarging the scale of
it and having it cropped in the lower right corner, behind the C.
2.Describe in detail what 3 of the objects you incorporated represent or
symbolize to you.
I chose to incorporate the dinner plate because it represents the
family dinners that my mom hosts throughout the year when I am able to catch
up with my brothers and sisters and their families. I also included my teaching
certificate because that symbolizes all of the hard work I put into becoming a
teacher, as well as how much I value my job. Another object I included that is
symbolic to me is my wedding ring which represents the strong bond and
friendship that I have with my husband.
3.What is really successful about your illuminated letter and why is it so
successful? Please do not say what you like about it. Nothing is not an answer
I was really successful at using a gradation of value from light to
dark. Behind my initial I used red that faded from a light value into a really
deep, dark value red. This was so successful because it brought emphasis to my
letter C by contrasting with the cool colors used on the letter.
4.What could you improve about illuminated letter? How would this improve
your design? Do not say what you dislike. Nothing is not an answer.
I could improve on the patterns I used in my illuminated letter. I
think they weren’t as intricate and detailed as I could have made them and
because of that the patterns tend to blend in with the background and do not
make the drawing as interesting as could be.
44. accessioning
name of work: title
Description of work: what is it?
Dimensions: sIZE
aRT MEDIUM: WHAT MATERIALS DID YOU USE?
ARTISTIC CONCEPT: WHAT WERE WE LEARNING
WITH THIS PROJECT?
ARTIST’S REFLECTION: ANYTHING YOU WANT
TO SAY ABOUT THE PROJECT, PROCESS OR
OUTCOME
45. accessioning
Date: 9/27 or 9/28 Course: Studio Art
name of work: Illuminated Letter
Description of work: An Illuminated
Letter incorporating objects that are
personal and meaningful to me
Dimensions: 8” by 8”
aRT MEDIUM: Sharpie Marker and Crayon
ARTISTIC CONCEPT: Value; Emphasis;
Unity; Creativity and Concept Development
ARTIST’S REFLECTION: Anything you want
to say about the process; outcome or
project. Nothing is not an answer!