SlideShare una empresa de Scribd logo
1 de 18
Descargar para leer sin conexión
A Solar Heated Workshop
                                 by
                            John Canivan


Imagine a morning sun sliding through your bedroom window and
gently waking you after a satisfying sleep. A sparrow lands on your
wild bird food dispenser and starts singing as the scent of geranium
mixed with the aroma of tomato blossoms makes its way from the
solar greenhouse below. You don’t have to get up but you want to.
Orders for more apple chips are filling your inbox but you’ll deal with
them later. You must have that morning sun heat shower to start your
day. The collectors are not yet hot, but there’s still plenty of heat
inside the heat storage vault. The mulch digester is working better
now since you’ve connected it with the solar workshop vault.
Extracting methane from hot wet mulch was not so difficult, but
finding a practical way to move the leftovers to the compost bin was a
challenge. As you cook your breakfast of rolled oats flavored with
dried apples, strawberries and bananas you wonder….
 “Was it worth the trouble”, you wonder?
AND then you smile…


                                                                     1
The solar heated workshop concept
A solar heated workshop may not be right for everyone but if your
property receives sufficient sunlight this sustainable energy workshop
might be right for you. Bigger is better when it comes to solar, but
affordability is also important. MTD solar collectors can be
manufactured for less than $4/ sq ft., so a 400 sq ft. array can be
assembled for $1600. Sixteen 60 plastic drums can be used to store
the solar heated water. These plastic drums can often be salvaged
from food processing plants at no cost.

More conventional drain back systems pump water to the bottom of
collectors while trickle down systems like this trickles water down
through the tops of the collector array. Sixteen 2’x12’ Modified Trickle
Down collectors can harvest more than 300,000 BTU’s per day in
most US mainland locations. Hot water is produced as it flows down
through a black absorbent absorber material within the collectors.
The heated water is then collected inside a 2” hand made PVC gutter.
From here it flows through 2” PVC drain pipes and into the end drums
of the heat storage vault. Multiple drums trap heat by separating hot
water from cold water. The same drums distribute heat efficiently by
preheating water. Each drum preheats water for its adjacent drum.


                                                                      2
This top view demonstrates the overall solar heating concept. Notice
that the heat storage drums are isolated from the shop inside their
own insulated storage vault built against the North wall. The proximity
of stored heat to the shop facilitates forced hot air or radiant floor
heating. Both methods have their advantages and disadvantages.

                                           This is my little 6’x12’
                                           sunshed with six 2’x8’ MTD
                                           collectors, a 50 watt PV
                                           panel and three 60 gallon
                                           drums worth of heat
                                           storage. It’s used to collect
                                           data, cure paint and dry
                                           fruit.

                                           The solar heated workshop
                                           is based on the research
                                           done with this shed.


                                                                      3
CONTENTS

 1.       Choosing a building site
 2.       Sub soil preparation
 3.       Footing
 4.       Cement pad for heat storage vault
 5.       Floor
 6.       Cement blocks
 7.       Shop stud walls
 8.       Ceiling joist
 9.       Ridge roof
 10.   Soffits
 11.   Vault platform
 12.   Multi-drum heat storage
 13.   Multi-drum heat distribution


                                              4
CHOOSING A BUILDING SITE
Choose a location with a good southern exposure that’s higher than
the surrounding terrain. You will not be happy if your shop fills with
water after the first rainstorm. If you decide to use some stored
workshop heat for your home DHW system, plan a trench that will
connect ¾” PEX from the heat exchange platform to your home hot
water system.

SUB SOIL PREPARATION
After settling on a workshop site you should hire an excavator to
scrape off loose loom and get down to solid sub soil. After the loom
has been removed level the sub soil and fill the excavated area with
sand. The top layer of sand should be level with the surrounding
ground. This of course means the top of the cement floor will be
higher than the surrounding ground.

FOOTING
More time should be spent with the footing than the workshop floor
because the weight of the shop rests on the 8” x16” footing. If 2x8x16
planks are used for the framing materials they may be reused when it
comes time to install the shop ceiling joists. I recommend keeping the
top of the footing about 3” above ground level. After the 2x8 planks
for the forms are removed, line the outside of the footing with 2” strips
of solid insulation.

HEAT STORAGE VAULT PAD
It’s best to pour the footing and the floor separately but you could still
pour a 3” deep cement pad for the heat storage vault at the same
time the footing is poured.

FLOOR
Placing solid insulation under the cement workshop floor is not
entirely necessary. Dry gravel under the floor may be used as an
insulator. Cover the gravel with plastic before pouring cement
otherwise the insulating properties of the gravel will be lost forever.


                                                                          5
CEMENT BLOCKS
Cement blocks are easy to lay once the footing and floor are poured.
Mortar the corner cement blocks in place and then stretch a level line
between the corners. Just follow the line and the blocks will look
great. Be sure to install anchor bolts about every 10 feet and fill the
hollow of the blocks with insulation.


SHOP STUD WALLS
Secure a bottom sill plate to the cement blocks with the anchor bolts.
Now install the stud walls on top of the bottom sill. Someone could
help raise the walls, but you seem to know what you’re doing and I
bet you could do it without any help. After all the stud walls are in
position, lock them in place with overlapping top sill plates. Keep the
studs plumb and the sills level. If you do this the work will be easier
and your Momma will be proud.


                                                                      6
CEILING JOISTS
Finish the stud wall framing before assembling the heat storage vault
First install the 2x8x16 ceiling joists AND give the building inspector a
piece of your famous blueberry pie if he gives you a hard time.


                                                                        7
RIDGE ROOF
Almost done! Let’s frame the ridge roof with 2x6x12s and take a
break for lunch. A ridge roof is less expensive than a truss roof plus it
will allow for valuable loft space.


SOFFITS
Frame out soffit extensions to leave a hollow area under the eves,
because this is where the drain from the gutter will pass under the top
of the sill plate.


                                                                        8
Let’s remove a few walls so you can see what I mean.


                                                       9
The remaining part of the shop construction is finish work. I’ll leave
this up to you. After installing MTD collectors and the heat storage
vault the shop should look something like this. PV panels could also
be added to the shop roof.


Once the shop is completed, the heat storage vault may be
assembled, but don’t mount the collectors yet. The heat storage vault
should first be completed. Keeping the TDM moist is a good idea, so
keep the collectors off the roof until the heat storage facility is ready
to go. This will extend collector life expectancy. Remember the
“Trickle Down Mat” collects heat and the drums inside the vault store
heat. Without heat storage drums all you have is a nice looking shop.


                                                                       10
VAULT PLATFORM
Storage drums are placed on the heat transfer platform last. Build the
outside vault stud walls so they may be easily removed. After the
vault is finished the drums are connected in series with 2” rubber
boots and 2” PVC pipes. You will not be able to daisy chain the
drums with a vault wall in the way.
OK…Let’s now focus on preparing the insulated vault platform. If a
Domestic Hot Water system is needed you’ll need a concrete slab
upon which the drums rest to extract heat. There are many ways to
extract heat from the drums of hot water but I believe this method is
most practical. A network of copper tubes connected in parallel will
transfer more heat than a serpentine PEX tube so let’s use copper for
DHW heat extraction. The heat storage vault platform is built on top
of the 3” cement pad that we mentioned earlier. Let’s take a closer
look at the cement pad and the copper tubes that run through the
heat transfer platform.


                                                                   11
This platform is framed with 2x6 timbers and rests on cement blocks.
The frame is packed with insulation (solid and fiberglass) and capped
with a ½” plywood lid. 2x4 sill plates line the perimeter of the platform.
Wire mesh is stapled to the plywood before the copper tubes are laid
out with a 2” space between them. After the tubes are in position the
cement platform is poured inside the 2x4 perimeter. Be sure to
protect the copper with polyurethane before pouring cement on it.
Cement can corrode copper over a period of time. A thin protective
coating will extend the life expectancy of your heat storage vault into
the next century. A well constructed level platform works will be worth
your efforts. Keep the drums at least 3” away from the inside walls of
the vault to allow air circulation. A top view of the heat transfer
platform concept is illustrated below.


                                                                       12
DHW HEAT EXCHANGE: This heat exchange platform is only 8 feet
long. It’s designed to accommodate three 60 gallon, but of course the
workshop heat transfer platform is 40 feet long and it accommodates
as many as 16 drums. The input and output manifolds are much
wider than the heat transfer tubes so that the flow rates within each
flow tube is about the same. An ideal heat exchange platform would
have cold tap water enter the cold side of the platform and exit the
hot side. Ideal conditions are not always possible so it is sometimes
necessary to sacrifice efficiency for practicality.

HEAT STORAGE: A dip tube heat transfer system is illustrated
below. Notice how heat stratification is maintained. The coldest water
is taken from the bottom of a drum with the help of a dip tube. This
cold water is then deposited near the top of the adjacent drum. In this
manner solar heated water is trapped within the multi-drum system.
The coldest water from the last drum is then returned to the collectors
to gather more heat.


                                                                    13
These 60 gallon drums have been connected through the tops, but
they may also be connected through the sides. I am now
recommending side drum connections with a diminished flow velocity
to reduce turbulence and increase heat stratification. Water having
the same flow rate will have a greater flow velocity through small
diameter orifices. To mitigate high velocity turbulence large diameter
orifices should be used to transport heated water through the multi-
drum storage system. High velocity water causes turbulence within
the drums which in turn decreases heat stratification which decreases
collector efficiency. In other words: By increasing the diameter of the
connecting pipes the collector efficiency is increased.


                                                                    14
As I mentioned above we may also connect sealed plastic drums
through the sides by drilling 2.7” holes through sides of the drums
and by installing rubber boots within these holes. To do this you
should use a circular saw, 2.75”, with the outer teeth filed down. Bulk
head connectors may also be used to insure a leak free junction, but I
have been lucky with simple 2” rubber boots held in place with 2”
PVC so I will continue to use this simple method until I have a
problem. Here is the best method of connecting drums that I have
found thus far.


The drum units may be pre-assembled in this manner. Two 2.7” holes
are drilled through the sides of each drum toward the center of the
sides. It is very important to keep the holes at a standard location in
each drum. One 2”x 28” PVC pipe may be used in each drum, but
before inserting the PVC pipe through the drum a top notch and
bottom notch are cut out and the center part of the PVC (black line) is
plugged so that hot water entering the drum is directed to the top and
cold water leaving the drum is pulled from the bottom. The large
notch cut into the PVC slows down the velocity of water. By lowering
the forces of turbulence the delicate forces of convection currents are
encouraged and the process of separating hot water from cold water
is facilitated. Now all we have to do is finish framing and finish
insulating the heat storage chamber before we retire for the day.


                                                                    15
A few cross supports should be used to hold the walls together and a
3” slab of solid insulation should be used as an inner lid above the
drums. A shed roof on hinges is also a good idea. We don’t want the
storage vault to fill with rain water. Four tons will be quite sufficient.

All we need for the Domestic Hot Water is a connection from out tap
water supply to our heated platform solar hot water supply. We can
also dry fruit on drying racks placed on top of these hot drums but
how shall we heat our workshop in winter?

THREE POSSIBILITIES

   1. Push or pull cold shop air through the heat storage vault with a
      fan.
   2. Regulate the flow of hot convection air currents from the heat
      storage vault with louvers.
   3. Last but not least…Radiant floor heating


                                                                        16
A radiant floor heating system provides an ideal method for regulating
shop temperature although there are concerns in cold climates where
freezing may be a problem. If you decide to heat your shop floor with
solar heated water be sure to insulate the outside of the footing as
mentioned before and drop in a mat of solid insulation before pouring
cement. Of course the sub floor should still be level and tamped down
Don’t forget about the steel flooring mesh and re-rods used to hold
the PEX in place while pouring the floor. Also notice the two circulator
pumps. Since heat is concentrated in the end drums hot water is
circulated from the end drums and returned to the coldest drums
located toward the center of the storage vault.

More information about MTD solar heating is available on line, but it’s
actually easier to build MTD collectors than explain how they are
built. MTD collector starter kits with construction guides are available.
They facilitate the hands on experience needed to become an MTD
pro.

May all your projects be filled with sunshine.
John Canivan      www.jc-solarhomes.com


                                                                      17
Solar Heated Workshop Contract Breakdown
Customer may choose any or all of the parts of this contract.


1. Cement floor, footing and heat storage platform           $5,000
2. Workshop frame                                           $10,000
3. Roof, insulation, stairs, dry walls, windows, door       $10,000
4. Thermopane windows, garage door, finish trim etc.        $ 5,000
5. MTD solar heating system with
      16 MTD collectors                                     $   8,000
      Sixteen 60 gallon heat storage drums                  $   2,000
      Insulated heat storage vault chamber 3’x40’           $   2,000
      Controller, pumps and fans                            $   1,000
      labor                                                 $   5,000


TOTAL                                                       $47,000


The details of this contract may vary. This is only a rough estimate. It
includes free maintenance (parts and labor) for the first 5 years.

Contact
John Canivan      516-785-6947     for more details…

www.jc-solarhomes.com


                                                                        18

Más contenido relacionado

La actualidad más candente

Visual Dictionary (Updated) 4/23
Visual Dictionary (Updated) 4/23Visual Dictionary (Updated) 4/23
Visual Dictionary (Updated) 4/23Backfill
 
Visual Dictionary (2)
Visual Dictionary (2)Visual Dictionary (2)
Visual Dictionary (2)Shawn Mancill
 
Visual Dictionary Presentation (New)
Visual Dictionary Presentation (New)Visual Dictionary Presentation (New)
Visual Dictionary Presentation (New)guestd068d3b
 
Visual Dictionary-Bevel
Visual Dictionary-BevelVisual Dictionary-Bevel
Visual Dictionary-Bevelbevel
 
sp10weldedwirefabric
sp10weldedwirefabricsp10weldedwirefabric
sp10weldedwirefabricauburn
 
Ambrico Architect Presentation
Ambrico Architect PresentationAmbrico Architect Presentation
Ambrico Architect PresentationR. Tyler Smith
 
visual dictionary- cornerbead
visual dictionary- cornerbeadvisual dictionary- cornerbead
visual dictionary- cornerbeadcornerbead
 
Visual Dictionary-CMU1
Visual Dictionary-CMU1Visual Dictionary-CMU1
Visual Dictionary-CMU1CMU1
 

La actualidad más candente (9)

Visual Dictionary (Updated) 4/23
Visual Dictionary (Updated) 4/23Visual Dictionary (Updated) 4/23
Visual Dictionary (Updated) 4/23
 
Visual Dictionary (2)
Visual Dictionary (2)Visual Dictionary (2)
Visual Dictionary (2)
 
Visual Dictionary Presentation (New)
Visual Dictionary Presentation (New)Visual Dictionary Presentation (New)
Visual Dictionary Presentation (New)
 
Visual Dictionary-Bevel
Visual Dictionary-BevelVisual Dictionary-Bevel
Visual Dictionary-Bevel
 
sp10osb
sp10osbsp10osb
sp10osb
 
sp10weldedwirefabric
sp10weldedwirefabricsp10weldedwirefabric
sp10weldedwirefabric
 
Ambrico Architect Presentation
Ambrico Architect PresentationAmbrico Architect Presentation
Ambrico Architect Presentation
 
visual dictionary- cornerbead
visual dictionary- cornerbeadvisual dictionary- cornerbead
visual dictionary- cornerbead
 
Visual Dictionary-CMU1
Visual Dictionary-CMU1Visual Dictionary-CMU1
Visual Dictionary-CMU1
 

Destacado

Drying characteristics of a hygroscopic material in a fabricated natural
Drying characteristics of a hygroscopic material in a fabricated naturalDrying characteristics of a hygroscopic material in a fabricated natural
Drying characteristics of a hygroscopic material in a fabricated naturalIAEME Publication
 
Poster for Development of solar drier for post harvest treatment
Poster for Development of solar drier for post harvest treatmentPoster for Development of solar drier for post harvest treatment
Poster for Development of solar drier for post harvest treatmentSumit Dharmarao
 
V4I2-IJERTV4IS020774
V4I2-IJERTV4IS020774V4I2-IJERTV4IS020774
V4I2-IJERTV4IS020774Vijesh Ravi
 
Solar Roof top Project proposal delhi
Solar Roof top Project proposal delhiSolar Roof top Project proposal delhi
Solar Roof top Project proposal delhiTarun Rathore
 

Destacado (6)

Drying characteristics of a hygroscopic material in a fabricated natural
Drying characteristics of a hygroscopic material in a fabricated naturalDrying characteristics of a hygroscopic material in a fabricated natural
Drying characteristics of a hygroscopic material in a fabricated natural
 
Poster for Development of solar drier for post harvest treatment
Poster for Development of solar drier for post harvest treatmentPoster for Development of solar drier for post harvest treatment
Poster for Development of solar drier for post harvest treatment
 
V4I2-IJERTV4IS020774
V4I2-IJERTV4IS020774V4I2-IJERTV4IS020774
V4I2-IJERTV4IS020774
 
Cement plant-operation-handbook by yaser elkelawy
Cement plant-operation-handbook by yaser elkelawyCement plant-operation-handbook by yaser elkelawy
Cement plant-operation-handbook by yaser elkelawy
 
Solar rooftop presentation
Solar rooftop presentationSolar rooftop presentation
Solar rooftop presentation
 
Solar Roof top Project proposal delhi
Solar Roof top Project proposal delhiSolar Roof top Project proposal delhi
Solar Roof top Project proposal delhi
 

Similar a Solar Heated Workshop Story

MT: Hotbeds and Cold Frames
MT: Hotbeds and Cold FramesMT: Hotbeds and Cold Frames
MT: Hotbeds and Cold FramesSotirakou964
 
Part 3 low cost housing
Part 3 low cost housingPart 3 low cost housing
Part 3 low cost housingvigyanashram
 
Plumbing Point Loma- Frozen Pipes
Plumbing Point Loma- Frozen PipesPlumbing Point Loma- Frozen Pipes
Plumbing Point Loma- Frozen PipesPeter Somhegyi
 
Solar Thermal Project
Solar Thermal ProjectSolar Thermal Project
Solar Thermal ProjectEd Woll
 
Thermal Storage Wall or Thrombe Wall (prototype model)
Thermal Storage Wall or Thrombe Wall (prototype model)Thermal Storage Wall or Thrombe Wall (prototype model)
Thermal Storage Wall or Thrombe Wall (prototype model)Prachurya Sarma
 
Choosing a solar hot water system
Choosing a solar hot water systemChoosing a solar hot water system
Choosing a solar hot water systemdavidjpayne
 
My Air Conditioner Isn't Cooling My House - 5 Amazing Fixes
My Air Conditioner Isn't Cooling My House - 5 Amazing FixesMy Air Conditioner Isn't Cooling My House - 5 Amazing Fixes
My Air Conditioner Isn't Cooling My House - 5 Amazing FixesAdam N' Julie Lewis
 
Healthy Space Crawlspace Fix To Damp, Wet, Moldy, And Unhealthy Crawlspace.
Healthy Space Crawlspace Fix To Damp, Wet, Moldy, And Unhealthy Crawlspace.Healthy Space Crawlspace Fix To Damp, Wet, Moldy, And Unhealthy Crawlspace.
Healthy Space Crawlspace Fix To Damp, Wet, Moldy, And Unhealthy Crawlspace.Tim Runyon
 
Plasterboard's Visual Dictionary
Plasterboard's Visual DictionaryPlasterboard's Visual Dictionary
Plasterboard's Visual Dictionaryplasterboard
 
The passive house_2009_Arny Arnadottir_1
The passive house_2009_Arny Arnadottir_1The passive house_2009_Arny Arnadottir_1
The passive house_2009_Arny Arnadottir_1Arny Arnadottir
 
ice plant factory report
ice plant factory reportice plant factory report
ice plant factory reportkifayat ullah
 
Low cost construction
Low cost construction Low cost construction
Low cost construction Brijesh Alig
 
Cover greenhouses, solariums,sundance designguide
Cover greenhouses, solariums,sundance designguideCover greenhouses, solariums,sundance designguide
Cover greenhouses, solariums,sundance designguideGherghescu Gabriel
 

Similar a Solar Heated Workshop Story (20)

MT: Hotbeds and Cold Frames
MT: Hotbeds and Cold FramesMT: Hotbeds and Cold Frames
MT: Hotbeds and Cold Frames
 
Cold Frames & Hot Beds Guide - for Winter Gardening in Chemung County, New York
Cold Frames & Hot Beds Guide - for Winter Gardening in Chemung County, New YorkCold Frames & Hot Beds Guide - for Winter Gardening in Chemung County, New York
Cold Frames & Hot Beds Guide - for Winter Gardening in Chemung County, New York
 
Build a shed
Build a shedBuild a shed
Build a shed
 
Part 3 low cost housing
Part 3 low cost housingPart 3 low cost housing
Part 3 low cost housing
 
Plumbing Point Loma- Frozen Pipes
Plumbing Point Loma- Frozen PipesPlumbing Point Loma- Frozen Pipes
Plumbing Point Loma- Frozen Pipes
 
Solar Thermal Project
Solar Thermal ProjectSolar Thermal Project
Solar Thermal Project
 
Build a shed
Build a shedBuild a shed
Build a shed
 
Thermal Storage Wall or Thrombe Wall (prototype model)
Thermal Storage Wall or Thrombe Wall (prototype model)Thermal Storage Wall or Thrombe Wall (prototype model)
Thermal Storage Wall or Thrombe Wall (prototype model)
 
Garden Season Extenders Summary - How to Maximize your Garden Output, without...
Garden Season Extenders Summary - How to Maximize your Garden Output, without...Garden Season Extenders Summary - How to Maximize your Garden Output, without...
Garden Season Extenders Summary - How to Maximize your Garden Output, without...
 
Choosing a solar hot water system
Choosing a solar hot water systemChoosing a solar hot water system
Choosing a solar hot water system
 
all sheets
all sheetsall sheets
all sheets
 
My Air Conditioner Isn't Cooling My House - 5 Amazing Fixes
My Air Conditioner Isn't Cooling My House - 5 Amazing FixesMy Air Conditioner Isn't Cooling My House - 5 Amazing Fixes
My Air Conditioner Isn't Cooling My House - 5 Amazing Fixes
 
Healthy Space Crawlspace Fix To Damp, Wet, Moldy, And Unhealthy Crawlspace.
Healthy Space Crawlspace Fix To Damp, Wet, Moldy, And Unhealthy Crawlspace.Healthy Space Crawlspace Fix To Damp, Wet, Moldy, And Unhealthy Crawlspace.
Healthy Space Crawlspace Fix To Damp, Wet, Moldy, And Unhealthy Crawlspace.
 
Plasterboard's Visual Dictionary
Plasterboard's Visual DictionaryPlasterboard's Visual Dictionary
Plasterboard's Visual Dictionary
 
The passive house_2009_Arny Arnadottir_1
The passive house_2009_Arny Arnadottir_1The passive house_2009_Arny Arnadottir_1
The passive house_2009_Arny Arnadottir_1
 
Solar.ppt
Solar.pptSolar.ppt
Solar.ppt
 
Hot & dry climate
Hot & dry climateHot & dry climate
Hot & dry climate
 
ice plant factory report
ice plant factory reportice plant factory report
ice plant factory report
 
Low cost construction
Low cost construction Low cost construction
Low cost construction
 
Cover greenhouses, solariums,sundance designguide
Cover greenhouses, solariums,sundance designguideCover greenhouses, solariums,sundance designguide
Cover greenhouses, solariums,sundance designguide
 

Solar Heated Workshop Story

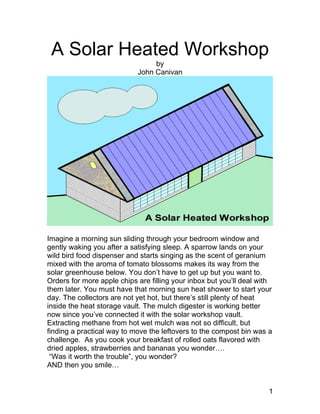
  • 1. A Solar Heated Workshop by John Canivan Imagine a morning sun sliding through your bedroom window and gently waking you after a satisfying sleep. A sparrow lands on your wild bird food dispenser and starts singing as the scent of geranium mixed with the aroma of tomato blossoms makes its way from the solar greenhouse below. You don’t have to get up but you want to. Orders for more apple chips are filling your inbox but you’ll deal with them later. You must have that morning sun heat shower to start your day. The collectors are not yet hot, but there’s still plenty of heat inside the heat storage vault. The mulch digester is working better now since you’ve connected it with the solar workshop vault. Extracting methane from hot wet mulch was not so difficult, but finding a practical way to move the leftovers to the compost bin was a challenge. As you cook your breakfast of rolled oats flavored with dried apples, strawberries and bananas you wonder…. “Was it worth the trouble”, you wonder? AND then you smile… 1
  • 2. The solar heated workshop concept A solar heated workshop may not be right for everyone but if your property receives sufficient sunlight this sustainable energy workshop might be right for you. Bigger is better when it comes to solar, but affordability is also important. MTD solar collectors can be manufactured for less than $4/ sq ft., so a 400 sq ft. array can be assembled for $1600. Sixteen 60 plastic drums can be used to store the solar heated water. These plastic drums can often be salvaged from food processing plants at no cost. More conventional drain back systems pump water to the bottom of collectors while trickle down systems like this trickles water down through the tops of the collector array. Sixteen 2’x12’ Modified Trickle Down collectors can harvest more than 300,000 BTU’s per day in most US mainland locations. Hot water is produced as it flows down through a black absorbent absorber material within the collectors. The heated water is then collected inside a 2” hand made PVC gutter. From here it flows through 2” PVC drain pipes and into the end drums of the heat storage vault. Multiple drums trap heat by separating hot water from cold water. The same drums distribute heat efficiently by preheating water. Each drum preheats water for its adjacent drum. 2
  • 3. This top view demonstrates the overall solar heating concept. Notice that the heat storage drums are isolated from the shop inside their own insulated storage vault built against the North wall. The proximity of stored heat to the shop facilitates forced hot air or radiant floor heating. Both methods have their advantages and disadvantages. This is my little 6’x12’ sunshed with six 2’x8’ MTD collectors, a 50 watt PV panel and three 60 gallon drums worth of heat storage. It’s used to collect data, cure paint and dry fruit. The solar heated workshop is based on the research done with this shed. 3
  • 4. CONTENTS 1. Choosing a building site 2. Sub soil preparation 3. Footing 4. Cement pad for heat storage vault 5. Floor 6. Cement blocks 7. Shop stud walls 8. Ceiling joist 9. Ridge roof 10. Soffits 11. Vault platform 12. Multi-drum heat storage 13. Multi-drum heat distribution 4
  • 5. CHOOSING A BUILDING SITE Choose a location with a good southern exposure that’s higher than the surrounding terrain. You will not be happy if your shop fills with water after the first rainstorm. If you decide to use some stored workshop heat for your home DHW system, plan a trench that will connect ¾” PEX from the heat exchange platform to your home hot water system. SUB SOIL PREPARATION After settling on a workshop site you should hire an excavator to scrape off loose loom and get down to solid sub soil. After the loom has been removed level the sub soil and fill the excavated area with sand. The top layer of sand should be level with the surrounding ground. This of course means the top of the cement floor will be higher than the surrounding ground. FOOTING More time should be spent with the footing than the workshop floor because the weight of the shop rests on the 8” x16” footing. If 2x8x16 planks are used for the framing materials they may be reused when it comes time to install the shop ceiling joists. I recommend keeping the top of the footing about 3” above ground level. After the 2x8 planks for the forms are removed, line the outside of the footing with 2” strips of solid insulation. HEAT STORAGE VAULT PAD It’s best to pour the footing and the floor separately but you could still pour a 3” deep cement pad for the heat storage vault at the same time the footing is poured. FLOOR Placing solid insulation under the cement workshop floor is not entirely necessary. Dry gravel under the floor may be used as an insulator. Cover the gravel with plastic before pouring cement otherwise the insulating properties of the gravel will be lost forever. 5
  • 6. CEMENT BLOCKS Cement blocks are easy to lay once the footing and floor are poured. Mortar the corner cement blocks in place and then stretch a level line between the corners. Just follow the line and the blocks will look great. Be sure to install anchor bolts about every 10 feet and fill the hollow of the blocks with insulation. SHOP STUD WALLS Secure a bottom sill plate to the cement blocks with the anchor bolts. Now install the stud walls on top of the bottom sill. Someone could help raise the walls, but you seem to know what you’re doing and I bet you could do it without any help. After all the stud walls are in position, lock them in place with overlapping top sill plates. Keep the studs plumb and the sills level. If you do this the work will be easier and your Momma will be proud. 6
  • 7. CEILING JOISTS Finish the stud wall framing before assembling the heat storage vault First install the 2x8x16 ceiling joists AND give the building inspector a piece of your famous blueberry pie if he gives you a hard time. 7
  • 8. RIDGE ROOF Almost done! Let’s frame the ridge roof with 2x6x12s and take a break for lunch. A ridge roof is less expensive than a truss roof plus it will allow for valuable loft space. SOFFITS Frame out soffit extensions to leave a hollow area under the eves, because this is where the drain from the gutter will pass under the top of the sill plate. 8
  • 9. Let’s remove a few walls so you can see what I mean. 9
  • 10. The remaining part of the shop construction is finish work. I’ll leave this up to you. After installing MTD collectors and the heat storage vault the shop should look something like this. PV panels could also be added to the shop roof. Once the shop is completed, the heat storage vault may be assembled, but don’t mount the collectors yet. The heat storage vault should first be completed. Keeping the TDM moist is a good idea, so keep the collectors off the roof until the heat storage facility is ready to go. This will extend collector life expectancy. Remember the “Trickle Down Mat” collects heat and the drums inside the vault store heat. Without heat storage drums all you have is a nice looking shop. 10
  • 11. VAULT PLATFORM Storage drums are placed on the heat transfer platform last. Build the outside vault stud walls so they may be easily removed. After the vault is finished the drums are connected in series with 2” rubber boots and 2” PVC pipes. You will not be able to daisy chain the drums with a vault wall in the way. OK…Let’s now focus on preparing the insulated vault platform. If a Domestic Hot Water system is needed you’ll need a concrete slab upon which the drums rest to extract heat. There are many ways to extract heat from the drums of hot water but I believe this method is most practical. A network of copper tubes connected in parallel will transfer more heat than a serpentine PEX tube so let’s use copper for DHW heat extraction. The heat storage vault platform is built on top of the 3” cement pad that we mentioned earlier. Let’s take a closer look at the cement pad and the copper tubes that run through the heat transfer platform. 11
  • 12. This platform is framed with 2x6 timbers and rests on cement blocks. The frame is packed with insulation (solid and fiberglass) and capped with a ½” plywood lid. 2x4 sill plates line the perimeter of the platform. Wire mesh is stapled to the plywood before the copper tubes are laid out with a 2” space between them. After the tubes are in position the cement platform is poured inside the 2x4 perimeter. Be sure to protect the copper with polyurethane before pouring cement on it. Cement can corrode copper over a period of time. A thin protective coating will extend the life expectancy of your heat storage vault into the next century. A well constructed level platform works will be worth your efforts. Keep the drums at least 3” away from the inside walls of the vault to allow air circulation. A top view of the heat transfer platform concept is illustrated below. 12
  • 13. DHW HEAT EXCHANGE: This heat exchange platform is only 8 feet long. It’s designed to accommodate three 60 gallon, but of course the workshop heat transfer platform is 40 feet long and it accommodates as many as 16 drums. The input and output manifolds are much wider than the heat transfer tubes so that the flow rates within each flow tube is about the same. An ideal heat exchange platform would have cold tap water enter the cold side of the platform and exit the hot side. Ideal conditions are not always possible so it is sometimes necessary to sacrifice efficiency for practicality. HEAT STORAGE: A dip tube heat transfer system is illustrated below. Notice how heat stratification is maintained. The coldest water is taken from the bottom of a drum with the help of a dip tube. This cold water is then deposited near the top of the adjacent drum. In this manner solar heated water is trapped within the multi-drum system. The coldest water from the last drum is then returned to the collectors to gather more heat. 13
  • 14. These 60 gallon drums have been connected through the tops, but they may also be connected through the sides. I am now recommending side drum connections with a diminished flow velocity to reduce turbulence and increase heat stratification. Water having the same flow rate will have a greater flow velocity through small diameter orifices. To mitigate high velocity turbulence large diameter orifices should be used to transport heated water through the multi- drum storage system. High velocity water causes turbulence within the drums which in turn decreases heat stratification which decreases collector efficiency. In other words: By increasing the diameter of the connecting pipes the collector efficiency is increased. 14
  • 15. As I mentioned above we may also connect sealed plastic drums through the sides by drilling 2.7” holes through sides of the drums and by installing rubber boots within these holes. To do this you should use a circular saw, 2.75”, with the outer teeth filed down. Bulk head connectors may also be used to insure a leak free junction, but I have been lucky with simple 2” rubber boots held in place with 2” PVC so I will continue to use this simple method until I have a problem. Here is the best method of connecting drums that I have found thus far. The drum units may be pre-assembled in this manner. Two 2.7” holes are drilled through the sides of each drum toward the center of the sides. It is very important to keep the holes at a standard location in each drum. One 2”x 28” PVC pipe may be used in each drum, but before inserting the PVC pipe through the drum a top notch and bottom notch are cut out and the center part of the PVC (black line) is plugged so that hot water entering the drum is directed to the top and cold water leaving the drum is pulled from the bottom. The large notch cut into the PVC slows down the velocity of water. By lowering the forces of turbulence the delicate forces of convection currents are encouraged and the process of separating hot water from cold water is facilitated. Now all we have to do is finish framing and finish insulating the heat storage chamber before we retire for the day. 15
  • 16. A few cross supports should be used to hold the walls together and a 3” slab of solid insulation should be used as an inner lid above the drums. A shed roof on hinges is also a good idea. We don’t want the storage vault to fill with rain water. Four tons will be quite sufficient. All we need for the Domestic Hot Water is a connection from out tap water supply to our heated platform solar hot water supply. We can also dry fruit on drying racks placed on top of these hot drums but how shall we heat our workshop in winter? THREE POSSIBILITIES 1. Push or pull cold shop air through the heat storage vault with a fan. 2. Regulate the flow of hot convection air currents from the heat storage vault with louvers. 3. Last but not least…Radiant floor heating 16
  • 17. A radiant floor heating system provides an ideal method for regulating shop temperature although there are concerns in cold climates where freezing may be a problem. If you decide to heat your shop floor with solar heated water be sure to insulate the outside of the footing as mentioned before and drop in a mat of solid insulation before pouring cement. Of course the sub floor should still be level and tamped down Don’t forget about the steel flooring mesh and re-rods used to hold the PEX in place while pouring the floor. Also notice the two circulator pumps. Since heat is concentrated in the end drums hot water is circulated from the end drums and returned to the coldest drums located toward the center of the storage vault. More information about MTD solar heating is available on line, but it’s actually easier to build MTD collectors than explain how they are built. MTD collector starter kits with construction guides are available. They facilitate the hands on experience needed to become an MTD pro. May all your projects be filled with sunshine. John Canivan www.jc-solarhomes.com 17
  • 18. Solar Heated Workshop Contract Breakdown Customer may choose any or all of the parts of this contract. 1. Cement floor, footing and heat storage platform $5,000 2. Workshop frame $10,000 3. Roof, insulation, stairs, dry walls, windows, door $10,000 4. Thermopane windows, garage door, finish trim etc. $ 5,000 5. MTD solar heating system with 16 MTD collectors $ 8,000 Sixteen 60 gallon heat storage drums $ 2,000 Insulated heat storage vault chamber 3’x40’ $ 2,000 Controller, pumps and fans $ 1,000 labor $ 5,000 TOTAL $47,000 The details of this contract may vary. This is only a rough estimate. It includes free maintenance (parts and labor) for the first 5 years. Contact John Canivan 516-785-6947 for more details… www.jc-solarhomes.com 18