
Recomendados
Recomendados
Más contenido relacionado
La actualidad más candente
La actualidad más candente (18)
Similar a Crystalene joy serrano 1
Similar a Crystalene joy serrano 1 (20)
Crystalene joy serrano 1
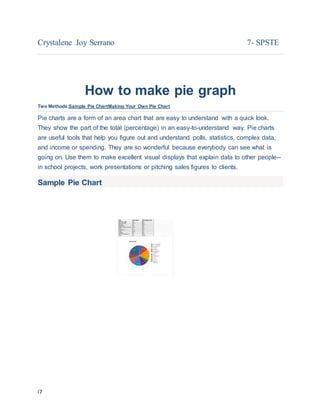
- 1. i7 Crystalene Joy Serrano 7- SPSTE How to make pie graph Two Methods:Sample Pie ChartMaking Your Own Pie Chart Pie charts are a form of an area chart that are easy to understand with a quick look. They show the part of the total (percentage) in an easy-to-understand way. Pie charts are useful tools that help you figure out and understand polls, statistics, complex data, and income or spending. They are so wonderful because everybody can see what is going on. Use them to make excellent visual displays that explain data to other people-- in school projects, work presentations or pitching sales figures to clients. Sample Pie Chart
- 2. i7 Sample Pie Chart About Time Making Your Own Pie Chart 1.
- 3. i7 2. 2 Gather your numerical data and label information and write it down with one data point per line, in descending order.
- 4. i7 3.
- 5. i7 3 Add the data all together calculate the total. This number will be your denominator. 4.
- 6. i7 4 Calculate the percentage of the total for each data point by dividing each one by the denominator (total) calculated above. 5. 5
- 7. i7 Calculate the angle between the two sides of each pie slice. To do this, multiply each percentage (still in decimal form) by 360. The logic behind this is that there are 360 degrees in a circle. If you know that 14,400 is 30 percent of the whole (or 0.30), then you're calculating 30% of 360 which is 108. Check your work. Add up the number of degrees you calculated for each data point. They should total 360. If not, you've missed something and should double-check your work. 6. 6
- 8. i7 Use a mathematical compass to draw a circle. To draw a pie chart accurately, you need to start with a perfect circle. This can be done using a compass (and a protractor to measure the angles). If you don't have a compass, try tracing around a circle template, using something round such as a lid or a CD. 7. 7
- 9. i7 Draw the radius. Start in the exact center of the circle and draw a straight line to the outside of the circle. (Hint: make a dot with the compass to find the center.) The straight line can be vertical (12 or 6 o'clock on the clock face) or horizontal (9 or 3 o'clock on the clock face). The segments you create then follow either a clockwise or counter-clockwise sequence. 8. 8
- 10. i7 Place your protractor on the circle. Position it on the circle so that the 90 degrees crosshair is situated directly above the center of the circle. The zero point should be vertically aligned along the vertical plot line. 9. 9 Draw each section division. Draw the sections by marking the first division against the edge of the protractor at the correct angle, using the angle formulations you got in the
- 11. i7 earlier step. Each time you add a section, the radius changes to the line you just drew; rotate your protractor accordingly. When marking the angle lines, make sure they are sharp and fine, to keep them clear and easy to see. 10. 10
- 12. i7 Color each segment. You can use color, patterns or just words, depending on what meets your purpose best. Add the name of each section and the percent it represents in the chart. Color each section of the pie chart a different color/pattern to easily visualize the results. If you drew everything in pencil first, always ink in the circle before coloring in any of the segments. This is because the circle is the trickiest part to draw accurately. Labels or words added to each segment should be written horizontally and centered (the same visual distance from the edge for each segment). This makes them easier to read.