

Recomendados
Más contenido relacionado
Destacado
Similar a Learn micro training for coas
Similar a Learn micro training for coas (20)
Último
Último (20)
Learn micro training for coas
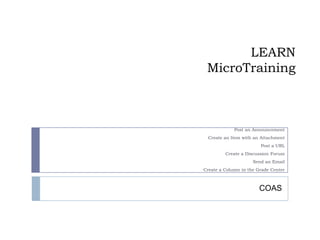
- 1. LEARN MicroTraining Post an Announcement Create an Item with an Attachment Post a URL Create a Discussion Forum Send an Email Create a Column in the Grade Center COAS
- 2. Say Good-Bye to Vista and Classic! Say Hello to LEARN! The entire University community will be switching to a single learning management system (LMS). Courses beginning June 25, 2012 will use LEARN. After that, ALL courses will have access to LEARN. This includes on-campus classes, hybrid classes, and online classes.
- 3. LEARN MicroTraining This brief training session will cover six very basic functions: create an announcement, create an item with an attachment, post a URL, create a discussion forum, send email, and create a column in the grade book. This training will demonstrate the most simple steps in performing these functions. This training also utilizes a template that will be available to all COAS faculty. This micro-training session will not provide a comprehensive review of each of the functions. For more information about the tools, features, and functions of LEARN, please check out the additional training options on the last slide.
- 4. To access LEARN, go to https://learn.dcollege.net and log in
- 5. In the “My Courses” section, click on the course you want to work on.
- 6. The opening page of your course will appear.
- 7. „Instructor Side‟ vs. „Student Side‟ of the Course In both Vista and Classic, there is an „instructor side‟ of the course from which the instructor can control the content and a „student side‟ of the course. This is also the case in LEARN, but the way to access the „instructor side‟ of the course is a little different.
- 8. Course Management: The Control Panel Classic users are accustomed to a Control Panel from which the course features can be managed. Vista users will need to learn about the Control Panel and the options that are available for course management. To access the Control Panel, scroll down. There will be a section called Control Panel with fixed features. Each feature has pull-down arrows. There are several hidden options within each control panel feature that can be accessed by using these pull-down arrows. All faculty will need to explore these hidden features and become acclimated to accessing them as needed.
- 9. To work on items from the „Instructor side‟ of the course… There is an „Edit Mode‟ button in the right corner just under the blue header. To access the „Instructor side‟ of the course, click the edit mode button to ON. When the Edit Mode button is on OFF, you will see the „Student side‟ of the course and you can view what your students see.
- 10. To Post an Announcement On the Announcements page, click on Create Announcement. The page will change and there will be four steps to posting an announcement….
- 11. Posting an Announcement Step 1: Announcement Information Type the subject of the announcement in the Subject box. Then, type in the content of the announcement in the text box.
- 12. Posting an Announcement Step 2: Web Announcement Options Do you want the announcement to display forever? Then, click Not Date Restricted. If you want the duration of the announcement to be limited, then set the Date Restrictions. Click on the box next to „Display After‟ and click on the box next to „Display Until.‟ Then, set the date and time for making the announcement available.
- 13. Posting an Announcement Step 3: Course Link Do you want the announcement to link to a particular part of the course? Then, click on the Browse button. If not, then skip this and go to Step 4.
- 14. Posting an Announcement Step 4: Submit Scroll down and click Submit. If the announcement posted correctly, a green bar will appear that says “Success: Announcement created” and the announcement will appear on the page.
- 15. Let‟s see what that announcement looks like from the Student side of the course… Go back to the Edit Mode button in the top right and click it to the OFF position. You will then see what the student sees.
- 16. Want to modify or remove the announcement? Click the Edit Mode button to ON. Use the pull-down right next to the announcement. If you select Edit, it will take you back to the page used to create the announcement and you can make modifications. If you select Delete, you will get a pop-up box that tells you that the action is final and cannot be undone. It will ask you „Delete this item?‟ Click OK. The green bar with “Success: Announcement Deleted will appear.
- 17. CREATE AN ITEM WITH AN ATTACHMENT Start with the Edit Mode ON. In this sample template, click on Unit 1. Click on the Build Content button. Under Create, click Item. The page will change and there be four steps....
- 18. Create an Item with an Attachment Step 1: Content Information Type the name of the item in the Name box. Type information and/or instructions about the item in the text box.
- 19. Create an Item with an Attachment Step 2: Attachments Scroll down to Step 2- Attachments. For this example, let‟s attach a syllabus from my computer. So, click on Browse My Computer. The items on my computer desktop will appear. Click on the item to be uploaded from the computer desktop. The name of the attachment will appear.
- 20. Creating an Item with an Attachment Step 3: Options Set the dates for student access by using the buttons in the Options section.
- 21. Creating an Item with an Attachment Step 4: Submit Scroll down to step 4 and click Submit. A green bar with a “Success” message will appear. The item with the attachment will appear…AT THE BOTTOM OF THE LIST OF ITEMS!
- 22. Want to change the order of appearance of the items? Use the up/down Drag- and-Drop arrows next to the item you want to move. Click on the up/down arrows and left-click on your computer. Drag the item to its new position. When it is in the position you want, click it in its new position.
- 23. Want to modify or delete the item or the attachment? Click on the pull-down arrows next to the item. If you want to delete the entire item, click Delete. If you want to modify the item or the attachment, click Edit. This will take you to the four-step page you used to create the item with the attachment. You may modify any part of the item or attachment there.
- 24. Post a URL Start with the Edit Mode ON. In this sample template, click on Unit 1. Click on the Build Content button. Under Create, click URL. The page will change and there be five steps....
- 25. Post a URL Step 1: URL Information Type in the name of the item in the Name box. Type in the URL.
- 26. Posting a URL Step 2: Description Type in any information in the text box.
- 27. Post a URL Step 3: Attachments, Step 4: Options, Step 5: Submit Step 3 – add any attachments by using the Browse buttons Step 4 – Set the open and close dates using the buttons in the Date and Time Restrictions area Step 5 – Click Submit The item will go to the BOTTOM OF THE LIST. Use the drag and drop feature to move the item into any other position.
- 28. Want to change a posted URL? To edit or delete the URL item, click on the pull-down arrows next to the item. To delete the item, click delete. To edit the item, click Edit. This will take you back to the page used to create the item. You can make any changes there.
- 29. CREATING A DISCUSSION FORUM Using this template as an example, click on the Discussion Board navigation button.
- 30. CREATING A DISCUSSION FORUM Click on the Create Forum button near the top of the page. The page will change and there will be four steps….
- 31. Creating a Discussion Forum Step 1: Forum Information Type the name of the Discussion Forum in the Name box. Type information about the forum in the text box.
- 32. Creating a Discussion Forum Step 2: Forum Availability Scroll down to Step 2 – Forum Availability. Using the calendar and time pull-downs, set the Display After and Display Until dates and times. If you want the discussion forum to stay open indefinitely, don‟t set any date or time restrictions.
- 33. Creating a Discussion Forum Step 3: Forum Settings Scroll down to step 3 – Forum Settings. Some items will be pre-clicked. Until you know if you want to make modifications to these, leave them as is. Extra option to consider: If you want to give students scores for the discussion forum, you can click on the Grade Discussion Forum box near the bottom. You can enter the number of points for that discussion forum. Clicking this will automatically create a column in the Grade Center for this discussion forum.
- 34. Creating a Discussion Forum Step 4: Submit Scroll down to step 4 – Submit. Click Submit. The page will change to the full Discussion Board page. The new discussion forum will be AT THE BOTTOM OF THE LIST. To change the order of appearance of the discussion forum, use the drag-and-drop to put the discussion forum in a different place in the list of items.
- 35. Creating a Discussion Forum To Modify or Delete a Discussion Forum To modify or delete a discussion forum, click the pull-down arrows next to the forum. To modify the forum, click Edit. This will take you back to the page you used to create the forum To delete the forum, click delete.
- 36. Starting a conversation within a discussion forum…. To start a conversation within a discussion forum: Click on the discussion forum. This will take you inside the forum. Click Create Thread. This will take you to a new page with three steps…
- 37. Starting a conversation within a discussion forum Step 1 - Message Type the subject for the conversation in the Subject box. Write a comment in the text box.
- 38. Starting a conversation in the Discussion Forum Step 2 – Attachments Step 2 – Adding an attachment: If you want to add an attachment, use the Browse My Computer or Browse Content Collection buttons
- 39. Starting a conversation in the Discussion Forum Step 3 - Submit Click Submit. The page will change and you will see the name of your new thread posted. To see the content of the thread, click on the name of the thread. This will change the page…
- 40. Starting a conversation using the Discussion Forum You will see the actual message that was posted along with the option of responding to the message by using the Reply button. When done viewing, click OK in the lower right corner. Clicking OK will take you back to the list of threads in that particular discussion forum. Conversations are conducted by people replying to each other‟s posts.
- 41. To Send an Email Scroll down to the Control Panel. There is a feature called Course Tools. On the left side of Course Tools is a pull-down arrow. Click the pull- down arrow for your options to appear. Click Send Email.
- 42. To Send an Email The page will give you many options for sending email. You should decide if you want to send the email to the whole class, individuals, or groups within the class. For this demonstration, let‟s say we want to send an email to one person. Scroll down and click on Single/Select Users. The page will change and there will be two steps…
- 43. To send an email Step 1 – Email Information, Step 2 - Submit From the „Available to Select‟ box, click on the person to whom you want to send the email. Click on the arrow pointing to the right to move that name to the „Selected‟ box on the right. Move down to the actual email content area. Type in the email subject in the Subject box. Type in your message. If you want, you can add an attachment. When done, click Submit in the lower right corner. The email will be sent to the recipient‟s Drexel email account.
- 44. Creating a Column in the Grade Center Scroll down to the Control Panel. The Grade Center will be in the list of course features. There are arrows to the left of the Grade Center that point down. If you click on these arrows, you have a choice of options of what you want to grade. To add a column in the Grade Center, click on Full Grade Center. There are arrows to the right of the Grade Center. If you click on these arrows, you will be taken to the Full Grade Center
- 45. Creating a Column in the Grade Center Click on the Create Column button. This will take you to a page with four steps…
- 46. To Create a Column in the Grade Center Step 1 – Column Information Type in the Column Name If you want, type in a Description. Primary Display – use the pull-down to choose whether the grades for that item should be recorded as a score, letter, percentage, complete/incomplete. Type in the Points Possible.
- 47. Create a Column in the Grade Center Step 2–Dates,Step 3–Options,Step 4-Submit Step 2 – Dates You can choose whether to enter due dates. If you don‟t want to enter due dates, leave this blank. Step 3 – Options You can choose whether to let students see this column or not. You can choose whether you want LEARN to use the column for doing course grade calculations Step 4 – Submit A column will appear in the Grade Center.
- 48. Want to learn more about LEARN? Online Learning Team Monday – Friday, 8:00am – 5:00pm 215-895-1224 olt@drexel.edu Blackboard On Demand Learning Center http://ondemand.blackboard.com/ Check http://www.drexel.edu/irt/help/workshops/ for information about upcoming LEARN training sessions.
- 49. Blackboard‟s On Demand Learning Site http://ondemand.blackboard.com Resources broken into 4 categories: Understanding & Building Your Course Communicating & Collaborating Assessing Learners For Students New items added regularly
- 50. Blackboard‟s On Demand Learning Site
- 51. On Demand Resources From Today Post an Announcement Create an Item with an Attachment Post a URL Create a Discussion Forum Send an Email Create a Column in the Grade Center