Lesson 3 - Insite Creative Workflow Roles And Responsibilities
•
1 like•575 views

In Lesson 3 we explore how to create roles in Insite Creative Workflow.

Recommended
More Related Content
Viewers also liked
Viewers also liked (20)
Similar to Lesson 3 - Insite Creative Workflow Roles And Responsibilities
Similar to Lesson 3 - Insite Creative Workflow Roles And Responsibilities (20)
More from Informatica
More from Informatica (13)
Recently uploaded
Recently uploaded (20)
Lesson 3 - Insite Creative Workflow Roles And Responsibilities
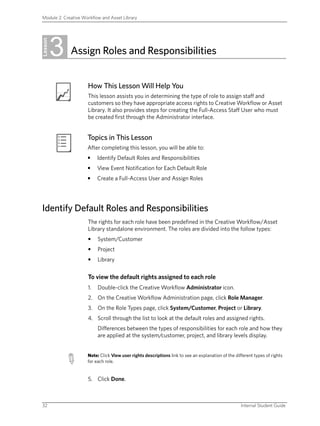
- 1. Module 2: Creative Workflow and Asset Library 3 Lesson Assign Roles and Responsibilities How This Lesson Will Help You This lesson assists you in determining the type of role to assign staff and Tea customers so they have appropriate access rights to Creative Workflow or Asset Library. It also provides steps for creating the Full-Access Staff User who must be created first through the Administrator interface. Topics in This Lesson After completing this lesson, you will be able to: • Identify Default Roles and Responsibilities • View Event Notification for Each Default Role • Create a Full-Access User and Assign Roles Identify Default Roles and Responsibilities The rights for each role have been predefined in the Creative Workflow/Asset Library standalone environment. The roles are divided into the follow types: • System/Customer • Project • Library To view the default rights assigned to each role Double-click the Creative Workflow Administrator icon. 1. 2. On the Creative Workflow Administration page, click Role Manager. 3. On the Role Types page, click System/Customer, Project or Library. 4. Scroll through the list to look at the default roles and assigned rights. Differences between the types of responsibilities for each role and how they are applied at the system/customer, project, and library levels display. Note: Click View user rights descriptions link to see an explanation of the different types of rights for each role. 5. Click Done. 32 Internal Student Guide
- 2. Assign Roles and Responsibilities Note: Click Edit to change the default entry names, add rights to existing roles, add new roles, or remove existing roles. Roles assigned to the site user at the System/Customer level in Creative Workflow Administration are inherited by the Project and Library levels. For example, if a Site Manager is assigned the administrator role at the System/ Customer level, the Site Manager will have an “Administrator-Default” role for all Customer, Project, and Library roles under the customer account. You can, however, override these roles at a project and library level. View Event Notification for Each Default Role The events that a user receives notification about are determined by the notification settings associated with the role the user is assigned. These events are tracked in a history database and users can be notified of specific events either by individual e-mail as the events occur or in a summary digest format once a day. To view event notification for each default role Double-click the Creative Workflow Administrator icon. 1. 2. On the Creative Workflow Administration page, click Role Manager. 3. On the Role Types page, click Project or Library. 4. Scroll to the right of each role. Note that a Notification link appears at the very end of each row. 5. Click Notification. The types of events which trigger either an e-mail or daily digest are selected. Also note that a filter for some of the Project event types appears which gives you an option of either receiving all notices or only those generated for the user. 6. If no changes are wanted, click Cancel. Note: The time of day when digests are delivered is set in Creative Workflow Administration under Configuration > Notification. Internal Support for Portal Products 33
- 3. Module 2: Creative Workflow and Asset Library Create a Full-Access User and Assign Roles Each company may have a designated staff user overseeing one or multiple client accounts. The staff user is typically engaged in these activities: • Creating and managing accounts and company information. • Assisting clients with the use of Creative Workflow. • Participating in internal (Agency) and/or external client workflow collaboration processes. The Full-Access Staff user in this scenario is the Site Manager who also has the responsibilities of project management and system administration. Therefore, the Site Manager is given administrative access for all role types (System/Customer, Project, and Library). Activity: Create the full-access user and assign roles Double-click the Creative Workflow Administrator icon. 1. 2. On Creative Workflow Administration page, click Staff Users. 3. On the Staff Users page, click Add New User. A dialog box appears warning that the account to be created will have access to all projects and libraries. 4. Since this is our intent, click OK. 5. Complete the boxes using your name and be sure to select Administrator in the drop down System Role, Project Role, and Library Role list. 6. Enter your e-mail address as the e-mail to be used for the staff user. E-mail notification on customer account activities such as, file uploads and tasks are sent to the corresponding staff user overseeing the customer account. 7. Click Add User. 8. Make a note of the username and password created since these will be used in future exercises. Note: More than one staff user may be created with either full or limited rights for the system, project, and library roles. 34 Internal Student Guide
- 4. Assign Roles and Responsibilities Lesson Summary After completing this lesson, you will be able to: • Identify Default Roles and Responsibilities • View Event Notification for Each Default Role • Create a Full-Access User and Assign Roles Internal Support for Portal Products 35