Microsoft Publisher 2007 Tutorial: Easter Egg Hunt Flyer
•
3 recomendaciones•1,307 vistas

Learn how to create an Easter Egg Hunt Flyer from beginning to end using Microsoft Publisher 2007.

Recomendados
Más contenido relacionado
La actualidad más candente
La actualidad más candente (13)
Similar a Microsoft Publisher 2007 Tutorial: Easter Egg Hunt Flyer
Similar a Microsoft Publisher 2007 Tutorial: Easter Egg Hunt Flyer (20)
Último
Último (20)
Microsoft Publisher 2007 Tutorial: Easter Egg Hunt Flyer
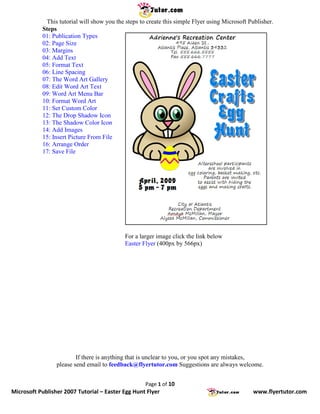
- 1. This tutorial will show you the steps to create this simple Flyer using Microsoft Publisher. Steps 01: Publication Types 02: Page Size 03: Margins 04: Add Text 05: Format Text 06: Line Spacing 07: The Word Art Gallery 08: Edit Word Art Text 09: Word Art Menu Bar 10: Format Word Art 11: Set Custom Color 12: The Drop Shadow Icon 13: The Shadow Color Icon 14: Add Images 15: Insert Picture From File 16: Arrange Order 17: Save File For a larger image click the link below Easter Flyer (400px by 566px) If there is anything that is unclear to you, or you spot any mistakes, please send email to feedback@flyertutor.com Suggestions are always welcome. Page 1 of 10 Microsoft Publisher 2007 Tutorial – Easter Egg Hunt Flyer www.flyertutor.com
- 2. Step 01: Publication Types Upon opening Microsoft Publisher 2007, you will see a listing of Popular Publication Types. Select Blank Page Sizes. Step 02: Page Size Double click on "Letter (Portrait) 8.5 x 11"to open up a Blank Page. Page 2 of 10 Microsoft Publisher 2007 Tutorial – Easter Egg Hunt Flyer www.flyertutor.com
- 3. Step 03: Margins Go to the File Menu > Page Setup. This will open up the Page Setup Window. To the right side of this window you will see the Margin Guides section. Set Top, Left, Bottom, and Right to "0.5". Click on the "OK" button on the bottom right of the screen. Step 04: Add Text Select the Text Box Icon on the Objects Menu Bar to the left of the screen or go to Insert Menu > Text Box. Hold down the left mouse button, draw a Text Box on the screen and then release. Start entering Text, in this case it will be the Company's Title and Contact Information: "Adrienne's Recreation Center 495 Aiden St., Atlantis Place, Atlantis 34332 Tel. 555.666.5555 Fax 555.666.7777". Page 3 of 10 Microsoft Publisher 2007 Tutorial – Easter Egg Hunt Flyer www.flyertutor.com
- 4. Step 05: Format Text Select all the Text, then move up to the Formatting Menu Bar (which is normally much longer than this). Select the down arrow on the right side of "Times New Roman" and change the Font to "Segoe Print" which is a free Font that was downloaded from www.FontFreak.com. Select the down arrow next to the number "10" and set the Font Size to "20". Change the Layout to "Center" by clicking on the Center Icon . Then specifically select the Company Title, select the Bold Icon and change the Font Size to "26". Step 06: Line Spacing Next reselect all the Text and select the Line Spacing Icon . This will bring up the Paragraph Window. In the Line Spacing section, change "Between Lines" to "0.6sp". The Formatted Text should look like this: The "April" Text uses the Font "Advert" also downloaded from www.FontFreak.com. Font Size is "30" and Layout is "Center". Page 4 of 10 Microsoft Publisher 2007 Tutorial – Easter Egg Hunt Flyer www.flyertutor.com
- 5. Step 07: The Word Art Gallery Next we can add some Fill Colored Text with a Drop Shadow. In this case, the Text is "Easter Crafts Egg Hunt". We must use the Word Art Icon found on the Objects Menu Bar since we want to have Text that has both a Fill and a Stroke. Once you select the Word Art Icon, the Word Art Gallery Window will appear. Select the 1st Option. Then click OK. Step 08: Edit Word Art Text This will give you the Edit WordArt Text Window. The Text to be entered is "Easter Crafts Egg Hunt". In order to get the desired effect, we will have to do one word at a time, then repeat the steps for each additional word. Where you see "Your Text Here" enter "Easter", click on the down arrow next to Font and select "Advert" and set the Size to "60". Then click OK. Repeat for the other 3 words. The Text should look like this: Step 09: Word Art Menu Bar Now select each word by holding down the left mouse button and dragging over the four words. The Word Art Menu Bar will appear. Select the Format Word Art Icon . Page 5 of 10 Microsoft Publisher 2007 Tutorial – Easter Egg Hunt Flyer www.flyertutor.com
- 6. Step 10: Format Word Art This will bring up the Format Word Art Window. You should be on the Colors and Lines Tab. In the Fill Section, select the down arrow next to Color. This will give you a drop down menu. Select More Colors. Step 11: Set Custom Color This brings up the Color Window which gives you the option to select Standard, Custom or Pantone Colors. Select the Custom Tab, then set Red to "0", Green to "128" and Blue to "232". Then click OK. Now go to the Line Section, and select the down arrow next to Color. Select White. Then set Weight to "1pt" and click OK. The Text should look like this: Page 6 of 10 Microsoft Publisher 2007 Tutorial – Easter Egg Hunt Flyer www.flyertutor.com
- 7. Step 12: The Drop Shadow Icon Choose the Drop Shadow Icon from the Formatting Menu Bar while the Text is still selected. The Drop Shadow Menu will appear. Select Shadow Style 4. The resulting Shadow will be "Gray". To change this to "Black" go back to the Shadow Style Window and select Shadow Settings. This will bring up the Shadow Settings Menu Bar. Step 13: The Shadow Color Icon The Shadow Color Icon is last on the Menu Bar. Select the Black Down Arrow next to the Icon and choose "Black". The new Text should look like this: Here is what the Drop Shadowed Text does for the Flyer. Step 14: Add Images Here I downloaded the Images of an Egg and a Rabbit from www.Clker.com, which is a site where you can download Royalty Free Clipart. You can also check out www.Public-Domain-Image.com, and OpenClipArt.org. Page 7 of 10 Microsoft Publisher 2007 Tutorial – Easter Egg Hunt Flyer www.flyertutor.com
- 8. Step 15: Insert Picture From File To Insert Images select the Picture Frame Icon on the Objects Menu Bar, then select "Picture from File", or go to the Insert Menu > Picture > From File. Be certain that your Images are in a Format that will be recognized by Microsoft Publisher. These Images are saved in PNG (Portable Network Graphics) Format. Once the Image has been inserted, resize it by selecting one of the "Circles" and holding down the Ctrl + Shift Keys together, so that you don't get a disproportionate Image. Step 16: Arrange Order Select the Bring to Front Icon on the Standard Menu Bar. This will change the order of the Images as you lay them out. Click on the Black Arrow to the right of this Icon to bring up the Order Menu or by going to Arrange > Order. Page 8 of 10 Microsoft Publisher 2007 Tutorial – Easter Egg Hunt Flyer www.flyertutor.com
- 9. Step 17: Save File Once you've finished arranging your Images your document will be complete. It should look like this: All that's left to do is Save the document. Go to File > Save. Page 9 of 10 Microsoft Publisher 2007 Tutorial – Easter Egg Hunt Flyer www.flyertutor.com
- 10. Page 10 of 10 Microsoft Publisher 2007 Tutorial – Easter Egg Hunt Flyer www.flyertutor.com