

Recomendados
Más contenido relacionado
Último
Último (20)
Destacado
Destacado (20)
Tented vias manual Eagle
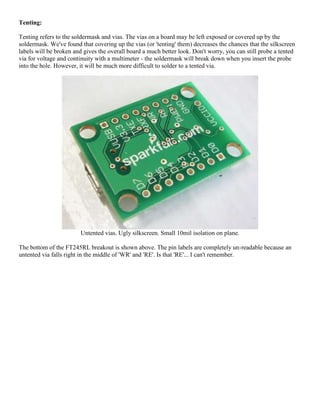
- 1. Tenting: Tenting refers to the soldermask and vias. The vias on a board may be left exposed or covered up by the soldermask. We've found that covering up the vias (or 'tenting' them) decreases the chances that the silkscreen labels will be broken and gives the overall board a much better look. Don't worry, you can still probe a tented via for voltage and continuity with a multimeter - the soldermask will break down when you insert the probe into the hole. However, it will be much more difficult to solder to a tented via. Untented vias. Ugly silkscreen. Small 10mil isolation on plane. The bottom of the FT245RL breakout is shown above. The pin labels are completely un-readable because an untented via falls right in the middle of 'WR' and 'RE'. Is that 'RE'... I can't remember.
- 2. Tented vias. Happier silkscreen. 12mil isolation on polygon pour. Bottom view of the XBee-Explorer product. I have been known to move a via to avoid a label as well, but that's just me. Tenting is taken care of in Eagle by modifying the DRC rules. To see if the vias will be tented or not, turn on all the layers by clicking on the display button: The Display button is below the 'i' button.
- 3. Click on 'All' then OK.
- 4. Turning on all the layers will create a lot of noise in the display of the board. What you are looking for is the white hatch marks indicating where the will be a lack of solder mask. The upper arrow points to a via that has no hatch marks, indicating there will be no lack of soldermask on that via (tenting it). The lower arrow points to a large hole with a white hatch mark on top of it. This is a solder point that needs to be exposed. The white hatch marks indicate there will be a lack of solder mask over this hole, exposing it so that we can solder to it. To tent your vias, open the DRC rules on your current design (Tools->DRC menu).