
Recommended
More Related Content
Similar to Teacher iPad Setup
Similar to Teacher iPad Setup (20)
More from ghbrown
More from ghbrown (20)
Recently uploaded
Recently uploaded (20)
Teacher iPad Setup
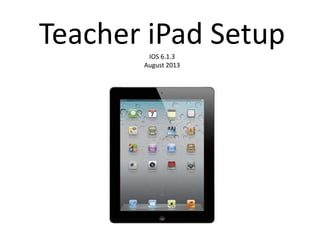
- 1. Teacher iPad SetupIOS 6.1.3 August 2013
- 2. Before using theses procedures, teachers should have already downloaded iTunes to their school laptop and created their Apple ID. Teachers will need their Apple ID and password to complete the steps for this iPad setup. Please have them bring this information to the setup training. If teachers have forgotten their Apple ID password, they should visit https://iforgot.apple.com. Instructions for each step are also included in the Notes section of each slide (within PowerPoint). We highly recommend leading small groups of teachers through this process. Leading an entire staff through this process at one time can present multiple challenges.
- 3. When you power on your new iPad, a welcome screen will appear. Slide the slider at the bottom of the page.
- 4. Choose English as your language, and then click the blue arrow button in the top-right corner of the screen.
- 5. Choose United States for your Country or Region. Then click the blue Next button.
- 6. The next screen asks you to choose a wireless network. Your available wireless networks should be listed. Tap GCSD. If GCSD does not appear, ask your TAC for your specific school WiFi network information.
- 7. You will now be prompted to enter your district username and password. This is the same username and password you use to log on to your district computer or school email. This is NOT your Apple ID. Type in the appropriate information, and then click the blue Join button.
- 8. You will be prompted to accept a network certificate. Ignore the “Not Verified” status if it appears. Click the Accept button.
- 9. The Wi-Fi page will reappear. The GCSD network should have a blue checkmark beside it. Click the blue Next button in the top-right corner of the screen.
- 10. Tap Enable Location Services, and then tap the blue Next button in the top-right corner of the screen.
- 11. Tap Set Up as New iPad, and then tap the blue Next button in the top- right corner of the screen.
- 12. Teachers should have already installed iTunes on their teacher laptops and created their Apple IDs. Teachers should tap Sign In with an Apple ID. If teachers have not created their Apple IDs, they should go back and complete this step before proceeding.
- 13. Teachers should type in their Apple ID and password. Their Apple ID should be their district email address. Remember to type in your FULL email address. Tap the blue Next button in the top-right corner of the screen.
- 14. If you accept the Terms and Conditions, click the blue Agree button in the bottom-right corner of the screen.
- 15. A pop-up window will appear to confirm your acceptance of the Terms and Conditions. Tap Agree.
- 16. Tap Don’t Use iCloud, and then click the blue Next button in the top- right corner of the screen.
- 17. Teachers can choose what email addresses they want to use with iMessage and FaceTime. Tap the blue Next button in the top-right corner of the screen.
- 18. Teachers can choose whether to use Siri or not. After making your selection, tap the blue Next button.
- 19. On the Diagnostics page, choose Don’t Send, then tap the blue Next button.
- 20. Tap the Start Using iPad button at the bottom of the screen.
- 21. You should now be on your iPad’s home screen. The next step of the setup process is to install MobileIron, our district’s Mobile Device Management System.
Editor's Notes
- When you power on your new iPad, a welcome screen will appear. Slide the slider at the bottom of the page.
- Choose English as your language, and then click the blue arrow button in the top-right corner of the screen.
- Choose United States for your Country or Region. Then click the blueNext button.
- The next screen asks you to choose a wireless network. Your available wireless networks should be listed. Tap GCSD. If GCSD does not appear, ask your TAC for your specific school WiFi network information.
- You will now be prompted to enter your district username and password. This is the same username and password you use to log on to your district computer or school email. This is NOT your Apple ID. Type in the appropriate information, and then click the blue Join button.
- You will be prompted to accept a network certificate. Ignore the “Not Verified” status if it appears. Click the Accept button.
- The Wi-Fi page will reappear. The GCSD network should have a blue checkmark beside it. Click the blue Next button in the top-right corner of the screen.
- Tap Enable Location Services, and then tap the blue Next button in the top-right corner of the screen.
- Tap Set Up as New iPad, and then tap the blue Next button in the top-right corner of the screen.
- Teachers should have already installed iTunes on their teacher laptops and created their Apple IDs. Teachers should tap Sign In with an Apple ID. If teachers have not created their Apple IDs, they should go back and complete this step before proceeding.
- Teachers should type in their Apple ID and password. Their Apple ID should be their district email address. Remember to type in your FULL email address. Tap the blue Next button in the top-right corner of the screen.
- If you accept the Terms and Conditions, click the blue Agree button in the bottom-right corner of the screen.
- A pop-up window will appear to confirm your acceptance of the Terms and Conditions. Tap Agree.
- Tap Don’t Use iCloud, and then click the blue Next button in the top-right corner of the screen.
- Teachers can choose what email addresses they want to use with iMessage and FaceTime. Tap the blue Next button in the top-right corner of the screen.
- Teachers can choose whether to use Siri or not. After making your selection, tap the blue Next button.
- On the Diagnostics page, choose Don’t Send, then tap the blue Next button.
- Tap the Start Using iPad button at the bottom of the screen.
- You should be now be on your iPad’s home screen. The next step of the setup process is to install MobileIron, our district’s Mobile Device Management System.