SlideShare una empresa de Scribd logo
1 de 185
Descargar para leer sin conexión
Cat. No. V231-E1-02


                      SYSMAC
                      WS02-SPTC1-V1
                      SPU-Console Ver. 1.3


                      OPERATION MANUAL
WS02-SPTC1-V1
SPU-Console Ver. 1.3
Operation Manual
Revised November 2005
iv
Notice:
     OMRON products are manufactured for use according to proper procedures by a qualified operator
     and only for the purposes described in this manual.
     The following conventions are used to indicate and classify precautions in this manual. Always heed
     the information provided with them. Failure to heed precautions can result in injury to people or dam-
     age to property.

!DANGER             Indicates an imminently hazardous situation which, if not avoided, will result in death or
                    serious injury.

!WARNING            Indicates a potentially hazardous situation which, if not avoided, could result in death or
                    serious injury.

!Caution            Indicates a potentially hazardous situation which, if not avoided, may result in minor or
                    moderate injury, or property damage.


OMRON Product References
     All OMRON products are capitalized in this manual. The word “Unit” is also capitalized when it refers to
     an OMRON product, regardless of whether or not it appears in the proper name of the product.
     The abbreviation “Ch,” which appears in some displays and on some OMRON products, often means
     “word” and is abbreviated “Wd” in documentation in this sense.
     The abbreviation “PLC” means Programmable Controller. “PC” is used, however, in some Program-
     ming Device displays to mean Programmable Controller.


Visual Aids
     The following headings appear in the left column of the manual to help you locate different types of
     information.
                           Note Indicates information of particular interest for efficient and convenient opera-
                                tion of the product.

                      1,2,3...     1. Indicates lists of one sort or another, such as procedures, checklists, etc.


 OMRON, 2005
     All rights reserved. No part of this publication may be reproduced, stored in a retrieval system, or transmitted, in any form, or
     by any means, mechanical, electronic, photocopying, recording, or otherwise, without the prior written permission of
     OMRON.
     No patent liability is assumed with respect to the use of the information contained herein. Moreover, because OMRON is con-
     stantly striving to improve its high-quality products, the information contained in this manual is subject to change without
     notice. Every precaution has been taken in the preparation of this manual. Nevertheless, OMRON assumes no responsibility
     for errors or omissions. Neither is any liability assumed for damages resulting from the use of the information contained in
     this publication.


                                                                                                                                    v
Unit Versions of SPU-Console
Unit Versions and SPU-Console
            Model                                     CS1W-SPU01/SPU02                             CJ1W-SPU01
Unit version                    Unit Ver. 1.0          Unit Ver. 1.2               Unit Ver. 1.3  Unit Ver. 1.3
SPU-       SPU-Console Ver. 1.0 Can be connected.      Cannot be connected.        Cannot be con- Cannot be con-
Console                                                                            nected.        nected.
           SPU-Console Ver. 1.2 Can be connected, but Can be connected.            Cannot be con- Cannot be con-
                                there are some limita-                             nected.        nected.
           SPU-Console Ver. 1.3 tions.                 Can be connected, but       Can be con-    Can be con-
                                (Operates as SPU-      there are some limitations. nected.        nected.
                                Console Ver. 1.0.)     (Operates as SPU-Con-
                                                       sole Ver. 1.2.)

                       Note      1. It is not possible to connect to a SYSMAC SPU Unit with unit version 1.3
                                    from SPU-Console versions lower than 1.3. Use SPU-Console version 1.3
                                    to connect to a SYSMAC SPU Unit with unit version 1.3.
                                 2. It is possible to connect to a SYSMAC SPU Unit with a unit version earlier
                                    than 1.3 from SPU-Console version 1.3, but the SPU-Console’s operations
                                    will be limited to SPU-Console operations for the lower unit version.

SPU-Console Version Upgrade
       The SPU-Console has been upgraded from Ver. 1.2 to Ver. 1.3. The following table shows the changes
       made in the upgrade.
                         Item                           SPU-Console Ver. 1.2    SPU-Console Ver. 1.3
Support for CJ-series CJ1W-SPU01 SYSMAC SPU            No                      Yes
Units
Importing and exporting registered contents of con-    No                      Yes
nected Units
Connection confirmation (connection status, error con- No                      Yes
tents)


vi
TABLE OF CONTENTS
PRECAUTIONS . . . . . . . . . . . . . . . . . . . . . . . . . . . . . . . . . . . xvii
  1     Intended Audience . . . . . . . . . . . . . . . . . . . . . . . . . . . . . . . . . . . . . . . . . . . . . . . . . . . . . . . . .          xviii
  2     General Precautions . . . . . . . . . . . . . . . . . . . . . . . . . . . . . . . . . . . . . . . . . . . . . . . . . . . . . . . .          xviii
  3     Safety Precautions . . . . . . . . . . . . . . . . . . . . . . . . . . . . . . . . . . . . . . . . . . . . . . . . . . . . . . . . .          xix
  4     Operating Environment Precautions . . . . . . . . . . . . . . . . . . . . . . . . . . . . . . . . . . . . . . . . . . .                       xix
  5     Application Precautions. . . . . . . . . . . . . . . . . . . . . . . . . . . . . . . . . . . . . . . . . . . . . . . . . . . . .               xx
  6     Conformance to EC Directives . . . . . . . . . . . . . . . . . . . . . . . . . . . . . . . . . . . . . . . . . . . . . . .                   xxii


SECTION 1
Overview of Features and Functions . . . . . . . . . . . . . . . . . .                                                                                 1
  1-1   Overview of the SYSMAC SPU Unit . . . . . . . . . . . . . . . . . . . . . . . . . . . . . . . . . . . . . . . . . .                             2
  1-2   SPU-Console . . . . . . . . . . . . . . . . . . . . . . . . . . . . . . . . . . . . . . . . . . . . . . . . . . . . . . . . . . . . .           2
  1-3   System Requirements . . . . . . . . . . . . . . . . . . . . . . . . . . . . . . . . . . . . . . . . . . . . . . . . . . . . . .                 4


SECTION 2
Setting Up, Starting, and Exiting the SPU-Console. . . . . . .                                                                                         7
  2-1   Installation . . . . . . . . . . . . . . . . . . . . . . . . . . . . . . . . . . . . . . . . . . . . . . . . . . . . . . . . . . . . . . .      8
  2-2   Uninstalling SPU-Console. . . . . . . . . . . . . . . . . . . . . . . . . . . . . . . . . . . . . . . . . . . . . . . . . . .                   9
  2-3   Starting and Exiting SPU-Console . . . . . . . . . . . . . . . . . . . . . . . . . . . . . . . . . . . . . . . . . . . .                       10
  2-4   SPU-Console Window Configuration . . . . . . . . . . . . . . . . . . . . . . . . . . . . . . . . . . . . . . . . . .                           11


SECTION 3
Initial Settings of the SYSMAC SPU Unit . . . . . . . . . . . . . .                                                                                  13
  3-1   Outline of Initial Settings . . . . . . . . . . . . . . . . . . . . . . . . . . . . . . . . . . . . . . . . . . . . . . . . . . .              14
  3-2   Connecting the SYSMAC SPU Unit and Computer with a LAN Cable . . . . . . . . . . . . . . . .                                                   14
  3-3   Starting the SYSMAC SPU Unit in Maintenance Mode . . . . . . . . . . . . . . . . . . . . . . . . . . . .                                       15
  3-4   Setting the IP Address of the Computer . . . . . . . . . . . . . . . . . . . . . . . . . . . . . . . . . . . . . . . .                         15
  3-5   Making the Initial Settings for the SYSMAC SPU Unit . . . . . . . . . . . . . . . . . . . . . . . . . . .                                      18
  3-6   Confirming Connections . . . . . . . . . . . . . . . . . . . . . . . . . . . . . . . . . . . . . . . . . . . . . . . . . . . .                 19


SECTION 4
Changing the SYSMAC SPU Unit’s Operating Mode . . . .                                                                                                21
  4-1   Operation Overview. . . . . . . . . . . . . . . . . . . . . . . . . . . . . . . . . . . . . . . . . . . . . . . . . . . . . . . .              22
  4-2   Confirming the Operating Mode . . . . . . . . . . . . . . . . . . . . . . . . . . . . . . . . . . . . . . . . . . . . . .                      22
  4-3   Changing the Operating Mode. . . . . . . . . . . . . . . . . . . . . . . . . . . . . . . . . . . . . . . . . . . . . . . .                     24


SECTION 5
Connecting to an SYSMAC SPU Unit . . . . . . . . . . . . . . . . .                                                                                   25
  5-1   Connecting and Disconnecting . . . . . . . . . . . . . . . . . . . . . . . . . . . . . . . . . . . . . . . . . . . . . . .                     26
  5-2   Managing Connections . . . . . . . . . . . . . . . . . . . . . . . . . . . . . . . . . . . . . . . . . . . . . . . . . . . . .                 30
  5-3   Editing Settings Offline (Unconnected) . . . . . . . . . . . . . . . . . . . . . . . . . . . . . . . . . . . . . . . .                         32
  5-4   Saving and Transferring Settings. . . . . . . . . . . . . . . . . . . . . . . . . . . . . . . . . . . . . . . . . . . . . .                    34
  5-5   Recording Files . . . . . . . . . . . . . . . . . . . . . . . . . . . . . . . . . . . . . . . . . . . . . . . . . . . . . . . . . . .          38


                                                                                                                                                             vii
TABLE OF CONTENTS
       SECTION 6
       Executing Commands. . . . . . . . . . . . . . . . . . . . . . . . . . . . . . .                                                                    43
         6-1      Command Types and Execution . . . . . . . . . . . . . . . . . . . . . . . . . . . . . . . . . . . . . . . . . . . . . .                 44
         6-2      Executing Commands from the SPU-Console . . . . . . . . . . . . . . . . . . . . . . . . . . . . . . . . . . .                           44
         6-3      Executing Commands from the SYSMAC SPU Unit . . . . . . . . . . . . . . . . . . . . . . . . . . . . .                                   44
         6-4      Executing Commands from the CPU Unit . . . . . . . . . . . . . . . . . . . . . . . . . . . . . . . . . . . . . .                        45


       SECTION 7
       Sampling Mode . . . . . . . . . . . . . . . . . . . . . . . . . . . . . . . . . . . .                                                              47
         7-1      Sampling Mode Introduction. . . . . . . . . . . . . . . . . . . . . . . . . . . . . . . . . . . . . . . . . . . . . . . . .             48


       SECTION 8
       Monitoring SYSMAC SPU Unit Operating Status . . . . . . .                                                                                          49
         8-1      Displaying System Information. . . . . . . . . . . . . . . . . . . . . . . . . . . . . . . . . . . . . . . . . . . . . . .              50
         8-2      Displaying Error Information . . . . . . . . . . . . . . . . . . . . . . . . . . . . . . . . . . . . . . . . . . . . . . . .            51


       SECTION 9
       Sampling Settings for Sampling Mode . . . . . . . . . . . . . . . . .                                                                              53
         9-1      Making the Sampling Settings. . . . . . . . . . . . . . . . . . . . . . . . . . . . . . . . . . . . . . . . . . . . . . . .             54
         9-2      Sampling Setting Windows and Operations . . . . . . . . . . . . . . . . . . . . . . . . . . . . . . . . . . . . .                       54
         9-3      Setting Variables . . . . . . . . . . . . . . . . . . . . . . . . . . . . . . . . . . . . . . . . . . . . . . . . . . . . . . . . . .   56
         9-4      Setting Sampling Patterns . . . . . . . . . . . . . . . . . . . . . . . . . . . . . . . . . . . . . . . . . . . . . . . . . . .         65
         9-5      Enabling the Sampling Settings. . . . . . . . . . . . . . . . . . . . . . . . . . . . . . . . . . . . . . . . . . . . . . .             74
         9-6      Executing Sampling. . . . . . . . . . . . . . . . . . . . . . . . . . . . . . . . . . . . . . . . . . . . . . . . . . . . . . . .       75
         9-7      Displaying the Sampling Result Folder . . . . . . . . . . . . . . . . . . . . . . . . . . . . . . . . . . . . . . . . .                 76
         9-8      Saving Sampling Data . . . . . . . . . . . . . . . . . . . . . . . . . . . . . . . . . . . . . . . . . . . . . . . . . . . . . .        78


       SECTION 10
       Trend Graphs . . . . . . . . . . . . . . . . . . . . . . . . . . . . . . . . . . . . .                                                             79
         10-1 Historical Trends . . . . . . . . . . . . . . . . . . . . . . . . . . . . . . . . . . . . . . . . . . . . . . . . . . . . . . . . . .       80
         10-2 Realtime Trends. . . . . . . . . . . . . . . . . . . . . . . . . . . . . . . . . . . . . . . . . . . . . . . . . . . . . . . . . . .        81


       SECTION 11
       Unit Settings . . . . . . . . . . . . . . . . . . . . . . . . . . . . . . . . . . . . . .                                                          83
         11-1 System Settings . . . . . . . . . . . . . . . . . . . . . . . . . . . . . . . . . . . . . . . . . . . . . . . . . . . . . . . . . . .       84
         11-2 FINS Network Settings . . . . . . . . . . . . . . . . . . . . . . . . . . . . . . . . . . . . . . . . . . . . . . . . . . . . .             86
         11-3 Enabling Changes in Unit Settings . . . . . . . . . . . . . . . . . . . . . . . . . . . . . . . . . . . . . . . . . . . .                   89
         11-4 Undoing Changes in Unit Settings . . . . . . . . . . . . . . . . . . . . . . . . . . . . . . . . . . . . . . . . . . . .                    90


       SECTION 12
       Supported Commands . . . . . . . . . . . . . . . . . . . . . . . . . . . . . .                                                                     91
         12-1 Commands . . . . . . . . . . . . . . . . . . . . . . . . . . . . . . . . . . . . . . . . . . . . . . . . . . . . . . . . . . . . . . .      92


viii
TABLE OF CONTENTS
SECTION 13
Data Storage Mode . . . . . . . . . . . . . . . . . . . . . . . . . . . . . . . . .                                                              93
  13-1 Data Storage Mode Introduction . . . . . . . . . . . . . . . . . . . . . . . . . . . . . . . . . . . . . . . . . . . . . .                 94


SECTION 14
Monitoring SYSMAC SPU Unit Operating Status . . . . . . .                                                                                        95
  14-1 Displaying System Information. . . . . . . . . . . . . . . . . . . . . . . . . . . . . . . . . . . . . . . . . . . . . . .                 96
  14-2 Displaying Error Information . . . . . . . . . . . . . . . . . . . . . . . . . . . . . . . . . . . . . . . . . . . . . . . .               97


SECTION 15
Data Collection Settings for Data Storage Mode . . . . . . . . .                                                                                 99
  15-1 Data Collection Setting Procedure. . . . . . . . . . . . . . . . . . . . . . . . . . . . . . . . . . . . . . . . . . . . .                100
  15-2 Data Collection Settings Window and Operation . . . . . . . . . . . . . . . . . . . . . . . . . . . . . . . . .                           100
  15-3 Setting Variables . . . . . . . . . . . . . . . . . . . . . . . . . . . . . . . . . . . . . . . . . . . . . . . . . . . . . . . . . .     102
  15-4 Setting Data Collection Patterns . . . . . . . . . . . . . . . . . . . . . . . . . . . . . . . . . . . . . . . . . . . . . .              110
  15-5 Setting Memory Events . . . . . . . . . . . . . . . . . . . . . . . . . . . . . . . . . . . . . . . . . . . . . . . . . . . . .           119
  15-6 Setting Schedule Events . . . . . . . . . . . . . . . . . . . . . . . . . . . . . . . . . . . . . . . . . . . . . . . . . . . .           124
  15-7 Displaying the List of Events . . . . . . . . . . . . . . . . . . . . . . . . . . . . . . . . . . . . . . . . . . . . . . . .             132
  15-8 Enabling the Data Collection Settings. . . . . . . . . . . . . . . . . . . . . . . . . . . . . . . . . . . . . . . . . .                  132
  15-9 Executing Data Collection . . . . . . . . . . . . . . . . . . . . . . . . . . . . . . . . . . . . . . . . . . . . . . . . . . .           133
  15-10 Displaying the Collection Result Folder . . . . . . . . . . . . . . . . . . . . . . . . . . . . . . . . . . . . . . . .                  134
  15-11 Saving Collection Data . . . . . . . . . . . . . . . . . . . . . . . . . . . . . . . . . . . . . . . . . . . . . . . . . . . . .         136


SECTION 16
Trend Graphs . . . . . . . . . . . . . . . . . . . . . . . . . . . . . . . . . . . . . 137
  16-1 Historical Trends . . . . . . . . . . . . . . . . . . . . . . . . . . . . . . . . . . . . . . . . . . . . . . . . . . . . . . . . . .     138


SECTION 17
Unit Settings . . . . . . . . . . . . . . . . . . . . . . . . . . . . . . . . . . . . . . 139
  17-1 Unit Settings . . . . . . . . . . . . . . . . . . . . . . . . . . . . . . . . . . . . . . . . . . . . . . . . . . . . . . . . . . . . .   140


SECTION 18
Data Storage Mode Commands. . . . . . . . . . . . . . . . . . . . . . . 141
  18-1 List of Data Storage Mode Commands . . . . . . . . . . . . . . . . . . . . . . . . . . . . . . . . . . . . . . . . .                      142


Appendices
    A      Troubleshooting with Error Codes . . . . . . . . . . . . . . . . . . . . . . . . . . . . . . . . . . . . . . . . . . . .              143
    B      Troubleshooting Connections . . . . . . . . . . . . . . . . . . . . . . . . . . . . . . . . . . . . . . . . . . . . . . . .           145
    C      Structure of the Network-shared Folder . . . . . . . . . . . . . . . . . . . . . . . . . . . . . . . . . . . . . . . .                149
    D      Changing from SYSMAC SPU Unit Ver. 1.0/1.2 . . . . . . . . . . . . . . . . . . . . . . . . . . . . . . . . .                          151
    E      Refreshing the System Program . . . . . . . . . . . . . . . . . . . . . . . . . . . . . . . . . . . . . . . . . . . . . .             153
    F      Reproducing a SYSMAC SPU Unit . . . . . . . . . . . . . . . . . . . . . . . . . . . . . . . . . . . . . . . . . . .                   155


                                                                                                                                                       ix
TABLE OF CONTENTS
    Index. . . . . . . . . . . . . . . . . . . . . . . . . . . . . . . . . . . . . . . . . . . . . 157
    Revision History . . . . . . . . . . . . . . . . . . . . . . . . . . . . . . . . . . . 161


x
About this Manual:
   This manual describes the installation and operation of the WS02-SPTC1-V1 SPU-Console Version
   1.3 (setting and monitoring software) for the CS1W-SPU01 and CS1W-SPU02 SYSMAC SPU Units
   and includes the sections described below.
   Please read this manual and all related manuals listed in the following table, and be sure you under-
   stand the information provided before attempting to install or operate an SYSMAC SPU Unit using the
   SPU-Console. Be sure to read the precautions provided in the following section.
   Precautions provides general precautions for using the SPU-Console, SYSMAC SPU Unit, Program-
   mable Controller, and related devices.
                    Name                   Cat. No.                           Contents
    WS02-SPTC1-V1                         V231        Describes the installation and operation of the SYSMAC
    SPU-Console Ver. 1.3 Operation Manual             SPU-Console Ver. 1.3.
    (this manual)
    CS1W-SPU01/SPU02                      V229        Describes the installation and operation of the SYSMAC
    SYSMAC SPU Units Operation Manual                 SPU Units.
    WS02-EDMC1                            V232        Describes the installation and operation of the SYSMAC
    SYSMAC SPU Data Management Mid-                   SPU Data Management Middleware (EDMS).
    dleware User’s Manual

   Section 1 provides an overview of the SPU-Console and describes the operating environment, includ-
   ing computer system requirements.
   Section 2 describes procedures for installing and uninstalling the SPU-Console, SPU-Console starting
   methods, and the basic SPU-Console window configuration.
   Section 3 describes how to make initial settings for SYSMAC SPU Units.
   Section 4 describes the SYSMAC SPU Unit's operating modes, including procedures for confirming
   and changing the operating mode.
   Section 5 describes the methods used for connecting the SPU-Console to SYSMAC SPU Units, man-
   aging SYSMAC SPU Unit connections, editing settings offline, transferring setting files between the
   SPU-Console and SYSMAC SPU Units, and recording files.
   Section 6 describes the methods used to execute commands for SYSMAC SPU Units.
   Section 7 introduces the SYSMAC SPU Unit’s Sampling Mode.
   Section 8 describes how to monitor SYSMAC SPU Unit operating status and error status.
   Section 9 explains how to make the sampling settings for Sampling Mode operation.
   Section 10 describes how to display trend graphs based on sampling files that have been collected.
   Section 11 describes how to set the system settings and FINS network settings.
   Section 12 provides a list of the commands that are supported for SYSMAC SPU Units.
   Section 13 introduces the SYSMAC SPU Unit's Data Storage Mode.
   Section 14 describes how to monitor SYSMAC SPU Unit operating status and error status.
   Section 15 explains how to make the data collection settings for Data Storage Mode operation.
   Section 16 provides information on operating trend graphs for data collection.
   Section 17 provides information on Unit settings for data collection.
   Section 18 provides a list of the commands that are supported for SYSMAC SPU Units in Data Stor-
   age Mode.
   The Appendices provide troubleshooting methods for SYSMAC SPU Unit errors and troubleshooting
   connections between the SPU-Console and SYSMAC SPU Units, and describes the SYSMAC SPU
   Unit’s network-shared folder configuration. Information is also provided on changing from SPU-Con-
   sole Ver. 1.0 or Ver. 1.2 and refreshing the system program.


                                                                                                           xi
!WARNING Failure to read and understand the information provided in this manual may result in per-
                     sonal injury or death, damage to the product, or product failure. Please read each section
                     in its entirety and be sure you understand the information provided in the section and
                     related sections before attempting any of the procedures or operations given.


xii
Read and Understand this Manual
Please read and understand this manual before using the product. Please consult your OMRON
representative if you have any questions or comments.


Warranty and Limitations of Liability
                                             WARRANTY
 OMRON's exclusive warranty is that the products are free from defects in materials and workmanship for a
 period of one year (or other period if specified) from date of sale by OMRON.

 OMRON MAKES NO WARRANTY OR REPRESENTATION, EXPRESS OR IMPLIED, REGARDING NON-
 INFRINGEMENT, MERCHANTABILITY, OR FITNESS FOR PARTICULAR PURPOSE OF THE
 PRODUCTS. ANY BUYER OR USER ACKNOWLEDGES THAT THE BUYER OR USER ALONE HAS
 DETERMINED THAT THE PRODUCTS WILL SUITABLY MEET THE REQUIREMENTS OF THEIR
 INTENDED USE. OMRON DISCLAIMS ALL OTHER WARRANTIES, EXPRESS OR IMPLIED.


                                 LIMITATIONS OF LIABILITY
 OMRON SHALL NOT BE RESPONSIBLE FOR SPECIAL, INDIRECT, OR CONSEQUENTIAL DAMAGES,
 LOSS OF PROFITS OR COMMERCIAL LOSS IN ANY WAY CONNECTED WITH THE PRODUCTS,
 WHETHER SUCH CLAIM IS BASED ON CONTRACT, WARRANTY, NEGLIGENCE, OR STRICT
 LIABILITY.

 In no event shall the responsibility of OMRON for any act exceed the individual price of the product on which
 liability is asserted.

 IN NO EVENT SHALL OMRON BE RESPONSIBLE FOR WARRANTY, REPAIR, OR OTHER CLAIMS
 REGARDING THE PRODUCTS UNLESS OMRON'S ANALYSIS CONFIRMS THAT THE PRODUCTS
 WERE PROPERLY HANDLED, STORED, INSTALLED, AND MAINTAINED AND NOT SUBJECT TO
 CONTAMINATION, ABUSE, MISUSE, OR INAPPROPRIATE MODIFICATION OR REPAIR.


                                                                                                           xiii
Application Considerations
                                       SUITABILITY FOR USE
  OMRON shall not be responsible for conformity with any standards, codes, or regulations that apply to the
  combination of products in the customer's application or use of the products.

  At the customer's request, OMRON will provide applicable third party certification documents identifying
  ratings and limitations of use that apply to the products. This information by itself is not sufficient for a
  complete determination of the suitability of the products in combination with the end product, machine,
  system, or other application or use.

  The following are some examples of applications for which particular attention must be given. This is not
  intended to be an exhaustive list of all possible uses of the products, nor is it intended to imply that the uses
  listed may be suitable for the products:

  • Outdoor use, uses involving potential chemical contamination or electrical interference, or conditions or
    uses not described in this manual.
  • Nuclear energy control systems, combustion systems, railroad systems, aviation systems, medical
    equipment, amusement machines, vehicles, safety equipment, and installations subject to separate
    industry or government regulations.
  • Systems, machines, and equipment that could present a risk to life or property.

  Please know and observe all prohibitions of use applicable to the products.

  NEVER USE THE PRODUCTS FOR AN APPLICATION INVOLVING SERIOUS RISK TO LIFE OR
  PROPERTY WITHOUT ENSURING THAT THE SYSTEM AS A WHOLE HAS BEEN DESIGNED TO
  ADDRESS THE RISKS, AND THAT THE OMRON PRODUCTS ARE PROPERLY RATED AND
  INSTALLED FOR THE INTENDED USE WITHIN THE OVERALL EQUIPMENT OR SYSTEM.


                                 PROGRAMMABLE PRODUCTS
  OMRON shall not be responsible for the user's programming of a programmable product, or any
  consequence thereof.


xiv
Disclaimers
                               CHANGE IN SPECIFICATIONS
 Product specifications and accessories may be changed at any time based on improvements and other
 reasons.

 It is our practice to change model numbers when published ratings or features are changed, or when
 significant construction changes are made. However, some specifications of the products may be changed
 without any notice. When in doubt, special model numbers may be assigned to fix or establish key
 specifications for your application on your request. Please consult with your OMRON representative at any
 time to confirm actual specifications of purchased products.


                                DIMENSIONS AND WEIGHTS
 Dimensions and weights are nominal and are not to be used for manufacturing purposes, even when
 tolerances are shown.


                                     PERFORMANCE DATA
 Performance data given in this manual is provided as a guide for the user in determining suitability and does
 not constitute a warranty. It may represent the result of OMRON's test conditions, and the users must
 correlate it to actual application requirements. Actual performance is subject to the OMRON Warranty and
 Limitations of Liability.


                                  ERRORS AND OMISSIONS
 The information in this manual has been carefully checked and is believed to be accurate; however, no
 responsibility is assumed for clerical, typographical, or proofreading errors, or omissions.


                                                                                                            xv
xvi
PRECAUTIONS
This section provides general precautions for using the SPU-Console Ver. 1.2 and the CS1W-SPU01 and CS1W-SPU02
SYSMAC SPU Units.
The information contained in this section is important for the safe and reliable application of SPU-Console and
SYSMAC SPU Units. You must read this section and understand the information contained before attempting to set
up or operate an SYSMAC SPU Unit using the SPU-Console.

      1     Intended Audience . . . . . . . . . . . . . . . . . . . . . . . . . . . . . . . . . . . . . . . . . . . . .     xviii
      2     General Precautions . . . . . . . . . . . . . . . . . . . . . . . . . . . . . . . . . . . . . . . . . . . .     xviii
      3     Safety Precautions. . . . . . . . . . . . . . . . . . . . . . . . . . . . . . . . . . . . . . . . . . . . . .     xix
      4     Operating Environment Precautions . . . . . . . . . . . . . . . . . . . . . . . . . . . . . . . .                 xix
      5     Application Precautions . . . . . . . . . . . . . . . . . . . . . . . . . . . . . . . . . . . . . . . . .          xx
      6     Conformance to EC Directives . . . . . . . . . . . . . . . . . . . . . . . . . . . . . . . . . . . .             xxii
            6-1      Applicable Directives . . . . . . . . . . . . . . . . . . . . . . . . . . . . . . . . . . . .           xxii
            6-2      Concepts . . . . . . . . . . . . . . . . . . . . . . . . . . . . . . . . . . . . . . . . . . . . . .    xxii


                                                                                                                                    xvii
Intended Audience                                                                                        1

1       Intended Audience
                           This manual is intended for the following personnel, who must also have
                           knowledge of electrical systems (an electrical engineer or the equivalent).
                             • Personnel in charge of installing FA systems.
                             • Personnel in charge of designing FA systems.
                             • Personnel in charge of managing FA systems and facilities.


2       General Precautions
                           The user must operate the product according to the performance specifica-
                           tions described in the operation manuals.
                           Before using the product under conditions which are not described in the
                           manual or applying the product to nuclear control systems, railroad systems,
                           aviation systems, vehicles, combustion systems, medical equipment, amuse-
                           ment machines, safety equipment, and other systems, machines, and equip-
                           ment that may have a serious influence on lives and property if used
                           improperly, consult your OMRON representative.
                           Make sure that the ratings and performance characteristics of the product are
                           sufficient for the systems, machines, and equipment, and be sure to provide
                           the systems, machines, and equipment with double safety mechanisms.
                           This manual provides information for programming and operating the Unit. Be
                           sure to read this manual before attempting to use the Unit and keep this man-
                           ual close at hand for reference during operation.

            !WARNING It is extremely important that a PLC and all PLC Units be used for the speci-
                           fied purpose and under the specified conditions, especially in applications that
                           can directly or indirectly affect human life. You must consult with your OMRON
                           representative before applying a PLC System to the above-mentioned appli-
                           cations.


xviii
Safety Precautions                                                                                     3

3       Safety Precautions
            !WARNING Do not attempt to take any Unit apart while the power is being supplied. Doing
                            so may result in electric shock.

            !WARNING Do not touch any of the terminals or terminal blocks while the power is being
                            supplied. Doing so may result in electric shock.

            !WARNING Do not attempt to disassemble, repair, or modify any Units. Any attempt to do
                            so may result in malfunction, fire, or electric shock.

                !Caution Execute online editing only after confirming that no adverse effects will be
                         caused by extending the cycle time. Otherwise, the input signals may not be
                         readable.

                !Caution Emergency stop circuits, interlock circuits, limit circuits, and similar safety
                         measures must be provided in external control circuits.

                !Caution Tighten the screws on the terminal block of the AC Power Supply Unit to the
                         torque specified in the operation manual. The loose screws may result in
                         burning or malfunction.


4       Operating Environment Precautions
                !Caution Do not operate the control system in the following locations:

                              • Locations subject to direct sunlight.
                              • Locations subject to temperatures or humidity outside the range specified
                                in the specifications.
                              • Locations subject to condensation as the result of severe changes in tem-
                                perature.
                              • Locations subject to corrosive or flammable gases.
                              • Locations subject to dust (especially iron dust) or salts.
                              • Locations subject to exposure to water, oil, or chemicals.
                              • Locations subject to shock or vibration.

                !Caution Install the SYSMAC SPU Unit correctly as described in the CS Series PLC
                         Operation Manual or CJ Series PLC Operation Manual.

                !Caution Take appropriate and sufficient countermeasures when installing systems in
                         the following locations:

                              • Locations subject to static electricity or other forms of noise.
                              • Locations subject to strong electromagnetic fields.
                              • Locations subject to possible exposure to radioactivity.
                              • Locations close to power supplies.


                                                                                                     xix
Application Precautions                                                                                       5

5       Application Precautions
                            Observe the following precautions when using the SYSMAC SPU Unit.

             !WARNING Always heed these precautions. Failure to abide by the following precautions
                            could lead to serious or possibly fatal injury.

                              • Always connect to a ground of 100 Ω or less when installing the Units. Not
                                connecting to a ground of 100 Ω or less may result in electric shock.
                              • Always turn OFF the power supply to the CPU Unit, Slaves, and Commu-
                                nications Units before attempting any of the following. Not turning OFF
                                the power supply may result in malfunction or electric shock.
                                   • Mounting or dismounting I/O Units, CPU Units, Memory Packs, or
                                     Master Units.
                                   • Assembling the Units.
                                   • Setting DIP switches or rotary switches.
                                   • Connecting cables or wiring the system.

                !Caution Failure to abide by the following precautions could lead to faulty operation of
                         the SYSMAC SPU Unit or the system, or could damage the SYSMAC SPU
                         Unit. Always heed these precautions.

                              • Fail-safe measures must be taken by the customer to ensure safety in the
                                event of incorrect, missing, or abnormal signals caused by broken signal
                                lines, momentary power interruptions, or other causes.
                              • Interlock circuits, limit circuits, and similar safety measures in external cir-
                                cuits (i.e., not in the Programmable Controller) must be provided by the
                                customer.
                              • Always use the power supply voltages specified in the operation manuals.
                                An incorrect voltage may result in malfunction or burning.
                              • Take appropriate measures to ensure that the specified power with the
                                rated voltage and frequency is supplied. Be particularly careful in places
                                where the power supply is unstable. An incorrect power supply may result
                                in malfunction.
                              • Install external breakers and take other safety measures against short-cir-
                                cuiting in external wiring. Insufficient safety measures against short-cir-
                                cuiting may result in burning.
                              • Make sure that all the Backplane mounting screws, terminal block screws,
                                and cable connector screws are tightened to the torque specified in the
                                relevant manuals. Incorrect tightening torque may result in malfunction.
                              • Leave the label attached to the Unit when wiring. Removing the label may
                                result in malfunction if foreign matter enters the Unit.
                              • Remove the label after the completion of wiring to ensure proper heat dis-
                                sipation. Leaving the label attached may result in malfunction.
                              • Use crimp terminals for wiring. Do not connect bare stranded wires
                                directly to terminals. Connection of bare stranded wires may result in
                                burning.
                              • Double-check all wiring and switch settings before turning ON the power
                                supply. Incorrect wiring may result in burning.
                              • Wire all connections correctly.


xx
Application Precautions                                                                                5

                          • Mount Units only after checking terminal blocks and connectors com-
                            pletely.
                          • Make sure that the terminal blocks, expansion cables, and other items
                            with locking devices are locked in place.
                          • When transporting the Unit, use special packing boxes and protect it from
                            being exposed to excessive vibration or impacts during transportation.
                          • Check the user program for proper execution before actually running it on
                            the Unit. Not checking the program may result in unexpected operation.
                          • Observe the following precautions when wiring the communications
                            cable.
                              • Separate the communications cables from the power lines or high-ten-
                                sion lines.
                              • Do not bend the communications cables past their natural bending ra-
                                dius.
                              • Do not pull on the communications cables.
                              • Do not place heavy objects on top of the communications cables.
                              • Always lay communications cable inside ducts.
                              • Use appropriate communications cables.
                          • Before touching a Unit, be sure to first touch a grounded metallic object in
                            order to discharge any static build-up. Not doing so may result in malfunc-
                            tion or damage.
                          • Confirm that no adverse effect will occur in the system before attempting
                            any of the following. Not doing so may result in an unexpected operation.
                              • Changing the operating mode of the PLC.
                              • Force-setting/force-resetting any bit in memory.
                              • Changing the present value of any word or any set value in memory.
                              • Touch the Unit only after first touching a grounded metal object to dis-
                                charge any static electricity from your body.
                              • Do not remove the Memory Card while the CARD indicator is lit. Doing
                                so may damage the files on the Memory Card.
                              • Do not turn OFF the power supply while Memory Card data is being
                                accessed. Doing so may damage the files on the Memory Card.
                              • Maintain the operating environment for the Memory Cards (such as
                                the ambient operating temperature and other conditions). Request op-
                                erating environment conditions from the manufacture of the card.
                              • OMRON is not responsible for the operation of any memory cards pro-
                                duced by other manufacturers.
                              • We recommend making a backup of the PC Card or Memory Card to
                                prevent loosing the data inadvertently, e.g., by mistakenly deleting it.
                              • Only Memory Cards can be used in the PC Card slot in a CS-series
                                SYSMAC SPU Unit. Modem cards and Ethernet cards, which are not
                                Memory Cards, cannot be used. Do not insert anything but Memory
                                Cards into the Memory Card slot.
                              • Make sure that the PC card or Memory Card is in the guides when in-
                                serting it. Faulty operation may result if the card is not in the guides.
                              • Always lock the Memory Card in place with the card holder or card cov-
                                er after inserting it. The Memory Card may become disconnected if it
                                is not locked in place, causing faulty operation.


                                                                                                     xxi
Conformance to EC Directives                                                                               6

                                   • Always confirm that the Memory Card is facing the correct direction be-
                                     fore inserting it. If a Memory Card is forced into the slot in the wrong
                                     direction, the Memory Card or guides may be damaged.
                                   • Always confirm the command code displayed on the 7-segment dis-
                                     play before pressing the ENTER Button. Faulty operation may result if
                                     the command code is incorrect.
                                   • Never restart or turn OFF the power to the SYSMAC SPU Unit while
                                     changing sampling settings or other settings. “P1,” “P2,” and through
                                     “PE” will be displayed on the 7-segment display while sampling set-
                                     tings are being changed. the SYSMAC SPU Unit is restarted or turned
                                     OFF before completing the change operation, the system file being
                                     changed may be damaged.
                                   • Do not turn OFF the power supply to the Unit while transferring the Unit
                                     parameters or other data. Doing so may result in incorrect data being
                                     transferred to the Unit or the Unit may malfunction.
                                   • With the CJ1W-SPU01 SYSMAC SPU Unit, do not connect anything
                                     other than a UPS connection to the COMM port. Doing so may inad-
                                     vertently shut down the SYSMAC SPU Unit.


6      Conformance to EC Directives
6-1      Applicable Directives
                               • EMC Directives
                               • Low Voltage Directive

6-2      Concepts
                          EMC Directives
                          OMRON devices that comply with EC Directives also conform to the related
                          EMC standards so that they can be more easily built into other devices or the
                          overall machine. The actual products have been checked for conformity to
                          EMC standards (see the following note). Whether the products conform to the
                          standards in the system used by the customer, however, must be checked by
                          the customer.
                          EMC-related performance of the OMRON devices that comply with EC Direc-
                          tives will vary depending on the configuration, wiring, and other conditions of
                          the equipment or control panel on which the OMRON devices are installed.
                          The customer must, therefore, perform the final check to confirm that devices
                          and the overall machine conform to EMC standards.
                   Note   Applicable EMS (Electromagnetic Susceptibility) and EMI (Electromagnetic
                          Interference) Standards in the EMC (Electromagnetic Compatibility) stan-
                          dards are as follows:
                                 Unit                         EMS                           EMI
                           CS1W-SPU01             EN61000-6-2                  EN61000-6-4
                           CS1W-SPU02                                          (Radiated emission: 10-m
                                                                               regulations)
                           CJ1W-SPU01

                          Low Voltage Directive
                          Always ensure that devices operating at voltages of 50 to 1,000 V AC and 75
                          to 1,500 V DC meet the required safety standards for the PLC (EN61131-2).


xxii
SECTION 1
                                                                    Overview of Features and Functions

This section provides an overview of the SPU-Console and describes the operating environment, including computer
system requirements.


      1-1   Overview of the SYSMAC SPU Unit . . . . . . . . . . . . . . . . . . . . . . . . . . . . . . .                      2
      1-2   SPU-Console . . . . . . . . . . . . . . . . . . . . . . . . . . . . . . . . . . . . . . . . . . . . . . . . . .    2
            1-2-1        Unit Connections. . . . . . . . . . . . . . . . . . . . . . . . . . . . . . . . . . . . . . . .       2
            1-2-2        Unit Settings . . . . . . . . . . . . . . . . . . . . . . . . . . . . . . . . . . . . . . . . . . .   3
            1-2-3        Sampling Settings (Sampling Mode) . . . . . . . . . . . . . . . . . . . . . . . .                     3
            1-2-4        Data Collection Settings (Data Storage Mode) . . . . . . . . . . . . . . . . .                        3
            1-2-5        Scheduler Settings (Data Storage Mode) . . . . . . . . . . . . . . . . . . . . .                      4
            1-2-6        Event List (Data Storage Mode) . . . . . . . . . . . . . . . . . . . . . . . . . . . .                4
            1-2-7        Executing SYSMAC SPU Unit Commands . . . . . . . . . . . . . . . . . . .                              4
            1-2-8        Monitoring SYSMAC SPU Unit Operating Status . . . . . . . . . . . . . .                               4
            1-2-9        Historical Trend Graphs . . . . . . . . . . . . . . . . . . . . . . . . . . . . . . . . . .           4
            1-2-10 Realtime Trend Graphs (Sampling Mode) . . . . . . . . . . . . . . . . . . . .                               4
      1-3   System Requirements . . . . . . . . . . . . . . . . . . . . . . . . . . . . . . . . . . . . . . . . . . .          4
            1-3-1        SPU-Console Specifications . . . . . . . . . . . . . . . . . . . . . . . . . . . . . . .              5
            1-3-2        Package Contents . . . . . . . . . . . . . . . . . . . . . . . . . . . . . . . . . . . . . . .        5


                                                                                                                                   1
Overview of the SYSMAC SPU Unit                                                             Section 1-1

1-1     Overview of the SYSMAC SPU Unit
                         The SYSMAC SPU Unit is a CS-series CPU Bus Unit that collects the speci-
                         fied I/O memory data from the CPU Unit using specified collection methods
                         (called collection patterns) and stores the data as CSV-format files (comma-
                         delimited). This function enables the SYSMAC SPU Unit to be used for appli-
                         cations such as analyzing the operation of the PLC and I/O connected to the
                         PLC, recording manufacturing data and other information, and much more.
                         The SYSMAC SPU Unit has two modes that can be selected to suit the appli-
                         cation: Sampling Mode and Data Storage Mode. The SYSMAC SPU Unit’s
                         functions are different in these two modes.
                           • Sampling Mode
                            In this mode, the SYSMAC SPU Unit samples the specified I/O memory
                            data from the CPU Unit at regular time intervals. The time intervals are
                            nearly constant, so the data can be recorded at particular times, and more
                            reliable information can be reproduced from the collected data.
                           • Data Storage Mode
                            In this mode, the SYSMAC SPU Unit records the specified I/O memory
                            data from the CPU Unit when a particular event occurs. This mode can
                            record data when a particular bit turns ON or at a particular time. In addi-
                            tion, it is also possible to record data at a fixed time after the event occurs,
                            although the time interval is not as precise as it is in Sampling Mode.
                         Either of these modes can be selected after the SYSMAC SPU Unit is
                         installed.
                         The settings and display in SPU-Console SPU Basic Software depend on the
                         operating mode. For this reason, this manual is divided into a Sampling Mode
                         part and a Data Storage Mode part. In this manual, references to Sampling
                         Mode indicates information applicable to Sampling Mode only, and references
                         to Data Storage Mode indicates information applicable to Data Storage Mode
                         only.


1-2     SPU-Console
                         The SPU-Console is a software product used for OMRON's Storage and Pro-
                         cessing Unit (called the SYSMAC SPU Unit) to set and operate the SYSMAC
                         SPU Unit, monitor operating status/errors, display trend graphs, and perform
                         other operations from a personal computer. The SPU-Console functions are
                         explained next.

1-2-1   Unit Connections
                         The SPU-Console is connected to the SYSMAC SPU Unit via a LAN. The
                         SPU-Console dynamically creates windows based on the ID information in the
                         SYSMAC SPU Unit that is connected, eliminating the need to set the model in
                         the software.


2
SPU-Console                                                                                        Section 1-2

1:1 Connection
                           SPU-Console                      SPU Unit          CS-series CPU Unit
                           Setting/Monitoring
                           Software


                                   LAN cross cable (commercially available)

Network Connection
                           SPU-Console                                   SPU Unit           CS-series CPU Unit
                           Setting/Monitoring
                           Software


                                           Hub or other network device


                          LAN straight cable         LAN straight cable (commercially available)
                          (commercially available)

1-2-2    Unit Settings
                         SYSMAC SPU Unit settings are performed by setting the time according to
                         the SYSMAC SPU Unit’s location (time zone settings), network settings, such
                         as the name and IP address on the Window network, and FINS network set-
                         tings.

1-2-3    Sampling Settings (Sampling Mode)
                         The data in I/O memory of the CPU Unit that is to be sampled by the SYS-
                         MAC SPU Unit is set in Sampling Mode. Sampling data is specified using vari-
                         ables. Variables have attributes, such as addresses and data types. Scale
                         conversion of variables is also possible. The collection pattern in Sampling
                         Mode is called the sampling pattern. Four sampling patterns (realtime sam-
                         pling and sampling 1 to 3) are available. For each sampling pattern, the length
                         of the sampling time interval, number of records, name of the file to be saved,
                         and the number of files are specified.

1-2-4    Data Collection Settings (Data Storage Mode)
                         The data in the CPU Unit memory to be collected by the SYSMAC SPU Unit
                         in Data Storage Mode and the collection method to be used must be speci-
                         fied. Data collection is specified using variables. Variables have attributes,
                         such as addresses and data types. Scale conversion of variables is also pos-
                         sible. The collection method in Data Storage Mode is called the data collec-
                         tion pattern. Two data collection patterns are supported: basic collection for
                         single data, and data collection for multiple data. For each collection pattern,
                         the length of the sampling time interval, number of records, name of the file to
                         be saved, and number of files are specified.


                                                                                                                 3
System Requirements                                                                      Section 1-3

                      The event settings that specify the time for data collection to start are also set.
                      Events are either memory events, which occur when specific conditions are
                      satisfied by values in memory, and schedule events, which occur at specific
                      times or time intervals. The combination of these events with the processing
                      that is performed when the events occur are called event rules. Event rules
                      such as “data is recorded in a CSV file whenever a certain bit turns ON” or
                      “data is recorded in a CSV file every data at 8:00” can be set.

1-2-5    Scheduler Settings (Data Storage Mode)
                      In Data Storage Mode, schedule events can be set whereby an event occurs
                      on a specific day and time. These are called scheduler settings. With sched-
                      uler settings, events occur at set times such as by hour (e.g., every hour), by
                      day (e.g., every day), by week (e.g., every Monday). The event rules for data
                      collection execution or other rules for event processing can be defined. Work-
                      ing days and the end of the month can also be specified for these events.

1-2-6    Event List (Data Storage Mode)
                      In Data Storage Mode, a list of the memory events and schedule events set in
                      the SYSMAC SPU Unit can be displayed. The list displays which events are
                      set and the operations that will be executed when these events occur.

1-2-7    Executing SYSMAC SPU Unit Commands
                      Commands such as those for starting/stopping sampling for the SYSMAC
                      SPU Unit can be executed from the SPU-Console.

1-2-8    Monitoring SYSMAC SPU Unit Operating Status
                      The SYSMAC SPU Unit operating status and error information can be dis-
                      played on the SPU-Console.

1-2-9    Historical Trend Graphs
                      Data recorded in CSV files by the SYSMAC SPU Unit can be displayed on
                      trend graphs.

1-2-10 Realtime Trend Graphs (Sampling Mode)
                      Sampling data collected by the SYSMAC SPU Unit can be displayed on trend
                      graphs in realtime.


1-3     System Requirements
                      The system requirements to use the SPU-Console are described in this sec-
                      tion.


4
System Requirements                                                                                            Section 1-3

1-3-1        SPU-Console Specifications
                Item                                                          Specification
Model number                                WS02-SPTC1-V1 (SPU-Console Ver. 1.3)
System require- Computer hardware           Computer that meets the system requirements for Microsoft Windows XP Pro-
ments                                       fessional
                CD-ROM drive                Required for installation.
                Display                     Super VGA (800 × 600) or better high-resolution video adapter and monitor
                Mouse                       Must conform to the models supported by the applicable OS.
                Network card                A separate Ethernet network card is required for computers that do not have a
                                            LAN port.
                   OS                       Microsoft Windows 2000 Professional
                                            Microsoft Windows XP Home Edition
                                            Microsoft Windows XP Professional
                Application platform        Microsoft.NET Framework Version 1.1
Communications platform                     FinsGateway Version 2003
Functions                                   Unit information, Unit setup, variable settings, collection pattern settings, event
                                            settings, and trend graphs
Unit information         Monitor            SYSMAC SPU Unit operating status and error information are displayed.
                         Operation          Operations, such as starting sampling
Unit setup                                  IP network settings
                                            FINS network settings
Variable settings                           Setting items to sample (by specifying I/O memory addresses using variables)
Collection pattern settings                 Collection pattern settings (period, file designations for saving, etc.)
Event settings (in Data Memory event        Settings for conditions according to changes in memory (e.g., bits turning ON)
Storage Mode)            settings
                         Scheduler set-    Settings for schedules (e.g., specific times, time intervals)
                         tings
Trend graphs             Historical trends CSV files are read and displayed.
                         Realtime trends    Current sampling data is read and displayed in trend graphics in real time.

                          Note       1. It is not possible to connect to a SYSMAC SPU Unit with unit version 1.3
                                        from SPU-Console versions lower than 1.3. Use SPU-Console version 1.3
                                        to connect to a SYSMAC SPU Unit with unit version 1.3.
                                     2. It is possible to connect to a SYSMAC SPU Unit with a unit version earlier
                                        than 1.3 from SPU-Console version 1.3, but the SPU-Console’s operations
                                        will be limited to SPU-Console operations for the lower unit version.

1-3-2        Package Contents
                                     The WS02-SPTC1-V1 contains the following software and data.
SPU-Console Execution                The program that performs SYSMAC SPU Unit settings and operations.
Program
Microsoft .NET Framework             Microsoft .NET Framework Version 1.1 is required to run the SPU-Console.
Version 1.1 Redistribution           The Microsoft .NET Framework Version 1.1 Redistribution Package provided
Package                              in the package can be used to install .NET Framework in the computer.
SYSMAC SPU Unit System               This system data is transferred to the SYSMAC SPU Unit.
Data
FinsGateway Version 2003             This communications middleware is required to run the SPU-Console.
Manual Data                          The manual data includes this manual and the SYSMAC SPU Unit Operation
                                     Manual (V229) in PDF (portable document format).


                                                                                                                              5
System Requirements   Section 1-3


6
SECTION 2
                              Setting Up, Starting, and Exiting the SPU-Console

This section describes procedures for installing and uninstalling the SPU-Console, SPU-Console starting methods, and the
basic SPU-Console window configuration.


       2-1   Installation . . . . . . . . . . . . . . . . . . . . . . . . . . . . . . . . . . . . . . . . . . . . . . . . . . . .    8
             2-1-1        Preparations for Installation . . . . . . . . . . . . . . . . . . . . . . . . . . . . . . .               8
             2-1-2        Installing Microsoft .NET Framework . . . . . . . . . . . . . . . . . . . . . . .                          8
             2-1-3        Installing FinsGateway . . . . . . . . . . . . . . . . . . . . . . . . . . . . . . . . . . .               8
             2-1-4        Installing SPU-Console . . . . . . . . . . . . . . . . . . . . . . . . . . . . . . . . . . .               9
       2-2   Uninstalling SPU-Console. . . . . . . . . . . . . . . . . . . . . . . . . . . . . . . . . . . . . . . .                 9
             2-2-1        Uninstalling SPU-Console . . . . . . . . . . . . . . . . . . . . . . . . . . . . . . . .                   9
             2-2-2        Uninstalling FinsGateway . . . . . . . . . . . . . . . . . . . . . . . . . . . . . . . . .                 9
       2-3   Starting and Exiting SPU-Console . . . . . . . . . . . . . . . . . . . . . . . . . . . . . . . . .                     10
             2-3-1        Starting SPU-Console . . . . . . . . . . . . . . . . . . . . . . . . . . . . . . . . . . . .              10
             2-3-2        Exiting SPU-Console . . . . . . . . . . . . . . . . . . . . . . . . . . . . . . . . . . . .               10
       2-4   SPU-Console Window Configuration . . . . . . . . . . . . . . . . . . . . . . . . . . . . . . .                         11
             2-4-1        Starting SPU-Console . . . . . . . . . . . . . . . . . . . . . . . . . . . . . . . . . . . .              11


                                                                                                                                         7
Installation                                                                                     Section 2-1

2-1      Installation
2-1-1      Preparations for Installation
                                 Before installing the SPU-Console, check the requirements given in 1-3 Sys-
                                 tem Requirements to be sure that all requirements have been met.
                                 The following basic steps are required to set up the SPU-Console.

                      1,2,3...   1. Installing Microsoft .NET Framework
                                 2. Installing FinsGateway
                                 3. Installing SPU-Console

2-1-2      Installing Microsoft .NET Framework
                                 Microsoft .NET Framework Version 1.1 is required to run the SPU-Console.

Confirming whether               Use Control Panel - Add or Remove Programs on your computer to see if
.NET Framework Is                Microsoft .NET Framework Version 1.1 is already installed.
Already Installed                If Microsoft .NET Framework 1.1 is listed in the currently installed programs,
                                 then it is already installed and does not need to be installed again.

Installing Microsoft             Microsoft .NET Framework Version 1.1 can be installed from the .NET Frame-
.NET Framework                   work Redistribution Package included in the SPU-Console installation disk.

Installing the Redistribution Package
                      1,2,3...   1. Start the computer and log in as a user with administrator rights.
                                 2. Place the SPU-Console installation disk in the CD-ROM drive.
                                     If the installation program starts automatically, click the Cancel Button to
                                     exit the program.
                                 3. Execute the following executable file from the SPU-Console installation
                                    disk: <CD-ROM drive>:DotnetEnglishDotnetfx.exe
Installing from the              Installation is also possible from the Microsoft Windows Update. You must be
Windows Update                   able to connect to the Internet to use the Windows Update function.
                                     Note   The Windows Update is provided by Microsoft Corporation.
                                         For Windows 2000, select Start - Windows Update.
                                         For Windows XP, select Start - All Programs - Windows Update.

2-1-3      Installing FinsGateway
                                 FinsGateway Version 2003 is required to run the SPU-Console.
                                 If a version lower than FinsGateway Version 2003 is already installed, unin-
                                 stall it first.
                                 The computer must be restarted after installing FinsGateway.

                      1,2,3...   1. Start the computer and log in as a user with administrator rights.
                                 2. Place the SPU-Console installation disk in the CD-ROM drive.
                                     If the installation program starts automatically, click the Cancel Button to
                                     exit the program.
                                 3. Execute the following executable file from the SPU-Console installation
                                    disk: <CD-ROM drive>:FinsGatewaysetup.exe
                                 4. Follow the instructions provided by the installation program.
                                 5. Restart the computer when installation has been completed.


8
Uninstalling SPU-Console                                                                        Section 2-2

2-1-4   Installing SPU-Console
                            Use the following procedure to install the SPU-Console.

                 1,2,3...   1. Start the computer and log in as a user with administrator rights.
                            2. Place the SPU-Console installation disk in the CD-ROM drive.
                                The installation program will start automatically. If it does not start, execute
                                the following executable file from the SPU-Console installation disk:
                                <CD-ROM drive>:setup.exe
                            3. Follow the instructions provided by the installation program.


2-2     Uninstalling SPU-Console
                            Use the following procedure to uninstall the SPU-Console program and thus
                            delete it from the computer.

2-2-1   Uninstalling SPU-Console
                            Use the following procedure to uninstall the SPU-Console.

                 1,2,3...   1. Start the computer and log in as a user with administrator rights.
                            2. Select Start - Control Panel.
                            3. Execute Add or Remove Programs for Windows XP or Add/Remove
                               Programs for Windows 2000.
                            4. Select OMRON SPU-Console Version 1.3 from the list of currently in-
                               stalled programs and click the Remove Button.
                                The Setup Maintenance Program will be started.
                            5. Select Remove from the Setup Maintenance Program and then click the
                               Next Button.
                                Follow the instructions provided by the uninstallation program.

2-2-2   Uninstalling FinsGateway
                            Do not uninstall FinsGateway if it is being used by an application other than
                            SPU-Console.
                            The computer must be restarted after uninstalling FinsGateway.

                 1,2,3...   1. Start the computer and log in as a user with administrator rights.
                            2. Select Start - Control Panel.
                            3. Execute Add or Remove Programs for Windows XP or Add/Remove
                               Programs for Windows 2000.
                            4. Select OMRON FinsGateway Version 2003 from the list of currently in-
                               stalled programs and click the Change/Remove Button.
                                The Setup Maintenance Program will be started.
                            5. Select Remove from the Setup Maintenance Program and then click the
                               Next Button.
                                Follow the instructions provided by the uninstallation program.
                            6. Restart the computer.
                            7. Execute the following executable file from the SPU-Console installation
                               disk: <CD-ROM drive>:FgwUtilsFgwRemover2003.exe
                                Follow the instructions provided by the uninstallation program.
                            8. Restart the computer.


                                                                                                              9
Starting and Exiting SPU-Console                                                          Section 2-3

2-3     Starting and Exiting SPU-Console
2-3-1    Starting SPU-Console
                          Select Start - All Program - OMRON - SPU Console 1.3 - SPU Console.
                          The SPU-Console will be started and the following window will be displayed.


                   Note     (1) The user must have administrator rights to run the SPU-Console. Log in
                                as a user that has administrator rights.
                            (2) More than one copy of SPU-Console can be started at the same time.
                            (3) If the following message appears when starting the SPU-Console, use
                                the following procedure to reinstall the SPU-Console: “File or assembly
                                name of FgwDotne, or one of its dependencies, was not found.”
                                   • Start the Setup Maintenance Program using the following procedure in
                                     2-2-1 Uninstalling SPU-Console.
                                   • Select Repair from the Setup Maintenance Program and then click the
                                     Next Button.
                                     Follow the instructions provided by the uninstallation program.

2-3-2    Exiting SPU-Console
                          Select File - Exit from the SPU-Console menus.
                          The SPU-Console will be closed.


10
SPU-Console Window Configuration                                                               Section 2-4

2-4      SPU-Console Window Configuration
2-4-1      Starting SPU-Console
                        The SPU-Console Window consists of several areas. This section describes
                        the various parts of the SPU-Console Window.


   Control Tabs                                                                                Menu Bar


                                                                           Control Panel


                                                                                  Status Bar


                              Item                                    Function
                         Menu Bar        Provides menus to perform SPU-Console operations. Menu items
                                         are grouped into related functions. The name of each group is dis-
                                         played on the menu bar. The functions within each group are
                                         accessed on pull-down menus.
                         Control Tabs    The control tabs are used to switch between SPU-Console tab
                                         pages.
                                         The name of each tab page is given on the control tabs. When a
                                         tab is clicked, the corresponding tab page will be displayed.
                         Control Panel   The Control Panel is used to start sampling and execute com-
                                         mands to control SYSMAC SPU Unit operation.
                         Status Bar      The Status Bar displays information, such as the status of the con-
                                         nected SYSMAC SPU Unit.


                                                                                                          11
SPU-Console Window Configuration   Section 2-4


12
SECTION 3
                                                    Initial Settings of the SYSMAC SPU Unit

This section describes how to make initial settings for SYSMAC SPU Units.


      3-1   Outline of Initial Settings . . . . . . . . . . . . . . . . . . . . . . . . . . . . . . . . . . . . . . . .   14
      3-2   Connecting the SYSMAC SPU Unit and Computer with a LAN Cable . . . . .                                        14
      3-3   Starting the SYSMAC SPU Unit in Maintenance Mode . . . . . . . . . . . . . . . . .                            15
      3-4   Setting the IP Address of the Computer . . . . . . . . . . . . . . . . . . . . . . . . . . . . .              15
      3-5   Making the Initial Settings for the SYSMAC SPU Unit . . . . . . . . . . . . . . . . .                         18
      3-6   Confirming Connections . . . . . . . . . . . . . . . . . . . . . . . . . . . . . . . . . . . . . . . . .      19


                                                                                                                               13
Outline of Initial Settings                                                                              Section 3-1

3-1      Outline of Initial Settings
                              Initial software settings must be performed to use the SYSMAC SPU Unit.
                              The initial settings include network settings, product information registration,
                              and system data transfer.
                              The steps require to make the initial settings are as follows:
                              Connect the SYSMAC SPU Unit and computer with a LAN cable.                   3-2
                                                                       ↓
                              Start the SYSMAC SPU Unit in Maintenance Mode.                               3-3
                                                                       ↓
                              Set the IP address of the computer.                                          3-4
                                                                       ↓
                              Make the initial settings for the SYSMAC SPU Unit.                           3-5
                                                                       ↓
                              Confirm that normal connection is possible from the computer to the          3-6
                              SYSMAC SPU Unit on a network.

                              Initial settings are performed using the Initialization Wizard from the computer
                              on which the SPU-Console is installed.
                      Note    The model number and lot number of the SYSMAC SPU Unit are required to
                              make the initial settings for the SYSMAC SPU Unit. Before mounting the SYS-
                              MAC SPU Unit, record the information on the sticker on the side of the Unit.
                              The model number and lot number are also printed on the sticker on the pack-
                              age.


3-2      Connecting the SYSMAC SPU Unit and Computer with a
         LAN Cable
                              The SYSMAC SPU Unit is connected to the computer with a LAN cable. The
                              connection can be made either through a hub or other network device, or 1:1.
                              A LAN cross-cable is required for a 1:1 connection.
                              Connect the LAN cable to the LAN1 port on the SYSMAC SPU Unit.
1:1 Connection
                                 SPU-Console                      SPU Unit          CS-series CPU Unit
                                 Setting/Monitoring
                                 Software


                                         LAN cross cable (commercially available)


14
Starting the SYSMAC SPU Unit in Maintenance Mode                                                       Section 3-3

Network Connection
                              SPU-Console                                    SPU Unit           CS-series CPU Unit
                              Setting/Monitoring
                              Software


                                               Hub or other network device


                             LAN straight cable          LAN straight cable (commercially available)
                             (commercially available)

                     Note   Do not connect to the network more than one SYSMAC SPU Unit for which
                            initial settings have not been made. IP addresses will be duplicated, and com-
                            munications may not be possible. Disconnect the LAN cable from all SYSMAC
                            SPU Units except for one and set one SYSMAC SPU Unit at a time. Alter-
                            nately, connect each SYSMAC SPU Unit to the computer using a 1:1 connec-
                            tion and set one SYSMAC SPU Unit at a time.


3-3     Starting the SYSMAC SPU Unit in Maintenance Mode
                            Use the following procedure to start the SYSMAC SPU Unit in Maintenance
                            Mode.

                 1,2,3...   1. Connect the LAN cable to the LAN1 port on the SYSMAC SPU Unit.
                            2. Turn ON pins 4 and 6 on the DIP switch on the SYSMAC SPU Unit and
                               then turn ON the power supply to the PLC. The SYSMAC SPU Unit will
                               start in Maintenance Mode.
                                    Pin 4 ON = IP address set to 192.168.0.100.
                                    Pin 6 ON = Start in Maintenance Mode.
                                When the SYSMAC SPU Unit has started in Maintenance Mode, “NM” will
                                be displayed on the 7-segment display on the SYSMAC SPU Unit.


                                   N       M

                            3. Check the IP address of the SYSMAC SPU Unit using the following proce-
                               dure.
                                  • Press the SELECT Switch to select command 05 and then press the
                                    ENTER Button twice. The IP address will be displayed on the 7-seg-
                                    ment display.
                                  • Confirm that 192.168.0.100 is displayed as the IP address.
                                  • If the IP address is not 192.168.0.100, check the DIP switch setting
                                    and repeat the procedure from step 2.


3-4     Setting the IP Address of the Computer
                            To enable connecting to the SYSMAC SPU Unit in Maintenance Mode, the IP
                            address of the computer must be temporarily set to 192.168.0.200.
                            The method for setting the IP address depends on the operating system of the
                            computer. Refer to user documentation provided with your computer for
                            details.


                                                                                                                     15
Setting the IP Address of the Computer                                                     Section 3-4

                             The following procedure is for Windows XP Professional.

                  1,2,3...   1. Connect the LAN cable to the LAN port on the computer and turn ON the
                                power supply to the computer.
                             2. Log in using the account of the computer administrator.
                                For Windows 2000, log in with administrator rights.
                             3. Select Start - Control Panel.
                             4. Click Network and Internet Connections and then click Network Con-
                                nections.


                                If the control panel is set for classic display, click Network Connections
                                from the Control Panel.
                                For Windows 2000, click Network and Dial-up Connections from the
                                control panel.


                             5. Right-click the network to be set and select Properties from the menu, as
                                shown below.


16
Setting the IP Address of the Computer                                                     Section 3-4

                               The Local Area Connection Properties Dialog Box of the network that was
                               selected will be displayed.


                           6. Select Internet Protocol (TCP/IP) and then click the Properties Button.
                               The Internet Protocol (TCP/IP) Properties Dialog Box shown below will be
                               displayed.
                           7. Recording the Current IP Address
                               If Use the following address is set, record the current IP address of the
                               computer so that it can be set again later.
                                IP address                          .       .        .
                                Subnet mask                         .       .        .
                                Default gateway                     .       .        .

                           8. Temporarily Changing the IP Address
                               Select Use the following address and change the IP address to the val-
                               ues given below.
                                 • IP address = 192.168.0.200
                                 • Subnet mask = 255.255.255.0


                           9. Click the OK Button to change the setting
                               It may be necessary to restart the computer to make the new settings valid.
                           This completes setting the IP address of the computer.


                                                                                                       17
Making the Initial Settings for the SYSMAC SPU Unit                                                Section 3-5

3-5     Making the Initial Settings for the SYSMAC SPU Unit
                             The Initialization Wizard of the SPU-Console is used to make the initial set-
                             tings for the SYSMAC SPU Unit. The Initialization Wizard makes network set-
                             tings, such as the IP address, transfers system data, etc.
                    Note     If initial settings (initialization) is performed for the SYSMAC SPU Unit, all set-
                             tings, including the sampling settings and unit settings, will be initialized. Con-
                             firm that it is okay to initialize the SYSMAC SPU Unit before proceeding.

                  1,2,3...   1. Select Start - All Program - OMRON - SPU Console 1.3 - Initialization
                                Wizard.
                                 The Initialization Wizard will be started.
                             2. Inputting SYSMAC SPU Unit Product Information
                                 Input the model number and lot number of the SYSMAC SPU Unit and click
                                 the Next Button.
                                 The model number and lot number can be found on the sticker on the side
                                 of the SYSMAC SPU Unit or on the sticker on the package.
                             3. Network Settings
                                 The following items are set.
                                         Item                                     Setting
                                  Unit Name            This is the name displayed under My Networks on the
                                                       Windows computer.
                                                       Set a unique name for each SYSMAC SPU Unit con-
                                                       nected to the same network.
                                  Obtain an IP address Select this setting to automatically obtain an IP address
                                  automatically        using the DHCP (Dynamic Host Configuration Protocol).
                                                         Note A DHCP server must exist on the network/system
                                                              to use this setting. If you do not know if a DHCP
                                                              server exists, ask your system administrator.
                                  Use the following IP   Select this setting when not automatically obtaining an IP
                                  address                address using the DHCP and then set the IP address and
                                                         subnet mask.
                                  IP address             Input the IP address.
                                                         Set a unique IP address for each SYSMAC SPU Unit con-
                                                         nected to the same network.
                                  Subnet mask            Set the same subnet mask as the one set on the network
                                                         computer to be connected.

                                 Set all of the required items and then click the Next Button.
                             4. Transferring System Data
                                 Check that the settings are correct and then click the Execute Button.
                                 System data will be transferred to the SYSMAC SPU Unit.


18
Confirming Connections                                                                     Section 3-6

                           5. Exiting the Initialization Wizard
                               The following window will be displayed if the Wizard is exited normally.


                               Click the Finish Button to exit.


3-6    Confirming Connections
                           After making the initial settings, use the following procedure to confirm that
                           the SYSMAC SPU Unit on the network can be recognized from the computer.

                1,2,3...   1. Return the computer's network settings to their previous values using the
                              procedure in 3-4 Setting the IP Address of the Computer as a guide.
                           2. Turn OFF the power supply to the PLC and then turn OFF all pins on the
                              DIP switch on the SYSMAC SPU Unit.
                           3. Turn ON the power supply to the PLC to start the SYSMAC SPU Unit.
                           4. Search for SYSMAC SPU Units on the network using the Windows Search
                              for Computers command.
                                 • For Windows XP, right-click My Network Places on the Start Menu
                                   and then select Search for Computers.
                                 • For Windows XP, right-click My Network Places on the desktop and
                                   then select Search for Computers.


                                                                                                          19
Confirming Connections                                                               Section 3-6

                         5. Input the Unit Name or IP address for the Computer name and then click
                            the Search Button.
                            The following display will appear if the SYSMAC SPU Unit is found.


20
SECTION 4
                     Changing the SYSMAC SPU Unit’s Operating Mode

This section provides information on the SYSMAC SPU Unit’s operating modes, including procedures for confirming and
changing the operating mode.

      4-1   Operation Overview . . . . . . . . . . . . . . . . . . . . . . . . . . . . . . . . . . . . . . . . . . . .   22
      4-2   Confirming the Operating Mode . . . . . . . . . . . . . . . . . . . . . . . . . . . . . . . . . . .          22
      4-3   Changing the Operating Mode . . . . . . . . . . . . . . . . . . . . . . . . . . . . . . . . . . . .          24


                                                                                                                              21
Operation Overview                                                                          Section 4-1

4-1     Operation Overview
                               The SYSMAC SPU Unit provides two operating modes: Sampling Mode and
                               Data Storage Mode. For an overview of operating modes, refer to SECTION 1
                               Overview of Features and Functions. Either of these operating modes can be
                               selected.
                               To select an operating mode, stop all SYSMAC SPU Unit operations. The
                               operating mode cannot be changed while the SYSMAC SPU Unit is operating.
                               Use the following procedure to change the SYSMAC SPU Unit operating
                               mode.

                    1,2,3...   1. Change the DIP switch setting on the SYSMAC SPU Unit and restart using
                                  the restart command.
                               2. After restarting, execute the command to change the operating mode.
                               3. When the command to change the operating mode has completed execut-
                                  ing, change the DIP switch setting on the SYSMAC SPU Unit and restart
                                  the Unit. The SYSMAC SPU Unit will use the newly set operating mode.


4-2     Confirming the Operating Mode
                               The following three methods can be used to confirm the operating mode.
Using 7-segment display        The operating mode is displayed on the 7-segment display on the front of the
on Front of the SYSMAC         SYSMAC SPU Unit.
SPU Unit
                                    7-segment display           Operating mode
                                                           Sampling Mode


                                                           Data Storage Mode


Using SPU-Console
Status Bar
                    1,2,3...   1. Connect to the SYSMAC SPU Unit using the SPU-Console. For details on
                                  connection methods, refer to 1-2-1 Unit Connections.
                               2. The operating mode is displayed in the Status Bar at the bottom right of
                                  SPU-Console.


22
Confirming the Operating Mode                                                             Section 4-2

Using SPU-Console: Unit
Information - System
Information - Mode
                  1,2,3...   1. Connect to the SYSMAC SPU Unit using the SPU-Console. For details on
                                connection methods, refer to 1-2-1 Unit Connections.
                             2. Select the Unit Information Tab and System Information to display the
                                system information.
                             3. The operating mode is displayed in the Mode Field in the System Informa-
                                tion Window.


                                                                                                     23
Changing the Operating Mode                                                                Section 4-3

4-3    Changing the Operating Mode
                           Use the following procedure to change from Sampling Mode to Data Storage
                           Mode.

                1,2,3...   1. First, record the SYSMAC SPU Unit’s currently set DIP switch setting.
                           2. Turn ON pins 4 and 6 only of the SYSMAC SPU Unit’s DIP switch.
                           3. Select command 12 (Restart Unit) using the SELECT Switch, and then
                              press the ENTER Button. For details on command execution methods, re-
                              fer to 6-3 Executing Commands from the SYSMAC SPU Unit. The Unit will
                              restart. Check that “NM” is shown on the 7-segment display.


                                 N       M

                           4. Change the SYSMAC SPU Unit’s operating mode. Select the number of
                              the operating mode to be changed to using the SELECT Switch, and then
                              press the ENTER Button.
                                  Operating mode change operation           Number to select using the
                                                                                SELECT Switch
                               Changing to Sampling Mode               68
                               Changing to Data Storage Mode           53

                           5. The display will change from “M1” in order. Wait until “F” is displayed.
                           6. When “F” is displayed in the 7-segment display, return the DIP switch to the
                              status recorded in step 1.
                           7. Select command 12 (Restart Unit) using the SELECT Switch and press
                              the ENTER Button. The SYSMAC SPU Unit will restart and operate in the
                              newly set operating mode.
                           8. Check that the operating mode has changed. Refer to the confirmation
                              methods in 4-2 Confirming the Operating Mode.


24
SYSMAC SPU Operation Manual

Más contenido relacionado

La actualidad más candente

Fanuc 0i d_sram_backup
Fanuc 0i d_sram_backupFanuc 0i d_sram_backup
Fanuc 0i d_sram_backupAnderson diehl
 
Motherboard manual ga-ma790x-ds4_e
Motherboard manual ga-ma790x-ds4_eMotherboard manual ga-ma790x-ds4_e
Motherboard manual ga-ma790x-ds4_eCord_Dj
 
19 945 Gzt M (1.0 C)
19 945 Gzt M (1.0 C)19 945 Gzt M (1.0 C)
19 945 Gzt M (1.0 C)guestf8dac1
 
Bc875 plg manual101
Bc875 plg manual101Bc875 plg manual101
Bc875 plg manual101Ahmad Syaugi
 
Blog Presentation
Blog PresentationBlog Presentation
Blog Presentationjezibianchi
 
MSI WS72 Workstation (Intel Xeon) Service Manual PDF (English)
  MSI WS72 Workstation (Intel Xeon) Service Manual PDF (English)   MSI WS72 Workstation (Intel Xeon) Service Manual PDF (English)
MSI WS72 Workstation (Intel Xeon) Service Manual PDF (English) manualsheet
 
1 scorbot-er-iii_user_manual
1  scorbot-er-iii_user_manual1  scorbot-er-iii_user_manual
1 scorbot-er-iii_user_manualTecnica Adestra
 
Blue e-wall-mounted-cooling-unit-33xx.xxx
Blue e-wall-mounted-cooling-unit-33xx.xxx Blue e-wall-mounted-cooling-unit-33xx.xxx
Blue e-wall-mounted-cooling-unit-33xx.xxx Erdinç Klima
 
MSI GT62VR DOMINATOR PRO (GEFORCE® GTX 1070) manual PDF / User Guide
   MSI GT62VR DOMINATOR PRO (GEFORCE® GTX 1070) manual PDF / User Guide   MSI GT62VR DOMINATOR PRO (GEFORCE® GTX 1070) manual PDF / User Guide
MSI GT62VR DOMINATOR PRO (GEFORCE® GTX 1070) manual PDF / User Guidemanualsheet
 
controlador manual
controlador manual controlador manual
controlador manual Pedro Roman
 
Motherboard Manual Ga M61p S3 E
Motherboard Manual Ga M61p S3 EMotherboard Manual Ga M61p S3 E
Motherboard Manual Ga M61p S3 Eguestd423ec
 
Lt200 drb200 tecnico
Lt200 drb200 tecnicoLt200 drb200 tecnico
Lt200 drb200 tecnicomiguecas
 

La actualidad más candente (15)

Manual E
Manual EManual E
Manual E
 
Fanuc 0i d_sram_backup
Fanuc 0i d_sram_backupFanuc 0i d_sram_backup
Fanuc 0i d_sram_backup
 
Motherboard manual ga-ma790x-ds4_e
Motherboard manual ga-ma790x-ds4_eMotherboard manual ga-ma790x-ds4_e
Motherboard manual ga-ma790x-ds4_e
 
19 945 Gzt M (1.0 C)
19 945 Gzt M (1.0 C)19 945 Gzt M (1.0 C)
19 945 Gzt M (1.0 C)
 
Bc875 plg manual101
Bc875 plg manual101Bc875 plg manual101
Bc875 plg manual101
 
Blog Presentation
Blog PresentationBlog Presentation
Blog Presentation
 
MSI WS72 Workstation (Intel Xeon) Service Manual PDF (English)
  MSI WS72 Workstation (Intel Xeon) Service Manual PDF (English)   MSI WS72 Workstation (Intel Xeon) Service Manual PDF (English)
MSI WS72 Workstation (Intel Xeon) Service Manual PDF (English)
 
1 scorbot-er-iii_user_manual
1  scorbot-er-iii_user_manual1  scorbot-er-iii_user_manual
1 scorbot-er-iii_user_manual
 
Blue e-wall-mounted-cooling-unit-33xx.xxx
Blue e-wall-mounted-cooling-unit-33xx.xxx Blue e-wall-mounted-cooling-unit-33xx.xxx
Blue e-wall-mounted-cooling-unit-33xx.xxx
 
MSI GT62VR DOMINATOR PRO (GEFORCE® GTX 1070) manual PDF / User Guide
   MSI GT62VR DOMINATOR PRO (GEFORCE® GTX 1070) manual PDF / User Guide   MSI GT62VR DOMINATOR PRO (GEFORCE® GTX 1070) manual PDF / User Guide
MSI GT62VR DOMINATOR PRO (GEFORCE® GTX 1070) manual PDF / User Guide
 
controlador manual
controlador manual controlador manual
controlador manual
 
Motorola rfs wi_ng_system_ref_guide
Motorola rfs wi_ng_system_ref_guideMotorola rfs wi_ng_system_ref_guide
Motorola rfs wi_ng_system_ref_guide
 
Motherboard Manual Ga M61p S3 E
Motherboard Manual Ga M61p S3 EMotherboard Manual Ga M61p S3 E
Motherboard Manual Ga M61p S3 E
 
Stk 500
Stk 500Stk 500
Stk 500
 
Lt200 drb200 tecnico
Lt200 drb200 tecnicoLt200 drb200 tecnico
Lt200 drb200 tecnico
 

Similar a SYSMAC SPU Operation Manual

Omron PLC cqm1 opearation manual
Omron PLC cqm1 opearation manualOmron PLC cqm1 opearation manual
Omron PLC cqm1 opearation manualYan Zhang
 
W427 e1-01+ws02-cpic1-e+cx programmer iec operation-manual
W427 e1-01+ws02-cpic1-e+cx programmer iec operation-manualW427 e1-01+ws02-cpic1-e+cx programmer iec operation-manual
W427 e1-01+ws02-cpic1-e+cx programmer iec operation-manualNguyễn Yên Giang
 
Honeywell gsmv-install-guide
Honeywell gsmv-install-guideHoneywell gsmv-install-guide
Honeywell gsmv-install-guideAlarm Grid
 
Siemens catalog hmi-tp070_e
Siemens catalog hmi-tp070_eSiemens catalog hmi-tp070_e
Siemens catalog hmi-tp070_eDien Ha The
 
Siemens catalog hmi-tp070 touch panel
Siemens catalog hmi-tp070 touch panelSiemens catalog hmi-tp070 touch panel
Siemens catalog hmi-tp070 touch panelDien Ha The
 
Simocode dp = manual de parametrização e operação
Simocode dp = manual de parametrização e operaçãoSimocode dp = manual de parametrização e operação
Simocode dp = manual de parametrização e operaçãoconfidencial
 
Loss-in-weight controller for GMC-X3.pdf
Loss-in-weight controller for GMC-X3.pdfLoss-in-weight controller for GMC-X3.pdf
Loss-in-weight controller for GMC-X3.pdfGeneral Measure
 
PLC and SCADA Training.pdf
PLC and SCADA Training.pdfPLC and SCADA Training.pdf
PLC and SCADA Training.pdfMarioHaguila
 
Analog module omron
Analog module omronAnalog module omron
Analog module omronAlain Hua
 
En 600stdprg fwmanual
En 600stdprg fwmanualEn 600stdprg fwmanual
En 600stdprg fwmanualToàn Huỳnh
 
Centro de maquinado pro light 2000
Centro de maquinado pro light 2000Centro de maquinado pro light 2000
Centro de maquinado pro light 2000Lenin Serrano
 
Cummins onan dggd generator set with power command 2100 controller service re...
Cummins onan dggd generator set with power command 2100 controller service re...Cummins onan dggd generator set with power command 2100 controller service re...
Cummins onan dggd generator set with power command 2100 controller service re...fusjejfjskerekem
 
Cummins onan dggd generator set with power command 2100 controller service re...
Cummins onan dggd generator set with power command 2100 controller service re...Cummins onan dggd generator set with power command 2100 controller service re...
Cummins onan dggd generator set with power command 2100 controller service re...fujsjejfskekkm
 
Cummins onan dghd generator set with power command 2100 controller service re...
Cummins onan dghd generator set with power command 2100 controller service re...Cummins onan dghd generator set with power command 2100 controller service re...
Cummins onan dghd generator set with power command 2100 controller service re...fjsjefkskememe
 
Cummins onan dghd generator set with power command 2100 controller service re...
Cummins onan dghd generator set with power command 2100 controller service re...Cummins onan dghd generator set with power command 2100 controller service re...
Cummins onan dghd generator set with power command 2100 controller service re...fjkskemuiijdmme
 
Cummins onan dggd generator set with power command 2100 controller service re...
Cummins onan dggd generator set with power command 2100 controller service re...Cummins onan dggd generator set with power command 2100 controller service re...
Cummins onan dggd generator set with power command 2100 controller service re...fjkskemuiijdmme
 

Similar a SYSMAC SPU Operation Manual (20)

Omron PLC cqm1 opearation manual
Omron PLC cqm1 opearation manualOmron PLC cqm1 opearation manual
Omron PLC cqm1 opearation manual
 
Manual CLP Omron CP1H
Manual CLP Omron CP1HManual CLP Omron CP1H
Manual CLP Omron CP1H
 
Omron CS1D
Omron CS1DOmron CS1D
Omron CS1D
 
W427 e1-01+ws02-cpic1-e+cx programmer iec operation-manual
W427 e1-01+ws02-cpic1-e+cx programmer iec operation-manualW427 e1-01+ws02-cpic1-e+cx programmer iec operation-manual
W427 e1-01+ws02-cpic1-e+cx programmer iec operation-manual
 
Honeywell gsmv-install-guide
Honeywell gsmv-install-guideHoneywell gsmv-install-guide
Honeywell gsmv-install-guide
 
Omrom e5cn i
Omrom e5cn iOmrom e5cn i
Omrom e5cn i
 
Siemens catalog hmi-tp070_e
Siemens catalog hmi-tp070_eSiemens catalog hmi-tp070_e
Siemens catalog hmi-tp070_e
 
Siemens catalog hmi-tp070 touch panel
Siemens catalog hmi-tp070 touch panelSiemens catalog hmi-tp070 touch panel
Siemens catalog hmi-tp070 touch panel
 
Simocode dp = manual de parametrização e operação
Simocode dp = manual de parametrização e operaçãoSimocode dp = manual de parametrização e operação
Simocode dp = manual de parametrização e operação
 
Cp1 e introduction manual
Cp1 e introduction manualCp1 e introduction manual
Cp1 e introduction manual
 
Loss-in-weight controller for GMC-X3.pdf
Loss-in-weight controller for GMC-X3.pdfLoss-in-weight controller for GMC-X3.pdf
Loss-in-weight controller for GMC-X3.pdf
 
PLC and SCADA Training.pdf
PLC and SCADA Training.pdfPLC and SCADA Training.pdf
PLC and SCADA Training.pdf
 
Analog module omron
Analog module omronAnalog module omron
Analog module omron
 
En 600stdprg fwmanual
En 600stdprg fwmanualEn 600stdprg fwmanual
En 600stdprg fwmanual
 
Centro de maquinado pro light 2000
Centro de maquinado pro light 2000Centro de maquinado pro light 2000
Centro de maquinado pro light 2000
 
Cummins onan dggd generator set with power command 2100 controller service re...
Cummins onan dggd generator set with power command 2100 controller service re...Cummins onan dggd generator set with power command 2100 controller service re...
Cummins onan dggd generator set with power command 2100 controller service re...
 
Cummins onan dggd generator set with power command 2100 controller service re...
Cummins onan dggd generator set with power command 2100 controller service re...Cummins onan dggd generator set with power command 2100 controller service re...
Cummins onan dggd generator set with power command 2100 controller service re...
 
Cummins onan dghd generator set with power command 2100 controller service re...
Cummins onan dghd generator set with power command 2100 controller service re...Cummins onan dghd generator set with power command 2100 controller service re...
Cummins onan dghd generator set with power command 2100 controller service re...
 
Cummins onan dghd generator set with power command 2100 controller service re...
Cummins onan dghd generator set with power command 2100 controller service re...Cummins onan dghd generator set with power command 2100 controller service re...
Cummins onan dghd generator set with power command 2100 controller service re...
 
Cummins onan dggd generator set with power command 2100 controller service re...
Cummins onan dggd generator set with power command 2100 controller service re...Cummins onan dggd generator set with power command 2100 controller service re...
Cummins onan dggd generator set with power command 2100 controller service re...
 

SYSMAC SPU Operation Manual

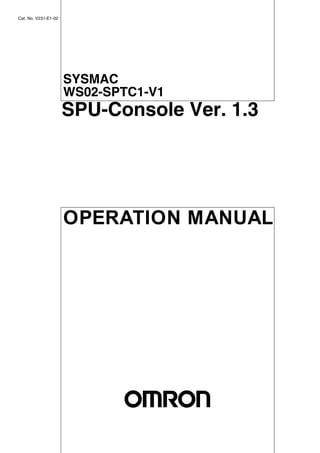
  • 1. Cat. No. V231-E1-02 SYSMAC WS02-SPTC1-V1 SPU-Console Ver. 1.3 OPERATION MANUAL
  • 2. WS02-SPTC1-V1 SPU-Console Ver. 1.3 Operation Manual Revised November 2005
  • 3. iv
  • 4. Notice: OMRON products are manufactured for use according to proper procedures by a qualified operator and only for the purposes described in this manual. The following conventions are used to indicate and classify precautions in this manual. Always heed the information provided with them. Failure to heed precautions can result in injury to people or dam- age to property. !DANGER Indicates an imminently hazardous situation which, if not avoided, will result in death or serious injury. !WARNING Indicates a potentially hazardous situation which, if not avoided, could result in death or serious injury. !Caution Indicates a potentially hazardous situation which, if not avoided, may result in minor or moderate injury, or property damage. OMRON Product References All OMRON products are capitalized in this manual. The word “Unit” is also capitalized when it refers to an OMRON product, regardless of whether or not it appears in the proper name of the product. The abbreviation “Ch,” which appears in some displays and on some OMRON products, often means “word” and is abbreviated “Wd” in documentation in this sense. The abbreviation “PLC” means Programmable Controller. “PC” is used, however, in some Program- ming Device displays to mean Programmable Controller. Visual Aids The following headings appear in the left column of the manual to help you locate different types of information. Note Indicates information of particular interest for efficient and convenient opera- tion of the product. 1,2,3... 1. Indicates lists of one sort or another, such as procedures, checklists, etc.  OMRON, 2005 All rights reserved. No part of this publication may be reproduced, stored in a retrieval system, or transmitted, in any form, or by any means, mechanical, electronic, photocopying, recording, or otherwise, without the prior written permission of OMRON. No patent liability is assumed with respect to the use of the information contained herein. Moreover, because OMRON is con- stantly striving to improve its high-quality products, the information contained in this manual is subject to change without notice. Every precaution has been taken in the preparation of this manual. Nevertheless, OMRON assumes no responsibility for errors or omissions. Neither is any liability assumed for damages resulting from the use of the information contained in this publication. v
  • 5. Unit Versions of SPU-Console Unit Versions and SPU-Console Model CS1W-SPU01/SPU02 CJ1W-SPU01 Unit version Unit Ver. 1.0 Unit Ver. 1.2 Unit Ver. 1.3 Unit Ver. 1.3 SPU- SPU-Console Ver. 1.0 Can be connected. Cannot be connected. Cannot be con- Cannot be con- Console nected. nected. SPU-Console Ver. 1.2 Can be connected, but Can be connected. Cannot be con- Cannot be con- there are some limita- nected. nected. SPU-Console Ver. 1.3 tions. Can be connected, but Can be con- Can be con- (Operates as SPU- there are some limitations. nected. nected. Console Ver. 1.0.) (Operates as SPU-Con- sole Ver. 1.2.) Note 1. It is not possible to connect to a SYSMAC SPU Unit with unit version 1.3 from SPU-Console versions lower than 1.3. Use SPU-Console version 1.3 to connect to a SYSMAC SPU Unit with unit version 1.3. 2. It is possible to connect to a SYSMAC SPU Unit with a unit version earlier than 1.3 from SPU-Console version 1.3, but the SPU-Console’s operations will be limited to SPU-Console operations for the lower unit version. SPU-Console Version Upgrade The SPU-Console has been upgraded from Ver. 1.2 to Ver. 1.3. The following table shows the changes made in the upgrade. Item SPU-Console Ver. 1.2 SPU-Console Ver. 1.3 Support for CJ-series CJ1W-SPU01 SYSMAC SPU No Yes Units Importing and exporting registered contents of con- No Yes nected Units Connection confirmation (connection status, error con- No Yes tents) vi
  • 6. TABLE OF CONTENTS PRECAUTIONS . . . . . . . . . . . . . . . . . . . . . . . . . . . . . . . . . . . xvii 1 Intended Audience . . . . . . . . . . . . . . . . . . . . . . . . . . . . . . . . . . . . . . . . . . . . . . . . . . . . . . . . . xviii 2 General Precautions . . . . . . . . . . . . . . . . . . . . . . . . . . . . . . . . . . . . . . . . . . . . . . . . . . . . . . . . xviii 3 Safety Precautions . . . . . . . . . . . . . . . . . . . . . . . . . . . . . . . . . . . . . . . . . . . . . . . . . . . . . . . . . xix 4 Operating Environment Precautions . . . . . . . . . . . . . . . . . . . . . . . . . . . . . . . . . . . . . . . . . . . xix 5 Application Precautions. . . . . . . . . . . . . . . . . . . . . . . . . . . . . . . . . . . . . . . . . . . . . . . . . . . . . xx 6 Conformance to EC Directives . . . . . . . . . . . . . . . . . . . . . . . . . . . . . . . . . . . . . . . . . . . . . . . xxii SECTION 1 Overview of Features and Functions . . . . . . . . . . . . . . . . . . 1 1-1 Overview of the SYSMAC SPU Unit . . . . . . . . . . . . . . . . . . . . . . . . . . . . . . . . . . . . . . . . . . 2 1-2 SPU-Console . . . . . . . . . . . . . . . . . . . . . . . . . . . . . . . . . . . . . . . . . . . . . . . . . . . . . . . . . . . . . 2 1-3 System Requirements . . . . . . . . . . . . . . . . . . . . . . . . . . . . . . . . . . . . . . . . . . . . . . . . . . . . . . 4 SECTION 2 Setting Up, Starting, and Exiting the SPU-Console. . . . . . . 7 2-1 Installation . . . . . . . . . . . . . . . . . . . . . . . . . . . . . . . . . . . . . . . . . . . . . . . . . . . . . . . . . . . . . . . 8 2-2 Uninstalling SPU-Console. . . . . . . . . . . . . . . . . . . . . . . . . . . . . . . . . . . . . . . . . . . . . . . . . . . 9 2-3 Starting and Exiting SPU-Console . . . . . . . . . . . . . . . . . . . . . . . . . . . . . . . . . . . . . . . . . . . . 10 2-4 SPU-Console Window Configuration . . . . . . . . . . . . . . . . . . . . . . . . . . . . . . . . . . . . . . . . . . 11 SECTION 3 Initial Settings of the SYSMAC SPU Unit . . . . . . . . . . . . . . 13 3-1 Outline of Initial Settings . . . . . . . . . . . . . . . . . . . . . . . . . . . . . . . . . . . . . . . . . . . . . . . . . . . 14 3-2 Connecting the SYSMAC SPU Unit and Computer with a LAN Cable . . . . . . . . . . . . . . . . 14 3-3 Starting the SYSMAC SPU Unit in Maintenance Mode . . . . . . . . . . . . . . . . . . . . . . . . . . . . 15 3-4 Setting the IP Address of the Computer . . . . . . . . . . . . . . . . . . . . . . . . . . . . . . . . . . . . . . . . 15 3-5 Making the Initial Settings for the SYSMAC SPU Unit . . . . . . . . . . . . . . . . . . . . . . . . . . . 18 3-6 Confirming Connections . . . . . . . . . . . . . . . . . . . . . . . . . . . . . . . . . . . . . . . . . . . . . . . . . . . . 19 SECTION 4 Changing the SYSMAC SPU Unit’s Operating Mode . . . . 21 4-1 Operation Overview. . . . . . . . . . . . . . . . . . . . . . . . . . . . . . . . . . . . . . . . . . . . . . . . . . . . . . . . 22 4-2 Confirming the Operating Mode . . . . . . . . . . . . . . . . . . . . . . . . . . . . . . . . . . . . . . . . . . . . . . 22 4-3 Changing the Operating Mode. . . . . . . . . . . . . . . . . . . . . . . . . . . . . . . . . . . . . . . . . . . . . . . . 24 SECTION 5 Connecting to an SYSMAC SPU Unit . . . . . . . . . . . . . . . . . 25 5-1 Connecting and Disconnecting . . . . . . . . . . . . . . . . . . . . . . . . . . . . . . . . . . . . . . . . . . . . . . . 26 5-2 Managing Connections . . . . . . . . . . . . . . . . . . . . . . . . . . . . . . . . . . . . . . . . . . . . . . . . . . . . . 30 5-3 Editing Settings Offline (Unconnected) . . . . . . . . . . . . . . . . . . . . . . . . . . . . . . . . . . . . . . . . 32 5-4 Saving and Transferring Settings. . . . . . . . . . . . . . . . . . . . . . . . . . . . . . . . . . . . . . . . . . . . . . 34 5-5 Recording Files . . . . . . . . . . . . . . . . . . . . . . . . . . . . . . . . . . . . . . . . . . . . . . . . . . . . . . . . . . . 38 vii
  • 7. TABLE OF CONTENTS SECTION 6 Executing Commands. . . . . . . . . . . . . . . . . . . . . . . . . . . . . . . 43 6-1 Command Types and Execution . . . . . . . . . . . . . . . . . . . . . . . . . . . . . . . . . . . . . . . . . . . . . . 44 6-2 Executing Commands from the SPU-Console . . . . . . . . . . . . . . . . . . . . . . . . . . . . . . . . . . . 44 6-3 Executing Commands from the SYSMAC SPU Unit . . . . . . . . . . . . . . . . . . . . . . . . . . . . . 44 6-4 Executing Commands from the CPU Unit . . . . . . . . . . . . . . . . . . . . . . . . . . . . . . . . . . . . . . 45 SECTION 7 Sampling Mode . . . . . . . . . . . . . . . . . . . . . . . . . . . . . . . . . . . . 47 7-1 Sampling Mode Introduction. . . . . . . . . . . . . . . . . . . . . . . . . . . . . . . . . . . . . . . . . . . . . . . . . 48 SECTION 8 Monitoring SYSMAC SPU Unit Operating Status . . . . . . . 49 8-1 Displaying System Information. . . . . . . . . . . . . . . . . . . . . . . . . . . . . . . . . . . . . . . . . . . . . . . 50 8-2 Displaying Error Information . . . . . . . . . . . . . . . . . . . . . . . . . . . . . . . . . . . . . . . . . . . . . . . . 51 SECTION 9 Sampling Settings for Sampling Mode . . . . . . . . . . . . . . . . . 53 9-1 Making the Sampling Settings. . . . . . . . . . . . . . . . . . . . . . . . . . . . . . . . . . . . . . . . . . . . . . . . 54 9-2 Sampling Setting Windows and Operations . . . . . . . . . . . . . . . . . . . . . . . . . . . . . . . . . . . . . 54 9-3 Setting Variables . . . . . . . . . . . . . . . . . . . . . . . . . . . . . . . . . . . . . . . . . . . . . . . . . . . . . . . . . . 56 9-4 Setting Sampling Patterns . . . . . . . . . . . . . . . . . . . . . . . . . . . . . . . . . . . . . . . . . . . . . . . . . . . 65 9-5 Enabling the Sampling Settings. . . . . . . . . . . . . . . . . . . . . . . . . . . . . . . . . . . . . . . . . . . . . . . 74 9-6 Executing Sampling. . . . . . . . . . . . . . . . . . . . . . . . . . . . . . . . . . . . . . . . . . . . . . . . . . . . . . . . 75 9-7 Displaying the Sampling Result Folder . . . . . . . . . . . . . . . . . . . . . . . . . . . . . . . . . . . . . . . . . 76 9-8 Saving Sampling Data . . . . . . . . . . . . . . . . . . . . . . . . . . . . . . . . . . . . . . . . . . . . . . . . . . . . . . 78 SECTION 10 Trend Graphs . . . . . . . . . . . . . . . . . . . . . . . . . . . . . . . . . . . . . 79 10-1 Historical Trends . . . . . . . . . . . . . . . . . . . . . . . . . . . . . . . . . . . . . . . . . . . . . . . . . . . . . . . . . . 80 10-2 Realtime Trends. . . . . . . . . . . . . . . . . . . . . . . . . . . . . . . . . . . . . . . . . . . . . . . . . . . . . . . . . . . 81 SECTION 11 Unit Settings . . . . . . . . . . . . . . . . . . . . . . . . . . . . . . . . . . . . . . 83 11-1 System Settings . . . . . . . . . . . . . . . . . . . . . . . . . . . . . . . . . . . . . . . . . . . . . . . . . . . . . . . . . . . 84 11-2 FINS Network Settings . . . . . . . . . . . . . . . . . . . . . . . . . . . . . . . . . . . . . . . . . . . . . . . . . . . . . 86 11-3 Enabling Changes in Unit Settings . . . . . . . . . . . . . . . . . . . . . . . . . . . . . . . . . . . . . . . . . . . . 89 11-4 Undoing Changes in Unit Settings . . . . . . . . . . . . . . . . . . . . . . . . . . . . . . . . . . . . . . . . . . . . 90 SECTION 12 Supported Commands . . . . . . . . . . . . . . . . . . . . . . . . . . . . . . 91 12-1 Commands . . . . . . . . . . . . . . . . . . . . . . . . . . . . . . . . . . . . . . . . . . . . . . . . . . . . . . . . . . . . . . . 92 viii
  • 8. TABLE OF CONTENTS SECTION 13 Data Storage Mode . . . . . . . . . . . . . . . . . . . . . . . . . . . . . . . . . 93 13-1 Data Storage Mode Introduction . . . . . . . . . . . . . . . . . . . . . . . . . . . . . . . . . . . . . . . . . . . . . . 94 SECTION 14 Monitoring SYSMAC SPU Unit Operating Status . . . . . . . 95 14-1 Displaying System Information. . . . . . . . . . . . . . . . . . . . . . . . . . . . . . . . . . . . . . . . . . . . . . . 96 14-2 Displaying Error Information . . . . . . . . . . . . . . . . . . . . . . . . . . . . . . . . . . . . . . . . . . . . . . . . 97 SECTION 15 Data Collection Settings for Data Storage Mode . . . . . . . . . 99 15-1 Data Collection Setting Procedure. . . . . . . . . . . . . . . . . . . . . . . . . . . . . . . . . . . . . . . . . . . . . 100 15-2 Data Collection Settings Window and Operation . . . . . . . . . . . . . . . . . . . . . . . . . . . . . . . . . 100 15-3 Setting Variables . . . . . . . . . . . . . . . . . . . . . . . . . . . . . . . . . . . . . . . . . . . . . . . . . . . . . . . . . . 102 15-4 Setting Data Collection Patterns . . . . . . . . . . . . . . . . . . . . . . . . . . . . . . . . . . . . . . . . . . . . . . 110 15-5 Setting Memory Events . . . . . . . . . . . . . . . . . . . . . . . . . . . . . . . . . . . . . . . . . . . . . . . . . . . . . 119 15-6 Setting Schedule Events . . . . . . . . . . . . . . . . . . . . . . . . . . . . . . . . . . . . . . . . . . . . . . . . . . . . 124 15-7 Displaying the List of Events . . . . . . . . . . . . . . . . . . . . . . . . . . . . . . . . . . . . . . . . . . . . . . . . 132 15-8 Enabling the Data Collection Settings. . . . . . . . . . . . . . . . . . . . . . . . . . . . . . . . . . . . . . . . . . 132 15-9 Executing Data Collection . . . . . . . . . . . . . . . . . . . . . . . . . . . . . . . . . . . . . . . . . . . . . . . . . . . 133 15-10 Displaying the Collection Result Folder . . . . . . . . . . . . . . . . . . . . . . . . . . . . . . . . . . . . . . . . 134 15-11 Saving Collection Data . . . . . . . . . . . . . . . . . . . . . . . . . . . . . . . . . . . . . . . . . . . . . . . . . . . . . 136 SECTION 16 Trend Graphs . . . . . . . . . . . . . . . . . . . . . . . . . . . . . . . . . . . . . 137 16-1 Historical Trends . . . . . . . . . . . . . . . . . . . . . . . . . . . . . . . . . . . . . . . . . . . . . . . . . . . . . . . . . . 138 SECTION 17 Unit Settings . . . . . . . . . . . . . . . . . . . . . . . . . . . . . . . . . . . . . . 139 17-1 Unit Settings . . . . . . . . . . . . . . . . . . . . . . . . . . . . . . . . . . . . . . . . . . . . . . . . . . . . . . . . . . . . . 140 SECTION 18 Data Storage Mode Commands. . . . . . . . . . . . . . . . . . . . . . . 141 18-1 List of Data Storage Mode Commands . . . . . . . . . . . . . . . . . . . . . . . . . . . . . . . . . . . . . . . . . 142 Appendices A Troubleshooting with Error Codes . . . . . . . . . . . . . . . . . . . . . . . . . . . . . . . . . . . . . . . . . . . . 143 B Troubleshooting Connections . . . . . . . . . . . . . . . . . . . . . . . . . . . . . . . . . . . . . . . . . . . . . . . . 145 C Structure of the Network-shared Folder . . . . . . . . . . . . . . . . . . . . . . . . . . . . . . . . . . . . . . . . 149 D Changing from SYSMAC SPU Unit Ver. 1.0/1.2 . . . . . . . . . . . . . . . . . . . . . . . . . . . . . . . . . 151 E Refreshing the System Program . . . . . . . . . . . . . . . . . . . . . . . . . . . . . . . . . . . . . . . . . . . . . . 153 F Reproducing a SYSMAC SPU Unit . . . . . . . . . . . . . . . . . . . . . . . . . . . . . . . . . . . . . . . . . . . 155 ix
  • 9. TABLE OF CONTENTS Index. . . . . . . . . . . . . . . . . . . . . . . . . . . . . . . . . . . . . . . . . . . . . 157 Revision History . . . . . . . . . . . . . . . . . . . . . . . . . . . . . . . . . . . 161 x
  • 10. About this Manual: This manual describes the installation and operation of the WS02-SPTC1-V1 SPU-Console Version 1.3 (setting and monitoring software) for the CS1W-SPU01 and CS1W-SPU02 SYSMAC SPU Units and includes the sections described below. Please read this manual and all related manuals listed in the following table, and be sure you under- stand the information provided before attempting to install or operate an SYSMAC SPU Unit using the SPU-Console. Be sure to read the precautions provided in the following section. Precautions provides general precautions for using the SPU-Console, SYSMAC SPU Unit, Program- mable Controller, and related devices. Name Cat. No. Contents WS02-SPTC1-V1 V231 Describes the installation and operation of the SYSMAC SPU-Console Ver. 1.3 Operation Manual SPU-Console Ver. 1.3. (this manual) CS1W-SPU01/SPU02 V229 Describes the installation and operation of the SYSMAC SYSMAC SPU Units Operation Manual SPU Units. WS02-EDMC1 V232 Describes the installation and operation of the SYSMAC SYSMAC SPU Data Management Mid- SPU Data Management Middleware (EDMS). dleware User’s Manual Section 1 provides an overview of the SPU-Console and describes the operating environment, includ- ing computer system requirements. Section 2 describes procedures for installing and uninstalling the SPU-Console, SPU-Console starting methods, and the basic SPU-Console window configuration. Section 3 describes how to make initial settings for SYSMAC SPU Units. Section 4 describes the SYSMAC SPU Unit's operating modes, including procedures for confirming and changing the operating mode. Section 5 describes the methods used for connecting the SPU-Console to SYSMAC SPU Units, man- aging SYSMAC SPU Unit connections, editing settings offline, transferring setting files between the SPU-Console and SYSMAC SPU Units, and recording files. Section 6 describes the methods used to execute commands for SYSMAC SPU Units. Section 7 introduces the SYSMAC SPU Unit’s Sampling Mode. Section 8 describes how to monitor SYSMAC SPU Unit operating status and error status. Section 9 explains how to make the sampling settings for Sampling Mode operation. Section 10 describes how to display trend graphs based on sampling files that have been collected. Section 11 describes how to set the system settings and FINS network settings. Section 12 provides a list of the commands that are supported for SYSMAC SPU Units. Section 13 introduces the SYSMAC SPU Unit's Data Storage Mode. Section 14 describes how to monitor SYSMAC SPU Unit operating status and error status. Section 15 explains how to make the data collection settings for Data Storage Mode operation. Section 16 provides information on operating trend graphs for data collection. Section 17 provides information on Unit settings for data collection. Section 18 provides a list of the commands that are supported for SYSMAC SPU Units in Data Stor- age Mode. The Appendices provide troubleshooting methods for SYSMAC SPU Unit errors and troubleshooting connections between the SPU-Console and SYSMAC SPU Units, and describes the SYSMAC SPU Unit’s network-shared folder configuration. Information is also provided on changing from SPU-Con- sole Ver. 1.0 or Ver. 1.2 and refreshing the system program. xi
  • 11. !WARNING Failure to read and understand the information provided in this manual may result in per- sonal injury or death, damage to the product, or product failure. Please read each section in its entirety and be sure you understand the information provided in the section and related sections before attempting any of the procedures or operations given. xii
  • 12. Read and Understand this Manual Please read and understand this manual before using the product. Please consult your OMRON representative if you have any questions or comments. Warranty and Limitations of Liability WARRANTY OMRON's exclusive warranty is that the products are free from defects in materials and workmanship for a period of one year (or other period if specified) from date of sale by OMRON. OMRON MAKES NO WARRANTY OR REPRESENTATION, EXPRESS OR IMPLIED, REGARDING NON- INFRINGEMENT, MERCHANTABILITY, OR FITNESS FOR PARTICULAR PURPOSE OF THE PRODUCTS. ANY BUYER OR USER ACKNOWLEDGES THAT THE BUYER OR USER ALONE HAS DETERMINED THAT THE PRODUCTS WILL SUITABLY MEET THE REQUIREMENTS OF THEIR INTENDED USE. OMRON DISCLAIMS ALL OTHER WARRANTIES, EXPRESS OR IMPLIED. LIMITATIONS OF LIABILITY OMRON SHALL NOT BE RESPONSIBLE FOR SPECIAL, INDIRECT, OR CONSEQUENTIAL DAMAGES, LOSS OF PROFITS OR COMMERCIAL LOSS IN ANY WAY CONNECTED WITH THE PRODUCTS, WHETHER SUCH CLAIM IS BASED ON CONTRACT, WARRANTY, NEGLIGENCE, OR STRICT LIABILITY. In no event shall the responsibility of OMRON for any act exceed the individual price of the product on which liability is asserted. IN NO EVENT SHALL OMRON BE RESPONSIBLE FOR WARRANTY, REPAIR, OR OTHER CLAIMS REGARDING THE PRODUCTS UNLESS OMRON'S ANALYSIS CONFIRMS THAT THE PRODUCTS WERE PROPERLY HANDLED, STORED, INSTALLED, AND MAINTAINED AND NOT SUBJECT TO CONTAMINATION, ABUSE, MISUSE, OR INAPPROPRIATE MODIFICATION OR REPAIR. xiii
  • 13. Application Considerations SUITABILITY FOR USE OMRON shall not be responsible for conformity with any standards, codes, or regulations that apply to the combination of products in the customer's application or use of the products. At the customer's request, OMRON will provide applicable third party certification documents identifying ratings and limitations of use that apply to the products. This information by itself is not sufficient for a complete determination of the suitability of the products in combination with the end product, machine, system, or other application or use. The following are some examples of applications for which particular attention must be given. This is not intended to be an exhaustive list of all possible uses of the products, nor is it intended to imply that the uses listed may be suitable for the products: • Outdoor use, uses involving potential chemical contamination or electrical interference, or conditions or uses not described in this manual. • Nuclear energy control systems, combustion systems, railroad systems, aviation systems, medical equipment, amusement machines, vehicles, safety equipment, and installations subject to separate industry or government regulations. • Systems, machines, and equipment that could present a risk to life or property. Please know and observe all prohibitions of use applicable to the products. NEVER USE THE PRODUCTS FOR AN APPLICATION INVOLVING SERIOUS RISK TO LIFE OR PROPERTY WITHOUT ENSURING THAT THE SYSTEM AS A WHOLE HAS BEEN DESIGNED TO ADDRESS THE RISKS, AND THAT THE OMRON PRODUCTS ARE PROPERLY RATED AND INSTALLED FOR THE INTENDED USE WITHIN THE OVERALL EQUIPMENT OR SYSTEM. PROGRAMMABLE PRODUCTS OMRON shall not be responsible for the user's programming of a programmable product, or any consequence thereof. xiv
  • 14. Disclaimers CHANGE IN SPECIFICATIONS Product specifications and accessories may be changed at any time based on improvements and other reasons. It is our practice to change model numbers when published ratings or features are changed, or when significant construction changes are made. However, some specifications of the products may be changed without any notice. When in doubt, special model numbers may be assigned to fix or establish key specifications for your application on your request. Please consult with your OMRON representative at any time to confirm actual specifications of purchased products. DIMENSIONS AND WEIGHTS Dimensions and weights are nominal and are not to be used for manufacturing purposes, even when tolerances are shown. PERFORMANCE DATA Performance data given in this manual is provided as a guide for the user in determining suitability and does not constitute a warranty. It may represent the result of OMRON's test conditions, and the users must correlate it to actual application requirements. Actual performance is subject to the OMRON Warranty and Limitations of Liability. ERRORS AND OMISSIONS The information in this manual has been carefully checked and is believed to be accurate; however, no responsibility is assumed for clerical, typographical, or proofreading errors, or omissions. xv
  • 15. xvi
  • 16. PRECAUTIONS This section provides general precautions for using the SPU-Console Ver. 1.2 and the CS1W-SPU01 and CS1W-SPU02 SYSMAC SPU Units. The information contained in this section is important for the safe and reliable application of SPU-Console and SYSMAC SPU Units. You must read this section and understand the information contained before attempting to set up or operate an SYSMAC SPU Unit using the SPU-Console. 1 Intended Audience . . . . . . . . . . . . . . . . . . . . . . . . . . . . . . . . . . . . . . . . . . . . . xviii 2 General Precautions . . . . . . . . . . . . . . . . . . . . . . . . . . . . . . . . . . . . . . . . . . . . xviii 3 Safety Precautions. . . . . . . . . . . . . . . . . . . . . . . . . . . . . . . . . . . . . . . . . . . . . . xix 4 Operating Environment Precautions . . . . . . . . . . . . . . . . . . . . . . . . . . . . . . . . xix 5 Application Precautions . . . . . . . . . . . . . . . . . . . . . . . . . . . . . . . . . . . . . . . . . xx 6 Conformance to EC Directives . . . . . . . . . . . . . . . . . . . . . . . . . . . . . . . . . . . . xxii 6-1 Applicable Directives . . . . . . . . . . . . . . . . . . . . . . . . . . . . . . . . . . . . xxii 6-2 Concepts . . . . . . . . . . . . . . . . . . . . . . . . . . . . . . . . . . . . . . . . . . . . . . xxii xvii
  • 17. Intended Audience 1 1 Intended Audience This manual is intended for the following personnel, who must also have knowledge of electrical systems (an electrical engineer or the equivalent). • Personnel in charge of installing FA systems. • Personnel in charge of designing FA systems. • Personnel in charge of managing FA systems and facilities. 2 General Precautions The user must operate the product according to the performance specifica- tions described in the operation manuals. Before using the product under conditions which are not described in the manual or applying the product to nuclear control systems, railroad systems, aviation systems, vehicles, combustion systems, medical equipment, amuse- ment machines, safety equipment, and other systems, machines, and equip- ment that may have a serious influence on lives and property if used improperly, consult your OMRON representative. Make sure that the ratings and performance characteristics of the product are sufficient for the systems, machines, and equipment, and be sure to provide the systems, machines, and equipment with double safety mechanisms. This manual provides information for programming and operating the Unit. Be sure to read this manual before attempting to use the Unit and keep this man- ual close at hand for reference during operation. !WARNING It is extremely important that a PLC and all PLC Units be used for the speci- fied purpose and under the specified conditions, especially in applications that can directly or indirectly affect human life. You must consult with your OMRON representative before applying a PLC System to the above-mentioned appli- cations. xviii
  • 18. Safety Precautions 3 3 Safety Precautions !WARNING Do not attempt to take any Unit apart while the power is being supplied. Doing so may result in electric shock. !WARNING Do not touch any of the terminals or terminal blocks while the power is being supplied. Doing so may result in electric shock. !WARNING Do not attempt to disassemble, repair, or modify any Units. Any attempt to do so may result in malfunction, fire, or electric shock. !Caution Execute online editing only after confirming that no adverse effects will be caused by extending the cycle time. Otherwise, the input signals may not be readable. !Caution Emergency stop circuits, interlock circuits, limit circuits, and similar safety measures must be provided in external control circuits. !Caution Tighten the screws on the terminal block of the AC Power Supply Unit to the torque specified in the operation manual. The loose screws may result in burning or malfunction. 4 Operating Environment Precautions !Caution Do not operate the control system in the following locations: • Locations subject to direct sunlight. • Locations subject to temperatures or humidity outside the range specified in the specifications. • Locations subject to condensation as the result of severe changes in tem- perature. • Locations subject to corrosive or flammable gases. • Locations subject to dust (especially iron dust) or salts. • Locations subject to exposure to water, oil, or chemicals. • Locations subject to shock or vibration. !Caution Install the SYSMAC SPU Unit correctly as described in the CS Series PLC Operation Manual or CJ Series PLC Operation Manual. !Caution Take appropriate and sufficient countermeasures when installing systems in the following locations: • Locations subject to static electricity or other forms of noise. • Locations subject to strong electromagnetic fields. • Locations subject to possible exposure to radioactivity. • Locations close to power supplies. xix
  • 19. Application Precautions 5 5 Application Precautions Observe the following precautions when using the SYSMAC SPU Unit. !WARNING Always heed these precautions. Failure to abide by the following precautions could lead to serious or possibly fatal injury. • Always connect to a ground of 100 Ω or less when installing the Units. Not connecting to a ground of 100 Ω or less may result in electric shock. • Always turn OFF the power supply to the CPU Unit, Slaves, and Commu- nications Units before attempting any of the following. Not turning OFF the power supply may result in malfunction or electric shock. • Mounting or dismounting I/O Units, CPU Units, Memory Packs, or Master Units. • Assembling the Units. • Setting DIP switches or rotary switches. • Connecting cables or wiring the system. !Caution Failure to abide by the following precautions could lead to faulty operation of the SYSMAC SPU Unit or the system, or could damage the SYSMAC SPU Unit. Always heed these precautions. • Fail-safe measures must be taken by the customer to ensure safety in the event of incorrect, missing, or abnormal signals caused by broken signal lines, momentary power interruptions, or other causes. • Interlock circuits, limit circuits, and similar safety measures in external cir- cuits (i.e., not in the Programmable Controller) must be provided by the customer. • Always use the power supply voltages specified in the operation manuals. An incorrect voltage may result in malfunction or burning. • Take appropriate measures to ensure that the specified power with the rated voltage and frequency is supplied. Be particularly careful in places where the power supply is unstable. An incorrect power supply may result in malfunction. • Install external breakers and take other safety measures against short-cir- cuiting in external wiring. Insufficient safety measures against short-cir- cuiting may result in burning. • Make sure that all the Backplane mounting screws, terminal block screws, and cable connector screws are tightened to the torque specified in the relevant manuals. Incorrect tightening torque may result in malfunction. • Leave the label attached to the Unit when wiring. Removing the label may result in malfunction if foreign matter enters the Unit. • Remove the label after the completion of wiring to ensure proper heat dis- sipation. Leaving the label attached may result in malfunction. • Use crimp terminals for wiring. Do not connect bare stranded wires directly to terminals. Connection of bare stranded wires may result in burning. • Double-check all wiring and switch settings before turning ON the power supply. Incorrect wiring may result in burning. • Wire all connections correctly. xx
  • 20. Application Precautions 5 • Mount Units only after checking terminal blocks and connectors com- pletely. • Make sure that the terminal blocks, expansion cables, and other items with locking devices are locked in place. • When transporting the Unit, use special packing boxes and protect it from being exposed to excessive vibration or impacts during transportation. • Check the user program for proper execution before actually running it on the Unit. Not checking the program may result in unexpected operation. • Observe the following precautions when wiring the communications cable. • Separate the communications cables from the power lines or high-ten- sion lines. • Do not bend the communications cables past their natural bending ra- dius. • Do not pull on the communications cables. • Do not place heavy objects on top of the communications cables. • Always lay communications cable inside ducts. • Use appropriate communications cables. • Before touching a Unit, be sure to first touch a grounded metallic object in order to discharge any static build-up. Not doing so may result in malfunc- tion or damage. • Confirm that no adverse effect will occur in the system before attempting any of the following. Not doing so may result in an unexpected operation. • Changing the operating mode of the PLC. • Force-setting/force-resetting any bit in memory. • Changing the present value of any word or any set value in memory. • Touch the Unit only after first touching a grounded metal object to dis- charge any static electricity from your body. • Do not remove the Memory Card while the CARD indicator is lit. Doing so may damage the files on the Memory Card. • Do not turn OFF the power supply while Memory Card data is being accessed. Doing so may damage the files on the Memory Card. • Maintain the operating environment for the Memory Cards (such as the ambient operating temperature and other conditions). Request op- erating environment conditions from the manufacture of the card. • OMRON is not responsible for the operation of any memory cards pro- duced by other manufacturers. • We recommend making a backup of the PC Card or Memory Card to prevent loosing the data inadvertently, e.g., by mistakenly deleting it. • Only Memory Cards can be used in the PC Card slot in a CS-series SYSMAC SPU Unit. Modem cards and Ethernet cards, which are not Memory Cards, cannot be used. Do not insert anything but Memory Cards into the Memory Card slot. • Make sure that the PC card or Memory Card is in the guides when in- serting it. Faulty operation may result if the card is not in the guides. • Always lock the Memory Card in place with the card holder or card cov- er after inserting it. The Memory Card may become disconnected if it is not locked in place, causing faulty operation. xxi
  • 21. Conformance to EC Directives 6 • Always confirm that the Memory Card is facing the correct direction be- fore inserting it. If a Memory Card is forced into the slot in the wrong direction, the Memory Card or guides may be damaged. • Always confirm the command code displayed on the 7-segment dis- play before pressing the ENTER Button. Faulty operation may result if the command code is incorrect. • Never restart or turn OFF the power to the SYSMAC SPU Unit while changing sampling settings or other settings. “P1,” “P2,” and through “PE” will be displayed on the 7-segment display while sampling set- tings are being changed. the SYSMAC SPU Unit is restarted or turned OFF before completing the change operation, the system file being changed may be damaged. • Do not turn OFF the power supply to the Unit while transferring the Unit parameters or other data. Doing so may result in incorrect data being transferred to the Unit or the Unit may malfunction. • With the CJ1W-SPU01 SYSMAC SPU Unit, do not connect anything other than a UPS connection to the COMM port. Doing so may inad- vertently shut down the SYSMAC SPU Unit. 6 Conformance to EC Directives 6-1 Applicable Directives • EMC Directives • Low Voltage Directive 6-2 Concepts EMC Directives OMRON devices that comply with EC Directives also conform to the related EMC standards so that they can be more easily built into other devices or the overall machine. The actual products have been checked for conformity to EMC standards (see the following note). Whether the products conform to the standards in the system used by the customer, however, must be checked by the customer. EMC-related performance of the OMRON devices that comply with EC Direc- tives will vary depending on the configuration, wiring, and other conditions of the equipment or control panel on which the OMRON devices are installed. The customer must, therefore, perform the final check to confirm that devices and the overall machine conform to EMC standards. Note Applicable EMS (Electromagnetic Susceptibility) and EMI (Electromagnetic Interference) Standards in the EMC (Electromagnetic Compatibility) stan- dards are as follows: Unit EMS EMI CS1W-SPU01 EN61000-6-2 EN61000-6-4 CS1W-SPU02 (Radiated emission: 10-m regulations) CJ1W-SPU01 Low Voltage Directive Always ensure that devices operating at voltages of 50 to 1,000 V AC and 75 to 1,500 V DC meet the required safety standards for the PLC (EN61131-2). xxii
  • 22. SECTION 1 Overview of Features and Functions This section provides an overview of the SPU-Console and describes the operating environment, including computer system requirements. 1-1 Overview of the SYSMAC SPU Unit . . . . . . . . . . . . . . . . . . . . . . . . . . . . . . . 2 1-2 SPU-Console . . . . . . . . . . . . . . . . . . . . . . . . . . . . . . . . . . . . . . . . . . . . . . . . . . 2 1-2-1 Unit Connections. . . . . . . . . . . . . . . . . . . . . . . . . . . . . . . . . . . . . . . . 2 1-2-2 Unit Settings . . . . . . . . . . . . . . . . . . . . . . . . . . . . . . . . . . . . . . . . . . . 3 1-2-3 Sampling Settings (Sampling Mode) . . . . . . . . . . . . . . . . . . . . . . . . 3 1-2-4 Data Collection Settings (Data Storage Mode) . . . . . . . . . . . . . . . . . 3 1-2-5 Scheduler Settings (Data Storage Mode) . . . . . . . . . . . . . . . . . . . . . 4 1-2-6 Event List (Data Storage Mode) . . . . . . . . . . . . . . . . . . . . . . . . . . . . 4 1-2-7 Executing SYSMAC SPU Unit Commands . . . . . . . . . . . . . . . . . . . 4 1-2-8 Monitoring SYSMAC SPU Unit Operating Status . . . . . . . . . . . . . . 4 1-2-9 Historical Trend Graphs . . . . . . . . . . . . . . . . . . . . . . . . . . . . . . . . . . 4 1-2-10 Realtime Trend Graphs (Sampling Mode) . . . . . . . . . . . . . . . . . . . . 4 1-3 System Requirements . . . . . . . . . . . . . . . . . . . . . . . . . . . . . . . . . . . . . . . . . . . 4 1-3-1 SPU-Console Specifications . . . . . . . . . . . . . . . . . . . . . . . . . . . . . . . 5 1-3-2 Package Contents . . . . . . . . . . . . . . . . . . . . . . . . . . . . . . . . . . . . . . . 5 1
  • 23. Overview of the SYSMAC SPU Unit Section 1-1 1-1 Overview of the SYSMAC SPU Unit The SYSMAC SPU Unit is a CS-series CPU Bus Unit that collects the speci- fied I/O memory data from the CPU Unit using specified collection methods (called collection patterns) and stores the data as CSV-format files (comma- delimited). This function enables the SYSMAC SPU Unit to be used for appli- cations such as analyzing the operation of the PLC and I/O connected to the PLC, recording manufacturing data and other information, and much more. The SYSMAC SPU Unit has two modes that can be selected to suit the appli- cation: Sampling Mode and Data Storage Mode. The SYSMAC SPU Unit’s functions are different in these two modes. • Sampling Mode In this mode, the SYSMAC SPU Unit samples the specified I/O memory data from the CPU Unit at regular time intervals. The time intervals are nearly constant, so the data can be recorded at particular times, and more reliable information can be reproduced from the collected data. • Data Storage Mode In this mode, the SYSMAC SPU Unit records the specified I/O memory data from the CPU Unit when a particular event occurs. This mode can record data when a particular bit turns ON or at a particular time. In addi- tion, it is also possible to record data at a fixed time after the event occurs, although the time interval is not as precise as it is in Sampling Mode. Either of these modes can be selected after the SYSMAC SPU Unit is installed. The settings and display in SPU-Console SPU Basic Software depend on the operating mode. For this reason, this manual is divided into a Sampling Mode part and a Data Storage Mode part. In this manual, references to Sampling Mode indicates information applicable to Sampling Mode only, and references to Data Storage Mode indicates information applicable to Data Storage Mode only. 1-2 SPU-Console The SPU-Console is a software product used for OMRON's Storage and Pro- cessing Unit (called the SYSMAC SPU Unit) to set and operate the SYSMAC SPU Unit, monitor operating status/errors, display trend graphs, and perform other operations from a personal computer. The SPU-Console functions are explained next. 1-2-1 Unit Connections The SPU-Console is connected to the SYSMAC SPU Unit via a LAN. The SPU-Console dynamically creates windows based on the ID information in the SYSMAC SPU Unit that is connected, eliminating the need to set the model in the software. 2
  • 24. SPU-Console Section 1-2 1:1 Connection SPU-Console SPU Unit CS-series CPU Unit Setting/Monitoring Software LAN cross cable (commercially available) Network Connection SPU-Console SPU Unit CS-series CPU Unit Setting/Monitoring Software Hub or other network device LAN straight cable LAN straight cable (commercially available) (commercially available) 1-2-2 Unit Settings SYSMAC SPU Unit settings are performed by setting the time according to the SYSMAC SPU Unit’s location (time zone settings), network settings, such as the name and IP address on the Window network, and FINS network set- tings. 1-2-3 Sampling Settings (Sampling Mode) The data in I/O memory of the CPU Unit that is to be sampled by the SYS- MAC SPU Unit is set in Sampling Mode. Sampling data is specified using vari- ables. Variables have attributes, such as addresses and data types. Scale conversion of variables is also possible. The collection pattern in Sampling Mode is called the sampling pattern. Four sampling patterns (realtime sam- pling and sampling 1 to 3) are available. For each sampling pattern, the length of the sampling time interval, number of records, name of the file to be saved, and the number of files are specified. 1-2-4 Data Collection Settings (Data Storage Mode) The data in the CPU Unit memory to be collected by the SYSMAC SPU Unit in Data Storage Mode and the collection method to be used must be speci- fied. Data collection is specified using variables. Variables have attributes, such as addresses and data types. Scale conversion of variables is also pos- sible. The collection method in Data Storage Mode is called the data collec- tion pattern. Two data collection patterns are supported: basic collection for single data, and data collection for multiple data. For each collection pattern, the length of the sampling time interval, number of records, name of the file to be saved, and number of files are specified. 3
  • 25. System Requirements Section 1-3 The event settings that specify the time for data collection to start are also set. Events are either memory events, which occur when specific conditions are satisfied by values in memory, and schedule events, which occur at specific times or time intervals. The combination of these events with the processing that is performed when the events occur are called event rules. Event rules such as “data is recorded in a CSV file whenever a certain bit turns ON” or “data is recorded in a CSV file every data at 8:00” can be set. 1-2-5 Scheduler Settings (Data Storage Mode) In Data Storage Mode, schedule events can be set whereby an event occurs on a specific day and time. These are called scheduler settings. With sched- uler settings, events occur at set times such as by hour (e.g., every hour), by day (e.g., every day), by week (e.g., every Monday). The event rules for data collection execution or other rules for event processing can be defined. Work- ing days and the end of the month can also be specified for these events. 1-2-6 Event List (Data Storage Mode) In Data Storage Mode, a list of the memory events and schedule events set in the SYSMAC SPU Unit can be displayed. The list displays which events are set and the operations that will be executed when these events occur. 1-2-7 Executing SYSMAC SPU Unit Commands Commands such as those for starting/stopping sampling for the SYSMAC SPU Unit can be executed from the SPU-Console. 1-2-8 Monitoring SYSMAC SPU Unit Operating Status The SYSMAC SPU Unit operating status and error information can be dis- played on the SPU-Console. 1-2-9 Historical Trend Graphs Data recorded in CSV files by the SYSMAC SPU Unit can be displayed on trend graphs. 1-2-10 Realtime Trend Graphs (Sampling Mode) Sampling data collected by the SYSMAC SPU Unit can be displayed on trend graphs in realtime. 1-3 System Requirements The system requirements to use the SPU-Console are described in this sec- tion. 4
  • 26. System Requirements Section 1-3 1-3-1 SPU-Console Specifications Item Specification Model number WS02-SPTC1-V1 (SPU-Console Ver. 1.3) System require- Computer hardware Computer that meets the system requirements for Microsoft Windows XP Pro- ments fessional CD-ROM drive Required for installation. Display Super VGA (800 × 600) or better high-resolution video adapter and monitor Mouse Must conform to the models supported by the applicable OS. Network card A separate Ethernet network card is required for computers that do not have a LAN port. OS Microsoft Windows 2000 Professional Microsoft Windows XP Home Edition Microsoft Windows XP Professional Application platform Microsoft.NET Framework Version 1.1 Communications platform FinsGateway Version 2003 Functions Unit information, Unit setup, variable settings, collection pattern settings, event settings, and trend graphs Unit information Monitor SYSMAC SPU Unit operating status and error information are displayed. Operation Operations, such as starting sampling Unit setup IP network settings FINS network settings Variable settings Setting items to sample (by specifying I/O memory addresses using variables) Collection pattern settings Collection pattern settings (period, file designations for saving, etc.) Event settings (in Data Memory event Settings for conditions according to changes in memory (e.g., bits turning ON) Storage Mode) settings Scheduler set- Settings for schedules (e.g., specific times, time intervals) tings Trend graphs Historical trends CSV files are read and displayed. Realtime trends Current sampling data is read and displayed in trend graphics in real time. Note 1. It is not possible to connect to a SYSMAC SPU Unit with unit version 1.3 from SPU-Console versions lower than 1.3. Use SPU-Console version 1.3 to connect to a SYSMAC SPU Unit with unit version 1.3. 2. It is possible to connect to a SYSMAC SPU Unit with a unit version earlier than 1.3 from SPU-Console version 1.3, but the SPU-Console’s operations will be limited to SPU-Console operations for the lower unit version. 1-3-2 Package Contents The WS02-SPTC1-V1 contains the following software and data. SPU-Console Execution The program that performs SYSMAC SPU Unit settings and operations. Program Microsoft .NET Framework Microsoft .NET Framework Version 1.1 is required to run the SPU-Console. Version 1.1 Redistribution The Microsoft .NET Framework Version 1.1 Redistribution Package provided Package in the package can be used to install .NET Framework in the computer. SYSMAC SPU Unit System This system data is transferred to the SYSMAC SPU Unit. Data FinsGateway Version 2003 This communications middleware is required to run the SPU-Console. Manual Data The manual data includes this manual and the SYSMAC SPU Unit Operation Manual (V229) in PDF (portable document format). 5
  • 27. System Requirements Section 1-3 6
  • 28. SECTION 2 Setting Up, Starting, and Exiting the SPU-Console This section describes procedures for installing and uninstalling the SPU-Console, SPU-Console starting methods, and the basic SPU-Console window configuration. 2-1 Installation . . . . . . . . . . . . . . . . . . . . . . . . . . . . . . . . . . . . . . . . . . . . . . . . . . . . 8 2-1-1 Preparations for Installation . . . . . . . . . . . . . . . . . . . . . . . . . . . . . . . 8 2-1-2 Installing Microsoft .NET Framework . . . . . . . . . . . . . . . . . . . . . . . 8 2-1-3 Installing FinsGateway . . . . . . . . . . . . . . . . . . . . . . . . . . . . . . . . . . . 8 2-1-4 Installing SPU-Console . . . . . . . . . . . . . . . . . . . . . . . . . . . . . . . . . . . 9 2-2 Uninstalling SPU-Console. . . . . . . . . . . . . . . . . . . . . . . . . . . . . . . . . . . . . . . . 9 2-2-1 Uninstalling SPU-Console . . . . . . . . . . . . . . . . . . . . . . . . . . . . . . . . 9 2-2-2 Uninstalling FinsGateway . . . . . . . . . . . . . . . . . . . . . . . . . . . . . . . . . 9 2-3 Starting and Exiting SPU-Console . . . . . . . . . . . . . . . . . . . . . . . . . . . . . . . . . 10 2-3-1 Starting SPU-Console . . . . . . . . . . . . . . . . . . . . . . . . . . . . . . . . . . . . 10 2-3-2 Exiting SPU-Console . . . . . . . . . . . . . . . . . . . . . . . . . . . . . . . . . . . . 10 2-4 SPU-Console Window Configuration . . . . . . . . . . . . . . . . . . . . . . . . . . . . . . . 11 2-4-1 Starting SPU-Console . . . . . . . . . . . . . . . . . . . . . . . . . . . . . . . . . . . . 11 7
  • 29. Installation Section 2-1 2-1 Installation 2-1-1 Preparations for Installation Before installing the SPU-Console, check the requirements given in 1-3 Sys- tem Requirements to be sure that all requirements have been met. The following basic steps are required to set up the SPU-Console. 1,2,3... 1. Installing Microsoft .NET Framework 2. Installing FinsGateway 3. Installing SPU-Console 2-1-2 Installing Microsoft .NET Framework Microsoft .NET Framework Version 1.1 is required to run the SPU-Console. Confirming whether Use Control Panel - Add or Remove Programs on your computer to see if .NET Framework Is Microsoft .NET Framework Version 1.1 is already installed. Already Installed If Microsoft .NET Framework 1.1 is listed in the currently installed programs, then it is already installed and does not need to be installed again. Installing Microsoft Microsoft .NET Framework Version 1.1 can be installed from the .NET Frame- .NET Framework work Redistribution Package included in the SPU-Console installation disk. Installing the Redistribution Package 1,2,3... 1. Start the computer and log in as a user with administrator rights. 2. Place the SPU-Console installation disk in the CD-ROM drive. If the installation program starts automatically, click the Cancel Button to exit the program. 3. Execute the following executable file from the SPU-Console installation disk: <CD-ROM drive>:DotnetEnglishDotnetfx.exe Installing from the Installation is also possible from the Microsoft Windows Update. You must be Windows Update able to connect to the Internet to use the Windows Update function. Note The Windows Update is provided by Microsoft Corporation. For Windows 2000, select Start - Windows Update. For Windows XP, select Start - All Programs - Windows Update. 2-1-3 Installing FinsGateway FinsGateway Version 2003 is required to run the SPU-Console. If a version lower than FinsGateway Version 2003 is already installed, unin- stall it first. The computer must be restarted after installing FinsGateway. 1,2,3... 1. Start the computer and log in as a user with administrator rights. 2. Place the SPU-Console installation disk in the CD-ROM drive. If the installation program starts automatically, click the Cancel Button to exit the program. 3. Execute the following executable file from the SPU-Console installation disk: <CD-ROM drive>:FinsGatewaysetup.exe 4. Follow the instructions provided by the installation program. 5. Restart the computer when installation has been completed. 8
  • 30. Uninstalling SPU-Console Section 2-2 2-1-4 Installing SPU-Console Use the following procedure to install the SPU-Console. 1,2,3... 1. Start the computer and log in as a user with administrator rights. 2. Place the SPU-Console installation disk in the CD-ROM drive. The installation program will start automatically. If it does not start, execute the following executable file from the SPU-Console installation disk: <CD-ROM drive>:setup.exe 3. Follow the instructions provided by the installation program. 2-2 Uninstalling SPU-Console Use the following procedure to uninstall the SPU-Console program and thus delete it from the computer. 2-2-1 Uninstalling SPU-Console Use the following procedure to uninstall the SPU-Console. 1,2,3... 1. Start the computer and log in as a user with administrator rights. 2. Select Start - Control Panel. 3. Execute Add or Remove Programs for Windows XP or Add/Remove Programs for Windows 2000. 4. Select OMRON SPU-Console Version 1.3 from the list of currently in- stalled programs and click the Remove Button. The Setup Maintenance Program will be started. 5. Select Remove from the Setup Maintenance Program and then click the Next Button. Follow the instructions provided by the uninstallation program. 2-2-2 Uninstalling FinsGateway Do not uninstall FinsGateway if it is being used by an application other than SPU-Console. The computer must be restarted after uninstalling FinsGateway. 1,2,3... 1. Start the computer and log in as a user with administrator rights. 2. Select Start - Control Panel. 3. Execute Add or Remove Programs for Windows XP or Add/Remove Programs for Windows 2000. 4. Select OMRON FinsGateway Version 2003 from the list of currently in- stalled programs and click the Change/Remove Button. The Setup Maintenance Program will be started. 5. Select Remove from the Setup Maintenance Program and then click the Next Button. Follow the instructions provided by the uninstallation program. 6. Restart the computer. 7. Execute the following executable file from the SPU-Console installation disk: <CD-ROM drive>:FgwUtilsFgwRemover2003.exe Follow the instructions provided by the uninstallation program. 8. Restart the computer. 9
  • 31. Starting and Exiting SPU-Console Section 2-3 2-3 Starting and Exiting SPU-Console 2-3-1 Starting SPU-Console Select Start - All Program - OMRON - SPU Console 1.3 - SPU Console. The SPU-Console will be started and the following window will be displayed. Note (1) The user must have administrator rights to run the SPU-Console. Log in as a user that has administrator rights. (2) More than one copy of SPU-Console can be started at the same time. (3) If the following message appears when starting the SPU-Console, use the following procedure to reinstall the SPU-Console: “File or assembly name of FgwDotne, or one of its dependencies, was not found.” • Start the Setup Maintenance Program using the following procedure in 2-2-1 Uninstalling SPU-Console. • Select Repair from the Setup Maintenance Program and then click the Next Button. Follow the instructions provided by the uninstallation program. 2-3-2 Exiting SPU-Console Select File - Exit from the SPU-Console menus. The SPU-Console will be closed. 10
  • 32. SPU-Console Window Configuration Section 2-4 2-4 SPU-Console Window Configuration 2-4-1 Starting SPU-Console The SPU-Console Window consists of several areas. This section describes the various parts of the SPU-Console Window. Control Tabs Menu Bar Control Panel Status Bar Item Function Menu Bar Provides menus to perform SPU-Console operations. Menu items are grouped into related functions. The name of each group is dis- played on the menu bar. The functions within each group are accessed on pull-down menus. Control Tabs The control tabs are used to switch between SPU-Console tab pages. The name of each tab page is given on the control tabs. When a tab is clicked, the corresponding tab page will be displayed. Control Panel The Control Panel is used to start sampling and execute com- mands to control SYSMAC SPU Unit operation. Status Bar The Status Bar displays information, such as the status of the con- nected SYSMAC SPU Unit. 11
  • 34. SECTION 3 Initial Settings of the SYSMAC SPU Unit This section describes how to make initial settings for SYSMAC SPU Units. 3-1 Outline of Initial Settings . . . . . . . . . . . . . . . . . . . . . . . . . . . . . . . . . . . . . . . . 14 3-2 Connecting the SYSMAC SPU Unit and Computer with a LAN Cable . . . . . 14 3-3 Starting the SYSMAC SPU Unit in Maintenance Mode . . . . . . . . . . . . . . . . . 15 3-4 Setting the IP Address of the Computer . . . . . . . . . . . . . . . . . . . . . . . . . . . . . 15 3-5 Making the Initial Settings for the SYSMAC SPU Unit . . . . . . . . . . . . . . . . . 18 3-6 Confirming Connections . . . . . . . . . . . . . . . . . . . . . . . . . . . . . . . . . . . . . . . . . 19 13
  • 35. Outline of Initial Settings Section 3-1 3-1 Outline of Initial Settings Initial software settings must be performed to use the SYSMAC SPU Unit. The initial settings include network settings, product information registration, and system data transfer. The steps require to make the initial settings are as follows: Connect the SYSMAC SPU Unit and computer with a LAN cable. 3-2 ↓ Start the SYSMAC SPU Unit in Maintenance Mode. 3-3 ↓ Set the IP address of the computer. 3-4 ↓ Make the initial settings for the SYSMAC SPU Unit. 3-5 ↓ Confirm that normal connection is possible from the computer to the 3-6 SYSMAC SPU Unit on a network. Initial settings are performed using the Initialization Wizard from the computer on which the SPU-Console is installed. Note The model number and lot number of the SYSMAC SPU Unit are required to make the initial settings for the SYSMAC SPU Unit. Before mounting the SYS- MAC SPU Unit, record the information on the sticker on the side of the Unit. The model number and lot number are also printed on the sticker on the pack- age. 3-2 Connecting the SYSMAC SPU Unit and Computer with a LAN Cable The SYSMAC SPU Unit is connected to the computer with a LAN cable. The connection can be made either through a hub or other network device, or 1:1. A LAN cross-cable is required for a 1:1 connection. Connect the LAN cable to the LAN1 port on the SYSMAC SPU Unit. 1:1 Connection SPU-Console SPU Unit CS-series CPU Unit Setting/Monitoring Software LAN cross cable (commercially available) 14
  • 36. Starting the SYSMAC SPU Unit in Maintenance Mode Section 3-3 Network Connection SPU-Console SPU Unit CS-series CPU Unit Setting/Monitoring Software Hub or other network device LAN straight cable LAN straight cable (commercially available) (commercially available) Note Do not connect to the network more than one SYSMAC SPU Unit for which initial settings have not been made. IP addresses will be duplicated, and com- munications may not be possible. Disconnect the LAN cable from all SYSMAC SPU Units except for one and set one SYSMAC SPU Unit at a time. Alter- nately, connect each SYSMAC SPU Unit to the computer using a 1:1 connec- tion and set one SYSMAC SPU Unit at a time. 3-3 Starting the SYSMAC SPU Unit in Maintenance Mode Use the following procedure to start the SYSMAC SPU Unit in Maintenance Mode. 1,2,3... 1. Connect the LAN cable to the LAN1 port on the SYSMAC SPU Unit. 2. Turn ON pins 4 and 6 on the DIP switch on the SYSMAC SPU Unit and then turn ON the power supply to the PLC. The SYSMAC SPU Unit will start in Maintenance Mode. Pin 4 ON = IP address set to 192.168.0.100. Pin 6 ON = Start in Maintenance Mode. When the SYSMAC SPU Unit has started in Maintenance Mode, “NM” will be displayed on the 7-segment display on the SYSMAC SPU Unit. N M 3. Check the IP address of the SYSMAC SPU Unit using the following proce- dure. • Press the SELECT Switch to select command 05 and then press the ENTER Button twice. The IP address will be displayed on the 7-seg- ment display. • Confirm that 192.168.0.100 is displayed as the IP address. • If the IP address is not 192.168.0.100, check the DIP switch setting and repeat the procedure from step 2. 3-4 Setting the IP Address of the Computer To enable connecting to the SYSMAC SPU Unit in Maintenance Mode, the IP address of the computer must be temporarily set to 192.168.0.200. The method for setting the IP address depends on the operating system of the computer. Refer to user documentation provided with your computer for details. 15
  • 37. Setting the IP Address of the Computer Section 3-4 The following procedure is for Windows XP Professional. 1,2,3... 1. Connect the LAN cable to the LAN port on the computer and turn ON the power supply to the computer. 2. Log in using the account of the computer administrator. For Windows 2000, log in with administrator rights. 3. Select Start - Control Panel. 4. Click Network and Internet Connections and then click Network Con- nections. If the control panel is set for classic display, click Network Connections from the Control Panel. For Windows 2000, click Network and Dial-up Connections from the control panel. 5. Right-click the network to be set and select Properties from the menu, as shown below. 16
  • 38. Setting the IP Address of the Computer Section 3-4 The Local Area Connection Properties Dialog Box of the network that was selected will be displayed. 6. Select Internet Protocol (TCP/IP) and then click the Properties Button. The Internet Protocol (TCP/IP) Properties Dialog Box shown below will be displayed. 7. Recording the Current IP Address If Use the following address is set, record the current IP address of the computer so that it can be set again later. IP address . . . Subnet mask . . . Default gateway . . . 8. Temporarily Changing the IP Address Select Use the following address and change the IP address to the val- ues given below. • IP address = 192.168.0.200 • Subnet mask = 255.255.255.0 9. Click the OK Button to change the setting It may be necessary to restart the computer to make the new settings valid. This completes setting the IP address of the computer. 17
  • 39. Making the Initial Settings for the SYSMAC SPU Unit Section 3-5 3-5 Making the Initial Settings for the SYSMAC SPU Unit The Initialization Wizard of the SPU-Console is used to make the initial set- tings for the SYSMAC SPU Unit. The Initialization Wizard makes network set- tings, such as the IP address, transfers system data, etc. Note If initial settings (initialization) is performed for the SYSMAC SPU Unit, all set- tings, including the sampling settings and unit settings, will be initialized. Con- firm that it is okay to initialize the SYSMAC SPU Unit before proceeding. 1,2,3... 1. Select Start - All Program - OMRON - SPU Console 1.3 - Initialization Wizard. The Initialization Wizard will be started. 2. Inputting SYSMAC SPU Unit Product Information Input the model number and lot number of the SYSMAC SPU Unit and click the Next Button. The model number and lot number can be found on the sticker on the side of the SYSMAC SPU Unit or on the sticker on the package. 3. Network Settings The following items are set. Item Setting Unit Name This is the name displayed under My Networks on the Windows computer. Set a unique name for each SYSMAC SPU Unit con- nected to the same network. Obtain an IP address Select this setting to automatically obtain an IP address automatically using the DHCP (Dynamic Host Configuration Protocol). Note A DHCP server must exist on the network/system to use this setting. If you do not know if a DHCP server exists, ask your system administrator. Use the following IP Select this setting when not automatically obtaining an IP address address using the DHCP and then set the IP address and subnet mask. IP address Input the IP address. Set a unique IP address for each SYSMAC SPU Unit con- nected to the same network. Subnet mask Set the same subnet mask as the one set on the network computer to be connected. Set all of the required items and then click the Next Button. 4. Transferring System Data Check that the settings are correct and then click the Execute Button. System data will be transferred to the SYSMAC SPU Unit. 18
  • 40. Confirming Connections Section 3-6 5. Exiting the Initialization Wizard The following window will be displayed if the Wizard is exited normally. Click the Finish Button to exit. 3-6 Confirming Connections After making the initial settings, use the following procedure to confirm that the SYSMAC SPU Unit on the network can be recognized from the computer. 1,2,3... 1. Return the computer's network settings to their previous values using the procedure in 3-4 Setting the IP Address of the Computer as a guide. 2. Turn OFF the power supply to the PLC and then turn OFF all pins on the DIP switch on the SYSMAC SPU Unit. 3. Turn ON the power supply to the PLC to start the SYSMAC SPU Unit. 4. Search for SYSMAC SPU Units on the network using the Windows Search for Computers command. • For Windows XP, right-click My Network Places on the Start Menu and then select Search for Computers. • For Windows XP, right-click My Network Places on the desktop and then select Search for Computers. 19
  • 41. Confirming Connections Section 3-6 5. Input the Unit Name or IP address for the Computer name and then click the Search Button. The following display will appear if the SYSMAC SPU Unit is found. 20
  • 42. SECTION 4 Changing the SYSMAC SPU Unit’s Operating Mode This section provides information on the SYSMAC SPU Unit’s operating modes, including procedures for confirming and changing the operating mode. 4-1 Operation Overview . . . . . . . . . . . . . . . . . . . . . . . . . . . . . . . . . . . . . . . . . . . . 22 4-2 Confirming the Operating Mode . . . . . . . . . . . . . . . . . . . . . . . . . . . . . . . . . . . 22 4-3 Changing the Operating Mode . . . . . . . . . . . . . . . . . . . . . . . . . . . . . . . . . . . . 24 21
  • 43. Operation Overview Section 4-1 4-1 Operation Overview The SYSMAC SPU Unit provides two operating modes: Sampling Mode and Data Storage Mode. For an overview of operating modes, refer to SECTION 1 Overview of Features and Functions. Either of these operating modes can be selected. To select an operating mode, stop all SYSMAC SPU Unit operations. The operating mode cannot be changed while the SYSMAC SPU Unit is operating. Use the following procedure to change the SYSMAC SPU Unit operating mode. 1,2,3... 1. Change the DIP switch setting on the SYSMAC SPU Unit and restart using the restart command. 2. After restarting, execute the command to change the operating mode. 3. When the command to change the operating mode has completed execut- ing, change the DIP switch setting on the SYSMAC SPU Unit and restart the Unit. The SYSMAC SPU Unit will use the newly set operating mode. 4-2 Confirming the Operating Mode The following three methods can be used to confirm the operating mode. Using 7-segment display The operating mode is displayed on the 7-segment display on the front of the on Front of the SYSMAC SYSMAC SPU Unit. SPU Unit 7-segment display Operating mode Sampling Mode Data Storage Mode Using SPU-Console Status Bar 1,2,3... 1. Connect to the SYSMAC SPU Unit using the SPU-Console. For details on connection methods, refer to 1-2-1 Unit Connections. 2. The operating mode is displayed in the Status Bar at the bottom right of SPU-Console. 22
  • 44. Confirming the Operating Mode Section 4-2 Using SPU-Console: Unit Information - System Information - Mode 1,2,3... 1. Connect to the SYSMAC SPU Unit using the SPU-Console. For details on connection methods, refer to 1-2-1 Unit Connections. 2. Select the Unit Information Tab and System Information to display the system information. 3. The operating mode is displayed in the Mode Field in the System Informa- tion Window. 23
  • 45. Changing the Operating Mode Section 4-3 4-3 Changing the Operating Mode Use the following procedure to change from Sampling Mode to Data Storage Mode. 1,2,3... 1. First, record the SYSMAC SPU Unit’s currently set DIP switch setting. 2. Turn ON pins 4 and 6 only of the SYSMAC SPU Unit’s DIP switch. 3. Select command 12 (Restart Unit) using the SELECT Switch, and then press the ENTER Button. For details on command execution methods, re- fer to 6-3 Executing Commands from the SYSMAC SPU Unit. The Unit will restart. Check that “NM” is shown on the 7-segment display. N M 4. Change the SYSMAC SPU Unit’s operating mode. Select the number of the operating mode to be changed to using the SELECT Switch, and then press the ENTER Button. Operating mode change operation Number to select using the SELECT Switch Changing to Sampling Mode 68 Changing to Data Storage Mode 53 5. The display will change from “M1” in order. Wait until “F” is displayed. 6. When “F” is displayed in the 7-segment display, return the DIP switch to the status recorded in step 1. 7. Select command 12 (Restart Unit) using the SELECT Switch and press the ENTER Button. The SYSMAC SPU Unit will restart and operate in the newly set operating mode. 8. Check that the operating mode has changed. Refer to the confirmation methods in 4-2 Confirming the Operating Mode. 24