

Recomendados
Más contenido relacionado
Destacado
Destacado (14)
Similar a HSC Broadcast Guide: Freshman
Similar a HSC Broadcast Guide: Freshman (20)
Último
Último (20)
HSC Broadcast Guide: Freshman
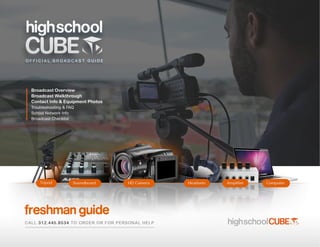
- 1. Broadcast Overview Broadcast Walkthrough Contact Info & Equipment Photos Troubleshooting & FAQ School Network Info Broadcast Checklist
- 2. F R E S H M A N B R O A D C A S T G U I D E PAG E 1 o f 1 3 broadcast overview Send to HSC Your Fans Setup your gear & produce in the Studio We make it easy for you to produce watch LIVE Their experience is your broadcast by using the HSC With a solid internet connection optimized for Studio which helps you keep score, and your equipment set-up camera manage rosters and many popular you’re ready to broadcast and tripod much more. screens. your event. computer tablet TV mobile computer: Connected to Internet with Adobe FMLE Software mixer headsets amplifier
- 3. F R E S H M A N B R O A D C A S T G U I D E PAG E 2 o f 1 3 Step 1: Set up your equipment Set-up Video Equipment 1. Set-up Tripod with unobstructed views 4. Connect video camera to computer via firewire 2. Place Camera on Tripod 5. Turn Camera on and set to Camera 3. Plug Camera into electrical outlet 6. Clean Camera Lens with a Lens Cloth camera and tripod Firewire 1. Plug computer into electrical outlet an turn on Set-up Computer 2. Plug Earbuds into computer to monitor broadcast Set-up Audio Equipment with Amp 1. Plug Soundboard into electrical outlet 4. Plug Headset Earphone into Amp Out (Black Cord) 2. Plug Amp into electrical outlet 5. Plug 1/4 cable from phone out to amp in computer 3. Plug Headsets Mic into Soundboard 6. Plug 1/4 cable from main out to usb in on Macbook connected to Internet with Adobe FMLE Mic Get Internet Connection 1. Either plug in Ethernet or turn on Wireless Device 4. Open Google Chrome Web Browser headsets 2. Plug in Primary Wireless Device to Electrical Outlet 5. Visit Speedtest.net and click "Begin Test" mixer 3. Plug in Secondary Wireless Device to Electrical Outlet 6. Note your Internet Upload Speed __________ Tip: For detailed photos please reference pages 6-7 amplifier
- 4. F R E S H M A N B R O A D C A S T G U I D E PAG E 3 o f 1 3 Step 2: Set Streaming Settings and TEST Broadcast Open Adobe Flash Media Live Encoder DESKTOP Software (FMLE) and enter the High School Cube preferred settings... Enter Audio Set Stream Settings B C A Settings for Test Stream Enter D Video Settings Enter Stream Code E Hit Connect then Start
- 5. F R E S H M A N B R O A D C A S T G U I D E PAG E 4 o f 1 3 Step 3: Complete TEST Broadcast and GO LIVE! A Open Chrome Web Browser 1. Go to HSC Studio: http://www.highschoolcube.com/studio 2. Enter your Event Code 3. (Optional) Set event settings: Scoreboard, Add & Edit Rosters, etc. 4. Click the Test tab. Verify that the test stream video is working. If not please review your settings from Step 2 and made sure you have not made a typo. 5. If you’d like more help or for someone else to verify you’ve set everything up correctly, simply use the gray Chat Box to instant message the HSC Support staff. B GO BACK to Adobe Flash Media Live Encoder 1. End your test broadcast. Click Stop, then Disconnect 2. Change URL in the FMS URL field from /test to /live rtmp://stream.highschoolcube.com/live 3. Click Connect 4. Click Start – You are now streaming to the web for all the world to see! 5. Instant Message HSC Support and let them know you’re LIVE
- 6. F R E S H M A N B R O A D C A S T G U I D E PAG E 5 o f 1 3 Step 4: Produce Your Broadcast 1. In Google Chrome go back to the HSC Studio 2. Select the Produce Event tab 3. Update the following depending on your event: Keep Score: Select Pull Down Scoreboard Template to Keep Score Monitor: Select None, Video or Audio to select monitoring preference Play Ads: Use Video Mixer to Que Ads and Play During Broadcast Live Reads: Click when announcer reads to track live reads 4. When you are done with your broadcast: Enter a Recap: Simple description about event Set Ending Time: Click To Set Ending Time. Stop Streaming 1. Exit Google Chrome 2. Open FMLE - Hit Stop and Disconnect to Stop Sending Stream 3. SMILE - you just completed a great broadcast!!!
- 7. F R E S H M A N B R O A D C A S T G U I D E PAG E 6 o f 1 3 Contact Info & Equipment Photos Questions? Comments? Need personal help? Email support@highschoolcube.com or call 312.445.8534 A Ethernet. Connect to establish Internet. computer B Firewire. Connect to HD camcorder. HD camcorder B Firewire. Connect to computer. connections C USB. Connect to the mixer. connections D Power. Connect to power outlet. B C B A D
- 8. F R E S H M A N B R O A D C A S T G U I D E PAG E 7 o f 1 3 Contact Info & Equipment Photos Questions? Comments? Need personal help? Email support@highschoolcube.com or call 312.445.8534 A Soundboard connection (purple) A Amplifier connection (purple) amplifier B Headset Earphone connections (2) mixer D Headset Mic connections (2) connections C Power. Connect to outlet. connections E Main Out to USB. Connect to computer. A D B E A C
- 9. F R E S H M A N B R O A D C A S T G U I D E PAG E 8 o f 1 3 Troubleshooting & FAQ You are no longer live streaming. ISSUE 1 Most likely you lost your Internet connection for more than 60 seconds. SOLUTION: First check that you are currently connected to the Internet by running a test on speedtest.net. Second, once you confirm you are connected to the Internet, open up Adobe Flash Media Live Encoder and do the following: Press stop, press disconnect – wait 30 seconds – then press connect and start. The Flash Media Live Encoder “beachball” icon is spinning. Most likely you lost your Internet ISSUE 2 connection for more than 60 seconds and Flash Media Live Encoder is frozen. SOLUTION: First, do a force quit of Flash Media Live Encoder. To Force Quit you do the following: Open Applications Folder on your macbook pro Open Utilities Folder Open Activity Monitor Select the Flash Media Live Encoder Process Click Quit Second, check that you are currently connected to the Internet by running an Internet test on speedtest.net. Third, once you confirm you are connected to the internet, open up Adobe Flash Media Live Encoder, confirm your streaming settings and stream code are accurate, then press connect and press start.
- 10. F R E S H M A N B R O A D C A S T G U I D E PAG E 9 o f 1 3 Troubleshooting & FAQ Flash Media Live Encoder Returns an Error “Cannot connect to Primary Server” ISSUE 3 after clicking CONNECT. SOLUTION: The most likely cause is that you do not have an Internet Connection. To resolve this check that you are currently connected to the Internet by running an Internet test on speedtest.net. Flash Media Live Encoder Returns an Error “Cannot Connect to Primary Server” ISSUE 4 after clicking START. SOLUTION: The most likely cause is that you entered the wrong 6 digit stream name. Check the stream name and re-enter. I am streaming the wrong devices, streaming at the wrong resolution, or ISSUE 5 streaming to the wrong location. No worries! SOLUTION: Sometimes the Flash Media Encoder will reset your settings. If you’ve had the video set to HDR (your camera instead of laptop camera) and your audio set to USB audio (instead of audio director, first two channels, etc….), it may change the next time you open it up. It’s in the checklist, but it’s easy to overlook if it’s been the same for the last ten times you’ve used it. Double-check every time.
- 11. F R E S H M A N B R O A D C A S T G U I D E PAG E 1 0 o f 1 3 Troubleshooting & FAQ ISSUE 6 Your Sound is Hissy/Static-y. SOLUTION: This is most likely due to one of the following: The USB port from laptop to soundboard has a bad connection – giving you that awful hiss or static. Sometimes for whatever the reason, it doesn’t “catch.” Try unplugging the cord from USB port and plugging in again. You can try a different USB port too. There could be a lot of interference in the press box, on the roof and/or at the scorer’s table. Try to avoid being on top of loud speakers. Also – try and spread out your computer, soundboard, amplifier and Wi-Fi card. We’ve found if we spread things out a bit – it cuts down on interference. ISSUE 7 I am not sending any sound to the computer. SOLUTION: This is most likely due to one of the following: When you plug your USB cord from laptop into soundboard – you’re plugging into “main out.” Right next to “main out” is “monitor out.” Make sure you are plugged into Main Out – Not Monitor Out. There are two black buttons on bottom right side of the soundboard. It’s very difficult to tell if they’re pushed in or not. If they are pushed in – you can’t hear yourself in headphones. Make sure tiny black buttons are not pushed in on the soundboard.
- 12. F R E S H M A N B R O A D C A S T G U I D E PAG E 1 1 o f 1 3 Troubleshooting & FAQ ISSUE 8 My computer is not recognizing the camera or audio devices. SOLUTION: Is everything plugged in? It can be overlooked during setup or someone could have accidently knocked out a cord. ISSUE 9 I lost my 4G wireless connection. SOLUTION: This is most likely due to one of the following: Make sure your Wi-Fi card is plugged into outlet – Not laptop. We are using a lot of juice live-streaming a game. We need all the juice possible. Keep Wi-Fi Cool because they can overheat – stand it up right or put it up on quarters to get air circulating around it. Keep Wi-Fi card dry. If it gets wet – it’s over. I don’t know why, but sometimes when I’m not getting a good Wi-Fi signal I can turn the airport off and then on again. I recommend you give this a shot too. If all else fails, try to reset the Wi-Fi card.
- 13. F R E S H M A N B R O A D C A S T G U I D E PAG E 1 2 o f 1 3 School Network Info High School Cube streams audio and video at a combined 224 to 992 kbps using Adobe Flash Media Live Encoder and our proprietary social streaming software. Please check the following notes to make sure the computer at the event can "see" the High School Cube streaming server. White List the following sites: *.HighSchoolCube.com *.envolve If the school/district is using a Proxy Server, please add the following site to the No Cache list: *.HighSchoolCube.com These are the URLs and IPs that we might utilize inbound and outbound for Live Streaming purposes: *.highschoolcube.com *.hscube.com *.thecube.com *.envolve.com www.highschoolcube.com: 50.19.246.62 stream.highschoolcube.com: 184.73.218.210 c.hscube.com: 216.137.35.127 v.hscube.com: 204.246.177.244 f.hscube.com: 50.19.246.62 s.hscube.com: 184.73.218.210 We need the following TCP ports open: 80, 554 and 1935 We will need a guest username and password to stream through your local wireless network.
- 14. F R E S H M A N B R O A D C A S T G U I D E PAG E 1 3 o f 1 3 Broadcast Checklist Set-up Set Gear Streaming Settings GO LIVE Produce Broadcast