
Recommended
More Related Content
Viewers also liked
Similar to FMP Storyboard
Similar to FMP Storyboard (20)
Recently uploaded
Recently uploaded (20)
FMP Storyboard
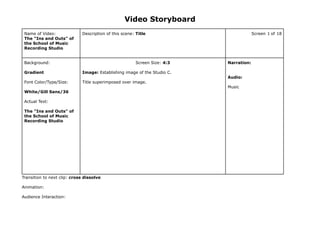
- 1. Name of Video: The "Ins and Outs" of the School of Music Recording Studio Description of this scene: Title Screen 1 of 18 Background: Gradient Font Color/Type/Size: White/Gill Sans/36 Actual Text: The "Ins and Outs" of the School of Music Recording Studio Screen Size: 4:3 Image: Establishing image of the Studio C. Title superimposed over image. Narration: Audio: Music Transition to next clip: cross dissolve Animation: Audience Interaction: Video Storyboard
- 2. Name of Video: The "Ins and Outs" of the School of Music Recording Studio Description of this scene: Introduction Screen 2 of 18 Background: Black Font Color/Type/Size: Actual Text: Screen Size: 4:3 Image: Dissolve from image of the Studio C to additional images of recording room, console, and workstation along with the narration. Ken Burns effect for motion. Narration: “This brief video will guide you through the steps necessary to connect a microphone in one of the recording rooms, route it thru the Tascam DM-4800 console, and record the audio using the Avid ProTools Digital audio Workstation.” Audio: Fade music under narration. Transition to next clip: fade to black Animation: Audience Interaction: Video Storyboard
- 3. Name of Video: The "Ins and Outs" of the School of Music Recording Studio Description of this scene: Prerequisites Screen 3 of 18 Background: Black Font Color/Type/Size: Actual Text: Screen Size: 4:3 Image: Collage of images of microphones, cables, consoles, and computers. Narration: “This video assumes the viewer is familiar with basic audio terminology, microphone, and has basic computer skills.” Audio: Transition to next clip: cross dissolve Animation: Audience Interaction: Video Storyboard
- 4. Name of Video: The "Ins and Outs" of the School of Music Recording Studio Description of this scene: Signal Path Overview Screen 4 of 18 Background: Black Font Color/Type/Size: Actual Text: Screen Size: 4:3 Graphic: Block diagram of the signal flow: • microphone • cable • patchbay • console • DAW Narration: “We will follow a simple, standard signal path, starting at a microphone and ending with the DAW.” Audio: Transition to next clip: cross dissolve Animation: Audience Interaction: Video Storyboard
- 5. Name of Video: The "Ins and Outs" of the School of Music Recording Studio Description of this scene: Microphone setup Screen 5 of 18 Background: Black Font Color/Type/Size: Actual Text: Screen Size: 4:3 Video: Microphone and clip being put on mic stand. Cable attached to microphone. Narration: “First, setup the microphone on the stand and attach the cable. Remember to handle mics with extreme care and be sure not to touch the capsules end of the mic. Always use a pop filter for vocal mics. Be sure to attach the cable to the stand below the mic as a strain relief. Coil the excess cable at the base of the stand. Audio: Transition to next clip: cross dissolve Animation: Audience Interaction: Video Storyboard
- 6. Name of Video: The "Ins and Outs" of the School of Music Recording Studio Description of this scene: Mic Cable connection Screen 6 of 18 Background: Black Font Color/Type/Size: Actual Text: Screen Size: 4:3 Video: Open black cabinet, connect mic cable to mic tielines. Close up of mic cable being patched into channel #3 Narration: “Each recording room has many microphone lines that connect to the control room. For this example, I’ll connect the microphone to input #3.” Audio: Transition to next clip: cross dissolve Animation: Audience Interaction: Video Storyboard
- 7. Name of Video: The "Ins and Outs" of the School of Music Recording Studio Description of this scene: Patching Screen 7 of 18 Background: Black Font Color/Type/Size: Actual Text: Screen Size: 4:3 Video: closeup of patchbay interconnection from Mic output #3 to Console Mic Preamp input #3 Narration: “Back in the control room, use a patch cable to connect the microphone to the console. In this example, I patch out out Instrumental Mic Out #3 to Console Mic Preamp In #3” Audio: Transition to next clip: cross dissolve Animation: Audience Interaction: Video Storyboard
- 8. Name of Video: The "Ins and Outs" of the School of Music Recording Studio Description of this scene: Console Setup Screen 8 of 18 Background: Black Font Color/Type/Size: Actual Text: Screen Size: 4:3 Graphic: Screen capture of console snapshot page. Narration: Describe navigation to snapshot page, which snapshot to choose, and how to recall snapshots. Audio: Transition to next clip: cross dissolve Animation: Audience Interaction: Video Storyboard
- 9. Name of Video: The "Ins and Outs" of the School of Music Recording Studio Description of this scene: Mic Preamp settings Screen 9 of 18 Background: Black Font Color/Type/Size: Actual Text: Screen Size: 4:3 Split screen video: Right screen shows close up of preamp controls and meter. Phantom power is turned on, gain is adjusted as Left screen shows person speaking into the microphone. Narration: “If you are using a mic which requires phantom power, such as a condenser mic, switch on the +48V switch. There is one switch for every four channels. As the performer plays into the mic, adjust the mic preamp gain so that the signal is loud, without peaking. Generally, aim for a maximum of -6dBFS. This leaves a safety margin.” Audio: Sound of person speaking into the microphone with live gain adjustments Transition to next clip: cross dissolve Animation: Audience Interaction: Video Storyboard
- 10. Name of Video: The "Ins and Outs" of the School of Music Recording Studio Description of this scene: Do you have sound? Screen 10 of 18 Background: Black Font Color/Type/Size: Actual Text: Screen Size: 4:3 Video: Pressing solo on channel #3, turning up the solo master and the control room monitor volume. Narration: “You should see signal on the meter. You can also check to see if you have sound by ‘soloing’ the channel. Press the SOLO button on channel 3, and make sure the solo master and the control room monitor volume are turned up. If you do not see signal or hear anything, go back to the beginning and check to make sure you have followed the steps.” Audio: Transition to next clip: cross dissolve Animation: Audience Interaction: Video Storyboard
- 11. Name of Video: The "Ins and Outs" of the School of Music Recording Studio Description of this scene: Routing to DAW Screen 11 of 18 Background: Black Font Color/Type/Size: Actual Text: Screen Size: 4:3 Graphic: Screen capture of console output slot routing page. Narration: “The snapshot you recalled includes output routing that will send your mic signal to the DAW. To view this routing, go to the Routing Page and select the 3rd screen - Output Slot. Notice that the AES outputs are fed from the Mic/Line input. This routes the microphone signal (after it is amplified to line level and converted to digital) to the DAW. Audio: Transition to next clip: cross dissolve Animation: Audience Interaction: Video Storyboard
- 12. Name of Video: The "Ins and Outs" of the School of Music Recording Studio Description of this scene: DAW boot / Application Launch Screen 12 of 18 Background: Black Font Color/Type/Size: Actual Text: Screen Size: 4:3 Video: Macintosh power key, possibly boot screen. Screen Capture: DAW Launch on Macintosh Narration: “Turn on the MacPro Tower in the machine room and wait for it to finish booting. Launch the ProTools application by clicking on the icon in the dock.” Audio: Transition to next clip: cross dissolve Animation: Audience Interaction: Video Storyboard
- 13. Name of Video: The "Ins and Outs" of the School of Music Recording Studio Description of this scene: DAW Session creation Screen 13 of 18 Background: Black Font Color/Type/Size: Actual Text: Screen Size: 4:3 Screencast: Session naming, settings, and save location. Narration: “Create a new session. Give it an appropriate name and pay attention to where it will be saved and the settings for sample rate, word length, and audio file format. For this example, I’ll use 44.1kHz, 16bit, Broadcast Wave files.” Audio: Transition to next clip: cross dissolve Animation: Audience Interaction: Video Storyboard
- 14. Name of Video: The "Ins and Outs" of the School of Music Recording Studio Description of this scene: DAW Hardware setup Screen 14 of 18 Background: Black Font Color/Type/Size: Actual Text: Screen Size: 4:3 Screencast: Check hardware setup and external clock settings. Narration: “Each time you use the workstation, it is important to check the Hardware Setup. Especially confirm that the clock source is External Word clock @ 44.1kHz.” Audio: Transition to next clip: cross dissolve Animation: Audience Interaction: Video Storyboard
- 15. Name of Video: The "Ins and Outs" of the School of Music Recording Studio Description of this scene: DAW Audio track Screen 15 of 18 Background: Black Font Color/Type/Size: Actual Text: Screen Size: 4:3 Screencast: Creating and name new audio track. Check Disc allocation Selecting appropriate input. Record ready. Narration: “Create new mono audio track. Rename the track before recording by double-clicking on the current name. All audio recorded on this track will begin with this name. Check the Disc Allocation for the track and select the correct input. In this example, that input is A3. Click the record-ready button.” Audio: Transition to next clip: cross dissolve Animation: Audience Interaction: Video Storyboard
- 16. Name of Video: The "Ins and Outs" of the School of Music Recording Studio Description of this scene: Do you have sound? Screen 16 of 18 Background: Black Font Color/Type/Size: Actual Text: Screen Size: 4:3 Screencast: Protools meters. Video: Select ProTools on the Control Room monitor. Narration: “At this point you should see signal on the ProTools meters. On the Tascam console control room monitor section, select ProTools as your source for listening.” Audio: Transition to next clip: cross dissolve Animation: Audience Interaction: Video Storyboard
- 17. Name of Video: The "Ins and Outs" of the School of Music Recording Studio Description of this scene: Record Screen 17 of 18 Background: Black Font Color/Type/Size: Actual Text: Screen Size: 4:3 Screencast: Initiate record. Narration: “You should now see signal and hear sound all the way through the signal path. Press Command-spacebar to begin recording. If you don’t see signal, check the console snapshot and track input. If you see signal but don’t hear anything, check the console control room monitor section and monitor volume. Audio: Transition to next clip: cross dissolve Animation: Audience Interaction: Video Storyboard
- 18. Name of Video: The "Ins and Outs" of the School of Music Recording Studio Description of this scene: Success! Screen 18 of 18 Background: Black Font Color/Type/Size: Actual Text: Screen Size: 4:3 Success! Narration: Audio: Transition to next clip: cross dissolve Animation: Audience Interaction: Video Storyboard