SlideShare una empresa de Scribd logo
1 de 54
Microsoft
PowerPoint 2010

       Chapter 3

 Reusing a Presentation
   and Adding Media
Objectives

•    Color a picture
•    Add an artistic effect to a picture
•    Delete and move placeholders
•    Align paragraph text
•    Copy a slide element from one slide to another


Reusing a Presentation and Adding Media               2
Objectives

•    Ungroup, change the color, and regroup a clip
•    Insert and edit a video clip
•    Insert audio
•    Control audio and video clips
•    Check for spelling errors
•    Print a presentation as a handout


Reusing a Presentation and Adding Media              3
Project – Presentation with
Video, Audio, and Pictures with Effects


Reusing a Presentation and Adding Media   4
General Project Guidelines

•    Use the color wheel to determine color choices
•    Vary paragraph alignment
•    Use multimedia selectively
•    Use handouts to organize your speech
•    Evaluate your presentation


Reusing a Presentation and Adding Media               5
Coloring a Picture

• With the picture selected, click the Color button
  on the Picture Tools Format tab to display the
  Color gallery
• Point to the desired color to display a live preview
  of the adjustment on the picture
• Click the desired color to apply this correction


Reusing a Presentation and Adding Media              6
Coloring a Picture


Reusing a Presentation and Adding Media   7
Adding an Artistic Effect to a Picture

• With the picture selected, click the Artistic Effects
  button on the Picture Tools Format tab to display
  the Artistic Effects gallery
• Point to the desired artistic effect to display a live
  preview of the adjustment
• Click the desired artistic effect to apply the
  correction


Reusing a Presentation and Adding Media                8
Adding an Artistic Effect to a Picture


Reusing a Presentation and Adding Media   9
Changing the Stacking Order

• With the object selected, click the Send Backward
  button arrow on the Picture Tools Format tab to
  display the Send Backward menu
• Click Send to Back to move the object underneath
  all slide objects


Reusing a Presentation and Adding Media           10
Resizing a Placeholder

• Click the border of the placeholder to select it.
  Point to one of the sizing handles so that the
  mouse pointer changes to a two-headed arrow
• Drag the sizing handle until the placeholder is the
  desired size


Reusing a Presentation and Adding Media             11
Moving a Placeholder
• With the placeholder selected, point to an area of the
  border between two sizing handles so that the mouse
  pointer changes to a four-headed arrow
• Drag the placeholder to the desired location
• Click to set the placeholder in its new location


Reusing a Presentation and Adding Media                    12
Aligning Paragraph Text

• Click somewhere in the paragraph to align to
  position the insertion point in the paragraph to be
  formatted
• Click the desired alignment button on the Home
  tab in the Paragraph group to align the paragraph


Reusing a Presentation and Adding Media            13
Deleting a Slide

• Right-click the slide to delete in the Slides tab to
  display the shortcut menu
• Click Delete Slide to delete the slide from the
  presentation


Reusing a Presentation and Adding Media                  14
Changing Views

• Click the desired view button in the lower right of
  the PowerPoint window to change the view of the
  presentation


Reusing a Presentation and Adding Media             15
Copying a Clip from One Slide to Another

• Click the desired clip to select it, and then click
  the Copy button on the Home tab
• Display the slide to paste the clip, and then click
  the Paste button on the Home tab to insert the
  clip


Reusing a Presentation and Adding Media                 16
Zooming a Slide

• Drag the Zoom slider to change the zoom level


Reusing a Presentation and Adding Media           17
Ungrouping a Clip

• With the clip selected, click Format on the Ribbon
  to display the Picture Tools Format tab
• Click the Group button on the Picture Tools
  Format tab to display the Group menu
• Click Ungroup on the Group menu


Reusing a Presentation and Adding Media            18
Ungrouping a Clip


Reusing a Presentation and Adding Media   19
Changing the Color of a Clip Object

• Click outside the clip area to display the clip
  without the sizing handles around the objects
• Click the desired object in the clip
• Click the Shape Fill button arrow on the Drawing
  Tools Format tab to display the Shape Fill gallery
• Point to the desired color to display a live preview
  of the color
• Click the color to change the object’s color

Reusing a Presentation and Adding Media              20
Changing the Color of a Clip Object


Reusing a Presentation and Adding Media   21
Deleting a Clip Object

• Click the desired object in the clip
• Press the DELETE key to delete the object


Reusing a Presentation and Adding Media       22
Regrouping Objects

• With the clip selected, click the Drawing Tools
  Format tab and then click the Group button to
  display the Group menu
• Click Regroup to combine all the objects


Reusing a Presentation and Adding Media             23
Inserting a Video File

• Click the Insert Video button on the Insert tab to
  display the Insert Video dialog box
• Navigate to the video location, and then click the
  desired video to select the file
• Click the Insert button to insert the movie clip


Reusing a Presentation and Adding Media                24
Inserting a Video File


Reusing a Presentation and Adding Media   25
Trimming a Video File
• Click Playback on the Ribbon to display the Video
  Tools Playback tab. Click the Trim Video button to
  display the Trim Video dialog box
• Point to the start point, which is indicated by the
  green marker on the left side, so that the mouse
  pointer changes to a two-headed arrow
• Drag the green marker to the desired start time
• Drag the red marker to the desired end time
• Click the OK button

Reusing a Presentation and Adding Media             26
Trimming a Video File


Reusing a Presentation and Adding Media   27
Adding Video Options

• If necessary, click Playback on the Ribbon to
  display the Video Tools Playback tab. Click the
  Start box to view the Start menu
• Click the desired option
• If desired, click the Play Full Screen check box
• Click the Volume button and click the desired
  volume


Reusing a Presentation and Adding Media              28
Inserting an Audio File

• Click Insert on the Ribbon to display the Insert tab
  and then click the Insert Audio button arrow to
  display the Insert Audio menu
• Click Clip Art Audio in the Insert Audio menu to open
  the Clip Art task pane
• Click the ‘Results should be’ box arrow and then click
  the ‘All media types’ check box to remove the check
  mark from each of the four types of media files
• Click the Audio check box to place a check mark in it

Reusing a Presentation and Adding Media                29
Inserting an Audio File
• Type the desired search text in the Search for text
  box, and then click the Go button
• Point to the desired clip to display the properties of
  the file
• Right-click the clip to select the clip and to display the
  Edit menu
• Click Preview/ Properties to display the
  Preview/Properties dialog box and to hear the clip
• Click the Close button to close the dialog box
• Click the desired clip in the results list to insert the
  file
Reusing a Presentation and Adding Media                   30
Inserting an Audio File


Reusing a Presentation and Adding Media   31
Adding Audio Options

• With the audio clip selected, click Playback on the
  Ribbon to display the Audio Tools Playback tab.
  Click the Start box to display the Start box menu
• Click the desired option in the Start menu
• If desired, click the Loop until Stopped check box
  to place a check mark in it
• If desired, click the Hide During Show check box to
  place a check mark in it

Reusing a Presentation and Adding Media            32
Adding Audio Options


Reusing a Presentation and Adding Media   33
Adding a Video Style

• With the video selected, click Format on the
  Ribbon to display the Video Tools Format tab
• Click the More button in the Video Styles gallery
  to expand the gallery
• Point to the desired style to display a live preview
  of that style applied to the video on the slide
• Click the desired style to apply the style to the
  selected video

Reusing a Presentation and Adding Media              34
Adding a Video Style


Reusing a Presentation and Adding Media   35
Resizing a Video

• With the video clip selected, drag a sizing handle
  until the video is the desired size


Reusing a Presentation and Adding Media                36
Inserting a Movie Clip

• Click the Picture button on the Insert tab to
  display the Insert Picture dialog box
• Navigate to the desired movie clip to insert, and
  then click the file to select it
• Click the Insert button to insert the movie clip into
  the slide


Reusing a Presentation and Adding Media              37
Inserting a Movie Clip


Reusing a Presentation and Adding Media   38
Finding and Replacing Text
• Click the Replace button on the Home tab to display
  the Replace dialog box
• Type the text to find in the Find what text box
• Press the TAB key, and then type the desired text to
  replace with in the Replace with text box
• Click the Replace all button to instruct PowerPoint to
  replace all occurrences of the Find what word(s) with
  the Replace with word(s)
• Click the OK button
• Click the Close button
Reusing a Presentation and Adding Media                39
Finding and Replacing Text


Reusing a Presentation and Adding Media   40
Finding and Inserting a Synonym

• Right-click the word for which you are searching a
  synonym
• Point to Synonyms on the shortcut menu to
  display a list of synonyms for this word
• Click the Synonym you want on the Synonyms
  submenu to replace the existing word


Reusing a Presentation and Adding Media            41
Finding and Inserting a Synonym


Reusing a Presentation and Adding Media   42
Adding Notes

• Click the Notes pane, and then type the desired
  text


Reusing a Presentation and Adding Media             43
Checking Spelling

• Click Review on the Ribbon to display the Review
  tab
• Click the Spelling button to start the spelling
  checker and display the Spelling dialog box
• Click the desired action for each misspelled word
  located
• When finished, click the OK button


Reusing a Presentation and Adding Media               44
Checking Spelling


Reusing a Presentation and Adding Media   45
Inserting a Slide Number

• Display the Insert tab and then click the Insert
  Slide Number to display the Header and Footer
  dialog box
• Click the Slide number check box to place a check
  mark in it
• If desired, click the ‘Don’t show on title slide’
  check box to place a check mark in it
• Click the Apply to All button to close the dialog
  box and insert the slide number
Reusing a Presentation and Adding Media           46
Inserting a Slide Number


Reusing a Presentation and Adding Media   47
Previewing and Printing a Handout
• Click File on the Ribbon to open the Backstage view
  and then click the Print tab
• Click Full Page Slides in the Settings area to display
  the Full Page Slides gallery
• Click the desired setting in the Handouts area to
  select this option and display a preview of the
  handout
• Click the Print button in the Print gallery to print the
  handout
• When the printer stops, retrieve the printed handout
Reusing a Presentation and Adding Media                  48
Previewing and Printing a Handout


Reusing a Presentation and Adding Media   49
Printing Speaker Notes

• Click the Print tab in the Backstage view and then
  click 2 Slides in the Settings area to display the
  gallery
• Click Notes Pages in the Print Layout area to select
  this option and display a preview of the current
  page
• Click the Print button in the Print gallery to print
  the notes
• When the printer stops, retrieve the printed pages
Reusing a Presentation and Adding Media             50
Printing Speaker Notes


Reusing a Presentation and Adding Media   51
Chapter Summary

•    Color a picture
•    Add an artistic effect to a picture
•    Delete and move placeholders
•    Align paragraph text
•    Copy a slide element from one slide to another


Reusing a Presentation and Adding Media               52
Chapter Summary

•    Ungroup, change the color, and regroup a clip
•    Insert and edit a video clip
•    Insert audio
•    Control audio and video clips
•    Check for spelling errors
•    Print a presentation as a handout


Reusing a Presentation and Adding Media              53
Microsoft
PowerPoint 2010

 Chapter 3 Complete

Más contenido relacionado

Destacado

Unit 1 living things year 5 study
Unit 1 living things year 5 studyUnit 1 living things year 5 study
Unit 1 living things year 5 studyFany Campoy
 
Mammals and birds ppt
Mammals and birds pptMammals and birds ppt
Mammals and birds ppt123456mnbvcxz
 
Adaptation for flight in birds
Adaptation for flight in birdsAdaptation for flight in birds
Adaptation for flight in birdsTanvi Naik
 
Raznovrsnost ptica, Ana
Raznovrsnost ptica, AnaRaznovrsnost ptica, Ana
Raznovrsnost ptica, Anaanatadic111
 
The five kingdoms of life 5
The five kingdoms of life 5The five kingdoms of life 5
The five kingdoms of life 5pilarhmachado
 
Interaktivni softver PTICE
Interaktivni softver PTICEInteraktivni softver PTICE
Interaktivni softver PTICEEna Horvat
 
Ξενοδοχεία - Πάργα - Διαμονή - διακοπές - τιμές
Ξενοδοχεία - Πάργα - Διαμονή - διακοπές - τιμέςΞενοδοχεία - Πάργα - Διαμονή - διακοπές - τιμές
Ξενοδοχεία - Πάργα - Διαμονή - διακοπές - τιμέςlichnos beach
 
2010 DFC Taiwan-Chi 056 「愛」入資源班
2010 DFC Taiwan-Chi 056 「愛」入資源班2010 DFC Taiwan-Chi 056 「愛」入資源班
2010 DFC Taiwan-Chi 056 「愛」入資源班dfctaiwan2010
 
PICMET2012 Conference / Tero Peltola
PICMET2012 Conference / Tero PeltolaPICMET2012 Conference / Tero Peltola
PICMET2012 Conference / Tero PeltolaTero Peltola
 
Elkarrizketa sindikatuekin
Elkarrizketa sindikatuekinElkarrizketa sindikatuekin
Elkarrizketa sindikatuekinhingenieroa
 
Saa s案例分析01
Saa s案例分析01Saa s案例分析01
Saa s案例分析01shaoshao11
 
2010 DFC Taiwan-Chi 012 老人特攻隊
2010 DFC Taiwan-Chi 012 老人特攻隊2010 DFC Taiwan-Chi 012 老人特攻隊
2010 DFC Taiwan-Chi 012 老人特攻隊dfctaiwan2010
 

Destacado (20)

Unit 1 living things year 5 study
Unit 1 living things year 5 studyUnit 1 living things year 5 study
Unit 1 living things year 5 study
 
Mammals and birds ppt
Mammals and birds pptMammals and birds ppt
Mammals and birds ppt
 
Ptice
PticePtice
Ptice
 
Adaptation for flight in birds
Adaptation for flight in birdsAdaptation for flight in birds
Adaptation for flight in birds
 
Raznovrsnost ptica, Ana
Raznovrsnost ptica, AnaRaznovrsnost ptica, Ana
Raznovrsnost ptica, Ana
 
Ptice
PticePtice
Ptice
 
The five kingdoms of life 5
The five kingdoms of life 5The five kingdoms of life 5
The five kingdoms of life 5
 
Interaktivni softver PTICE
Interaktivni softver PTICEInteraktivni softver PTICE
Interaktivni softver PTICE
 
Ptice
PticePtice
Ptice
 
Ptice
PticePtice
Ptice
 
Ptice
PticePtice
Ptice
 
Euskera, Komodoko Dragoia
Euskera, Komodoko DragoiaEuskera, Komodoko Dragoia
Euskera, Komodoko Dragoia
 
Halloween’
Halloween’Halloween’
Halloween’
 
Ξενοδοχεία - Πάργα - Διαμονή - διακοπές - τιμές
Ξενοδοχεία - Πάργα - Διαμονή - διακοπές - τιμέςΞενοδοχεία - Πάργα - Διαμονή - διακοπές - τιμές
Ξενοδοχεία - Πάργα - Διαμονή - διακοπές - τιμές
 
Calendar2012 jan-sep
Calendar2012 jan-sepCalendar2012 jan-sep
Calendar2012 jan-sep
 
2010 DFC Taiwan-Chi 056 「愛」入資源班
2010 DFC Taiwan-Chi 056 「愛」入資源班2010 DFC Taiwan-Chi 056 「愛」入資源班
2010 DFC Taiwan-Chi 056 「愛」入資源班
 
PICMET2012 Conference / Tero Peltola
PICMET2012 Conference / Tero PeltolaPICMET2012 Conference / Tero Peltola
PICMET2012 Conference / Tero Peltola
 
Elkarrizketa sindikatuekin
Elkarrizketa sindikatuekinElkarrizketa sindikatuekin
Elkarrizketa sindikatuekin
 
Saa s案例分析01
Saa s案例分析01Saa s案例分析01
Saa s案例分析01
 
2010 DFC Taiwan-Chi 012 老人特攻隊
2010 DFC Taiwan-Chi 012 老人特攻隊2010 DFC Taiwan-Chi 012 老人特攻隊
2010 DFC Taiwan-Chi 012 老人特攻隊
 

Similar a PowerPoint Chapter 03

PowerPoint Chapter 01
PowerPoint Chapter 01PowerPoint Chapter 01
PowerPoint Chapter 01jgardne4
 
PowerPoint Chapter 01
PowerPoint Chapter 01PowerPoint Chapter 01
PowerPoint Chapter 01xtin101
 
Pscs6 ch01 ppt
Pscs6 ch01 pptPscs6 ch01 ppt
Pscs6 ch01 pptcpashke
 
Photoshop CS6 Chapter One
Photoshop CS6 Chapter OnePhotoshop CS6 Chapter One
Photoshop CS6 Chapter Onecpashke
 
PowerPoint Chapter 2
PowerPoint Chapter 2PowerPoint Chapter 2
PowerPoint Chapter 2xtin101
 
Ch01_PowerPoint.pptx
Ch01_PowerPoint.pptxCh01_PowerPoint.pptx
Ch01_PowerPoint.pptxOER Commons
 
Chapter 1 PowerPoint
Chapter 1 PowerPointChapter 1 PowerPoint
Chapter 1 PowerPointBecca Waldo
 
Word Chapter 1
Word Chapter 1Word Chapter 1
Word Chapter 1jgardne4
 
Microsoft Word Chapter 01
Microsoft Word Chapter 01Microsoft Word Chapter 01
Microsoft Word Chapter 01malik1972
 
Word Chapter 01
Word Chapter 01Word Chapter 01
Word Chapter 01xtin101
 
Pscs6 ch07 ppt
Pscs6 ch07 pptPscs6 ch07 ppt
Pscs6 ch07 pptcpashke
 
Power point for beginner
Power point for beginnerPower point for beginner
Power point for beginnerAzy Softie
 

Similar a PowerPoint Chapter 03 (20)

PowerPoint Chapter 01
PowerPoint Chapter 01PowerPoint Chapter 01
PowerPoint Chapter 01
 
PowerPoint Chapter 01
PowerPoint Chapter 01PowerPoint Chapter 01
PowerPoint Chapter 01
 
Pscs6 ch01 ppt
Pscs6 ch01 pptPscs6 ch01 ppt
Pscs6 ch01 ppt
 
Photoshop CS6 Chapter One
Photoshop CS6 Chapter OnePhotoshop CS6 Chapter One
Photoshop CS6 Chapter One
 
PowerPoint 2013 ch07
PowerPoint 2013 ch07PowerPoint 2013 ch07
PowerPoint 2013 ch07
 
PowerPoint Chapter 2
PowerPoint Chapter 2PowerPoint Chapter 2
PowerPoint Chapter 2
 
Ch01_PowerPoint.pptx
Ch01_PowerPoint.pptxCh01_PowerPoint.pptx
Ch01_PowerPoint.pptx
 
Ppt2013 ch09
Ppt2013 ch09Ppt2013 ch09
Ppt2013 ch09
 
PowerPoint 2013 ch05
PowerPoint 2013 ch05PowerPoint 2013 ch05
PowerPoint 2013 ch05
 
Word ch10
Word ch10Word ch10
Word ch10
 
Chapter 1 PowerPoint
Chapter 1 PowerPointChapter 1 PowerPoint
Chapter 1 PowerPoint
 
PowerPoint 2013
PowerPoint 2013PowerPoint 2013
PowerPoint 2013
 
Word Chapter 1
Word Chapter 1Word Chapter 1
Word Chapter 1
 
Word 2010 Chap 1
Word 2010 Chap 1Word 2010 Chap 1
Word 2010 Chap 1
 
Microsoft Word Chapter 01
Microsoft Word Chapter 01Microsoft Word Chapter 01
Microsoft Word Chapter 01
 
Word Chapter 01
Word Chapter 01Word Chapter 01
Word Chapter 01
 
Slide Design
Slide DesignSlide Design
Slide Design
 
Pscs6 ch07 ppt
Pscs6 ch07 pptPscs6 ch07 ppt
Pscs6 ch07 ppt
 
PowerPoint 2013 ch06
PowerPoint 2013 ch06PowerPoint 2013 ch06
PowerPoint 2013 ch06
 
Power point for beginner
Power point for beginnerPower point for beginner
Power point for beginner
 

Más de jgardne4

Student Educational Plan at Delaware Technical Community College
Student Educational Plan at Delaware Technical Community CollegeStudent Educational Plan at Delaware Technical Community College
Student Educational Plan at Delaware Technical Community Collegejgardne4
 
First assignment Document
First assignment DocumentFirst assignment Document
First assignment Documentjgardne4
 
Instructions for Screen Capture
Instructions for Screen CaptureInstructions for Screen Capture
Instructions for Screen Capturejgardne4
 
Access Chapter 02
Access Chapter 02Access Chapter 02
Access Chapter 02jgardne4
 
Access Chapter 01
Access Chapter 01Access Chapter 01
Access Chapter 01jgardne4
 
Excel Chapter 03
Excel Chapter 03Excel Chapter 03
Excel Chapter 03jgardne4
 
Excel Chapter 02
Excel Chapter 02Excel Chapter 02
Excel Chapter 02jgardne4
 
Excel chapter 01
Excel chapter 01Excel chapter 01
Excel chapter 01jgardne4
 
Word Chapter 03
Word Chapter 03Word Chapter 03
Word Chapter 03jgardne4
 
Word Chapter 02
Word Chapter 02Word Chapter 02
Word Chapter 02jgardne4
 
Lvm cis17 2w4 online class how to sign into sam
Lvm cis17 2w4 online class how to sign into samLvm cis17 2w4 online class how to sign into sam
Lvm cis17 2w4 online class how to sign into samjgardne4
 
Introduction to cis107 fall 2012
Introduction to cis107 fall 2012Introduction to cis107 fall 2012
Introduction to cis107 fall 2012jgardne4
 
Getting started summer 2012
Getting started summer 2012Getting started summer 2012
Getting started summer 2012jgardne4
 
CIS107 Intro jg
CIS107 Intro jgCIS107 Intro jg
CIS107 Intro jgjgardne4
 

Más de jgardne4 (14)

Student Educational Plan at Delaware Technical Community College
Student Educational Plan at Delaware Technical Community CollegeStudent Educational Plan at Delaware Technical Community College
Student Educational Plan at Delaware Technical Community College
 
First assignment Document
First assignment DocumentFirst assignment Document
First assignment Document
 
Instructions for Screen Capture
Instructions for Screen CaptureInstructions for Screen Capture
Instructions for Screen Capture
 
Access Chapter 02
Access Chapter 02Access Chapter 02
Access Chapter 02
 
Access Chapter 01
Access Chapter 01Access Chapter 01
Access Chapter 01
 
Excel Chapter 03
Excel Chapter 03Excel Chapter 03
Excel Chapter 03
 
Excel Chapter 02
Excel Chapter 02Excel Chapter 02
Excel Chapter 02
 
Excel chapter 01
Excel chapter 01Excel chapter 01
Excel chapter 01
 
Word Chapter 03
Word Chapter 03Word Chapter 03
Word Chapter 03
 
Word Chapter 02
Word Chapter 02Word Chapter 02
Word Chapter 02
 
Lvm cis17 2w4 online class how to sign into sam
Lvm cis17 2w4 online class how to sign into samLvm cis17 2w4 online class how to sign into sam
Lvm cis17 2w4 online class how to sign into sam
 
Introduction to cis107 fall 2012
Introduction to cis107 fall 2012Introduction to cis107 fall 2012
Introduction to cis107 fall 2012
 
Getting started summer 2012
Getting started summer 2012Getting started summer 2012
Getting started summer 2012
 
CIS107 Intro jg
CIS107 Intro jgCIS107 Intro jg
CIS107 Intro jg
 

Último

microwave assisted reaction. General introduction
microwave assisted reaction. General introductionmicrowave assisted reaction. General introduction
microwave assisted reaction. General introductionMaksud Ahmed
 
Grant Readiness 101 TechSoup and Remy Consulting
Grant Readiness 101 TechSoup and Remy ConsultingGrant Readiness 101 TechSoup and Remy Consulting
Grant Readiness 101 TechSoup and Remy ConsultingTechSoup
 
Advanced Views - Calendar View in Odoo 17
Advanced Views - Calendar View in Odoo 17Advanced Views - Calendar View in Odoo 17
Advanced Views - Calendar View in Odoo 17Celine George
 
Introduction to Nonprofit Accounting: The Basics
Introduction to Nonprofit Accounting: The BasicsIntroduction to Nonprofit Accounting: The Basics
Introduction to Nonprofit Accounting: The BasicsTechSoup
 
BASLIQ CURRENT LOOKBOOK LOOKBOOK(1) (1).pdf
BASLIQ CURRENT LOOKBOOK  LOOKBOOK(1) (1).pdfBASLIQ CURRENT LOOKBOOK  LOOKBOOK(1) (1).pdf
BASLIQ CURRENT LOOKBOOK LOOKBOOK(1) (1).pdfSoniaTolstoy
 
Sports & Fitness Value Added Course FY..
Sports & Fitness Value Added Course FY..Sports & Fitness Value Added Course FY..
Sports & Fitness Value Added Course FY..Disha Kariya
 
General AI for Medical Educators April 2024
General AI for Medical Educators April 2024General AI for Medical Educators April 2024
General AI for Medical Educators April 2024Janet Corral
 
Software Engineering Methodologies (overview)
Software Engineering Methodologies (overview)Software Engineering Methodologies (overview)
Software Engineering Methodologies (overview)eniolaolutunde
 
APM Welcome, APM North West Network Conference, Synergies Across Sectors
APM Welcome, APM North West Network Conference, Synergies Across SectorsAPM Welcome, APM North West Network Conference, Synergies Across Sectors
APM Welcome, APM North West Network Conference, Synergies Across SectorsAssociation for Project Management
 
Explore beautiful and ugly buildings. Mathematics helps us create beautiful d...
Explore beautiful and ugly buildings. Mathematics helps us create beautiful d...Explore beautiful and ugly buildings. Mathematics helps us create beautiful d...
Explore beautiful and ugly buildings. Mathematics helps us create beautiful d...christianmathematics
 
fourth grading exam for kindergarten in writing
fourth grading exam for kindergarten in writingfourth grading exam for kindergarten in writing
fourth grading exam for kindergarten in writingTeacherCyreneCayanan
 
Presentation by Andreas Schleicher Tackling the School Absenteeism Crisis 30 ...
Presentation by Andreas Schleicher Tackling the School Absenteeism Crisis 30 ...Presentation by Andreas Schleicher Tackling the School Absenteeism Crisis 30 ...
Presentation by Andreas Schleicher Tackling the School Absenteeism Crisis 30 ...EduSkills OECD
 
Kisan Call Centre - To harness potential of ICT in Agriculture by answer farm...
Kisan Call Centre - To harness potential of ICT in Agriculture by answer farm...Kisan Call Centre - To harness potential of ICT in Agriculture by answer farm...
Kisan Call Centre - To harness potential of ICT in Agriculture by answer farm...Krashi Coaching
 
Ecosystem Interactions Class Discussion Presentation in Blue Green Lined Styl...
Ecosystem Interactions Class Discussion Presentation in Blue Green Lined Styl...Ecosystem Interactions Class Discussion Presentation in Blue Green Lined Styl...
Ecosystem Interactions Class Discussion Presentation in Blue Green Lined Styl...fonyou31
 
Interactive Powerpoint_How to Master effective communication
Interactive Powerpoint_How to Master effective communicationInteractive Powerpoint_How to Master effective communication
Interactive Powerpoint_How to Master effective communicationnomboosow
 
1029 - Danh muc Sach Giao Khoa 10 . pdf
1029 -  Danh muc Sach Giao Khoa 10 . pdf1029 -  Danh muc Sach Giao Khoa 10 . pdf
1029 - Danh muc Sach Giao Khoa 10 . pdfQucHHunhnh
 
Web & Social Media Analytics Previous Year Question Paper.pdf
Web & Social Media Analytics Previous Year Question Paper.pdfWeb & Social Media Analytics Previous Year Question Paper.pdf
Web & Social Media Analytics Previous Year Question Paper.pdfJayanti Pande
 

Último (20)

microwave assisted reaction. General introduction
microwave assisted reaction. General introductionmicrowave assisted reaction. General introduction
microwave assisted reaction. General introduction
 
Grant Readiness 101 TechSoup and Remy Consulting
Grant Readiness 101 TechSoup and Remy ConsultingGrant Readiness 101 TechSoup and Remy Consulting
Grant Readiness 101 TechSoup and Remy Consulting
 
Advanced Views - Calendar View in Odoo 17
Advanced Views - Calendar View in Odoo 17Advanced Views - Calendar View in Odoo 17
Advanced Views - Calendar View in Odoo 17
 
Introduction to Nonprofit Accounting: The Basics
Introduction to Nonprofit Accounting: The BasicsIntroduction to Nonprofit Accounting: The Basics
Introduction to Nonprofit Accounting: The Basics
 
BASLIQ CURRENT LOOKBOOK LOOKBOOK(1) (1).pdf
BASLIQ CURRENT LOOKBOOK  LOOKBOOK(1) (1).pdfBASLIQ CURRENT LOOKBOOK  LOOKBOOK(1) (1).pdf
BASLIQ CURRENT LOOKBOOK LOOKBOOK(1) (1).pdf
 
Sports & Fitness Value Added Course FY..
Sports & Fitness Value Added Course FY..Sports & Fitness Value Added Course FY..
Sports & Fitness Value Added Course FY..
 
General AI for Medical Educators April 2024
General AI for Medical Educators April 2024General AI for Medical Educators April 2024
General AI for Medical Educators April 2024
 
Software Engineering Methodologies (overview)
Software Engineering Methodologies (overview)Software Engineering Methodologies (overview)
Software Engineering Methodologies (overview)
 
APM Welcome, APM North West Network Conference, Synergies Across Sectors
APM Welcome, APM North West Network Conference, Synergies Across SectorsAPM Welcome, APM North West Network Conference, Synergies Across Sectors
APM Welcome, APM North West Network Conference, Synergies Across Sectors
 
Explore beautiful and ugly buildings. Mathematics helps us create beautiful d...
Explore beautiful and ugly buildings. Mathematics helps us create beautiful d...Explore beautiful and ugly buildings. Mathematics helps us create beautiful d...
Explore beautiful and ugly buildings. Mathematics helps us create beautiful d...
 
fourth grading exam for kindergarten in writing
fourth grading exam for kindergarten in writingfourth grading exam for kindergarten in writing
fourth grading exam for kindergarten in writing
 
Presentation by Andreas Schleicher Tackling the School Absenteeism Crisis 30 ...
Presentation by Andreas Schleicher Tackling the School Absenteeism Crisis 30 ...Presentation by Andreas Schleicher Tackling the School Absenteeism Crisis 30 ...
Presentation by Andreas Schleicher Tackling the School Absenteeism Crisis 30 ...
 
Kisan Call Centre - To harness potential of ICT in Agriculture by answer farm...
Kisan Call Centre - To harness potential of ICT in Agriculture by answer farm...Kisan Call Centre - To harness potential of ICT in Agriculture by answer farm...
Kisan Call Centre - To harness potential of ICT in Agriculture by answer farm...
 
Mattingly "AI & Prompt Design: The Basics of Prompt Design"
Mattingly "AI & Prompt Design: The Basics of Prompt Design"Mattingly "AI & Prompt Design: The Basics of Prompt Design"
Mattingly "AI & Prompt Design: The Basics of Prompt Design"
 
Advance Mobile Application Development class 07
Advance Mobile Application Development class 07Advance Mobile Application Development class 07
Advance Mobile Application Development class 07
 
Ecosystem Interactions Class Discussion Presentation in Blue Green Lined Styl...
Ecosystem Interactions Class Discussion Presentation in Blue Green Lined Styl...Ecosystem Interactions Class Discussion Presentation in Blue Green Lined Styl...
Ecosystem Interactions Class Discussion Presentation in Blue Green Lined Styl...
 
Interactive Powerpoint_How to Master effective communication
Interactive Powerpoint_How to Master effective communicationInteractive Powerpoint_How to Master effective communication
Interactive Powerpoint_How to Master effective communication
 
1029 - Danh muc Sach Giao Khoa 10 . pdf
1029 -  Danh muc Sach Giao Khoa 10 . pdf1029 -  Danh muc Sach Giao Khoa 10 . pdf
1029 - Danh muc Sach Giao Khoa 10 . pdf
 
Mattingly "AI & Prompt Design: Structured Data, Assistants, & RAG"
Mattingly "AI & Prompt Design: Structured Data, Assistants, & RAG"Mattingly "AI & Prompt Design: Structured Data, Assistants, & RAG"
Mattingly "AI & Prompt Design: Structured Data, Assistants, & RAG"
 
Web & Social Media Analytics Previous Year Question Paper.pdf
Web & Social Media Analytics Previous Year Question Paper.pdfWeb & Social Media Analytics Previous Year Question Paper.pdf
Web & Social Media Analytics Previous Year Question Paper.pdf
 

PowerPoint Chapter 03

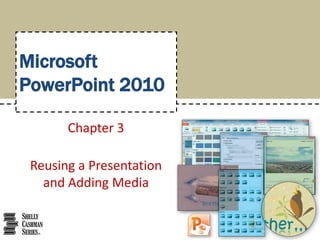
  • 1. Microsoft PowerPoint 2010 Chapter 3 Reusing a Presentation and Adding Media
  • 2. Objectives • Color a picture • Add an artistic effect to a picture • Delete and move placeholders • Align paragraph text • Copy a slide element from one slide to another Reusing a Presentation and Adding Media 2
  • 3. Objectives • Ungroup, change the color, and regroup a clip • Insert and edit a video clip • Insert audio • Control audio and video clips • Check for spelling errors • Print a presentation as a handout Reusing a Presentation and Adding Media 3
  • 4. Project – Presentation with Video, Audio, and Pictures with Effects Reusing a Presentation and Adding Media 4
  • 5. General Project Guidelines • Use the color wheel to determine color choices • Vary paragraph alignment • Use multimedia selectively • Use handouts to organize your speech • Evaluate your presentation Reusing a Presentation and Adding Media 5
  • 6. Coloring a Picture • With the picture selected, click the Color button on the Picture Tools Format tab to display the Color gallery • Point to the desired color to display a live preview of the adjustment on the picture • Click the desired color to apply this correction Reusing a Presentation and Adding Media 6
  • 7. Coloring a Picture Reusing a Presentation and Adding Media 7
  • 8. Adding an Artistic Effect to a Picture • With the picture selected, click the Artistic Effects button on the Picture Tools Format tab to display the Artistic Effects gallery • Point to the desired artistic effect to display a live preview of the adjustment • Click the desired artistic effect to apply the correction Reusing a Presentation and Adding Media 8
  • 9. Adding an Artistic Effect to a Picture Reusing a Presentation and Adding Media 9
  • 10. Changing the Stacking Order • With the object selected, click the Send Backward button arrow on the Picture Tools Format tab to display the Send Backward menu • Click Send to Back to move the object underneath all slide objects Reusing a Presentation and Adding Media 10
  • 11. Resizing a Placeholder • Click the border of the placeholder to select it. Point to one of the sizing handles so that the mouse pointer changes to a two-headed arrow • Drag the sizing handle until the placeholder is the desired size Reusing a Presentation and Adding Media 11
  • 12. Moving a Placeholder • With the placeholder selected, point to an area of the border between two sizing handles so that the mouse pointer changes to a four-headed arrow • Drag the placeholder to the desired location • Click to set the placeholder in its new location Reusing a Presentation and Adding Media 12
  • 13. Aligning Paragraph Text • Click somewhere in the paragraph to align to position the insertion point in the paragraph to be formatted • Click the desired alignment button on the Home tab in the Paragraph group to align the paragraph Reusing a Presentation and Adding Media 13
  • 14. Deleting a Slide • Right-click the slide to delete in the Slides tab to display the shortcut menu • Click Delete Slide to delete the slide from the presentation Reusing a Presentation and Adding Media 14
  • 15. Changing Views • Click the desired view button in the lower right of the PowerPoint window to change the view of the presentation Reusing a Presentation and Adding Media 15
  • 16. Copying a Clip from One Slide to Another • Click the desired clip to select it, and then click the Copy button on the Home tab • Display the slide to paste the clip, and then click the Paste button on the Home tab to insert the clip Reusing a Presentation and Adding Media 16
  • 17. Zooming a Slide • Drag the Zoom slider to change the zoom level Reusing a Presentation and Adding Media 17
  • 18. Ungrouping a Clip • With the clip selected, click Format on the Ribbon to display the Picture Tools Format tab • Click the Group button on the Picture Tools Format tab to display the Group menu • Click Ungroup on the Group menu Reusing a Presentation and Adding Media 18
  • 19. Ungrouping a Clip Reusing a Presentation and Adding Media 19
  • 20. Changing the Color of a Clip Object • Click outside the clip area to display the clip without the sizing handles around the objects • Click the desired object in the clip • Click the Shape Fill button arrow on the Drawing Tools Format tab to display the Shape Fill gallery • Point to the desired color to display a live preview of the color • Click the color to change the object’s color Reusing a Presentation and Adding Media 20
  • 21. Changing the Color of a Clip Object Reusing a Presentation and Adding Media 21
  • 22. Deleting a Clip Object • Click the desired object in the clip • Press the DELETE key to delete the object Reusing a Presentation and Adding Media 22
  • 23. Regrouping Objects • With the clip selected, click the Drawing Tools Format tab and then click the Group button to display the Group menu • Click Regroup to combine all the objects Reusing a Presentation and Adding Media 23
  • 24. Inserting a Video File • Click the Insert Video button on the Insert tab to display the Insert Video dialog box • Navigate to the video location, and then click the desired video to select the file • Click the Insert button to insert the movie clip Reusing a Presentation and Adding Media 24
  • 25. Inserting a Video File Reusing a Presentation and Adding Media 25
  • 26. Trimming a Video File • Click Playback on the Ribbon to display the Video Tools Playback tab. Click the Trim Video button to display the Trim Video dialog box • Point to the start point, which is indicated by the green marker on the left side, so that the mouse pointer changes to a two-headed arrow • Drag the green marker to the desired start time • Drag the red marker to the desired end time • Click the OK button Reusing a Presentation and Adding Media 26
  • 27. Trimming a Video File Reusing a Presentation and Adding Media 27
  • 28. Adding Video Options • If necessary, click Playback on the Ribbon to display the Video Tools Playback tab. Click the Start box to view the Start menu • Click the desired option • If desired, click the Play Full Screen check box • Click the Volume button and click the desired volume Reusing a Presentation and Adding Media 28
  • 29. Inserting an Audio File • Click Insert on the Ribbon to display the Insert tab and then click the Insert Audio button arrow to display the Insert Audio menu • Click Clip Art Audio in the Insert Audio menu to open the Clip Art task pane • Click the ‘Results should be’ box arrow and then click the ‘All media types’ check box to remove the check mark from each of the four types of media files • Click the Audio check box to place a check mark in it Reusing a Presentation and Adding Media 29
  • 30. Inserting an Audio File • Type the desired search text in the Search for text box, and then click the Go button • Point to the desired clip to display the properties of the file • Right-click the clip to select the clip and to display the Edit menu • Click Preview/ Properties to display the Preview/Properties dialog box and to hear the clip • Click the Close button to close the dialog box • Click the desired clip in the results list to insert the file Reusing a Presentation and Adding Media 30
  • 31. Inserting an Audio File Reusing a Presentation and Adding Media 31
  • 32. Adding Audio Options • With the audio clip selected, click Playback on the Ribbon to display the Audio Tools Playback tab. Click the Start box to display the Start box menu • Click the desired option in the Start menu • If desired, click the Loop until Stopped check box to place a check mark in it • If desired, click the Hide During Show check box to place a check mark in it Reusing a Presentation and Adding Media 32
  • 33. Adding Audio Options Reusing a Presentation and Adding Media 33
  • 34. Adding a Video Style • With the video selected, click Format on the Ribbon to display the Video Tools Format tab • Click the More button in the Video Styles gallery to expand the gallery • Point to the desired style to display a live preview of that style applied to the video on the slide • Click the desired style to apply the style to the selected video Reusing a Presentation and Adding Media 34
  • 35. Adding a Video Style Reusing a Presentation and Adding Media 35
  • 36. Resizing a Video • With the video clip selected, drag a sizing handle until the video is the desired size Reusing a Presentation and Adding Media 36
  • 37. Inserting a Movie Clip • Click the Picture button on the Insert tab to display the Insert Picture dialog box • Navigate to the desired movie clip to insert, and then click the file to select it • Click the Insert button to insert the movie clip into the slide Reusing a Presentation and Adding Media 37
  • 38. Inserting a Movie Clip Reusing a Presentation and Adding Media 38
  • 39. Finding and Replacing Text • Click the Replace button on the Home tab to display the Replace dialog box • Type the text to find in the Find what text box • Press the TAB key, and then type the desired text to replace with in the Replace with text box • Click the Replace all button to instruct PowerPoint to replace all occurrences of the Find what word(s) with the Replace with word(s) • Click the OK button • Click the Close button Reusing a Presentation and Adding Media 39
  • 40. Finding and Replacing Text Reusing a Presentation and Adding Media 40
  • 41. Finding and Inserting a Synonym • Right-click the word for which you are searching a synonym • Point to Synonyms on the shortcut menu to display a list of synonyms for this word • Click the Synonym you want on the Synonyms submenu to replace the existing word Reusing a Presentation and Adding Media 41
  • 42. Finding and Inserting a Synonym Reusing a Presentation and Adding Media 42
  • 43. Adding Notes • Click the Notes pane, and then type the desired text Reusing a Presentation and Adding Media 43
  • 44. Checking Spelling • Click Review on the Ribbon to display the Review tab • Click the Spelling button to start the spelling checker and display the Spelling dialog box • Click the desired action for each misspelled word located • When finished, click the OK button Reusing a Presentation and Adding Media 44
  • 45. Checking Spelling Reusing a Presentation and Adding Media 45
  • 46. Inserting a Slide Number • Display the Insert tab and then click the Insert Slide Number to display the Header and Footer dialog box • Click the Slide number check box to place a check mark in it • If desired, click the ‘Don’t show on title slide’ check box to place a check mark in it • Click the Apply to All button to close the dialog box and insert the slide number Reusing a Presentation and Adding Media 46
  • 47. Inserting a Slide Number Reusing a Presentation and Adding Media 47
  • 48. Previewing and Printing a Handout • Click File on the Ribbon to open the Backstage view and then click the Print tab • Click Full Page Slides in the Settings area to display the Full Page Slides gallery • Click the desired setting in the Handouts area to select this option and display a preview of the handout • Click the Print button in the Print gallery to print the handout • When the printer stops, retrieve the printed handout Reusing a Presentation and Adding Media 48
  • 49. Previewing and Printing a Handout Reusing a Presentation and Adding Media 49
  • 50. Printing Speaker Notes • Click the Print tab in the Backstage view and then click 2 Slides in the Settings area to display the gallery • Click Notes Pages in the Print Layout area to select this option and display a preview of the current page • Click the Print button in the Print gallery to print the notes • When the printer stops, retrieve the printed pages Reusing a Presentation and Adding Media 50
  • 51. Printing Speaker Notes Reusing a Presentation and Adding Media 51
  • 52. Chapter Summary • Color a picture • Add an artistic effect to a picture • Delete and move placeholders • Align paragraph text • Copy a slide element from one slide to another Reusing a Presentation and Adding Media 52
  • 53. Chapter Summary • Ungroup, change the color, and regroup a clip • Insert and edit a video clip • Insert audio • Control audio and video clips • Check for spelling errors • Print a presentation as a handout Reusing a Presentation and Adding Media 53