1. Ver. 4
Please refer to the
MODIFICATION NOTICE.
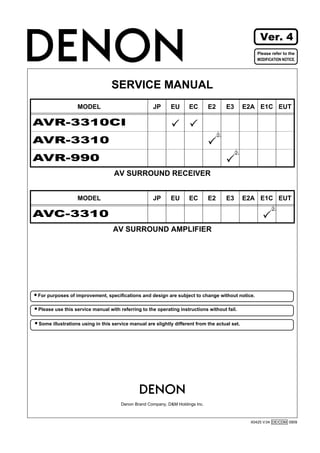
SERVICE MANUAL
MODEL JP EU EC E2 E3 E2A E1C EUT
AVR-3310CI
s
AVR-3310
s
AVR-990
AV SURROUND RECEIVER
MODEL JP EU EC E2 E3 E2A E1C EUT
s
AVC-3310
AV SURROUND AMPLIFIER
●
For purposes of improvement, specifications and design are subject to change without notice.
●
Please use this service manual with referring to the operating instructions without fail.
● Some illustrations using in this service manual are slightly different from the actual set.
e
Denon Brand Company, D&M Holdings lnc.
X0425 V.04 DE/CDM 0909
2. SAFETY PRECAUTIONS
The following check should be performed for the continued protection of the customer and service technician.
LEAKAGE CURRENT CHECK
Before returning the unit to the customer, make sure you make either (1) a leakage current check or (2) a line to chassis
resistance check. If the leakage current exceeds 0.5 milliamps, or if the resistance from chassis to either side of the
power cord is less than 460 kohms, the unit is defective.
CAUTION Please heed the points listed below during servicing and inspection.
◎ Heed the cautions! ◎ Inspect for safety after servicing!
Spots requiring particular attention when servicing, such Check that all screws, parts and wires removed or discon-
as the cabinet, parts, chassis, etc., have cautions indicated nected for servicing have been put back in their original po-
on labels or seals. Be sure to heed these cautions and the sitions, inspect that no parts around the area that has been
cautions indicated in the handling instructions. serviced have been negatively affected, conduct an insu-
lation check on the external metal connectors and between
◎ Caution concerning electric shock! the blades of the power plug, and otherwise check that
safety is ensured.
(1) An AC voltage is impressed on this set, so touching in-
ternal metal parts when the set is energized could
(Insulation check procedure)
cause electric shock. Take care to avoid electric shock,
Unplug the power cord from the power outlet, disconnect
by for example using an isolating transformer and
the antenna, plugs, etc., and turn the power switch on. Us-
gloves when servicing while the set is energized, un-
ing a 500V insulation resistance tester, check that the in-
plugging the power cord when replacing parts, etc.
sulation resistance between the terminals of the power
(2)There are high voltage parts inside. Handle with extra plug and the externally exposed metal parts (antenna ter-
care when the set is energized. minal, headphones terminal, microphone terminal, input
terminal, etc.) is 1MΩ or greater. If it is less, the set must
◎ Caution concerning disassembly and be inspected and repaired.
assembly!
Though great care is taken when manufacturing parts from
sheet metal, there may in some rare cases be burrs on the
CAUTION Concerning important safety
edges of parts which could cause injury if fingers are
moved across them. Use gloves to protect your hands.
parts
◎ Only use designated parts! Many of the electric and structural parts used in the set
have special safety properties. In most cases these prop-
The set's parts have specific safety properties (fire resis- erties are difficult to distinguish by sight, and using re-
tance, voltage resistance, etc.). For replacement parts, be placement parts with higher ratings (rated power and
sure to use parts which have the same properties. In par- withstand voltage) does not necessarily guarantee that
ticular, for the important safety parts that are marked z on safety performance will be preserved. Parts with safety
wiring diagrams and parts lists, be sure to use the desig- properties are indicated as shown below on the wiring dia-
nated parts. grams and parts lists is this service manual. Be sure to re-
place them with parts with the designated part number.
◎ Be sure to mount parts and arrange
the wires as they were originally! (1) Schematic diagrams ... Indicated by the z mark.
For safety reasons, some parts use tape, tubes or other in- (2) Parts lists ... Indicated by the z mark.
sulating materials, and some parts are mounted away from
Using parts other than the designated
the surface of printed circuit boards. Care is also taken with
parts could result in electric shock, fires or
the positions of the wires inside and clamps are used to
other dangerous situations.
keep wires away from heating and high voltage parts, so
be sure to set everything back as it was originally.
2
AVR-3310CI/AVR-3310/AVR990/AVC-3310
4. WIRE ARRANGEMENT
If wire bundles are untied or moved to perform adjustment or parts replacement etc., be sure to rearrange them neatly as
they were originally bundled or placed afterward.
Otherwise, incorrect arrangement can be a cause of noise
generation.
Wire arrangement viewed from the top
Front Panel side
sd
Except AVR-3310CI, AVR-990 model
Back Panel side
4
AVR-3310CI/AVR-3310/AVR990/AVC-3310
5. CAUTION IN SERVICING
Before the Digital P.W.B. are replaced
If you cannot specify the cause of the digital PWB defect, carry out "Initializing" → "Update to latest firmware".
The defect may be cleared.
・See the following for the method of initializing the μcom.
Initializing AV SURROUND RECEIVER
AV SURROUND RECEIVER initialization should be performed when the µcom, peripheral parts of µcom, and Digital P.W.B.
are replaced.
1. Switch off the unit.
2. Hold the following STANDARD button and DSP SIMULATION button, and switch on the unit.
3. Check that the entire display is flashing with an interval of about 1 second, and release your fingers from the 2 buttons and
the microprocessor will be initialized.
Note:・If step 3 does not work, start over from step 1.
・All user settings will be lost and this factory setting will be recovered when this initialization mode.
So make sure to memorize your setting for restoring after the initialization.
1,2 2,3
JIG to use for servicing
When you repair the printing board, you can use the following JIG. Please order to Denon Official Service Distributor in your
region if necessary.
Extention cable kit
00D SPK- 561 EXTENSION UNIT KIT : 1 Set
00D SPK- 562 TUCP CONN. JOINT KIT : 1 Set
Extention cable for Idling Current
Parts Number for Extension Cables and Quantity of Unit.
Parts Number Parts Name Q'ty / unit Remarks
612050082004D 6P 250mm NH 1 L=250mm 6P NH Cable
612050083007D 8P 250mm NH 1 L=250mm 8P NH Cable
How to use and Adjust Idle Current.
1. The thin and hard plate (ex. Ruler) is fixed with the tape behind the cable.
2. The voltmeter is connected with the other side of the extension cable.
3. Refer to ADJUSTMENT(Idling Current).
5
AVR-3310CI/AVR-3310/AVR990/AVC-3310
6. DISASSEMBLY d
• Disassemble in order of the arrow of the figure of following flow.
• In the case of the re-assembling, assemble it in order of the reverse of the following flow.
• In the case of the re-assembling, observe "attention of assembling" it.
s
TOP COVER
DIGITAL UNIT ASSY FRONT PANEL UNIT ASSY
Refer to "DISASSEMBLY REG UNIT Refer to "DISASSEMBLY
2. DIGITAL UNIT ASSY" Refer to "DISASSEMBLY 1.FRONT PANEL UNIT ASSY"
and "EXPLODED VIEW" 5. REG UNIT" P.SW UNIT
DIGITAL UNIT and "EXPLODED VIEW" (Ref. No. of EXPLODED VIEW : A-8)
(Ref. No. of EXPLODED VIEW : G) REG UNIT FRONT USB UNIT
(Ref. No. of EXPLODED VIEW : B-4) (Ref. No. of EXPLODED VIEW : E-3)
REG CONNECT-1 UNIT MIC UNIT
BACK PANEL UNIT ASSY (Ref. No. of EXPLODED VIEW : A-15) (Ref. No. of EXPLODED VIEW : A-9)
Refer to "DISASSEMBLY CONNECT UNIT-2 FRONT IN UNIT
3. BACK PANEL UNIT ASSY" (Ref. No. of EXPLODED VIEW : D-4) (Ref. No. of EXPLODED VIEW : A-10)
PTC UNIT VR CONNECT UNIT
d (Ref. No. of EXPLODED VIEW : A-5)
A.VIDEO UNIT, A.AUDIO UNIT VOLUME UNIT
and RADIATOR UNIT ASSY SPEAKER UNIT (Ref. No. of EXPLODED VIEW : A-4)
Refer to "DISASSEMBLY Refer to "DISASSEMBLY FUNC CONNECT UNIT
4. A.VIDEO UNIT, A.AUDIO UNIT 6. AMP UNIT" (Ref. No. of EXPLODED VIEW : A-7)
and RADIATOR UNIT ASSY" and "EXPLODED VIEW" FUNC UNIT
and "EXPLODED VIEW" SPEAKER UNIT (Ref. No. of EXPLODED VIEW : A-6)
A.VIDEO UNIT (Ref. No. of EXPLODED VIEW : D-1) FLD UNIT
(Ref. No. of EXPLODED VIEW : E-1) (Ref. No. of EXPLODED VIEW : A-1)
A.AUDIO UNIT
(Ref. No. of EXPLODED VIEW : E-2) AMP CONNECT UNIT
MAIN CPU UNIT Refer to "DISASSEMBLY
(Ref. No. of EXPLODED VIEW : F) 7. AMP CONNECT UNIT"
REMOTE/IPOD UNIT and "EXPLODED VIEW"
(Ref. No. of EXPLODED VIEW : B-5) AMP CONNECT UNIT
232C UNIT (Ref. No. of EXPLODED VIEW : D-2)
(Ref. No. of EXPLODED VIEW : B-6)
P.AMP UNIT
Refer to "DISASSEMBLY
9.P.AMP UNIT"
and "EXPLODED VIEW"
P.AMP UNIT
(Ref. No. of EXPLODED VIEW : C-1∼7) d
6
AVR-3310CI/AVR-3310/AVR990/AVC-3310
7. About the photos used for descriptions in the “DISASSEMBLY” section.
• The direction from which the photographs used herein were photographed is indicated at "Direction of photograph: ***" at
the left of the respective photographs.
• Refer to the table below for a description of the direction in which the photos were taken.
• Photographs for which no direction is indicated were taken from above the product.
s The viewpoint of each photograph Direction of photograph: B
(Photografy direction)
Front side
[View from above]
Direction of photograph: C Direction of photograph: D
Except AVR-3310CI, AVR-990 model d
Direction of photograph: A
1. FRONT PANEL UNIT ASSY
Proceeding : TOP COVER → FRONT PANEL UNIT ASSY
(1) Remove the screws.
d
View from bottom
(2) Cut the wire clampers then disconnect the connector wires.
CY052 Except EUEC model
s
cut
CX021
Direction of photograph: D
cut
7
AVR-3310CI/AVR-3310/AVR990/AVC-3310
8. (3) Disconnect the FFC Cables. d
FFC Cable
Direction of photograph: C
(4) Remove the screws
s
d
Please refer to "EXPLODED VIEW" for the disassembly method of each P.W.B included in FRONT PANEL ASSY.
[Attention of assembling]
When mounting the FRONT PANEL ASSY on the CHASSIS, do so with the DOOR open so as to prevent
breaking the EARTH PLATE(DOOR).
If the FRONT PANEL ASSY is mounted on the chassis with the DOOR closed, the EARTH PLATE(DOOR) will
hit the CHASSIS and break.
DOOR open
EARTH PLATE (DOOR)
Direction of photograph: A
DOOR
DOOR closed (EARTH PLATE (DOOR) will be broken.)
EARTH PLATE (DOOR)
DOOR
Direction of photograph: A
8
AVR-3310CI/AVR-3310/AVR990/AVC-3310
9. 2. DIGITAL UNIT ASSY
Proceeding : TOP COVER → DIGITAL UNIT ASSY
(1) Remove the screws.
◆
Direction of photograph: A
(2) Remove the alminium tape, then cut the wire clampers. Disconnect the connector wire, FFC Cables, and board to
board.
MAIN CPU UNIT FFC Cable cut FFC Cable CX047 Except EUEC model
s
cut
Board to board
FFC Cable
DIGTAL UNIT ASSY
Alminium Tape CY052
3. BACK PANEL UNIT ASSY
Proceeding : TOP COVER → DIGITAL UNIT ASSY → BACK PANEL UNIT ASSY
Remove the Sheets, then remove the screws.
Sheets
View from bottom
9
AVR-3310CI/AVR-3310/AVR990/AVC-3310
10. Remove the screws.
EUEC model
Direction of photograph: A
s E2 model
Direction of photograph: A
d
E1C model
Direction of photograph: A
10
AVR-3310CI/AVR-3310/AVR990/AVC-3310
11. (3) Disconnect the connector wires and FFC Cable, then remove the screws.
s
CX055 CX074
Style pin : Loose
d
Except AVR-3310CI, AVR-990 model
Cord holder : Loose
Style pin : Loose
CX091
(4) Remove the PWB HOLDER. Disconnect the connector wire and FFC Cable. d
FFC Cable
CX068
Direction of photograph: C
PWB HOLDER
11
AVR-3310CI/AVR-3310/AVR990/AVC-3310
12. 4. A.VIDEO UNIT, AUDIO UNIT and RADIATOR UNIT ASSY
Proceeding : TOP COVER → BACK PANEL UNIT ASSY → DIGITAL UNIT ASSY
→ A.VIDEO UNIT, A.AUDIO UNIT and RADIATOR UNIT ASSY d
(1) Disconnect the board to board and FFC Cable.
Except E1C model
FFC Cable
Direction of photograph: C
MAIN CPU UNIT
d
E1C model
CY034
v
Direction of photograph: C
MAIN CPU UNIT
(2) Disconnect the connector wires.
CX192 CX073
12
AVR-3310CI/AVR-3310/AVR990/AVC-3310
13. (3) Remove the screws.
EUEC model A.VIDEO UNIT
A.AUDIO UNIT d
Direction of photograph: A
RADIATOR UNIT ASSY
s E2 model A.VIDEO UNIT
A.AUDIO UNIT d
Direction of photograph: A
RADIATOR UNIT ASSY
5. REG UNIT
Proceeding : TOP COVER → BACK PANEL UNIT ASSY → DIGITAL UNIT ASSY
→ A.VIDEO UNIT, A.AUDIO UNIT and RADIATOR UNIT ASSY d
→ REG UNIT
(1) Disconnect the board to board and connector wires. Remove the Filament Tape.
Filament Tape
Board to board
HOTMELT
v
Direction of photograph: A CX231 CX092
13
AVR-3310CI/AVR-3310/AVR990/AVC-3310
14. (2) Disconnect the connector wires, then remove the screws.
s
Direction of photograph: A
PTC UNIT
6. SPEAKER UNIT s
Proceeding : TOP COVER → BACK PANEL UNIT ASSY → DIGITAL UNIT ASSY
→ A.VIDEO UNIT, A.AUDIO UNIT and RADIATOR UNIT ASSY d
→ REG UNIT → SPEAKER UNIT
(1) Disconnect the VH connector and conector.
CX871 CX872
CX874
CX875
View from bottom
CX877
CX876
CX891 CX873 CX851
7. AMP CONNECT UNIT s
Proceeding : TOP COVER → BACK PANEL UNIT ASSY → DIGITAL UNIT ASSY
→ A.VIDEO UNIT, A.AUDIO UNIT and RADIATOR UNIT ASSY d
→ REG UNIT → SPEAKER UNIT → AMP CONNECT UNIT
(1) Disconnect the connector.
CX807 CX812 CX811 CX806
Direction of photograph: A
CX805 CX803 CX804
14
AVR-3310CI/AVR-3310/AVR990/AVC-3310
15. 8. P.AMP UNIT s
Proceeding : TOP COVER → BACK PANEL UNIT ASSY → DIGITAL UNIT ASSY
→ A.VIDEO UNIT, A.AUDIO UNIT and RADIATOR UNIT ASSY d
→ REG UNIT → SPEAKER UNIT → →
AMP CONNECT UNIT
→ P.AMP UNIT
(1) Remove the screws.
Direction of photograph: B
15
AVR-3310CI/AVR-3310/AVR990/AVC-3310
16. SPECIAL MODE
Special mode setting button
※ Press the ON/OFF button to turn on while pressing both buttons A and B at the same time.
Mode Button A Button B contents
Serial No. and firmware versions such as Main, Sub, DSP are
Version display
(µcom/DSP Error Display) STATUS RETURN displayed in the FL manager. Errors are displayed when they
occur. (Refer to 16 page.)
Displaying the protection history
Displaying the protection history mode STATUS MENU
(Refer to 18 page.)
Initialization mode DSP Backup data initialization is carried out.
(Remove settings for Installer Setup.) STANDARD SIMULATION (Remove settings for Installer Setup.)
Initialization mode CURSOR UP CURSOR Backup data initialization is carried out.
(Includes settings for Installer Setup) DOWN (Includes settings for Installer Setup)
DIRECT/ ---E2 model only---
Change tuner frequency step to FM:200kHz/AM:10kHzSTEP.f
Mode for switching tuner frequency step STANDARD
STEREO
Operations using remote control are rejected.
Mode for preventing remote control STATUS ENTER (Mode cancellation: Turn off power and execute the same button
acceptance
operations as when performing setup.)
DSP Operations using main unit panel buttons or master volume are
Panel lock mode SIMULATION ZONE2 rejected.
Panel lock mode DIRECT/ ZONE2 Operations using main unit panel buttons are rejected.
(Remove Master volume) STEREO
PURE
Cancellation of panel lock mode ZONE2 Panel lock mode is cancelled.
DIRECT
Access Remote Maintenance mode via the internet.Installer Setup
CURSOR is displayed on GUI/Option Menu.
Installer Setup mode MENU
LEFT
※ Refer to AVR_RemoteMaintenance_.pdf of SDI.
Note:
If " " is displayed on the fluorescent display, the unit is set to the special developer's mode and RS-232C com-
munications are not possible.
Press and hold in the "STATUS" and " ▽ " buttons for over 3 seconds with the power turned on to turn the " "
display off. RS-232C communications are now enabled.
PURE DIRECT/
STANDARD DIRECT STEREO ENTER STATUS
DSP
SIMULATION CURSOR RETURN
ON/OFF ZONE2 MENU
16
AVR-3310CI/AVR-3310/AVR990/AVC-3310
17. 1. Version display (µcom/DSP Error Display)
1.1. Operation Spec
µcom version display mode:
When the following conditions are satisfied at its starting state, error information is displayed before version information.
Starting method (same as µcom version display):
Press the ON/OFF button to turn on while pressing both buttons STATUS and RETURN at the same time.
("Error information" is displayed after about 10 seconds.)
The FL display changes in the order given in item-1.2. each time you press the STATUS button.
1.2. Display Order
Error information(Refer to 1.3. Error display) → qModel destination information wMain-µcom version information/
Main1st Boot Loader eSub µcom rDSP version information tAudio PLD yOSD FPGA Config uOSD Pro-
gram iOSD Font Data oETHER(DM860) First BootLoafer, HardwareID Q0ETHER(DM860) Second BootLoader,
RhapsodyFlag Q1ETHER(DM860) IMAGE Q2ETHER(DM860) MAC ADDRESS information Q3HD RADIO SDK /HD
RADIO DSP(E2 model only) Q4MultEQ Pro APP (Displayed when Audyssey Pro is complete)
Q5MultEQ Pro ICL (Displayed when Audyssey Pro is complete)
No. Display item Display
Model destination
q AVR3 3 1 0 E 3
Cereal No. S / N . 01234 56789
Main-µcom Ma i n : .
w
Main 1st Boot Loder Ma i n FBL : .
Sub-µcom
e Sub : .
DSP
r DSP : .
Audio PLD
t Aud i o PLD : .
FPGA
y OSD Co n f i g :
OSD Program
u OSD PRG :
i OSD Font Data OSD DAT :
o DM860 1st Bootloader E t he r FBL
- Hard ID
-
Q0 DM860 2nd Bootloader E t he r SB L
- Rhapsody Flag
-
Q1 DM860 Image E t he r I MG
-
Q2 ETHER MAC ADDRESS
* E t he r ne t MAC
-
HD RADIO SDK
Q3 * HDSDK : .
HD RADIO DSP * HDDS P : C 0 0 0 2 . 0 0 0
MultEQ Pro APP
Q4 * Mu l t EQ P r o APP
. . .
MultEQ Pro ICL
Q5 * Mu l t EQ P r o I CL
. . .
17
AVR-3310CI/AVR-3310/AVR990/AVC-3310
18. 1.3. Error display
See the following table for each "Error information" display and its contents (status).
Display order is ①②③④⑤ .
Condition State Display
① Sub-µcom
No response from Sub-µcom "□SUB□ □ERROR□01□□"
NG
② DIR NG No response from DIR "□DIR□ □ERROR□01□□"
③ DSP1 NG When DSP boot, executing DSP reset makes no change to DSP1 FLAG0
"□DSP□□ERROR□01□ □"
port "H".
No change to DSP FLAG0 port "H" before issuing DSP command. "□DSP□□ERROR□02□ □"
When DSP data read, executing WRITE="L" makes no change to ACK="H". "□DSP□□ERROR□03□ □"
When DSP data read, executing REQ="L" makes no change to ACK="L". "□DSP□□ERROR□04□ □"
When DSP data write, executing WRITE="H" makes no change to ACK="H". "□DSP□□ERROR□05□ □"
When DSP data write, executing REQ="L" makes no change to ACK="L". "□DSP□□ERROR□06□ □"
When DSP special code boot, executing DSP reset makes no change to
"□DSP□□ERROR□11□ □"
DSP FLAG0 port "H".
No change to DSP FLAG0 port "H" before issuing DSP special read com-
"□DSP□□ERROR□12□ □"
mand.
No change to DSP FLAG0 port "H" before DSP version read. "□DSP□□ERROR□13□ □"
④ EEPROM NG Error appeared in EEPROM checksum.(*** is a block address number.) "□E2PROM□ERR***□ □"
⑤ Both SUB/DSP (No error display, version display
/EEPROM OK only)
2. Displaying the protection history mode
2.1. Operation specifications
ERROR MODE(displaying the protection history)
When started up, the error information is displayed.
Starting up:
With the "MENU" and "STATUS" buttons pressed, press the "ON/OFF" button to turn the power on. The error (protection
history display) mode is set.
Then, press the "STATUS" button to turn on the FL display.
2.2. About the display on the FL display
When the "STATUS" button is pressed after setting the error (protection history display) mode, a history like the one shown
below is displayed, depending on the conditions.
(1) Normally (when there has been no protection incident)
PRO T EC T H I S TOR Y
: NO PROT E C T
(2) For ASO/DC (when the last protection incident was ASO or DC protection)
PRO T EC T H I S TOR Y
: ASO / DC
(3) For THERMAL (when the last protection incident was THERMAL protection)
PRO T EC T H I S TOR Y
: T H E RM A L
When the "STATUS" button is pressed again after the above protection history is displayed, the normal display reappears.
18
AVR-3310CI/AVR-3310/AVR990/AVC-3310
19. 2.3. Clearing the protection history
There are two ways to clear the protection history, as described below.
(1) Start up the error (protection history display) mode, display the error, then press and hold in the "ENTER" button for 3
seconds.
PRO T EC T H I S TOR Y
: T H E RM A L
Press and hold in the "ENTER" button for 3 seconds
PRO T EC T H I S TOR Y
C L E AR
The above is displayed and the protection history is cleared.
PRO T EC T H I S TOR Y
: NO PROT E C T
(2) Initialize.
※ If you want to save a backup, use the method in 2.3.(1) above.
Warning indication by the STANDBY LED
If the power is turned off when a protection incident has been detected, the STANDBY LED (red) flashes as follows as
warning according to the conditions in which the protection incident occurred.
(1) ASO/DC PROTECTION : Flashes in cycles of 0.5 seconds (0.25 seconds lit, 0.25 seconds off)
(2) THERMAL PROTECTION : Flashes in cycles of 2 seconds (1 second lit, 1 second off)
3. Mode for switching tuner frequency step ---E2 model only--- f
3.1. Operation specification
Change tuner frequency step to FM:200kHz/AM:10kHz STEP.
Starting up:
1.With the "STANDARD" and "DIRECT/STEREO" buttons pressed, press the "ON/OFF"
button to turn the power on.
"*Tuner FRQ Set" appears on the display.
* T u n e r F R Q S e t
A M 9 / F M 5 0
2.Use and select "<AM10/FM200>".
* T u n e r F R Q S e t
A M 1 0 / F M 2 0 0
3.Press the "ENTER" button.
4. Press the "ON/OFF" button to turn the power off.
5. Then, press the "ON/OFF" button to turn the power on.
NOTE : Backup data(Remove settings for Installer Setup) initialization is carried out automatically.
19
AVR-3310CI/AVR-3310/AVR990/AVC-3310
20. VERSION UPGRADE PROCEDURE OF FIRMWARE
You can update by downloading the latest firmware from the Internet.
1. Update from the Internet
1.1. Connecting to the Network
(1) System Requirement
• Internet Connection by Broadband Circuit
• Modem
• Router
• Ethernet cable (CAT-5 or greater recommended)
(2) Setting
Internet
Computer
Modem LAN port/
Ethernet
connector
To WAN port
Router
To LAN port
To LAN port
ETHERNET
connector
1.2. Check for Update and Update
Check if the latest firmware exists. You can also check approximately how long it will take to complete an update.
(1) Press the MENU button on the remote control to display the GUI menu.
(2) Use the cursor buttons to select "Manual Setup" → "Option Setup" → "Firmware Update" → "Update Check".
(3) Press the ENTER buttom.
• The latest version of the firmware uploaded to the web is displayed.
• If the latest firmware version is on the web, proceed to (4).
• If the latest firmware is already installed, press the MENU button to close the menu.
(4) Use the cursor buttons to select "Update", then press the ENTER button.
• During update, the power indicator lights red and the GUI screen is shut down. And a rough remaining time is
indicated on the display.
• When updating is complete the power indicator lights green and normal status is resumed.
(5) Press the MENU button to close the menu.
--- Cautions on Firmware Update ---
• In order to use these functions, you must have the correct system requirements and settings for a broadband Internet
connection.
• Do not turn off the power until updating is completed.
Even with a broadband connection to the Internet, approximately about 1 hour is required for the updating procedure to
be completed.
Once updating starts, normal operations on the AVR-3310 cannot be performed until updating is completed. Also, setting
items of the GUI menu of AVR-3310 or setting items of the image adjustment may be initialized.
Make a note of the settings before updating, and set them again after updating.
20
AVR-3310CI/AVR-3310/AVR990/AVC-3310
21. 1.3. About the error code
See the chart below for error codes, details of faults, and coping strategies when firmware updates are performed
through DPMS (Denon Product Management Server).
Error
Details of Error code Display Coping strategies
code
Reset and update again.
01 Log-in to DPMS has failed. Log i n f a i l ed Carry out the update in an environment
that has little network load.
01
Line, etc., is busy when logging Carry out the update in an environment
02
into DPMS.
Se r v e r i s bu s y that has little network load.
02
Check the network connection.
03 Connection to DPMS failed. Conne c t i on f a i l Carry out the update in an environment
that has little network load.
03
Check the network connection.
Firmware file data was requested
04
but error message was received.
Conne c t i on f a i l Carry out the update in an environment
that has little network load.
04
Check the network connection.
Firmware file data was requested
05
but it timed out.
Conne c t i on f a i l Carry out the update in an environment
05 that has little network load.
Check the network connection.
Firmware file data was requested
06
but error message was received.
Conne c t i on f a i l Carry out the update in an environment
that has little network load.
06
Check the network connection.
All firmware file data was
07
requested but it timed out.
Conne c t i on f a i l Carry out the update in an environment
07 that has little network load.
Main CPU firmware file data was Check the network connection.
08 requested but error message was Conne c t i on f a i l Carry out the update in an environment
received. that has little network load.
08
Check the network connection.
Main CPU firmware file data was
09
requested but it timed out.
Conne c t i on f a i l Carry out the update in an environment
that has little network load.
09
Turn the power off then back on.
Error (NG) message received
Updating starts automatically.
0A when downloading Main CPU firm- Down l o ad f a i l Carry out the update in an environment
ware. 0A that has little network load.
Turn the power off then back on.
Error (line congestion) message
Updating starts automatically.
0B received when downloading Main Down l o ad f a i l Carry out the update in an environment
CPU firmware.
0B that has little network load.
Turn the power off then back on.
Error (connection failure) mes-
Updating starts automatically.
0C sage received when downloading Down l o ad f a i l Carry out the update in an environment
Main CPU firmware.
0C that has little network load.
Turn the power off then back on.
Data acquisition failed (timed out)
Updating starts automatically.
0D when downloading Main CPU firm- Conne c t i on f a i l Carry out the update in an environment
ware.
0D that has little network load.
Main CPU failed to receive firm-
Turn the power off then back on.
30 ware for rewriting sent from Ma i n F i rm * * * m i n Updating starts automatically.
DM860 (when timed out).
Upda t i ng f a i l 30
21
AVR-3310CI/AVR-3310/AVR990/AVC-3310
22. Error
Details of Error code Display Coping strategies
code
Main CPU failed to receive firm-
Turn the power off then back on.
31 ware for rewriting sent from Ma i n F i rm * * * m i n Updating starts automatically.
DM860 (when an error )
Upda t i ng f a i l 31
There was invalid data in the firm-
ware for rewriting sent from Turn the power off then back on.
32
DM860 to Main CPU (when a
Ma i n F i rm * * * m i n Updating starts automatically.
Check Sum error). Upda t i ng f a i l 32
The deletion of block data failed Turn the power off then back on.
33
before rewriting Main CPU.
Ma i n F i rm * * * m i n Updating starts automatically.
E r as e f a i l 33
The rewriting of block data failed Turn the power off then back on.
34
when rewriting Main CPU.
Ma i n F i rm * * * m i n Updating starts automatically.
Upda t i ng f a i l 34
The data verification was invalid Turn the power off then back on.
35
after rewriting Main CPU.
Ma i n * * *mi n Updating starts automatically.
U p d a t e C h e c k NG 3 5
Log-in to DPMS has failed when
Carry out the update in an environment
36 rewriting firmware such as Sub Log i n f a i l ed that has little network load.
CPU, DSP, FPGA, and PLD.
36
Line, etc., is busy when logging
into DPMS when rewriting firm- Carry out the update in an environment
37
ware such as Sub CPU, DSP,
Se r v e r i s bu s y that has little network load.
FPGA, and PLD. 37
Connection to DPMS failed when Check the network connection.
38 rewriting firmware such as Sub Conne c t i on f a i l Carry out the update in an environment
CPU, DSP, FPGA, and PLD. that has little network load.
38
Connection to DPMS timed out Check the network connection.
39 when rewriting firmware such as Conne c t i on f a i l Carry out the update in an environment
Sub CPU, DSP, FPGA, and PLD. that has little network load.
39
Turn the power off then back on.
Error (NG) message received
Updating starts automatically.
3A when downloading firmware when Down l o ad f a i l Carry out the update in an environment
rewriting Main CPU.
3A that has little network load.
Turn the power off then back on.
Error (line congestion) message
Updating starts automatically.
3B received when downloading firm- Down l o ad f a i l Carry out the update in an environment
ware when rewriting Main CPU.
3B that has little network load.
Error (connection failure) mes- Turn the power off then back on.
sage received when downloading Updating starts automatically.
3C
firmware when rewriting Main
Down l o ad f a i l Carry out the update in an environment
CPU. 3C that has little network load.
Turn the power off then back on.
Data acquisition failed (timed out)
Updating starts automatically.
3D when downloading firmware when Conne c t i on f a i l Carry out the update in an environment
rewriting Main CPU.
3D that has little network load.
Error message received regarding Check the network connection.
3E firmware data when rewriting Main Conne c t i on f a i l Carry out the update in an environment
CPU. that has little network load.
3E
Firmware file data was requested Check the network connection.
3F but it timed out when rewriting Conne c t i on f a i l Carry out the update in an environment
Main CPU. that has little network load.
3F
22
AVR-3310CI/AVR-3310/AVR990/AVC-3310
23. Error
Details of Error code Display Coping strategies
code
Log-in to DPMS has failed when
Carry out the update in an environment
50 rewriting firmware such as Sub Sub * * *mi n that has little network load.
CPU, DSP, FPGA, and PLD.
Log i n f a i l ed 50
Line, etc., is busy when logging
into DPMS when rewriting firm- Carry out the update in an environment
51
ware such as Sub CPU, DSP,
Sub * * *mi n that has little network load.
FPGA, and PLD. Se r v e r i s bu s y51
Connection to DPMS failed when Check the network connection.
52 rewriting firmware such as Sub Sub * * *mi n Carry out the update in an environment
CPU, DSP, FPGA, and PLD. that has little network load.
Conne c t i onFa i l 52
Connection to DPMS timed out Check the network connection.
53 when rewriting firmware such as Sub * * *mi n Carry out the update in an environment
Sub CPU, DSP, FPGA, and PLD. that has little network load.
Conne c t i onFa i l 53
Error message received regarding
Turn the power off then back on.
firmware data after logging in to
54 DPMS when rewriting firmware Sub * * *mi n Updating starts automatically.
Carry out the update in an environment
such as Sub CPU, DSP, FPGA, Upda t i ng f a i l 54 that has little network load.
and PLD.
When rewriting firmware such as
Turn the power off then back on.
Sub CPU, DSP, FPGA, and PLD,
55 request was made for firmware Sub * * *mi n Updating starts automatically.
Carry out the update in an environment
data after logging in to DPMS, but Upda t i ng f a i l 55 that has little network load.
it timed out.
Failure to download firmware after Turn the power off then back on.
logging in to DPMS when rewriting Updating starts automatically.
56
firmware such as Sub CPU, DSP,
Sub * * *mi n Carry out the update in an environment
FPGA, and PLD. Down l o ad f a i l 56 that has little network load.
Firmware download error received
Turn the power off then back on.
(line congestion) after logging in to
57 DPMS when rewriting firmware Sub * * *mi n Updating starts automatically.
Carry out the update in an environment
such as Sub CPU, DSP, FPGA, Se r v e r i s bu s y57 that has little network load.
and PLD.
Firmware download error received
Turn the power off then back on.
(connection failure) after logging in
58 to DPMS when rewriting firmware Sub * * *mi n Updating starts automatically.
Carry out the update in an environment
such as Sub CPU, DSP, FPGA, Conne c t i onFa i l 58 that has little network load.
and PLD.
When rewriting firmware such as
Turn the power off then back on.
Sub CPU, DSP, FPGA, and PLD,
59 request was made for downloading Sub * * *mi n Updating starts automatically.
Carry out the update in an environment
firmware after logging in to DPMS, Down l o ad f a i l 59 that has little network load.
but it timed out.
NACK received when “C” com-
Turn the power off then back on.
5A mand sent to Sub CPU, DSP, Sub * * *mi n Updating starts automatically.
FPGA, PLD etc.
Conne c t i onFa i l 5A
NACK received when “L” com-
Turn the power off then back on.
5B mand sent to Sub CPU, DSP, Sub * * *mi n Updating starts automatically.
FPGA, PLD etc.
Upda t i ng f a i l 5B
Sub CPU, DSP, FPGA, PLD etc.
failed to receive firmware for Turn the power off then back on.
5C
rewriting sent from DM860 (when
Sub * * *mi n Updating starts automatically.
timed out). Upda t i ng f a i l 5C
Sub CPU, DSP, FPGA, PLD etc.
failed to receive firmware for Turn the power off then back on.
5D
rewriting sent from DM860 (when Sub * * *mi n Updating starts automatically.
an error). Upda t i ng f a i l 5D
Invalid data in firmware such as
Sub CPU, DSP, FPGA, and PLD Turn the power off then back on.
5E
for rewriting sent from DM860
Sub * * *mi n Updating starts automatically.
(when a Check Sum error). Upda t i ng f a i l 5E
23
AVR-3310CI/AVR-3310/AVR990/AVC-3310
24. Error
Details of Error code Display Coping strategies
code
Invalid data in firmware such as
Sub CPU, DSP, FPGA, and PLD Turn the power off then back on.
5F
for rewriting sent from DM860
Sub * * *mi n Updating starts automatically.
(invalid data received). Upda t i ng f a i l 5F
NACK received when “P” com-
Turn the power off then back on.
60 mand sent to Sub CPU, DSP, Sub * * *mi n Updating starts automatically.
FPGA, PLD etc.
Upda t i ng f a i l 60
NACK received when “I” command
Turn the power off then back on.
61 sent to Sub CPU, DSP, FPGA, Sub * * *mi n Updating starts automatically.
PLD etc.
U p d a t e C h e c k NG 6 1
Failure to acquire serial flash data Turn the power off then back on.
80
and before deleting serial flash.
GU I F l a s h * * * m i n Updating starts automatically.
Upda t i ng f a i l 80
Failure to delete data before rewrit- Turn the power off then back on.
81
ing serial flash.
GU I F l a s h * * * m i n Updating starts automatically.
Upda t i ng f a i l 81
Failure to receive firmware for
Turn the power off then back on.
82 serial flash rewriting sent by GU I F l a s h * * * m i n Updating starts automatically.
DM860 (when timed out).
Upda t i ng f a i l 82
Failure to receive firmware for
Turn the power off then back on.
83 serial flash rewriting sent by GU I F l a s h * * * m i n Updating starts automatically.
DM860 (when an error).
Upda t i ng f a i l 83
Failure to receive firmware for
Turn the power off then back on.
84 serial flash rewriting sent by GU I F l a s h * * * m i n Updating starts automatically.
DM860 (when a Check Sum error).
Upda t i ng f a i l 84
Failure to receive firmware for
serial flash rewriting sent by Turn the power off then back on.
85
DM860 (when invalid data
GU I F l a s h * * * m i n Updating starts automatically.
received). Upda t i ng f a i l 85
Failure to rewrite when writing data Turn the power off then back on.
86
in serial flash.
GU I F l a s h * * * m i n Updating starts automatically.
Upda t i ng f a i l 86
Failure to acquire (Application Check the network connection.
A0 Mode) IP address before rewriting E t he r I MG * * * m i n Carry out the update in an environment
DM860 (AutoIP). that has little network load.
Conne c t i onFa i l A0
Failure to acquire (Application Check the network connection.
A1 Mode) IP address before rewriting E t he r I MG * * * m i n Carry out the update in an environment
DM860 (when timed out). that has little network load.
Conne c t i onFa i l A1
Notification of invalid login via
Check the network connection.
DPMS access when rewriting
A2
DM860 related firmware (Applica- E t he r I MG * * * m i n Carry out the update in an environment
tion Mode). Log i n f a i l ed A2 that has little network load.
Notification of line congestion via
Check the network connection.
DPMS access when rewriting
A3
DM860 related firmware (Applica-
E t he r I MG * * *mi n Carry out the update in an environment
that has little network load.
tion Mode). Se r v e r i s bu s yA3
Notification of connection failure
Check the network connection.
via DPMS access when rewriting
A4
DM860 related firmware (Applica-
E t he r I MG * * * m i n Carry out the update in an environment
that has little network load.
tion Mode). Conne c t i onFa i l A4
24
AVR-3310CI/AVR-3310/AVR990/AVC-3310
25. Error
Details of Error code Display Coping strategies
code
Connection through DPMS access
Check the network connection.
timed out when rewriting DM860
A5
related firmware (Application
E t he r I MG * * * m i n Carry out the update in an environment
that has little network load.
Mode). Conne c t i onFa i l A5
Firmware data error message Turn the power off then back on.
received after DPMS login when Updating starts automatically.
A6
rewriting DM860 related firmware
E t he r I MG * * * m i n Carry out the update in an environment
(Application Mode). Upda t i ng f a i l A6 that has little network load.
When rewriting DM860 related
Turn the power off then back on.
firmware (Application Mode),
A7 request was made for firmware E t he r I MG * * * m i n Updating starts automatically.
Carry out the update in an environment
data after DPMS login but it timed Upda t i ng f a i l A7 that has little network load.
out.
Failure to acquire (Boot Loader Check the network connection.
A8 Mode) IP address before rewriting E t he r I MG * * * m i n Carry out the update in an environment
DM860 (AutoIP).
Conne c t i onFa i l A8 that has little network load.
Failure to acquire (Boot Loader Check the network connection.
A9 Mode) IP address before rewriting E t he r I MG * * * m i n Carry out the update in an environment
DM860 (when timed out). that has little network load.
Conne c t i onFa i l A9
Notification of invalid login via
Check the network connection.
DPMS access when rewriting
AA
DM860 related firmware (Boot
E t he r I MG * * * m i n Carry out the update in an environment
that has little network load.
Loader Mode). Log i n f a i l ed AA
Notification of line congestion via
Check the network connection.
DPMS access when rewriting
AB
DM860 related firmware (Boot
E t he r I MG * * *mi n Carry out the update in an environment
that has little network load.
Loader Mode). Se r v e r i s b u s y AB
Notification of connection failure
Check the network connection.
via DPMS access when rewriting
AC
DM860 related firmware (Boot
E t he r I MG * * * m i n Carry out the update in an environment
that has little network load.
Loader Mode). C o n n e c t i o n F a i l AC
Connection through DPMS access
Check the network connection.
timed out when rewriting DM860
AD
related firmware (Boot Loader
E t he r I MG * * * m i n Carry out the update in an environment
Mode). C o n n e c t i o n F a i l AD that has little network load.
Firmware download error message Turn the power off then back on.
received (when download fails) Updating starts automatically.
AE
when rewriting DM860 related firm-
E t he r I MG * * * m i n Carry out the update in an environment
ware (Boot Loader Mode). Down l o a d f a i l AE that has little network load.
Firmware download error message Turn the power off then back on.
received (line congestion) when Updating starts automatically.
AF
rewriting DM860 related firmware E t he r I MG * * *mi n Carry out the update in an environment
(Boot Loader Mode). Se r v e r i s b u s y AF that has little network load.
Firmware download error message Turn the power off then back on.
received (connection failure) when Updating starts automatically.
B0
rewriting DM860 related firmware E t he r I MG * * * m i n Carry out the update in an environment
(Boot Loader Mode). Conne c t i onFa i l B0 that has little network load.
When rewriting DM860 related Turn the power off then back on.
firmware (Boot Loader Mode), Updating starts automatically.
B1
request was made for firmware
E t he r I MG * * * m i n Carry out the update in an environment
download but it timed out . Down l o ad f a i l B1 that has little network load.
Turn the power off then back on.
Error message received when Updating starts automatically.
B2
rewriting DM860 related firmware.
E t he r I MG * * * m i n Carry out the update in an environment
Upda t i ng f a i l B2 that has little network load.
25
AVR-3310CI/AVR-3310/AVR990/AVC-3310
26. Device display when firmware updated
Target of devide when firmware updated.
Target of device Display Error cpde
Main Ma i n F i rm * * *mi n 30 ∼ 35
Upda t i ng
Sub Sub * * *mi n 50 ∼ 61
Upda t i ng
Audio PLD AP LD * * *mi n 50 ∼ 61
Upda t i ng
DSP DSP * * *mi n 50 ∼ 61
Upda t i ng
OSD
(FPGA/Program/ OSD * * *mi n 80 ∼ 86
Font Data)
Upda t i ng
DM860 Boot Loader E t h e r SB L * * *mi n A0 ∼ B2
Upda t i ng
DM860 Image E t he r I MG * * *mi n A0 ∼ B2
Upda t i ng
26
AVR-3310CI/AVR-3310/AVR990/AVC-3310
27. ADJUSTMENT
Audio Section
Idling Current (8U-110062, 8U-110063-3)
Required measurement equipment: DC Voltmeter
Preparation
(1) Avoid direct blow from an air conditioner or an electric fan, and adjust the unit at normal room temperature 15°C ~ 30°C
(59°F ~ 86°F).
(2) Presetting
POWER (Power source switch) OFF
SPEAKER (Speaker terminal) No load
(Do not connect speaker, dummy resistor, etc.)
Adjustment
(1) Remove top cover and set VR101, VR201, VR301, VR401, VR501, VR601, VR701, on 8U-110062 (POWER AMP Unit)
at fully counterclockwise ( ).
(2) Connect DC Voltmeter to test points(8U-110063-3).
• FRONT-Lch: CX660 ③ ④ pin
• FRONT-Rch: CX660 ⑤ ⑥ pin
• CENTER ch: CX660 ① ② pin
• SURROUND-Lch: CX680 ⑤ ⑥ pin
• SURROUND-Rch: CX680 ⑦ ⑧ pin
• SURROUND BACK-Lch: CX680 ① ② pin
• SURROUND BACK-Rch: CX680 ③ ④ pin)
(3) Connect power cord to AC Line, and turn power switch "ON".
(4) Presetting.
MASTER VOLUME : "---" counterclockwise ( min.)
MODE : 7CH STEREO
FUNCTION : CD
(5) Allow 2 minutes, and turn VR101 clockwise ( ) to adjust the TEST POINT voltage to 8 mV ± 0.5 mV DC.
(6) After 10 minutes from preset, turn VR101 to set the voltage to 8 mV ± 0.5 mV DC.
(7) Adjust the Variable Resistors of other channels in the same way.
(8) After 5 minutes from (6), turn VR101 to set the voltage to 8 mV ± 0.5 mV DC.
(9) Adjust the Variable Resistors of other channels in the same way.
27
AVR-3310CI/AVR-3310/AVR990/AVC-3310
28. DC Voltmeter CX680 CX660
SBR ch
SBL ch
SR ch
FR ch
SL ch
FL ch
C ch
8U-310039 DIGITAL Unit
8U-110061-4 POWER SUPPLY Unit
VR501 VR301
VR701 VR601 VR401 VR201 VR101
Audio Section
Adjustment volume is set for 8U-110062-1 ∼ 7. The test point is at 8U-110063-3.
Insert an adjustment driver / connection terminal from an adjustment aperture of 8U-110061-4(POWER SUPPLY Unit)P.W.B..
28
AVR-3310CI/AVR-3310/AVR990/AVC-3310
29. Surround Modes and Parameters
Signals and adjustability in the different modes
Channel output Parameter (default values are shown in parentheses)
Surround Mode
Front Surround Surround Front Wide Front Height D. COMP DRC LFE AFDM Surround
Center Subwoofer Cinema EQ. Mode Room Size Effect Level
L/R L/R Back L/R L/R L/R z1 z2 z3 z1 Back
PURE DIRECT, DIRECT (2ch) S A A A Dz4 A A S (OFF) S (Auto) S (0 dB) A A A A A A
DSD DIRECT S A A A A A A A A A A A A A A A
DSD MULTI DIRECT S D D D D A A A A S (0 dB) A S A A A A
MULTI CH DIRECT S D D D D A A A A S (0 dB) S (ON) S A A A A
STEREO S A A A D A A S (OFF) S (Auto) S (0 dB) A A A A A A
EXT. IN S D D D D A A A A A A A A A A A
MULTI CH IN S D D D D D (NOTE4) D (NOTE4) A A S (0 dB) S (ON) S S (OFF) A A A
WIDE SCREEN S D D D D D D S (OFF) S (Auto) S (0 dB) A S S (OFF) A A S (ON, 10)
DOLBY PRO LOGIC gz S D D A D A D S (OFF) S (Auto) S (0 dB) A A A S (Height) A A
DOLBY PRO LOGIC gx S D D D D A A S (OFF) S (Auto) A A S S (NOTE1) S (Cinema) A A
DOLBY PRO LOGIC g S D D A D D (NOTE4) D (NOTE4) S (OFF) S (Auto) A A S S (NOTE2) S (Cinema) A A
DTS NEO:6 S D D D D D (NOTE4) D (NOTE4) S (OFF) S (Auto) A A S S (NOTE1) S (Cinema) A A
DOLBY DIGITAL S D D D D D (NOTE4) D (NOTE3) S (OFF) A S (0 dB) S (ON) S S (OFF) A A A
DOLBY DIGITAL Plus S D D D D D (NOTE4) D (NOTE3) S (OFF) A S (0 dB) S (ON) S S (OFF) A A A
DOLBY TrueHD S D D D D D (NOTE4) D (NOTE3) A S (Auto) S (0 dB) S (ON) S S (OFF) A A A
DTS SURROUND S D D D D D (NOTE4) D (NOTE3) S (OFF) A S (0 dB) S (ON) S S (OFF) A A A
DTS 96/24 S D D D D D (NOTE4) D (NOTE3) S (OFF) A S (0 dB) S (ON) S S (OFF) A A A
29
DTS-HD S D D D D D (NOTE4) D (NOTE3) S (OFF) A S (0 dB) S (ON) S S (OFF) A A A
DTS EXPRESS S D D D D D (NOTE4) D (NOTE3) S (OFF) A S (0 dB) S (ON) S S (OFF) A A A
SURROUND MODES AND PARAMETERS
neural S D D D D D (NOTE4) D (NOTE4) A A A A S A A A A
7CH STEREO S D D D D D D S (OFF) S (Auto) S (0 dB) A S A A A A
SUPER STADIUM S D D D D D D S (OFF) S (Auto) S (0 dB) A S A A S (Medium) S (10)
ROCK ARENA S D D D D D D S (OFF) S (Auto) S (0 dB) A S A A S (Medium) S (10)
JAZZ CLUB S D D D D D D S (OFF) S (Auto) S (0 dB) A S A A S (Medium) S (10)
CLASSIC CONCERT S D D D D D D S (OFF) S (Auto) S (0 dB) A S A A S (Medium) S (10)
MONO MOVIE S D D D D D D S (OFF) S (Auto) S (0 dB) A S A A S (Medium) S (10)
VIDEO GAME S D D D D D D S (OFF) S (Auto) S (0 dB) A S A A S (Medium) S (10)
AVR-3310CI/AVR-3310/AVR990/AVC-3310
MATRIX S D D D D D D S (OFF) S (Auto) S (0 dB) A S A A A A
VIRTUAL S A A A D A A S (OFF) S (Auto) S (0 dB) A A A A A A
S : Signal / Adjustable
A : No signal / Not adjustable
D : Turned on or off by speaker configuration setting
NOTE1 : This parameter is availabe when the “Mode” is set to “Cinema” (vpage 73).
NOTE2 : This parameter is availabe when the “Mode” is set to “Cinema” or “ProLogic” (vpage 73).
NOTE3 : This parameter is availabe when the “Front Height” is set to “ON” or “DSX” is set to “ON” (vpage 74, 76).
NOTE4 : This parameter is availabe when the “DSX” is set to “ON” (vpage 76).
NOTE:
z1 : When playing Dolby Digital and DTS signals.
z2 : When playing Dolby TrueHD signal.
z3 : When playing Dolby Digital, DTS, DVD-Audio and Super Audio CD.
z4 : When the “Subwoofer Mode” is set to “LFE+Main” (vpage 35) only.
30. Signals and adjustability in the different modes
Parameter (default values are shown in parentheses)
NEO:6 MUSIC
Surround Mode PRO LOGIC g/gx MUSIC mode only EXT. IN only
mode only Dynamic
Delay Time Subwoofer Front Height Tone Control MultEQ XT Dynamic EQ RESTORER DSX
Subwoofer Volume
Panorama Dimension Center Width Center Image
Att.
PURE DIRECT, DIRECT (2ch) A S A A A A A A A A A A A A
DSD DIRECT A A A A A A A A A A A A A A
DSD MULTI DIRECT A A A A A A A A A A A A A A
MULTI CH DIRECT A A A A A A A A A A A A A A
STEREO A A A A A A A A S (OFF) S (OFF) S S S A
EXT. IN A A A A A A A S A A A A A A
MULTI CH IN A A S A A A A A S (OFF) S (OFF) S S A S
WIDE SCREEN A A A A A A A A S (OFF) S (OFF) S S S A
DOLBY PRO LOGIC gz A A S A A A A A S (OFF) S (OFF) S S S A
DOLBY PRO LOGIC gx A A S S (OFF) S (3) S (3) A A S (OFF) S (OFF) S S S A
DOLBY PRO LOGIC g A A S S (OFF) S (3) S (3) A A S (OFF) S (OFF) S S S S
DTS NEO:6 A A A A A A S (0.3) A S (OFF) S (OFF) S S S S
DOLBY DIGITAL A A S A A A A A S (OFF) S (OFF) S S A S
DOLBY DIGITAL Plus A A S A A A A A S (OFF) S (OFF) S S A S
DOLBY TrueHD A A S A A A A A S (OFF) S (OFF) S S A S
DTS SURROUND A A S A A A A A S (OFF) S (OFF) S S A S
DTS 96/24 A A S A A A A A S (OFF) S (OFF) S S A S
DTS-HD A A S A A A A A S (OFF) S (OFF) S S A S
30
DTS EXPRESS A A S A A A A A S (OFF) S (OFF) S S A S
neural A A A A A A A A S (OFF) S (OFF) S S S S
7CH STEREO A A A A A A A A S (OFF) S (OFF) S S S A
SUPER STADIUM A A A A A A A A S (NOTE5) S (OFF) S S S A
ROCK ARENA A A A A A A A A S (NOTE6) S (OFF) S S S A
JAZZ CLUB A A A A A A A A S (OFF) S (OFF) S S S A
CLASSIC CONCERT A A A A A A A A S (OFF) S (OFF) S S S A
MONO MOVIE A A A A A A A A S (OFF) S (OFF) S S S A
VIDEO GAME A A A A A A A A S (OFF) S (OFF) S S S A
MATRIX
AVR-3310CI/AVR-3310/AVR990/AVC-3310
S (30 ms) A A A A A A A S (OFF) S (OFF) S S S A
VIRTUAL A A A A A A A A S (OFF) S (OFF) S S S A
S : Signal / Adjustable
A : No signal / Not adjustable
NOTE5 : BASS +6 dB, TREBLE 0 dB
NOTE6 : BASS +6 dB, TREBLE +4 dB