Human interface guidelines_v1.8.0
•
0 recomendaciones•1,633 vistas

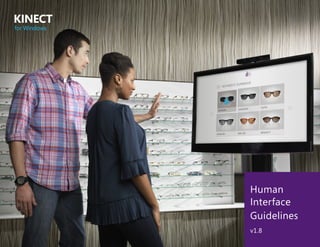
Welcome to the world of Microsoft Kinect for Windows–enabled applications. This document is your roadmap to building exciting humancomputer interaction solutions you once thought were impossible.

Recomendados
Recomendados
Más contenido relacionado
La actualidad más candente
La actualidad más candente (20)
Destacado
Destacado (8)
Similar a Human interface guidelines_v1.8.0
Similar a Human interface guidelines_v1.8.0 (20)
Último
Último (20)
Human interface guidelines_v1.8.0
- 2. Kinect for Windows | Human Interface Guidelines v1.8 2 ©2013 Microsoft Corporation. All rights reserved. Acknowledgement and waiver You acknowledge that this document is provided “as-is,” and that you bear the risk of using it. (Information and views expressed in this document, including URL and other Internet Web site references, may change without notice.) This document does not provide you with any legal rights to any intellectual property in any Microsoft product. The information in this document is also not intended to constitute legal or other professional advice or to be used as a substitute for specific advice from a licensed professional. You should not act (or refrain from acting) based on information in this document without obtaining professional advice about your particular facts and circumstances. You may copy and use this document for your internal, reference purposes. In using the Kinect software and Kinect sensors described in this document, you assume all risk that your use of the Kinect sensors and/or the software causes any harm or loss, including to the end users of your Kinect for Windows applications, and you agree to waive all claims against Microsoft and its affiliates related to such use (including but not limited to any claim that a Kinect sensor or the Kinect software is defective) and to hold Microsoft and its affiliates harmless from such claims. Microsoft, Kinect, Windows, and Xbox are registered trademarks, and Xbox360 is a trademark, of the Microsoft group of companies. All other trademarks are property of their respective owners.
- 3. Kinect for Windows | Human Interface Guidelines v1.8 3 Contents Introduction Learn about the Kinect for Windows sensor and SDK, and how placement and environment affect its use Interaction Design Tenets for Kinect for Windows Learn about our design principles and how to design the best input for the task Gesture Learn interaction design considerations for various types of gesture Voice Learn interaction design considerations for voice, including language and audio considerations Feedback Learn about interaction design considerations for gestural and audio feedback, text prompts, and more Basic Interactions Learn about the areas of the Kinect screen and user space, plus details on engaging, targeting, selecting, panning and scrolling, zooming, and entering text Additional Interactions Learn about distance-dependent interactions, and designing for multiple inputs and users Conclusion 4 14 21 46 60 77 118 135
- 4. Kinect for Windows | Human Interface Guidelines v1.8 4 Introduction Welcome to the world of Microsoft Kinect for Windows–enabled applications. This document is your roadmap to building exciting human- computer interaction solutions you once thought were impossible. We want to help make your experience with Microsoft Kinect for Windows, and your users’ experiences, the best. So, we’re going to set you off on a path toward success by sharing our most effective design tips, based on our long-term design, development, and usability work. You’ll be able to focus on all those unique challenges you want to tackle. Keep this guide at hand – because, as we regularly update it to reflect both our ongoing findings and the evolving capabilities of Kinect for Windows, you’ll stay on the cutting edge. Before we get into design tips, it will help to start with a couple of basics: a quick introduction to the Kinect for Windows sensor, software development kit (SDK), and Developer Toolkit, and some environment and sensor setup considerations. Introduction Kinect for Windows | Human Interface Guidelines v1.8 4
- 5. Kinect for Windows | Human Interface Guidelines v1.8 5 Meet the Kinect for Windows Sensor and SDK The Kinect for Windows sensor and SDK provide the ears and eyes of your application. You’ll want to keep their capabilities in mind as you design your application. Introduction > Meet the Kinect for Windows Sensor and SDK
- 6. Kinect for Windows | Human Interface Guidelines v1.8 6 Introduction > Meet the Kinect for Windows Sensor and SDK How Kinect for Windows sensor, SDK, and Toolkit work together The Kinect for Windows sensor, SDK, and Toolkit work as a team to provide new and exciting capabilities to your application. Kinect for Windows sensor Provides raw color image frames from the RGB camera, depth image frames from the depth camera, and audio data from the microphone array to the SDK. Kinect for Windows SDK Processes the raw data from the sensor to provide you with information such as skeleton tracking for two people, player tracking for six people, and word recognition from audio data for a given language. You can download the SDK free from www.KinectforWindows.com. Kinect for Windows Developer Toolkit Using the Toolkit is optional, but you can find code samples in it that show how to use features of the SDK, as well as components such as Kinect Button and Kinect Cursor, which help you build interfaces faster. Using the components in the Toolkit lets you focus on your unique problem, and makes the user experience of your application consistent with other Kinect for Windows–enabled applications. Throughout this document, whenever we reference a sample or control, it is in the Developer Toolkit, also downloadable at www.KinectforWindows.com. The following sections cover what this team of products does to bring natural experiences to your application. When we say “Kinect for Windows,” we mean the “sensor” and SDK working together, unless otherwise specified.
- 7. Kinect for Windows | Human Interface Guidelines v1.8 7 • Physical limits: 0.4m to 3m • Sweet spot: 0.8m to 2.5m What Kinect for Windows sees Kinect for Windows is versatile, and can see people holistically, not just smaller hand gestures. Six people can be tracked, including two whole skeletons. The sensor has an RGB (red-green-blue) camera for color video, and an infrared emitter and camera that measure depth. The measurements for depth are returned in millimeters. The Kinect for Windows sensor enables a wide variety of interactions, but any sensor has “sweet spots” and limitations. With this in mind, we defined its focus and limits as follows: Physical limits – The actual capabilities of the sensor and what it can see. Sweet spots – Areas where people experience optimal interactions, given that they’ll often have a large range of movement and need to be tracked with their arms or legs extended. 27° 43.5° 27° 57.5° 0.4m/1.3ft sweet spot physical limits 3m/9.8ft 0.8m/2.6ft 2.5m/8.2ft sweet spot physical limits0.8m/2.6ft 4m/13.1ft 1.2m/4ft 3.5m/11.5ft Near mode depth ranges • Physical limits: 0.8m to 4m (default) Extended depth (beyond 4m) can also be retrieved but skeleton and player tracking get noisier the further you get away, and therefore may be unreliable. • Sweet spot: 1.2m to 3.5m Default mode depth ranges • Horizontal: 57.5 degrees • Vertical: 43.5 degrees, with -27 to +27 degree tilt range up and down Angle of vision (depth and RGB) Note that Near mode is an actual setting for Kinect for Windows, and is different from the various ranges we detail in Interaction Ranges, later in this document. Introduction > Meet the Kinect for Windows Sensor and SDK
- 8. Kinect for Windows | Human Interface Guidelines v1.8 8 Skeleton tracking Full skeleton mode Seated mode Kinect for Windows can track up to six people within its view, including two whole skeletons. Kinect for Windows can track skeletons in default full skeleton mode with 20 joints. Kinect for Windows can also track seated skeletons with only the upper 10 joints. Introduction > Meet the Kinect for Windows Sensor and SDK
- 9. Kinect for Windows | Human Interface Guidelines v1.8 9 Audio input Microphone array Sound threshold The Kinect for Windows sensor detects audio input from + and – 50 degrees in front of the sensor. The microphone array can be pointed at 10-degree increments within the 100-degree range. This can be used to be specific about the direction of important sounds, such as a person speaking, but it will not completely remove other ambient noise. The microphone array can cancel 20dB (decibels) of ambient noise, which improves audio fidelity. That’s about the sound level of a whisper. (Kinect for Windows supports monophonic sound cancellation, but not stereophonic.) Sound coming from behind the sensor gets an additional 6dB suppression based on the design of the microphone housing. What Kinect for Windows hears Kinect for Windows is unique because its single sensor captures both voice and gesture, from face tracking and small movements to whole- body. The sensor has four microphones that enable your application to respond to verbal input, in addition to responding to movement. For more information about audio and voice issues, see Voice, later in this document. 20 decibels cancelled Introduction > Meet the Kinect for Windows Sensor and SDK
- 10. Kinect for Windows | Human Interface Guidelines v1.8 10 Directional microphone Loudest source targeting You can also programmatically direct the microphone array – for example, toward a set location, or following a skeleton as it’s tracked. By default, Kinect for Windows tracks the loudest audio input. track me! Introduction > Meet the Kinect for Windows Sensor and SDK
- 11. Kinect for Windows | Human Interface Guidelines v1.8 11 Introduction > Consider Sensor Placement and Environment Consider Sensor Placement and Environment The situation in which your Kinect for Windows–enabled application is used can affect how users perceive its reliability and usability. Don’t forget to test your application early (and often) with the kind of environment and setup you expect it to ultimately be used in. Consider the following factors when you design your application. For more information, see Choose the Right Environment for Voice, and Best Setup for Controls and Interactions, later in this document.
- 12. Kinect for Windows | Human Interface Guidelines v1.8 12 Introduction > Consider Sensor Placement and Environment Will many people be moving around the sensor? You’ll want an optimal setup and space where no one comes between the engaged user and the sensor. For example, you might want an interaction area defined by using a sticker on the floor to indicate where the user should stand, or by roping off an area so that people walk around. Will you rely on voice as an input method? Voice input requires a quiet environment for reliable results. If you can’t control ambient noise level, try designing for user interaction closer to the sensor. If a noisy environment is unavoidable, voice might work better as augmenting other inputs (but not as the sole input method). How far back are your users? Consider what they can comfortably see. Design your user interface to account for the distance at which people will interact, within the range of the sensor. Users who are older or visually impaired might need graphics or fonts to be larger. What will the lighting situation be? Lighting affects image quality in different ways. So, if you envision a particular design, you’ll want to specify that users check their lighting; and if you expect a certain kind of lighting, you’ll need to design around those limitations. For example, ideally the light will come from behind the sensor. The infrared depth camera works in all lighting situations (even darkness), but better in moderate light than in direct sunlight or full-spectrum lighting. Dim lighting is fine for depth- sensing applications (such as using avatars); with large amounts of natural light, skeleton tracking is less reliable. On the other hand, color image quality does require good lighting (for example, if you’ll use green-screening).
- 13. Kinect for Windows | Human Interface Guidelines v1.8 13 Introduction > Consider Sensor Placement and Environment How will your users dress? Items that drastically change the shape of a person wearing or holding them might confuse skeleton tracking. For example, black clothing, as well as reflective items, can interfere with the infrared camera and make skeleton tracking less reliable. Where will the sensor be placed? Because your users will be interacting with the screen, place the sensor above or below the screen, to directly face the subjects it’s expected to track. Avoid extreme tilt angles. If you’re using the Kinect for Windows controls and interactions we provide, the distance between the user and the sensor that will provide the most reliable behavior is between 1.5 and 2 meters. If your scenario involves simple motion or blob detection and doesn’t rely on skeleton tracking, you can mount the sensor to the ceiling or at other angles.
- 14. Kinect for Windows | Human Interface Guidelines v1.8 14 Interaction Design Tenets for Kinect for Windows Kinect for Windows opens up a new world of gesture design and voice design. 14 Interaction Design Tenets for Kinect for Windows Kinect for Windows | Human Interface Guidelines v1.8
- 15. Kinect for Windows | Human Interface Guidelines v1.8 15 Overall Design Principles Before we go into to our design guidelines, we recommend you first read this brief section for some very important interaction tenets. They reflect the best ways we’ve found to employ gesture and voice, and to avoid some thorny issues. Keep the following in mind as you design your interactions. Interaction Design Tenets for Kinect for Windows > Overall Design Principles
- 16. Kinect for Windows | Human Interface Guidelines v1.8 16 The best user experiences are context-aware. • Your UI should adapt as the distance between the user and the sensor changes. • Your UI should respond to the number and engagement of users. • Place your controls based on expected user movements or actions. • Make sure your interactions are appropriate for the environment in which your application will be used. • The further the user, the wider the range of movement. • The closer the user, the more and finer the content, tasks, and gestures. • Environment affects user input. Each input method is best at something and worst at something. • Users choose the input that requires the least overall effort for a given scenario. • People tend to stick to a single input unless they have a reason to change. • Input methods should be reliable, consistent, and convenient – otherwise people will look for alternative options. • Switching input methods should happen intuitively, or at natural transition points in the scenario. The strongest designs come after user testing. • Kinect for Windows enables a lot of new interactions, but also brings new challenges. • It’s especially hard to guess ahead of time what will work and what won’t. • Sometimes minor adjustments can make a huge difference. • Conduct user tests often and early, and allow time in your schedule for adjustments to your design. Confident users are happy users. • It’s important to keep interactions simple, and easy to learn and master. • Avoid misinterpreting user intent. • Give constant feedback so people always know what’s happening and what to expect. Interaction Design Tenets for Kinect for Windows > Overall Design Principles
- 17. Kinect for Windows | Human Interface Guidelines v1.8 17 Strong Inputs In order to provide a good experience and not frustrate users, a strong voice and gesture interaction design should fulfill a number of requirements. To start with, it should be natural, with an appropriate and smooth learning curve for users. A slightly higher learning curve, with richer functionality, may be appropriate for expert users who will use the application frequently (for example, in an office setting for daily tasks). Interaction Design Tenets for Kinect for Windows > Strong Inputs For more information about designing for different distance ranges, see Distance-Dependent Interactions, later in this document.
- 18. Kinect for Windows | Human Interface Guidelines v1.8 18 Interaction Design Tenets for Kinect for Windows > Strong Inputs A strong voice and gesture interaction design should be: • Considerate of user expectations from their use of other common input mechanisms (touch, keyboard, mouse). • Ergonomically comfortable. • Low in interactional cost for infrequent or large numbers of users (for example, a kiosk in a public place). • Integrated, easily understandable, user education for any new interaction. • Precise, reliable, and fast. • Considerate of sociological factors. People should feel comfortable using the input in their environment.
- 19. Kinect for Windows | Human Interface Guidelines v1.8 19 Intuitive, with easy “mental mapping.” Efficient at a variety of distance ranges. Easy to back out of if mistakenly started, rather than users having to complete the action before undoing or canceling. Appropriate for the amount and type of content displayed. Interaction Design Tenets for Kinect for Windows > Strong Inputs
- 20. Kinect for Windows | Human Interface Guidelines v1.8 20 The Right Input Mode for Your Task As you design your interactions, keep in mind all the input methods available to you, and the pros and cons each have to offer. Interaction Design Tenets for Kinect for Windows > Strong Inputs Enable users to accomplish tasks quickly and intuitively. Use each input mode for what it’s naturally best at. Take user orientation and location into account so that input modes are switched only when it’s convenient and benefits productivity. Force users to use inappropriate input methods for certain tasks just because they’re good for other tasks in the scenario. Require an input method that feels forced, unnatural, awkward, or tedious. Do Don’t Switch input modes for the sake of variety or effect. Natural actions If one interaction is better at a given task, consider using that one instead of forcing all interactions into one input mode. For example, for entering text, let people use their physical keyboard or a touch interface instead of gesturing.
- 21. Kinect for Windows | Human Interface Guidelines v1.8 21 Gesture This section begins by providing some important gesture definitions and goes on to recommend a number of important design considerations for gesture interaction. Gesture 21Kinect for Windows | Human Interface Guidelines v1.8
- 22. Kinect for Windows | Human Interface Guidelines v1.8 22 Basics In this document we use the term gesture broadly to mean any form of movement that can be used as an input or interaction to control or influence an application. Gestures can take many forms, from simply using your hand to target something on the screen, to specific, learned patterns of movement, to long stretches of continuous movement using the whole body. Gesture is an exciting input method to explore, but it also presents some intriguing challenges. Following are a few examples of commonly used gesture types. Gesture > Basics
- 23. Kinect for Windows | Human Interface Guidelines v1.8 23 Innate gestures Learned gestures Gestures that the user intuitively knows or that make sense, based on the person’s understanding of the world, including any skills or training they might have. Examples: • Pointing to aim • Grabbing to pick up • Pushing to select Gestures you must teach the user before they can interact with Kinect for Windows. Examples: • Waving to engage • Making a specific pose to cancel an action Innate and learned gestures You can design for innate gestures that people might be familiar with, as well as ones they’ll need to learn and memorize. Gesture > Basics Wave to engage
- 24. Kinect for Windows | Human Interface Guidelines v1.8 24 Static gesture Continuous gesture A pose or posture that the user must match and that the application recognizes as meaningful. Prolonged tracking of movement where no specific pose is recognized but the movement is used to interact with the application. Static, dynamic, and continuous gestures Whether users know a given gesture by heart or not, the gestures you design for your Kinect for Windows application can range from a single pose to a more prolonged motion. Gesture > Basics Dynamic gesture A defined movement that allows the user to directly manipulate an object or control and receive continuous feedback. Slide to confirm Confirmed! Pressing to select and gripping to move are examples of dynamic gestures. Examples include enabling a user to pick up a virtual box or perform a whole-body movement. Be wary of designing for symbolic static gestures such as “okay” that might carry different meanings across cultures.
- 25. Kinect for Windows | Human Interface Guidelines v1.8 25 Gesture Interaction Design With Kinect for Windows, you can explore the new and innovative field of gesture interaction design. Here are some of our key findings and considerations in making gesture designs feel “magical.” Gesture > Gesture Interaction Design
- 26. Kinect for Windows | Human Interface Guidelines v1.8 26 Users should agree with these statements as they use gesture in your application: • I quickly learned all the basic gestures. • Now that I learned a gesture, I can quickly and accurately perform it. • When I gesture, I’m ergonomically comfortable. • When I gesture, the application is responsive and provides both immediate and ongoing feedback. Accomplish gesture goals The users’ goal is to accomplish their tasks efficiently, easily, and naturally. Your goal is to enable them to fulfill theirs. Gesture > Gesture Interaction Design
- 27. Kinect for Windows | Human Interface Guidelines v1.8 27 Gesture > Gesture Interaction Design Design for reliability Reliability should be a top priority. Without reliability, your application will feel unresponsive and difficult to use, and frustrate your users. Try to strike a good reliability balance. Teach users how to effectively perform a gesture. Instill confidence so users can show others how to perform a gesture. Teach users how to perform a gesture early in the experience so they can use it in similar contexts. Consider the frequency and cost of false activations. Drive users to other modes of input/ interaction because of poor reliability. Require such rigid gestures that users develop superstitious behaviors, like making up incorrect justifications for reactions they don’t understand. Do Don’t Use different gestures for similar actions unless there is too much overlap between the gestures and natural variation in users’ movement. Design multiple gestures that are too similar. • If the gesture is too circumscribed, unique, or complex, there will be fewer “false positives,” but it might be hard to perform. • If the gesture is too unspecific or simple, it will be easier to perform, but might have lots of false positives and/or conflicts with other gestures. For more information about false positives, see Engagement, later in this document.
- 28. Kinect for Windows | Human Interface Guidelines v1.8 28 Design for appropriate user mindset If you’re designing a non-gaming Kinect for Windows–enabled application, or a specific UI item such as a menu, keep in mind that game mindset is NOT the same as UI mindset. As you design, keep conscious of the purpose of your application and the nature of your users, and design accordingly. Gesture > Gesture Interaction Design Game mindset Challenge is fun! If a user is in game mindset and can’t perform a gesture, then it’s a challenge to master it and do better next time. UI mindset Challenge is frustrating. If a user is in UI mindset and can’t perform a gesture, he or she will be frustrated and have low tolerance for any learning curve. In game mindset, a silly gesture can be fun or entertaining. In UI mindset, a silly gesture is awkward or unprofessional.
- 29. Kinect for Windows | Human Interface Guidelines v1.8 29 Design for natural interactions Gesture might provide a cool new method of interacting with your application, but keep in mind that its use should be purposeful. Gesture > Gesture Interaction Design Allow people to interact from a distance. Allow gesture to enable an interaction or expression that other input devices can’t. Center part of the interaction on user tracking and poses – things that Kinect for Windows does best. Try to force-fit gesture or voice on existing UI that was designed for a different input method. For example, don’t simply map gestures to a touch interface. Require gestures for tasks that could be done faster and more easily by using another input method. Require that gestures be used for productivity, speed, and precision tasks. Do Don’t Provide multiple ways to perform a task if environment or context might change.
- 30. Kinect for Windows | Human Interface Guidelines v1.8 30 Gesture > Gesture Interaction Design Determine user intent and engagement Determining user intent is a key issue, and hard to do right. Unlike other input devices, which require explicit contact from a user, or only track a tiny area of a person’s body, Kinect for Windows sees a person holistically. Kinect for Windows users are constantly moving and interacting with the world, whether or not they intend to be interacting with your application. Your challenge is to detect intended gestures correctly and avoid detecting “false positive” gestures. Keep in mind that users in a social context may alternate between interacting with the application and with other people beside them or in the vicinity. The application must be aware and considerate of the social context of the users. Hello! Provide feedback to increase confidence. Provide a clear and simple way for people to engage and disengage. Recognize unique and intentional movement as gesture or interaction. Ignore natural body movements (scratching, sneezing, etc.). Forget to provide feedback when a gesture fails or is canceled. Require users to modify natural behavior to avoid interaction. Miss, ignore, or don’t recognize the user’s gesture. Misinterpret natural body movements as the proposed gesture. Do Don’t For more information, see the Engagement and Feedback sections, later in this document. Part of determining user intent is recognizing when people want to first engage with the application. It’s tricky because there’s no physical medium such as a mouse for detecting intent with Kinect for Windows. If the user must actively trigger engagement, be sure you demonstrate it at some point early in the experience, or make the trigger clearly visible when it’s needed. Avoid long or cumbersome engagement experiences, because they will become frustrating for returning users or users who have already observed someone using the application.
- 31. Kinect for Windows | Human Interface Guidelines v1.8 31 Gesture > Gesture Interaction Design Waving is one method for determining user intent. (For example, Xbox users must wave back and forth at least three times, rotating at the elbow, for the movement to be recognized.) Waving feels natural, yet it’s a unique movement not often misinterpreted. It also carries meaning to people as a way to begin an interaction. Other possible ways to recognize engagement involve how close the user is to the sensor, or a particular pose, such as what direction he or she is facing. You can also choose to recognize when someone disengages as a cue to explicitly turn interactability off, rather than using a timeout or other passive method. For example, when a user turns away from the screen, take that as a cue that they’re no longer engaged. (But be careful not to disengage people accidentally in the middle of a task.) Notes
- 32. Kinect for Windows | Human Interface Guidelines v1.8 32 Gesture > Gesture Interaction Design Design for variability of input Users’ previous experience and expectations affect how they interact with your application. Keep in mind that one person might not perform a gesture the same way as someone else. Gesture interpretation Simply “asking users to wave” doesn’t guarantee the same motion. They might wave: • From their wrist • From their elbow • With their whole arm • With an open hand moving from left to right • By moving their fingers up and down together It’s hard to scan for a broad variety of interpretations; instead, it’s best to give users clear tips about the exact gesture you require.
- 33. Kinect for Windows | Human Interface Guidelines v1.8 33 Gesture > Gesture Interaction Design Make the gesture fit the user’s task Logical gestures have meaning and they relate to associated UI tasks or actions. The feedback should relate to the user’s physical movement. Make the action and feedback parallel – for example, users swipe left to scroll left or move content to the left. Require users to move a hand up to scroll content to the left. Do Don’t Use logical movements that are easy to learn and remember. Require abstract body movements that have no relationship to the task and are hard to learn and remember. Make the size or scope of the motion match the significance of the feedback or action. Require a big movement for a small result, like a whole arm swipe to move one item in a list. Use big, easily distinguishable movements for important and less frequent actions. Use big movements for actions that must be repeated many times through an experience.
- 34. Kinect for Windows | Human Interface Guidelines v1.8 34 Gesture > Gesture Interaction Design Design for complete gesture sets The more gestures your application requires, the harder it is to design a strong gesture set. So, we recommend that you keep the number of gestures small, both so that they’re easy to learn and remember, and that they’re distinct enough from one another to avoid gesture collisions. In addition, if you strive to be consistent with other applications, people will feel at home with the gestures and you’ll reduce the number of gestures they have to learn. You’ll also reduce the training you have to provide. Here are a few things to remember when defining a gesture set: • Make sure each gesture in an application’s gesture set feels related and cohesive. • Keep your users’ cognitive load low; don’t overload them with gestures to remember. Research shows that people can remember a maximum of six gestures. • Take cues from existing gestures that have been established in other Kinect applications. • Test thoroughly for “false positive” triggers between gestures. • Use obvious differentiators, such as direction and hand state, to make gestures significantly different, reduce false positives, and avoid overlap. • Make sure similar tasks use the same gesture language, so that users can guess or discover gestures through logical inference or pairing. For example, pair a swipe right (to move content right) to a swipe left (to move content left). IF: THEN:
- 35. Kinect for Windows | Human Interface Guidelines v1.8 35 Gesture > Gesture Interaction Design Differentiate direction changes. Differentiate progression or path. Risk gesture overlap by making the direction of two similar gestures the same. Have two gestures that follow the same path, especially if they’re in the same direction. Have vague and similar start and end points that result in different actions. Do Don’t Have clear and different start and end points.
- 36. Kinect for Windows | Human Interface Guidelines v1.8 36 Think about the whole scenario. What does the user do after completing a gesture? Might that action look like the start of an unintended gesture? Will it put them in a natural position to begin the next logical gesture for your common scenarios? Notes Gesture > Gesture Interaction Design Do Don’t Define the conceptual opposite action of a defined gesture as something other than a pair or mirror of that gesture. Design logically paired gestures to be consistent and follow the same gesture language.
- 37. Kinect for Windows | Human Interface Guidelines v1.8 37 Handle repeating gestures gracefully If users will need to perform a gesture repeatedly (for example, moving through pages of content), you might encounter a few common challenges. Gesture > Gesture Interaction Design Design repeating gestures to be fluid, without jarring starts and stops. Enable users to quickly get into a rhythm of movement. Let feedback get in the way and hinder or pace the user’s rhythm. For example, people shouldn’t feel like they must wait for an animation to finish before they can repeat the gesture. Design a gesture such that repetition is inefficient. Do Don’t Consider the movement of the whole repetition. Ignore the “return” portion of a repeated gesture if it will disrupt the ability of the user to repeat the gesture smoothly. Design the opposite gesture to resemble the “return” portion of the first gesture.
- 38. Kinect for Windows | Human Interface Guidelines v1.8 38 Avoid “handed” gestures Handed gestures are ones that can be done only with a specific hand. They do not provide users with a truly natural experience, are undiscoverable, and should be avoided. Allow users to switch hands to reduce fatigue. Accommodate both left and right- handed people. Design as if you, the developer or designer, are the only user. Require specifically handed gestures; they’re not discoverable or accessible. Do Don’t Gesture > Gesture Interaction Design
- 39. Kinect for Windows | Human Interface Guidelines v1.8 39 Vary one-handed and two-handed gestures For variety and to accommodate natural interaction, you can design for both single- handed and two-handed gestures. Gesture > Gesture Interaction Design Use one-handed gestures for all critical-path tasks. They’re efficient and accessible, and easier than two- handed gestures to discover, learn, and remember. Use two-handed gestures for noncritical tasks (for example, zooming) or for advanced users. Two-handed gestures should be symmetrical because they’re then easier to perform and remember. Require the user to switch between one- and two-handed gestures indiscriminately. Use two-handed gestures for critical, frequent tasks. Do Don’t
- 40. Kinect for Windows | Human Interface Guidelines v1.8 40 Remember that fatigue undermines gesture Your user shouldn’t get tired because of gesturing. Fatigue increases messiness, which leads to poor performance and frustration, and ultimately a bad user experience. Gesture > Gesture Interaction Design Offer gesture alternatives: for example, in a list of items, use different gestures to navigate in small or big steps, jump within the list, zoom in or out, or filter to shorten the list. Require excessive repetition of a single gesture, such as page swiping to get through a long list. (So, avoid long lists or use a more appropriate modality, such as voice search.) Require users to assume uncomfortable positions, such as holding their hand above their head for a long time. Do Don’t natural movements awkward movements good gestures in between (unique and purposeful) For more information, see Multimodal Interactions, later in this document.
- 41. Kinect for Windows | Human Interface Guidelines v1.8 41 Consider user posture and movement ranges User posture might affect your gesture design, so consider where and how your users will use your application. For example, sitting limits a person’s possible movements. Design a single gesture that works well across all viable postures. Be aware of the loss of reliability if you view a user from the side. Joints that are not in full view are placed in predicted locations by the skeleton tracking and aren’t always in the correct position. Require users to stand at distances or orientations where skeleton tracking will be less reliable. Examples include users oriented sideways to the sensor, blocked by objects (such as a table), out of visible range of the sensor, etc. Keep in mind the normal and comfortable ranges of interaction for the human body. Design alternate gestures for the same command, such as different gestures for seated and full skeleton mode. Do Don’t Design one gesture that works well in one posture but poorly in another. Gesture > Gesture Interaction Design
- 42. Kinect for Windows | Human Interface Guidelines v1.8 42 Teach gestures and enable discoverability Whenever a gesture is available to interact with your application, you should find a way to communicate it to your user. Here are some options. Teaching methods • A quick tutorial for new users • An indication of gesture state throughout the interaction • A visual cue or hint when a user first engages • A static image • An animation • A message or notification Gesture > Gesture Interaction Design How to gesture Hello! Wave to engage
- 43. Kinect for Windows | Human Interface Guidelines v1.8 43 Be aware of technical barriers If you’re using skeleton data to define your gestures, you’ll have greater flexibility, but some limitations as well. Tracking movement Keeping arms and hands to the side of the body when performing gestures makes them easier to track, whereas hand movements in front of the body can be unreliable. Field of view Make sure the sensor tilt and location, and your gesture design, avoid situations where the sensor can’t see parts of a gesture, such as users extending a hand above their head. Tracking reliability Skeleton tracking is most stable when the user faces the sensor. Gesture > Gesture Interaction Design Tracking speed For very fast gestures, consider skeleton tracking speed and frames-per-second limitations. The fastest that Kinect for Windows can track is at 30 frames per second.
- 44. Kinect for Windows | Human Interface Guidelines v1.8 44 Remember your audience Regardless of how you define your gestures, keep your target audience in mind so that the gestures work for the height ranges and physical and cognitive abilities of your users. Think about the whole distance range that your users can be in, angles that people might pose at, and various height ranges that you want to support. Conduct frequent usability tests and be sure to test across the full range of intended user types. Gesture > Gesture Interaction Design Physical differences For example, you should account for users of various heights and limb lengths. Young people also make, for example, very different movements than adults when performing the same action, due to differences in their dexterity and control.
- 45. Kinect for Windows | Human Interface Guidelines v1.8 45 Iterate Finally, getting a gesture to feel just right might take many tweaks and iterations. Create parameters for anything you can, and (we can’t say it enough) conduct frequent usability tests. Gesture > Gesture Interaction Design Design a gesture that works reliably for your whole range of users. Design a natural and discoverable gesture. Design a gesture that works for you but no one else. Build your application to be inflexible, so it is hard to make adjustments. Do Don’t
- 46. Kinect for Windows | Human Interface Guidelines v1.8 46 Voice Besides gesture, voice is another input method that enables new and natural-feeling experiences. Voice 46Kinect for Windows | Human Interface Guidelines v1.8
- 47. Kinect for Windows | Human Interface Guidelines v1.8 47 Basics Using voice in your Kinect for Windows– enabled application allows you to choose specific words or phrases to listen for and use as triggers. Words or phrases spoken as commands aren’t conversational and might not seem like a natural way to interact, but when voice input is designed and integrated well, it can make experiences feel fast and increase your confidence in the user’s intent. Voice > Basics
- 48. Kinect for Windows | Human Interface Guidelines v1.8 48 About confidence levels When you use Kinect for Windows voice- recognition APIs to listen for specific words, confidence values are returned for each word while your application is listening. You can tune the confidence level at which you will accept that the sound matches one of your defined commands. Voice > Basics • Try to strike a balance between reducing false positive recognitions and making it difficult for users to say the command clearly enough to be recognized. • Match the confidence level to the severity of the command. For example, “Purchase now” should probably require higher confidence than “Previous” or “Next.” • It is really important to try this out in the environment where your application will be running, to make sure it works as expected. Seemingly small changes in ambient noise can make a big difference in reliability.
- 49. Kinect for Windows | Human Interface Guidelines v1.8 49 Keyword/trigger The sensor only listens for a single keyword. When it hears that word, it listens for additional specified words or phrases. This is the best way to reduce false activations. The keyword you choose should be very distinct so that it isn’t easily misinterpreted. For example, on Xbox360, “Xbox” is the keyword. Not many words sound like “Xbox,” so it’s a well-chosen keyword. Listening models There are two main listening models for using voice with Kinect for Windows: using a keyword or trigger, and “active listening.” Always on, active listening The sensor is always listening for all of your defined words or phrases. This works fine if you have a very small number of distinct words or phrases – but the more you have, the more likely it is that you’ll have false activations. This also depends on how much you expect the user to be speaking while the application is running, which will most likely depend on the specific environment and scenario. Voice > Basics Kinect! Home Home
- 50. Kinect for Windows | Human Interface Guidelines v1.8 50 Choose words and phrases carefully When choosing what words or phrases to use, keep the following in mind. (If each screen has its own set of phrases, these guidelines apply within a set; if the whole application uses one set of phrases, the guidelines apply to the whole application.) Distinct sounds Avoid alliteration, words that rhyme, common syllable lengths, common vowel sounds, and using the same words in different phrases. Brevity Keep phrases short (1-5 words). Word length Be wary of one-syllable keywords, because they’re more likely to overlap with others. Simple vocabulary Use common words where possible for a more natural feeling experience and for easier memorization. Voice > Basics SHOW ME THE ONE ON THE LEFT PUT THIS ONE IN THE SHOPPING CART SHOW THE LEFT ONE PUT IN CART Don’t Alliteration Same words in different phrasesRhymes Vowels in Common Syllables in Common CAT KIT KEY MAKE TAKE Pair Pear SOMETHING SOMEONE INCREASE DECREASE MAIN TAKE DATE FACE ONE MORE TIME SHOW ME MORE PLAY MORE LIKE THIS MORE RED Do PLAY STOP MORE SCROLL BACK PLAY THIS ONE STOP VIDEO SHOW MORE SONGS SCROLL RIGHT GO BACK Don’tDo MAX OUT CRIMSON INITIAL TURN UP RED FIRST Don’tDo Don’t
- 51. Kinect for Windows | Human Interface Guidelines v1.8 51 Minimal voice prompts Keep the number of phrases or words per screen small (3-6). Word alternatives User prompts If you have even more items that need to be voice- accessible, or for non-text based content, consider using numbers to map to choices on a screen, as in this example. For commands recognized with low confidence, help course correct by providing prompts – for example, “Did you mean ‘camera’?” Voice > Basics Go home, Go back, Next page, Previous page 1 2 3 camera 2 Did you mean “camera”? camrwoj
- 52. Kinect for Windows | Human Interface Guidelines v1.8 52 Reduced false activation Test and be flexible. If a specific word always fails or is falsely recognized, try to think of a new way to describe it. Acoustics Test your words and phrases in an acoustic environment similar to where you intend your application to be used. Voice > Basics Confidence level threshold VS Test Test Triggering audio Try using a trigger or event to make Kinect for Windows start listening. For example, only listen when a skeleton is detected in a certain area. You can require higher confidence levels (80% to 95%) – that is, having Kinect for Windows respond only when it’s certain that the user has given the correct trigger. This might make it harder to users to interact, but reduce unintentional actions.
- 53. Kinect for Windows | Human Interface Guidelines v1.8 53 Voice Interaction Design Generally, it’s best to avoid forcing people to memorize phrases or discover them on their own. Here are a few best practices for helping users understand that they can use voice, and learn what words or phrases are available. Voice > Voice Interaction Design
- 54. Kinect for Windows | Human Interface Guidelines v1.8 54 Visual voice prompts Display exactly how users must say voice commands. Listening mode Indicate visually that the application is “listening” for commands. For example, Xbox360 uses a microphone icon. User assistance Display keywords onscreen, or take users through a beginning tutorial. “Show me the next one” “Show me the next 20” First say “Kinect”, then say “Home” or “Next” Voice > Voice Interaction Design
- 55. Kinect for Windows | Human Interface Guidelines v1.8 55 Voice > Voice Interaction Design Visual notifications If there is an issue with the microphone connection, display an error icon and/ or message so the user can address the problem. Audio prompting If for some reason the user might not be facing the screen, have an option for Kinect for Windows to read the available phrases out loud. Alternative input Voice shouldn’t be the only method by which a user can interact with the application. Build in allowances for the person to use another input method in case voice isn’t working or becomes unreliable. Microphone is not detecting audio, please check connection! if: then: The quick brown fox jumped over the lazy dog
- 56. Kinect for Windows | Human Interface Guidelines v1.8 56 VUI (voice user interface) bars and labels As seen in Xbox360 interfaces, VUI bars and labels are a great way to indicate what commands are available, especially if you’re using a keyword. In Xbox360, the user says the keyword (“Xbox”), and then the VUI bar appears, containing phrases that he or she can choose from. This is a good way of clearly indicating what phrases are available, without having them always present on the screen. See it, say it model The “see it, say it” model is one where the available phrases are defined by the text on the screen. This means that a user could potentially read any UI text and have it trigger a reaction. A variation of this is to have a specified text differentiator, such as size, underline, or a symbol, that indicates that the word can be used as a spoken command. If you do that, you should use iconography or a tutorial in the beginning of the experience to inform the user that the option is available, and teach them what it means. Either way, there should be a clear, visual separation between actionable text on a screen and static text. Voice > Voice Interaction Design You can say: “Home”, “Next”, “Back” Kinect When mic icon is blue, you can say words in blue. Lorem ipsum dolor sit amet, consectetur adipisiciing elit, sed do eiusmod tempor incididunt ut labore et dolore magna al qua.
- 57. Kinect for Windows | Human Interface Guidelines v1.8 57 Voice > Voice Interaction Design Choose the right environment for voice There are a few environmental considerations that will have a significant effect on whether or not you can successfully use voice in your application. Ambient noise The sensor focuses on the loudest sound source and attempts to cancel out other ambient noise (up to around 20dB). This means that if there’s other conversation in the room (usually around 60-65dB), the accuracy of your speech recognition is reduced. Amplify that to the sound level of a mall or cafeteria and you can imagine how much harder it is to recognize even simple commands in such an environment. At some level, ambient noise is unavoidable, but if your application will run in a loud environment, voice might not be the best interaction choice. Ideally, you should only use voice if: • The environment is quiet and relatively closed off. • There won’t be multiple people speaking at once. 60-65dB =
- 58. Kinect for Windows | Human Interface Guidelines v1.8 58 Voice > Voice Interaction Design System noises and cancellation Although the sensor is capable of more complex noise cancellation if you want to build that support, the built-in functionality only cancels out monophonic sounds, such as a system beep, but not stereophonic. This means that even if you know that your application will be playing a specific song, or that the song will be playing in the room, Kinect for Windows cannot cancel it out, but if you’re using monophonic beeps to communicate something to your user, those can be cancelled. Distance of users to the sensor When users are extremely close to the sensor, the sound level of their voice is high. However, as they move away, the level quickly drops off and becomes hard for the sensor to hear, which could result in unreliable recognition or require users to speak significantly louder. Ambient noise also plays a role in making it harder for the sensor to hear someone as they get farther away. You might have to make adjustments to find a “sweet spot” for your given environment and setup, where a voice of normal volume can be picked up reliably. In an environment with low ambient noise and soft PC sounds, a user should be able to comfortably speak at normal to low voice levels (49-55dB) at both near and far distances. Distance of user to Kinect Audioleveldetected
- 59. Kinect for Windows | Human Interface Guidelines v1.8 59 Voice > Voice Interaction Design Social considerations Keep in mind the social implications of your users needing to say commands loudly while using your application. Make sure that the commands are appropriate for the environment, so you don’t force your users to say things that will make them uncomfortable. Also make sure that the volume at which they have to speak is appropriate for the environment. For example, speaking loud commands in a cubicle-based office setup might be distracting and inappropriate.
- 60. Kinect for Windows | Human Interface Guidelines v1.8 60 Feedback Whether you employ gesture, voice, or both, providing good feedback is critical to making users feel in control and helping them understand what’s happening in the application. This section covers some ways you can make feedback as strong as possible. Feedback 60Kinect for Windows | Human Interface Guidelines v1.8
- 61. Kinect for Windows | Human Interface Guidelines v1.8 61 Basics It’s important, especially if your users are standing at a distance and have little direct contact with the interface, to take extra care in showing them how their actions map to your application. Also, because a gesture is only effective and reliable when users are in the correct visibility range, it’s important to give feedback to them in case they don’t know when they’re out of range. Feedback > Basics
- 62. Kinect for Windows | Human Interface Guidelines v1.8 62 Consider what users want to know As you design, imagine you’re a first-time user, and ask yourself these questions. Feedback > Basics • What does the sensor see? • Where’s the field of view? • How much of me can the sensor see? • Is my head in view? For more information, see Engagement, later in this document. • Is the sensor on and ready? • Am I in control? • Can I engage now?
- 63. Kinect for Windows | Human Interface Guidelines v1.8 63 Feedback > Basics Many of these questions can be answered by displaying a small User Viewer (visualizing depth) on the screen to show what Kinect for Windows sees at any given time. Highlighting players, hands, or other joints in the depth viewer might also be helpful. You can also prompt people to move into the appropriate field of view whenever they’re cropped, too close, or too far back. Notes • How many people can the sensor see? • How do I know it’s seeing me and not someone else? • When and where can I gesture?
- 64. Kinect for Windows | Human Interface Guidelines v1.8 64 Feedback Interaction Design This section gives tips for designing various kinds of feedback, including selection states, progress indicators, and other visuals, as well as audio feedback. Feedback > Feedback Interaction Design
- 65. Kinect for Windows | Human Interface Guidelines v1.8 65 Feedback > Feedback Interaction Design Input suggestions Use iconography or tutorials to show users what input methods are available to them. Gesture suggestions Show what gestures are available. Best practices There are several best practices that apply whether you’re designing for gesture or voice. Make it clear what content the user can take action on, and how Differentiated controls Use iconography, colors, or tutorials to show users how to differentiate between controls they can activate, text prompts for voice input, and other text and content. Lorem ipsum dolorLorem Lorem ipsum dolor sit amet, consectetur adipiscing button link normal text Visual feedback Show cursor visuals if you’re tracking a user’s hand. For more information, see Targeting and Selecting, later in this document. Press to select
- 66. Kinect for Windows | Human Interface Guidelines v1.8 66 Feedback > Feedback Interaction Design Audio notifications If there’s an error with a Kinect for Windows state (for example, a hardware or a connection issue), show the error message or state and a suggestion for how to fix it. Display some change in the visuals. Consider whether you should recommend that the user switch to alternative input methods. Command suggestions Show what commands users can speak. For an example of how to do this, see the Sensor Chooser component in the Kinect for Windows Developer Toolkit. You can say: “Home”, “Next”, “Back” Microphone is not detecting audio, please check connection!
- 67. Kinect for Windows | Human Interface Guidelines v1.8 67 Targeting and selection Provide feedback about what items users can take action on, what state those items are currently in, and how to take action on them. Feedback > Feedback Interaction Design Progress feedback When a user controls something by direct manipulation, show the progress in a way that translates to the person’s motion. Map feedback to gesture Clarify selection states For example, if the user turns a page by a gesture, show the page pulling up and turning over as his or her hand moves horizontally. For example, for targeting and selecting, with a gesture that requires Z-axis movement, using size changes to show depth helps users understand the action required (see Kinect Button, later in this document).
- 68. Kinect for Windows | Human Interface Guidelines v1.8 68 Selection confirmation Whether the user triggers an item by voice or gesture, have a visual indication of recognition before changing the state of the application. Feedback > Feedback Interaction Design UI controls For controls that are not for navigation, such as check boxes and toggle buttons, have clear visual changes that show state changes. resting hover selected Lorem ipsum
- 69. Kinect for Windows | Human Interface Guidelines v1.8 69 Feedback > Feedback Interaction Design Ergonomics Be careful when designing the timeout length for progress indicators in case users might be required to hold a position. Also consider how frequently users will be repeating the interaction. Avoid forcing users to wait unnecessarily. Clear visuals If you’re using a progress timer, or a countdown, use clear visuals to show the entire progression. If you are visualizing the user’s progress in completing a task, make sure the visual is clear, prominent, and placed where the user is focused. Use progress indicators Hold pose for 4 seconds
- 70. Kinect for Windows | Human Interface Guidelines v1.8 70 User orientation If the UI changes based on something (such as distance) that the user might have triggered inadvertently, try animation to show where the content is located in the new layout. Feedback > Feedback Interaction Design Layout continuity If the user is navigating, use animation to help him or her understand the layout. Keep context by animating For example, horizontal animation can show that the user has moved horizontally in space in your application’s layout.
- 71. Kinect for Windows | Human Interface Guidelines v1.8 71 Feedback > Feedback Interaction Design Use skeleton tracking feedback Full-body skeleton tracking provides a wide range of new application possibilities. You can use feedback both to lead and confirm the user’s movements. The User Viewer Another way to do this is to show a small scene viewer or visualization to show the user exactly what Kinect for Windows can see at any given time. This can help users understand how to stay within the right range and, when they’re outside of it, why things aren’t working. (For more information, see The User Viewer, later in this document.) Make sure users know whether the sensor sees them User resets If you need to track a user but the sensor cannot see them, let the user know where to stand so that it can. If you lose track of a user in the middle of a process, pause the process and guide the user back to a place where you can track him or her. For example, in Kinect Sports, the game tells users if they’re getting too close and shows them at the beginning where to stand for optimal tracking. For more user-tracking feedback information, see Engagement, later in this document. Please move left
- 72. Kinect for Windows | Human Interface Guidelines v1.8 72 Feedback > Feedback Interaction Design Training and feedback If you want users to copy a specific movement or action, you can show an avatar or animation, either before you expect to track the users’ movement, or even during the movement. If you show an animation during the user’s movement, visually indicate whether or not the user is doing it correctly. Lead by example An example of this is in Xbox Dance Central, where the onscreen dancer moves correctly and independently of the user, but limbs get highlighted in red if the user makes a mistake.
- 73. Kinect for Windows | Human Interface Guidelines v1.8 73 Feedback > Feedback Interaction Design Realistic reactions Make other objects in the scene react correctly to collisions with the skeleton/ avatar. Smooth movements Apply smoothing techniques to skeleton-tracking data to avoid motion and poses that are jittery or not human-like. Real-time movements Make sure the movement is in real time so the person feels in control. Mirror users’ actions
- 74. Kinect for Windows | Human Interface Guidelines v1.8 74 Use audio feedback Audio feedback can be very effective, and has its own set of considerations. Feedback > Feedback Interaction Design Teaching cues You can use sound patterns or cues to communicate a simple message or teach users when to pay attention. Warning sounds Audio can be a good way to get users’ attention if they need to be notified of something – for example, audio warnings or alerts. Microphone is not detecting audio, please check connection!
- 75. Kinect for Windows | Human Interface Guidelines v1.8 75 Feedback > Feedback Interaction Design Activity signals Sounds can be a good way to signal to a user that something has changed or has been selected. Click Announce selection states Consider using sounds that match the action the user is taking, to enforce his or her feeling of control and familiarity – for example, a click noise when a button is pressed. Instructional audio If the user isn’t facing the screen, or is far away, consider using audio as a way to communicate to him or her – for example, giving available options, directions or instructions, or alerts. Base audio feedback on user orientation You can play the next song by saying “next”
- 76. Kinect for Windows | Human Interface Guidelines v1.8 76 Feedback > Feedback Interaction Design Combine feedback In the physical world, we use all of our senses to gauge whether our actions are effective and in order to communicate naturally with others. Similarly, combining different types of feedback often makes for a better experience in a virtual world. Reinforced feedback Combining visual and audio inputs can make feedback stronger. A great example of this is the menu in Dance Central. As the user scrolls up and down the menu, the following changes happen to the item he or she points to: • It grows larger. • It glows a brighter shade of pink. • It gets a slider visual. • The items surrounding it become slightly larger and a slightly different color. • The sound changes dynamically, in real time, based on the position of the user’s hand. The result seems like a very “hands-on” experience, where the user can almost feel the effects of his or her movements.
- 77. Kinect for Windows | Human Interface Guidelines v1.8 77 Basic Interactions Although we leave it up to you to create exciting and unique experiences with Kinect for Windows, we’ve taken care of some of the basic interactions and controls for you and included them in the Developer Toolkit. Using our interactions and controls saves you time and also establishes some consistency that your users will learn to expect as they encounter Kinect for Windows experiences in various aspects of their daily lives. We’ve spent a lot of time tuning and testing this first set of interactions to give you the best foundation possible, and we’ll add more in our future releases. The following sections help you set the stage for your application, and show you how to enable users to easily engage with it, target and select items, and scroll or pan. We also call out some examples that you’ll find in the Interaction Gallery, and share some tips for interactions that we don’t provide for you. Basic Interactions 77Kinect for Windows | Human Interface Guidelines v1.8
- 78. Kinect for Windows | Human Interface Guidelines v1.8 78 Basic Interactions > Best Setup for Controls and Interactions Best Setup for Controls and Interactions We’ve worked hard to provide great controls and interactions, but to make them as reliable as possible, we recommend this setup: • Set your application to use Near mode. For more information, see the SDK, at: http://msdn.microsoft.com/en-us/ library/microsoft.kinect.skeletonstream. enabletrackinginnearrange.aspx • Optimally your users should be standing between 1.5m and 2m away from the sensor. • The sensor should be placed above or below the screen, wherever it has the least amount of tilt and can see the most of your users’ bodies. It helps a lot if it can see your users’ heads. • The sensor should be centered on the screen so that users can stand directly in front of it. • There should not be large amounts of natural light, or people walking in front of your users. For information about button controls, see Kinect Button, later in this document.
- 79. Kinect for Windows | Human Interface Guidelines v1.8 79 Basic Interactions > Best Setup for Controls and Interactions Screen resolution The Kinect for Windows controls we’ve built were designed for 1920x1080 resolution screens. Whether you’re using these controls or creating your own, keep in mind that different screen resolutions affect the intended size of the control. Also, because the Physical Interaction Zone (or PHIZ, described in the following section) has a fixed size relative to the person, and doesn’t adjust for the screen size or orientation, it might be helpful as you resize your controls to focus on fine-tuning the ratio of control size to PHIZ size, to ensure that the experience is still reliable and the control is still easily selectable. The smallest button we’ve designed is 220 by 220px in 1920x1080 resolution. We’ve tested to ensure that this button size and resolution combination makes it possible to have close to 100 percent accuracy for most users. If you have a different resolution, however, you need to resize the button to make sure the ratio is maintained, to keep the reliability. The following chart shows how this small button size translates for different resolutions. UHDTV (W)QHD 1080p WSXGA+ HD+ WXGA+ WXGA 720p XGA SD HVGA Kinect Region (px) Button (px) Width Height Width/Height 7680 2560 1920 1680 1600 1440 1366 1280 1024 720 480 4320 1440 1080 1050 900 900 768 720 768 480 320 880 294 220 214 184 184 157 147 157 98 66
- 80. Kinect for Windows | Human Interface Guidelines v1.8 80 Basic Interactions > Setting the Stage: the Kinect Region, the PHIZ, and the Cursor Setting the Stage: the Kinect Region, the PHIZ, and the Cursor The Kinect Region, the Physical Interaction Zone (PHIZ), and the cursor are all things that you need to get started with your Kinect for Windows–enabled interface. You can easily set them up so they’ll work the best for your scenario.
- 81. Kinect for Windows | Human Interface Guidelines v1.8 81 The Kinect Region The Kinect Region is the area on the screen where Kinect for Windows–enabled interactions are possible in your application. That means it’s also the only area where your Kinect for Windows cursor will appear. As you plan and design your application, consider where and how big you want this area to be, how itwill affect the user experience, and how it will fit within the orientation of your screen (landscape or portrait). Basic Interactions > Setting the Stage: the Kinect Region, the PHIZ, and the Cursor To try out how it would feel with another setup, use a mouse to click the Restore button at the upper-right of the Interaction Gallery sample window, change the size of the window, and drag it to different parts of the screen. Also, notice that all controls in the sample are mouse-enabled, but are built to be used primarily with Kinect for Windows interactions, with mouse as more of an administrative or testing input. If part of your application is mouse- and keyboard-enabled and part is Kinect for Windows–enabled, consider putting the non–Kinect-enabled controls inside the Kinect Region and then hiding them, along with the mouse cursor, when the user interacts with Kinect for Windows. For more information, see Multiple Inputs, later in this document. Notes Full window In the Interaction Gallery sample, shown at right, the Kinect Region is the entire window; when the sample is maximized, which it is by default, that’s the entire screen. This method is the least jarring and confusing for users because it most directly translates to the expected behavior of cursor areas that they’ve experienced before.
- 82. Kinect for Windows | Human Interface Guidelines v1.8 82 The Physical Interaction Zone The PHIZ aims to: • Provide a consistent experience that users can learn quickly, across all Kinect for Windows–enabled applications. • Enable users to comfortably reach everything they need to interact with. • Provide responsive tracking (low latency). Basic Interactions > Setting the Stage: the Kinect Region, the PHIZ, and the Cursor Area The area of the PHIZ is relative to the size and location of the user, and which hand he or she is using. It spans from approximately the user’s head to the navel and is centered slightly to the side corresponding to the hand the user is actively using to interact. Each hand has its own separate PHIZ. Shape Instead of mapping directly from a flat, rectangular area that has the same shape as the screen, we take the range of movement of human arms into account and use a curved surface, which makes moving and extending the arm within the area comfortable and natural. Axis We measure X and Y dimensions as if the curved surface were a rectangle. We measure Z by arm extension, because we’ve found that this is not always the same as Z space between the user and the sensor.
- 83. Kinect for Windows | Human Interface Guidelines v1.8 83 Basic Interactions > Setting the Stage: the Kinect Region, the PHIZ, and the Cursor Ergonomics The PHIZ stays the same shape and size relative to the user, regardless of the aspect ratio of the Kinect Region (for example, portrait vs. landscape), to keep users in a space where movement is comfortable and not fatiguing. This means that users will always be able to comfortably interact with all parts of your application; however, keep in mind that the thinner and longer your Kinect Region is, the harder it will be for your users to target precisely. For example, if your screen is extremely tall and narrow, users will have to move their hands much farther to move left and right, and moving up and down will seem extremely fast.
- 84. Kinect for Windows | Human Interface Guidelines v1.8 84 Portrait Screen Interactions A large screen in portrait orientation is well suited to individual interactions. The entire screen can present a single user-centric interaction surface. The user can interact with the screen in the same way he or she might with a dressing-room mirror. Basic Interactions > Setting the Stage: the Kinect Region, the PHIZ, and the Cursor Portrait screen design Even though a single user can easily fit into the frame, it can be a challenge to design an experience that involves movement spanning the entire vertical range of the portrait screen. Mapping the PHIZ to the portrait screen will affect the cursor interaction. Moving the cursor left and right seems slower. Moving the cursor up and down seems more rapid, and makes fine- grained control more difficult. UI placement Place the controls within easy reach of the user, for example, near the center of the PHIZ. Place interaction points away from the margins of the screen and toward the center so that a user can easily use either hand.
- 85. Kinect for Windows | Human Interface Guidelines v1.8 85 Basic Interactions > Setting the Stage: the Kinect Region, the PHIZ, and the Cursor User considerations Avoid long interactions that require the user to keep his- or-her hands raised for more than a few seconds, such as a vertical scroll. Avoid fine-grained vertical motions in your UI interactions. Fined-grained targeting along the vertical axis will cause fatigue in users.
- 86. Kinect for Windows | Human Interface Guidelines v1.8 86 Basic Interactions > Setting the Stage: the Kinect Region, the PHIZ, and the Cursor Variations in user height Portrait screens should account for users of various heights. The UI elements will either need to be designed to accommodate an average user height or should use Adaptive UI design to target individual users. As we mention in Remember your audience earlier in this document, keep your audience in mind. Consider sensor placement and limitations If the sensor is placed at the bottom or the top of the portrait screen, it may have difficulty tracking the user at a steep angle. The sensor will see the user’s skeleton and gestures from an angle and if the user is very close to the display, the skeleton may be clipped. A sensor placed at the top of the screen may have difficulty recognizing a short user who is standing close to the screen. As we mentioned in Consider Sensor Placement and Environment earlier in this document, the best practice is to anticipate these limitations and to test the interactions.
- 87. Kinect for Windows | Human Interface Guidelines v1.8 87 The Kinect for Windows Cursor Much like a mouse cursor, the Kinect for Windows cursor provides visual cues to your users as they target, select, and scroll or pan by moving their hand in the PHIZ. Although we’ve built a lot of feedback into our controls and we suggest you do the same for any new ones you build, we’ve made the cursor a strong mechanism for providing feedback. Basic Interactions > Setting the Stage: the Kinect Region, the PHIZ, and the Cursor Pressing As a user extends his or her arm in a pressing motion, a color fill goes up and down within the cursor to indicate how far along in the press the user is. This feature was heavily user-tested and has shown to improve pressing accuracy and learnability. It also makes it easier for users to cancel before a press is made, or retarget if a press is about to happen over the wrong control. The cursor also has a visual state that indicates when the user has completed a press. Gripping When Kinect for Windows detects that the user’s hand is in a gripped state, the cursor changes to a gripped visual and shows a color consistent with the fully pressed state. This confirms to the user that the grip is detected, as well as being a strong visual cue for how to make a recognizable gripped hand. Default targeting state Targeting over something that is actionable (grip or press) Gripped hand detected Fully pressed state Right hand vs. left hand cursors Standard cursor and feedback graphics Progress indication (color fills hand as the user presses further)
- 88. Kinect for Windows | Human Interface Guidelines v1.8 88 Basic Interactions > Setting the Stage: the Kinect Region, the PHIZ, and the Cursor The cursor moves freely within the Kinect Region only when the user’s hand is in the PHIZ; if the user’s hand is anywhere above and to the sides of the PHIZ, the cursor sticks to the top, left, or right of the window, and becomes semitransparent. This provides feedback for how to get back into the area where the user can interact. When the user’s hand falls below the PHIZ, the cursor drops off the bottom of the screen and is no longer visible, allowing the user to rest or disengage. Because we’ve built only one-handed interactions (see Vary one-handed and two-handed gestures, earlier in this document), by default we show only one cursor for one user at any given time. This cursor is determined by the hand of the primary user who first enters the PHIZ (see the following section, Engagement). The primary user can switch hands at any time by dropping one hand and raising the other.
- 89. Kinect for Windows | Human Interface Guidelines v1.8 89 Basic Interactions > Engagement Engagement With most human-computer interactions, it’s easy to know when users mean to interact with the computer, because they deliberately move the mouse, touch the keyboard, or touch the screen. With Kinect for Windows, it’s harder to distinguish between deliberate intent to engage and mere natural movement in front of the sensor. We leave the details of how to handle this up to you, because your specific scenario might have special requirements or sensitivity. This section describes the default behavior and the User Viewer control, covers some things to think about as you design for engagement, and explains the solution we’ve implemented in the Interaction Gallery sample.
- 90. Kinect for Windows | Human Interface Guidelines v1.8 90 Basic Interactions > Engagement Default engagement behavior The Kinect for Windows interaction model considers the engaged user to be whoever is in control of the application. By default, the engaged user is the same as the primary user, and the primary user is selected based solely on user hand states observed. These defaults can be overridden. Hand states Other than “Not tracked,” they are not mutually exclusive: • Not tracked – No hands are being tracked. • Tracked – Kinect is tracking at least one skeleton. • Active – Hand is tracked, and raised anywhere above the bottom of the PHIZ, at any reachable arm extension – for example, when the arm is reached all the way up, out to the right, or out to the left, and anywhere in between. • Interactive – Hand is tracked, active, and inside the PHIZ (a smaller rectangle that is within the active area described above). Primary user Only one user can control the single cursor at any time; this person is the primary user. Default primary user selection can be overridden by your application to fit your scenario: • The primary user is designated when the first tracked person raises his or her hand. • When the primary user drops his or her hand below the PHIZ (out of the active area), or leaves the view of the sensor, he or she stops being the primary user, and another skeleton- tracked user can raise a hand to become the new primary user. • While the primary user has an active hand, another user cannot take over. • Even though the sensor can see up to six people, only two of them will have tracked skeletons. The primary user can only be one of these two fully tracked users. It might make sense for your application to cycle through tracked skeletons, to enable all (up to six) users to have the opportunity to be active. Notes
- 91. Kinect for Windows | Human Interface Guidelines v1.8 91 Colors • Color for the primary (engaged) user • Color for any other users who are detected but not tracked We’ve chosen some generic colors as default for this control, but you can set them to whatever’s appropriate for your design and brand. The User Viewer helps to answer the following engagement questions for your users: • Can the sensor see me? • Is any part of my body clipped? Is my hand still in view? • Am I the primary user in control of the experience right now? • Is it possible for me to take over control of the application? • Someone just walked in between me and the sensor: am I still tracked? • Is the person behind me or next to me confusing the sensor and making my cursor jumpy? The User Viewer We’ve built the User Viewer control to help make engagement easier for users to understand. It’s a simple view that shows silhouettes for any user tracked by the sensor and allows developers to set colors for any visible players. By default, it uses two colors to distinguish between the primary user and others. Basic Interactions > Engagement
- 92. Kinect for Windows | Human Interface Guidelines v1.8 92 Basic Interactions > Engagement Including the User Viewer in your application helps your users understand how to place themselves at the right distance and orientation for the sensor to see them. It also reduces any feeling that the application or Kinect for Windows is buggy, unresponsive, or unexplainably jumpy, and helps users figure out what is happening and how to make their experience better. As mentioned above, this feedback is especially important in Kinect for Windows interactions, because users moving freely in space will quickly feel a frustrating lack of control if the system does not behave as they expected. For more information, see Feedback, earlier in this document. You can size and place the User Viewer anywhere in your user interface. In the Interaction Gallery sample, we use the user viewer in two different ways: A full-screen overlay on the Attract view The purpose of the Attract view is to show users that we can see them, and entice them to interact with the application. The large User Viewer helps to get this message across and serves as an interesting visualization. Small and centered at the top on all other screens This visually cues users to what the sensor sees, who the engaged user is, and how to take over engagement. We also use the small User Viewer as a launching point for application messaging and user education, and replace it with the Sensor Chooser UI if there is a Kinect for Windows connectivity error.
- 93. Kinect for Windows | Human Interface Guidelines v1.8 93 Considerations for designing engagement It’s important that when a user is ready to interact with your application, they can do so easily. Basic Interactions > Engagement The top engagement interaction challenges are to ensure that: • Users who want to engage, can. • Users who aren’t trying to engage, don’t. • Engaging feels natural and intuitive. • Engaging doesn’t feel like significant additional effort.
- 94. Kinect for Windows | Human Interface Guidelines v1.8 94 Ease of engagement When considering how to design your application’s engagement strategy, consider how and where you expect your users to interact with it. In some scenarios, it should be harder for users to engage. Basic Interactions > Engagement Quick, easy engagement If you’re not concerned about false positives, a “low barrier” solution might simply look for a tracked user’s hand entering the PHIZ (being interactive), such as our default behavior does. For example, this might be a good method for a simple interactive sign. Deliberate, safe engagement A “high barrier” solution could build on top of a low barrier, looking for additional factors in order to remove false positives. For example, you might want this when data or consequences are more critical. With the high-barrier solution, after the low-barrier criteria are met, hinting could show what else is required to complete engagement. You might trigger engagement when the user: • Faces the screen • Raises a hand into the engagement area • Is in front of the sensor and remains stationary for a short time (less than 500 milliseconds) Notes
- 95. Kinect for Windows | Human Interface Guidelines v1.8 95 Common false positives for engagement Your challenge is to design actions that feel easy to the user, but also don’t risk false positives. Here are some common user behaviors that can potentially be misinterpreted: • Holding something (such as a drink or mobile phone) • Moving a hand toward the body or resting it on the body • Touching the face or hair • Resting an arm on the back of a chair • Yawning and extending arms • Talking and gesturing with other people Basic Interactions > Engagement
- 96. Kinect for Windows | Human Interface Guidelines v1.8 96 Basic Interactions > Engagement Initial engagement In the Interaction Gallery sample, we demonstrate an example of a more complicated engagement model that has a “speed bump” for initial engagement and then allows deliberate engagement handoff between users. Here is how the engagement flow works: • The application starts in Attract view, which cycles through images, enticing users to come and interact. • As users who walk by are detected, they appear as gray silhouettes in a full-screen overlay on the Attract view. • When a user pauses and faces the sensor, her player mask turns purple and she is directed to raise her hand. (For more information about player masks, see Multiple Users, later in this document.) • Once the user raises her hand, her silhouette is replaced with a cursor, and she is presented with a large button and instructed to “Push Here.” Note that this also serves as user education, teaching the press-to-select interaction. In user research, we found that this was enough to teach people to successfully press to interact with the rest of the application. • After she presses the large button in the center of the screen, she is successfully engaged and enters the Home view of the application. This is a fairly high barrier to entry, requiring a user to perform a deliberate action in order to engage. Another option would be to skip this step and go directly to the home page after a user raises his or her hand into the PHIZ. Notes
- 97. Kinect for Windows | Human Interface Guidelines v1.8 97 Basic Interactions > Engagement User handoff After initial engagement, the Interaction Gallery sample demonstrates how users can hand off to another user. The following occurs in the event that one user decides to relinquish control to another: • If, at any time, the primary (interacting) user drops her hand below the PHIZ, a second skeleton-tracked user has a chance to take over control and is assigned a blue color in the User Viewer. • Messaging comes out from the small User Viewer to inform the second tracked user that he has an opportunity to raise a hand to take over. • If the second user raises his hand, he has temporary control of the cursor and is prompted to press a button to take over. • If, at any time before the second user presses, the first user raises her hand, she is still the primary user and will remain in control of the application, removing the ability for the second user to take over. • If the second user completes the press, he is now the primary user, and has control over the cursor. • If the primary user leaves, the application will give any other tracked user the chance to confirm engagement and remain in the current view.
- 98. Kinect for Windows | Human Interface Guidelines v1.8 98 This solution overrides the default engagement behavior in the following ways: • The primary user drops his or her hand but does not completely disengage and other users cannot immediately take over control. • The primary user does not immediately switch when one user drops his or her hand and the second user raises his or her hand. • A third User Viewer color is used for the candidate user who has the option of taking over control. • The candidate user who is trying to take over control is temporarily the primary user, but will not remain so if he or she does not complete the required speed-bump action. Basic Interactions > Engagement
- 99. Kinect for Windows | Human Interface Guidelines v1.8 99 Basic Interactions > Targeting Targeting After users have engaged with a Kinect for Windows application, one of the first tasks is to target an object (get to an area or item they want to open or take action on). Where people traditionally move a mouse or move their hand over a touch screen, they can now move their hand in the PHIZ to control a cursor on the screen. We’ve enabled targeting from a distance to enable natural integration with other distance-based interactions. We’ve found that people naturally move their hands in the X, Y, and Z axes even when they think they’re moving only in a single axis. Our ergonomic PHIZ helps translate to the screen what users think and feel they are doing. As with any new input method, there’s a slight learning curve, but users quickly learn, especially as they continue to encounter the same experience in all Kinect for Windows– enabled applications. As you design interfaces where users target objects, consider the following.
- 100. Kinect for Windows | Human Interface Guidelines v1.8 100 Make controls easy to target, with appropriate spacing, placement, and sizes. Make sure visual feedback matches user intent. Provide audio feedback when the user targets an actionable item. Provide ambiguous feedback. Make it clear which objects the user can take action on. Crowd multiple controls together or make them too small to reliably hit. (Our recommended smallest button size is 220px; see Screen Resolution.) Make users guess which items they can interact with. Do Don’t Basic Interactions > Targeting Lorem Lorem ipsum dolor sit amet, consectetur Lorem ipsum dolor Lorem ipsum dolor actionable non-actionable
- 101. Kinect for Windows | Human Interface Guidelines v1.8 101 Basic Interactions > Selecting Selecting Typically, users target an item in order to take action on it. For example, they may want to select a button that triggers a reaction, such as navigation, in an application. In this document, when we refer to selecting, we mean selecting an item and triggering an action.
- 102. Kinect for Windows | Human Interface Guidelines v1.8 102 With the Kinect Button and Kinect Cursor components in the Developer Toolkit, we are introducing a new interaction for selecting with Kinect for Windows: pressing. We’ve found that when presented with a Kinect for Windows control, users naturally think of pressing with their hand in space; it maps nicely to their understanding of the physical world where they press physical buttons or extend their arm to point at objects. Currently, the components we’ve built support only the ability to select an item to trigger an action, but you could extend and build on the interaction to make it work for other selection scenarios, such as toggling multiple items in a list. Along with the press interaction, we’ve provided you with two styles of Kinect Button as components in the Developer Toolkit, designed specifically to provide a good pressing experience as well as feedback. We’ll cover our new button styles and tips later in this section. Basic Interactions > Selecting Although we’ve built only buttons so far, we think it’s a good idea to use the press interaction for other selectable controls where it feels natural. If you’re building your own Kinect for Windows controls, consider using the press gesture where it translates well, to keep experiences consistent and avoid forcing users to learn a large gesture set. Notes
- 103. Kinect for Windows | Human Interface Guidelines v1.8 103 Why is pressing better than hovering? The Basic Interactions sample in the 1.6 version of the Developer Toolkit showed hovering as the solution for selection. In that model, a user must target a control, and then hold his or her hand over that control for a specified amount of time to make the selection. Although it’s easy to learn, and dependable, hovering over controls is not something users can get better or faster at, and as a result, selection interactions can seem tedious and slow. People also tend to feel anxious about the hover progress timer starting, so they keep moving their hand, or feel they have to hold their hand in a blank area so as not to inadvertently select something. Pressing allows users to be precise, but to go at their own pace and use a more natural movement. As we designed the pressing model, our goals were: • Users can select with no training. • Users can select anywhere on the screen. • Performance improves over the hover model. Basic Interactions > Selecting We want users to be confident when they press to select and we want to make inadvertent selections rare. Here are some of the problems we’ve worked to solve while translating users’ hand movements and arm extensions in space to a press on the screen: • A user means to simply target (moving in X and Y axes) when they are physically making some movements in Z. • A user means to push or press “straight out” in Z when, in fact, he or she is moving quite a lot in X and Y. • Different users will start pressing at different arm-extension levels (for example, some with their arm close to their body, some with their arm almost fully extended). • Users need to cancel an inadvertent press gesture. • Users need visual progress feedback: how much more do they need to press? Are they pressing when they don’t mean to? • Users need to learn to press in order to select. 1.6 hover model 1.7 press model
- 104. Kinect for Windows | Human Interface Guidelines v1.8 104 Kinect Button The Developer Toolkit provides you with two styles of Kinect Button, a component we’ve built to make the most common selectable control easy to add to your application and to customize for your experience. We’ve built in feedback to help users understand that the control is targetable, which control they’re targeting, and how to interact with it in 3D space. A combination of the button’s changing size and the cursor visuals helps users understand that they need to press and how far they need to press in order to select it. It also shows them if they’re in the middle of a press so they can cancel if they need to. In designing pressing with our button controls, we decided to trigger on release, similarly to standard touch and mouse behavior. This enables users to cancel a press at any time by moving their hand up, left, or right. Moving their hand down will trigger a release, however, because we found that as people get confident with their presses, they often drop their hand as they release. Although the buttons were designed for Kinect for Windows interactions, they also respond to mouse, keyboard, and touch input. Basic Interactions > Selecting
- 105. Kinect for Windows | Human Interface Guidelines v1.8 105 Button styles We are providing two button styles you can use: tiles and circle buttons. You can change button sizes, shapes, and colors, and also create your own, but we think these styles are a good baseline and will cover most of the common scenarios. The buttons are the recommended sizes for 1920x1080 screens. If you’re developing for a different screen resolution, be sure to adjust the size, to make sure your users can both hit them accurately and read button text from the distance you expect them to interact from. For a chart of how button size translates for different resolutions, see the chart in Best Setup for Controls and Interactions, earlier in this document. In the Interaction Gallery sample, we show an example of how to use the tile button style tailored to specific experiences and styled for a specific brand. Look at the Video Player module to see a slightly different use of a circle button (which is outlined on the following page). Basic Interactions > Selecting Tile buttons We provide three sizes for tile buttons: small (220px), medium (330px) and large (440px). • Tile buttons can fit in a grid, with equal padding between tiles. Padding can vary, if hit areas don’t overlap. For usability, button size is more important than padding. • Tile buttons are composed of a background (which can be a solid color or an image/symbol) and a text area that overlays the background on the bottom edge. • If text is omitted, the overlay does not appear. If an image is omitted, a solid color appears. • You can easily resize them to fit your design. • Tile buttons are good for listing items, launching pages, or navigating. • Tile buttons are built to be easy for users to target and select – keep them somewhat large so that they‘ll remain easy to target. • The border property allows for invisible padding that is hit-targetable. This allows buttons without dead space between them, making it easier for users to select within a group of items. By default, tile buttons have invisible 5px borders. In the Interaction Gallery sample, we use tile buttons for: • Tiles on the home screen that navigate you to each of the modules • Images that launch shadow boxes in both the horizontal scrolling view and the Article view • The buttons for the engagement speed bumps
- 106. Kinect for Windows | Human Interface Guidelines v1.8 106 Basic Interactions > Selecting Circle buttons These are used mostly for simple navigation buttons (such as Back or Home) or for settings. • The design is a circle surrounding a glyph of your choice; you can also add text below or to the right of the circle. • You can scale the size of the circle and text to fit your needs and resolution. • You can replace the circle and glyph with an image of your choice. • Make sure that they are easy to target and select on your resolution and screen size. • The button and text are inside a rectangular area that is all hit-targetable – this enables users to be less accurate and still hit the button. The area of the button is larger than the visuals, which helps reduce clutter without making users struggle to select the buttons. • By default you can use them in black or white, or you can re-template them to use a brand color of your choice. In the Interaction Gallery sample, we use circle buttons for: • Back buttons in various views • The Close (X) button on shadow boxes • The Play/Pause/Replay button on the video view Normal Hover Pressed Disabled PLAY PLAY PLAYPLAY
- 107. Kinect for Windows | Human Interface Guidelines v1.8 107 Basic Interactions > Panning and Scrolling Panning and Scrolling Scrolling enables users to navigate up and down, or left and right; panning can enable users to navigate freely in X and Y within a canvas, like dragging a finger over a map on a touchscreen. Experiences often allow users to scroll and pan continuously, pixel by pixel through content, at intervals through a surface or page, or between consecutive screens or views.
- 108. Kinect for Windows | Human Interface Guidelines v1.8 108 Basic Interactions > Panning and Scrolling With the Kinect Scroll Viewer component, we’re introducing a new direct-manipulation, continuous panning and scrolling interaction: grip and move. Kinect for Windows can detect the user’s hand closing into a fist, called gripping. This interaction is a solution for scrolling through lists or panning on large canvases, but might not be the strongest interaction for navigation between discrete pages, screens, or views. The gesture allows for a high level of control, but can be fatiguing to do repeatedly or for large jumps. You can place content or controls inside a Kinect Scroll Viewer to add this experience to an application. Although we’ve built grip recognition to work specifically for scrolling or panning, consider using it for similar interactions, such as zooming, drag and drop, or rotating. Gripping works best if the user is no more than 2m away from the sensor. Gripping works best if users’ wrists are easily seen. Encourage users to remove large coats or items on their wrists before interacting by gripping. For paging or view-changing scrolling scenarios, consider using Kinect Buttons in the scroll viewer, or above it, to help jump users to the place they’re looking for. When there are discrete sections, it may be faster and less frustrating to navigate straight to them, rather than scroll to them with direct manipulation. Notes