Tutorial for moodle 2.5
•Descargar como DOCX, PDF•
1 recomendación•693 vistas

This is a tutorial about resources in Moodle. It explains how to use them.

Recomendados
Más contenido relacionado
La actualidad más candente
La actualidad más candente (16)
Destacado
Destacado (13)
Similar a Tutorial for moodle 2.5
Similar a Tutorial for moodle 2.5 (20)
Más de Maria Josè Giavedoni
Más de Maria Josè Giavedoni (20)
Último
Último (20)
Tutorial for moodle 2.5
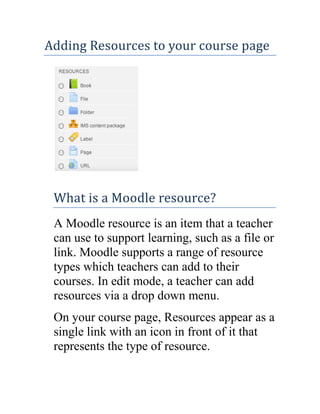
- 1. Adding Resources to your course page What is a Moodle resource? A Moodle resource is an item that a teacher can use to support learning, such as a file or link. Moodle supports a range of resource types which teachers can add to their courses. In edit mode, a teacher can add resources via a drop down menu. On your course page, Resources appear as a single link with an icon in front of it that represents the type of resource.
- 2. Types of resources Book - Multi-page resources in a book-like format File - A picture, a pdf document, a spreadsheet, a sound file, a video file Folder - To help organize files. One folder may contain other folders IMS content package - Add static material from other sources in the standard IMS content package format Label - Can be a few displayed words or an image used to separate resources and activities in a topic section, or can be a lengthy description or instructions Page - The student sees a single, scrollable screen that a teacher creates with the robust HTML editor URL - You can send the student to any place they can reach on their web browser, for example Wikipedia
- 3. Uploading a single file - PDF, powerpoint, image etc 1.Files work simply now. Where you see it, is where it is. So when you add a file to your course now, that is where the file is. 2.To add a file. Click on the "Turn editing on" in your Course administration block or click on the button at the top right of your screen. 3.Choose "File" from the "Add an activity or resource ..." drop down menu in the course section (topic or week) that you would like the file to be placed in.
- 4. 4.This will open a new screen.The Name and Description are required field settings. 5.Type in a title in the "Name" field, this will be the name of the link visable on the course page which the students will click on to access the file. 6.Type in a description which should be a short description displayed under the link to explain the resource. Select the "Display description on course page" if you wish students to view the description.
- 5. 7.In the Content section, drag the files from your desktop or click "Add" and the following File picker screen will appear. 8.On the left side, you can see a number of source repositories (local and web services) from which you can upload your file. For the majority of users, the option "Upload a file" will be used to select the file from your computer.
- 6. 9.Click browse and select your file from your computer, click open and then upload. The file will then appear in your course section as below:10.Click browse and select your file from your computer, click open and then upload. The file will then appear in your course section as below:- NOTE - the maximum file size you can load is 1 GB, but the default upload size is 50MB. Course format Appearance Completion tracking Groups Role renaming Once completed "Save Changes" to record your settings for that resource.
- 7. Linking to an audio or video file If you are linking to a resource that is already hosted somewhere on the web. Here are step by step instructions 1.Open a web browser and navigate to the webpage with the media file. 2.Right click on the file link to bring up a context menu. 3.Select "Copy link location." This action will put the full address of the link into the clipboard. 4.Go to your course homepage and click the "Add a resource" drop down menu and select "URL" 5.In the URL location field paste the address of the link to the media file. 6.After you have given the resource a proper name and short summary, save your changes.
- 8. Creating a Page (web active page) Adding a "Page" resource creates a link to another course page that can display a variety of content; text, images, audio, video, embedded code or a combination of all these using the HTML text editor. The advantages of using the "Page" resource rather than the "File" resource: 1.You want students to read content and not have the option of downloading it. 2.Can be accessed by mobile devices eg: smartphones (most cant access word docs) 3.Easy access for teacher editing, and more configurable (add text, change colours etc) 4.Can contain links to other files, web pages, glossaries etc When you add a "Page" Resource the following screen will appear. The "Name"
- 9. will show up on the course page for your students to link to the html page. The "Description" will only shows up if selected. The main body of the page "Content", is where you can type your text, create a link, or add embedded HTML code.
- 10. Displaying content in this manner is recommended over displaying content in Word or PDF, as the text is much smaller and easier to download in this (html) format, and
- 11. students don't need a special plug-in or application to view your content. For multipage documents, the Book module may give better results. Screen Display options for resources File & URL When adding resources "File" or "URL" there are options for how the files are displayed for or webservices accessed. In the settings options for each resource, the following display options are available in the settings of each resource. The Display options are as follows:
- 12. Automatic - Make the best guess at what should happen (probably what is wanted 99% of the time). Embed - Show the Moodle page with heading, blocks and footer. Show the title/description of the item and display the file directly in the page as well (good for images, flash animations, videos?, PDFs). New Window - This is a preferable option to show documents without loosing a tab in your browser with your course content. In frame - show the Moodle heading and the file description, with the file displayed in a resizable area below (images, PDF, flash, etc. supported) New window - very much like 'in pop-up', but the new window is a full browser window, with menus and address bar, etc. Force download - user clicks on the file, then the web browser pops up with the 'where do you want to save this file' box. Open - No Moodle heading, blocks, footer or description - just show the file in the web browser (e.g. shows image, PDF, flash
- 13. animation, taking up the whole browser window) In pop-up - Same as 'Open', but opens a new browser window to show this file (without the Moodle heading, blocks, etc) - this browser window also does not have all the menus and address bar in it. By setting the option for New Window, the resource will be opened in a browsers new window or tab therfore allowing the student to view the resource without losing their place in the course's page. How do I upload more than one file at a time? To upload more than one resource file at a time, add a folder to your course page. You can create a folder by choosing "Folder" from your "Add a Resource menu".
- 14. In the next screen, give your folder a Name and description (This will appear as the name on the course page) Adding individual files into the folder
- 15. If you are adding files individually to your folder, click and drag off your desktop or Add and upload the file. Continue with this step for as many files as you wish to be in the folder Adding multiple files at one time using ZIP To upload a folder full of files into your Moodle course, first you must zip it. On Windows XP, you can zip a folder by right clicking it, then choosing the "Send to Compressed (zipped) folder option". On MacOSX, you can Control-Click on the folder and choose "Create Archive of "foldername". Once you have zipped the folder with the files you would like to upload, Upload the Zip file into the folder, then click the "Unzip" link next to the file's name.
- 16. Viewing a folder, cont. Now go back to the main course screen by clicking the course's short name in the upper left of the screen. Students will now see a link to the folder on the course page, which they may click to view the files inside the folder:- When a student clicks on the folder they will see all the files in the folder.
- 17. Adding a label Unlike the other resources, adding a "Label" will allow you to add text or images directly onto your course page,rather than links to a resource. Thus lables are useful to separate resource and activity links within a topic information (perhaps for subtopics or special instructions). To add a label, simply choose insert label from the Add a resource drop
- 18. down. This will open up an an editor window. This is a free form option to add text, images, links and other engaging content to place on your course page. When you have your text and images set, click "Save changes". This will place the text on your course page. Source: http://moodle.unitec.ac.nz/mod/book/tool/