Over the Top (OTT) Market Size & Growth Outlook 2024-2030
Dairy
1. Diary
I am now going to start to put together my college promotion video with the footage that I have
gotten so far. First I opened up Adobe Premiere Element 10, the first thing that I did so I wouldn’t be
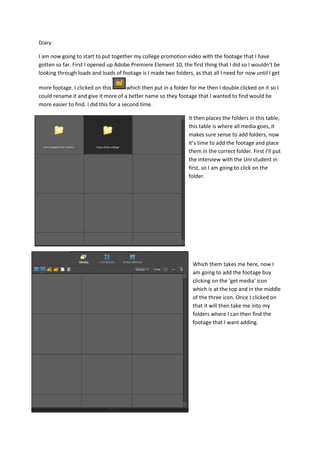
looking through loads and loads of footage is I made two folders, as that all I need for now until I get
more footage. I clicked on this which then put in a folder for me then I double clicked on it so I
could rename it and give it more of a better name so they footage that I wanted to find would be
more easier to find. I did this for a second time.
It then places the folders in this table,
this table is where all media goes, it
makes sure sense to add folders, now
it’s time to add the footage and place
them in the correct folder. First I’ll put
the interview with the Uni student in
first, so I am going to click on the
folder.
Which them takes me here, now I
am going to add the footage buy
clicking on the ‘get media’ icon
which is at the top and in the middle
of the three icon. Once I clicked on
that it will then take me into my
folders where I can then find the
footage that I want adding.
2. once I found it I then highlight it
and then click on open.
Then this loading bar appears
which mean it’s place the
footage in.
Now the table is filled up with the footage that I
had gotten.
I then dragged the footage that I will cut and changed into the timeline waiting for me to start
cutting and change them around.
I imported the college clips in the same way as the interview clips, and the I dragged the clips that I
wanted from the clips, once it was in the time line I then cut the bits that I didn’t want from the clip
by clicking on this cuts the bit that I didn’t want and then I just deleted it. But if I wanted to use
that clip again then I would just put that clip into the timeline and thenI would just use the bits that I
want. But then once I got the first clip done and sorted to how I liked it. I then put in the other clip
3. that I then cut that down to how I wanted it to be again and now I am going to put in a slide
transition in between both of those clipstogether and make them look good when they go between
each other. First I click on Edit which then changes what I could click on.
Then I clicked on transition, and then
under it has the clips that I selected so I
know what clip it is that I am going
transition, as you can see I have quite a
lot of different effects, I looked through
the different affects to find the one that
I wanted. This is the
one in which I wanted to use for the
first transition once I have found the
one that I wanted I have clicked on it
the then dragged it from transition and
into the time line.
But when you drag it into the timeline, you don’t place it on the clip itself you put it in the box in
between here and then it will make the two slide transition together towards the end of the first clip
and at the start of the next clip. I then put in more clips and did the same, cut the clips to make them
sorter and more usable. Then I put slide transition in between the two new clips and then I did the
same thing as I did before by placing the transition in the box in the middle box and then once that
done it then worked. Once I did that, I did the same thing over again until I was happy with what I
was getting from these clips.
4. This is now what my time line looks like with the clips added in, so far I’ve cut it down it will be about
21 second but even that is still too long for different shots of the college. I would find the end of the
start if the clips and cut it down by using to make it short. I did a few more times so that each
clip I was putting in was nice and short, as I want the video to only be about a minute or two so it’s
quick and gets to the point. I also decided to change the style of the interviews as I can’t get the
other shot to work so it’ll be the one shot which will be cut down.
On one of the clips I’ve got to turn up there sound as it’s a little too
quiet, first I am going to select the clip that needed to be turned up
Then I clicked on the speaker which
is above the clips and then a drop
down menu appeared, now that the
drop menu appeared I am now
going to click on the Audio Mix, as
it’s the audio I want turning up.
Then I clicked on the audio mix
Then this came up, I e levelled everything
so that the audio for that clip would be
the only one that would be able to be
heard. I made sure that Audio was the
highest, because the sound is coming
from audio 1, so making sure that was the
highest was the main thing. Once I was
done with that I then clicked the close
button and now that clip should be loader
than it was before.
Now that’s done I am now going to need to put two clips over each other so that it will give a voice
over effecton the video. The way I am going to is to pick the clip that I want and then I’ll just drag it
over.
5. Then I just put the clip into video
and audio 2 and now when that
plays it will be that clip showing
but video and audio 1 sound that
you’ll be able to hear
Now that the video is done I am now going to put in some music to go with the video, I got the video
and converted from Youtube.
I went in to get media, and then
this came up and now I am going
to click on files and folders,
because that’s where the music is
based in a folder in my documents.
Then this came up, now I will find
the music, which is in this folder,
now that I’ve found the music I am
going to double click on it
6. which now the music is sorted into the table where I get all
my videos. Now that is in I am going to drag the music from
there and then place it into soundtrack.
now the music is in the soundtrack
and plays when the video starts to
play.
Now I am going to export the video. First I am going into Share.
Then this came up, now I
am going to click on
Export to computer as I
want it on my computer
so I can find it. then I
clicked on it
7. Then this came up, I put it on HD, as that what I filmed in and then I am going to give it a title and
then save it my work document so I can find it when I need to. Once I’ve sorted all that out I then
pressed on save
Then this came up, this
now mean that my video
is being exported to the
folder where I told it to
go
Now it’s saved in my work space so I’ll be able to find it when I need to.