SlideShare una empresa de Scribd logo
1 de 40
Descargar para leer sin conexión
Easy Ergonomics
For Desktop Computer Users


           Department of Industrial Relations
           Cal/OSHA Consultation Service
           Research and Education Unit          1
COMPUTER ERGONOMICS GUIDE


  Easy Ergonomics for Desktop Computer Users was developed and prepared for publication by the
  Cal/OSHA Consultation Service, Research and Education Unit, Division of Occupational Safety
  and Health, California Department of Industrial Relations. It was distributed under the provisions
  of the Library Distribution Act and Government Code Section 11096.


                 Published 2005 by the California Department of Industrial Relations


  This booklet is not meant to be a substitute for, or a legal interpretation of, the occupational safety
  and health standards. Please see the California Code of Regulations, Title 8, or the Labor Code for
  detailed and exact information, specifications, and exceptions.

  The display or use of particular products in this booklet is for illustrative purposes only and does
  not constitute an endorsement by the Department of Industrial Relations.
Introduction

Congratulations! You have taken the first step toward improving the way you work at your
desktop computer.

Have you ever thought of the many things you do while you are at your computer work station?
What is your body posture while you are performing general computer functions, such as keying,
mousing, or writing? How long do you work at your computer without taking breaks?

By changing the way you interact with your computer equipment and furniture, you may be able
to reduce your risk of injury.

Protect your ability to work! If you are already feeling some discomfort or pain or if you would
like to learn how to work safely and reduce your risk of injury, read on. This guide was written
for you.


                                                                                                   13
COMPUTER ERGONOMICS GUIDE


    Using this booklet

     This booklet is intended for use by desktop computer users. The purpose of this booklet is to help
     you reduce your chances of being injured. You will learn to identify common desktop computer
     work station problems and explore some improvement goals. By understanding how you perform
     your job tasks, and how you use your equipment and furniture, you can work more safely,
     efficiently and comfortably.

     Each section of this booklet begins with an action goal which tells you what you need to do to
     work more safely and more comfortably. The action goals are summarized on pages 5 and 6, and
     covered in more detail in the sections on pages 8-33.


    Suggestions in this booklet are made to improve your work station first by utilizing your existing
    furniture and equipment. Try to do the best you can with what you’ve got. After that, suggestions are
    made to improve your work station by purchasing new or replacing existing furniture and
    equipment. If you are unable to improve your work station without purchasing new or replacing
    existing furniture or equipment, talk to your immediate supervisor. If you are already feeling
    discomfort, the table on page 4 will direct you to the sections in the booklet that address possible
    causes for your discomfort.

    The Checklist on page 7 serves as a way to identify computer tasks that may expose you to the risk of
    injury. If you answer YES to all the questions on the Checklist, you may not need to go any further. The
    pages that follow the Checklist offer suggestions for improving your work station and your work
    practices.

    You can also use this booklet as a training tool. Talk about these guidelines in your safety meetings
    and discuss ways to make necessary improvements.


    No one is required to use the information in this booklet. This booklet is not intended to
    provide employers or employees with information on how to comply with Cal/OSHA regulations.


2
TAKE A LOOK


Take a Look
As you read this booklet, sit at your computer and take a good look at what you do there. You may be
surprised to learn that some things you do every day may cause you pain or discomfort over time.
Learn how to change your work habits! You can ease your symptoms and learn how to work pain free.

Job Tasks
Before you begin to look for risk factors, it is important to understand how your job tasks may
contribute to your exposure to these risk factors. Ask yourself which tasks you perform
simultaneously (at the same time). For computer users, simultaneous tasks are those tasks that are
performed while keying, and include:
    A. keying / mousing (generic term for using an external pointing device)
    B. keying / mousing / writing
    C. keying / mousing / writing / using the telephone
    D. keying / mousing / writing / using the telephone / reading

When simultaneous and nonsimultaneous tasks are performed in awkward postures or with extended
reaches, you increase your chances of developing an injury. If you perform simultaneous tasks, go
to pages 19-25.

Workstation “Handedness”
Look at the direction of the work flow when performing simultaneous tasks. Generally, people are
most comfortable when they work toward their dominant side. For example, if you are right-handed,
your right hand is your dominant hand, and your right side is your dominant side. Does the
“handedness” of your work station fit your hand dominance? In other words, does the design of the
work station promote your work to flow toward your dominant hand? The “handedness” of the work
station is determined by the location of the keyboard relative to the work area where other tasks are
performed simultaneously with keying. When this work area (often the writing surface) is to the left
of the keyboard, it is said to be a left-handed work station, and vice versa. A right-handed employee
who sits at a left-handed work station will twist, turn, and reach to get to the work area to his/her
left. The “handedness” of the work station is not always a concern, as in the case when only one task
is performed there (e.g. keying only). To learn more ways to make the work station fit your
handedness, go to pages 22-25.


                  Left-handed workstation                 Right-handed workstation                      35
COMPUTER ERGONOMICS GUIDE


    Risk Factors
    In computer tasks there are certain conditions or risk factors that can contribute to the development of
    musculoskeletal disorders (MSDs) when computer users are exposed frequently to these risk factors, or
    for long periods of time. The conditions for exposing a user to the risk of MSDs associated with
    computer use are as follows:
        •   Keying for long periods of time without breaks or rest
        •   Using force when striking the keyboard or when gripping the pointing device (e.g. mouse,
            trackball)
        •   Working with awkward neck, shoulder, elbow, wrist, or back postures
        •   Remaining in the same position for a long time with little or no movement (e.g. sitting,
            holding the mouse)
        •   Continuous pressure against (leaning on) the wrist rest, work surface edge, or armrest with
            the wrists, forearms, or elbows; or against the front edge of the chair with the back of the legs.

    Do not wait until you feel pain or discomfort. Learn to change the way you work. If you understand your
    body posture in relationship to your computer equipment and furniture, you may, in fact, be able to prevent
    this kind of injury.

    If you are exposed to any of these risk factors repeatedly or for long periods, you might experience pain
    or discomfort. If you do, refer to the pages below for improvement options. If you continue to have pain
    or discomfort, let your immediate supervisor know.

             If you are having pain or
                                         It may be related to this...                     Refer to these pages...
             discomfort here...
             LOWER BACK                  ●
                                             Chair adjustment                                   8- 15
                                         ●
                                             Organization of the work station                   22- 25

             UPPER BACK                  ●
                                             Chair adjustment                                   13- 14
                                         ●
                                             Keyboard height                                    16- 18
                                         ●
                                             Location of the pointing device                    19- 21
                                         ●
                                             Organization of the work station                   22- 25
                                         ●
                                             Monitor height and distance                        27- 28
                                         ●
                                             Placement of the document                          31, 32

             NECK                        ●
                                             Organization of the work station                   22- 25
                                         ●
                                             Monitor height and distance                        27- 28
                                         ●
                                             Placement of the document                          31, 32

             ARMS / SHOULDERS            ●
                                             Chair adjustment                                   13- 14
                                         ●
                                             Keyboard height                                    16- 18
                                         ●
                                             Location of the pointing device                    19- 21
                                         ●
                                             Organization of the work station                   22- 25

             FOREARMS                    ●
                                             Keyboard height                                    16- 18
                                         ●
                                             Location of the pointing device                    19- 21
                                         ●
                                             Organization of the work station                   22- 25

             WRISTS / HANDS              ●
                                             Keyboard height                                    16- 18
                                         ●
                                             Location of the pointing device                    19- 21
                                         ●
                                             Organization of the work station                   22- 25
             VISION                      ●
                                             Monitor height and distance                        27- 28
                                         ●
                                             Monitor glare                                      29
4                                        ●
                                             Placement of the document                          31, 32
ACTION GOALS


Action Goals
Now that you are aware of the job tasks you perform and the risk factors leading to MSDs, you are
ready to look at the setup and organization of the furniture and equipment in your work space. The
action goals that follow will help you reduce or eliminate some of these risks. They are written to
help you work safely.

The following action goals describe the best way to work at your work station. This section will help
you to know where to start looking for problems at your work station. After reading these goals,
complete the Checklist on page 7. If you are unable to answer questions on the Checklist because
you need additional information about an action goal, or if you answer “NO” to any item on the
checklist, go to the page indicated where the action goal is covered in greater detail.

Goals
WHEN SITTING
1a-b. Your feet are resting comfortably on the floor or on a footrest,
      and your knees are slightly lower than your hips.
2.    There is a 2- to 4-inch gap between the back of your knees and the
      front edge of the chair when your back is against the chair.
3.    The curve of the chair back fits into the deepest part of the curve in
      your lower back.
4.    The back of the chair is upright or tilted back for comfort, and
      provides upper back support.
5.    Armrests are adjusted so that they are just slightly below your
      elbows when your shoulders are relaxed.
6.    Armrests do not interfere with access to the keying, mousing or writing surfaces.

WHEN KEYING
7a. Your shoulders are relaxed, and your
    elbows are close to your body.
7b. Your elbows are bent to 90 degrees
    or slightly greater (inner angle).
7c. The tops of the “home row” keys are
    at the same height as your elbows,
    or slightly lower than your elbows.
7d. Your wrists are straight (not bent).


WHEN POSITIONING THE CURSOR WITH A POINTING DEVICE
(using a mouse, trackball, touch pad, etc.)
8. The pointing device is close to the keyboard.

                                                                                                        57
COMPUTER ERGONOMICS GUIDE


      Goals
      WHEN ORGANIZING THE WORK SPACE
      9a. Reaches performed frequently are within the “near”
          work space (your elbows remain at your sides).
      9b. Reaches performed occasionally are within the “near”
          or “mid” work space (no more than an arm’s length
          away).
      9c. You are not reaching across your body to work.


      WHEN VIEWING THE MONITOR
      10a. It is in front of you and the top line of print is at or
           just below your eye level or even lower if you wear
           bifocal, trifocal, or progressive lenses; AND
           You are able to scan the screen from top to bottom by
           using only eye movements, not head movements.
      10b. You can sit against the back of the chair and read the
           monitor screen from a comfortable distance, without
           experiencing eye fatigue, blurred vision or headaches.
      10c. The monitor screen is free of glare.                       Viewing through bifocal lenses


      WHEN READING THE DOCUMENT
      11a. The document is off the flat work surface and in your
           line of vision.
      11b. The document is directly next to the monitor or
           between the monitor and the keyboard.
      11c. The document is at the same distance as, or closer
           than, the monitor.
      11d. You can look at the document and the monitor by
           moving only your eyes, not your head.


      WHEN USING A NEW SOFTWARE PROGRAM OR OPERATING SYSTEM (OS)
      12a. You are efficient in the most common tasks you perform.
      12b. You reduce the stress and frustration you experience when you cannot complete a task.


6
Instructions:                                             CHECKLIST
Answer the questions below to determine problems that might cause MSDs. If you answer “NO,” turn to the page indicated for improvement options. If
you run out of improvement options and you still have problems, contact your immediate supervisor.

 GOAL
 pp. 9-33                                                                                                       YES NO          If NO, see page:

    WHEN SITTING
            Is the chair height adjusted so that your feet rest comfortably flat on the
 1a-b       floor or footrest, with your knees just slightly lower than the hips?                                                        9

            Look at the depth of the seat pan. Is there a small gap (2 to 4inches)
    2                                                                                                                                   10
            between the back of your legs and the front edge of the seat pan?

    3       Does the curve of the back of the chair fit into your low back?                                                              11

    4       Does the back of the chair tilt back?                                                                                        12

            With your shoulders relaxed, are the armrests slightly below your elbows,
    5                                                                                                                                    13
            and do your arms hang comfortably at your sides?
            Can you get your chair close enough to your keying, mousing, or
    6       writing surfaces without reaching?                                                                                           15

    WHEN KEYING
            With your shoulders relaxed and your fingers curved, is the home row of
  7a-d                                                                                                                                  17
            keys at the same height as your elbows or slightly below your elbows?
    WHEN POSITIONING THE CURSOR WITH A POINTING DEVICE

    8       Is the pointing device positioned close to the keyboard?                                                                     20

    WHEN ORGANIZING THE WORK SPACE
            Are you able to use your work surface and equipment without over-
  9a-c      reaching or using awkward postures?                                                                                          23
    WHEN VIEWING THE MONITOR
            Is it in front of you and the top line of print is at or just below eye level or
            even lower if you wear bifocal, trifocal, or progressive lenses; AND
  10a                                                                                                                                    27
            are you able to scan the screen from top to bottom using only eye
            movements, not head movements?

            Can you sit against the back and read the monitor screen from a
  10b       comfortable distance, without experiencing eye fatigue, blurred vision,                                                      28
            or headaches?

  10c       Is the monitor screen free of glare?                                                                                         29
    WHEN READING THE DOCUMENT
       Is the document off the flat work surface and at the same distance as the
 11a-d monitor screen?                                                                                                                  31

     WHEN USING NEW SOFTWARE PROGRAMS AND OPERATING SYSTEMS
            Have you been trained on the software programs and operating system you
   12                                                                                                                                    33
            are using?

                                                                                                                                                79
COMPUTER ERGONOMICS GUIDE


    WHEN SITTING
                                                                           Seat pan adjustments:

        Chair back
                                  Lumbar
                                  curve
                                  (low back)
    Seat pan


                                                                Pull out to make        Push back to make
                                                                seat pan deeper         seat pan shallower

    Awkward seated postures and lengthy periods of sitting may increase your risk of injury. It is
    important that you are comfortable while sitting, as remaining in an awkward seated posture can
    increase your fatigue level, tighten muscles, or irritate nerves. When your body is fatigued or in
    discomfort, the risk of injury increases, and productivity and accuracy decrease. An awkward seated
    posture is especially risky if it is combined with lengthy periods of sitting, or other awkward body
    postures, and eventually you may have trouble doing even simple tasks, such as reaching for the
    telephone.

    When you remain in the same seated posture for a long time, your blood flow slows down and you
    may begin to feel tired. The muscles in your neck, shoulders, and back become fatigued. Recognize
    opportunities to get out of your chair and move around. Instead of reaching up to the overhead bin,
    stand up. Instead of reaching to the printer, place the printer farther away so you must get up and walk
    to it. Stand up to take a phone call. Moving around keeps the blood flowing and prevents muscle
    fatigue and cramping.

    When your chair is properly adjusted
    1a-b. Your feet are resting comfortably on the floor or on a footrest, and your knees are slightly
          lower than your hips.
    2.    There is a 2- 4-inch gap between the back of your knees and the front edge of the chair
          when your back is against the chair.
    3.    The curve of the chair back fits into the deepest part of the curve in your lower back.
    4.    The back of the chair is upright or tilted back for comfort.
    5.    Armrests are adjusted so that they are just slightly below your elbows when your shoulders
          are relaxed.
    6.    Armrests do not interfere with access to keying, mousing, or writing surfaces.

        You may need to adjust the height of your chair every day, depending upon the job task, and the
        shoes you are wearing (the higher the heels, the higher the chair will be raised). If the seat pan
8       height is changed, the keyboard and monitor will need to be adjusted, as well.
WHEN SITTING


     ACTION GOAL #1: Adjust the seat pan height so that

     a. Your feet rest comfortably flat on the floor,
        or on a footrest.
     b. Your knees are slightly lower than your hips.


IF YOU SEE THIS . . .            TRY THIS . . .


                                                                  OR


Your feet do not rest             Lower the chair until your           Use a footrest.
comfortably flat on the floor.    feet rest comfortably flat on
                                  the floor.


IF YOU SEE THIS . . .            TRY THIS . . .


Your feet rest on the floor,     Raise the chair until your
but your knees are higher        hips are slightly higher than
than your hips.                  your knees.


                                                                                                11
                                                                                                9
COMPUTER ERGONOMICS GUIDE


        ACTION GOAL #2: Adjust the seat pan depth so
        that there is a 2– 4-inch gap between the back of your
        knees and the front edge of the chair when your back
        is against the chair.


     IF YOU SEE THIS . . .                      TRY THIS . . .


     There is more than 4 inches                Slide the seat out (forward) to make it deeper and provide
     between the front edge of the              more support.
     seat pan and the back of your
     knees.                                                 OR


                                                Use a chair with a seat pan that has a 2- to 4-inch gap
                                                between the back of your knees and the front edge of the
                                                chair when your back is against the chair.*


     * Select a chair that fits and is comfortable. Be sure that the chair provides upper and lower back
     support. Ask for a demonstration of the adjustment features of the chair.

10
WHEN SITTING


    ACTION GOAL #3: Adjust the height of the back of
    the chair so that the curve of the back of the chair fits
    into the deepest part of the curve in your lower back.


IF YOU SEE THIS . . .                                         TRY THIS . . .


  Chair back too low      Chair back too high

The curve in the chair back does not fit into               Reach back to feel the curve in your lower
your lower back.                                            back. Then raise or lower the chair back until it
                                                            fits into the curve of your lower back;

                                                                                OR
                                                            Use another chair that can be adjusted to fit
                                                            your lower back.*


   * Select a chair that fits and is comfortable. Be sure that the chair provides upper and lower back
   support. Ask for a demonstration of the adjustment features of the chair.

                                                                                                            13
                                                                                                            11
COMPUTER ERGONOMICS GUIDE


     ACTION GOAL #4: Adjust the tilt of the back of
     the chair so that the back of the chair is upright or
     tilted back for comfort.


     IF YOU SEE THIS . . .                   TRY THIS . . .


     The chair back does not                 Use another chair that tilts back
     tilt back slightly and rock             slightly and rocks or locks into
     or lock into position.                  position.*


      * Select a chair that fits and is comfortable. Be sure that the chair provides upper and lower back
      support. Ask for a demonstration of the adjustment features of the chair.


12
WHEN SITTING


  ACTION GOAL #5: Adjust the armrests so that

  a: They are slightly below your elbows when your
     shoulders are relaxed.
  b. Your arms hang comfortably at your sides.


IF YOU SEE THIS . . .            TRY THIS . . .


  Armrests too high

Your shoulders are raised when       With shoulders relaxed, lower the armrests to just slightly
resting on the armrests.             below your elbows.


IF YOU SEE THIS . . .            TRY THIS . . .


  Armrests too low

You reach down to rest on           Raise the armrests to just slightly below your
the armrests.                       elbows when your shoulders are relaxed.

                                                                                                   13
                                                                                                   15
COMPUTER ERGONOMICS GUIDE


        ACTION GOAL #5 Continued


     IF YOU SEE THIS . . .                            TRY THIS . . .


     The armrests cannot be                           Remove the armrests.
     adjusted to slightly below
     your elbows when your                                        OR
     shoulders are relaxed.
                                                      Use another chair with adjustable armrests.*


       * Select a chair that fits and is comfortable. Be sure that the chair provides upper and lower
       back support. Ask for a demonstration of the adjustment features of the chair.


14
WHEN SITTING


  ACTION GOAL #6: Adjust the armrests so that
  they do not interfere with access to keying,
  mousing or writing surfaces.


IF YOU SEE THIS . . .                 TRY THIS . . .


Armrests interfere with              Adjust the armrests to their lowest position. In this
access to keying, mousing,           position they cannot be used for resting.
or writing surfaces.
                                                 OR


                                     Remove the armrests.


                                                                                               17
                                                                                               15
COMPUTER ERGONOMICS GUIDE


WHEN KEYING
 When the keyboard is at the right height
 7a. Your shoulders are relaxed, and your elbows are close to your body.
 7b. Your elbows are bent to 90 degrees, or slightly greater (inner angle).
 7c. The tops of the “home row” keys are at the same height as your elbows,
     or slightly below your elbows.
 7d. Your wrists are straight (not bent).


                   Home row                          Keys at elbow height            Keys slightly below elbows
                                                     “Neutral” keyboard               “Negative” keyboard tilt
     When you center your fingers on “home row”, your fingers must reach the top, bottom, and sides of the
     keyboard. The fingers and wrists do all the work and they quickly tire.

       Try this keying technique*
       Instead, transfer the workload from your hands to the larger muscles of your arms, elbows, and
       shoulders by using arm movements rather than just finger and wrist movements while keying.
       You will work more comfortably and you won’t tire as quickly.
       Source:
       * “Computing Without Pain With the MouseKeyDo System,” Norman J. Kahan, MD.

 In this section, reference is made to the keyboard platform. The keyboard platform is mounted beneath the
 work surface, and allows you to raise, lower, and tilt the keyboard. For computer operators, it is recommended
 that the keyboard platform is either flat (not tilted) or tilted downwards (negative tilt). It is not recommended
 that the keyboard is tilted upwards (positive tilt), as this forces you to bend your wrists back.


           Negative tilt                    Flat or neutral (not tilted)                      Positive tilt

           Many desktop computer users still use the standard, or traditional, keyboard. For a description of
           alternative keyboards, go to
16         http://www.healthycomputing.com/office/accessories/keyboard/#Keyboards.
WHEN KEYING


    ACTION GOAL #7: Adjust the keyboard height so that

    a. Your shoulders are relaxed, and
       your elbows are close to your body.
    b. Your elbows are bent to 90 degrees,                                or
       slightly greater (inner angle).
    c. The tops of the home row keys are                                  at
       the same height as your elbows or
       slightly below your elbows
       (negative tilt).
    d. Your wrists are straight (not bent).


IF YOU SEE THIS . . .                  TRY THIS . . .


       Keyboard too high
                                       Raise or lower the keyboard platform or your chair until the
The keyboard is above elbow            tops of the home row keys are at the same height as your
height.                                elbows or slightly below your elbows when your shoulders
                                       are relaxed. Use a footrest if necessary.


                                                  OR


       Keyboard too low

The keyboard is too low and
your wrists are bent.
                                      Tilt the back edge of your keyboard platform slightly
                                      downward (“negative” tilt). You arms will tilt downward, and
                                      your elbows will open to slightly more than 900. Don’t use
                                      the legs beneath the keyboard.

                                                                                                      17
                                                                                                      19
COMPUTER ERGONOMICS GUIDE


     ACTION GOAL #7 Continued


         IF YOU SEE THIS . . .            TRY THIS . . .


          The keyboard is at your elbow   Use the wrist rest only for short periods
          height, but you lean on your    between keying. For longer periods, remove
          wrists while keying.            your hands from the keyboard and rest them
                                          in your lap.


18
POSITIONING THE CURSOR


WHEN POSITIONING THE CURSOR
WITH A POINTING DEVICE
Pointing devices, such as the mouse and trackball, can cause computer-related injuries to the
shoulders, neck, elbows, wrists, and hands. Common actions associated with such devices include
reaching, gripping, pivoting at the wrist, finger clicking, and holding the button when “dragging” the
mouse. Those actions and static arm posture (“mouse arm”) may cause problems eventually.

When a pointing device is used while keying, it is important that it is accessed without overreaching
or using awkward postures. To accomplish this place the pointing device as close to the keyboard as
possible.

When the pointing device is in the right position
8. The pointing device is close to the keyboard.


  There are many improvement options for positioning the pointing
  device that are not covered in this section. Other comfortable positions
  for the pointing device that promote a flat (neutral) wrist can be used.


   When using a mouse, try this technique:*
   • Drop your arm and hand as one onto the mouse, with your

     upper arm hanging freely from your shoulder.
   • Drape your hand over the mouse, with your palm on the

     center of the mouse and all your fingertips hanging over
     the front and sides (avoid the temptation to grip the mouse with your fingers).
   • Make small circular motions with the mouse by making arm movements from the shoulder.

   • Click the mouse button with the mid-section of your finger rather than your fingertip.

       Source:
       * “Computing Without Pain With the MouseKeyDo System,” Norman J. Kahan, MD.


Tips for mouse or trackball:
   • Take your hand off the mouse or trackball when you are not using it, and rest your hand in
        your lap.

   •   Make sure you have enough space on the work surface to move the cursor with the mouse in
       one sweeping movement, rather than having to pick up and reposition the mouse.

                                                                                                         21
                                                                                                         19
COMPUTER ERGONOMICS GUIDE


     ACTION GOAL #8: Place the pointing device
     so that it is close to the keyboard.


 IF YOU SEE THIS . . .                   TRY THIS . . .


 The pointing device is a                Use a keyboard that does not have a 10-key pad and place the
 trackball that does not fit on          trackball next to the keyboard.
 the keyboard platform.

                                                    OR


     There are many improvement
     options for positioning the
     pointing device that are not        Replace the keyboard platform with an adjustable keyboard
     covered in this section. Other      platform wide enough to fit the keyboard and the trackball.
     comfortable positions for the       Adjust the height and tilt of the platform so that the tops of the
     pointing device that promote a      home row keys are at your elbow height, or slightly below
     flat (neutral) wrist can be used.   your elbows (negative tilt), when your shoulders are relaxed.


20
POSITIONING THE CURSOR


   ACTION GOAL #8 Continued
IF YOU SEE THIS . . .                 TRY THIS . . .


                                                                            Mouse platform


The pointing device is a
mouse that does not fit on            Place a mouse platform over the numbers pad and use it as a
the keyboard platform.                mousing surface.

          OR                                     OR
IF YOU SEE THIS . . .                 TRY THIS . . .


The pointing device is
either a mouse or a
trackball that does not fit
on the keyboard platform.


                                      Follow these steps:
                                      1. Remove the keyboard platform;
                                      2. Then place the keyboard and pointing device directly on the
                                         work surface, with the mouse or trackball next to the keyboard.
                                      3. Raise the chair until the tops of the home row keys are at the
                                         same height as your elbows, or slightly below your elbows,
  There are many improvement             when your shoulders are relaxed. Use a footrest, if necessary.
  options for positioning the         4. Adjust the height and distance of the monitor, if necessary.
  pointing device that are not
  covered in this section. Other                 OR
  comfortable positions for the
  pointing device that promote a
  flat (neutral) wrist can be used.


                                      Use a keyboard with a built-in pointing device (touch pad).    23
                                                                                                     21
COMPUTER ERGONOMICS GUIDE


 ORGANIZING
 THE
 WORK SPACE
                                                  “Near” work space              “Mid” work space


 Overreaching is defined as reaching to such a distance that you lean
 forward or to the sides while fully extending your arm. Overreaching in
 any direction causes fatigue, reducing productivity and accuracy and
 increasing the risk of injury. Reduce or eliminate overreaching by
 rearranging the work station.
                                                                                Avoid overreaching
 “Near” Work space Activities
 For activities performed frequently or repetitively, the work should be
 performed within the “near” work space, with your elbows at your sides.
 Within this space, you can work comfortably without stretching or
 leaning. Working outside this space requires you to reach, bend, twist,
 and so forth. These activities lead to discomfort and fatigue and can
 cause injuries. By working within the “near” work space, you can
 maximize efficiency and comfort.                                               “Near” work space


 “Mid” Work space Activities
 Activities performed occasionally can be performed in the “mid” work
 space (an arm’s length away); however, this requires extension of your
 arm. Activities performed beyond this mid-range involve leaning and
 reaching and should be performed rarely.

 If your work space is properly organized                                        “Mid” work space
 9a. Reaches performed frequently are within the “near” work space
      (your elbows remain at your sides).
 9b. Reaches performed occasionally are within the “near” or “mid”
      work space (no more than an arm’s length away).
 9c. You are not reaching across your body to work.


                                                                           Avoid reaching across your body

22
ORGANIZING THE WORK SPACE


  ACTION GOAL #9: Organize the work space so
  that

  a. Reaches performed frequently are within the
     near work space (your elbows are at your sides).
  b. Reaches performed occasionally are within the
     near or mid work space (no more than an arm’s
     length away).
  c. You are not reaching across your body to work.


IF YOU SEE THIS . . .            TRY THIS . . .


                                      “Near” work space                “Mid” work space

You frequently lean to make      Remove unnecessary equipment and supplies from the
reaches more than an arm’s       work station;
length away.
                                                        AND

                                 Re-organize your work space by moving all necessary
                                 equipment and supplies close, to no more than an arm’s
                                 length away, or to a location where you must get up and
                                 walk to it.


                                                                                           23
                                                                                           25
COMPUTER ERGONOMICS GUIDE


      ACTION GOAL #9 Continued

     IF YOU SEE THIS . . .            TRY THIS . . .


                                       Follow these steps:
                                       1. Remove the keyboard platform;
                                       2. Then place the keyboard, pointing device and writing
                                          material directly on the work surface;
                                       3. Raise the chair until the tops of the home row keys are
                                          at the same height as your elbows, or slightly below
                                          your elbows when your shoulders are relaxed. Use a
     You are using a keyboard             footrest, if necessary.
     platform and you are keying,      4. Adjust the height and distance of the monitor, if
     mousing, and writing                 necessary.
     simultaneously, and you
     reach above and behind your                       OR
     keyboard to get to the
     pointing device or the writing
     surface.


                                       Follow these steps:
                                       1. Replace the keyboard platform with a height- and tilt-
                                          adjustable platform that is wide enough for the
                                          keyboard and pointing device.
                                       2. Adjust the height and tilt of the keyboard platform until
                                          the tops of the home row keys are the same height as
                                          your elbows, or slightly below your elbows (negative
                                          tilt) when your shoulders are relaxed.
24
ORGANIZING THE WORK SPACE


    ACTION GOAL #9 Continued

IF YOU SEE THIS . . .           TRY THIS . . .


You reach across your body      Reverse the placement of the computer equipment
to work because:                so that non-keying tasks are performed on your
Your work station does not      dominant side when you are sitting at your
match your dominant hand        keyboard.
(handedness).

IF YOU SEE THIS . . .           TRY THIS . . .


You reach across your body to        Reverse the placement of the file drawers so that
work because:                        they are beneath the work surface on your non-
File drawers prevent you from        dominant side.
having knee clearance beneath
the work surface on your
dominant side.
                                                                                         27
                                                                                         25
COMPUTER ERGONOMICS GUIDE


       WHEN VIEWING THE MONITOR


     Monitor height
     The maximum height of your viewing range is established by your horizontal line of sight when you
     are comfortably and properly seated at your work station.

     A monitor that is set too high will cause you to tip or tilt your head back to look up at the monitor.
     Over time, neck, shoulder, and upper back pain may result. You may also notice dry eyes because
     there is a tendency to blink less when looking up.

     Monitor distance
     Placing the monitor at a comfortable distance varies with each person. In general, the closer you are to
     the monitor, the harder your eyes work to keep the image in focus. You may experience eye fatigue,
     blurred vision, or headaches if your monitor is placed too close. On the other hand, if you lean forward
     to see the monitor, pull it closer to you.

     If your monitor is properly adjusted
     10a. It is in front of you and the top line of print is at or
           below your horizontal line of sight or even lower if
           you wear bifocal, trifocal or progressive lenses.
     10b. You can sit against the back of the chair and read the
           monitor screen from a comfortable distance, without
           experiencing eye fatigue, blurred vision, or headaches.
     10c. The monitor screen is free of glare.


            Try these techniques
            1. Periodically shift your view to something in the background (behind the monitor). Give
               your eyes a chance to relax.
            2. Periodically rest your eyes by closing them for five seconds.
            3. Adjust the monitor’s contrast and/or brightness (light background, dark font).
            4. Zoom in to increase the display percentage.
            5. Blink!


26
WHEN VIEWING THE MONITOR


 ACTION GOAL #10a: Adjust the height of the
 monitor so that

 • It is directly in front of you and the the top line of
   print is at or just below eye level, or lower if you
   wear bifocal, trifocal, or progressive lenses AND

 • You are able to scan the screen from top to bottom
                                                                            With bifocal, trifocal,
   using only eye movements, not head movements.                            or progressive lenses
IF YOU SEE THIS . . .              TRY THIS . . .


                                                                     OR


      Monitor too high                  Lower the monitor                           Raise the chair
The top line of print is above     Lower the monitor (remove the computer or monitor riser[s] from
eye level.                         beneath the monitor) until the top line of print is at or slightly below
                                   eye level, or lower if you wear bifocal, trifocal, or progressive lenses.

                                                                   OR
                                   Raise your chair until your eyes are at or just slightly above the top
                                   line of print, or even higher if you wear bifocal, trifocal or progressive
                                   lenes. Use a footrest, if necessary.

IF YOU SEE THIS . . .              TRY THIS . . .


       Monitor too low                With bifocal, trifocal, or              Without bifocal, trifocal, or
                                         progressive lenses                       progressive lenses

  You use head movements to        Raise the monitor until the top line of print is at or slightly below
  scan from top to bottom of       your eye level, or even lower if you wear bifocal, trifocal, or
  the screen.                      progressive lenses.
                                                                                                                29
                                                                                                                27
COMPUTER ERGONOMICS GUIDE


     ACTION GOAL #10b: Start with the monitor
     an arm’s lenght away. Then adjust the distance
     of the monitor so that you can sit against the
     back of the chair and read the monitor screen
     from a comfortable distance, without
     experiencing eye fatigue, blurred vision, or
     headaches.


 IF YOU SEE THIS . . .               TRY THIS . . .


                                                                       A small change can
                                                                      make a big difference

       Monitor too close
 You have symptoms (eye              Move the monitor back until you can comfortably read the
 fatigue, blurred vision, or         screen without experiencing symptoms.
 headaches).


 IF YOU SEE THIS . . .               TRY THIS . . .


                                                                      A small change can
                                                                     make a big difference

        Monitor too far
 You have difficulty reading the     Move the monitor closer until you can sit back and
 screen, and lean forward to get a   comfortably read the screen without symptoms.
 closer look.


28
WHEN VIEWING THE MONITOR


     ACTION GOAL #10c: Adjust the tilt of the
     monitor so that the screen is free of glare.


IF YOU SEE THIS . . .                   TRY THIS . . .


45


Glare on your monitor from              Tilt the monitor down slightly;
task or overhead lighting.
                                                      OR
                                        Dim task or overhead lights; draw blinds or curtains.

 IF YOU SEE THIS . . .                  TRY THIS . . .


 Glare on your monitor from             Reposition the monitor so that it is at a right angle to the
 windows.                               light source;

                                                      OR

     Other sources of glare
     include light colored
     clothing and white                                                  OR
     papers.


                                       Use a glare screen.                      Use file folders or a
                                                                                screen hood             31
                                                                                                        29
COMPUTER ERGONOMICS GUIDE


     WHEN READING THE DOCUMENT


     Focusing on a document requires the muscles in your eyes to contract to keep the image sharp. Each
     time your eyes shift from the document to the monitor they must refocus. Eventually they become
     fatigued. Ultimately, the result is eye fatigue, eyestrain, or headaches which can affect productivity and
     accuracy.

     When the document is placed flat on the work surface, you will use head and neck movements to shift
     your view between the document and the monitor. These movements can cause neck strain if performed
     repeatedly, or day after day.

     When the document holder is properly placed
     11a. The document is off the flat work surface
          and in your line of vision.
     11b. The document is directly next to the monitor,
          or between the monitor and the keyboard.
     11c. The document is at the same distance as, or
          closer than, the monitor.
     11d. You can look at the document and the monitor
          by moving only your eyes, not your head.


30
WHEN READING THE DOCUMENT


   ACTION GOAL #11: Position the document so that

   a. It is off the flat worksurface and in your
      line of sight.
   b. It is directly next to the monitor or
      between the monitor and the keyboard.
   c. It is at the same distance as the monitor
      or closer.
   d. You can shift your view between the
      document and the monitor by moving
      only your eyes, not your head.

IF YOU SEE THIS . . .                                         TRY THIS . . .


                            The document is not directly      Place the document at the same
                            next to the monitor.              height and distance as the
                                                              monitor unless the print is too
                                                              small to read. If the print is
                                                              hard to read, place the
                                                              document closer to and at the
                                                              same height as the monitor.

                                                                         OR


                                                              Position the document
                                                              between the monitor and the
                                                              keyboard.
                                                                                                33
                                                                                                31
COMPUTER ERGONOMICS GUIDE


        ACTION GOAL #11 Continued

     IF YOU SEE THIS . . .          TRY THIS . . .


     The document is farther away   Use a document holder that mounts to the monitor
     than the monitor.              or is positioned to either the left or right side of
                                    the monitor;


                                                OR


                                    Position the document between the monitor and
                                    the keyboard.


32
KNOW YOUR SOFTWARE


KNOW YOUR SOFTWARE PROGRAMS
AND OPERATING SYSTEM...


     ACTION GOAL #12: Ask your manager for instructions or training
     before you begin so that

     a. You are efficient in the most common tasks you perform.
     b. You reduce the stress and frustration you experience when you
        cannot complete a task.


Protect your ability to work! Ask your manager for help if you have not been trained on the software
programs or operating system you are using.

If you need to work with a particular program or operating system, be sure to familiarize yourself
with it ahead of time. Training can be as simple as a short demonstration or taking a class for a day
or two. The time spent in training can pay off in big dividends in (1) preventing injuries; (2) being
able to work without discomfort or pain; (3) reducing unnecessary movements; (4) saving time and
getting the work done more efficiently.

Many software programs have shortcuts that allow you to quickly accomplish tasks without using a
pointing device (mouse, trackball, etc.). By pressing one or more keys on the keyboard you can
complete your task quickly and without the awkward postures associated with the pointing device.
Learn to use the shortcuts as an alternative to the pointing device.


                                                                                                        35
                                                                                                        33
COMPUTER ERGONOMICS GUIDE


     The Benefits of Software Training

     By Anthony Andre, PhD.
     Interface Analysis


     In a recent usability study conducted by Interface Analysis Associates, 24 intermediate to highly
     experienced computer users were observed while they were attempting to perform basic tasks in common
     software applications. Their interactions with the software were analyzed in terms of length of time,
     number of mouse clicks, and successful completion of the tasks and when compared to optimal
     performance standards. The results showed that, on average, participants either took longer and used
     more mouse clicks than necessary to successfully perform common computer tasks, or they couldn’t
     figure out how to complete a task. In the end, the study suggests that for every 8 hours of computer work,
     the same work could have been performed in only 40 minutes if the software training had been provided!

       Impacts on You
       During these periods of inefficiency, participants were observed for body postures and other
       behaviors, such as facial expressions (indicators of frustration or stress) and verbal utterances.
       These observations revealed the impact of software inefficiency in four main areas:

       Time: The more inefficient we are as computer users, the more time we spend sitting in front of the
       computer. The negative effects of prolonged sitting include poor circulation; muscle fatigue; back,
       shoulder, and neck pain; eye strain; and more.

       Repetitions: Inefficiency results in more mouse clicks and keystrokes, that is, higher repetitions.

       Posture: Our postures change when we can’t easily accomplish our goals with our computer
       software. For example, we lean forward, we hold the mouse with our arm outstretched and shoulder
       raised, and ultimately we lose the basis for the support of good body posture.

       Stress: With each failed attempt to carry out a specific action or command with our computer
       software, we experience higher levels of stress, frustration, and time pressure.

     Conclusions and Guidelines
     Computer users are encouraged to explore ways to improve their computer interaction efficiency
     and seek training in the software programs and operating systems they use in their workplaces. Indeed,
     most of the participants indicated that their interactions with software would be more efficient with
     formal training.


34
REFERENCE


TIPS TO IMPROVE THE WAY YOU WORK

• Take micro-breaks from repetitious activities or static postures every 30 minutes for one or two
  minutes before resuming that activity or posture. Find opportunities to get out of your chair and
  move around.

• Place the telephone on your non-dominant hand side. Your dominant hand will be free
  for writing, and cradling the telephone between your ear and shoulder while writing will not be
  necessary.

• Use a telephone headset or the speaker when performing tasks simultaneously with the
  telephone. This practice will prevent awkward neck and shoulder postures associated with
  cradling the telephone between your ear and shoulder.

• Type with the tips of the fingers. Less force is needed to depress the keys with the tips of
  the fingers. Use a light touch when keying.

• Change postures frequently throughout the day. Alternate working from a sitting to a standing
  position whenever possible. Change the tilt of the back of the chair frequently.

• Use shortcut keys whenever possible, instead of a pointing device (mouse, trackball, etc.).

• Alternate hands when using the pointing device, OR alternate between pointing devices (e.g.
  alternate between mouse and trackball). Use larger muscles by moving from the elbow and
  shoulder, rather than from the wrist, when operating the pointing device.

• Stand up to reach into overhead bins rather than reaching up from a sitting position,
  OR, lower the overhead storage bins if possible.


                                                                                                      37
                                                                                                      35
COMPUTER ERGONOMICS GUIDE


     List of Websites

     The Web sites listed below contain ergonomic information for office and industrial work settings and
     work techniques.

     Australia OHS
     http://www.nohsc.gov.au/OHSInformation/Databases/OHSSolutions/solutionslistres.asp?Sort=Industry
     Canadian OSHA
     http://www.ccohs.ca/oshanswers/ergonomics/
     Cornell University
     http://ergo.human.cornell.edu
     Ergo Solutions
     http://www.ergosolutionsmag.com
     Ergo Web
     http://www.ergoweb.com/resources/casestudies/
     Federal OSHA
     http://www.osha.gov
     Healthy Computing
     http://www.healthycomputing.com
     Human Factors/Ergonomics Society (HFES)
     http://www.hfes.org
     Interface Analysis
     http://www.interface-analysis.com
     International Ergonomics Association (IEA)
     http://www.iea.cc
     MouseKeyDo
     http://www.mousekeydo.com
     National Institute for Occupational Safety & Health (NIOSH)
     http://www.cdc.gov/niosh/topics/
     Oregon OSHA
     http://www.orosha.org/consult/ergonomic/health_ergonomics.htm
     UC Berkeley/SF
     http://www.me.berkeley.edu/ergo/
     UC Davis Ag-Ergo
     http://ag-ergo.ucdavis.edu
     Washington State Labor & Industries
     http://www.lni.wa.gov/Safety/Topics/ReduceHazards/ErgoBank/default.asp


36
ACKNOWLEDGEMENTS


WRITER
Fran Wagner, MS, Certified Industrial Ergonomist, First Response Ergonomics

EDITOR
Faye Ong, Associate Editor, CDE Press, California Department of Education

PHOTOGRAPHY
Rick Hight, Cal/OSHA Consultation, Research and Education
Fran Wagner, First Response Ergonomics

PAGE LAYOUT AND DESIGN
Ken Jackson, Graphic Designer, Link One LLC

ACKNOWLEDGEMENTS
The following people assisted in the research and development of this booklet:

Anthony Andre, PhD                          Principal, Interface Analysis Associates
Dave Bare                                   Cal/OSHA Consultation Services
Marisela Bonilla                            Cal/OSHA Consultation Services
Cindy Burt, MS, OTR/L, CEA                  UCLA Environment Health & Safety
Zin Cheung, MS, CIE                         Cal/OSHA Consultation Services
Richard DaRosa, MS                          Cal/OSHA Consultation Services
Mario Feletto, MS, MPH                      Cal/OSHA Consultation Services
Alan Hedge, PhD, CPE                        Cornell University Human Factors/Ergonomics Lab
John Howard, MD, MPH, JD, LLM               Director, National Institute for Occupational Safety & Health
Norman Kahan, MD, Director                  Sports & Occupation Medical Associates/MouseKeyDo
Mike Oldridge                               The Mart Office Furniture
Ann Pudoff, CIE                             Bickmore Risk Services
Cheri Ruliffson                             Vision Services Plan
Kristy Schultz, MS, CIE                     Cal/OSHA Consultation Services


                                                                                                        39
                                                                                                        37
COMPUTER ERGONOMICS GUIDE
         Cal/OSHA Consultation Programs
    Toll-free number: 1-800-963-9424                              Internet: www.dir.ca.gov

                                On-site Assistance Program
                                                Area Offices

                                                        Northern California
                                                        2424 Arden Way, Suite 410
                                                        Sacramento, CA 95825
                                                        (916) 263-0704


                                                            Central Valley
San Francisco Bay Area                                      1901 North Gateway Blvd., Suite 102
1515 Clay St., Suite 1103                                   Fresno, CA 93727
Oakland, CA 94612                                           (559) 454-1295
(510) 622-2891

                                                                              San Bernardino/Orange
                                                                              464 West 4th St., Suite 339
                                                                              San Bernardino, CA 92401
                                                                              (909) 383-4567
      San Fernando Valley
      6150 Van Nuys Blvd., Suite 307
      Van Nuys, CA 91401
      (818) 901-5754


                 Los Angeles
                 10350 Heritage Park Dr., Suite 201
                 Santa Fe Springs, CA 90670
                 (562) 944-9366                                              San Diego
                                                                             7575 Metropolitan Dr., Suite 204
                                                                             San Diego, CA 92108
                                                                             (619) 767-2060


Your call will in no way trigger an inspection by Cal/OSHA Enforcement

            Voluntary Protection Program                       Research and Education Unit
            Oakland, CA 94612                                  Sacramento, CA 95825
            (510) 622-1081                                     (916) 574-2528


                                                                                                     05 91266

Más contenido relacionado

Similar a Computerergo

Applied ergonomics
Applied ergonomicsApplied ergonomics
Applied ergonomicsSyed Humam
 
Ergonomics Workstation Self Ergonomic Assessment
Ergonomics Workstation Self Ergonomic Assessment Ergonomics Workstation Self Ergonomic Assessment
Ergonomics Workstation Self Ergonomic Assessment Abirami V Veeramani
 
Sample Office Ergonomic Evaluation
Sample Office Ergonomic EvaluationSample Office Ergonomic Evaluation
Sample Office Ergonomic Evaluationaljingst
 
Report on ergonomic design of workstations
Report on ergonomic design of workstationsReport on ergonomic design of workstations
Report on ergonomic design of workstationstheherovishal8692
 
Ergonomic approaches to workstation design of computer workers
Ergonomic approaches to workstation design of computer workersErgonomic approaches to workstation design of computer workers
Ergonomic approaches to workstation design of computer workersUbaidullahTeli
 
Computer Ergonomics
Computer ErgonomicsComputer Ergonomics
Computer Ergonomicssumitverma07
 
Ergonomics For Pc Users
Ergonomics For Pc UsersErgonomics For Pc Users
Ergonomics For Pc Usersmahdi salari
 
Ergonomics Training by Washingtion State University
Ergonomics Training by Washingtion State UniversityErgonomics Training by Washingtion State University
Ergonomics Training by Washingtion State UniversityAtlantic Training, LLC.
 
Computer workstation safety
Computer workstation safetyComputer workstation safety
Computer workstation safetyElla Agbettor
 
Lo1 part 1.PPTX
Lo1 part 1.PPTXLo1 part 1.PPTX
Lo1 part 1.PPTXSantaBest
 
Computer-Workstation-Ergonomics.pptx
Computer-Workstation-Ergonomics.pptxComputer-Workstation-Ergonomics.pptx
Computer-Workstation-Ergonomics.pptxMarkLeonardDBarriata
 
Lesson #2: Working with computers
Lesson #2: Working with computersLesson #2: Working with computers
Lesson #2: Working with computersmarinoromi
 

Similar a Computerergo (20)

Applied ergonomics
Applied ergonomicsApplied ergonomics
Applied ergonomics
 
Ergonomics Workstation Self Ergonomic Assessment
Ergonomics Workstation Self Ergonomic Assessment Ergonomics Workstation Self Ergonomic Assessment
Ergonomics Workstation Self Ergonomic Assessment
 
Display screen equipment 101
Display screen equipment 101Display screen equipment 101
Display screen equipment 101
 
Display Screen Equipment
Display Screen Equipment Display Screen Equipment
Display Screen Equipment
 
Sample Office Ergonomic Evaluation
Sample Office Ergonomic EvaluationSample Office Ergonomic Evaluation
Sample Office Ergonomic Evaluation
 
Display screens
Display screens Display screens
Display screens
 
Ergonomics.doc
Ergonomics.docErgonomics.doc
Ergonomics.doc
 
Report on ergonomic design of workstations
Report on ergonomic design of workstationsReport on ergonomic design of workstations
Report on ergonomic design of workstations
 
Ergonomic approaches to workstation design of computer workers
Ergonomic approaches to workstation design of computer workersErgonomic approaches to workstation design of computer workers
Ergonomic approaches to workstation design of computer workers
 
Computer Ergonomics
Computer ErgonomicsComputer Ergonomics
Computer Ergonomics
 
Ergonomics For Pc Users
Ergonomics For Pc UsersErgonomics For Pc Users
Ergonomics For Pc Users
 
Ergonomics Training by Washingtion State University
Ergonomics Training by Washingtion State UniversityErgonomics Training by Washingtion State University
Ergonomics Training by Washingtion State University
 
Computer workstation safety
Computer workstation safetyComputer workstation safety
Computer workstation safety
 
Office ergonomics
Office ergonomicsOffice ergonomics
Office ergonomics
 
Lo1 part 1.PPTX
Lo1 part 1.PPTXLo1 part 1.PPTX
Lo1 part 1.PPTX
 
Computer-Workstation-Ergonomics.pptx
Computer-Workstation-Ergonomics.pptxComputer-Workstation-Ergonomics.pptx
Computer-Workstation-Ergonomics.pptx
 
Lesson #2: Working with computers
Lesson #2: Working with computersLesson #2: Working with computers
Lesson #2: Working with computers
 
Ergonomic paper
Ergonomic paperErgonomic paper
Ergonomic paper
 
Office ergonomics by kapil
Office ergonomics by kapilOffice ergonomics by kapil
Office ergonomics by kapil
 
CompTech4MicroEnt-HNC
CompTech4MicroEnt-HNCCompTech4MicroEnt-HNC
CompTech4MicroEnt-HNC
 

Más de mahdi salari

Ot positioning set
Ot positioning setOt positioning set
Ot positioning setmahdi salari
 
Ot exercise therapy set
Ot exercise therapy setOt exercise therapy set
Ot exercise therapy setmahdi salari
 
Mechanisms Leading To Musculoskeletal Disorders In Dentistry New
Mechanisms Leading To Musculoskeletal Disorders In Dentistry  NewMechanisms Leading To Musculoskeletal Disorders In Dentistry  New
Mechanisms Leading To Musculoskeletal Disorders In Dentistry Newmahdi salari
 
Mechanisms Leading To Musculoskeletal Disorders In Dentistry 2
Mechanisms Leading To Musculoskeletal Disorders In Dentistry  2Mechanisms Leading To Musculoskeletal Disorders In Dentistry  2
Mechanisms Leading To Musculoskeletal Disorders In Dentistry 2mahdi salari
 
Mechanisms Leading To Musculoskeletal Disorders In Dentistry 1
Mechanisms Leading To Musculoskeletal Disorders In Dentistry  1Mechanisms Leading To Musculoskeletal Disorders In Dentistry  1
Mechanisms Leading To Musculoskeletal Disorders In Dentistry 1mahdi salari
 

Más de mahdi salari (8)

Writing's splints
Writing's splintsWriting's splints
Writing's splints
 
Ot positioning set
Ot positioning setOt positioning set
Ot positioning set
 
Ot exercise therapy set
Ot exercise therapy setOt exercise therapy set
Ot exercise therapy set
 
Mechanisms Leading To Musculoskeletal Disorders In Dentistry New
Mechanisms Leading To Musculoskeletal Disorders In Dentistry  NewMechanisms Leading To Musculoskeletal Disorders In Dentistry  New
Mechanisms Leading To Musculoskeletal Disorders In Dentistry New
 
Miniscus Complet
Miniscus CompletMiniscus Complet
Miniscus Complet
 
Mechanisms Leading To Musculoskeletal Disorders In Dentistry 2
Mechanisms Leading To Musculoskeletal Disorders In Dentistry  2Mechanisms Leading To Musculoskeletal Disorders In Dentistry  2
Mechanisms Leading To Musculoskeletal Disorders In Dentistry 2
 
Mechanisms Leading To Musculoskeletal Disorders In Dentistry 1
Mechanisms Leading To Musculoskeletal Disorders In Dentistry  1Mechanisms Leading To Musculoskeletal Disorders In Dentistry  1
Mechanisms Leading To Musculoskeletal Disorders In Dentistry 1
 
Process Of Work
Process Of WorkProcess Of Work
Process Of Work
 

Último

Pharmaceutical Marketting: Unit-5, Pricing
Pharmaceutical Marketting: Unit-5, PricingPharmaceutical Marketting: Unit-5, Pricing
Pharmaceutical Marketting: Unit-5, PricingArunagarwal328757
 
Kolkata Call Girls Services 9907093804 @24x7 High Class Babes Here Call Now
Kolkata Call Girls Services 9907093804 @24x7 High Class Babes Here Call NowKolkata Call Girls Services 9907093804 @24x7 High Class Babes Here Call Now
Kolkata Call Girls Services 9907093804 @24x7 High Class Babes Here Call NowNehru place Escorts
 
Russian Call Girls Chickpet - 7001305949 Booking and charges genuine rate for...
Russian Call Girls Chickpet - 7001305949 Booking and charges genuine rate for...Russian Call Girls Chickpet - 7001305949 Booking and charges genuine rate for...
Russian Call Girls Chickpet - 7001305949 Booking and charges genuine rate for...narwatsonia7
 
Statistical modeling in pharmaceutical research and development.
Statistical modeling in pharmaceutical research and development.Statistical modeling in pharmaceutical research and development.
Statistical modeling in pharmaceutical research and development.ANJALI
 
College Call Girls Vyasarpadi Whatsapp 7001305949 Independent Escort Service
College Call Girls Vyasarpadi Whatsapp 7001305949 Independent Escort ServiceCollege Call Girls Vyasarpadi Whatsapp 7001305949 Independent Escort Service
College Call Girls Vyasarpadi Whatsapp 7001305949 Independent Escort ServiceNehru place Escorts
 
97111 47426 Call Girls In Delhi MUNIRKAA
97111 47426 Call Girls In Delhi MUNIRKAA97111 47426 Call Girls In Delhi MUNIRKAA
97111 47426 Call Girls In Delhi MUNIRKAAjennyeacort
 
call girls in Connaught Place DELHI 🔝 >༒9540349809 🔝 genuine Escort Service ...
call girls in Connaught Place  DELHI 🔝 >༒9540349809 🔝 genuine Escort Service ...call girls in Connaught Place  DELHI 🔝 >༒9540349809 🔝 genuine Escort Service ...
call girls in Connaught Place DELHI 🔝 >༒9540349809 🔝 genuine Escort Service ...saminamagar
 
Call Girls ITPL Just Call 7001305949 Top Class Call Girl Service Available
Call Girls ITPL Just Call 7001305949 Top Class Call Girl Service AvailableCall Girls ITPL Just Call 7001305949 Top Class Call Girl Service Available
Call Girls ITPL Just Call 7001305949 Top Class Call Girl Service Availablenarwatsonia7
 
Call Girls Service in Bommanahalli - 7001305949 with real photos and phone nu...
Call Girls Service in Bommanahalli - 7001305949 with real photos and phone nu...Call Girls Service in Bommanahalli - 7001305949 with real photos and phone nu...
Call Girls Service in Bommanahalli - 7001305949 with real photos and phone nu...narwatsonia7
 
VIP Call Girls Mumbai Arpita 9910780858 Independent Escort Service Mumbai
VIP Call Girls Mumbai Arpita 9910780858 Independent Escort Service MumbaiVIP Call Girls Mumbai Arpita 9910780858 Independent Escort Service Mumbai
VIP Call Girls Mumbai Arpita 9910780858 Independent Escort Service Mumbaisonalikaur4
 
Dwarka Sector 6 Call Girls ( 9873940964 ) Book Hot And Sexy Girls In A Few Cl...
Dwarka Sector 6 Call Girls ( 9873940964 ) Book Hot And Sexy Girls In A Few Cl...Dwarka Sector 6 Call Girls ( 9873940964 ) Book Hot And Sexy Girls In A Few Cl...
Dwarka Sector 6 Call Girls ( 9873940964 ) Book Hot And Sexy Girls In A Few Cl...rajnisinghkjn
 
Call Girls Service Noida Maya 9711199012 Independent Escort Service Noida
Call Girls Service Noida Maya 9711199012 Independent Escort Service NoidaCall Girls Service Noida Maya 9711199012 Independent Escort Service Noida
Call Girls Service Noida Maya 9711199012 Independent Escort Service NoidaPooja Gupta
 
High Profile Call Girls Kodigehalli - 7001305949 Escorts Service with Real Ph...
High Profile Call Girls Kodigehalli - 7001305949 Escorts Service with Real Ph...High Profile Call Girls Kodigehalli - 7001305949 Escorts Service with Real Ph...
High Profile Call Girls Kodigehalli - 7001305949 Escorts Service with Real Ph...narwatsonia7
 
Russian Call Girls Gunjur Mugalur Road : 7001305949 High Profile Model Escort...
Russian Call Girls Gunjur Mugalur Road : 7001305949 High Profile Model Escort...Russian Call Girls Gunjur Mugalur Road : 7001305949 High Profile Model Escort...
Russian Call Girls Gunjur Mugalur Road : 7001305949 High Profile Model Escort...narwatsonia7
 
Book Call Girls in Kasavanahalli - 7001305949 with real photos and phone numbers
Book Call Girls in Kasavanahalli - 7001305949 with real photos and phone numbersBook Call Girls in Kasavanahalli - 7001305949 with real photos and phone numbers
Book Call Girls in Kasavanahalli - 7001305949 with real photos and phone numbersnarwatsonia7
 
VIP Call Girls Lucknow Nandini 7001305949 Independent Escort Service Lucknow
VIP Call Girls Lucknow Nandini 7001305949 Independent Escort Service LucknowVIP Call Girls Lucknow Nandini 7001305949 Independent Escort Service Lucknow
VIP Call Girls Lucknow Nandini 7001305949 Independent Escort Service Lucknownarwatsonia7
 
Call Girls Hebbal Just Call 7001305949 Top Class Call Girl Service Available
Call Girls Hebbal Just Call 7001305949 Top Class Call Girl Service AvailableCall Girls Hebbal Just Call 7001305949 Top Class Call Girl Service Available
Call Girls Hebbal Just Call 7001305949 Top Class Call Girl Service Availablenarwatsonia7
 
Call Girls Service in Virugambakkam - 7001305949 | 24x7 Service Available Nea...
Call Girls Service in Virugambakkam - 7001305949 | 24x7 Service Available Nea...Call Girls Service in Virugambakkam - 7001305949 | 24x7 Service Available Nea...
Call Girls Service in Virugambakkam - 7001305949 | 24x7 Service Available Nea...Nehru place Escorts
 
Housewife Call Girls Bangalore - Call 7001305949 Rs-3500 with A/C Room Cash o...
Housewife Call Girls Bangalore - Call 7001305949 Rs-3500 with A/C Room Cash o...Housewife Call Girls Bangalore - Call 7001305949 Rs-3500 with A/C Room Cash o...
Housewife Call Girls Bangalore - Call 7001305949 Rs-3500 with A/C Room Cash o...narwatsonia7
 
High Profile Call Girls Mavalli - 7001305949 | 24x7 Service Available Near Me
High Profile Call Girls Mavalli - 7001305949 | 24x7 Service Available Near MeHigh Profile Call Girls Mavalli - 7001305949 | 24x7 Service Available Near Me
High Profile Call Girls Mavalli - 7001305949 | 24x7 Service Available Near Menarwatsonia7
 

Último (20)

Pharmaceutical Marketting: Unit-5, Pricing
Pharmaceutical Marketting: Unit-5, PricingPharmaceutical Marketting: Unit-5, Pricing
Pharmaceutical Marketting: Unit-5, Pricing
 
Kolkata Call Girls Services 9907093804 @24x7 High Class Babes Here Call Now
Kolkata Call Girls Services 9907093804 @24x7 High Class Babes Here Call NowKolkata Call Girls Services 9907093804 @24x7 High Class Babes Here Call Now
Kolkata Call Girls Services 9907093804 @24x7 High Class Babes Here Call Now
 
Russian Call Girls Chickpet - 7001305949 Booking and charges genuine rate for...
Russian Call Girls Chickpet - 7001305949 Booking and charges genuine rate for...Russian Call Girls Chickpet - 7001305949 Booking and charges genuine rate for...
Russian Call Girls Chickpet - 7001305949 Booking and charges genuine rate for...
 
Statistical modeling in pharmaceutical research and development.
Statistical modeling in pharmaceutical research and development.Statistical modeling in pharmaceutical research and development.
Statistical modeling in pharmaceutical research and development.
 
College Call Girls Vyasarpadi Whatsapp 7001305949 Independent Escort Service
College Call Girls Vyasarpadi Whatsapp 7001305949 Independent Escort ServiceCollege Call Girls Vyasarpadi Whatsapp 7001305949 Independent Escort Service
College Call Girls Vyasarpadi Whatsapp 7001305949 Independent Escort Service
 
97111 47426 Call Girls In Delhi MUNIRKAA
97111 47426 Call Girls In Delhi MUNIRKAA97111 47426 Call Girls In Delhi MUNIRKAA
97111 47426 Call Girls In Delhi MUNIRKAA
 
call girls in Connaught Place DELHI 🔝 >༒9540349809 🔝 genuine Escort Service ...
call girls in Connaught Place  DELHI 🔝 >༒9540349809 🔝 genuine Escort Service ...call girls in Connaught Place  DELHI 🔝 >༒9540349809 🔝 genuine Escort Service ...
call girls in Connaught Place DELHI 🔝 >༒9540349809 🔝 genuine Escort Service ...
 
Call Girls ITPL Just Call 7001305949 Top Class Call Girl Service Available
Call Girls ITPL Just Call 7001305949 Top Class Call Girl Service AvailableCall Girls ITPL Just Call 7001305949 Top Class Call Girl Service Available
Call Girls ITPL Just Call 7001305949 Top Class Call Girl Service Available
 
Call Girls Service in Bommanahalli - 7001305949 with real photos and phone nu...
Call Girls Service in Bommanahalli - 7001305949 with real photos and phone nu...Call Girls Service in Bommanahalli - 7001305949 with real photos and phone nu...
Call Girls Service in Bommanahalli - 7001305949 with real photos and phone nu...
 
VIP Call Girls Mumbai Arpita 9910780858 Independent Escort Service Mumbai
VIP Call Girls Mumbai Arpita 9910780858 Independent Escort Service MumbaiVIP Call Girls Mumbai Arpita 9910780858 Independent Escort Service Mumbai
VIP Call Girls Mumbai Arpita 9910780858 Independent Escort Service Mumbai
 
Dwarka Sector 6 Call Girls ( 9873940964 ) Book Hot And Sexy Girls In A Few Cl...
Dwarka Sector 6 Call Girls ( 9873940964 ) Book Hot And Sexy Girls In A Few Cl...Dwarka Sector 6 Call Girls ( 9873940964 ) Book Hot And Sexy Girls In A Few Cl...
Dwarka Sector 6 Call Girls ( 9873940964 ) Book Hot And Sexy Girls In A Few Cl...
 
Call Girls Service Noida Maya 9711199012 Independent Escort Service Noida
Call Girls Service Noida Maya 9711199012 Independent Escort Service NoidaCall Girls Service Noida Maya 9711199012 Independent Escort Service Noida
Call Girls Service Noida Maya 9711199012 Independent Escort Service Noida
 
High Profile Call Girls Kodigehalli - 7001305949 Escorts Service with Real Ph...
High Profile Call Girls Kodigehalli - 7001305949 Escorts Service with Real Ph...High Profile Call Girls Kodigehalli - 7001305949 Escorts Service with Real Ph...
High Profile Call Girls Kodigehalli - 7001305949 Escorts Service with Real Ph...
 
Russian Call Girls Gunjur Mugalur Road : 7001305949 High Profile Model Escort...
Russian Call Girls Gunjur Mugalur Road : 7001305949 High Profile Model Escort...Russian Call Girls Gunjur Mugalur Road : 7001305949 High Profile Model Escort...
Russian Call Girls Gunjur Mugalur Road : 7001305949 High Profile Model Escort...
 
Book Call Girls in Kasavanahalli - 7001305949 with real photos and phone numbers
Book Call Girls in Kasavanahalli - 7001305949 with real photos and phone numbersBook Call Girls in Kasavanahalli - 7001305949 with real photos and phone numbers
Book Call Girls in Kasavanahalli - 7001305949 with real photos and phone numbers
 
VIP Call Girls Lucknow Nandini 7001305949 Independent Escort Service Lucknow
VIP Call Girls Lucknow Nandini 7001305949 Independent Escort Service LucknowVIP Call Girls Lucknow Nandini 7001305949 Independent Escort Service Lucknow
VIP Call Girls Lucknow Nandini 7001305949 Independent Escort Service Lucknow
 
Call Girls Hebbal Just Call 7001305949 Top Class Call Girl Service Available
Call Girls Hebbal Just Call 7001305949 Top Class Call Girl Service AvailableCall Girls Hebbal Just Call 7001305949 Top Class Call Girl Service Available
Call Girls Hebbal Just Call 7001305949 Top Class Call Girl Service Available
 
Call Girls Service in Virugambakkam - 7001305949 | 24x7 Service Available Nea...
Call Girls Service in Virugambakkam - 7001305949 | 24x7 Service Available Nea...Call Girls Service in Virugambakkam - 7001305949 | 24x7 Service Available Nea...
Call Girls Service in Virugambakkam - 7001305949 | 24x7 Service Available Nea...
 
Housewife Call Girls Bangalore - Call 7001305949 Rs-3500 with A/C Room Cash o...
Housewife Call Girls Bangalore - Call 7001305949 Rs-3500 with A/C Room Cash o...Housewife Call Girls Bangalore - Call 7001305949 Rs-3500 with A/C Room Cash o...
Housewife Call Girls Bangalore - Call 7001305949 Rs-3500 with A/C Room Cash o...
 
High Profile Call Girls Mavalli - 7001305949 | 24x7 Service Available Near Me
High Profile Call Girls Mavalli - 7001305949 | 24x7 Service Available Near MeHigh Profile Call Girls Mavalli - 7001305949 | 24x7 Service Available Near Me
High Profile Call Girls Mavalli - 7001305949 | 24x7 Service Available Near Me
 

Computerergo

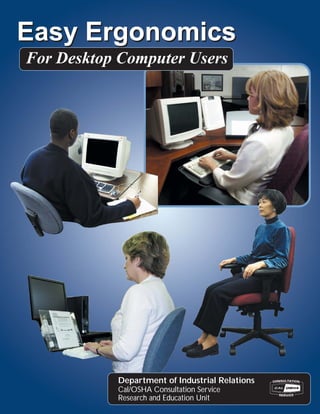
  • 1. Easy Ergonomics For Desktop Computer Users Department of Industrial Relations Cal/OSHA Consultation Service Research and Education Unit 1
  • 2. COMPUTER ERGONOMICS GUIDE Easy Ergonomics for Desktop Computer Users was developed and prepared for publication by the Cal/OSHA Consultation Service, Research and Education Unit, Division of Occupational Safety and Health, California Department of Industrial Relations. It was distributed under the provisions of the Library Distribution Act and Government Code Section 11096. Published 2005 by the California Department of Industrial Relations This booklet is not meant to be a substitute for, or a legal interpretation of, the occupational safety and health standards. Please see the California Code of Regulations, Title 8, or the Labor Code for detailed and exact information, specifications, and exceptions. The display or use of particular products in this booklet is for illustrative purposes only and does not constitute an endorsement by the Department of Industrial Relations.
  • 3. Introduction Congratulations! You have taken the first step toward improving the way you work at your desktop computer. Have you ever thought of the many things you do while you are at your computer work station? What is your body posture while you are performing general computer functions, such as keying, mousing, or writing? How long do you work at your computer without taking breaks? By changing the way you interact with your computer equipment and furniture, you may be able to reduce your risk of injury. Protect your ability to work! If you are already feeling some discomfort or pain or if you would like to learn how to work safely and reduce your risk of injury, read on. This guide was written for you. 13
  • 4. COMPUTER ERGONOMICS GUIDE Using this booklet This booklet is intended for use by desktop computer users. The purpose of this booklet is to help you reduce your chances of being injured. You will learn to identify common desktop computer work station problems and explore some improvement goals. By understanding how you perform your job tasks, and how you use your equipment and furniture, you can work more safely, efficiently and comfortably. Each section of this booklet begins with an action goal which tells you what you need to do to work more safely and more comfortably. The action goals are summarized on pages 5 and 6, and covered in more detail in the sections on pages 8-33. Suggestions in this booklet are made to improve your work station first by utilizing your existing furniture and equipment. Try to do the best you can with what you’ve got. After that, suggestions are made to improve your work station by purchasing new or replacing existing furniture and equipment. If you are unable to improve your work station without purchasing new or replacing existing furniture or equipment, talk to your immediate supervisor. If you are already feeling discomfort, the table on page 4 will direct you to the sections in the booklet that address possible causes for your discomfort. The Checklist on page 7 serves as a way to identify computer tasks that may expose you to the risk of injury. If you answer YES to all the questions on the Checklist, you may not need to go any further. The pages that follow the Checklist offer suggestions for improving your work station and your work practices. You can also use this booklet as a training tool. Talk about these guidelines in your safety meetings and discuss ways to make necessary improvements. No one is required to use the information in this booklet. This booklet is not intended to provide employers or employees with information on how to comply with Cal/OSHA regulations. 2
  • 5. TAKE A LOOK Take a Look As you read this booklet, sit at your computer and take a good look at what you do there. You may be surprised to learn that some things you do every day may cause you pain or discomfort over time. Learn how to change your work habits! You can ease your symptoms and learn how to work pain free. Job Tasks Before you begin to look for risk factors, it is important to understand how your job tasks may contribute to your exposure to these risk factors. Ask yourself which tasks you perform simultaneously (at the same time). For computer users, simultaneous tasks are those tasks that are performed while keying, and include: A. keying / mousing (generic term for using an external pointing device) B. keying / mousing / writing C. keying / mousing / writing / using the telephone D. keying / mousing / writing / using the telephone / reading When simultaneous and nonsimultaneous tasks are performed in awkward postures or with extended reaches, you increase your chances of developing an injury. If you perform simultaneous tasks, go to pages 19-25. Workstation “Handedness” Look at the direction of the work flow when performing simultaneous tasks. Generally, people are most comfortable when they work toward their dominant side. For example, if you are right-handed, your right hand is your dominant hand, and your right side is your dominant side. Does the “handedness” of your work station fit your hand dominance? In other words, does the design of the work station promote your work to flow toward your dominant hand? The “handedness” of the work station is determined by the location of the keyboard relative to the work area where other tasks are performed simultaneously with keying. When this work area (often the writing surface) is to the left of the keyboard, it is said to be a left-handed work station, and vice versa. A right-handed employee who sits at a left-handed work station will twist, turn, and reach to get to the work area to his/her left. The “handedness” of the work station is not always a concern, as in the case when only one task is performed there (e.g. keying only). To learn more ways to make the work station fit your handedness, go to pages 22-25. Left-handed workstation Right-handed workstation 35
  • 6. COMPUTER ERGONOMICS GUIDE Risk Factors In computer tasks there are certain conditions or risk factors that can contribute to the development of musculoskeletal disorders (MSDs) when computer users are exposed frequently to these risk factors, or for long periods of time. The conditions for exposing a user to the risk of MSDs associated with computer use are as follows: • Keying for long periods of time without breaks or rest • Using force when striking the keyboard or when gripping the pointing device (e.g. mouse, trackball) • Working with awkward neck, shoulder, elbow, wrist, or back postures • Remaining in the same position for a long time with little or no movement (e.g. sitting, holding the mouse) • Continuous pressure against (leaning on) the wrist rest, work surface edge, or armrest with the wrists, forearms, or elbows; or against the front edge of the chair with the back of the legs. Do not wait until you feel pain or discomfort. Learn to change the way you work. If you understand your body posture in relationship to your computer equipment and furniture, you may, in fact, be able to prevent this kind of injury. If you are exposed to any of these risk factors repeatedly or for long periods, you might experience pain or discomfort. If you do, refer to the pages below for improvement options. If you continue to have pain or discomfort, let your immediate supervisor know. If you are having pain or It may be related to this... Refer to these pages... discomfort here... LOWER BACK ● Chair adjustment 8- 15 ● Organization of the work station 22- 25 UPPER BACK ● Chair adjustment 13- 14 ● Keyboard height 16- 18 ● Location of the pointing device 19- 21 ● Organization of the work station 22- 25 ● Monitor height and distance 27- 28 ● Placement of the document 31, 32 NECK ● Organization of the work station 22- 25 ● Monitor height and distance 27- 28 ● Placement of the document 31, 32 ARMS / SHOULDERS ● Chair adjustment 13- 14 ● Keyboard height 16- 18 ● Location of the pointing device 19- 21 ● Organization of the work station 22- 25 FOREARMS ● Keyboard height 16- 18 ● Location of the pointing device 19- 21 ● Organization of the work station 22- 25 WRISTS / HANDS ● Keyboard height 16- 18 ● Location of the pointing device 19- 21 ● Organization of the work station 22- 25 VISION ● Monitor height and distance 27- 28 ● Monitor glare 29 4 ● Placement of the document 31, 32
  • 7. ACTION GOALS Action Goals Now that you are aware of the job tasks you perform and the risk factors leading to MSDs, you are ready to look at the setup and organization of the furniture and equipment in your work space. The action goals that follow will help you reduce or eliminate some of these risks. They are written to help you work safely. The following action goals describe the best way to work at your work station. This section will help you to know where to start looking for problems at your work station. After reading these goals, complete the Checklist on page 7. If you are unable to answer questions on the Checklist because you need additional information about an action goal, or if you answer “NO” to any item on the checklist, go to the page indicated where the action goal is covered in greater detail. Goals WHEN SITTING 1a-b. Your feet are resting comfortably on the floor or on a footrest, and your knees are slightly lower than your hips. 2. There is a 2- to 4-inch gap between the back of your knees and the front edge of the chair when your back is against the chair. 3. The curve of the chair back fits into the deepest part of the curve in your lower back. 4. The back of the chair is upright or tilted back for comfort, and provides upper back support. 5. Armrests are adjusted so that they are just slightly below your elbows when your shoulders are relaxed. 6. Armrests do not interfere with access to the keying, mousing or writing surfaces. WHEN KEYING 7a. Your shoulders are relaxed, and your elbows are close to your body. 7b. Your elbows are bent to 90 degrees or slightly greater (inner angle). 7c. The tops of the “home row” keys are at the same height as your elbows, or slightly lower than your elbows. 7d. Your wrists are straight (not bent). WHEN POSITIONING THE CURSOR WITH A POINTING DEVICE (using a mouse, trackball, touch pad, etc.) 8. The pointing device is close to the keyboard. 57
  • 8. COMPUTER ERGONOMICS GUIDE Goals WHEN ORGANIZING THE WORK SPACE 9a. Reaches performed frequently are within the “near” work space (your elbows remain at your sides). 9b. Reaches performed occasionally are within the “near” or “mid” work space (no more than an arm’s length away). 9c. You are not reaching across your body to work. WHEN VIEWING THE MONITOR 10a. It is in front of you and the top line of print is at or just below your eye level or even lower if you wear bifocal, trifocal, or progressive lenses; AND You are able to scan the screen from top to bottom by using only eye movements, not head movements. 10b. You can sit against the back of the chair and read the monitor screen from a comfortable distance, without experiencing eye fatigue, blurred vision or headaches. 10c. The monitor screen is free of glare. Viewing through bifocal lenses WHEN READING THE DOCUMENT 11a. The document is off the flat work surface and in your line of vision. 11b. The document is directly next to the monitor or between the monitor and the keyboard. 11c. The document is at the same distance as, or closer than, the monitor. 11d. You can look at the document and the monitor by moving only your eyes, not your head. WHEN USING A NEW SOFTWARE PROGRAM OR OPERATING SYSTEM (OS) 12a. You are efficient in the most common tasks you perform. 12b. You reduce the stress and frustration you experience when you cannot complete a task. 6
  • 9. Instructions: CHECKLIST Answer the questions below to determine problems that might cause MSDs. If you answer “NO,” turn to the page indicated for improvement options. If you run out of improvement options and you still have problems, contact your immediate supervisor. GOAL pp. 9-33 YES NO If NO, see page: WHEN SITTING Is the chair height adjusted so that your feet rest comfortably flat on the 1a-b floor or footrest, with your knees just slightly lower than the hips? 9 Look at the depth of the seat pan. Is there a small gap (2 to 4inches) 2 10 between the back of your legs and the front edge of the seat pan? 3 Does the curve of the back of the chair fit into your low back? 11 4 Does the back of the chair tilt back? 12 With your shoulders relaxed, are the armrests slightly below your elbows, 5 13 and do your arms hang comfortably at your sides? Can you get your chair close enough to your keying, mousing, or 6 writing surfaces without reaching? 15 WHEN KEYING With your shoulders relaxed and your fingers curved, is the home row of 7a-d 17 keys at the same height as your elbows or slightly below your elbows? WHEN POSITIONING THE CURSOR WITH A POINTING DEVICE 8 Is the pointing device positioned close to the keyboard? 20 WHEN ORGANIZING THE WORK SPACE Are you able to use your work surface and equipment without over- 9a-c reaching or using awkward postures? 23 WHEN VIEWING THE MONITOR Is it in front of you and the top line of print is at or just below eye level or even lower if you wear bifocal, trifocal, or progressive lenses; AND 10a 27 are you able to scan the screen from top to bottom using only eye movements, not head movements? Can you sit against the back and read the monitor screen from a 10b comfortable distance, without experiencing eye fatigue, blurred vision, 28 or headaches? 10c Is the monitor screen free of glare? 29 WHEN READING THE DOCUMENT Is the document off the flat work surface and at the same distance as the 11a-d monitor screen? 31 WHEN USING NEW SOFTWARE PROGRAMS AND OPERATING SYSTEMS Have you been trained on the software programs and operating system you 12 33 are using? 79
  • 10. COMPUTER ERGONOMICS GUIDE WHEN SITTING Seat pan adjustments: Chair back Lumbar curve (low back) Seat pan Pull out to make Push back to make seat pan deeper seat pan shallower Awkward seated postures and lengthy periods of sitting may increase your risk of injury. It is important that you are comfortable while sitting, as remaining in an awkward seated posture can increase your fatigue level, tighten muscles, or irritate nerves. When your body is fatigued or in discomfort, the risk of injury increases, and productivity and accuracy decrease. An awkward seated posture is especially risky if it is combined with lengthy periods of sitting, or other awkward body postures, and eventually you may have trouble doing even simple tasks, such as reaching for the telephone. When you remain in the same seated posture for a long time, your blood flow slows down and you may begin to feel tired. The muscles in your neck, shoulders, and back become fatigued. Recognize opportunities to get out of your chair and move around. Instead of reaching up to the overhead bin, stand up. Instead of reaching to the printer, place the printer farther away so you must get up and walk to it. Stand up to take a phone call. Moving around keeps the blood flowing and prevents muscle fatigue and cramping. When your chair is properly adjusted 1a-b. Your feet are resting comfortably on the floor or on a footrest, and your knees are slightly lower than your hips. 2. There is a 2- 4-inch gap between the back of your knees and the front edge of the chair when your back is against the chair. 3. The curve of the chair back fits into the deepest part of the curve in your lower back. 4. The back of the chair is upright or tilted back for comfort. 5. Armrests are adjusted so that they are just slightly below your elbows when your shoulders are relaxed. 6. Armrests do not interfere with access to keying, mousing, or writing surfaces. You may need to adjust the height of your chair every day, depending upon the job task, and the shoes you are wearing (the higher the heels, the higher the chair will be raised). If the seat pan 8 height is changed, the keyboard and monitor will need to be adjusted, as well.
  • 11. WHEN SITTING ACTION GOAL #1: Adjust the seat pan height so that a. Your feet rest comfortably flat on the floor, or on a footrest. b. Your knees are slightly lower than your hips. IF YOU SEE THIS . . . TRY THIS . . . OR Your feet do not rest Lower the chair until your Use a footrest. comfortably flat on the floor. feet rest comfortably flat on the floor. IF YOU SEE THIS . . . TRY THIS . . . Your feet rest on the floor, Raise the chair until your but your knees are higher hips are slightly higher than than your hips. your knees. 11 9
  • 12. COMPUTER ERGONOMICS GUIDE ACTION GOAL #2: Adjust the seat pan depth so that there is a 2– 4-inch gap between the back of your knees and the front edge of the chair when your back is against the chair. IF YOU SEE THIS . . . TRY THIS . . . There is more than 4 inches Slide the seat out (forward) to make it deeper and provide between the front edge of the more support. seat pan and the back of your knees. OR Use a chair with a seat pan that has a 2- to 4-inch gap between the back of your knees and the front edge of the chair when your back is against the chair.* * Select a chair that fits and is comfortable. Be sure that the chair provides upper and lower back support. Ask for a demonstration of the adjustment features of the chair. 10
  • 13. WHEN SITTING ACTION GOAL #3: Adjust the height of the back of the chair so that the curve of the back of the chair fits into the deepest part of the curve in your lower back. IF YOU SEE THIS . . . TRY THIS . . . Chair back too low Chair back too high The curve in the chair back does not fit into Reach back to feel the curve in your lower your lower back. back. Then raise or lower the chair back until it fits into the curve of your lower back; OR Use another chair that can be adjusted to fit your lower back.* * Select a chair that fits and is comfortable. Be sure that the chair provides upper and lower back support. Ask for a demonstration of the adjustment features of the chair. 13 11
  • 14. COMPUTER ERGONOMICS GUIDE ACTION GOAL #4: Adjust the tilt of the back of the chair so that the back of the chair is upright or tilted back for comfort. IF YOU SEE THIS . . . TRY THIS . . . The chair back does not Use another chair that tilts back tilt back slightly and rock slightly and rocks or locks into or lock into position. position.* * Select a chair that fits and is comfortable. Be sure that the chair provides upper and lower back support. Ask for a demonstration of the adjustment features of the chair. 12
  • 15. WHEN SITTING ACTION GOAL #5: Adjust the armrests so that a: They are slightly below your elbows when your shoulders are relaxed. b. Your arms hang comfortably at your sides. IF YOU SEE THIS . . . TRY THIS . . . Armrests too high Your shoulders are raised when With shoulders relaxed, lower the armrests to just slightly resting on the armrests. below your elbows. IF YOU SEE THIS . . . TRY THIS . . . Armrests too low You reach down to rest on Raise the armrests to just slightly below your the armrests. elbows when your shoulders are relaxed. 13 15
  • 16. COMPUTER ERGONOMICS GUIDE ACTION GOAL #5 Continued IF YOU SEE THIS . . . TRY THIS . . . The armrests cannot be Remove the armrests. adjusted to slightly below your elbows when your OR shoulders are relaxed. Use another chair with adjustable armrests.* * Select a chair that fits and is comfortable. Be sure that the chair provides upper and lower back support. Ask for a demonstration of the adjustment features of the chair. 14
  • 17. WHEN SITTING ACTION GOAL #6: Adjust the armrests so that they do not interfere with access to keying, mousing or writing surfaces. IF YOU SEE THIS . . . TRY THIS . . . Armrests interfere with Adjust the armrests to their lowest position. In this access to keying, mousing, position they cannot be used for resting. or writing surfaces. OR Remove the armrests. 17 15
  • 18. COMPUTER ERGONOMICS GUIDE WHEN KEYING When the keyboard is at the right height 7a. Your shoulders are relaxed, and your elbows are close to your body. 7b. Your elbows are bent to 90 degrees, or slightly greater (inner angle). 7c. The tops of the “home row” keys are at the same height as your elbows, or slightly below your elbows. 7d. Your wrists are straight (not bent). Home row Keys at elbow height Keys slightly below elbows “Neutral” keyboard “Negative” keyboard tilt When you center your fingers on “home row”, your fingers must reach the top, bottom, and sides of the keyboard. The fingers and wrists do all the work and they quickly tire. Try this keying technique* Instead, transfer the workload from your hands to the larger muscles of your arms, elbows, and shoulders by using arm movements rather than just finger and wrist movements while keying. You will work more comfortably and you won’t tire as quickly. Source: * “Computing Without Pain With the MouseKeyDo System,” Norman J. Kahan, MD. In this section, reference is made to the keyboard platform. The keyboard platform is mounted beneath the work surface, and allows you to raise, lower, and tilt the keyboard. For computer operators, it is recommended that the keyboard platform is either flat (not tilted) or tilted downwards (negative tilt). It is not recommended that the keyboard is tilted upwards (positive tilt), as this forces you to bend your wrists back. Negative tilt Flat or neutral (not tilted) Positive tilt Many desktop computer users still use the standard, or traditional, keyboard. For a description of alternative keyboards, go to 16 http://www.healthycomputing.com/office/accessories/keyboard/#Keyboards.
  • 19. WHEN KEYING ACTION GOAL #7: Adjust the keyboard height so that a. Your shoulders are relaxed, and your elbows are close to your body. b. Your elbows are bent to 90 degrees, or slightly greater (inner angle). c. The tops of the home row keys are at the same height as your elbows or slightly below your elbows (negative tilt). d. Your wrists are straight (not bent). IF YOU SEE THIS . . . TRY THIS . . . Keyboard too high Raise or lower the keyboard platform or your chair until the The keyboard is above elbow tops of the home row keys are at the same height as your height. elbows or slightly below your elbows when your shoulders are relaxed. Use a footrest if necessary. OR Keyboard too low The keyboard is too low and your wrists are bent. Tilt the back edge of your keyboard platform slightly downward (“negative” tilt). You arms will tilt downward, and your elbows will open to slightly more than 900. Don’t use the legs beneath the keyboard. 17 19
  • 20. COMPUTER ERGONOMICS GUIDE ACTION GOAL #7 Continued IF YOU SEE THIS . . . TRY THIS . . . The keyboard is at your elbow Use the wrist rest only for short periods height, but you lean on your between keying. For longer periods, remove wrists while keying. your hands from the keyboard and rest them in your lap. 18
  • 21. POSITIONING THE CURSOR WHEN POSITIONING THE CURSOR WITH A POINTING DEVICE Pointing devices, such as the mouse and trackball, can cause computer-related injuries to the shoulders, neck, elbows, wrists, and hands. Common actions associated with such devices include reaching, gripping, pivoting at the wrist, finger clicking, and holding the button when “dragging” the mouse. Those actions and static arm posture (“mouse arm”) may cause problems eventually. When a pointing device is used while keying, it is important that it is accessed without overreaching or using awkward postures. To accomplish this place the pointing device as close to the keyboard as possible. When the pointing device is in the right position 8. The pointing device is close to the keyboard. There are many improvement options for positioning the pointing device that are not covered in this section. Other comfortable positions for the pointing device that promote a flat (neutral) wrist can be used. When using a mouse, try this technique:* • Drop your arm and hand as one onto the mouse, with your upper arm hanging freely from your shoulder. • Drape your hand over the mouse, with your palm on the center of the mouse and all your fingertips hanging over the front and sides (avoid the temptation to grip the mouse with your fingers). • Make small circular motions with the mouse by making arm movements from the shoulder. • Click the mouse button with the mid-section of your finger rather than your fingertip. Source: * “Computing Without Pain With the MouseKeyDo System,” Norman J. Kahan, MD. Tips for mouse or trackball: • Take your hand off the mouse or trackball when you are not using it, and rest your hand in your lap. • Make sure you have enough space on the work surface to move the cursor with the mouse in one sweeping movement, rather than having to pick up and reposition the mouse. 21 19
  • 22. COMPUTER ERGONOMICS GUIDE ACTION GOAL #8: Place the pointing device so that it is close to the keyboard. IF YOU SEE THIS . . . TRY THIS . . . The pointing device is a Use a keyboard that does not have a 10-key pad and place the trackball that does not fit on trackball next to the keyboard. the keyboard platform. OR There are many improvement options for positioning the pointing device that are not Replace the keyboard platform with an adjustable keyboard covered in this section. Other platform wide enough to fit the keyboard and the trackball. comfortable positions for the Adjust the height and tilt of the platform so that the tops of the pointing device that promote a home row keys are at your elbow height, or slightly below flat (neutral) wrist can be used. your elbows (negative tilt), when your shoulders are relaxed. 20
  • 23. POSITIONING THE CURSOR ACTION GOAL #8 Continued IF YOU SEE THIS . . . TRY THIS . . . Mouse platform The pointing device is a mouse that does not fit on Place a mouse platform over the numbers pad and use it as a the keyboard platform. mousing surface. OR OR IF YOU SEE THIS . . . TRY THIS . . . The pointing device is either a mouse or a trackball that does not fit on the keyboard platform. Follow these steps: 1. Remove the keyboard platform; 2. Then place the keyboard and pointing device directly on the work surface, with the mouse or trackball next to the keyboard. 3. Raise the chair until the tops of the home row keys are at the same height as your elbows, or slightly below your elbows, There are many improvement when your shoulders are relaxed. Use a footrest, if necessary. options for positioning the 4. Adjust the height and distance of the monitor, if necessary. pointing device that are not covered in this section. Other OR comfortable positions for the pointing device that promote a flat (neutral) wrist can be used. Use a keyboard with a built-in pointing device (touch pad). 23 21
  • 24. COMPUTER ERGONOMICS GUIDE ORGANIZING THE WORK SPACE “Near” work space “Mid” work space Overreaching is defined as reaching to such a distance that you lean forward or to the sides while fully extending your arm. Overreaching in any direction causes fatigue, reducing productivity and accuracy and increasing the risk of injury. Reduce or eliminate overreaching by rearranging the work station. Avoid overreaching “Near” Work space Activities For activities performed frequently or repetitively, the work should be performed within the “near” work space, with your elbows at your sides. Within this space, you can work comfortably without stretching or leaning. Working outside this space requires you to reach, bend, twist, and so forth. These activities lead to discomfort and fatigue and can cause injuries. By working within the “near” work space, you can maximize efficiency and comfort. “Near” work space “Mid” Work space Activities Activities performed occasionally can be performed in the “mid” work space (an arm’s length away); however, this requires extension of your arm. Activities performed beyond this mid-range involve leaning and reaching and should be performed rarely. If your work space is properly organized “Mid” work space 9a. Reaches performed frequently are within the “near” work space (your elbows remain at your sides). 9b. Reaches performed occasionally are within the “near” or “mid” work space (no more than an arm’s length away). 9c. You are not reaching across your body to work. Avoid reaching across your body 22
  • 25. ORGANIZING THE WORK SPACE ACTION GOAL #9: Organize the work space so that a. Reaches performed frequently are within the near work space (your elbows are at your sides). b. Reaches performed occasionally are within the near or mid work space (no more than an arm’s length away). c. You are not reaching across your body to work. IF YOU SEE THIS . . . TRY THIS . . . “Near” work space “Mid” work space You frequently lean to make Remove unnecessary equipment and supplies from the reaches more than an arm’s work station; length away. AND Re-organize your work space by moving all necessary equipment and supplies close, to no more than an arm’s length away, or to a location where you must get up and walk to it. 23 25
  • 26. COMPUTER ERGONOMICS GUIDE ACTION GOAL #9 Continued IF YOU SEE THIS . . . TRY THIS . . . Follow these steps: 1. Remove the keyboard platform; 2. Then place the keyboard, pointing device and writing material directly on the work surface; 3. Raise the chair until the tops of the home row keys are at the same height as your elbows, or slightly below your elbows when your shoulders are relaxed. Use a You are using a keyboard footrest, if necessary. platform and you are keying, 4. Adjust the height and distance of the monitor, if mousing, and writing necessary. simultaneously, and you reach above and behind your OR keyboard to get to the pointing device or the writing surface. Follow these steps: 1. Replace the keyboard platform with a height- and tilt- adjustable platform that is wide enough for the keyboard and pointing device. 2. Adjust the height and tilt of the keyboard platform until the tops of the home row keys are the same height as your elbows, or slightly below your elbows (negative tilt) when your shoulders are relaxed. 24
  • 27. ORGANIZING THE WORK SPACE ACTION GOAL #9 Continued IF YOU SEE THIS . . . TRY THIS . . . You reach across your body Reverse the placement of the computer equipment to work because: so that non-keying tasks are performed on your Your work station does not dominant side when you are sitting at your match your dominant hand keyboard. (handedness). IF YOU SEE THIS . . . TRY THIS . . . You reach across your body to Reverse the placement of the file drawers so that work because: they are beneath the work surface on your non- File drawers prevent you from dominant side. having knee clearance beneath the work surface on your dominant side. 27 25
  • 28. COMPUTER ERGONOMICS GUIDE WHEN VIEWING THE MONITOR Monitor height The maximum height of your viewing range is established by your horizontal line of sight when you are comfortably and properly seated at your work station. A monitor that is set too high will cause you to tip or tilt your head back to look up at the monitor. Over time, neck, shoulder, and upper back pain may result. You may also notice dry eyes because there is a tendency to blink less when looking up. Monitor distance Placing the monitor at a comfortable distance varies with each person. In general, the closer you are to the monitor, the harder your eyes work to keep the image in focus. You may experience eye fatigue, blurred vision, or headaches if your monitor is placed too close. On the other hand, if you lean forward to see the monitor, pull it closer to you. If your monitor is properly adjusted 10a. It is in front of you and the top line of print is at or below your horizontal line of sight or even lower if you wear bifocal, trifocal or progressive lenses. 10b. You can sit against the back of the chair and read the monitor screen from a comfortable distance, without experiencing eye fatigue, blurred vision, or headaches. 10c. The monitor screen is free of glare. Try these techniques 1. Periodically shift your view to something in the background (behind the monitor). Give your eyes a chance to relax. 2. Periodically rest your eyes by closing them for five seconds. 3. Adjust the monitor’s contrast and/or brightness (light background, dark font). 4. Zoom in to increase the display percentage. 5. Blink! 26
  • 29. WHEN VIEWING THE MONITOR ACTION GOAL #10a: Adjust the height of the monitor so that • It is directly in front of you and the the top line of print is at or just below eye level, or lower if you wear bifocal, trifocal, or progressive lenses AND • You are able to scan the screen from top to bottom With bifocal, trifocal, using only eye movements, not head movements. or progressive lenses IF YOU SEE THIS . . . TRY THIS . . . OR Monitor too high Lower the monitor Raise the chair The top line of print is above Lower the monitor (remove the computer or monitor riser[s] from eye level. beneath the monitor) until the top line of print is at or slightly below eye level, or lower if you wear bifocal, trifocal, or progressive lenses. OR Raise your chair until your eyes are at or just slightly above the top line of print, or even higher if you wear bifocal, trifocal or progressive lenes. Use a footrest, if necessary. IF YOU SEE THIS . . . TRY THIS . . . Monitor too low With bifocal, trifocal, or Without bifocal, trifocal, or progressive lenses progressive lenses You use head movements to Raise the monitor until the top line of print is at or slightly below scan from top to bottom of your eye level, or even lower if you wear bifocal, trifocal, or the screen. progressive lenses. 29 27
  • 30. COMPUTER ERGONOMICS GUIDE ACTION GOAL #10b: Start with the monitor an arm’s lenght away. Then adjust the distance of the monitor so that you can sit against the back of the chair and read the monitor screen from a comfortable distance, without experiencing eye fatigue, blurred vision, or headaches. IF YOU SEE THIS . . . TRY THIS . . . A small change can make a big difference Monitor too close You have symptoms (eye Move the monitor back until you can comfortably read the fatigue, blurred vision, or screen without experiencing symptoms. headaches). IF YOU SEE THIS . . . TRY THIS . . . A small change can make a big difference Monitor too far You have difficulty reading the Move the monitor closer until you can sit back and screen, and lean forward to get a comfortably read the screen without symptoms. closer look. 28
  • 31. WHEN VIEWING THE MONITOR ACTION GOAL #10c: Adjust the tilt of the monitor so that the screen is free of glare. IF YOU SEE THIS . . . TRY THIS . . . 45 Glare on your monitor from Tilt the monitor down slightly; task or overhead lighting. OR Dim task or overhead lights; draw blinds or curtains. IF YOU SEE THIS . . . TRY THIS . . . Glare on your monitor from Reposition the monitor so that it is at a right angle to the windows. light source; OR Other sources of glare include light colored clothing and white OR papers. Use a glare screen. Use file folders or a screen hood 31 29
  • 32. COMPUTER ERGONOMICS GUIDE WHEN READING THE DOCUMENT Focusing on a document requires the muscles in your eyes to contract to keep the image sharp. Each time your eyes shift from the document to the monitor they must refocus. Eventually they become fatigued. Ultimately, the result is eye fatigue, eyestrain, or headaches which can affect productivity and accuracy. When the document is placed flat on the work surface, you will use head and neck movements to shift your view between the document and the monitor. These movements can cause neck strain if performed repeatedly, or day after day. When the document holder is properly placed 11a. The document is off the flat work surface and in your line of vision. 11b. The document is directly next to the monitor, or between the monitor and the keyboard. 11c. The document is at the same distance as, or closer than, the monitor. 11d. You can look at the document and the monitor by moving only your eyes, not your head. 30
  • 33. WHEN READING THE DOCUMENT ACTION GOAL #11: Position the document so that a. It is off the flat worksurface and in your line of sight. b. It is directly next to the monitor or between the monitor and the keyboard. c. It is at the same distance as the monitor or closer. d. You can shift your view between the document and the monitor by moving only your eyes, not your head. IF YOU SEE THIS . . . TRY THIS . . . The document is not directly Place the document at the same next to the monitor. height and distance as the monitor unless the print is too small to read. If the print is hard to read, place the document closer to and at the same height as the monitor. OR Position the document between the monitor and the keyboard. 33 31
  • 34. COMPUTER ERGONOMICS GUIDE ACTION GOAL #11 Continued IF YOU SEE THIS . . . TRY THIS . . . The document is farther away Use a document holder that mounts to the monitor than the monitor. or is positioned to either the left or right side of the monitor; OR Position the document between the monitor and the keyboard. 32
  • 35. KNOW YOUR SOFTWARE KNOW YOUR SOFTWARE PROGRAMS AND OPERATING SYSTEM... ACTION GOAL #12: Ask your manager for instructions or training before you begin so that a. You are efficient in the most common tasks you perform. b. You reduce the stress and frustration you experience when you cannot complete a task. Protect your ability to work! Ask your manager for help if you have not been trained on the software programs or operating system you are using. If you need to work with a particular program or operating system, be sure to familiarize yourself with it ahead of time. Training can be as simple as a short demonstration or taking a class for a day or two. The time spent in training can pay off in big dividends in (1) preventing injuries; (2) being able to work without discomfort or pain; (3) reducing unnecessary movements; (4) saving time and getting the work done more efficiently. Many software programs have shortcuts that allow you to quickly accomplish tasks without using a pointing device (mouse, trackball, etc.). By pressing one or more keys on the keyboard you can complete your task quickly and without the awkward postures associated with the pointing device. Learn to use the shortcuts as an alternative to the pointing device. 35 33
  • 36. COMPUTER ERGONOMICS GUIDE The Benefits of Software Training By Anthony Andre, PhD. Interface Analysis In a recent usability study conducted by Interface Analysis Associates, 24 intermediate to highly experienced computer users were observed while they were attempting to perform basic tasks in common software applications. Their interactions with the software were analyzed in terms of length of time, number of mouse clicks, and successful completion of the tasks and when compared to optimal performance standards. The results showed that, on average, participants either took longer and used more mouse clicks than necessary to successfully perform common computer tasks, or they couldn’t figure out how to complete a task. In the end, the study suggests that for every 8 hours of computer work, the same work could have been performed in only 40 minutes if the software training had been provided! Impacts on You During these periods of inefficiency, participants were observed for body postures and other behaviors, such as facial expressions (indicators of frustration or stress) and verbal utterances. These observations revealed the impact of software inefficiency in four main areas: Time: The more inefficient we are as computer users, the more time we spend sitting in front of the computer. The negative effects of prolonged sitting include poor circulation; muscle fatigue; back, shoulder, and neck pain; eye strain; and more. Repetitions: Inefficiency results in more mouse clicks and keystrokes, that is, higher repetitions. Posture: Our postures change when we can’t easily accomplish our goals with our computer software. For example, we lean forward, we hold the mouse with our arm outstretched and shoulder raised, and ultimately we lose the basis for the support of good body posture. Stress: With each failed attempt to carry out a specific action or command with our computer software, we experience higher levels of stress, frustration, and time pressure. Conclusions and Guidelines Computer users are encouraged to explore ways to improve their computer interaction efficiency and seek training in the software programs and operating systems they use in their workplaces. Indeed, most of the participants indicated that their interactions with software would be more efficient with formal training. 34
  • 37. REFERENCE TIPS TO IMPROVE THE WAY YOU WORK • Take micro-breaks from repetitious activities or static postures every 30 minutes for one or two minutes before resuming that activity or posture. Find opportunities to get out of your chair and move around. • Place the telephone on your non-dominant hand side. Your dominant hand will be free for writing, and cradling the telephone between your ear and shoulder while writing will not be necessary. • Use a telephone headset or the speaker when performing tasks simultaneously with the telephone. This practice will prevent awkward neck and shoulder postures associated with cradling the telephone between your ear and shoulder. • Type with the tips of the fingers. Less force is needed to depress the keys with the tips of the fingers. Use a light touch when keying. • Change postures frequently throughout the day. Alternate working from a sitting to a standing position whenever possible. Change the tilt of the back of the chair frequently. • Use shortcut keys whenever possible, instead of a pointing device (mouse, trackball, etc.). • Alternate hands when using the pointing device, OR alternate between pointing devices (e.g. alternate between mouse and trackball). Use larger muscles by moving from the elbow and shoulder, rather than from the wrist, when operating the pointing device. • Stand up to reach into overhead bins rather than reaching up from a sitting position, OR, lower the overhead storage bins if possible. 37 35
  • 38. COMPUTER ERGONOMICS GUIDE List of Websites The Web sites listed below contain ergonomic information for office and industrial work settings and work techniques. Australia OHS http://www.nohsc.gov.au/OHSInformation/Databases/OHSSolutions/solutionslistres.asp?Sort=Industry Canadian OSHA http://www.ccohs.ca/oshanswers/ergonomics/ Cornell University http://ergo.human.cornell.edu Ergo Solutions http://www.ergosolutionsmag.com Ergo Web http://www.ergoweb.com/resources/casestudies/ Federal OSHA http://www.osha.gov Healthy Computing http://www.healthycomputing.com Human Factors/Ergonomics Society (HFES) http://www.hfes.org Interface Analysis http://www.interface-analysis.com International Ergonomics Association (IEA) http://www.iea.cc MouseKeyDo http://www.mousekeydo.com National Institute for Occupational Safety & Health (NIOSH) http://www.cdc.gov/niosh/topics/ Oregon OSHA http://www.orosha.org/consult/ergonomic/health_ergonomics.htm UC Berkeley/SF http://www.me.berkeley.edu/ergo/ UC Davis Ag-Ergo http://ag-ergo.ucdavis.edu Washington State Labor & Industries http://www.lni.wa.gov/Safety/Topics/ReduceHazards/ErgoBank/default.asp 36
  • 39. ACKNOWLEDGEMENTS WRITER Fran Wagner, MS, Certified Industrial Ergonomist, First Response Ergonomics EDITOR Faye Ong, Associate Editor, CDE Press, California Department of Education PHOTOGRAPHY Rick Hight, Cal/OSHA Consultation, Research and Education Fran Wagner, First Response Ergonomics PAGE LAYOUT AND DESIGN Ken Jackson, Graphic Designer, Link One LLC ACKNOWLEDGEMENTS The following people assisted in the research and development of this booklet: Anthony Andre, PhD Principal, Interface Analysis Associates Dave Bare Cal/OSHA Consultation Services Marisela Bonilla Cal/OSHA Consultation Services Cindy Burt, MS, OTR/L, CEA UCLA Environment Health & Safety Zin Cheung, MS, CIE Cal/OSHA Consultation Services Richard DaRosa, MS Cal/OSHA Consultation Services Mario Feletto, MS, MPH Cal/OSHA Consultation Services Alan Hedge, PhD, CPE Cornell University Human Factors/Ergonomics Lab John Howard, MD, MPH, JD, LLM Director, National Institute for Occupational Safety & Health Norman Kahan, MD, Director Sports & Occupation Medical Associates/MouseKeyDo Mike Oldridge The Mart Office Furniture Ann Pudoff, CIE Bickmore Risk Services Cheri Ruliffson Vision Services Plan Kristy Schultz, MS, CIE Cal/OSHA Consultation Services 39 37
  • 40. COMPUTER ERGONOMICS GUIDE Cal/OSHA Consultation Programs Toll-free number: 1-800-963-9424 Internet: www.dir.ca.gov On-site Assistance Program Area Offices Northern California 2424 Arden Way, Suite 410 Sacramento, CA 95825 (916) 263-0704 Central Valley San Francisco Bay Area 1901 North Gateway Blvd., Suite 102 1515 Clay St., Suite 1103 Fresno, CA 93727 Oakland, CA 94612 (559) 454-1295 (510) 622-2891 San Bernardino/Orange 464 West 4th St., Suite 339 San Bernardino, CA 92401 (909) 383-4567 San Fernando Valley 6150 Van Nuys Blvd., Suite 307 Van Nuys, CA 91401 (818) 901-5754 Los Angeles 10350 Heritage Park Dr., Suite 201 Santa Fe Springs, CA 90670 (562) 944-9366 San Diego 7575 Metropolitan Dr., Suite 204 San Diego, CA 92108 (619) 767-2060 Your call will in no way trigger an inspection by Cal/OSHA Enforcement Voluntary Protection Program Research and Education Unit Oakland, CA 94612 Sacramento, CA 95825 (510) 622-1081 (916) 574-2528 05 91266