SlideShare una empresa de Scribd logo
1 de 58
Descargar para leer sin conexión
Department Of CSE & IT


                               CONTENT


Experiment                                                                  Page
                               Name of the Experiment
    No.                                                                      No.

                                                                               1
           1             To recognize various component of PC.


                           Dismantling and assembling of PC.                   6
           2


           3
                                 Use of h/w trainer kit.
                                                                             12
                    Simulation of simple fundamental units like
           4                 half adder full adder etc.                      25


Page | 1                                             Prepared By Mr.Neelamani Samal
Department Of CSE & IT


HARDWARE AND SOFTWARE REQUIREMENTS :-


1.PC components.


2. Hardware trainer kit for

    Printer ,SMPS, Motherboard, Real time clock, CPU, Hard disk.


3. Simulation software(XLINIX).


Page | 2                                       Prepared By Mr.Neelamani Samal
Department Of CSE & IT


Lab Experiment No. :- 1


Objective :-
   To Recognize the various components of a       Personal Computer.


Theory:-
The basic components of a PC are

       1.   Input Unit
       2.   Output unit
       3.   Memory unit
       4.   Control unit
       5.   Arithmetic logic unit


Input Unit :-
It is the unit through which data/instructions can be entered into the
computers .

e.g. Keyboard , Mouse etc.


Output Unit :-
It is the unit by which we can get output from the entered input from the
computer.

e.g. Monitors ,Printer, Speaker etc.


Page | 3                                          Prepared By Mr.Neelamani Samal
Department Of CSE & IT


Memory Unit :-
It stores the information by providing facility to the CPU actively by
providing necessary data to CPU.

Memory units are of two types

  1.Primary memory

  2. Secondary memory.

Primary Memory:- It is also of two types:

     i) RAM
     ii) ROM

RAM:- It can be randomly accessed.
       Memory is temporarily used because when the power goes off ,all
the data stored in it are erased.So it is volatile in nature.It can be read and
the data can be written into it.


ROM:- It is also randomly accessed. It is only readmemory unit.It is non-
volatile in nature.

It can be read only but datas can’t be written into it.


ALU:-     It performs arithmetic operation like addition,subtraction etc and
logical operation loke AND,OR,NAND etc. It works in electronic speed but
the device attached to it works in low speed.That’s why processor can
handle all the peripheral devices at a time.

    IT establishes well coordination between other four functional unit.


Page | 4                                            Prepared By Mr.Neelamani Samal
Department Of CSE & IT


CU:-      It is the unit which controls the flow of information through the
processor and coordinate the activities the activities of other unit which are
within it.

So it is the brain within the brain as it controls what happens inside the
processor.

It generate timing signal and control signal for well coordination.


Configurtion of a PC.


SI Name of               Name of         Capacity/frequency          interface
NO component             Manufacturer

1.    Processor
2.    MotherBoard
3.    RAM
4.    HDD
5.    FDD
6.    DVD
7.    TFT/CRT
8.    Keyboard
9.    Mouse
10.   UPS
11.   Cabinet
12.   Speaker


Page | 5                                           Prepared By Mr.Neelamani Samal
Department Of CSE & IT


Processor:-      The microprocessor accepts inputs from the user in the
form of data and instruction. It process the information and instruction and
then send the processed information to the output device.


Motherboard:- It is the main circuit of PC.It conatains the interface for
the microprocessor,BIOS,Memory and storage device neeed to control
peripheral devices such as monitor,keyboard,mouse etc.


RAM:- It stores data temporarily.So it is called volatile.


HDD:- IT is a secondary storage device for permanent data storage
device i.e. placed in the system.It is similar to human brain where all the
past to present events are stored.


DVD RAM: The Digital versatile disc stored digitally.
A DVD writer is a DVD player as well as a writer.


FDD:     It is a n external storage device. It is magnetic round disc enclosed
in a plastic jacket.

Today we have double size high quality to density disk with 1.44 MB of
size.


Page | 6                                          Prepared By Mr.Neelamani Samal
Department Of CSE & IT


Keyboard:- It is a primary input device of the PC similar to type writer.
Mouse:- It is used to point to the desired position in the computer. It is
also an input device.


UPS:- It is the device that produce supply to the PC.
It provides all the time of power cut.So we can save the current data and
shut down properly.


Speaker: It is an output device through which CPU can produce sound
for the user.


TFT monitor:- It is an output device through wich we can read data.


Cabinet:- outer covering of CPU.


Conclusion:-


Page | 7                                         Prepared By Mr.Neelamani Samal
Department Of CSE & IT


EXPERIMENT NO:-02
OBJECTIVES:-         To understand how the different components of PC
are connected to work properly.


Components required:-
1.cabinet

2.SMPS.

3.HDD

4.processor

5.Motherboard

6.Ram

7.IDE cable.

8.ROM

9.System fan and CPU fan.

10.Tool kit

Description:
      The required components are taken and checked whether the
        components are good condition or not.
      At first clean the required components and it should be done with
        paint brush.
      All the components handled with care.
      The step by step procedure should be followed for dismantling and
        assembling of the PC.
      The procedure dismantling and assembling are as follows :


Page | 8                                        Prepared By Mr.Neelamani Samal
Department Of CSE & IT


                               Building TheComputer

           Step 1: Prepare the case
Remove the empty computer case from its packing and remove both side panels and
takeout any items that may be inside the case .Place it on the work space so that the
motherboard facing up.
           Step 2: Installing the Mother Board rises
Inspect whether the motherboard risers are installed properly, if not then install it
properly so that the motherboard will not be in direct contact with the metal case.
           Step 3: Installing the Dives and mother board in the case

 1: Remove side panel
Remove the side panel from the case in order to gain access to the cabinet as well as
the motherboard properly.

 2: Remove front external drive panel
Remove the drive bay blanking the spaces.. So that we can install the required drives
properly and freely.

 3: Installing external drives
With the blanking places removed slide the drives into their corresponding bays.

 4: Case screws
Fix the drives using the case screw provided .The screw should not be so tightly placed,
otherwise it may harm the respective components of the PC.

 5: Fixing the drives
Fix the optical and floppy drives into its places with screwed properly.

 6: Drives installed

                                   The optical and floppy drives located in the correct
                                   bays in the pc case.


Page | 9                                                       Prepared By Mr.Neelamani Samal
Department Of CSE & IT


 7: motherboard mask


8: Discard unwanted parts
After everything is in its place just discard the unwanted parts that were present initially
in the case.


Page | 10                                                    Prepared By Mr.Neelamani Samal
Department Of CSE & IT


        Step 4 :Installing mother board in the case


1: Installing the Processor

                                 Place the CPU into its slot properly seeing the cut marks
                                 present in the processor for identification. Care must be
                                 given while installing the CPU, if any Pin breaks then the
                                 Processor will become useless. Then place the sink and
                                 CPU fan properly and lock it with the lock provided.


Page | 11                                              Prepared By Mr.Neelamani Samal
Department Of CSE & IT


 2: CPU and Fan


                                         The CPU fan should be placed over the CPU to
                                         keep the processor cool .


                                             Place the RAM into its slots. Press it to
3: Installing the RAM
                                             get the RAM Locked. If the RAM is not
                                             placed properly then the PC will not
                                             start. And will give a beep sound.


4: Installing the power supply
Use the SMPS(Switch Mode Power Supply) cables to give power supply to the
individual components of the PC.


5: Installing The HDD

                                                     The HDD should be Placed in its
                                                     proper place and should be
                                                     connected with the ATA cable or The
                                                     SATA cable as the port may be. And
                                                     power supply should be given to it.


Page | 12                                               Prepared By Mr.Neelamani Samal
Department Of CSE & IT


6: Connecting the case cable
Connect the below cables properly as per instruction. And connect the same cable to
the motherboard also.


Step 5: Closing The system case by cover
Once all the parts of the PC are connected to its slots properly and firmly just close the
system case and screw it properly.

Conclusion :-


Page | 13                                                   Prepared By Mr.Neelamani Samal
Department Of CSE & IT


Experiment No. 3
Objective :
               i)Study of Fault analysis point of the CPU trainer kit.

               ii) Study of Dot Matrix Printer.

              iii) To study the Fault analysis points of Dot Matrix printer

              iv) Study of VBMB 40 HD Trainer kit.

              v) Study of real time clock using 465 hard disk driver.

EQUIPMENTS REQUIRED:

   1. CPU Trainer kit
   2. Monitor
   3. Keyboard
   4. Mouse


THEORY :
The CPU Trainer kit has 8 different fault analysis point. To estimate the various
fault covering the individual sections of personal computers

T1: For Keyboard logic

T2 : For BIOS logic

T3: For Hard Disk logic

T4 : For Mouse logic

T5: For Video logic(for synchronization horizontally)

T6: For Video logic(for Vertical synchronization)

T7: For Serial Communication logic

T8: For Parallel Communication logic


Page | 14                                                Prepared By Mr.Neelamani Samal
Department Of CSE & IT


PROCEDURE :
T1:

Fault Analysis: Switch off the system, Put T1 in open mode and switch ON the
system.

Symptom: Any character that is to be given through the keyboard can not be
displayed or the keyboard can not work properly.

T2:

Fault Analysis: Switch off the system, Put T2 in open mode and switch ON the
system.

Symptom: Without processing any key the control will automatically flow to the
BIOS

T3:

Fault Analysis: Switch off the system, Put T3 in open mode and switch ON the
system.

Symptom: The OS will not be properly loaded, HDD will not be initialized

T4:

Fault Analysis: Switch off the system, Put T4 in open mode and switch ON the
system.

Symptoms: The mouse will not work properly.

T5:

Fault Analysis: Switch off the system, Put T5 in open mode and switch ON the
system.

Symptoms:Display scroll horizontally


Page | 15                                            Prepared By Mr.Neelamani Samal
Department Of CSE & IT


T6

Fault Analysis: Switch off the system, Put T6 in open mode and switch ON the
system.

Symptom:Display scroll vertically

T7:

Fault Analysis: Switch off the system, Put T7 in open mode and switch ON the
system.

Symptoms: Serial Port does not receive or transmit information to or from its sub
system or interface unit.

T8:

Fault Analysis: Switch off the system, Put T8 in open mode and switch ON the
system.

Symptom:It prints junk character


                                   CPU TRAINER KIT

CONCLUSION 1:


Page | 16                                             Prepared By Mr.Neelamani Samal
Department Of CSE & IT


Objective 2:- Study of Dot Matrix Printer.


EQUIPMENTS REQUIRED:
      1.DOT Matrix Printer

         2.Power supply unit

         3.Power cord


DESCRIPTION:


1.Thisthe first type of printer to be used in home and school but they are not used
now-a-days.

2.A Dot Matrix Printer or impact matrix printer is a type of computer printer with a
print head that run back and forth or up and down motion, in the phase and print
by impact , striking an ink soaked cloth ribbon against the paper, much like the
print mechanism on a type writer.

3. Each dot is produced by a tiny metal rod also called a wire or pin which is
driven forward by the power of tiny electromagnet or solenoid either directly or
through small parts.


Page | 17                                              Prepared By Mr.Neelamani Samal
Department Of CSE & IT


ADVANTAGES:


1.Relatively cheap to buy

2.Low operating cost

3.Create carbon copy using carbonated papers.


DISADVANTAGES:


1.Print quality is poor and important documents are not suitable to give managers
or customers.

2.Very Slow

3.Noisy

4.Can not produce colour copies.


CONCLUSION 2:


Page | 18                                             Prepared By Mr.Neelamani Samal
Department Of CSE & IT


OBJECTIVE 3: To study the Fault analysis points of Dot Matrix printer


EQUIPMENTS REQUIRED:


1.Dot matrix printer Trainer kit.

2.Power supply


PROCEDURE:


Dot matrix printer Trainer kit has 8 Fault analysis point to identify 8 different fault
generated in DMP Trainer kit.

The fault analysis points are

T1:Power logic

T2.Wrong Character printing

T3.Paper sensor without paper

T4.Print in the same line

T5.Home position

T6.Line space incorrect

T7.Paper out

T8.Single dot or collection of dots are missing


Page | 19                                                Prepared By Mr.Neelamani Samal
Department Of CSE & IT


DESCRIPTION:

T1:

Fault Analysis:T1 is normally in closed position, to introduce the problem switch
off the printer . T1 is open and switch on the printer to identify the problem.

Symptom:No printer operation can be performed

T2:

Fault Analysis:T2 is normally in closed position, to introduce the problem switch
off the printer . T2 is open and switch on the printer to identify the problem.

Symptom:Printer prints wrong character.

T3:

Fault Analysis:T3 is normally in closed position, to introduce the problem switch
off the printer . T3 is open and switch on the printer to identify the problem.

Symptoms:The printer will sense the paper even when the paper is not available for
printing.

T4:

Fault Analysis:T4 is normally in closed position, to introduce the problem switch
off the printer . T4 is open and switch on the printer to identify the problem.

Symptom:Overlapping of characters will be identified.

T5:

Fault Analysis:T5 is normally in closed position, to introduce the problem switch
off the printer . T5 is open and switch on the printer to identify the problem.

Symptom:Home position sensor may be defective. The sensor will not at the initial
position by pressing initialization button. It will move to the end.

T6:
Fault Analysis:T6 is normally in closed position, to introduce the problem switch
off the printer . T6 is open and switch on the printer to identify the problem.


Page | 20                                               Prepared By Mr.Neelamani Samal
Department Of CSE & IT


Symptoms:Line feeding is not proper.

T7:

Fault Analysis:T7 is normally in closed position, to introduce the problem switch
off the printer . T7 is open and switch on the printer to identify the problem.

Symptom:Carriage motor struck while initializing the printer. The sensor can not
be initialized by pressing the initialization button.

T8:

Fault Analysis:T8 is normally in closed position, to introduce the problem switch
off the printer . T8 is open and switch on the printer to identify the problem.

Symptom:While printing single dot or line of dots are missing consistently.


CONCLUSION 3:


Page | 21                                             Prepared By Mr.Neelamani Samal
Department Of CSE & IT


OBJECTIVE 4 : Study of VBMB 40 HD Trainer kit.


EQUIPMENTS REQUIRED:


1.Micro controller 51EB

2.One Hard Disk

3.VBMB 40 Card

4.One 40 core cable, one 50 core cable and one serial cable

5.Multi output power supply unit

6.one VBMB 40 installer CD

7.One keyboard


PROCEDURE:


1.Go to WINXTALK program

2.Choose open point (the communication setting are already set, do not change).

3.Choose communication window (from the WINXTALK menu or F2 shortcut)

4.From Micro controller type the command “ SM” and press enter

5. You will find # prompt on the monitor and serial mode on the micro 51 LED
display

6.Type command “pi 4100” on the 3 prompt of WINXTALK communication
windows and press enter


Page | 22                                             Prepared By Mr.Neelamani Samal
Department Of CSE & IT


7.From the text file option of WINX communication window choose download
push button(note the number of characters transmitted appear on the status bar of
WINX communication window)

8.Click on # type the command “go 4100” and press enter, the message appears ,
the information about HD that is cylinder, comma, sector etc and the next
command prompt is LBA= 0x00000000,(R)ead , (W)rite,(L)BA , (U)p , (D)own ,
(h)ex dump, (q)uit

9.Press 'L' from key board to select the hexa decimal address , then provide the
address value suppose “55”

10.Once again the previous command prompt LBA= 0x00000000,(R)ead ,
(W)rite,(L)BA , (U)p , (D)own , (h)ex dump, (q)uit will appear.

11.Choose 'R' and ' H' to see the information stored in the address of the HD.

12.Press “INT” key from the micro 51EB then # prompt will appear on the WINX
communication window.

13.Type the command “FP 600061ff 77” (here 77 is data) then press enter.

14.At the # prompt once again type the command “go 4100” and press enter.

15.Press “L” key from the key board and provide LBA address “55” then press
enter.

16.At the command prompt LBA= 0x00000000,(R)ead , (W)rite,(L)BA , (U)p ,
(D)own , (h)ex dump, (q)uit will appear. Then press “W” key when warning
message will appear then press “Y” “sector write OK” .

17.At LBA prompt press 'R' and 'H' , you can see the written in the HD


Page | 23                                              Prepared By Mr.Neelamani Samal
Department Of CSE & IT


                         MICRO 51 EB                                   50 and
40 CORE CABLE


                                 VBMB 40 CARD


CONCLUSION 4:


Page | 24                                       Prepared By Mr.Neelamani Samal
Department Of CSE & IT


OBJECTIVE 5 : Study of real time clock using 465 hard disk driver.


EQUIPMENTS REQUIRED:


1.VBMB 15 card

2.PCI driver

3.50 core cable


PROCEDURE:


1.Open PLXP on the desktop, go to command click on it.

2.Reset COP then open my computer.

3.Go to CD-drive click on VPCI-107 then click on program.

4.Then double click on VBMB 15 exe file.

5.One black screen will come and it will ask for confirmation. Enter 'y' then give
value for hour,minute and second.

6.The given time will be displayed in real-time clock kit.


Page | 25                                              Prepared By Mr.Neelamani Samal
Department Of CSE & IT


                         PCI DRIVER         REAL TIME CLOCK


                                           VBMB 15 CARD


CONCLUSION 5:


Page | 26                             Prepared By Mr.Neelamani Samal
Department Of CSE & IT


EXPERIMENT NO.4


OBJECTIVE:-
Simulation of fundamental unit like
                   1. Half adder
                   2. Full adder and
                   3. Multiplexer

Software required:-

 XILINX ISE 9.1i

Theory:-
  Halfadder:-

Procedure:-
      Step1:
            To simulate the functional working of Halfadder we need XILINX 9.1i to
            run in Admin mode as shown below.


Page | 27                                                Prepared By Mr.Neelamani Samal
Department Of CSE & IT


            Step2:
            Go to file menu and chose new project.


 Step3:
 Type the project name and then choose the top level source type as
HDL.


Page | 28                                            Prepared By Mr.Neelamani Samal
Department Of CSE & IT


            Stpe4:
            Set the parameter in the window as
               Family- Spantan3
               Device-XC3S200
               Package-FT256
               Speed- 4
               Preferred Language-VHDL
              And press next


Page | 29                                        Prepared By Mr.Neelamani Samal
Department Of CSE & IT


            Step5:
              Choose the new source and press next and whenever the new window
            open,Put the same file name and choose VHDL module
            .


Page | 30                                               Prepared By Mr.Neelamani Samal
Department Of CSE & IT


            Step6:

            In the next window input two port name as input1 and input2 and direction as
            in.Then input two port name as sum and carry and set direction as out.


            Step7: And press next.


Page | 31                                                   Prepared By Mr.Neelamani Samal
Department Of CSE & IT


            Step8: Press next


            Step9: Press next


Page | 32                       Prepared By Mr.Neelamani Samal
Department Of CSE & IT


            Step10: Press next


            Step11:Press finish


Page | 33                         Prepared By Mr.Neelamani Samal
Department Of CSE & IT


            Step12: Write the HDL code for half adder followed by begin.


            Step13:
             Double click on the Synthesize.xst and go to check syntax and if error not
            found the following screen appear.


Page | 34                                                    Prepared By Mr.Neelamani Samal
Department Of CSE & IT


            Step14:
            Then click on the view RTL schme


Page | 35                                      Prepared By Mr.Neelamani Samal
Department Of CSE & IT


            Step15:Then following output screen output screen appear.


Page | 36                                                Prepared By Mr.Neelamani Samal
Department Of CSE & IT


Conclusion:-


Page | 37                Prepared By Mr.Neelamani Samal
Department Of CSE & IT


            FULL ADDER

            Theory:


            Procedure

            Step1:
            To simulate the functional working of full adder we need XILINX 9.1i to run in
            Admin mode as shown below.


Page | 38                                                     Prepared By Mr.Neelamani Samal
Department Of CSE & IT


            Step2:
            Go to file menu and chose new project.


 Step3:
  Type the project name and then choose the top level source type as HDL.


Page | 39                                              Prepared By Mr.Neelamani Samal
Department Of CSE & IT


              Stpe4:
            Set the parameter in the window as
               Family- Spantan3
               Device-XC3S200
               Package-FT256
              Speed- 4
              Preferred Language-VHDL
            And press next


Page | 40                                        Prepared By Mr.Neelamani Samal
Department Of CSE & IT


Step5:
 Choose the new source and press next and whenever the new window open, Put the
same file name and choose VHDL module


Page | 41                                           Prepared By Mr.Neelamani Samal
Department Of CSE & IT


            Step6:
            In the next window input two port name as input1 and input2 and direction as
            in.Then input two port name as sum and carry and set direction as out.


            Step7: And press next.


Page | 42                                                   Prepared By Mr.Neelamani Samal
Department Of CSE & IT


            Step8: Press next


            Step9: Press next


Page | 43                       Prepared By Mr.Neelamani Samal
Department Of CSE & IT


            Step10: Press next


            Step11:Press finish


Page | 44                         Prepared By Mr.Neelamani Samal
Department Of CSE & IT


            Step12: Write the HDL code for half adder followed by begin.


Page | 45                                         Prepared By Mr.Neelamani Samal
Department Of CSE & IT


            Step13:
             Double click on the Synthesize.xst and go to check syntax and if
            error not found the following screen appear.


Page | 46                                             Prepared By Mr.Neelamani Samal
Department Of CSE & IT


            Step14:
            Then click on the view RTL schme


            Step15:Then following output screen output screen appear.


Page | 47                                        Prepared By Mr.Neelamani Samal
Department Of CSE & IT


Conclusion:-


Page | 48                Prepared By Mr.Neelamani Samal
Department Of CSE & IT


            MULTIPLEXER

            Step1:
            To simulate the functional working of full adder we need XILINX 9.1i to run in
            Admin mode as shown below.


            Step2:
            Go to file menu and chose new project.


Page | 49                                                     Prepared By Mr.Neelamani Samal
Department Of CSE & IT


Step3
Type the project name and then choose the top level source type as HDL.


            Stpe4:
            Set the parameter in the window as
               Family- Spantan3
               Device-XC3S200
               Package-FT256
              Speed- 4
              Preferred Language-VHDL
            And press next


Page | 50                                              Prepared By Mr.Neelamani Samal
Department Of CSE & IT


Step5:
 Choose the new source and press next and whenever the new
window open, Put the same file name and choose VHDL module


Page | 51                                Prepared By Mr.Neelamani Samal
Department Of CSE & IT


Page | 52                Prepared By Mr.Neelamani Samal
Department Of CSE & IT


            Step6:

            In the next window input two port name as input1 and input2
            and direction as in.Then input two port name as sum and carry
            and set direction as out.


            Step7: And press next.


Page | 53                                         Prepared By Mr.Neelamani Samal
Department Of CSE & IT


            Step8: And press next


            Step9: And press next


Page | 54                           Prepared By Mr.Neelamani Samal
Department Of CSE & IT


            Step10: And press finish


            Step12: Write the HDL code for half adder followed by begin


Page | 55                                         Prepared By Mr.Neelamani Samal
Department Of CSE & IT


            Step13:
             Double click on the Synthesize.xst and go to check syntax and
            if error not found the following screen appear.


Page | 56                                         Prepared By Mr.Neelamani Samal
Department Of CSE & IT


            Step14:Then following output screen output screen appear


Page | 57                                        Prepared By Mr.Neelamani Samal
Department Of CSE & IT


            Conclusion:-


Page | 58                  Prepared By Mr.Neelamani Samal

Más contenido relacionado

La actualidad más candente

8085 MICROPROCESSOR ARCHITECTURE AND ITS OPERATIONS
8085 MICROPROCESSOR ARCHITECTURE AND ITS OPERATIONS8085 MICROPROCESSOR ARCHITECTURE AND ITS OPERATIONS
8085 MICROPROCESSOR ARCHITECTURE AND ITS OPERATIONSRamaPrabha24
 
Instruction Set Architecture
Instruction Set ArchitectureInstruction Set Architecture
Instruction Set ArchitectureDilum Bandara
 
Computer organiztion5
Computer organiztion5Computer organiztion5
Computer organiztion5Umang Gupta
 
CPU Architecture - Basic
CPU Architecture - BasicCPU Architecture - Basic
CPU Architecture - BasicYong Heui Cho
 
introduction to microprocessors
introduction to microprocessorsintroduction to microprocessors
introduction to microprocessorsvishi1993
 
Computer Organisation & Architecture (chapter 1)
Computer Organisation & Architecture (chapter 1) Computer Organisation & Architecture (chapter 1)
Computer Organisation & Architecture (chapter 1) Subhasis Dash
 
8257 DMA Controller
8257 DMA Controller8257 DMA Controller
8257 DMA ControllerShivamSood22
 
introduction to microprocessor and microcomputer
introduction to microprocessor and microcomputerintroduction to microprocessor and microcomputer
introduction to microprocessor and microcomputerSatya P. Joshi
 
8085 microprocessor architecture ppt
8085 microprocessor architecture ppt8085 microprocessor architecture ppt
8085 microprocessor architecture pptParvesh Gautam
 
Chapter 2-8085 Microprocessor Architecture and Microcomputer Systems
Chapter 2-8085 Microprocessor Architecture and Microcomputer SystemsChapter 2-8085 Microprocessor Architecture and Microcomputer Systems
Chapter 2-8085 Microprocessor Architecture and Microcomputer Systemscmkandemir
 
Introduction to Computer Architecture and Organization
Introduction to Computer Architecture and OrganizationIntroduction to Computer Architecture and Organization
Introduction to Computer Architecture and OrganizationDr. Balaji Ganesh Rajagopal
 
Instruction Execution Cycle
Instruction Execution CycleInstruction Execution Cycle
Instruction Execution Cycleutsav_shah
 

La actualidad más candente (20)

8085 MICROPROCESSOR ARCHITECTURE AND ITS OPERATIONS
8085 MICROPROCESSOR ARCHITECTURE AND ITS OPERATIONS8085 MICROPROCESSOR ARCHITECTURE AND ITS OPERATIONS
8085 MICROPROCESSOR ARCHITECTURE AND ITS OPERATIONS
 
Instruction Set Architecture
Instruction Set ArchitectureInstruction Set Architecture
Instruction Set Architecture
 
digital Counter
digital Counterdigital Counter
digital Counter
 
Computer organiztion5
Computer organiztion5Computer organiztion5
Computer organiztion5
 
CPU Architecture - Basic
CPU Architecture - BasicCPU Architecture - Basic
CPU Architecture - Basic
 
introduction to microprocessors
introduction to microprocessorsintroduction to microprocessors
introduction to microprocessors
 
Functional units
Functional unitsFunctional units
Functional units
 
SHLD and LHLD instruction
SHLD and LHLD instructionSHLD and LHLD instruction
SHLD and LHLD instruction
 
Computer Organisation & Architecture (chapter 1)
Computer Organisation & Architecture (chapter 1) Computer Organisation & Architecture (chapter 1)
Computer Organisation & Architecture (chapter 1)
 
8257 DMA Controller
8257 DMA Controller8257 DMA Controller
8257 DMA Controller
 
Instruction codes
Instruction codesInstruction codes
Instruction codes
 
introduction to microprocessor and microcomputer
introduction to microprocessor and microcomputerintroduction to microprocessor and microcomputer
introduction to microprocessor and microcomputer
 
8085 microprocessor architecture ppt
8085 microprocessor architecture ppt8085 microprocessor architecture ppt
8085 microprocessor architecture ppt
 
Chapter 2-8085 Microprocessor Architecture and Microcomputer Systems
Chapter 2-8085 Microprocessor Architecture and Microcomputer SystemsChapter 2-8085 Microprocessor Architecture and Microcomputer Systems
Chapter 2-8085 Microprocessor Architecture and Microcomputer Systems
 
Introduction to Computer Architecture and Organization
Introduction to Computer Architecture and OrganizationIntroduction to Computer Architecture and Organization
Introduction to Computer Architecture and Organization
 
Instruction Execution Cycle
Instruction Execution CycleInstruction Execution Cycle
Instruction Execution Cycle
 
Microprocessor
MicroprocessorMicroprocessor
Microprocessor
 
CPU Architecture
CPU ArchitectureCPU Architecture
CPU Architecture
 
Von Neumann Architecture
Von Neumann ArchitectureVon Neumann Architecture
Von Neumann Architecture
 
Microprocessor ppt
Microprocessor pptMicroprocessor ppt
Microprocessor ppt
 

Destacado

Software Engineering Lab Manual
Software Engineering Lab ManualSoftware Engineering Lab Manual
Software Engineering Lab ManualNeelamani Samal
 
Experiment write-vhdl-code-for-realize-all-logic-gates
Experiment write-vhdl-code-for-realize-all-logic-gatesExperiment write-vhdl-code-for-realize-all-logic-gates
Experiment write-vhdl-code-for-realize-all-logic-gatesRicardo Castro
 
Master EASA presentation
Master EASA presentation Master EASA presentation
Master EASA presentation Craig Pollitt
 
Computer workshop lecture 1 by Mohsin Rajpoot
Computer workshop lecture 1 by Mohsin RajpootComputer workshop lecture 1 by Mohsin Rajpoot
Computer workshop lecture 1 by Mohsin Rajpootmohsinraju555
 
Computer lab workshop
Computer lab workshopComputer lab workshop
Computer lab workshopMr.Ateach
 
Computer Access Workshop 23/11/11
Computer Access Workshop 23/11/11Computer Access Workshop 23/11/11
Computer Access Workshop 23/11/11Keytools
 
Digital Logic & Computer Architecture Practical Book by Yasir Ahmed Khan
Digital Logic & Computer Architecture Practical Book by Yasir Ahmed KhanDigital Logic & Computer Architecture Practical Book by Yasir Ahmed Khan
Digital Logic & Computer Architecture Practical Book by Yasir Ahmed KhanYasir Khan
 
Windows server 2008 step by-step guide for dns in small networks
Windows server 2008 step by-step guide for dns in small networksWindows server 2008 step by-step guide for dns in small networks
Windows server 2008 step by-step guide for dns in small networksOchiroo Dorj
 
Digital logic design lab1
Digital logic design lab1Digital logic design lab1
Digital logic design lab1Shakeel Akram
 
Sonex Sanitary And Others Pakistan
Sonex Sanitary And Others PakistanSonex Sanitary And Others Pakistan
Sonex Sanitary And Others PakistanEmad Butt
 
BBC2.0: The BBC’s 15 Web Principles
BBC2.0: The BBC’s 15 Web PrinciplesBBC2.0: The BBC’s 15 Web Principles
BBC2.0: The BBC’s 15 Web Principleshvs
 
Workshop practice lab 1
Workshop practice lab 1Workshop practice lab 1
Workshop practice lab 1Shakeel Akram
 
digital signal-processing-lab-manual
digital signal-processing-lab-manualdigital signal-processing-lab-manual
digital signal-processing-lab-manualAhmed Alshomi
 
Unit 2 assembly language programming
Unit 2   assembly language programmingUnit 2   assembly language programming
Unit 2 assembly language programmingKartik Sharma
 
Lab 1 Introduction to Computer
Lab 1   Introduction to ComputerLab 1   Introduction to Computer
Lab 1 Introduction to ComputerHalimaton Sa'adiah
 
COMPUTER ORGANIZATION -Multiplexer,Demultiplexer, Encoder
COMPUTER ORGANIZATION -Multiplexer,Demultiplexer, EncoderCOMPUTER ORGANIZATION -Multiplexer,Demultiplexer, Encoder
COMPUTER ORGANIZATION -Multiplexer,Demultiplexer, EncoderVanitha Chandru
 

Destacado (20)

Software Engineering Lab Manual
Software Engineering Lab ManualSoftware Engineering Lab Manual
Software Engineering Lab Manual
 
Experiment write-vhdl-code-for-realize-all-logic-gates
Experiment write-vhdl-code-for-realize-all-logic-gatesExperiment write-vhdl-code-for-realize-all-logic-gates
Experiment write-vhdl-code-for-realize-all-logic-gates
 
Master EASA presentation
Master EASA presentation Master EASA presentation
Master EASA presentation
 
Computer workshop lecture 1 by Mohsin Rajpoot
Computer workshop lecture 1 by Mohsin RajpootComputer workshop lecture 1 by Mohsin Rajpoot
Computer workshop lecture 1 by Mohsin Rajpoot
 
Computer lab workshop
Computer lab workshopComputer lab workshop
Computer lab workshop
 
Computer Access Workshop 23/11/11
Computer Access Workshop 23/11/11Computer Access Workshop 23/11/11
Computer Access Workshop 23/11/11
 
Microprocessor lab manual
Microprocessor lab manualMicroprocessor lab manual
Microprocessor lab manual
 
Digital Logic & Computer Architecture Practical Book by Yasir Ahmed Khan
Digital Logic & Computer Architecture Practical Book by Yasir Ahmed KhanDigital Logic & Computer Architecture Practical Book by Yasir Ahmed Khan
Digital Logic & Computer Architecture Practical Book by Yasir Ahmed Khan
 
Windows server 2008 step by-step guide for dns in small networks
Windows server 2008 step by-step guide for dns in small networksWindows server 2008 step by-step guide for dns in small networks
Windows server 2008 step by-step guide for dns in small networks
 
Digital logic design lab1
Digital logic design lab1Digital logic design lab1
Digital logic design lab1
 
Sonex Sanitary And Others Pakistan
Sonex Sanitary And Others PakistanSonex Sanitary And Others Pakistan
Sonex Sanitary And Others Pakistan
 
BBC2.0: The BBC’s 15 Web Principles
BBC2.0: The BBC’s 15 Web PrinciplesBBC2.0: The BBC’s 15 Web Principles
BBC2.0: The BBC’s 15 Web Principles
 
Workshop practice lab 1
Workshop practice lab 1Workshop practice lab 1
Workshop practice lab 1
 
Cn lab manual 150702
Cn lab manual 150702Cn lab manual 150702
Cn lab manual 150702
 
Workshop practice ii lecture notes
Workshop practice ii lecture notesWorkshop practice ii lecture notes
Workshop practice ii lecture notes
 
digital signal-processing-lab-manual
digital signal-processing-lab-manualdigital signal-processing-lab-manual
digital signal-processing-lab-manual
 
Comp 107 cep ii
Comp 107 cep iiComp 107 cep ii
Comp 107 cep ii
 
Unit 2 assembly language programming
Unit 2   assembly language programmingUnit 2   assembly language programming
Unit 2 assembly language programming
 
Lab 1 Introduction to Computer
Lab 1   Introduction to ComputerLab 1   Introduction to Computer
Lab 1 Introduction to Computer
 
COMPUTER ORGANIZATION -Multiplexer,Demultiplexer, Encoder
COMPUTER ORGANIZATION -Multiplexer,Demultiplexer, EncoderCOMPUTER ORGANIZATION -Multiplexer,Demultiplexer, Encoder
COMPUTER ORGANIZATION -Multiplexer,Demultiplexer, Encoder
 

Similar a computer architecture lab manual

Assemble a desktop pc
Assemble a desktop pcAssemble a desktop pc
Assemble a desktop pcRajat Gupta
 
Computer 10 Other Parts of the Internal System Unit
Computer 10 Other Parts of the Internal System UnitComputer 10 Other Parts of the Internal System Unit
Computer 10 Other Parts of the Internal System UnitJessaBejer1
 
Computer hardware and simulation lab manual
Computer  hardware and simulation lab manualComputer  hardware and simulation lab manual
Computer hardware and simulation lab manualVivek Kumar Sinha
 
Install computer system,devices and peripherals
Install computer system,devices and peripheralsInstall computer system,devices and peripherals
Install computer system,devices and peripheralsRaiza Janelle
 
pc assembly 1111111pc assembly 1111111- Copy.pptx
pc assembly 1111111pc assembly 1111111- Copy.pptxpc assembly 1111111pc assembly 1111111- Copy.pptx
pc assembly 1111111pc assembly 1111111- Copy.pptxCarloCimacio
 
K to 12_entrep-based_pc_hardware_servicing_learning_module.pdf
K to 12_entrep-based_pc_hardware_servicing_learning_module.pdfK to 12_entrep-based_pc_hardware_servicing_learning_module.pdf
K to 12_entrep-based_pc_hardware_servicing_learning_module.pdfJelito Rueras
 
Module computer systems
Module computer systemsModule computer systems
Module computer systemsKak Yong
 
Computer Hardware Servicing Learning Module v.2.0
Computer Hardware Servicing Learning Module v.2.0Computer Hardware Servicing Learning Module v.2.0
Computer Hardware Servicing Learning Module v.2.0Bogs De Castro
 
PC Assembly, PC Disassembly, and Connecting PC Peripherals
PC Assembly, PC Disassembly, and Connecting PC PeripheralsPC Assembly, PC Disassembly, and Connecting PC Peripherals
PC Assembly, PC Disassembly, and Connecting PC PeripheralsAldosPauloSegundo
 
Lm computer hardware
Lm computer hardwareLm computer hardware
Lm computer hardwareAdrian Buban
 
K to 12_entrep-based_pc_hardware_servicing_learning_module
K to 12_entrep-based_pc_hardware_servicing_learning_moduleK to 12_entrep-based_pc_hardware_servicing_learning_module
K to 12_entrep-based_pc_hardware_servicing_learning_moduleJohndion Ruloma
 
Computer hardware servicing_ict-computer (1)
Computer hardware servicing_ict-computer (1)Computer hardware servicing_ict-computer (1)
Computer hardware servicing_ict-computer (1)GRACE SAGOSO
 
Computer Hardware and Servicing.pdf
Computer Hardware and Servicing.pdfComputer Hardware and Servicing.pdf
Computer Hardware and Servicing.pdfJAYARVILLARIN1
 

Similar a computer architecture lab manual (20)

Assemble a desktop pc
Assemble a desktop pcAssemble a desktop pc
Assemble a desktop pc
 
Computer 10 Other Parts of the Internal System Unit
Computer 10 Other Parts of the Internal System UnitComputer 10 Other Parts of the Internal System Unit
Computer 10 Other Parts of the Internal System Unit
 
Module3 system unit
Module3 system unitModule3 system unit
Module3 system unit
 
Computer hardware and simulation lab manual
Computer  hardware and simulation lab manualComputer  hardware and simulation lab manual
Computer hardware and simulation lab manual
 
Module3 system unit
Module3 system unitModule3 system unit
Module3 system unit
 
2.3
2.32.3
2.3
 
Install computer system,devices and peripherals
Install computer system,devices and peripheralsInstall computer system,devices and peripherals
Install computer system,devices and peripherals
 
pc assembly 1111111pc assembly 1111111- Copy.pptx
pc assembly 1111111pc assembly 1111111- Copy.pptxpc assembly 1111111pc assembly 1111111- Copy.pptx
pc assembly 1111111pc assembly 1111111- Copy.pptx
 
K to 12_entrep-based_pc_hardware_servicing_learning_module.pdf
K to 12_entrep-based_pc_hardware_servicing_learning_module.pdfK to 12_entrep-based_pc_hardware_servicing_learning_module.pdf
K to 12_entrep-based_pc_hardware_servicing_learning_module.pdf
 
Module computer systems
Module computer systemsModule computer systems
Module computer systems
 
La2 computer system
La2   computer systemLa2   computer system
La2 computer system
 
Computer Hardware Servicing Learning Module v.2.0
Computer Hardware Servicing Learning Module v.2.0Computer Hardware Servicing Learning Module v.2.0
Computer Hardware Servicing Learning Module v.2.0
 
PC Assembly, PC Disassembly, and Connecting PC Peripherals
PC Assembly, PC Disassembly, and Connecting PC PeripheralsPC Assembly, PC Disassembly, and Connecting PC Peripherals
PC Assembly, PC Disassembly, and Connecting PC Peripherals
 
Lm computer hardware
Lm computer hardwareLm computer hardware
Lm computer hardware
 
Ict k12 paul
Ict k12 paulIct k12 paul
Ict k12 paul
 
K to 12_entrep-based_pc_hardware_servicing_learning_module
K to 12_entrep-based_pc_hardware_servicing_learning_moduleK to 12_entrep-based_pc_hardware_servicing_learning_module
K to 12_entrep-based_pc_hardware_servicing_learning_module
 
Computer hardware servicing_ict-computer (1)
Computer hardware servicing_ict-computer (1)Computer hardware servicing_ict-computer (1)
Computer hardware servicing_ict-computer (1)
 
TLE K to12 ICT - CHS learning module
 TLE K to12 ICT - CHS learning module TLE K to12 ICT - CHS learning module
TLE K to12 ICT - CHS learning module
 
Computer Hardware and Servicing.pdf
Computer Hardware and Servicing.pdfComputer Hardware and Servicing.pdf
Computer Hardware and Servicing.pdf
 
Caramerakitkomputer.ppt
Caramerakitkomputer.pptCaramerakitkomputer.ppt
Caramerakitkomputer.ppt
 

Más de Neelamani Samal

Fault Tolerance token Based Algorithm
Fault Tolerance token Based AlgorithmFault Tolerance token Based Algorithm
Fault Tolerance token Based AlgorithmNeelamani Samal
 
Os scheduling Algorithms
Os scheduling AlgorithmsOs scheduling Algorithms
Os scheduling AlgorithmsNeelamani Samal
 
A fault tolerant tokenbased atomic broadcast algorithm relying on responsive ...
A fault tolerant tokenbased atomic broadcast algorithm relying on responsive ...A fault tolerant tokenbased atomic broadcast algorithm relying on responsive ...
A fault tolerant tokenbased atomic broadcast algorithm relying on responsive ...Neelamani Samal
 
Software Engineering Sample Question paper for 2012
Software Engineering Sample Question paper for 2012Software Engineering Sample Question paper for 2012
Software Engineering Sample Question paper for 2012Neelamani Samal
 
Software engineering note
Software engineering noteSoftware engineering note
Software engineering noteNeelamani Samal
 
Lamport’s algorithm for mutual exclusion
Lamport’s algorithm for mutual exclusionLamport’s algorithm for mutual exclusion
Lamport’s algorithm for mutual exclusionNeelamani Samal
 
How to install windows Xp sp2
How to install windows Xp sp2How to install windows Xp sp2
How to install windows Xp sp2Neelamani Samal
 
Game Playing In A I Final
Game  Playing In  A I  FinalGame  Playing In  A I  Final
Game Playing In A I FinalNeelamani Samal
 

Más de Neelamani Samal (15)

Fault Tolerance token Based Algorithm
Fault Tolerance token Based AlgorithmFault Tolerance token Based Algorithm
Fault Tolerance token Based Algorithm
 
Os scheduling Algorithms
Os scheduling AlgorithmsOs scheduling Algorithms
Os scheduling Algorithms
 
RTS Question Paper 2012
RTS Question Paper 2012RTS Question Paper 2012
RTS Question Paper 2012
 
A fault tolerant tokenbased atomic broadcast algorithm relying on responsive ...
A fault tolerant tokenbased atomic broadcast algorithm relying on responsive ...A fault tolerant tokenbased atomic broadcast algorithm relying on responsive ...
A fault tolerant tokenbased atomic broadcast algorithm relying on responsive ...
 
Os lab manual
Os lab manualOs lab manual
Os lab manual
 
Software Engineering Sample Question paper for 2012
Software Engineering Sample Question paper for 2012Software Engineering Sample Question paper for 2012
Software Engineering Sample Question paper for 2012
 
Software engineering note
Software engineering noteSoftware engineering note
Software engineering note
 
Values oflife
Values oflifeValues oflife
Values oflife
 
Attitute
AttituteAttitute
Attitute
 
Cd writning technology
Cd writning technologyCd writning technology
Cd writning technology
 
Turing machine
Turing machineTuring machine
Turing machine
 
Lamport’s algorithm for mutual exclusion
Lamport’s algorithm for mutual exclusionLamport’s algorithm for mutual exclusion
Lamport’s algorithm for mutual exclusion
 
How to install windows Xp sp2
How to install windows Xp sp2How to install windows Xp sp2
How to install windows Xp sp2
 
Game Playing In A I Final
Game  Playing In  A I  FinalGame  Playing In  A I  Final
Game Playing In A I Final
 
Computer Brain Power
Computer Brain PowerComputer Brain Power
Computer Brain Power
 

Último

Measures of Central Tendency: Mean, Median and Mode
Measures of Central Tendency: Mean, Median and ModeMeasures of Central Tendency: Mean, Median and Mode
Measures of Central Tendency: Mean, Median and ModeThiyagu K
 
SOCIAL AND HISTORICAL CONTEXT - LFTVD.pptx
SOCIAL AND HISTORICAL CONTEXT - LFTVD.pptxSOCIAL AND HISTORICAL CONTEXT - LFTVD.pptx
SOCIAL AND HISTORICAL CONTEXT - LFTVD.pptxiammrhaywood
 
The Most Excellent Way | 1 Corinthians 13
The Most Excellent Way | 1 Corinthians 13The Most Excellent Way | 1 Corinthians 13
The Most Excellent Way | 1 Corinthians 13Steve Thomason
 
How to Make a Pirate ship Primary Education.pptx
How to Make a Pirate ship Primary Education.pptxHow to Make a Pirate ship Primary Education.pptx
How to Make a Pirate ship Primary Education.pptxmanuelaromero2013
 
MENTAL STATUS EXAMINATION format.docx
MENTAL     STATUS EXAMINATION format.docxMENTAL     STATUS EXAMINATION format.docx
MENTAL STATUS EXAMINATION format.docxPoojaSen20
 
Contemporary philippine arts from the regions_PPT_Module_12 [Autosaved] (1).pptx
Contemporary philippine arts from the regions_PPT_Module_12 [Autosaved] (1).pptxContemporary philippine arts from the regions_PPT_Module_12 [Autosaved] (1).pptx
Contemporary philippine arts from the regions_PPT_Module_12 [Autosaved] (1).pptxRoyAbrique
 
Organic Name Reactions for the students and aspirants of Chemistry12th.pptx
Organic Name Reactions  for the students and aspirants of Chemistry12th.pptxOrganic Name Reactions  for the students and aspirants of Chemistry12th.pptx
Organic Name Reactions for the students and aspirants of Chemistry12th.pptxVS Mahajan Coaching Centre
 
Call Girls in Dwarka Mor Delhi Contact Us 9654467111
Call Girls in Dwarka Mor Delhi Contact Us 9654467111Call Girls in Dwarka Mor Delhi Contact Us 9654467111
Call Girls in Dwarka Mor Delhi Contact Us 9654467111Sapana Sha
 
Separation of Lanthanides/ Lanthanides and Actinides
Separation of Lanthanides/ Lanthanides and ActinidesSeparation of Lanthanides/ Lanthanides and Actinides
Separation of Lanthanides/ Lanthanides and ActinidesFatimaKhan178732
 
URLs and Routing in the Odoo 17 Website App
URLs and Routing in the Odoo 17 Website AppURLs and Routing in the Odoo 17 Website App
URLs and Routing in the Odoo 17 Website AppCeline George
 
Software Engineering Methodologies (overview)
Software Engineering Methodologies (overview)Software Engineering Methodologies (overview)
Software Engineering Methodologies (overview)eniolaolutunde
 
Sanyam Choudhary Chemistry practical.pdf
Sanyam Choudhary Chemistry practical.pdfSanyam Choudhary Chemistry practical.pdf
Sanyam Choudhary Chemistry practical.pdfsanyamsingh5019
 
Solving Puzzles Benefits Everyone (English).pptx
Solving Puzzles Benefits Everyone (English).pptxSolving Puzzles Benefits Everyone (English).pptx
Solving Puzzles Benefits Everyone (English).pptxOH TEIK BIN
 
POINT- BIOCHEMISTRY SEM 2 ENZYMES UNIT 5.pptx
POINT- BIOCHEMISTRY SEM 2 ENZYMES UNIT 5.pptxPOINT- BIOCHEMISTRY SEM 2 ENZYMES UNIT 5.pptx
POINT- BIOCHEMISTRY SEM 2 ENZYMES UNIT 5.pptxSayali Powar
 
Paris 2024 Olympic Geographies - an activity
Paris 2024 Olympic Geographies - an activityParis 2024 Olympic Geographies - an activity
Paris 2024 Olympic Geographies - an activityGeoBlogs
 
Industrial Policy - 1948, 1956, 1973, 1977, 1980, 1991
Industrial Policy - 1948, 1956, 1973, 1977, 1980, 1991Industrial Policy - 1948, 1956, 1973, 1977, 1980, 1991
Industrial Policy - 1948, 1956, 1973, 1977, 1980, 1991RKavithamani
 

Último (20)

TataKelola dan KamSiber Kecerdasan Buatan v022.pdf
TataKelola dan KamSiber Kecerdasan Buatan v022.pdfTataKelola dan KamSiber Kecerdasan Buatan v022.pdf
TataKelola dan KamSiber Kecerdasan Buatan v022.pdf
 
Measures of Central Tendency: Mean, Median and Mode
Measures of Central Tendency: Mean, Median and ModeMeasures of Central Tendency: Mean, Median and Mode
Measures of Central Tendency: Mean, Median and Mode
 
SOCIAL AND HISTORICAL CONTEXT - LFTVD.pptx
SOCIAL AND HISTORICAL CONTEXT - LFTVD.pptxSOCIAL AND HISTORICAL CONTEXT - LFTVD.pptx
SOCIAL AND HISTORICAL CONTEXT - LFTVD.pptx
 
The Most Excellent Way | 1 Corinthians 13
The Most Excellent Way | 1 Corinthians 13The Most Excellent Way | 1 Corinthians 13
The Most Excellent Way | 1 Corinthians 13
 
How to Make a Pirate ship Primary Education.pptx
How to Make a Pirate ship Primary Education.pptxHow to Make a Pirate ship Primary Education.pptx
How to Make a Pirate ship Primary Education.pptx
 
Model Call Girl in Bikash Puri Delhi reach out to us at 🔝9953056974🔝
Model Call Girl in Bikash Puri  Delhi reach out to us at 🔝9953056974🔝Model Call Girl in Bikash Puri  Delhi reach out to us at 🔝9953056974🔝
Model Call Girl in Bikash Puri Delhi reach out to us at 🔝9953056974🔝
 
MENTAL STATUS EXAMINATION format.docx
MENTAL     STATUS EXAMINATION format.docxMENTAL     STATUS EXAMINATION format.docx
MENTAL STATUS EXAMINATION format.docx
 
Contemporary philippine arts from the regions_PPT_Module_12 [Autosaved] (1).pptx
Contemporary philippine arts from the regions_PPT_Module_12 [Autosaved] (1).pptxContemporary philippine arts from the regions_PPT_Module_12 [Autosaved] (1).pptx
Contemporary philippine arts from the regions_PPT_Module_12 [Autosaved] (1).pptx
 
Organic Name Reactions for the students and aspirants of Chemistry12th.pptx
Organic Name Reactions  for the students and aspirants of Chemistry12th.pptxOrganic Name Reactions  for the students and aspirants of Chemistry12th.pptx
Organic Name Reactions for the students and aspirants of Chemistry12th.pptx
 
Call Girls in Dwarka Mor Delhi Contact Us 9654467111
Call Girls in Dwarka Mor Delhi Contact Us 9654467111Call Girls in Dwarka Mor Delhi Contact Us 9654467111
Call Girls in Dwarka Mor Delhi Contact Us 9654467111
 
Separation of Lanthanides/ Lanthanides and Actinides
Separation of Lanthanides/ Lanthanides and ActinidesSeparation of Lanthanides/ Lanthanides and Actinides
Separation of Lanthanides/ Lanthanides and Actinides
 
URLs and Routing in the Odoo 17 Website App
URLs and Routing in the Odoo 17 Website AppURLs and Routing in the Odoo 17 Website App
URLs and Routing in the Odoo 17 Website App
 
Software Engineering Methodologies (overview)
Software Engineering Methodologies (overview)Software Engineering Methodologies (overview)
Software Engineering Methodologies (overview)
 
Sanyam Choudhary Chemistry practical.pdf
Sanyam Choudhary Chemistry practical.pdfSanyam Choudhary Chemistry practical.pdf
Sanyam Choudhary Chemistry practical.pdf
 
Solving Puzzles Benefits Everyone (English).pptx
Solving Puzzles Benefits Everyone (English).pptxSolving Puzzles Benefits Everyone (English).pptx
Solving Puzzles Benefits Everyone (English).pptx
 
POINT- BIOCHEMISTRY SEM 2 ENZYMES UNIT 5.pptx
POINT- BIOCHEMISTRY SEM 2 ENZYMES UNIT 5.pptxPOINT- BIOCHEMISTRY SEM 2 ENZYMES UNIT 5.pptx
POINT- BIOCHEMISTRY SEM 2 ENZYMES UNIT 5.pptx
 
Model Call Girl in Tilak Nagar Delhi reach out to us at 🔝9953056974🔝
Model Call Girl in Tilak Nagar Delhi reach out to us at 🔝9953056974🔝Model Call Girl in Tilak Nagar Delhi reach out to us at 🔝9953056974🔝
Model Call Girl in Tilak Nagar Delhi reach out to us at 🔝9953056974🔝
 
Paris 2024 Olympic Geographies - an activity
Paris 2024 Olympic Geographies - an activityParis 2024 Olympic Geographies - an activity
Paris 2024 Olympic Geographies - an activity
 
Código Creativo y Arte de Software | Unidad 1
Código Creativo y Arte de Software | Unidad 1Código Creativo y Arte de Software | Unidad 1
Código Creativo y Arte de Software | Unidad 1
 
Industrial Policy - 1948, 1956, 1973, 1977, 1980, 1991
Industrial Policy - 1948, 1956, 1973, 1977, 1980, 1991Industrial Policy - 1948, 1956, 1973, 1977, 1980, 1991
Industrial Policy - 1948, 1956, 1973, 1977, 1980, 1991
 

computer architecture lab manual

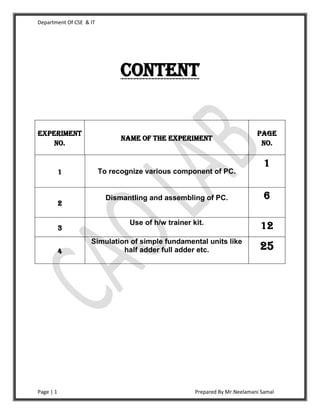
  • 1. Department Of CSE & IT CONTENT Experiment Page Name of the Experiment No. No. 1 1 To recognize various component of PC. Dismantling and assembling of PC. 6 2 3 Use of h/w trainer kit. 12 Simulation of simple fundamental units like 4 half adder full adder etc. 25 Page | 1 Prepared By Mr.Neelamani Samal
  • 2. Department Of CSE & IT HARDWARE AND SOFTWARE REQUIREMENTS :- 1.PC components. 2. Hardware trainer kit for Printer ,SMPS, Motherboard, Real time clock, CPU, Hard disk. 3. Simulation software(XLINIX). Page | 2 Prepared By Mr.Neelamani Samal
  • 3. Department Of CSE & IT Lab Experiment No. :- 1 Objective :- To Recognize the various components of a Personal Computer. Theory:- The basic components of a PC are 1. Input Unit 2. Output unit 3. Memory unit 4. Control unit 5. Arithmetic logic unit Input Unit :- It is the unit through which data/instructions can be entered into the computers . e.g. Keyboard , Mouse etc. Output Unit :- It is the unit by which we can get output from the entered input from the computer. e.g. Monitors ,Printer, Speaker etc. Page | 3 Prepared By Mr.Neelamani Samal
  • 4. Department Of CSE & IT Memory Unit :- It stores the information by providing facility to the CPU actively by providing necessary data to CPU. Memory units are of two types 1.Primary memory 2. Secondary memory. Primary Memory:- It is also of two types: i) RAM ii) ROM RAM:- It can be randomly accessed. Memory is temporarily used because when the power goes off ,all the data stored in it are erased.So it is volatile in nature.It can be read and the data can be written into it. ROM:- It is also randomly accessed. It is only readmemory unit.It is non- volatile in nature. It can be read only but datas can’t be written into it. ALU:- It performs arithmetic operation like addition,subtraction etc and logical operation loke AND,OR,NAND etc. It works in electronic speed but the device attached to it works in low speed.That’s why processor can handle all the peripheral devices at a time. IT establishes well coordination between other four functional unit. Page | 4 Prepared By Mr.Neelamani Samal
  • 5. Department Of CSE & IT CU:- It is the unit which controls the flow of information through the processor and coordinate the activities the activities of other unit which are within it. So it is the brain within the brain as it controls what happens inside the processor. It generate timing signal and control signal for well coordination. Configurtion of a PC. SI Name of Name of Capacity/frequency interface NO component Manufacturer 1. Processor 2. MotherBoard 3. RAM 4. HDD 5. FDD 6. DVD 7. TFT/CRT 8. Keyboard 9. Mouse 10. UPS 11. Cabinet 12. Speaker Page | 5 Prepared By Mr.Neelamani Samal
  • 6. Department Of CSE & IT Processor:- The microprocessor accepts inputs from the user in the form of data and instruction. It process the information and instruction and then send the processed information to the output device. Motherboard:- It is the main circuit of PC.It conatains the interface for the microprocessor,BIOS,Memory and storage device neeed to control peripheral devices such as monitor,keyboard,mouse etc. RAM:- It stores data temporarily.So it is called volatile. HDD:- IT is a secondary storage device for permanent data storage device i.e. placed in the system.It is similar to human brain where all the past to present events are stored. DVD RAM: The Digital versatile disc stored digitally. A DVD writer is a DVD player as well as a writer. FDD: It is a n external storage device. It is magnetic round disc enclosed in a plastic jacket. Today we have double size high quality to density disk with 1.44 MB of size. Page | 6 Prepared By Mr.Neelamani Samal
  • 7. Department Of CSE & IT Keyboard:- It is a primary input device of the PC similar to type writer. Mouse:- It is used to point to the desired position in the computer. It is also an input device. UPS:- It is the device that produce supply to the PC. It provides all the time of power cut.So we can save the current data and shut down properly. Speaker: It is an output device through which CPU can produce sound for the user. TFT monitor:- It is an output device through wich we can read data. Cabinet:- outer covering of CPU. Conclusion:- Page | 7 Prepared By Mr.Neelamani Samal
  • 8. Department Of CSE & IT EXPERIMENT NO:-02 OBJECTIVES:- To understand how the different components of PC are connected to work properly. Components required:- 1.cabinet 2.SMPS. 3.HDD 4.processor 5.Motherboard 6.Ram 7.IDE cable. 8.ROM 9.System fan and CPU fan. 10.Tool kit Description:  The required components are taken and checked whether the components are good condition or not.  At first clean the required components and it should be done with paint brush.  All the components handled with care.  The step by step procedure should be followed for dismantling and assembling of the PC.  The procedure dismantling and assembling are as follows : Page | 8 Prepared By Mr.Neelamani Samal
  • 9. Department Of CSE & IT Building TheComputer Step 1: Prepare the case Remove the empty computer case from its packing and remove both side panels and takeout any items that may be inside the case .Place it on the work space so that the motherboard facing up. Step 2: Installing the Mother Board rises Inspect whether the motherboard risers are installed properly, if not then install it properly so that the motherboard will not be in direct contact with the metal case. Step 3: Installing the Dives and mother board in the case 1: Remove side panel Remove the side panel from the case in order to gain access to the cabinet as well as the motherboard properly. 2: Remove front external drive panel Remove the drive bay blanking the spaces.. So that we can install the required drives properly and freely. 3: Installing external drives With the blanking places removed slide the drives into their corresponding bays. 4: Case screws Fix the drives using the case screw provided .The screw should not be so tightly placed, otherwise it may harm the respective components of the PC. 5: Fixing the drives Fix the optical and floppy drives into its places with screwed properly. 6: Drives installed The optical and floppy drives located in the correct bays in the pc case. Page | 9 Prepared By Mr.Neelamani Samal
  • 10. Department Of CSE & IT 7: motherboard mask 8: Discard unwanted parts After everything is in its place just discard the unwanted parts that were present initially in the case. Page | 10 Prepared By Mr.Neelamani Samal
  • 11. Department Of CSE & IT Step 4 :Installing mother board in the case 1: Installing the Processor Place the CPU into its slot properly seeing the cut marks present in the processor for identification. Care must be given while installing the CPU, if any Pin breaks then the Processor will become useless. Then place the sink and CPU fan properly and lock it with the lock provided. Page | 11 Prepared By Mr.Neelamani Samal
  • 12. Department Of CSE & IT 2: CPU and Fan The CPU fan should be placed over the CPU to keep the processor cool . Place the RAM into its slots. Press it to 3: Installing the RAM get the RAM Locked. If the RAM is not placed properly then the PC will not start. And will give a beep sound. 4: Installing the power supply Use the SMPS(Switch Mode Power Supply) cables to give power supply to the individual components of the PC. 5: Installing The HDD The HDD should be Placed in its proper place and should be connected with the ATA cable or The SATA cable as the port may be. And power supply should be given to it. Page | 12 Prepared By Mr.Neelamani Samal
  • 13. Department Of CSE & IT 6: Connecting the case cable Connect the below cables properly as per instruction. And connect the same cable to the motherboard also. Step 5: Closing The system case by cover Once all the parts of the PC are connected to its slots properly and firmly just close the system case and screw it properly. Conclusion :- Page | 13 Prepared By Mr.Neelamani Samal
  • 14. Department Of CSE & IT Experiment No. 3 Objective : i)Study of Fault analysis point of the CPU trainer kit. ii) Study of Dot Matrix Printer. iii) To study the Fault analysis points of Dot Matrix printer iv) Study of VBMB 40 HD Trainer kit. v) Study of real time clock using 465 hard disk driver. EQUIPMENTS REQUIRED: 1. CPU Trainer kit 2. Monitor 3. Keyboard 4. Mouse THEORY : The CPU Trainer kit has 8 different fault analysis point. To estimate the various fault covering the individual sections of personal computers T1: For Keyboard logic T2 : For BIOS logic T3: For Hard Disk logic T4 : For Mouse logic T5: For Video logic(for synchronization horizontally) T6: For Video logic(for Vertical synchronization) T7: For Serial Communication logic T8: For Parallel Communication logic Page | 14 Prepared By Mr.Neelamani Samal
  • 15. Department Of CSE & IT PROCEDURE : T1: Fault Analysis: Switch off the system, Put T1 in open mode and switch ON the system. Symptom: Any character that is to be given through the keyboard can not be displayed or the keyboard can not work properly. T2: Fault Analysis: Switch off the system, Put T2 in open mode and switch ON the system. Symptom: Without processing any key the control will automatically flow to the BIOS T3: Fault Analysis: Switch off the system, Put T3 in open mode and switch ON the system. Symptom: The OS will not be properly loaded, HDD will not be initialized T4: Fault Analysis: Switch off the system, Put T4 in open mode and switch ON the system. Symptoms: The mouse will not work properly. T5: Fault Analysis: Switch off the system, Put T5 in open mode and switch ON the system. Symptoms:Display scroll horizontally Page | 15 Prepared By Mr.Neelamani Samal
  • 16. Department Of CSE & IT T6 Fault Analysis: Switch off the system, Put T6 in open mode and switch ON the system. Symptom:Display scroll vertically T7: Fault Analysis: Switch off the system, Put T7 in open mode and switch ON the system. Symptoms: Serial Port does not receive or transmit information to or from its sub system or interface unit. T8: Fault Analysis: Switch off the system, Put T8 in open mode and switch ON the system. Symptom:It prints junk character CPU TRAINER KIT CONCLUSION 1: Page | 16 Prepared By Mr.Neelamani Samal
  • 17. Department Of CSE & IT Objective 2:- Study of Dot Matrix Printer. EQUIPMENTS REQUIRED: 1.DOT Matrix Printer 2.Power supply unit 3.Power cord DESCRIPTION: 1.Thisthe first type of printer to be used in home and school but they are not used now-a-days. 2.A Dot Matrix Printer or impact matrix printer is a type of computer printer with a print head that run back and forth or up and down motion, in the phase and print by impact , striking an ink soaked cloth ribbon against the paper, much like the print mechanism on a type writer. 3. Each dot is produced by a tiny metal rod also called a wire or pin which is driven forward by the power of tiny electromagnet or solenoid either directly or through small parts. Page | 17 Prepared By Mr.Neelamani Samal
  • 18. Department Of CSE & IT ADVANTAGES: 1.Relatively cheap to buy 2.Low operating cost 3.Create carbon copy using carbonated papers. DISADVANTAGES: 1.Print quality is poor and important documents are not suitable to give managers or customers. 2.Very Slow 3.Noisy 4.Can not produce colour copies. CONCLUSION 2: Page | 18 Prepared By Mr.Neelamani Samal
  • 19. Department Of CSE & IT OBJECTIVE 3: To study the Fault analysis points of Dot Matrix printer EQUIPMENTS REQUIRED: 1.Dot matrix printer Trainer kit. 2.Power supply PROCEDURE: Dot matrix printer Trainer kit has 8 Fault analysis point to identify 8 different fault generated in DMP Trainer kit. The fault analysis points are T1:Power logic T2.Wrong Character printing T3.Paper sensor without paper T4.Print in the same line T5.Home position T6.Line space incorrect T7.Paper out T8.Single dot or collection of dots are missing Page | 19 Prepared By Mr.Neelamani Samal
  • 20. Department Of CSE & IT DESCRIPTION: T1: Fault Analysis:T1 is normally in closed position, to introduce the problem switch off the printer . T1 is open and switch on the printer to identify the problem. Symptom:No printer operation can be performed T2: Fault Analysis:T2 is normally in closed position, to introduce the problem switch off the printer . T2 is open and switch on the printer to identify the problem. Symptom:Printer prints wrong character. T3: Fault Analysis:T3 is normally in closed position, to introduce the problem switch off the printer . T3 is open and switch on the printer to identify the problem. Symptoms:The printer will sense the paper even when the paper is not available for printing. T4: Fault Analysis:T4 is normally in closed position, to introduce the problem switch off the printer . T4 is open and switch on the printer to identify the problem. Symptom:Overlapping of characters will be identified. T5: Fault Analysis:T5 is normally in closed position, to introduce the problem switch off the printer . T5 is open and switch on the printer to identify the problem. Symptom:Home position sensor may be defective. The sensor will not at the initial position by pressing initialization button. It will move to the end. T6: Fault Analysis:T6 is normally in closed position, to introduce the problem switch off the printer . T6 is open and switch on the printer to identify the problem. Page | 20 Prepared By Mr.Neelamani Samal
  • 21. Department Of CSE & IT Symptoms:Line feeding is not proper. T7: Fault Analysis:T7 is normally in closed position, to introduce the problem switch off the printer . T7 is open and switch on the printer to identify the problem. Symptom:Carriage motor struck while initializing the printer. The sensor can not be initialized by pressing the initialization button. T8: Fault Analysis:T8 is normally in closed position, to introduce the problem switch off the printer . T8 is open and switch on the printer to identify the problem. Symptom:While printing single dot or line of dots are missing consistently. CONCLUSION 3: Page | 21 Prepared By Mr.Neelamani Samal
  • 22. Department Of CSE & IT OBJECTIVE 4 : Study of VBMB 40 HD Trainer kit. EQUIPMENTS REQUIRED: 1.Micro controller 51EB 2.One Hard Disk 3.VBMB 40 Card 4.One 40 core cable, one 50 core cable and one serial cable 5.Multi output power supply unit 6.one VBMB 40 installer CD 7.One keyboard PROCEDURE: 1.Go to WINXTALK program 2.Choose open point (the communication setting are already set, do not change). 3.Choose communication window (from the WINXTALK menu or F2 shortcut) 4.From Micro controller type the command “ SM” and press enter 5. You will find # prompt on the monitor and serial mode on the micro 51 LED display 6.Type command “pi 4100” on the 3 prompt of WINXTALK communication windows and press enter Page | 22 Prepared By Mr.Neelamani Samal
  • 23. Department Of CSE & IT 7.From the text file option of WINX communication window choose download push button(note the number of characters transmitted appear on the status bar of WINX communication window) 8.Click on # type the command “go 4100” and press enter, the message appears , the information about HD that is cylinder, comma, sector etc and the next command prompt is LBA= 0x00000000,(R)ead , (W)rite,(L)BA , (U)p , (D)own , (h)ex dump, (q)uit 9.Press 'L' from key board to select the hexa decimal address , then provide the address value suppose “55” 10.Once again the previous command prompt LBA= 0x00000000,(R)ead , (W)rite,(L)BA , (U)p , (D)own , (h)ex dump, (q)uit will appear. 11.Choose 'R' and ' H' to see the information stored in the address of the HD. 12.Press “INT” key from the micro 51EB then # prompt will appear on the WINX communication window. 13.Type the command “FP 600061ff 77” (here 77 is data) then press enter. 14.At the # prompt once again type the command “go 4100” and press enter. 15.Press “L” key from the key board and provide LBA address “55” then press enter. 16.At the command prompt LBA= 0x00000000,(R)ead , (W)rite,(L)BA , (U)p , (D)own , (h)ex dump, (q)uit will appear. Then press “W” key when warning message will appear then press “Y” “sector write OK” . 17.At LBA prompt press 'R' and 'H' , you can see the written in the HD Page | 23 Prepared By Mr.Neelamani Samal
  • 24. Department Of CSE & IT MICRO 51 EB 50 and 40 CORE CABLE VBMB 40 CARD CONCLUSION 4: Page | 24 Prepared By Mr.Neelamani Samal
  • 25. Department Of CSE & IT OBJECTIVE 5 : Study of real time clock using 465 hard disk driver. EQUIPMENTS REQUIRED: 1.VBMB 15 card 2.PCI driver 3.50 core cable PROCEDURE: 1.Open PLXP on the desktop, go to command click on it. 2.Reset COP then open my computer. 3.Go to CD-drive click on VPCI-107 then click on program. 4.Then double click on VBMB 15 exe file. 5.One black screen will come and it will ask for confirmation. Enter 'y' then give value for hour,minute and second. 6.The given time will be displayed in real-time clock kit. Page | 25 Prepared By Mr.Neelamani Samal
  • 26. Department Of CSE & IT PCI DRIVER REAL TIME CLOCK VBMB 15 CARD CONCLUSION 5: Page | 26 Prepared By Mr.Neelamani Samal
  • 27. Department Of CSE & IT EXPERIMENT NO.4 OBJECTIVE:- Simulation of fundamental unit like 1. Half adder 2. Full adder and 3. Multiplexer Software required:- XILINX ISE 9.1i Theory:- Halfadder:- Procedure:- Step1: To simulate the functional working of Halfadder we need XILINX 9.1i to run in Admin mode as shown below. Page | 27 Prepared By Mr.Neelamani Samal
  • 28. Department Of CSE & IT Step2: Go to file menu and chose new project. Step3: Type the project name and then choose the top level source type as HDL. Page | 28 Prepared By Mr.Neelamani Samal
  • 29. Department Of CSE & IT Stpe4: Set the parameter in the window as Family- Spantan3 Device-XC3S200 Package-FT256 Speed- 4 Preferred Language-VHDL And press next Page | 29 Prepared By Mr.Neelamani Samal
  • 30. Department Of CSE & IT Step5: Choose the new source and press next and whenever the new window open,Put the same file name and choose VHDL module . Page | 30 Prepared By Mr.Neelamani Samal
  • 31. Department Of CSE & IT Step6: In the next window input two port name as input1 and input2 and direction as in.Then input two port name as sum and carry and set direction as out. Step7: And press next. Page | 31 Prepared By Mr.Neelamani Samal
  • 32. Department Of CSE & IT Step8: Press next Step9: Press next Page | 32 Prepared By Mr.Neelamani Samal
  • 33. Department Of CSE & IT Step10: Press next Step11:Press finish Page | 33 Prepared By Mr.Neelamani Samal
  • 34. Department Of CSE & IT Step12: Write the HDL code for half adder followed by begin. Step13: Double click on the Synthesize.xst and go to check syntax and if error not found the following screen appear. Page | 34 Prepared By Mr.Neelamani Samal
  • 35. Department Of CSE & IT Step14: Then click on the view RTL schme Page | 35 Prepared By Mr.Neelamani Samal
  • 36. Department Of CSE & IT Step15:Then following output screen output screen appear. Page | 36 Prepared By Mr.Neelamani Samal
  • 37. Department Of CSE & IT Conclusion:- Page | 37 Prepared By Mr.Neelamani Samal
  • 38. Department Of CSE & IT FULL ADDER Theory: Procedure Step1: To simulate the functional working of full adder we need XILINX 9.1i to run in Admin mode as shown below. Page | 38 Prepared By Mr.Neelamani Samal
  • 39. Department Of CSE & IT Step2: Go to file menu and chose new project. Step3: Type the project name and then choose the top level source type as HDL. Page | 39 Prepared By Mr.Neelamani Samal
  • 40. Department Of CSE & IT Stpe4: Set the parameter in the window as Family- Spantan3 Device-XC3S200 Package-FT256 Speed- 4 Preferred Language-VHDL And press next Page | 40 Prepared By Mr.Neelamani Samal
  • 41. Department Of CSE & IT Step5: Choose the new source and press next and whenever the new window open, Put the same file name and choose VHDL module Page | 41 Prepared By Mr.Neelamani Samal
  • 42. Department Of CSE & IT Step6: In the next window input two port name as input1 and input2 and direction as in.Then input two port name as sum and carry and set direction as out. Step7: And press next. Page | 42 Prepared By Mr.Neelamani Samal
  • 43. Department Of CSE & IT Step8: Press next Step9: Press next Page | 43 Prepared By Mr.Neelamani Samal
  • 44. Department Of CSE & IT Step10: Press next Step11:Press finish Page | 44 Prepared By Mr.Neelamani Samal
  • 45. Department Of CSE & IT Step12: Write the HDL code for half adder followed by begin. Page | 45 Prepared By Mr.Neelamani Samal
  • 46. Department Of CSE & IT Step13: Double click on the Synthesize.xst and go to check syntax and if error not found the following screen appear. Page | 46 Prepared By Mr.Neelamani Samal
  • 47. Department Of CSE & IT Step14: Then click on the view RTL schme Step15:Then following output screen output screen appear. Page | 47 Prepared By Mr.Neelamani Samal
  • 48. Department Of CSE & IT Conclusion:- Page | 48 Prepared By Mr.Neelamani Samal
  • 49. Department Of CSE & IT MULTIPLEXER Step1: To simulate the functional working of full adder we need XILINX 9.1i to run in Admin mode as shown below. Step2: Go to file menu and chose new project. Page | 49 Prepared By Mr.Neelamani Samal
  • 50. Department Of CSE & IT Step3 Type the project name and then choose the top level source type as HDL. Stpe4: Set the parameter in the window as Family- Spantan3 Device-XC3S200 Package-FT256 Speed- 4 Preferred Language-VHDL And press next Page | 50 Prepared By Mr.Neelamani Samal
  • 51. Department Of CSE & IT Step5: Choose the new source and press next and whenever the new window open, Put the same file name and choose VHDL module Page | 51 Prepared By Mr.Neelamani Samal
  • 52. Department Of CSE & IT Page | 52 Prepared By Mr.Neelamani Samal
  • 53. Department Of CSE & IT Step6: In the next window input two port name as input1 and input2 and direction as in.Then input two port name as sum and carry and set direction as out. Step7: And press next. Page | 53 Prepared By Mr.Neelamani Samal
  • 54. Department Of CSE & IT Step8: And press next Step9: And press next Page | 54 Prepared By Mr.Neelamani Samal
  • 55. Department Of CSE & IT Step10: And press finish Step12: Write the HDL code for half adder followed by begin Page | 55 Prepared By Mr.Neelamani Samal
  • 56. Department Of CSE & IT Step13: Double click on the Synthesize.xst and go to check syntax and if error not found the following screen appear. Page | 56 Prepared By Mr.Neelamani Samal
  • 57. Department Of CSE & IT Step14:Then following output screen output screen appear Page | 57 Prepared By Mr.Neelamani Samal
  • 58. Department Of CSE & IT Conclusion:- Page | 58 Prepared By Mr.Neelamani Samal