SlideShare una empresa de Scribd logo
1 de 17
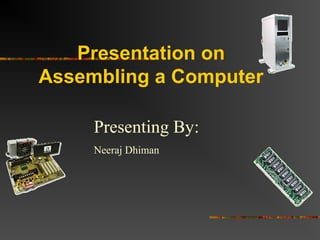
Presentation on
Assembling a Computer
Presenting By:
Neeraj Dhiman
Safety Procedures
 Clean work area free of dust and food
 Never open a monitor
 Remove jewelry and watches
 Turn power off and remove power plug
 Fire extinguisher available
 Use anti static mat and wrist strap
 Hold cards by edges/avoid touching chips
 Put components on non conductive surface
 Do not use magnetized screw drivers
Electrostatic Discharge
 If you notice it, it’s at least 2000 volts
 Charge of 200 volts can damage components
 Keep all components in anti-static bags
 Humidity above 50%
 Use grounded mats (workbench and floor)
 Use wrist straps
 Periodically touch unpainted grounded metal
computer parts to lower the body’s static
energy
Keeping an Inventory
 Document all components, parts purchased
 Use an inventory checklist
 May be difficult to recall later
 Will be helpful in locating and downloading
device drivers
 Note specific warranty info
 Save specifics about installation and
maintenance requirements so warranties will be
valid
 Use small box to hold all manuals and disks
 Label box for specific computer
 Store in secure place
Choosing a computer case and
system unit
 Case
 Allows easy access to
internal components
 Provides room for expansion
 ATX form factor
 Available desk top space
 LED indicators on front
 Dust filters if area where
computer to be used is dusty
 Power supply
 Minimum 250
watts
 ATX
 Single 20 pin
 Fan pulls air
through case
from front to
back
Preparing to install
Motherboard
 Review the motherboard location map
 Configure the motherboard
 Install the CPU, heat sink and fan, RAM
 Connect power supply cables to
motherboard power connectors and misc.
connectors to correct switches and lights
 Set the system BIOS
Configuring the processor
 Set jumper settings
for appropriate
frequency
 Ensure the CPU
used supports the
BUS speed and the
CPU clock speed of
Motherboard
Installing the CPU
 ZIF (Zero Insertion Force) trait on nearly all socket 7 and
similar types
 Inspect pins for damage
 Locate pin 1 on both chip and socket
 Open the ZIF socket (raise lever)
 Insert processor (should easily slide on)
 Make sure there is not a gap between bottom of chip and
socket
 Push lever down
 Set CPU voltage jumper settings if necessary (Pentium II
and later CPU’s adjust automatically to voltage)
Install Heat Sink and Fan
 Attach fan to heat sink if not already
attached
 Apply thin layer of compound to chip
surface
 Attach heat sink by placing squarely
on top of processor and press down
gently
 Bend clips in place to hold sink
 Make sure there is good contact
between sink and Chip surface
 Wipe off any excess compound
 Plug power cord from fan to fan
power pins on motherboard
Install RAM
 Two types RAM used on
most PC’s
 DDR1
 DDR2
 Look at motherboard map to
determine which bank to
place DIMM 1 module in
 Orient the Dimm chip over
the slot (keyed) and insert
into slot
 Lock in place by closing
levers
Installing the Motherboard
 Position case for easy access, locate holes on
motherboard and corresponding holes on case
 Insert spacers that came with motherboard into
holes on case and install plastic standoffs into holes
on motherboard
 Carefully slide the board into the case, lining up
holes
 Tighten board to case with screws
 Verify that the back of the motherboard is not
touching the case, all slots and connectors line up
properly, board is securely held in place, and board
does not bend when pressed
Attaching LEDs, key lock and
speaker
 Use motherboard manual as a guide for
proper placement
 Turbo LED (mainly legacy item)
 Power LED
 Hard drive activity LED
 Key lock switch (common with older
systems, rare now; prevented BIOS
meddling)
 PC speaker
Connect power supply cables
 AT motherboard
 Locate two large wire leads from power supply
(P8 and P9)
 Locate 12 pin power connector on motherboard
 Plug P8 and P9 into connector
 Be sure black wires are in the middle beside one
another
 ATX motherboard
 Attach the connector that is keyed to fit only one
way into the motherboard connector
Attach hard drive and CD-ROM
 Use separate IDE cables if possible and set both jumpers to
Master (or single on the hard drive if available)
 If sharing an IDE cable, set the hard drive to Master and the CD-
ROM to slave
 Install hard drive away from power supply which can act like a
magnet and destroy data
 Keep hard drive near front of case to benefit from air drawn into
case and keep away from other hardware
 Slide drive into selected drive rail and screw drive into place
 Attach ribbon cable to the primary controller of the motherboard
and attach power cord
 Follow with CD-ROM installation and attach to secondary
controller of the motherboard
Installing a video card
 Use AGP expansion slot if
available, otherwise use PCI or ISA
 Remove slot insert and insert
video card by aligning pins and
gently applying pressure
 Secure to case with a screw
 Some motherboards have built-in
video. If you want to install an
external card then you must
disable the built in video in the
CMOS
AGP VIDEO CARD
Post Assembly Checklist
 All expansion cards are fully inserted
 CPU fan is attached to power
 The 110/220 volt switch is configured properly
 Drives are connected to power
 Ribbon cables are attached correctly
 Fans are free from interference from wires
 CPU voltage settings are correctly configured
 Power switch is off and power supply connectors are
connected properly to motherboard
 All connections are tight
 Pins are properly aligned
 Close the case before booting
 Connect keyboard, mouse and monitor and plug in AC power
We've successfully assembled
a computer
THANK YOU
ANY QUERY

Más contenido relacionado

La actualidad más candente

Chs pc cleaning
Chs pc cleaningChs pc cleaning
Chs pc cleaninganjgulf
 
Performing Computer Operations [Autosaved].pptx
Performing Computer Operations [Autosaved].pptxPerforming Computer Operations [Autosaved].pptx
Performing Computer Operations [Autosaved].pptxMaryGraceHeredero3
 
Criteria for Testing Electronic Components.pdf
Criteria for Testing Electronic Components.pdfCriteria for Testing Electronic Components.pdf
Criteria for Testing Electronic Components.pdfJoferMarcelo
 
Terminating and Connecting Electrical Wiring and Electronic Circuits (TCEC) ....
Terminating and Connecting Electrical Wiring and Electronic Circuits (TCEC) ....Terminating and Connecting Electrical Wiring and Electronic Circuits (TCEC) ....
Terminating and Connecting Electrical Wiring and Electronic Circuits (TCEC) ....DannyverFullo1
 
Learning activity-sheet-module1 CSS 1.0
Learning activity-sheet-module1 CSS 1.0Learning activity-sheet-module1 CSS 1.0
Learning activity-sheet-module1 CSS 1.0Rye Raine
 
Configure Computer System and Network
Configure Computer System and NetworkConfigure Computer System and Network
Configure Computer System and NetworkEILLEN IVY PORTUGUEZ
 
Ch 2 computer assembly disassembly
Ch 2 computer  assembly disassemblyCh 2 computer  assembly disassembly
Ch 2 computer assembly disassemblymekashaw tizazu
 
Plan and Prepare for Configuration
Plan and Prepare for Configuration Plan and Prepare for Configuration
Plan and Prepare for Configuration nanette sansano
 
Bios and cmos
Bios and cmosBios and cmos
Bios and cmosOnline
 
04. Computer Casing (Case, Housing)
04. Computer Casing (Case, Housing)04. Computer Casing (Case, Housing)
04. Computer Casing (Case, Housing)Akhila Dakshina
 
Introduction to Motherboard
Introduction to Motherboard Introduction to Motherboard
Introduction to Motherboard Makrand Patil
 
Parts of the system unit
Parts of the system unitParts of the system unit
Parts of the system unitSamantha Regis
 
Grade-10-DLP-CSS-June 5-6.docx
Grade-10-DLP-CSS-June 5-6.docxGrade-10-DLP-CSS-June 5-6.docx
Grade-10-DLP-CSS-June 5-6.docxAngelito Villalon
 

La actualidad más candente (20)

Pc assembly
Pc assemblyPc assembly
Pc assembly
 
Chs pc cleaning
Chs pc cleaningChs pc cleaning
Chs pc cleaning
 
Performing Computer Operations [Autosaved].pptx
Performing Computer Operations [Autosaved].pptxPerforming Computer Operations [Autosaved].pptx
Performing Computer Operations [Autosaved].pptx
 
Criteria for Testing Electronic Components.pdf
Criteria for Testing Electronic Components.pdfCriteria for Testing Electronic Components.pdf
Criteria for Testing Electronic Components.pdf
 
Disassembling a PC
Disassembling a PCDisassembling a PC
Disassembling a PC
 
Terminating and Connecting Electrical Wiring and Electronic Circuits (TCEC) ....
Terminating and Connecting Electrical Wiring and Electronic Circuits (TCEC) ....Terminating and Connecting Electrical Wiring and Electronic Circuits (TCEC) ....
Terminating and Connecting Electrical Wiring and Electronic Circuits (TCEC) ....
 
Learning activity-sheet-module1 CSS 1.0
Learning activity-sheet-module1 CSS 1.0Learning activity-sheet-module1 CSS 1.0
Learning activity-sheet-module1 CSS 1.0
 
Configure Computer System and Network
Configure Computer System and NetworkConfigure Computer System and Network
Configure Computer System and Network
 
Ch 2 computer assembly disassembly
Ch 2 computer  assembly disassemblyCh 2 computer  assembly disassembly
Ch 2 computer assembly disassembly
 
PERSONAL COMPUTER DISASSEMBLY
PERSONAL COMPUTER DISASSEMBLYPERSONAL COMPUTER DISASSEMBLY
PERSONAL COMPUTER DISASSEMBLY
 
Computer maintenance
Computer maintenanceComputer maintenance
Computer maintenance
 
Maintaining computer and network system
Maintaining computer and network systemMaintaining computer and network system
Maintaining computer and network system
 
Plan and Prepare for Configuration
Plan and Prepare for Configuration Plan and Prepare for Configuration
Plan and Prepare for Configuration
 
Bios and cmos
Bios and cmosBios and cmos
Bios and cmos
 
Assembling the computer
Assembling the computerAssembling the computer
Assembling the computer
 
04. Computer Casing (Case, Housing)
04. Computer Casing (Case, Housing)04. Computer Casing (Case, Housing)
04. Computer Casing (Case, Housing)
 
Introduction to Motherboard
Introduction to Motherboard Introduction to Motherboard
Introduction to Motherboard
 
Parts of the system unit
Parts of the system unitParts of the system unit
Parts of the system unit
 
2.3
2.32.3
2.3
 
Grade-10-DLP-CSS-June 5-6.docx
Grade-10-DLP-CSS-June 5-6.docxGrade-10-DLP-CSS-June 5-6.docx
Grade-10-DLP-CSS-June 5-6.docx
 

Destacado

Destacado (10)

Chapter 5 Questions
Chapter 5 QuestionsChapter 5 Questions
Chapter 5 Questions
 
7th ed ppt ch06
7th ed ppt ch067th ed ppt ch06
7th ed ppt ch06
 
Ch04
Ch04Ch04
Ch04
 
7th ed ppt ch05
7th ed ppt ch057th ed ppt ch05
7th ed ppt ch05
 
P.C motherboard
P.C motherboardP.C motherboard
P.C motherboard
 
Installing and Troubleshooting the Basic Components
Installing and Troubleshooting the Basic ComponentsInstalling and Troubleshooting the Basic Components
Installing and Troubleshooting the Basic Components
 
Chap1 chipset
Chap1 chipsetChap1 chipset
Chap1 chipset
 
Chapter 5 Processors
Chapter 5 ProcessorsChapter 5 Processors
Chapter 5 Processors
 
Chapter 2: Microprocessors
Chapter 2: MicroprocessorsChapter 2: Microprocessors
Chapter 2: Microprocessors
 
Chapter 4 Microprocessor CPU
Chapter 4 Microprocessor CPUChapter 4 Microprocessor CPU
Chapter 4 Microprocessor CPU
 

Similar a Assembling a computer

Assembling_a_Computer.ppt
Assembling_a_Computer.pptAssembling_a_Computer.ppt
Assembling_a_Computer.pptrafi266513
 
SYSTEM ADMINISTRATION AND MAINTENANCE NOTES PERIYAR UNIVERSITY
SYSTEM ADMINISTRATION AND MAINTENANCE NOTES PERIYAR UNIVERSITYSYSTEM ADMINISTRATION AND MAINTENANCE NOTES PERIYAR UNIVERSITY
SYSTEM ADMINISTRATION AND MAINTENANCE NOTES PERIYAR UNIVERSITYGOKUL SREE
 
Computer hardware basic -shashank
Computer hardware basic  -shashankComputer hardware basic  -shashank
Computer hardware basic -shashanktechbed
 
Computer Assembly.pptx
Computer Assembly.pptxComputer Assembly.pptx
Computer Assembly.pptxAndrew_Braza
 
1.1-4 Assemble Computer Hardware PowerPoint.pptx
1.1-4 Assemble Computer Hardware PowerPoint.pptx1.1-4 Assemble Computer Hardware PowerPoint.pptx
1.1-4 Assemble Computer Hardware PowerPoint.pptxRandyGaray
 
Installation of motherboard
Installation of motherboardInstallation of motherboard
Installation of motherboardRuchika Sinha
 
buildingapc-140831103031-phpapp01.pdf
buildingapc-140831103031-phpapp01.pdfbuildingapc-140831103031-phpapp01.pdf
buildingapc-140831103031-phpapp01.pdfJohnPeterPaulGarces
 
Assemble a desktop pc
Assemble a desktop pcAssemble a desktop pc
Assemble a desktop pcRajat Gupta
 
Computer Hardware & Software Lab Manual 4
Computer Hardware & Software Lab Manual 4Computer Hardware & Software Lab Manual 4
Computer Hardware & Software Lab Manual 4senayteklay
 
Computer 10 Other Parts of the Internal System Unit
Computer 10 Other Parts of the Internal System UnitComputer 10 Other Parts of the Internal System Unit
Computer 10 Other Parts of the Internal System UnitJessaBejer1
 
Css grade 11 week 4
Css grade 11 week 4Css grade 11 week 4
Css grade 11 week 4Danilo Anos
 
pc assembly 1111111pc assembly 1111111- Copy.pptx
pc assembly 1111111pc assembly 1111111- Copy.pptxpc assembly 1111111pc assembly 1111111- Copy.pptx
pc assembly 1111111pc assembly 1111111- Copy.pptxCarloCimacio
 
Build your own computer
Build your own computerBuild your own computer
Build your own computerMansoor Shar
 

Similar a Assembling a computer (20)

Assembling_a_Computer.ppt
Assembling_a_Computer.pptAssembling_a_Computer.ppt
Assembling_a_Computer.ppt
 
SYSTEM ADMINISTRATION AND MAINTENANCE NOTES PERIYAR UNIVERSITY
SYSTEM ADMINISTRATION AND MAINTENANCE NOTES PERIYAR UNIVERSITYSYSTEM ADMINISTRATION AND MAINTENANCE NOTES PERIYAR UNIVERSITY
SYSTEM ADMINISTRATION AND MAINTENANCE NOTES PERIYAR UNIVERSITY
 
Dasar komputer chapter3
Dasar komputer chapter3Dasar komputer chapter3
Dasar komputer chapter3
 
Computer hardware basic -shashank
Computer hardware basic  -shashankComputer hardware basic  -shashank
Computer hardware basic -shashank
 
Computer Assembly.pptx
Computer Assembly.pptxComputer Assembly.pptx
Computer Assembly.pptx
 
ASSEMBLY-AND-DISASSEMBLY (1).pptx
ASSEMBLY-AND-DISASSEMBLY (1).pptxASSEMBLY-AND-DISASSEMBLY (1).pptx
ASSEMBLY-AND-DISASSEMBLY (1).pptx
 
ASSEMBLY-AND-DISASSEMBLY.pptx
ASSEMBLY-AND-DISASSEMBLY.pptxASSEMBLY-AND-DISASSEMBLY.pptx
ASSEMBLY-AND-DISASSEMBLY.pptx
 
ASSEMBLY-AND-DISASSEMBLY.pptx
ASSEMBLY-AND-DISASSEMBLY.pptxASSEMBLY-AND-DISASSEMBLY.pptx
ASSEMBLY-AND-DISASSEMBLY.pptx
 
BuildingAComputer
BuildingAComputerBuildingAComputer
BuildingAComputer
 
1.1-4 Assemble Computer Hardware PowerPoint.pptx
1.1-4 Assemble Computer Hardware PowerPoint.pptx1.1-4 Assemble Computer Hardware PowerPoint.pptx
1.1-4 Assemble Computer Hardware PowerPoint.pptx
 
Installation of motherboard
Installation of motherboardInstallation of motherboard
Installation of motherboard
 
buildingapc-140831103031-phpapp01.pdf
buildingapc-140831103031-phpapp01.pdfbuildingapc-140831103031-phpapp01.pdf
buildingapc-140831103031-phpapp01.pdf
 
Assemble a desktop pc
Assemble a desktop pcAssemble a desktop pc
Assemble a desktop pc
 
Computer Hardware & Software Lab Manual 4
Computer Hardware & Software Lab Manual 4Computer Hardware & Software Lab Manual 4
Computer Hardware & Software Lab Manual 4
 
Computer 10 Other Parts of the Internal System Unit
Computer 10 Other Parts of the Internal System UnitComputer 10 Other Parts of the Internal System Unit
Computer 10 Other Parts of the Internal System Unit
 
Css grade 11 week 4
Css grade 11 week 4Css grade 11 week 4
Css grade 11 week 4
 
pc assembly 1111111pc assembly 1111111- Copy.pptx
pc assembly 1111111pc assembly 1111111- Copy.pptxpc assembly 1111111pc assembly 1111111- Copy.pptx
pc assembly 1111111pc assembly 1111111- Copy.pptx
 
Build your own computer
Build your own computerBuild your own computer
Build your own computer
 
Caramerakitkomputer.ppt
Caramerakitkomputer.pptCaramerakitkomputer.ppt
Caramerakitkomputer.ppt
 
Caramerakitkomputer
CaramerakitkomputerCaramerakitkomputer
Caramerakitkomputer
 

Último

SAP Build Work Zone - Overview L2-L3.pptx
SAP Build Work Zone - Overview L2-L3.pptxSAP Build Work Zone - Overview L2-L3.pptx
SAP Build Work Zone - Overview L2-L3.pptxNavinnSomaal
 
The State of Passkeys with FIDO Alliance.pptx
The State of Passkeys with FIDO Alliance.pptxThe State of Passkeys with FIDO Alliance.pptx
The State of Passkeys with FIDO Alliance.pptxLoriGlavin3
 
Are Multi-Cloud and Serverless Good or Bad?
Are Multi-Cloud and Serverless Good or Bad?Are Multi-Cloud and Serverless Good or Bad?
Are Multi-Cloud and Serverless Good or Bad?Mattias Andersson
 
"Debugging python applications inside k8s environment", Andrii Soldatenko
"Debugging python applications inside k8s environment", Andrii Soldatenko"Debugging python applications inside k8s environment", Andrii Soldatenko
"Debugging python applications inside k8s environment", Andrii SoldatenkoFwdays
 
From Family Reminiscence to Scholarly Archive .
From Family Reminiscence to Scholarly Archive .From Family Reminiscence to Scholarly Archive .
From Family Reminiscence to Scholarly Archive .Alan Dix
 
Nell’iperspazio con Rocket: il Framework Web di Rust!
Nell’iperspazio con Rocket: il Framework Web di Rust!Nell’iperspazio con Rocket: il Framework Web di Rust!
Nell’iperspazio con Rocket: il Framework Web di Rust!Commit University
 
Advanced Computer Architecture – An Introduction
Advanced Computer Architecture – An IntroductionAdvanced Computer Architecture – An Introduction
Advanced Computer Architecture – An IntroductionDilum Bandara
 
Ensuring Technical Readiness For Copilot in Microsoft 365
Ensuring Technical Readiness For Copilot in Microsoft 365Ensuring Technical Readiness For Copilot in Microsoft 365
Ensuring Technical Readiness For Copilot in Microsoft 3652toLead Limited
 
The Ultimate Guide to Choosing WordPress Pros and Cons
The Ultimate Guide to Choosing WordPress Pros and ConsThe Ultimate Guide to Choosing WordPress Pros and Cons
The Ultimate Guide to Choosing WordPress Pros and ConsPixlogix Infotech
 
Connect Wave/ connectwave Pitch Deck Presentation
Connect Wave/ connectwave Pitch Deck PresentationConnect Wave/ connectwave Pitch Deck Presentation
Connect Wave/ connectwave Pitch Deck PresentationSlibray Presentation
 
The Fit for Passkeys for Employee and Consumer Sign-ins: FIDO Paris Seminar.pptx
The Fit for Passkeys for Employee and Consumer Sign-ins: FIDO Paris Seminar.pptxThe Fit for Passkeys for Employee and Consumer Sign-ins: FIDO Paris Seminar.pptx
The Fit for Passkeys for Employee and Consumer Sign-ins: FIDO Paris Seminar.pptxLoriGlavin3
 
"ML in Production",Oleksandr Bagan
"ML in Production",Oleksandr Bagan"ML in Production",Oleksandr Bagan
"ML in Production",Oleksandr BaganFwdays
 
Tampa BSides - Chef's Tour of Microsoft Security Adoption Framework (SAF)
Tampa BSides - Chef's Tour of Microsoft Security Adoption Framework (SAF)Tampa BSides - Chef's Tour of Microsoft Security Adoption Framework (SAF)
Tampa BSides - Chef's Tour of Microsoft Security Adoption Framework (SAF)Mark Simos
 
Developer Data Modeling Mistakes: From Postgres to NoSQL
Developer Data Modeling Mistakes: From Postgres to NoSQLDeveloper Data Modeling Mistakes: From Postgres to NoSQL
Developer Data Modeling Mistakes: From Postgres to NoSQLScyllaDB
 
Hyperautomation and AI/ML: A Strategy for Digital Transformation Success.pdf
Hyperautomation and AI/ML: A Strategy for Digital Transformation Success.pdfHyperautomation and AI/ML: A Strategy for Digital Transformation Success.pdf
Hyperautomation and AI/ML: A Strategy for Digital Transformation Success.pdfPrecisely
 
How AI, OpenAI, and ChatGPT impact business and software.
How AI, OpenAI, and ChatGPT impact business and software.How AI, OpenAI, and ChatGPT impact business and software.
How AI, OpenAI, and ChatGPT impact business and software.Curtis Poe
 
Generative AI for Technical Writer or Information Developers
Generative AI for Technical Writer or Information DevelopersGenerative AI for Technical Writer or Information Developers
Generative AI for Technical Writer or Information DevelopersRaghuram Pandurangan
 
TrustArc Webinar - How to Build Consumer Trust Through Data Privacy
TrustArc Webinar - How to Build Consumer Trust Through Data PrivacyTrustArc Webinar - How to Build Consumer Trust Through Data Privacy
TrustArc Webinar - How to Build Consumer Trust Through Data PrivacyTrustArc
 
DevoxxFR 2024 Reproducible Builds with Apache Maven
DevoxxFR 2024 Reproducible Builds with Apache MavenDevoxxFR 2024 Reproducible Builds with Apache Maven
DevoxxFR 2024 Reproducible Builds with Apache MavenHervé Boutemy
 
Scanning the Internet for External Cloud Exposures via SSL Certs
Scanning the Internet for External Cloud Exposures via SSL CertsScanning the Internet for External Cloud Exposures via SSL Certs
Scanning the Internet for External Cloud Exposures via SSL CertsRizwan Syed
 

Último (20)

SAP Build Work Zone - Overview L2-L3.pptx
SAP Build Work Zone - Overview L2-L3.pptxSAP Build Work Zone - Overview L2-L3.pptx
SAP Build Work Zone - Overview L2-L3.pptx
 
The State of Passkeys with FIDO Alliance.pptx
The State of Passkeys with FIDO Alliance.pptxThe State of Passkeys with FIDO Alliance.pptx
The State of Passkeys with FIDO Alliance.pptx
 
Are Multi-Cloud and Serverless Good or Bad?
Are Multi-Cloud and Serverless Good or Bad?Are Multi-Cloud and Serverless Good or Bad?
Are Multi-Cloud and Serverless Good or Bad?
 
"Debugging python applications inside k8s environment", Andrii Soldatenko
"Debugging python applications inside k8s environment", Andrii Soldatenko"Debugging python applications inside k8s environment", Andrii Soldatenko
"Debugging python applications inside k8s environment", Andrii Soldatenko
 
From Family Reminiscence to Scholarly Archive .
From Family Reminiscence to Scholarly Archive .From Family Reminiscence to Scholarly Archive .
From Family Reminiscence to Scholarly Archive .
 
Nell’iperspazio con Rocket: il Framework Web di Rust!
Nell’iperspazio con Rocket: il Framework Web di Rust!Nell’iperspazio con Rocket: il Framework Web di Rust!
Nell’iperspazio con Rocket: il Framework Web di Rust!
 
Advanced Computer Architecture – An Introduction
Advanced Computer Architecture – An IntroductionAdvanced Computer Architecture – An Introduction
Advanced Computer Architecture – An Introduction
 
Ensuring Technical Readiness For Copilot in Microsoft 365
Ensuring Technical Readiness For Copilot in Microsoft 365Ensuring Technical Readiness For Copilot in Microsoft 365
Ensuring Technical Readiness For Copilot in Microsoft 365
 
The Ultimate Guide to Choosing WordPress Pros and Cons
The Ultimate Guide to Choosing WordPress Pros and ConsThe Ultimate Guide to Choosing WordPress Pros and Cons
The Ultimate Guide to Choosing WordPress Pros and Cons
 
Connect Wave/ connectwave Pitch Deck Presentation
Connect Wave/ connectwave Pitch Deck PresentationConnect Wave/ connectwave Pitch Deck Presentation
Connect Wave/ connectwave Pitch Deck Presentation
 
The Fit for Passkeys for Employee and Consumer Sign-ins: FIDO Paris Seminar.pptx
The Fit for Passkeys for Employee and Consumer Sign-ins: FIDO Paris Seminar.pptxThe Fit for Passkeys for Employee and Consumer Sign-ins: FIDO Paris Seminar.pptx
The Fit for Passkeys for Employee and Consumer Sign-ins: FIDO Paris Seminar.pptx
 
"ML in Production",Oleksandr Bagan
"ML in Production",Oleksandr Bagan"ML in Production",Oleksandr Bagan
"ML in Production",Oleksandr Bagan
 
Tampa BSides - Chef's Tour of Microsoft Security Adoption Framework (SAF)
Tampa BSides - Chef's Tour of Microsoft Security Adoption Framework (SAF)Tampa BSides - Chef's Tour of Microsoft Security Adoption Framework (SAF)
Tampa BSides - Chef's Tour of Microsoft Security Adoption Framework (SAF)
 
Developer Data Modeling Mistakes: From Postgres to NoSQL
Developer Data Modeling Mistakes: From Postgres to NoSQLDeveloper Data Modeling Mistakes: From Postgres to NoSQL
Developer Data Modeling Mistakes: From Postgres to NoSQL
 
Hyperautomation and AI/ML: A Strategy for Digital Transformation Success.pdf
Hyperautomation and AI/ML: A Strategy for Digital Transformation Success.pdfHyperautomation and AI/ML: A Strategy for Digital Transformation Success.pdf
Hyperautomation and AI/ML: A Strategy for Digital Transformation Success.pdf
 
How AI, OpenAI, and ChatGPT impact business and software.
How AI, OpenAI, and ChatGPT impact business and software.How AI, OpenAI, and ChatGPT impact business and software.
How AI, OpenAI, and ChatGPT impact business and software.
 
Generative AI for Technical Writer or Information Developers
Generative AI for Technical Writer or Information DevelopersGenerative AI for Technical Writer or Information Developers
Generative AI for Technical Writer or Information Developers
 
TrustArc Webinar - How to Build Consumer Trust Through Data Privacy
TrustArc Webinar - How to Build Consumer Trust Through Data PrivacyTrustArc Webinar - How to Build Consumer Trust Through Data Privacy
TrustArc Webinar - How to Build Consumer Trust Through Data Privacy
 
DevoxxFR 2024 Reproducible Builds with Apache Maven
DevoxxFR 2024 Reproducible Builds with Apache MavenDevoxxFR 2024 Reproducible Builds with Apache Maven
DevoxxFR 2024 Reproducible Builds with Apache Maven
 
Scanning the Internet for External Cloud Exposures via SSL Certs
Scanning the Internet for External Cloud Exposures via SSL CertsScanning the Internet for External Cloud Exposures via SSL Certs
Scanning the Internet for External Cloud Exposures via SSL Certs
 

Assembling a computer

  • 1. Presentation on Assembling a Computer Presenting By: Neeraj Dhiman
  • 2. Safety Procedures  Clean work area free of dust and food  Never open a monitor  Remove jewelry and watches  Turn power off and remove power plug  Fire extinguisher available  Use anti static mat and wrist strap  Hold cards by edges/avoid touching chips  Put components on non conductive surface  Do not use magnetized screw drivers
  • 3. Electrostatic Discharge  If you notice it, it’s at least 2000 volts  Charge of 200 volts can damage components  Keep all components in anti-static bags  Humidity above 50%  Use grounded mats (workbench and floor)  Use wrist straps  Periodically touch unpainted grounded metal computer parts to lower the body’s static energy
  • 4. Keeping an Inventory  Document all components, parts purchased  Use an inventory checklist  May be difficult to recall later  Will be helpful in locating and downloading device drivers  Note specific warranty info  Save specifics about installation and maintenance requirements so warranties will be valid  Use small box to hold all manuals and disks  Label box for specific computer  Store in secure place
  • 5. Choosing a computer case and system unit  Case  Allows easy access to internal components  Provides room for expansion  ATX form factor  Available desk top space  LED indicators on front  Dust filters if area where computer to be used is dusty  Power supply  Minimum 250 watts  ATX  Single 20 pin  Fan pulls air through case from front to back
  • 6. Preparing to install Motherboard  Review the motherboard location map  Configure the motherboard  Install the CPU, heat sink and fan, RAM  Connect power supply cables to motherboard power connectors and misc. connectors to correct switches and lights  Set the system BIOS
  • 7. Configuring the processor  Set jumper settings for appropriate frequency  Ensure the CPU used supports the BUS speed and the CPU clock speed of Motherboard
  • 8. Installing the CPU  ZIF (Zero Insertion Force) trait on nearly all socket 7 and similar types  Inspect pins for damage  Locate pin 1 on both chip and socket  Open the ZIF socket (raise lever)  Insert processor (should easily slide on)  Make sure there is not a gap between bottom of chip and socket  Push lever down  Set CPU voltage jumper settings if necessary (Pentium II and later CPU’s adjust automatically to voltage)
  • 9. Install Heat Sink and Fan  Attach fan to heat sink if not already attached  Apply thin layer of compound to chip surface  Attach heat sink by placing squarely on top of processor and press down gently  Bend clips in place to hold sink  Make sure there is good contact between sink and Chip surface  Wipe off any excess compound  Plug power cord from fan to fan power pins on motherboard
  • 10. Install RAM  Two types RAM used on most PC’s  DDR1  DDR2  Look at motherboard map to determine which bank to place DIMM 1 module in  Orient the Dimm chip over the slot (keyed) and insert into slot  Lock in place by closing levers
  • 11. Installing the Motherboard  Position case for easy access, locate holes on motherboard and corresponding holes on case  Insert spacers that came with motherboard into holes on case and install plastic standoffs into holes on motherboard  Carefully slide the board into the case, lining up holes  Tighten board to case with screws  Verify that the back of the motherboard is not touching the case, all slots and connectors line up properly, board is securely held in place, and board does not bend when pressed
  • 12. Attaching LEDs, key lock and speaker  Use motherboard manual as a guide for proper placement  Turbo LED (mainly legacy item)  Power LED  Hard drive activity LED  Key lock switch (common with older systems, rare now; prevented BIOS meddling)  PC speaker
  • 13. Connect power supply cables  AT motherboard  Locate two large wire leads from power supply (P8 and P9)  Locate 12 pin power connector on motherboard  Plug P8 and P9 into connector  Be sure black wires are in the middle beside one another  ATX motherboard  Attach the connector that is keyed to fit only one way into the motherboard connector
  • 14. Attach hard drive and CD-ROM  Use separate IDE cables if possible and set both jumpers to Master (or single on the hard drive if available)  If sharing an IDE cable, set the hard drive to Master and the CD- ROM to slave  Install hard drive away from power supply which can act like a magnet and destroy data  Keep hard drive near front of case to benefit from air drawn into case and keep away from other hardware  Slide drive into selected drive rail and screw drive into place  Attach ribbon cable to the primary controller of the motherboard and attach power cord  Follow with CD-ROM installation and attach to secondary controller of the motherboard
  • 15. Installing a video card  Use AGP expansion slot if available, otherwise use PCI or ISA  Remove slot insert and insert video card by aligning pins and gently applying pressure  Secure to case with a screw  Some motherboards have built-in video. If you want to install an external card then you must disable the built in video in the CMOS AGP VIDEO CARD
  • 16. Post Assembly Checklist  All expansion cards are fully inserted  CPU fan is attached to power  The 110/220 volt switch is configured properly  Drives are connected to power  Ribbon cables are attached correctly  Fans are free from interference from wires  CPU voltage settings are correctly configured  Power switch is off and power supply connectors are connected properly to motherboard  All connections are tight  Pins are properly aligned  Close the case before booting  Connect keyboard, mouse and monitor and plug in AC power
  • 17. We've successfully assembled a computer THANK YOU ANY QUERY