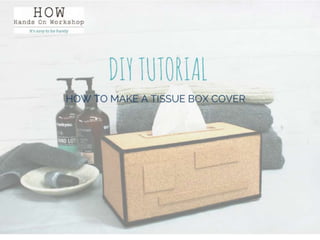
Tissue box cover

There are some bathroom consumables (that is, the items you regularly replace) which are nice to splash out on – like botanical scented handwash in lovely bottles. But groovy designs on cardboard tissue boxes is not one of them. They look good, but the extra cost seems silly for something which get tossed out after a couple of weeks. Here’s a way to make a smart looking cover to disguise the ho-hum print on your box of budget priced tissues. Lynn Pavey came up with this novel idea using cork to create two different tissue box covers – a colourful one for a child or baby’s room, and one for an adult or family bathroom. It’s made by copying the original tissue box shape and covering it in panels of adhesive cork, then folding it back together again before adding decorative trims. When you make the box, keep in mind that different brands of tissue have different sized boxes. Allow for the biggest box or keep to your preferred brand.

Recomendados
Más contenido relacionado
Similar a Tissue box cover
Similar a Tissue box cover (20)
Último
Último (20)
Tissue box cover
- 2. Materials you’ll need Self adhesive cork roll 1 sheet of cardboard (poster board) all purpose glue (eg. Aquadhere which dries clear) Self-adhesive Velcro dots (4 per box) Trims for kids’ tissue box cover: Assorted buttons – 12 Assorted braids, ribbons, bias binding (1.8 metres) 12cm zipper Trim for adult’s tissue box cover: Brown/black velvet ribbon Equipment you will need: Scissors Pencil Ruler Paint brush Pins ‘Stanley’ knife (‘Xacto’ knife)
- 3. Make a template To create the cover for the box, requires making a template from the tissue box, covering it with cork panels and then folding it back together again. Take the tissue box you plan to cover. Pull it apart, so it’s one piece of cardboard. Trace around it on a big piece of paper. Measure each face of the box and add ‘hems’ of 0.75cm around every edge. This will make it easier to cover the box. Starting with the top of the box (rectangle or square) mark this as the centre on the cardboard. Copy to the cardboard the panels of the box adding the extra 0.75cm around each side. You should have a large “plus” sign. Have a close look at the one done here for a short square shaped box.
- 4. Add 3cm border, cut out template Mark a 3 cm border around the ‘plus’ shape on the cardboard. Cut out template. Make a diagongal cut through the boarder to the corners of the top of the corner. Make a crease along all the lines.
- 5. Cut cork panels Cut cork to fit each of the panels for top, sides and end of box, not the border sections. Use the blade knife (Stanley or Xacto) along the edge of the ruler to cut a straight line in the cork. Peel of the adhesive backing then stick onto the matching panel on the cardboard template.
- 6. Measure and cut pieces for base of box. Stick down each panel close to the border line. Cut 4 additional pieces of cork. These will be for the base of the tissue box cover. 2 pieces are the length of the sides of the box (x 3cm), 2 pieces are the width of the sides of the box (x 3cm). Position these at the end of the ‘plus’ shape. Note, these are the only border panels that are covered with a piece of cork.
- 7. Completed ‘plus’ shape with 4 base pieces added The completed template will have all the panels covered with a piece of cork with an extra strip at the 4 ends of the ‘plus’ sign. The other seams around each edge will be showing and not covered in cork. Cut around the outside of this template.
- 8. Cut piece for tissue box opening The centre opening (where the tissues pull out) is re-inforced with an extra piece of cork in the shape of a rectangle frame. Cut out a rectangle (2.5cm x 4.5cm) to form a hole on the top panel of the box cover. Then cut out another square from a separate piece of cork in the shape of a rectangular frame (5.7cm x 3.7cm on the outside, 4.5cm x 2.5cm on the inside). Use glue to stick this on top of the hole.
- 9. Stick the box together To create the box cover, fold along the seam lines, cut corner borders at an angle to allow border tabs to fold.
- 10. Re-fold the cover back into the shape of the tissue box. Glue together the corresponding border tabs to form the box shape, and glue flat on the inside of the box. Allow to dry. For the base flaps, cut corners at a slight angle so they will not be seen when box is upright. Fold 2 base flaps (covered in cork) closed which are opposite each other. Stick a pair of Velcro dots on each corner of the 2 flaps (4 all together). Peel off backing paper from top dot and fold over the other 2 opposing flaps. The base of the box is now sealed closed with the Velcro dots in correct position.
- 11. Decorate with braids and buttons Decide positions of each braid, measure and cut, allowing extra 2 cms to trim later. Use a small paint brush to apply a line of glue along the seams. Use sparingly because excess glue will ooze out from the binding and mark the cork. Re-glue if necessary. Pin buttons into place, glue and keep pinned.
- 12. Pin zipper across the opening and glue the ends to the cork. Allow to dry. Trim excess braid.
- 13. Ta Da! Here’s one we made with a green zip.
Notas del editor
- Make a template