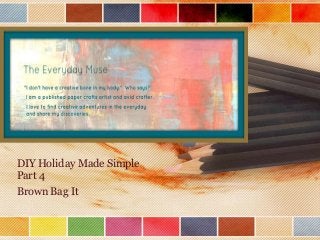
Holiday diy made simple. pt 4 - Brown Bag It
•Descargar como PPTX, PDF•
2 recomendaciones•619 vistas

Easy and affordable gift bag and tag ideas utilizing lunch brown bags

Recomendados
Recomendados
Más contenido relacionado
Destacado
Destacado (10)
Último
Último (20)
Holiday diy made simple. pt 4 - Brown Bag It
- 1. DIY Holiday Made Simple Part 4 Brown Bag It
- 2. Brown Bag Gift Bags and Tags
- 3. Create easy gift bags from lunch bags You will need: -Lunch brown bags -Scissors/decorative edge -glue -hole punch -paper; washi tape -gift tag blanks -stickers -ribbons (Ribbon/black and white stickers /gift tag from The Paper Source)
- 4. Choosing a Theme • Before you begin gluing and cutting, gather around your supplies and choose your theme. Whether it is based on color or motif, I find it easier when I pre-determine what I want to use. HINT: If your handmade gift is modern and glitzy, don’t do your gift bag with a whimsical theme. I try to match the décor of the gift bag with the gift inside.
- 5. Choose your theme Ribbon/Stickers and gift tag blank from The Paper Source
- 6. How to do: Step 1 • Fold over top of lunch bag as shown on next slide and punch two holes. HINT: Do not punch too near the edge and make sure you go through all layers of the bag • Cut off lunch bag top using decorative scissors
- 7. Cut holes and cut top of bag
- 8. How to do: Step 2 • Trace out gift tag shape onto decorative paper. • Punch holes in top of tag and decorate with stickers and ribbons as desired
- 9. Make Your gift tag
- 10. How to do: Step 3 • Thread your ribbon through the holes on the brown bag. • Adhere stickers, washi tape, ribbons as desired.
- 12. You are done! • And in just three simple steps you have a custom gift bag that is affordable and quick to make. • By simple changing colors, you can create different looks to match the gift inside or the gift recipient.
- 15. Short on time? You can make custom gift tags and add to store bought gift bags. Just by adding one handmade element makes your packaging unique.
- 16. With just a couple simple supplies, you can create one-of-a-kind cards and gifts for your friends and family. The only limit is your imagination! For more ideas and hints on bringing creativity into your daily life visit my blog, “The Everyday Muse” @ www.pattistudioblog.blogspot.com. FOLLOW ME! WWW.PINTEREST.COM/PHSTUDIO WWW.FACEBOOK.COM/PATTISTUDIO WWW.TWITTER.COM/PATTISTUDIO