How to create S-Curve by MS Project 2013
•Descargar como PPSX, PDF•
15 recomendaciones•26,412 vistas

Step by step to create S-Curve by MS Project 2013

Recomendados
Recomendados
Más contenido relacionado
La actualidad más candente
La actualidad más candente (20)
Destacado
Destacado (20)
Similar a How to create S-Curve by MS Project 2013
Similar a How to create S-Curve by MS Project 2013 (20)
Último
Último (15)
How to create S-Curve by MS Project 2013
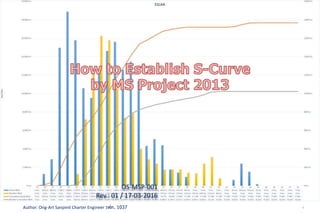
- 1. 1Author: Ong-Art Sanpinit Charter Engineer วฟก. 1037 OS-MSP-001 Rev.: 01 / 17-03-2016
- 2. 2Author: Ong-Art Sanpinit Charter Engineer วฟก. 1037 Sample of Visual in excel
- 3. 3Author: Ong-Art Sanpinit Charter Engineer วฟก. 1037 This article is to explain Project Management Concept as a quick reference through step by step guidance using MS Project 2013 The targeted audience is a beginner to the project management and experienced with MS Project in early version, such 2007 or 2010 Guide line
- 4. 4Author: Ong-Art Sanpinit Charter Engineer วฟก. 1037 1. Start Project 2. Plan the Tasks 3. Assign resources 4. Project Baseline set up 5. Update progress 6. Forecast Information 7. Step by Step to S-Curve 8. Step by Step Export Data to Excel (Visual Report) 9. Close Project Table of Contents
- 5. 5Author: Ong-Art Sanpinit Charter Engineer วฟก. 1037 Prior to start the project planning, Project manager should be identified, who can set up a project plan in MS project 2013 Step-1: Start Project 1. Create a new Project File To create a new blank project in Project, click the file tab. Click new
- 6. 6Author: Ong-Art Sanpinit Charter Engineer วฟก. 1037 2. Set project start date Go to Project tab. Click Project information Step-1: Start Project
- 7. 7Author: Ong-Art Sanpinit Charter Engineer วฟก. 1037 Step-1: Start Project 3. Define Project Calendar Go to Project tab. Click Change Working time
- 8. 8Author: Ong-Art Sanpinit Charter Engineer วฟก. 1037 Step-1: Start Project 4. Save the Project file Go to Tab file, select save as with Project Name or Job Order running number
- 9. 9Author: Ong-Art Sanpinit Charter Engineer วฟก. 1037 In the planning stage, we need to achieved project’s goals. To do this, we have to identify the project’s milestone, deliverables and tasks. This plan can be use work breakdown structure (WBS). Step-2: Plan the Tasks
- 10. 10Author: Ong-Art Sanpinit Charter Engineer วฟก. 1037 Step-2: Plan the Tasks 1. Enter Task Click View tab. In the Task View groups, click Gantt Chart. In the Task Name fields, enter tasks.
- 11. 11Author: Ong-Art Sanpinit Charter Engineer วฟก. 1037 Step-2: Plan the Tasks 2. Decide how you want to Schedule Task In Project 2013, we can schedule tasks manually or automatically. Select schedule method after enter a new tasks by clicking in the Task Mode column:- Note: New Tasks manually set by default in Option Tab
- 12. 12Author: Ong-Art Sanpinit Charter Engineer วฟก. 1037 Step-2: Plan the Tasks 3. Outline Tasks Create task hierarchy including tasks and milestones under summary task, which can be represent phase or other work divisions. Click the Task tab. In the Schedule group select Indent or Outdent button • Tip: if you created a summary task with duration, start or finish date, then the tasks that fall under the summary task will not be rolled up to this summary tasks.
- 13. 13Author: Ong-Art Sanpinit Charter Engineer วฟก. 1037 4. Enter Durations Click the Duration field for a task and enter a Duration. Two way to entering a duration:- Mutually Schedule task A number or text like “Tomorrow” or “Next after roll shell” etc. Auto Schedule task Number only, 3d=3 Days, 0d=milestone, 6? is an estimate duration. Note: Both can selected in the Task Mode Step-2: Plan the Tasks
- 14. 14Author: Ong-Art Sanpinit Charter Engineer วฟก. 1037 Step-2: Plan the Tasks 5. Link Tasks to show relationships Click the Task tab, in the View Group click Gantt Chart. Select the tasks that you want to link then click the Link Tasks button in the Schedule group, or move a mouse to bar chart press and drack down to tasks that you want to link. To change the default Finish-to-Start (FS), double click the link line and change.
- 15. 15Author: Ong-Art Sanpinit Charter Engineer วฟก. 1037 Assignments are the associations between specific tasks and the resources needed to completed them. We can assign more than one resources to a tasks. We can assign work resources (People), material (pipe/shell etc.) and cost (THB) to tasks. Step-3: Assign Resources
- 16. 16Author: Ong-Art Sanpinit Charter Engineer วฟก. 1037 Step-3: Assign Resources 1. Add Resources to Project Click the Task Tab, in the Views dropdown list select Resources Sheet. In the Resources Name filed, type the name of resources that we’ll use in this project.
- 17. 17Author: Ong-Art Sanpinit Charter Engineer วฟก. 1037 2. Assign Resources to Tasks In the Resources Tab, Click Assign Resources the click resources name then click assign Step-3: Assign Resources
- 18. 18Author: Ong-Art Sanpinit Charter Engineer วฟก. 1037 Step-3: Assign Resources 3. Enter the Work Hours spending on Tasks After assign a resources to the Tasks, work hours automatically show in a Work. If PM prefer control a Working hours, it can be change in in Work Field. Entering Work reflects real world scheduling. Go to Gantt Chart, right click on column then click Insert Columns type "WORK” to select the Work Columns
- 19. 19Author: Ong-Art Sanpinit Charter Engineer วฟก. 1037 Step-3: Assign Resources 4. Know the Work Tasks Type After Assign a resources to Tasks, MS Project determine how to schedule the tasks based on the tasks type.(Manually tasks don’t use task type) durations may change as we assign resources to tasks. How tasks types work Work, duration and unit are determined by formula:- Work =Duration x Units
- 20. 20Author: Ong-Art Sanpinit Charter Engineer วฟก. 1037 Step-3: Assign Resources In a… If we revised Work If we revised Duration If we revised units Fixed units tasks Duration changes Work changes Duration changes Fixed work tasks Duration changes Units change Duration changes Fixed duration tasks Units change Work changes Work changes To set a default task type for the entire project, click the options. Go to Schedule group, in the default task type box shown fixed units as a default, we can change to Fixed Duration or Fixed Work To change the task type for an individual, go to tasks tab in properties group click information or to tasks name double click it will appear.
- 21. 21Author: Ong-Art Sanpinit Charter Engineer วฟก. 1037 Step-3: Assign Resources 5. Identify factors effecting task schedules We can use MS Project 2013 to help for understanding how changes one task can effect the rest of the project. Click the task tab then in the Schedule group click Inspect Task. A pane opens on the left showing the factors that affect the scheduling of selected task. Or double click in tasks name.
- 22. 22Author: Ong-Art Sanpinit Charter Engineer วฟก. 1037 Create a baseline or interim plan is to compare between plan and actual. Saving baseline plan enables to identify and solve discrepancy and plan more accurately for similar future projects. Step-4: Set the Project Baseline
- 23. 23Author: Ong-Art Sanpinit Charter Engineer วฟก. 1037 Step-4: Set the Project Base Line 1. Save the baseline plan After the plan is solidly in place for the finish date, budget and scope, we can submit a plan for approval. Once it has been approved, save the baseline plan. Click the Project tab, in Schedule group click Set Baseline
- 24. 24Author: Ong-Art Sanpinit Charter Engineer วฟก. 1037 Step-4: Set the Project Base Line 2.View baseline data in Gantt Chart views In Gantt chart view, move a mouse to gantt area, right click and select Bar Style. Name Appearance Show for Task Row From To Base Plan (Custom) Select bar shave and color Select Normal 2 or 3 Baseline Start Baseline finish
- 25. 25Author: Ong-Art Sanpinit Charter Engineer วฟก. 1037 Step-4: Set the Project Base Line 3. View Baseline in a Table Go to View tab, in Data group click to Table and select Variance or insert columns with custom field.
- 26. 26Author: Ong-Art Sanpinit Charter Engineer วฟก. 1037 Updating the progress is the only way to ensure it stays on tracks as work is performed. The focus at this point is on managing changes, updating the schedule, tracking progress and communicating project information. MS Project 2013 tracks 3 sets of date: Current, Baseline and Actual. When we set the baseline, current = baseline. when a task is 100% complete, current=actual. Step-5: Update Progress
- 27. 27Author: Ong-Art Sanpinit Charter Engineer วฟก. 1037 Step-5: Update Progress 1. Manage Change Managing changes involves modifying duration, date, dependencies, resource assignment or tasks based on requested changes or new information. Keep the current fields up to date and compare to baseline.
- 28. 28Author: Ong-Art Sanpinit Charter Engineer วฟก. 1037 Step-5: Update Progress 2. Track actual date and duration It’s the best to decide on a single method for tracking progress. We can enter percentage complete, actual start and finish dates, actual remaining durations or actual and remaining work. Click the Task tab, select the task that we want to enter actual progress. In the Schedule group select the amount of progress done on the tasks. Default: 0%, 25%, 50%, 75%, 100% Note: we can put a number direct to %Complete field
- 29. 29Author: Ong-Art Sanpinit Charter Engineer วฟก. 1037 Step-5: Update Progress 3. Track Actual Hours and Cost If we want to enter actual and remaining work hours or costs, use tracking table. Click View tab, in Data group point Table and select Tracking. Enter progress data in the Act. Work or Act. Cost field for the task. Program is determine if we put the actual start and actual finish or % Complete.
- 30. 30Author: Ong-Art Sanpinit Charter Engineer วฟก. 1037 MS Project 2013 provide many ways of built in report, but for us we have to create a customize report by using S-Curve Reports. Step-6: View Report Information
- 31. 31Author: Ong-Art Sanpinit Charter Engineer วฟก. 1037 Step-6: View Report Information 1. Select a View MS Project 2013 has old and new views to help you to see project information and report it to others. Click the View Tab, in either the Task Views group or Resources Views group, select the view you want to use. There’re many view but most usful ones include:- • Team planner View • Timeline View • Gantt Chart View • Calendar View
- 32. 32Author: Ong-Art Sanpinit Charter Engineer วฟก. 1037 Step-6: View Report Information 2. Customize a View Select the view you want to customize and then on the Format tab click the type of view element you want to change, such as the bar style on the Gantt Chart or gridlines and time scales of any views. Tips & Tricks, if you want to filter, sort or group tasks prior to printing, click the View tab and then in the Data group, click sort, Filter or Group options.
- 33. 33Author: Ong-Art Sanpinit Charter Engineer วฟก. 1037 Step-6: View Report Information 3. Print a View or Report Set up the current view that we want it to look when printed. Click the File Tab and then click Print. A preview part of the view to see the actual size of the view as it will be printed.
- 34. 34Author: Ong-Art Sanpinit Charter Engineer วฟก. 1037 Step-6: View Report Information 4. Generate a Report In Report tab has many report to view information of project but we’re intent to create the S-Curve by using MS Project as a tools, we’ll focus on how to do it. Click the Report tab, go to View reports group, select Customer
- 35. 35Author: Ong-Art Sanpinit Charter Engineer วฟก. 1037 Step-7: Step by Step to S-Curve In the field list (right hand) Select Category to Time.
- 36. 36Author: Ong-Art Sanpinit Charter Engineer วฟก. 1037 Step-7: Step by Step to S-Curve Then Select Field go to Work, click Actual Work and Cumulative Actual Work only.
- 37. 37Author: Ong-Art Sanpinit Charter Engineer วฟก. 1037 Step-7: Step by Step to S-Curve The Click on Baseline, click Baseline Cumulative Work, just only one.
- 38. 38Author: Ong-Art Sanpinit Charter Engineer วฟก. 1037 Step-7: Step by Step to S-Curve In chart area Right click to change chart type. Select Chart type to Combo.
- 39. 39Author: Ong-Art Sanpinit Charter Engineer วฟก. 1037 Step-7: Step by Step to S-Curve In the Change Chart Type dialog in Series Name choose All Cumulative (Actual & Baseline) Chart type to Line Type. Actual Work chart type to Clustered Column and Click Secondary Axis
- 40. 40Author: Ong-Art Sanpinit Charter Engineer วฟก. 1037 Step-7: Step by Step to S-Curve In Field List, in Tasks Tab look at Select Category, click Edit customize time from Days to Weeks and change format as you like.
- 41. 41Author: Ong-Art Sanpinit Charter Engineer วฟก. 1037 Step-7: Step by Step to S-Curve In design Tab, choose format color as you like. In Chart Layout select Layout No 5 to show Data
- 42. 42Author: Ong-Art Sanpinit Charter Engineer วฟก. 1037 Step-7: Step by Step to S-Curve Final as just Fonts size and others
- 43. 43Author: Ong-Art Sanpinit Charter Engineer วฟก. 1037 Step-8: Export Data to Excel 1. Visual Report Go to Report tab, select on Visual reports Export. Select template dialog show, go to Task Usage tab, move a mouse on Cash Flow Report template, then click Edit Template. In Visual Report-Field Picker is pop up, in Available Field, select Base line Cumulative Work and Cumulative Actual Work add to selected Fields.
- 44. 44Author: Ong-Art Sanpinit Charter Engineer วฟก. 1037 Step-8: Export Data to Excel 2. Analyze Data in Pivot Table In PivotTable Fields, select only Actual Work, Baseline Cumulative work and Cumulative Actual Work.
- 45. 45Author: Ong-Art Sanpinit Charter Engineer วฟก. 1037 Step-8: Export Data to Excel 3. Custom Charts in Excel In Pivot Tab Fields, select only Baseline Cumulative Work, Cumulative Actual Work and Actual Work. In Chart Area Right Click mouse select Combo chart, then All cumulative change type to Line only Actual Work to Clustter Column.
- 46. 46Author: Ong-Art Sanpinit Charter Engineer วฟก. 1037 Step-8: Export Data to Excel
- 47. 47Author: Ong-Art Sanpinit Charter Engineer วฟก. 1037 Just because your project is almost finished doesn’t mean that your work is done. We still need to solve any final project detail and customer acceptance for final deliverables. Conduct a “Lessons Learned” session, recording information about areas for improvement and best practices. Make any final update to project plan. Finally archive the project plan according to our organization’s guideline. Step-9: Close the Project
- 48. 48Author: Ong-Art Sanpinit Charter Engineer วฟก. 1037 Step-9: Close the Project 1. Create a Final Report Click the Report tab, click Visual Reports to see project data as a Pivot Table report in Excel 2013 or Pivot Diagram view in Visio professional 2013 We can also view basic reports that don’t require Excel or Visio. Click Report Tab many report category available to view depend on how we want to views.
- 49. 49Author: Ong-Art Sanpinit Charter Engineer วฟก. 1037 Step-9: Close the Project 2. Save a Project as a Template After completing a project, we have to leverage what we’ve learned in the project by making it as a template for future projects. Click the File tab and Save As and then in the Save As Type box click Template.
- 50. 50Author: Ong-Art Sanpinit Charter Engineer วฟก. 1037 Thanks you End