
![Forward ,[object Object],[object Object],[object Object],[object Object],[object Object],[object Object],[object Object],[object Object],[object Object],[object Object]](data:image/gif;base64,R0lGODlhAQABAIAAAAAAAP///yH5BAEAAAAALAAAAAABAAEAAAIBRAA7)
Recomendados
Más contenido relacionado
La actualidad más candente
La actualidad más candente (18)
Destacado
Destacado (16)
Similar a A To Z Optimization Of Computer
Similar a A To Z Optimization Of Computer (20)
Más de Shan Sachwani
Más de Shan Sachwani (18)
Último
Último (20)
A To Z Optimization Of Computer
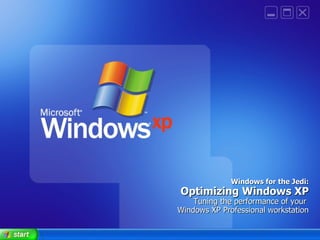
- 1. Windows for the Jedi: Optimizing Windows XP Tuning the performance of your Windows XP Professional workstation
- 6. OS Optimization Reducing Boot Time through Drivers & System Resources
- 13. OS Optimization Reducing Boot Time through the Registry
- 16. OS Optimization Reducing Boot Time through Services & Startup
- 20. OS Optimization Reducing Shutdown Time
- 24. Resource Performance Tuning Disk Performance
- 32. Resource Performance Tuning Network Performance
- 37. Resource Performance Tuning Memory Performance
- 40. Resource Performance Tuning Operating System Performance
- 46. Hardware Adjustments Video/Memory Latency & Why enabling everything is evil
- 52. Cleaning up the System DLLs, Temp files, & Turds
- 62. Appendix Slides I still haven’t cleaned up for inclusion
Notas del editor
- Tools are located at \lan-usp-01userskurtshPublicPresentationsWindowsXPOptimization.
- Windows can’t conceivably clean up after every application re: temp files. It can’t make the disk fragmentation free – defrag processes take a LONG time and dynamic defragmentation slows normal file I/O to a halt. People are more interested in their workstation working quickly NOW NOW NOW and not interested in their workstation “operate efficiently to insure optimized long term performance”. There are always constraints around hardware that is available. A hard drive that has 50% of it’s space free fragments at only a 1/10 of a drive that uses more than 50% of it’s space. A machine that has 256MB of memory will always swap OS System Kernel files out of memory and have to bring them back in. The number of combinations of network I/O devices and network types are too numerous to compensate for. If an application uses memory, bandwidth, CPU, storage inefficiently there’s nothing anyone can do about it. Tools like Quicktime and Real Player are notorious for using enormous amounts of memory when they don’t need to.
- The next step in the tweaking process is to get all of the software that is needed. The main software program that you will use is called CableNut, which is developed by CableNut Software and is available for free at www.cablenut.com. CableNut is a great program that allows users to edit their Internet settings easily. Visit their Web page and download and install the latest copy. Once you have downloaded CableNut, you are ready to start getting information to use with the program. The first value that you will need to calculate is the latency of your connection when it is active. To do this, you will use the trace route command built into Windows XP. Follow these steps to get the latency value to use for your connection: First, open up a Command Prompt window. This can be done by clicking the Start Menu and selecting Run. Then type cmd in the text box and click the OK button. Once Command Prompt is loaded, you are ready for the next part. Because you will need to test your connection when it is active, you will need to find something large to download that will run the duration of the test, which will be approximately 30 seconds. I recommend that you head over to www.microsoft.com/downloads and find some huge file, such as the .NET SDK framework, which is over 100,000 KBs. For the test, you want a file big enough so it will be downloading throughout the whole test. Those of you on a dialup connection can pick a much smaller file than those on a high-speed connection. Once you have your download test file picked out, start the download and switch back to the Command Prompt window. In that window, type tracert www.tweakxp.com. During the test, you will see many times displayed in milliseconds. After the test finishes, pick the highest time, as shown in Figure 11-12. This is the number that you will use as your latency. Also, feel free to cancel the download after the test is finished. Now that you have the latency value calculated, you are ready to enter this information into a great online CableNut settings calculator written by Joe Zeiler, who is one of the talented moderators at the TweakXP.com support forums. Open up your Web browser and visit www.j79zlr.com/cablenutXP2k.php (the URL is case-sensitive!), then follow these steps to get the values to enter into CableNut: Once you have opened up the site, the first part of using the settings calculator is to select your connection type from the drop-down box. Next, you will have to do a little research and find out exactly what your upload and download speeds should be for your Internet connection. I had to contact Comcast, my ISP, to find out the exact values, because the values are not always advertised. Once, you get those values, make sure that they are in kilobits per second and not kilobytes per second (KB= kilobytes; Kb= kilobits), then enter them in the corresponding text boxes on the Web page. Enter the latency value that you calculated earlier into the latency text box on the Web page and then click the Calculate button. After you hit the Compute Settings button, scroll down and you will see the values that were calculated. Now, you are almost done. Continue scrolling down until you see a button labeled CCS File Generator under the Cablenut setting files section. Click that button and a new window will pop up with some text in it. Make sure that you have any pop-up blockers disabled when you are using the calculator. Use the mouse and select all of the text and numbers that are displayed in the pop-up window. Right-click the mouse and select copy to copy all of the text on the page to the clipboard. Now open up Notepad from the Accessories folder. In the blank Notepad window, paste the contents of the clipboard by right-clicking the white background and selecting Paste. Once Notepad is displaying the information that you copied from the pop-up window, all that is left is to save the file in the CableNut format. To do this, click the File menu bar item and select Save As. Then in the Save As Type drop-down box, select All Files. Key in myCableNutSettings.ccs in the file name text box. Specify the Save location, such as the desktop, and click the Save button. You are now finished with the calculations that will optimize your Internet connection. That wasn't too hard now, was it? Now that you have created your CableNut settings file, or will be using the 56K settings file, you are ready to start using CableNut. Follow these steps to import the new optimized settings into your system: Start up the CableNut application by opening the Start Menu and browsing to the CableNut folder and selecting the adjuster application. When CableNut has loaded, click the File menu bar item and select Open Custom Settings File. Navigate to where you saved your settings file, or if you are a 56K user, use the file that is on the companion CD, called 56K_CableNut.ccs, and then click the Open button. Now you will see the information boxes for all of the different parameters filled with your connection-specific information, as sh
- Dynamic Link Libraries, or DLLs, are files containing data or functions that Windows programs can call when needed by linking to them. Every piece of windows software will include instructions to the operating system as to which DLLs it will need to access, and XP will cache these particular files in memory for faster access. The trouble is, Windows XP keeps these DLLs cached after the relevant program has closed, wasting memory space. While DLLs are generally tiny, enough of them can make a dent, so it's worthwhile to implement this registry tweak, which will force Windows XP to unload DLLs used by a specific program when that program halts. To do this, first run REGEDIT. Navigate to HKEY_LOCAL_MACHINESOFTWAREMicrosoftWindowsCurrentVersionExplorer. reate a new key named 'AlwaysUnloadDLL' and set the default value to equal '1.'
- Supported Chipsets The Intel® Application Accelerator supports the following Intel® chipsets: Intel® 810 Chipset Intel® 810E Chipset Intel® 810E2 Chipset Intel® 815 Chipset Intel® 815E Chipset Intel® 815EP Chipset Intel® 815P Chipset Intel® 820 Chipset Intel® 820E Chipset Intel® 840 Chipset Intel® 845 Chipset Intel® 850 Chipset Intel® 860 Chipset ------------------------------- DOWNLOAD: http://www.intel.com/support/chipsets/iaa/ ------------------------------- Intel Application Accelerator Make your PC go appreciably faster for free thank to Intel A major performance bottleneck on a PC is fetching data from the hard drive, much of the time your processor is waiting around for new data to arrive. Intel, bless them, have looked at this and come up with a efficient new driver for your ATA interface which replaces Microsoft’s Windows driver. All your IDE drives will benefit, including ATAPI CD-ROM and DVD drives and even removeable drives. Among the features are a data pre-fetcher for Pentium 4s, automatic selection of the best DMA transfer mode and support for drives of over 137GB. You can also mix DMA transfer modes on the same IDE channel. It comes replete with a diagnostic utility and plenty of documentation. It has been pretty thoroughly tested and has passed through Microsoft’s Hardware Quality Labs. The results, according to Intel figures, are pretty impressive. On a Pentium 4 system boot time is 58 per cent faster and even more impressively, the Winbech 99 figures are 34 per cent faster, nice. If there is a catch we can’t see one.
- Supported Chipsets The Intel® Application Accelerator supports the following Intel® chipsets: Intel® 810 Chipset Intel® 810E Chipset Intel® 810E2 Chipset Intel® 815 Chipset Intel® 815E Chipset Intel® 815EP Chipset Intel® 815P Chipset Intel® 820 Chipset Intel® 820E Chipset Intel® 840 Chipset Intel® 845 Chipset Intel® 850 Chipset Intel® 860 Chipset ------------------------------- DOWNLOAD: http://www.intel.com/support/chipsets/iaa/ ------------------------------- Intel Application Accelerator Make your PC go appreciably faster for free thank to Intel A major performance bottleneck on a PC is fetching data from the hard drive, much of the time your processor is waiting around for new data to arrive. Intel, bless them, have looked at this and come up with a efficient new driver for your ATA interface which replaces Microsoft’s Windows driver. All your IDE drives will benefit, including ATAPI CD-ROM and DVD drives and even removeable drives. Among the features are a data pre-fetcher for Pentium 4s, automatic selection of the best DMA transfer mode and support for drives of over 137GB. You can also mix DMA transfer modes on the same IDE channel. It comes replete with a diagnostic utility and plenty of documentation. It has been pretty thoroughly tested and has passed through Microsoft’s Hardware Quality Labs. The results, according to Intel figures, are pretty impressive. On a Pentium 4 system boot time is 58 per cent faster and even more impressively, the Winbech 99 figures are 34 per cent faster, nice. If there is a catch we can’t see one.
- Optimizing Internet Explorer HOST blocker - http://www.mvps.org/winhelp2002/hosts.txt Avant Browser Maxthon FlashGet IE Download Limit Fix MSN Toolbar Suite How to Repair/Reinstall Internet Explorer Optimizing application execution PDF SpeedUp Cool add-ons & tool for Windows XP SP2 Wireless Connectivity Fix SP2 Connection Limit Fix DUMeter DVDRegionChanger Screensavers Diskpie RM.EXE (Bad Filenames)
- Does your computer slow down when you browse your local area network and connect to other computers that are sharing data? One of the most common causes of this slowdown is a feature of Windows Explorer that looks for scheduled tasks on remote computers. This effort can take some time on some computers and can really slow down your browsing. The window with which you are browsing the network may appear to freeze momentarily, as the system is waiting for a response from the remote computer. Although this problem is a complex one, the solution is very simple. Instead of having to wait for the remote scheduled tasks, which is useless information to anyone who is not a system administrator remotely configuring scheduled tasks, you can disable this feature. In order to do this, you will have to hack the System Registry and delete a reference to a key so that this feature will not be loaded. To do this, follow these steps: Open up the Registry Editor by clicking the Start Menu and selecting Run. Then type regedit in the text box and click the OK button. Once the Registry Editor has loaded, expand the HKEY_LOCAL_MACHINE key. Next, expand Software and then Microsoft. Locate Windows and expand that as well. You will want to be editing the main system files, so expand CurrentVersion. Because this feature is a feature of the Windows component known as Explorer, expand the Explorer key. Next, you will want to modify the remote computer settings, so expand the RemoteComputer key and then expand the NameSpace key to show all of the features that are enabled when you browse to a remote computer. In the NameSpace folder you will find two entries. One is "{2227A280-3AEA-1069-A2DE-08002B30309D}" which tells Explorer to show printers shared on the remote machine. The other, "{D6277990-4C6A-11CF-8D87-00AA0060F5BF}," tells Explorer to show remote scheduled tasks. This is the one that you should delete. This can be done by right-clicking the name of the key and selecting Delete.
- If you are having serious performance issues with your XP system, or are getting repeated crashes and/or error messages, it could well be a problem with Windows XP's system files. If one or more of these files has become corrupted, or if the hardware configuration of the computer has changed significantly since you first installed Windows XP, performing a repair install may well be the ticket to resolving your problems. A repair installation re-writes all essential Windows XP system files and re-detects all hardware without affecting the registry, current desktop settings or user data stored on the hard drive. This is the only way short of a full installation that can recover from errors caused by installing a different motherboard in an XP system, for example. To perform a repair installation: Boot the system from your XP CD. Choose the 'press enter to set up Windows XP now' option. Press F8 to skip through the EULA (though if you haven't read it before, you should now. See our legal article for details as to why. Now press R to begin a repair installation. Your system will go through the entire XP install process, but will not attempt to replace any of your existing data. It will simply reinstall the vital system files, fixing any that are corrupted or missing.