
Recomendados
Más contenido relacionado
La actualidad más candente
La actualidad más candente (20)
Destacado
Similar a Blog silper
Similar a Blog silper (20)
Más de silper03
Blog silper
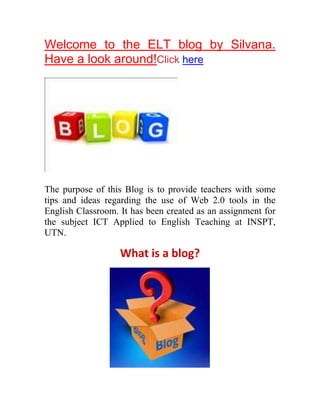
- 1. Welcome to the ELT blog by Silvana. Have a look around!Click here The purpose of this Blog is to provide teachers with some tips and ideas regarding the use of Web 2.0 tools in the English Classroom. It has been created as an assignment for the subject ICT Applied to English Teaching at INSPT, UTN. What is a blog?
- 2. A blog is essentially a web page with regular diary or journal entries. The term is, in fact, short for web log. How does it work? A blog consists of a number of postings, which are published on one web page, in reverse chronological order with the most recent posting at the top. Most blogs allow readers to comment on entries, thereby creating an online community around a common topic or interest. Types of blogs Blogs used in education are also known as edublogs. There are three types of edublogs: 1.Tutor blogs: These are used by a teacher in order to provide learners with news and comments on issues, extra reading practice or homework, online links, a summary of a class for learners who were unable to attend, study tips, and so on. In this case, learners will access and read, and possibly add comments to the blog outside the classroom.
- 3. 2.Student blogs: A teacher may encourage their learners to set up and maintain their own individual blogs. Other learners can be encouraged to post comments and reactions to student blogs postings. 3.Class blogs: They are used by an entire class. These can be used to post comments on certain topics or on class work or on any other issue the teacher thinks interesting and relevant to learners. Here, all learners post to the same blog. Advantages of the use of blogs in the classroom Blogs provide a 'real-world' tool for learners with which to practise their written English, as well as a way of contacting learners from other parts of the world if the blog is used as part of an international exchange. A blog is publicly available on the Internet. In theory, anyone can read the blog, although only invited members can be given permission to add comments.Don’t forget! One of the issues to bear in mind when using edublogs is that of correction. Learners tend to want their written work
- 4. in a blog to be as accurate as possible, given that the blog is publicly accessible. Asking learners to prepare blog entries in a word processing program beforehand can help with this process. A further area of consideration is assessment. Since a blog is essentially written, blog postings can be used for evaluation. The evaluation criteria (which has to be made clear to learners in advance) will probably include those used to evaluate more traditional, paper-based forms of writing, such as accuracy, fluency, coherence and relevance, but they may also include criteria related to the visual nature of this electronic medium, such as the effective use of visuals and visual presentation overall. Dudeney, G., & Hockly, N. (2007).How to teach English with technology. (pp. 86-94). England: Pearson Longman.
- 5. Do an Activity with Fodey! Level: intermediate Grammar focus: Passive Voice (in the past) Communicative goal: Describing an important event. 1) Think of a football match or concert you have recently attended or watched on TV. 2) Make a list of the most important events that happened during it or the most interesting facts that have called your attention. 3) After that, write an article including the most important facts. Write it in a word document. 4) Then send the article to your teacher for correction. 5) Once you have received your teacher’s corrections, go to www.Fodey.com and write the article. 6) Once you have finished, send it to your teacher. She will
- 6. upload your newspaper article on the blog under the entry MY NEWSPAPER ARTICLE. Here you can see a tutorial on how to use Fodey. Evaluation criteria: Fodey Needs improvement Good Very good Excellent Grammar Vocabulary Organisation of language content Click here to do your own article with Fodey.
- 7. Do an Activity with Voki! Level: pre-intermediate Grammar focus: present simple Communicative goal: describing people 1. Choose a famous sport man (football, tennis etc player) or singer you like most. 2. Find information about him or her (age/where he was born/nationality/why he or she is famous for/records etc./personal appearance) and complete the following chart. Name: Personal appearance: Date of birth and age: Nationality: Profession: Achievements: Others:
- 8. 3. Then, write in a word document some sentences such as: I am....../I am .....years old/I have got long hair.....etc. using this information. (You can send them to me for correction, if necessary). 4. Then go to www.Voki.com (use the account created in class) and create a character who will talk about himself/herself using some of the relevant information you have found (use classical characters to adapt your ‘Voki’ and make him or her look similar to the character of your choice) 5. Once you have created it, send an email to your teacher with your Voki's embed code. 6. Then the teacher will upload your ‘Voki’ in the blog under the entry MY FAVOURITE CHARACTER. Hereyou can see a tutorial on how to use Voki. Now Click hereto do your own Voki. Evaluation criteria: Voki Needs improvement Good Very good Excellent Usage of Tool Grammar Vocabulary
- 9. Do an activity with Mixbook now! Level: intermediate Communicative goal: talking about your favourite sport team. 1.Choose any sport team that you support. 2.Look for images and information about it. 3.Go to www.mixbook.com (use the account created in class) and create a ‘Mixbook’ with the images and information that you have collected. 4.Remember to include some information about the history of the team such as championships, favourites or famous players and why you like this team. To do so use the function: Add Text. 5. Once your ‘Mixbook’ is ready, you will have to deliver a presentation showing it to your classmates. Here you can see a tutorial on how to use Mixbook.
- 10. Evaluation criteria: Mixbook Needs improvement Good Very good Excellent Grammar Vocabulary Organisation of content Click here to do your own photo album with Mixbook.
- 11. Do an activity with Xtranormal now! Level: intermediate Communicative goal: talking about an important event. 1. Think of a football match or concert you have recently attended or watched on TV. 2. Make a list of the most important events that happened during it or the facts that have called your attention. 3. Write a dialogue between two News presenters who are talking about that event and reporting the main facts to their audience. 4. Then send the dialogue to your teacher for correction. 5. Once you have received your teacher’s corrections, go to www.xtranormal.com (use the account created in class) to do a video. 6. Choose the option Suzie Movies. There you will find the characters and setting to make your news presentation.
- 12. 7.You can make all the choices to make your presentation. (Use two TV presenters) 8. Before publishing your piece of work, take into account the privacy option (ask me or an adult if you have any doubts about it). 9. Once you have finished, send an email to your teacher with the embed code. She will upload your xtranormal activity in the blog under the entry MY NEWS PRESENTATION. Here you can see a tutorial on how to use Xtranormal. Evaluation criteria: Xtranormal Needs improvement Good Very good Excellent Content Language Execution of video Click here to do your own movie with Xtranormal.
- 13. FODEY: Description + Step by step Fodey is a fun tool with which you can make a newspaper clipping with your own headline and story. It's really simple and fun! You just have to think of a story and Fodey will take care of the rest! How do I start? (Remember that you can view the full-size image by clicking on it!) 1- Go to http://www.fodey.com/ and you will instantly see the newspaper template
- 14. 2- Now you'll start creating your own piece of news! Choose the name of your newspaper, the date of your article, the title and start typing your news. Once you've finished, click "Generate" 3- Now all you have to do is click "Download your image" and save it on your computer. Good job! I hope you have found this tutorial useful. To create your own piece of news, visit www.fodey.com Here you can see my own creation.
- 15. Click here to do an activity using Fodey
- 16. VOKI: Description + Step by step Voki enables users to express themselves on the web in their own voice using a talking character. You can customize your Voki to look like you or take on the identity of lots of other types of characters such as animals, monsters, anime etc. You can even have your Voki speak with your own voice! Let's give it a try! How do I start? (Remember that you can view the full-size image by clicking on it!) 1- Go to http://www.voki.com/ and click on the option "Create" 2- You are now presented with the following screen, where you will have all the necessary options to customize your Voki 3- The first section is "Customize your character". Click there on the first part within this section!
- 17. 4- These are the options for customizing our Vokis' head. First of all you will have to choose from the styles categories (some are anime, animals, politics, oddballs, etc). You can click on the arrows to see more categories. Once you've chosen a category, select whether you want to see male heads, female heads or both and choose one of the heads in that category. Then you can change the colour of your Voki's mouth, eyes, skin and hair. 5- After this, if you click on "tweak" (to the right of "colour") you can modify your Voki's mouth, nose, head shape, etc.
- 18. 6- Now, let's choose our Voki's hair! Click on the "hair" and "skin"option and choose the one you like best. Then select the mouth icon and choose one of the mouths available. 7- If you have chosen a male character, you will also be able to choose his facehair 8- We will now click on the "clothing" section and repeat the same procedures for the selection of clothes and hats for our Voki
- 19. 9- Then we will move to the "bling" section and choose, in the same way as before, glasses, scarfs and necklaces and objects that our Voki will have. 10- Now we will close the "Customize your character" section and move to "Give it a voice". In this case, you have four different options to get your Voki to speak. 11- Now you will have to pick a background for the setting of your Voki. Again, you may choose one from the available options, or you may upload an image from your computer.
- 20. 12- After choosing the background, you can select the colour for your Voki's player. Chooseyourfavouriteone! 13- Finally, you can click on "publish", name yourVoki and save it. 14- Congratulations! Your Voki is finished! Now you have many sharing options for people to see it! You can e-mail it to a friend. You can also publish it on your website. You
- 21. have many different options to share your Voki on different pages, as well as an embed code and your Vokis' URL. Goon and startsharingitwithyourfriends! I hope you've found this tutorial useful! You can see a Voki I created below. Enjoy! http://www.voki.com/pickup.php?scid=6762523&height=267&width=200 Now, click here to do an activity with Voki.
- 22. MIXBOOK: Description + Step by step Mixbook is an easy and fun way to make completely customizable photo books, cards, and calendars on the web for free. Mixbook gives you the freedom to lay out and design your creations to your heart’s content. The outcomes can be really nice and personalised. Why don't you check it out? How do I start? (Remember that you can view the full-size image by clicking on the link!) 1- Go to http://www.mixbook.com/ and click on "Signup" 2- Complete the information and click "Get Started "to create your account
- 23. 3- You will be sent to your Mixbook profile. Now, click on "Create" to begin creating your mixbook. 4- This is the first step for the creation of your mixbook. You will have to write a title for your mixbook. You can also include a description and category for your creation. You can choose who do you want your mixbook to be visible for and when you're ready click "Create Mixbook"
- 24. 5 - There are different sizes for the creation of your Mixbook. Choosetheoneyoulikebest! 6- Then, you will choose the theme for your Mixbook. There are many options you can choose from, within several classifications. Look at them and choose your favourite one. You can click on "Preview theme" to make sure that you do like it. You can also tick the box which says "Give me a book that is almost done". I suggest doing so if this is the first time you'll be creating a Mixbook because you can change the images and texts but do not have to design the whole pages from the beginning.Once you've decided on the one you want, click "Choose Theme"
- 25. 7- Once you've chosen you'll be sent to this page. Click on "customize your book" to continue. 8- Next, you will be asked to upload the photos you want to use for your project. You have many different options from where to pick the images (flickr, facebook, picasa, etc). If you just want to upload the images from your computer, click on "select photos" 9- After you've selected your photos, click on add photo and wait until all of them have been uploaded. You can choose to add more photos or delete one that you have uploaded. Whenyou'vefinishedchoosingthephotos, closethiswindow.
- 26. 10- Now you'll start filling the Mixbook with your material. Drag and drop images where you want them to be and insert the texts you want to include. I recommend ticking the "hide used" option below the photos, so that you do not incidentally repeat a picture. 11- You can always include a textbox by clicking on "Add text". If you've made a mistake you can click on "undo" or "redo". As you can see, there are many editing options you can apply to your text (such as font, size, colour, frame, style, etc)
- 27. 12- To add an image, you simply drag and drop it wherever you want to place it. Again, there are many editing options that you can apply to your images. Don't be afraidtoexperiment! 13- Once you've finished with a page, you can go to the next one, or see the previous one by clicking on the arrows below the page. You can also click on any page to go directly to that one. There are also several page tools:-You can add a blank page which you can design completely-You can duplicate a page if you want to copy that layout to another page-You can remove a page you do not want to include in your album 14- With all of these tools and editing options, you'll be able to complete the differentpages you want to include in your
- 28. Mixbook, remembering that you can really personalize your album if you want to.(There are some extra options that may come in handy:- Change theme: you can change the theme you chose for your Mixbook-AutoMix: the photos you chose are automatically distributed by the webpage throughout your Mixbook. However, you cannot undo this, so you should be really sure before clicking here!-Fullscreen: to see your Mixbook clearer!-Help-Save: you can save your Mixbook at any point and continue later-Preview: you can see how your Mixbook will look once finished-Order: WATCH OUT! This is where Mixbook stops being free. If you order a paper version of your Mixbook you will be charged the printing and delivery costs). This was the basic way in which a Mixbook is created. I hope you'll be able to try for yourself now! To do so, go to http://www.mixbook.com/ Now, click here to do an activity with Mixbook. You can see my own Mixbookhere! | Start your own Photo Books | Create custom Christmas Cards
- 29. XTRANORMAL: description + step by step The Xtranormal is a website that contains computer animated videoclips, featuring three-dimensional characters that can speak. With this website you can create videos by scritpting the dialogue by choosing from a menue of camera angles and predesigned characters and scenes. Xtranormal videos may also be created through an interface on the YouTube website. How do I start? 1. The first thing to do is create anXtranormal account. It's very easy but make sure that you have an email account. Its not really required, but if you want to save your video, you should make an account. 2. Choose the best option for your piece of work. You can create your story with any of the following collections.
- 30. 3. Here comes the fun. Making your video will be very easy. Choose the showpack you want to use, the actors and voices, your actors and camera angles, and other things that you may want to include in your video. Choosesettings
- 31. Chooseactors Choosesounds 4. Nowtype the script in the script box, and hit preview when your ready. If you do not like what you have typed or want to change something else, you can change it, then hit preview to see your changes in a preview.
- 32. 5. Now hit Publish, and type in the title, description, and Rating. Take into account the privacy issue, if you want to share this with your friends only. 6.Now wait until your video is done uploading. Once it is done, go to account settings and finish the work. I hope you've found this tutorial useful! To create your own movie, you can go to http://www.xtranormal.com Now, click here to do an activity with xtranormal. You can see a movie I've created below. Enjoy!
- 33. A second start by: siper