SlideShare a Scribd company logo
1 of 15
Project 6:

Advertising Samples
Cleaning and
adjusting images
Working in
perspective
Working with
lighting
Working in three
dimensions
Adobe Photoshop CC: The Professional Portfolio
Patch tool
Source:
– Marquee defines
pixels that
will be replaced

Adobe Photoshop CC: The Professional Portfolio

Destination:
– Marquee defines
pixels that will be
copied to another area
Replace Color adjustment
Change color only within
defined range
Sample color:
– In dialog box preview window
– On canvas behind dialog box

Duplicate layer makes the
adjustment non-destructive
Layer mask limits the
adjustment to certain areas
Merging layers means the
adjustment is permanent
Adobe Photoshop CC: The Professional Portfolio
Adjustment layers
Non-destructive to original pixels
Apply specific adjustments to a layer
Adjustment settings remain editable
Clip adjustment
to apply only to next
underlying layer
Edit adjustment
layer mask to limit
the adjustment to
specific areas

Adobe Photoshop CC: The Professional Portfolio
Hue/Saturation adjustment
Change hue, saturation, and/or lightness
Change entire “Master” image
Change a specific color range

Adobe Photoshop CC: The Professional Portfolio
Shadow/Highlight adjustment
Can’t be an adjustment
layer
Correct overall highlights
and shadows
Correct tonal width in
Extended mode

Adobe Photoshop CC: The Professional Portfolio
Image Correction tools
Red Eye tool
Blur tool
Sharpen tool
Smudge tool

Adobe Photoshop CC: The Professional Portfolio

Color Replacement tool
Dodge tool
Burn tool
Sponge tool
Free Transform options
Edit>Free Transform (Command/Control-T)
Drag handles to stretch or shrink
Click outside corner to rotate
Modifier Keys:
–
–
–
–

Option/Alt = transform around center point
Shift = transform proportionally
Command/Control-corner handle = distort
Command/Control-side handle = skew

Adobe Photoshop CC: The Professional Portfolio
Vanishing Point filter
One-point perspective
– Single vanishing point
– Use Free Transform
mode or Vanishing Point
filter

Two-point perspective
– Two vanishing
points/planes
– Use Vanishing Point filter

Adobe Photoshop CC: The Professional Portfolio
Warp transformation
Edit>Transform>Warp
Options bar:
– Built-in Warp
styles menu
– Change Bend
– Change
Horizontal and
Vertical Distortion

Drag handle to affect specific warp bend

Adobe Photoshop CC: The Professional Portfolio
Custom Warping
Option in the Options bar when in Warp
Transform mode
Apply to any layer except type
Edit warp graph to change the warp
– Drag lines, points, and handles

Adobe Photoshop CC: The Professional Portfolio
Lighting Effects
New Lighting Effects gallery
Filter>Render>Lighting Effects
Add multiple light sources to a layer
Change type and settings for each light
Applies to active layer
Destructive on regular layers
Convert to Smart Object layer for non-destructive
lighting
Adobe Photoshop CC: The Professional Portfolio
Point Lighting

Adobe Photoshop CC: The Professional Portfolio
Infinite Lighting

Adobe Photoshop CC: The Professional Portfolio
Spot Lighting

Adobe Photoshop CC: The Professional Portfolio

More Related Content

Similar to Pscc slides p6

Photoshop 2018 Car Magazine Cover
Photoshop 2018 Car Magazine CoverPhotoshop 2018 Car Magazine Cover
Photoshop 2018 Car Magazine CoverJerry Arnold
 
Project 1 Campground Icons-Illustrator
Project 1 Campground Icons-IllustratorProject 1 Campground Icons-Illustrator
Project 1 Campground Icons-IllustratorJerry Arnold
 
adobe Photoshop
adobe Photoshop adobe Photoshop
adobe Photoshop FariK1
 
InDesign Project 2 Festival Poster
InDesign Project 2 Festival PosterInDesign Project 2 Festival Poster
InDesign Project 2 Festival PosterJerry Arnold
 
Project 1 Letterhead Design-InDesign
Project 1 Letterhead Design-InDesignProject 1 Letterhead Design-InDesign
Project 1 Letterhead Design-InDesignJerry Arnold
 
Adobe photoshop extended cs5 [old version]
Adobe photoshop extended cs5 [old version]Adobe photoshop extended cs5 [old version]
Adobe photoshop extended cs5 [old version]Kimetenthray
 
Pscc slides interface
Pscc slides interfacePscc slides interface
Pscc slides interfaceTracie King
 
Adobe Photoshop I Primer
Adobe Photoshop I PrimerAdobe Photoshop I Primer
Adobe Photoshop I PrimerNYCCTfab
 
Exposé Anglais Comment Fonctionne Photoshop
Exposé Anglais Comment Fonctionne PhotoshopExposé Anglais Comment Fonctionne Photoshop
Exposé Anglais Comment Fonctionne Photoshopjexpoz
 
InDesign Project 3 Aerospace Newsletter
InDesign Project 3 Aerospace NewsletterInDesign Project 3 Aerospace Newsletter
InDesign Project 3 Aerospace NewsletterJerry Arnold
 
Presentation board
Presentation boardPresentation board
Presentation boardCaksback
 
Civil 3D Visualization
Civil 3D VisualizationCivil 3D Visualization
Civil 3D VisualizationLarry Young
 
Illustrator 2018 Regatta Artwork
Illustrator 2018 Regatta ArtworkIllustrator 2018 Regatta Artwork
Illustrator 2018 Regatta ArtworkJerry Arnold
 

Similar to Pscc slides p6 (20)

Pscc slides p1
Pscc slides p1Pscc slides p1
Pscc slides p1
 
Photoshop 2018 Car Magazine Cover
Photoshop 2018 Car Magazine CoverPhotoshop 2018 Car Magazine Cover
Photoshop 2018 Car Magazine Cover
 
Pscc slides p4
Pscc slides p4Pscc slides p4
Pscc slides p4
 
Project 1 Campground Icons-Illustrator
Project 1 Campground Icons-IllustratorProject 1 Campground Icons-Illustrator
Project 1 Campground Icons-Illustrator
 
Print17 slides p5
Print17 slides p5Print17 slides p5
Print17 slides p5
 
Print17 slides p6
Print17 slides p6Print17 slides p6
Print17 slides p6
 
adobe Photoshop
adobe Photoshop adobe Photoshop
adobe Photoshop
 
Module
ModuleModule
Module
 
InDesign Project 2 Festival Poster
InDesign Project 2 Festival PosterInDesign Project 2 Festival Poster
InDesign Project 2 Festival Poster
 
Aicc slides p1
Aicc slides p1Aicc slides p1
Aicc slides p1
 
Project 1 Letterhead Design-InDesign
Project 1 Letterhead Design-InDesignProject 1 Letterhead Design-InDesign
Project 1 Letterhead Design-InDesign
 
Adobe photoshop extended cs5 [old version]
Adobe photoshop extended cs5 [old version]Adobe photoshop extended cs5 [old version]
Adobe photoshop extended cs5 [old version]
 
Pscc slides interface
Pscc slides interfacePscc slides interface
Pscc slides interface
 
Adobe Photoshop I Primer
Adobe Photoshop I PrimerAdobe Photoshop I Primer
Adobe Photoshop I Primer
 
Exposé Anglais Comment Fonctionne Photoshop
Exposé Anglais Comment Fonctionne PhotoshopExposé Anglais Comment Fonctionne Photoshop
Exposé Anglais Comment Fonctionne Photoshop
 
InDesign Project 3 Aerospace Newsletter
InDesign Project 3 Aerospace NewsletterInDesign Project 3 Aerospace Newsletter
InDesign Project 3 Aerospace Newsletter
 
Presentation board
Presentation boardPresentation board
Presentation board
 
Civil 3D Visualization
Civil 3D VisualizationCivil 3D Visualization
Civil 3D Visualization
 
Print17 slides p2
Print17 slides p2Print17 slides p2
Print17 slides p2
 
Illustrator 2018 Regatta Artwork
Illustrator 2018 Regatta ArtworkIllustrator 2018 Regatta Artwork
Illustrator 2018 Regatta Artwork
 

More from Tracie King

The career search project
The career search projectThe career search project
The career search projectTracie King
 
The career search project word
The career search project wordThe career search project word
The career search project wordTracie King
 
Game Story and Character Development
Game Story and Character DevelopmentGame Story and Character Development
Game Story and Character DevelopmentTracie King
 
Production and Management: Developing the Process
Production and Management: Developing the ProcessProduction and Management: Developing the Process
Production and Management: Developing the ProcessTracie King
 
98 374 Lesson 02-slides
98 374 Lesson 02-slides98 374 Lesson 02-slides
98 374 Lesson 02-slidesTracie King
 
98 374 Lesson 01-slides
98 374 Lesson 01-slides98 374 Lesson 01-slides
98 374 Lesson 01-slidesTracie King
 
98 374 Lesson 06-slides
98 374 Lesson 06-slides98 374 Lesson 06-slides
98 374 Lesson 06-slidesTracie King
 
98 374 Lesson 05-slides
98 374 Lesson 05-slides98 374 Lesson 05-slides
98 374 Lesson 05-slidesTracie King
 
98 374 Lesson 04-slides
98 374 Lesson 04-slides98 374 Lesson 04-slides
98 374 Lesson 04-slidesTracie King
 
98 374 Lesson 03-slides
98 374 Lesson 03-slides98 374 Lesson 03-slides
98 374 Lesson 03-slidesTracie King
 

More from Tracie King (20)

The career search project
The career search projectThe career search project
The career search project
 
The career search project word
The career search project wordThe career search project word
The career search project word
 
Game Story and Character Development
Game Story and Character DevelopmentGame Story and Character Development
Game Story and Character Development
 
Production and Management: Developing the Process
Production and Management: Developing the ProcessProduction and Management: Developing the Process
Production and Management: Developing the Process
 
98 374 Lesson 02-slides
98 374 Lesson 02-slides98 374 Lesson 02-slides
98 374 Lesson 02-slides
 
98 374 Lesson 01-slides
98 374 Lesson 01-slides98 374 Lesson 01-slides
98 374 Lesson 01-slides
 
98 374 Lesson 06-slides
98 374 Lesson 06-slides98 374 Lesson 06-slides
98 374 Lesson 06-slides
 
98 374 Lesson 05-slides
98 374 Lesson 05-slides98 374 Lesson 05-slides
98 374 Lesson 05-slides
 
98 374 Lesson 04-slides
98 374 Lesson 04-slides98 374 Lesson 04-slides
98 374 Lesson 04-slides
 
98 374 Lesson 03-slides
98 374 Lesson 03-slides98 374 Lesson 03-slides
98 374 Lesson 03-slides
 
Max2015 ch01
Max2015 ch01Max2015 ch01
Max2015 ch01
 
Max2015 ch03
Max2015 ch03Max2015 ch03
Max2015 ch03
 
Max2015 ch02
Max2015 ch02Max2015 ch02
Max2015 ch02
 
Max2015 ch05
Max2015 ch05Max2015 ch05
Max2015 ch05
 
Max2015 ch04
Max2015 ch04Max2015 ch04
Max2015 ch04
 
Max2015 ch06
Max2015 ch06Max2015 ch06
Max2015 ch06
 
Max2015 ch07
Max2015 ch07Max2015 ch07
Max2015 ch07
 
Max2015 ch08
Max2015 ch08Max2015 ch08
Max2015 ch08
 
Max2015 ch09
Max2015 ch09Max2015 ch09
Max2015 ch09
 
Max2015 ch10
Max2015 ch10Max2015 ch10
Max2015 ch10
 

Recently uploaded

Keynote by Prof. Wurzer at Nordex about IP-design
Keynote by Prof. Wurzer at Nordex about IP-designKeynote by Prof. Wurzer at Nordex about IP-design
Keynote by Prof. Wurzer at Nordex about IP-designMIPLM
 
Inclusivity Essentials_ Creating Accessible Websites for Nonprofits .pdf
Inclusivity Essentials_ Creating Accessible Websites for Nonprofits .pdfInclusivity Essentials_ Creating Accessible Websites for Nonprofits .pdf
Inclusivity Essentials_ Creating Accessible Websites for Nonprofits .pdfTechSoup
 
Oppenheimer Film Discussion for Philosophy and Film
Oppenheimer Film Discussion for Philosophy and FilmOppenheimer Film Discussion for Philosophy and Film
Oppenheimer Film Discussion for Philosophy and FilmStan Meyer
 
Grade 9 Quarter 4 Dll Grade 9 Quarter 4 DLL.pdf
Grade 9 Quarter 4 Dll Grade 9 Quarter 4 DLL.pdfGrade 9 Quarter 4 Dll Grade 9 Quarter 4 DLL.pdf
Grade 9 Quarter 4 Dll Grade 9 Quarter 4 DLL.pdfJemuel Francisco
 
GRADE 4 - SUMMATIVE TEST QUARTER 4 ALL SUBJECTS
GRADE 4 - SUMMATIVE TEST QUARTER 4 ALL SUBJECTSGRADE 4 - SUMMATIVE TEST QUARTER 4 ALL SUBJECTS
GRADE 4 - SUMMATIVE TEST QUARTER 4 ALL SUBJECTSJoshuaGantuangco2
 
USPS® Forced Meter Migration - How to Know if Your Postage Meter Will Soon be...
USPS® Forced Meter Migration - How to Know if Your Postage Meter Will Soon be...USPS® Forced Meter Migration - How to Know if Your Postage Meter Will Soon be...
USPS® Forced Meter Migration - How to Know if Your Postage Meter Will Soon be...Postal Advocate Inc.
 
Transaction Management in Database Management System
Transaction Management in Database Management SystemTransaction Management in Database Management System
Transaction Management in Database Management SystemChristalin Nelson
 
ANG SEKTOR NG agrikultura.pptx QUARTER 4
ANG SEKTOR NG agrikultura.pptx QUARTER 4ANG SEKTOR NG agrikultura.pptx QUARTER 4
ANG SEKTOR NG agrikultura.pptx QUARTER 4MiaBumagat1
 
EMBODO Lesson Plan Grade 9 Law of Sines.docx
EMBODO Lesson Plan Grade 9 Law of Sines.docxEMBODO Lesson Plan Grade 9 Law of Sines.docx
EMBODO Lesson Plan Grade 9 Law of Sines.docxElton John Embodo
 
Concurrency Control in Database Management system
Concurrency Control in Database Management systemConcurrency Control in Database Management system
Concurrency Control in Database Management systemChristalin Nelson
 
TEACHER REFLECTION FORM (NEW SET........).docx
TEACHER REFLECTION FORM (NEW SET........).docxTEACHER REFLECTION FORM (NEW SET........).docx
TEACHER REFLECTION FORM (NEW SET........).docxruthvilladarez
 
How to Add Barcode on PDF Report in Odoo 17
How to Add Barcode on PDF Report in Odoo 17How to Add Barcode on PDF Report in Odoo 17
How to Add Barcode on PDF Report in Odoo 17Celine George
 
ENG 5 Q4 WEEk 1 DAY 1 Restate sentences heard in one’s own words. Use appropr...
ENG 5 Q4 WEEk 1 DAY 1 Restate sentences heard in one’s own words. Use appropr...ENG 5 Q4 WEEk 1 DAY 1 Restate sentences heard in one’s own words. Use appropr...
ENG 5 Q4 WEEk 1 DAY 1 Restate sentences heard in one’s own words. Use appropr...JojoEDelaCruz
 
Virtual-Orientation-on-the-Administration-of-NATG12-NATG6-and-ELLNA.pdf
Virtual-Orientation-on-the-Administration-of-NATG12-NATG6-and-ELLNA.pdfVirtual-Orientation-on-the-Administration-of-NATG12-NATG6-and-ELLNA.pdf
Virtual-Orientation-on-the-Administration-of-NATG12-NATG6-and-ELLNA.pdfErwinPantujan2
 
4.18.24 Movement Legacies, Reflection, and Review.pptx
4.18.24 Movement Legacies, Reflection, and Review.pptx4.18.24 Movement Legacies, Reflection, and Review.pptx
4.18.24 Movement Legacies, Reflection, and Review.pptxmary850239
 
Student Profile Sample - We help schools to connect the data they have, with ...
Student Profile Sample - We help schools to connect the data they have, with ...Student Profile Sample - We help schools to connect the data they have, with ...
Student Profile Sample - We help schools to connect the data they have, with ...Seán Kennedy
 
Visit to a blind student's school🧑‍🦯🧑‍🦯(community medicine)
Visit to a blind student's school🧑‍🦯🧑‍🦯(community medicine)Visit to a blind student's school🧑‍🦯🧑‍🦯(community medicine)
Visit to a blind student's school🧑‍🦯🧑‍🦯(community medicine)lakshayb543
 
Daily Lesson Plan in Mathematics Quarter 4
Daily Lesson Plan in Mathematics Quarter 4Daily Lesson Plan in Mathematics Quarter 4
Daily Lesson Plan in Mathematics Quarter 4JOYLYNSAMANIEGO
 

Recently uploaded (20)

Keynote by Prof. Wurzer at Nordex about IP-design
Keynote by Prof. Wurzer at Nordex about IP-designKeynote by Prof. Wurzer at Nordex about IP-design
Keynote by Prof. Wurzer at Nordex about IP-design
 
Inclusivity Essentials_ Creating Accessible Websites for Nonprofits .pdf
Inclusivity Essentials_ Creating Accessible Websites for Nonprofits .pdfInclusivity Essentials_ Creating Accessible Websites for Nonprofits .pdf
Inclusivity Essentials_ Creating Accessible Websites for Nonprofits .pdf
 
Oppenheimer Film Discussion for Philosophy and Film
Oppenheimer Film Discussion for Philosophy and FilmOppenheimer Film Discussion for Philosophy and Film
Oppenheimer Film Discussion for Philosophy and Film
 
Paradigm shift in nursing research by RS MEHTA
Paradigm shift in nursing research by RS MEHTAParadigm shift in nursing research by RS MEHTA
Paradigm shift in nursing research by RS MEHTA
 
Grade 9 Quarter 4 Dll Grade 9 Quarter 4 DLL.pdf
Grade 9 Quarter 4 Dll Grade 9 Quarter 4 DLL.pdfGrade 9 Quarter 4 Dll Grade 9 Quarter 4 DLL.pdf
Grade 9 Quarter 4 Dll Grade 9 Quarter 4 DLL.pdf
 
GRADE 4 - SUMMATIVE TEST QUARTER 4 ALL SUBJECTS
GRADE 4 - SUMMATIVE TEST QUARTER 4 ALL SUBJECTSGRADE 4 - SUMMATIVE TEST QUARTER 4 ALL SUBJECTS
GRADE 4 - SUMMATIVE TEST QUARTER 4 ALL SUBJECTS
 
USPS® Forced Meter Migration - How to Know if Your Postage Meter Will Soon be...
USPS® Forced Meter Migration - How to Know if Your Postage Meter Will Soon be...USPS® Forced Meter Migration - How to Know if Your Postage Meter Will Soon be...
USPS® Forced Meter Migration - How to Know if Your Postage Meter Will Soon be...
 
Transaction Management in Database Management System
Transaction Management in Database Management SystemTransaction Management in Database Management System
Transaction Management in Database Management System
 
ANG SEKTOR NG agrikultura.pptx QUARTER 4
ANG SEKTOR NG agrikultura.pptx QUARTER 4ANG SEKTOR NG agrikultura.pptx QUARTER 4
ANG SEKTOR NG agrikultura.pptx QUARTER 4
 
EMBODO Lesson Plan Grade 9 Law of Sines.docx
EMBODO Lesson Plan Grade 9 Law of Sines.docxEMBODO Lesson Plan Grade 9 Law of Sines.docx
EMBODO Lesson Plan Grade 9 Law of Sines.docx
 
Concurrency Control in Database Management system
Concurrency Control in Database Management systemConcurrency Control in Database Management system
Concurrency Control in Database Management system
 
TEACHER REFLECTION FORM (NEW SET........).docx
TEACHER REFLECTION FORM (NEW SET........).docxTEACHER REFLECTION FORM (NEW SET........).docx
TEACHER REFLECTION FORM (NEW SET........).docx
 
How to Add Barcode on PDF Report in Odoo 17
How to Add Barcode on PDF Report in Odoo 17How to Add Barcode on PDF Report in Odoo 17
How to Add Barcode on PDF Report in Odoo 17
 
ENG 5 Q4 WEEk 1 DAY 1 Restate sentences heard in one’s own words. Use appropr...
ENG 5 Q4 WEEk 1 DAY 1 Restate sentences heard in one’s own words. Use appropr...ENG 5 Q4 WEEk 1 DAY 1 Restate sentences heard in one’s own words. Use appropr...
ENG 5 Q4 WEEk 1 DAY 1 Restate sentences heard in one’s own words. Use appropr...
 
Virtual-Orientation-on-the-Administration-of-NATG12-NATG6-and-ELLNA.pdf
Virtual-Orientation-on-the-Administration-of-NATG12-NATG6-and-ELLNA.pdfVirtual-Orientation-on-the-Administration-of-NATG12-NATG6-and-ELLNA.pdf
Virtual-Orientation-on-the-Administration-of-NATG12-NATG6-and-ELLNA.pdf
 
4.18.24 Movement Legacies, Reflection, and Review.pptx
4.18.24 Movement Legacies, Reflection, and Review.pptx4.18.24 Movement Legacies, Reflection, and Review.pptx
4.18.24 Movement Legacies, Reflection, and Review.pptx
 
LEFT_ON_C'N_ PRELIMS_EL_DORADO_2024.pptx
LEFT_ON_C'N_ PRELIMS_EL_DORADO_2024.pptxLEFT_ON_C'N_ PRELIMS_EL_DORADO_2024.pptx
LEFT_ON_C'N_ PRELIMS_EL_DORADO_2024.pptx
 
Student Profile Sample - We help schools to connect the data they have, with ...
Student Profile Sample - We help schools to connect the data they have, with ...Student Profile Sample - We help schools to connect the data they have, with ...
Student Profile Sample - We help schools to connect the data they have, with ...
 
Visit to a blind student's school🧑‍🦯🧑‍🦯(community medicine)
Visit to a blind student's school🧑‍🦯🧑‍🦯(community medicine)Visit to a blind student's school🧑‍🦯🧑‍🦯(community medicine)
Visit to a blind student's school🧑‍🦯🧑‍🦯(community medicine)
 
Daily Lesson Plan in Mathematics Quarter 4
Daily Lesson Plan in Mathematics Quarter 4Daily Lesson Plan in Mathematics Quarter 4
Daily Lesson Plan in Mathematics Quarter 4
 

Pscc slides p6

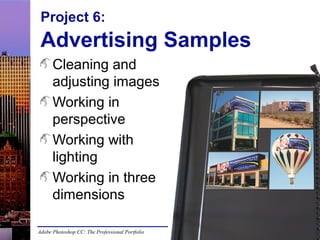
  • 1. Project 6: Advertising Samples Cleaning and adjusting images Working in perspective Working with lighting Working in three dimensions Adobe Photoshop CC: The Professional Portfolio
  • 2. Patch tool Source: – Marquee defines pixels that will be replaced Adobe Photoshop CC: The Professional Portfolio Destination: – Marquee defines pixels that will be copied to another area
  • 3. Replace Color adjustment Change color only within defined range Sample color: – In dialog box preview window – On canvas behind dialog box Duplicate layer makes the adjustment non-destructive Layer mask limits the adjustment to certain areas Merging layers means the adjustment is permanent Adobe Photoshop CC: The Professional Portfolio
  • 4. Adjustment layers Non-destructive to original pixels Apply specific adjustments to a layer Adjustment settings remain editable Clip adjustment to apply only to next underlying layer Edit adjustment layer mask to limit the adjustment to specific areas Adobe Photoshop CC: The Professional Portfolio
  • 5. Hue/Saturation adjustment Change hue, saturation, and/or lightness Change entire “Master” image Change a specific color range Adobe Photoshop CC: The Professional Portfolio
  • 6. Shadow/Highlight adjustment Can’t be an adjustment layer Correct overall highlights and shadows Correct tonal width in Extended mode Adobe Photoshop CC: The Professional Portfolio
  • 7. Image Correction tools Red Eye tool Blur tool Sharpen tool Smudge tool Adobe Photoshop CC: The Professional Portfolio Color Replacement tool Dodge tool Burn tool Sponge tool
  • 8. Free Transform options Edit>Free Transform (Command/Control-T) Drag handles to stretch or shrink Click outside corner to rotate Modifier Keys: – – – – Option/Alt = transform around center point Shift = transform proportionally Command/Control-corner handle = distort Command/Control-side handle = skew Adobe Photoshop CC: The Professional Portfolio
  • 9. Vanishing Point filter One-point perspective – Single vanishing point – Use Free Transform mode or Vanishing Point filter Two-point perspective – Two vanishing points/planes – Use Vanishing Point filter Adobe Photoshop CC: The Professional Portfolio
  • 10. Warp transformation Edit>Transform>Warp Options bar: – Built-in Warp styles menu – Change Bend – Change Horizontal and Vertical Distortion Drag handle to affect specific warp bend Adobe Photoshop CC: The Professional Portfolio
  • 11. Custom Warping Option in the Options bar when in Warp Transform mode Apply to any layer except type Edit warp graph to change the warp – Drag lines, points, and handles Adobe Photoshop CC: The Professional Portfolio
  • 12. Lighting Effects New Lighting Effects gallery Filter>Render>Lighting Effects Add multiple light sources to a layer Change type and settings for each light Applies to active layer Destructive on regular layers Convert to Smart Object layer for non-destructive lighting Adobe Photoshop CC: The Professional Portfolio
  • 13. Point Lighting Adobe Photoshop CC: The Professional Portfolio
  • 14. Infinite Lighting Adobe Photoshop CC: The Professional Portfolio
  • 15. Spot Lighting Adobe Photoshop CC: The Professional Portfolio

Editor's Notes

  1. The source images for this project demonstrate a number of issues that need to be addressed before the client’s ad can be composited and put into perspective. Some of these issues are problems in the original photography. Once you have made the necessary adjustments to the source images, you will also learn a number of techniques for placing a flat image into correct perspective to match the composited background. Because Photoshop is such a powerful program, there are dozens — if not hundreds — of options for manipulating images. We selected the images for this project to highlight a number of corrections and adjustments that have not been explained in previous projects. As we have mentioned previously, it is important to understand all of your options so you can know what tools will be useful when you encounter similar problems in a professional environment.
  2. The Patch tool is a powerful, but sometimes confusing, way to remove elements from an image by replacing certain pixels with other pixels from the same image. When you choose the Patch tool, be sure to check the Options bar. The most important choice is whether the original selected area represents the Source or the Destination pixels. •If Source is active, the original marquee defines the pixels that will be replaced. When you drag the marquee, you drag to the area that will replace the previous selection. •If Destination is active, the original marquee defines the pixels that will be copied to another area. When you drag the marquee, you drag to the area that will be replaced. It is very easy to forget and accidentally use the wrong option. Especially when using this tool, remember the Undo command (Command/Control-Z). Choosing Undo not only restores the patched area, but also moves the selection marquee back to its position before you dragged it. Keep the following in mind when you use the Patch tool: •Work at 100% view •Patch the smallest area necessary •Avoid patching to edges with high contrast •Avoid patching repeatedly using the same source to prevent noticeable “tracks”
  3. The Replace Color adjustment changes pixels within a selected color range. The dialog box is similar to the Select Color dialog box. You can click in the dialog box’s preview window, or in the document window (behind the dialog box) to select the color you want to replace. The Fuzziness slider defines the variance from the actual selected color that will be included in the selection. Sliders at the bottom of the dialog box adjust the hue, saturation, and lightness of the selection. If you simply apply the adjustment to the Background layer, you can’t make changes later without stepping back through the history — potentially requiring a lot of rework. Options in the Image>Adjustments submenu permanently affect the layers where they are applied — they are destructive. The Replace Color exercise in this project describes a common workaround for applying a non-destructive adjustment. Duplicating the layer before applying the adjustment maintains the original Background layer. If you later want to change the adjustment, you could simply delete the duplicate layer and start again. After merging the two layers, the adjustment is permanent. Most professionals prefer to always maintain layers, never flattening or merging. We include this step as an instructive tool, so you can better compare non-destructive and destructive actions.
  4. Adjustment layers are a better solution for applying true non-destructive adjustments. These special layers store the settings that you define for the applied adjustment, which means you can edit those settings at any time. Because adjustment layers are a type of layer, they can be turned on or off, duplicated, reordered, or deleted in the Layers panel. Adjustment layers affect all underlying layers by default. You can use the Create Clipping Mask command in the adjustment layer’s contextual menu to restrict the effect to a single underlying layer. You can create an adjustment layer using the menu at the bottom of the Layers panel, or by clicking a specific adjustment in the Adjustments panel. When an adjustment layer is selected, you can edit the related settings using the Properties panel. Each adjustment layer has an attached layer mask. By default, the adjustment applies to the entire layer (the mask is white). You can select the layer mask and paint with black to remove the effect from certain areas. All but a few of the options in the Image>Adjustments submenu can also be applied as adjustment layers. Replace Color is one of the few that cannot be applied as an adjustment layer — which is why we included the workaround in the previous exercise.
  5. As the name implies, the Hue/Saturation adjustment can be used to change the Hue, Saturation, and Lightness of an image. You can apply the adjustment to the entire (“Master”) spectrum, or to only certain color ranges. Because adjustment layers are non-destructive, you can edit the settings at any time — simply select the layer in the Layers panel and then use the Properties panel to change the settings. You can also reset an adjustment to its default values by choosing Reset [Adjustment] in the panel Options menu. In the Layers panel, adjustment layers should show an icon that identifies the related adjustment. We have noticed a bug in the release software that sometimes causes this icon to show only the basic “adjustment layer” icon instead of the specific adjustment icon.
  6. The Shadow/Highlight adjustment is another option that can’t be applied as an adjustment layer. However, it can still be very useful to lighten shadows and darken highlights throughout an image. Keep in mind that you could use the duplicate-layer workaround to apply this adjustment non-destructively. In the case of this exercise, we didn’t think it necessary because there was no need to maintain the too-dark image layer. In Extended mode, you can exercise much tighter control over the way the adjustment applies. (See Page 321 for a detailed explanation.)
  7. In addition to destructive adjustments and filters, Photoshop includes a number of tools that can be useful for correcting specific problems. Examples of these tools are shown on Pages 323-324. The Red Eye tool (as the name implies) removes the red-eye effect caused by flash photography. The Blur tool softens edges and reduces detail. The Sharpen tool increases contrast at apparent edges. The Smudge tool pushes pixels around in an image, kind of like finger paint. The Color Replacement tool basically allows you to “paint” the Replace Color adjustment. The Dodge tool lightens areas of an image. The Burn tool darkens areas of an image. The Sponge tool changes the color saturation where you paint. You might ask students to open any file and experiment with these tools to get a better idea of what they do and where they might be useful.
  8. Stage 2 of this project once again involves compositing. However, this project requires a bit more than simply pasting one image into another. One of the most difficult aspects of compositing is creating a natural transition so the composited image actually seems to be part of its background. Without careful attention to detail, composites feel artificial. For example, think about adding a person into an “exotic vacation” photo. If the people aren’t scaled and distorted properly, it is very obvious that they don’t belong — for example, a person who is approximately the same size as a full-grown elephant in an African savannah background. In this project, the task is to place the client’s ad into context in several background images. This requires transforming the ad in a number of ways, all of which are made much easier by the different tools in Photoshop’s arsenal. The first required composite places the ad on a flat building façade. This can be simply accomplished with a series of basic transformations (scale, skew, and distort).
  9. When you only need to adjust perspective in one direction, the Free Transform options are often sufficient. For more complex transformations — including placing an object into two-point perspective — the Vanishing Point filter makes the task much easier. Important point: The results of the Vanishing Point filter will become part of the selected layer. Make sure you create a new layer if you want the content pasted in the filter to occupy a new layer. The first step to using the Vanishing Point filter is defining the perspective plane (or planes) in the image. Most images have lines — whether obvious or implied — that can be used to define the planes. In this image, the building’s construction makes the two perspective planes obvious. After you define the perspective planes, you can paste the contents of the Clipboard into the filter, then drag the pasted content into the perspective plane. The Vanishing Point filter can be difficult to understand when you first try to use it. Remind students to review the information on Page 329 about the various options and controls in the filter.
  10. When you composite an image onto any object that isn’t flat, you have to consider the shape of the background object to effectively create the composite. In this example, the water tank is round. Because the viewing distance is great enough to show the entire ad without wrapping around the tank’s sides, a small built-in warp is sufficient to create a realistic composite. When you enter Warp transformation mode, you use the Options bar menu to choose a specific type of warp. Each item in the menu includes a small icon that suggests the result of that option. After you choose a specific type of warp, you can also use the Options bar to change the bend of the warp, as well as the horizontal and vertical distortion to apply. In the document window, the edge of the warp graph includes a single handle that controls the bend of the warp. You can drag this handle to dynamically change the bend setting.
  11. The hot air balloon in this project is a good example of where the built-in warp styles are not sufficient to meet the intended goal. A Custom warp presents points at all four corners of the warp grid; each of those points has handles to control the shape of connecting grid lines. You can also click specific lines on the warp grid to drag that part of the warp grid. Controlling the custom warp grid makes more sense if you remember what you learned in Project 2 about anchor points and handles. Each corner of the grid relates to a corner point; dragging a handle on one side of the point does not affect the handle on the other side of the point. It is important to realize that warp transformations are destructive. If you want to be able to change the warp settings at a later date, you should convert the target layer to a Smart Object layer prior to applying the warp.
  12. When compositing images, lighting is just as important to realistic results as scale and perspective. For example, we’ve seen finished products where someone was added to a group shot, but the new addition was obviously captured in different lighting. Everyone had a shadow on the left except the one guy who had no shadows at all (he was photographed in a studio and added later). The scale was right, the pose seemed to fit, but the lighting made the composite work obvious. Three of the composite images in this project will benefit from some lighting adjustments — the focus of Stage 3. The Lighting Effects gallery can be used to change the apparent lighting of the selected layer. The filter only affects the active layer. If you apply the filter to a regular layer, the change is destructive. If you apply Lighting Effects to a Smart Object layer, you can reopen the filter dialog box and change the applied lighting. The Lighting Effects gallery is an on-screen interface that allows you to click and drag to change the settings of the selected light source. You can also use the attached Properties and Lights panels to change settings, change the active light source, show or hide specific light sources, and delete specific light sources.
  13. Point lights shine in all directions, such as light that shines from a light bulb. When a point light is selected in the Lighting Effects gallery, you can use the on-screen controls to change the light’s position, size (scale), and intensity.
  14. Infinite light shines in a single direction from a far distance, such as the sun. When an infinite light is selected in the Lighting Effects gallery, you can use the on-screen controls to change the intensity of the light, as well as the position of the apparent light source, which affects the angle the light strikes the active layer.
  15. Spot lights cast an elliptical beam of light, such as the beam from a flashlight. When a spot light is selected in the Lighting Effects gallery, you can use the on-screen controls to change the position, hotspot angle, intensity, and horizontal and vertical size (scale) of the light.