A Beginners Guide to Building a RAG App Using Open Source Milvus
Care of microscope
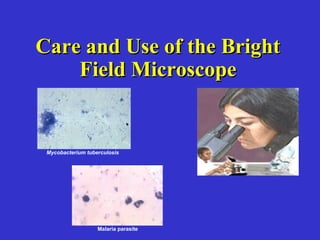
1. Care and Use of the BrightCare and Use of the Bright
Field MicroscopeField Microscope
Malaria parasite
Mycobacterium tuberculosis
2. Importance of the MicroscopeImportance of the Microscope
• Important for hematology, microbiology, TB, and
malaria testing
• Compound microscope used in bacteriology, biology,
and medicine to examine minute objects such as
bacteria, other unicellular organisms, and plant and
animal cells and tissue
• Advances in fluorochrome stains and monoclonal
antibody techniques caused growth in use of
fluorescence microscopy in both biomedical analysis
and cell biology
3. Basic Components of the MicroscopeBasic Components of the Microscope
and their functions...and their functions...
Power switchPower switch
Light intensity controlLight intensity control
CondenserCondenser
StageStage
ObjectivesObjectives
Eyepiece lensEyepiece lens
Stage motionStage motion
control knobscontrol knobs
Course and fineCourse and fine
adjustmentsadjustments
knobsknobs
Field diaphragm ringField diaphragm ring
Aperture diaphragmAperture diaphragm
4. Care and Maintenance of the MicroscopeCare and Maintenance of the Microscope
• Good preventive maintenance and care includes:Good preventive maintenance and care includes:
• Regular cleaning of oculars and objectivesRegular cleaning of oculars and objectives
• Avoid damaging oculars and other optics with eyeAvoid damaging oculars and other optics with eye
make-up or other debrismake-up or other debris
• Careful handling to avoid abrupt motionsCareful handling to avoid abrupt motions
• Protect from direct sunlight, high temperature,Protect from direct sunlight, high temperature,
humidity, dust and vibrationhumidity, dust and vibration
• Use appropriate materials to clean the lensesUse appropriate materials to clean the lenses
• Cover when not in use with vinyl or plastic dust coverCover when not in use with vinyl or plastic dust cover
5. Cleaning the MicroscopeCleaning the Microscope
Routine Cleaning Supplies:Routine Cleaning Supplies:
• Commercial lens tissue for opticsCommercial lens tissue for optics
• Caution: DoCaution: Do notnot use paper towels oruse paper towels or
other rough paper productsother rough paper products
• Cotton swabs with wooden shaft (optics)Cotton swabs with wooden shaft (optics)
• 70% isopropyl alcohol70% isopropyl alcohol
• Dilute methanol is satisfactoryDilute methanol is satisfactory
• Mild detergent and soft cloth for stageMild detergent and soft cloth for stage
and base of microscopeand base of microscope
6. Cleaning Oculars and ObjectivesCleaning Oculars and Objectives
• Unplug the microscopeUnplug the microscope
• Wash handsWash hands
• Remove dust from optical glass surfacesRemove dust from optical glass surfaces
• Carefully remove eyepieces, objectives,Carefully remove eyepieces, objectives,
condenser, and filters–one at a timecondenser, and filters–one at a time
• Excessive rubbing can cause damage toExcessive rubbing can cause damage to
iridescent coating on lensiridescent coating on lens
• Clean and replace as completedClean and replace as completed
• Do NotDo Not take eyepiece or objectives aparttake eyepiece or objectives apart
7. • Unplug microscope and allow bulb toUnplug microscope and allow bulb to
coolcool
• Carefully place microscope on its sideCarefully place microscope on its side
• Open bulb house; use tissue to removeOpen bulb house; use tissue to remove
bulbbulb
• Use tissue (to avoid fingerprints) to pickUse tissue (to avoid fingerprints) to pick
up new bulbup new bulb
• Insert new bulb and close bulb houseInsert new bulb and close bulb house
Replacing Microscope BulbReplacing Microscope Bulb
8. • Plug in microscope and turn on illuminator. RotatePlug in microscope and turn on illuminator. Rotate
nosepiece to lock 10X objective in placenosepiece to lock 10X objective in place
• Place smear on stage and center it under the 10XPlace smear on stage and center it under the 10X
objectiveobjective
• Open the field diaphragm all the way and closeOpen the field diaphragm all the way and close
condenser diaphragm all the waycondenser diaphragm all the way
• Move up (rack up) stage to its highest positionMove up (rack up) stage to its highest position
• Adjust the oculars for interpupillary distance so thatAdjust the oculars for interpupillary distance so that
only one circle of light is seenonly one circle of light is seen
• Rack up condenser as high as possibleRack up condenser as high as possible
Setting the Koehler IlluminationSetting the Koehler Illumination
9. • Close field diaphragm half way and focus smear at 10XClose field diaphragm half way and focus smear at 10X
• Close field diaphragm until diameter of illuminatedClose field diaphragm until diameter of illuminated
image is smaller than the field of viewimage is smaller than the field of view
• Lower condenser with positioning knob until you haveLower condenser with positioning knob until you have
a sharp, focused image of the edges of the fielda sharp, focused image of the edges of the field
diaphragmdiaphragm
• Adjust condenser using centering screws so that theAdjust condenser using centering screws so that the
circle of light is centered in fieldcircle of light is centered in field
• Open field diaphragm until illuminated image is justOpen field diaphragm until illuminated image is just
larger than the field of view. If more light is needed,larger than the field of view. If more light is needed,
use the transformer.use the transformer.
• Koehler illumination is now set. It is important not toKoehler illumination is now set. It is important not to
move the condenser up or down or change the fieldmove the condenser up or down or change the field
diaphragm.diaphragm.
Setting the Koehler IlluminationSetting the Koehler Illumination
(continued)(continued)
10. Operation of the Microscope –Operation of the Microscope –
Examining SmearsExamining Smears
• Put smear on stage and center it under the 10XPut smear on stage and center it under the 10X
objectiveobjective
• Adjust intensity of the light to a comfortable levelAdjust intensity of the light to a comfortable level
with the transformerwith the transformer
• Open condenser diaphragm about 70% to achieve aOpen condenser diaphragm about 70% to achieve a
good balance of resolution and contrastgood balance of resolution and contrast
• Adjust oculars for interpupillary distance so thatAdjust oculars for interpupillary distance so that
when looking with both eyes only one circle of lightwhen looking with both eyes only one circle of light
is seenis seen
11. Examining SmearsExamining Smears (continued)(continued)
• Adjust sharpness of image by moving adjustmentAdjust sharpness of image by moving adjustment
ring on adjustable ocularring on adjustable ocular
• Once 10X focus is achieved, rotate nosepiece so thatOnce 10X focus is achieved, rotate nosepiece so that
the 40X objective is in placethe 40X objective is in place
• Readjust the intensity of light to a comfortable levelReadjust the intensity of light to a comfortable level
using the transformerusing the transformer
• Use the fine adjustment knob to focus up and downUse the fine adjustment knob to focus up and down
through the different planes of the fieldthrough the different planes of the field
12. Microscope Problems – Troubleshooting 1Microscope Problems – Troubleshooting 1
ProblemProblem: Black Field: Black Field
Possible Causes:Possible Causes:
• Microscope not plugged inMicroscope not plugged in
• Power not available at outletPower not available at outlet
• Illuminator not turned onIlluminator not turned on
• Bulb burned outBulb burned out
• Objective not clicked into placeObjective not clicked into place
• Condenser too low withCondenser too low with
diaphragms closeddiaphragms closed
13. Microscope Problems – Troubleshooting 2Microscope Problems – Troubleshooting 2
ProblemProblem: Field only partially illuminated: Field only partially illuminated
Possible Causes:Possible Causes:
• Objective not clicked into positionObjective not clicked into position
• Condenser not centered correctlyCondenser not centered correctly
• Condenser too lowCondenser too low
• Field diaphragms closed too muchField diaphragms closed too much
14. ProblemProblem: Difficulty focusing with 10X: Difficulty focusing with 10X
objectiveobjective
Possible Causes:Possible Causes:
• Wrong objective in placeWrong objective in place
• Objective not screwed into placeObjective not screwed into place
• Not in correct plane of focusNot in correct plane of focus
Microscope Problems – Troubleshooting 3Microscope Problems – Troubleshooting 3
15. Microscope Problems – Troubleshooting 4Microscope Problems – Troubleshooting 4
ProblemProblem: Difficulty focusing with 40X: Difficulty focusing with 40X
objectiveobjective
Possible Causes:Possible Causes:
• Not in correct plane of focusNot in correct plane of focus
• Not initially focused at 10XNot initially focused at 10X
16. Microscope Problems – Troubleshooting 5Microscope Problems – Troubleshooting 5
ProblemProblem: Blurry image at 10X or 40X: Blurry image at 10X or 40X
Possible Causes:Possible Causes:
• Dirty objectiveDirty objective
• Dirty slideDirty slide
• Dirty coverslipDirty coverslip
ProblemProblem: Ground glass appearance: Ground glass appearance
Possible Causes:Possible Causes:
• Condenser too highCondenser too high
17. CreditsCredits
Thanks to STD/HIV Prevention Training Center of
New England
in Collaboration with
State Laboratory Institute
and
National Laboratory Training Network, CDC