SlideShare una empresa de Scribd logo
1 de 16
Descargar para leer sin conexión
QUICKSTART GUIDE
            ENGLISH ( 1 – 2 )

      GUÍA DE INICIO RÁPIDO
            ESPAÑOL ( 3 – 4 )

GUIDE D'UTILISATION RAPIDE
           FRANÇAIS ( 5 – 6 )

              GUIDA RAPIDA
            ITALIANO ( 7 – 8 )

            KURZANLEITUNG
           DEUTSCH ( 9 – 10 )


        WWW.AKAIPRO.COM
BOX CONTENTS
     SynthStation 25                                                       The app, Akai SynthStation Studio, is not
     4 AAA batteries                                                       included. To purchase it, go to the iTunes
     Quickstart Guide                                                      App Store and search for "SynthStation
     Safety Instructions & Warranty Information Booklet                    Studio."


REAR PANEL OVERVIEW
1.   POWER INPUT – Connect a 6V
     DC – 1A power adapter (center
     pin positive, 2.1mm pin diameter,       2
     5.5mm barrel diameter, not                       4 6 5                                                     1 3
     included) to this jack then into an electrical outlet. Alternatively, you can power SynthStation 25 with 4 AAA batteries
     (inserted into the battery compartment underneath the unit) or via the USB PORT on the side of the unit with a standard
     mini-USB cable (not included) connected to your computer. However, using a power adapter will let you charge your
             ®              ®
     iPhone or iPod touch * while using SynthStation 25.
2.   MINI-USB PORT – Plug a standard mini-USB cable (not included) into this port and into the USB port of your computer.
     The computer's USB port will provide power to SynthStation 25. When connected to your Mac or PC, SynthStation 25
     can be used as a USB-MIDI controller. SynthStation 25 is class-compliant, so it is "plug-and-play" – no separate driver
     installation is necessary.
3.   POWER SWITCH – Turns SynthStation 25 on or off.
4.   MASTER VOLUME – Adjusts the volume of the MAIN OUTPUTS and HEADPHONE OUTPUT. This master output
     includes iPhone or iPod touch playback.
5.   HEADPHONE OUTPUT – Connect 1/8" stereo headphones to this output. You can adjust level of this output with the
     MASTER VOLUME knob.
6.   MAIN OUTPUTS – Connect a speaker system or other output device to these outputs using the included stereo RCA
     cable. Adjust the level of these outputs with the MASTER VOLUME knob.

                             * iPhone and iPod touch are trademarks of Apple Inc., registered in the U.S. and other countries.


TOP PANEL OVERVIEW
1.   DOCK – Connect your iPhone or
     iPod touch here. Gently rock the
     device back and forth over the
     connector    when  attaching  or
     removing it.
2.   KEYBOARD        –     This    25-note                                              1
     keyboard is velocity-sensitive and, in        3       4                                              7 7 7 7
     conjunction with the OCTAVE –/+
     buttons, can control an eight-octave
                                                                                                          6 6 5 5
     range.
     Note: Your performance on the
     KEYBOARD is independent from the
     keyboard shown on the Perform
     Page    in   SynthStation Studio,
     allowing you perform in three
     octaves at a time – one in
     SynthStation Studio and the two-
                                                                                    2
     octave KEYBOARD on SynthStation
     25.
3.   PITCH BEND WHEEL – Transmits MIDI Pitch Bend information to raise or lower the pitch of the KEYBOARD
     temporarily.
4.   MOD WHEEL – Transmits continuous controller data (CC #1 or
     Modulation Depth).
5.   OCTAVE –/+ – These buttons can be used to shift the KEYBOARD's              Note for Gen 1 (original) iPhone users:
     range up or down three octaves in either direction allowing for an          When using SynthStation 25, use the
     eight-octave range. When you are higher or lower than the center            following steps to connect your iPhone:
     octaves, the corresponding OCTAVE button will light. To return the          put your iPhone in Airplane Mode, turn on
     KEYBOARD to the center octaves, press both OCTAVE buttons                   SynthStation 25, then lastly, connect your
     simultaneously.                                                             iPhone to the dock. You are now ready to
                                                                                 use SynthStation 25.
6.   PROGRAM –/+ – These buttons can be used to change the Program
     (the set of Sounds in SynthStation Studio).
7.   DRUM / SYNTH – These buttons select one of three Synth parts or the Drum part for performance in SynthStation
     Studio. The KEYBOARD will play the sounds of the selected part.


                                                            1
TROUBLESHOOTING
If you are encountering issues while powering on SynthStation 25, try one of the following solutions:

     •       If you are using battery power, make sure 4 new AAA batteries are properly inserted in the
             battery compartment on the underside of SynthStation 25.
     •       If you are powering SynthStation 25 via USB connection to your computer (using a mini-USB
             cable, not included), disconnect then reconnect it to your computer. Also, try connecting
             SynthStation 25 to a USB port on your computer rather than a USB hub.
     •       If you are powering SynthStation 25 with a power adapter (not included), ensure the adapter is
             plugged into a live power outlet. Also make sure the power adapter's voltage and amperage are
             correct (in this case, 6V DC, 1A).


 Note for Gen 1 (original) iPhone users: When using SynthStation 25, use the following steps to
 connect your iPhone: put your iPhone in Airplane Mode, turn on SynthStation 25, then lastly, connect
 your iPhone to the dock. You are now ready to use SynthStation 25.


If you encounter any issues related to delayed, incorrect, or lack of software response, try one of the
following solutions:

     •       Close then reopen the SynthStation Studio app.
     •       Disconnect then reconnect your iPhone or iPod touch to SynthStation 25.
     •       Confirm that your iPhone or iPod touch is properly connected to SynthStation 25. To do this, go
             to Settings    General    About in your iPhone or iPod touch, then scroll to the bottom of the
             page. "SynthStation 25" should be shown.
     •       Turn your iPhone or iPod touch off then on again and reopen the SynthStation Studio app.
     •       Turn SynthStation 25 off then on again. (If you are powering it via its mini-USB connection,
             disconnect then reconnect it to your computer. Also, try connecting SynthStation 25 to a USB
             port on your computer rather than a USB hub.)
     •       Delete the SynthStation Studio app from your iPhone or iPod touch then re-download it. (Be sure
             you have backed up the app on your computer before deleting it from your iPhone or iPod touch.)


SPECIFICATIONS
Note keys:              25 (velocity-sensitive)                    The app, Akai SynthStation Studio, is not
Inputs/outputs:         1 RCA stereo output                        included. To purchase it, go to the iTunes
                                                                   App Store and search for "SynthStation
                        1 1/8" stereo headphone output             Studio."
                        1 USB-mini port
Power:                  Power adapter (not included): 6V DC, 1A, center pin positive,
                                                      2.1mm pin diameter, 5.5mm barrel diameter
                        Mini-USB cable (not included) connected to computer: 6V DC, 1A
                        Batteries: 4 AAA
Dimensions:             310mm x 203mm x 40mm (W x D x H)
Weight:                 1.7 lb / 7.7kg


                  THIS DEVICE COMPLIES WITH PART 15 OF THE FCC RULES. OPERATION IS
                  SUBJECT TO THE FOLLOWING TWO CONDITIONS:
                  (1) THIS DEVICE MAY NOT CAUSE HARMFUL INTERFERENCE, AND
                  (2) THIS DEVICE MUST ACCEPT ANY INTERFERENCE RECEIVED, INCLUDING
                  INTERFERENCE THAT MAY CAUSE UNDESIRED OPERATION.


                                                      2
CONTENIDO DE LA CAJA
     SynthStation 25
                                                                     La aplicación, Akai SynthStation Studio, no
     4 Baterías AAA                                                  está incluida. Para comprarla, visite la tienda
     Guía de inicio rápido                                           de aplicaciones (App Store) de iTunes App y
     Folleto de instrucciones de seguridad e información sobre la    busque "SynthStation Studio".
     garantía


VISTA DEL PANEL TRASERO
1.   ENTRADA DE ALIMENTACIÓN
     – Conecte a este jack un
     adaptador de alimentación de 6 V     2
     CC – 1 A (pin central positivo,              4 6 5                                                     1 3
     diámetro del pin 2.1 mm, diámetro del tubo 5.5 mm, no incluido) y luego enchufe el adaptador a un tomacorriente.
     Como alternativa, puede alimentar el SynthStation 25 con 4 baterías AAA (insertadas en el compartimiento de baterías
     debajo de la unidad) o por el PUERTO USB del costado de la unidad con un cable mini-USB (no incluido) conectado a
     la computadora. No obstante, si usa un adaptador de alimentación puede cargar su iPhone® o iPod touch® * mientras
     usa el SynthStation 25.
2.   PUERTO MINI-USB – Enchufe a este puerto un cable mini-USB estándar (no incluido) y luego enchúfelo al puerto USB
     de la computadora. Este puerto de la computadora suministra alimentación al SynthStation 25. Cuando se conecta a
     su Mac o PC, el SynthStation 25 se puede usar como controlador USB-MIDI. SynthStation 25 cumple la clase 25, de
     modo que es "plug-and-play" —no es necesario instalar ningún driver por separado.
3.   INTERRUPTOR DE ENCENDIDO – Enciende y apaga el SynthStation 25.
4.   VOLUMEN MAESTRO – Ajusta el volumen de las SALIDAS PRINCIPALES y la SALIDA PARA AURICULARES. Esta
     salida maestra incluye la reproducción de iPhone o iPod touch.
5.   SALIDA PARA AURICULARES – Conecte a esta entrada los auriculares estéreo de 1/8”. Puede ajustar el nivel de
     esta salida con la perilla de VOLUMEN MAESTRO.
6.   SALIDAS PRINCIPALES – Conecte a estas salidas un sistema de altavoces u otro dispositivo de salida mediante el
     cable RCA estéreo incluido. Ajuste el nivel de estas salidas con la perilla de VOLUMEN MAESTRO.

                         * iTunes e iPod Touch son marcas registradas de Apple, Inc., registradas en EE.UU. y otros países.


VISTA DEL PANEL SUPERIOR
1.   ESTACIÓN DE ACOPLAMIENTO –
     Conecte aquí su iPhone o iPod
     touch. Balancee delicadamente el
     dispositivo en uno y otro sentido
     sobre el conector cuando lo conecte
     o lo retire.
                                                                                     1
2.   TECLADO – Este teclado de 25                 3       4                                            7 7 7 7
     notas es sensible a la velocidad y,
     en conjunto con los botones                                                                       6 6 5 5
     OCTAVE –/+, pueden controlar un
     rango de ocho octavas.
     Nota: Su ejecución en el TECLADO
     es independiente del teclado que se
     muestra en la Página de ejecución
     de SynthStation Studio, lo que le
     permite tocar en tres octavas a la
     vez —una en SynthStation Studio y                                           2
     el TECLADO de dos octavas en
     SynthStation 25.
3.   RUEDA DE INFLEXIÓN DE PITCH
     – Transmite información de inflexión de pitch MIDI para elevar o bajar el pitch del TECLADO temporalmente.
4.   RUEDA DE MODULACIÓN – Transmite datos de controlador continuo (CC Nº 1 o profundidad de modulación).
5.   OCTAVA –/+ – Estos botones se pueden usar para desplazar la gama del TECLADO hacia arriba o abajo tres octavas
     en cada sentido, permitiendo así una gama de ocho octavas. Cuando esté más arriba o más abajo que las octavas
     centrales, se enciende el botón OCTAVE correspondiente. Para llevar nuevamente el TECLADO a las octavas
     centrales, pulse ambos botones OCTAVE simultáneamente.
6.   PROGRAMA –/+ – Estos botones se pueden usar para cambiar el programa (conjunto de sonidos de SynthStation
     Studio).
7.   BATERÍA / SINTETIZADOR – Estos botones seleccionan una de las tres partes de sintetizador o la parte de batería de
     SynthStation Studio. El TECLADO reproduce los sonidos de la parte seleccionada.


                                                            3
SOLUCIÓN DE PROBLEMAS
Si tiene problemas al encender el SynthStation 25, pruebe una de las siguientes soluciones:

     •     Si usa alimentación por baterías, asegúrese de insertar correctamente 4 baterías AAA nuevas en
           el compartimiento de baterías del lado inferior del SynthStation 25.
     •     Si alimenta el SynthStation 25 por la conexión USB a la computadora (mediante un cable mini-
           USB, no incluido), desconéctelo y luego vuelva a conectarlo a la misma. Asimismo, trate de
           conectar el SynthStation 25 a un puerto USB de la computadora en lugar de un concentrador
           (hub) USB.
     •     Si alimenta el SynthStation 25 con un adaptador de alimentación (no incluido), asegúrese de que
           dicho adaptador esté enchufado a un tomacorriente activo. Además, asegúrese de que el voltaje
           y el amperaje del adaptador de alimentación sean los correctos (en este caso, 6 V CC, 1 A).

Si tiene problemas relacionados con la respuesta retardada, incorrecta o falta de respuesta del
software, intente una de las siguientes soluciones:

     •     Cierre y vuelva a abrir la aplicación SynthStation Studio.
     •     Desconecte y vuelva a conectar el iPhone o iPod touch al SynthStation 25.
     •     Confirme que el iPhone o iPod touch esté conectado correctamente al SynthStation 25. Para
           hacerlo, vaya a Settings   General    About en su iPhone o iPod touch y desplácese hasta el
           pie de la página. Debe aparecer "SynthStation 25".
     •     Apague el iPhone o iPod touch y luego enciéndalo nuevamente y vuelva a abrir la aplicación
           SynthStation Studio.
     •     Apague y encienda nuevamente el SynthStation 25. (Si lo alimenta por la conexión mini-USB,
           desconéctelo y vuelva a conectarlo a la computadora. Asimismo, trate de conectar el
           SynthStation 25 a un puerto USB de la computadora en lugar de un concentrador (hub) USB.)
     •     Elimine la aplicación SynthStation Studio del iPhone o iPod touch y vuelva a cargarla.
           (Asegúrese de hacer una copia de seguridad de la aplicación en la computadora antes de
           eliminarla del iPhone o iPod touch.)


ESPECIFICACIONES
Teclas de nota:         25 (sensibles a la velocidad)
Entradas/salidas:       1 salida RCA estéreo
                        1 salida estéreo para auriculares de 1/8"
                        1 puerto USB-mini
Alimentación:           Adaptador de alimentación (no incluido): 6 V CC, 1 A, pin central positivo,
                                                                    diámetro del pin 2.1 mm,
                                                                    diámetro del tubo 5.5 mm
                        Cable Mini-USB (no incluido) conectado a la computadora: 6 V CC, 1 A
                        Baterías: 4 AAA
Dimensiones:            310 x 203 x 40 mm (ancho x prof. x altura)
Peso:                   7.7 kg (1.7 lb)


 La aplicación, Akai SynthStation Studio, no
 está incluida. Para comprarla, visite la tienda
 de aplicaciones (App Store) de iTunes App y
 busque "SynthStation Studio".


                                                        4
CONTENU DE LA BOÎTE
         SynthStation 25
                                                                                 L’application Akai SynthStation Studio
         4 piles de format AAA
                                                                                 n’est pas incluse. Pour vous la procurer,
         Guide d’utilisation simplifié
                                                                                 visitez le iTune App Store et recherchez
         Consignes de sécurité et informations concernant la
                                                                                 « SynthStation Studio ».
         garantie


CARACTÉRISTIQUES DU PANNEAU ARRIÈRE
1.       POWER         –    Branchez     un
         adaptateur d'alimentation de 6 V
         c.c., 1 A (fiche creuse de 5,5 mm
                                                 2
         à centre positif de 2,1 mm de                  4 6 5                                                          1 3
         diamètre, non inclus) à cette
         entrée, puis à une prise secteur. Vous pouvez également alimenter le SynthStation 25 avec 4 piles AAA (le
         compartiment pour piles est situé sur le dessous de l’appareil) ou encore, via le port USB situé sur le côté de l’appareil à
         l’aide d’un câble mini-USB (non inclus) branché à votre ordinateur. Cependant, l’utilisation d’un adaptateur
         d’alimentation vous permet de recharger la pile de votre iPhone® ou iPod touch® * tout en utilisant le SynthStation 25.
2.       PORT MINI-USB – Branchez un câble mini-USB standard (non inclus) dans cette entrée et l'autre extrémité dans le port
         USB d'un ordinateur. Le port USB de l'ordinateur permet d’alimenter le SynthStation 25. Lorsqu’il est branché à votre
         Mac ou à votre PC, le SynthStation 25 peut être utilisé comme contrôleur USB-MIDI. Le SynthStation 25 est doté d’une
         connexion USB prête à l’utilisation et ne requiert donc pas l’installation de pilotes.
3.       L'INTERRUPTEUR D'ALIMENTATION (POWER) – Cette touche permet de mettre le SynthStation 25 sous tension et
         hors tension.
4.       VOLUME – Ce bouton permet d'ajuster le niveau du volume des sorties principales (MAIN RIGHT et MAIN LEFT) et de
         la sortie casque d’écoute (PHONES). Cette sortie inclut le signal de lecture du iPhone ou iPod.
5.       PHONES – Un casque d'écoute peut être branché à cette sortie de 1/8 po. Le niveau du signal de cette sortie est
         commandé par le bouton VOLUME.
6.       SORTIES MAIN – Ces entrées permettent de brancher un système de sonorisation ou d’autres appareils de sortie à
         l’aide du câble RCA inclus. Le niveau du signal de ces sorties est commandé par le bouton VOLUME.

     * iPhone et iPod sont des marques de commerce déposées de Apple, inc., enregistrées aux États-Unis et dans d'autres pays.


CARACTÉRISTIQUES DU PANNEAU SUPÉRIEUR
1.       SOCLE – Branchez un iPhone ou
         un iPod ici. Insérez le bas du iPhone
         ou du iPod sur le connecteur en
         effectuant        doucement         un
         mouvement         d'avant      arrière,
         procédez de même pour le retirer.                                                    1
2.       CLAVIER – Ce clavier doté de 25                3        4                                              7 7 7 7
         touches sensibles à la dynamique
         peut commander une plage de neuf                                                                       6 6 5 5
         octaves à l’aide des touches
         OCTAVE DOWN/UP.
         Remarque : Votre performance sur
         le clavier est indépendante du clavier
         indiqué sur Perform Page dans
         SynthStation        Studio,      vous
         permettant de jouer en trois octaves
         à la fois, une sur SynthStation Studio
                                                                                          2
         et les deux autres sur le
         SynthStation 25.
3.       MOLETTE DE MODULATION DE LA HAUTEUR TONALE – Cette molette permet d’envoyer des données MIDI
         concernant l’augmentation ou la réduction temporaire de la hauteur tonale du clavier.
4.       MOLETTE DE MODULATION – Cette molette peut être utilisée pour transmettre des données de contrôleur en continu
         (CC no. 1 ou Modulation Depth).
5.       OCTAVE UP/DOWN – Ces touches vous permettent d'augmenter ou de diminuer la plage d’octaves du clavier de trois
         octaves dans les deux directions, permettant une plage de huit octaves. Lorsque vous dépassez en plus ou en moins
         l’octave du milieu, la touche OCTAVE correspondante s’allume. Appuyez sur les deux touches OCTAVE simultanément
         afin de remettre le clavier à l’octave du milieu par défaut.
6.       PROGRAM PREV/NEXT – Appuyez sur ces touches afin de changer l’ensemble des sons de batterie du SynthStation
         Studio).
7.       DRUMS/SYNTH 1 à 3 – Ces touches permettent de sélectionner une des trois sections synthé ou la section batterie du
         SynthStation Studio. Le clavier jouera les sons de la section sélectionnée.


                                                                  5
GUIDE DE DÉPANNAGE
Si vous éprouvez des difficultés lors de la mise sous tension du SynthStation 25, essayez une des
solutions suivantes :

     •      Si vous utilisez l’alimentation par piles, assurez-vous que les 4 piles AAA sont correctement
            insérées dans le compartiment des piles sur le dessous du SynthStation 25.
     •      Si vous utilisez l’alimentation via la connexion USB de votre ordinateur à l’aide d’un câble mini-
            USB (non inclus), débranchez le câble mini-USB puis rebranchez-le de nouveau. Essayez
            également de brancher le SynthStation 25 à un port USB de votre ordinateur plutôt que dans un
            répéteur USB.
     •      Si vous utilisez un adaptateur d’alimentation (non inclus), veuillez vous assurer qu’il est branché
            dans une prise de courant sous tension. Veuillez également vous assurer que la tension et
            l’intensité de courant électrique de l’adaptateur d’alimentation sont d’adéquates (6 V c.c., 1 A).

Si vous éprouvez un retard ou une erreur dans la réponse du logiciel, essayez une des solutions
suivantes :

     •      Fermez l’application SynthStation Studio, puis relancez-la.
     •      Débranchez le iPhone ou le iPod touch du SynthStation 25, puis rebranchez-le de nouveau.
     •      Confirmez que le iPhone ou le iPod touch est correctement branché au SynthStation 25. Pour ce
            faire, cliquez sur Réglages     Général    Informations sur le iPhone ou le iPod touch, puis
            parcourrez jusqu’au bas de la page, « SynthStation 25 » devrait être affiché.
     •      Fermez et rouvrez le iPhone ou le iPod touch, puis lancez l’application SynthStation Studio.
     •      Fermez et rouvrez le SynthStation 25. (Si vous utilisez l’alimentation via la connexion mini-USB,
            débranchez le câble mini-USB puis rebranchez-le de nouveau. Essayez également de brancher
            le SynthStation 25 à un port USB de votre ordinateur plutôt que dans un répéteur USB.)
     •      Supprimez l’application SynthStation Studio du iPhone ou du iPod touch, puis téléchargez-la de
            nouveau. (Assurez-vous d’avoir fait une copie de sauvegarde de l’application avant de la
            supprimer du iPhone ou du iPod touch.)


SPÉCIFICATIONS
Touches :                          25 (sensibles à la dynamique)
Entrées/sorties :                  Sortie audio stéréo RCA
                                   1 Sortie casque d'écoute 1/8 po
                                   1 Port mini-USB
Alimentation électrique :          Adaptateur d’alimentation (non inclus) : 6 V c.c., 1 A
                                   (fiche creuse de 5,5 mm à centre positif de 2,1 mm de diamètre)
                                   Câble mini-USB (non inclus) branché à un ordinateur : 6 V c.c., 1 A
                                   Piles : 4 AAA
Dimensions :                       310 mm x 203 mm x 40 mm (L x P x H)
Poids :                            1,7 lb / 7,7 kg

 L’application Akai SynthStation Studio
 n’est pas incluse. Pour vous la procurer,
 visitez le iTune App Store et recherchez
 « SynthStation Studio ».


                                                      6
CONTENUTI DELLA CONFEZIONE
     SynthStation 25                                                            L’app, Akai SynthStation Studio, non è
     4 batterie AAA                                                             inclusa. Per acquistarla, recarsi all’iTunes
     Guida rapida                                                               App Store e cercare "SynthStation Studio".
     Istruzioni di sicurezza e garanzia


PANORAMICA PANNELLO POSTERIORE
1.   INGRESSO DI ALIMENTAZIONE
     – Collegare un adattatore di
     alimentazione 6V CC – 1A (polo            2
     centrale positivo, di diametro 2,1                4 6 5                                                         1 3
     mm, diametro del cilindro 5,5 mm,
     non in dotazione) a questo jack, quindi inserirlo in una presa elettrica. Alternativamente, è possible alimentare il
     SynthStation 25 servendosi di 4 batterie AAA (inserite nelo scomparto batterie al di sotto dell'apparecchio) oppure
     tramite la porta USB posta lateralmente all’apparecchio servendosi di un cavo mini-USB standard (non in dotazione)
     collegato al computer. Tuttavia, l’utilizzo di un adattatore di alimentazione consentirà di caricare l’iPhone® o l’iPod touch®
     * durante l’uso del SynthStation 25.
2.   PORTA MINI-USB – Collegare un cavo standard mini-USB (non in dotazione) a questa porta e a livello della porta USB
     del computer. La porta USB del computer garantisce l’alimentazione del SynthStation 25. Se collegato al Mac o al PC, il
     SynthStation 25 può essere utilizzato come controller USB-MIDI. SynthStation 25 è un dispositivo compatibile, quindi è
     "plug-and-play": non richiede l’installazione di driver a parte.
3.   INTERRUTTORE DI ALIMENTAZIONE (POWER) – Accende e spegne il SynthStation 25.
4.   VOLUME MASTER – Regola il volume delle USCITE PRINCIPALI e dell’USCITA CUFFIE. Questa uscita master include
     la riproduzione di iPhone o iPod touch.
5.   USCITA CUFFIE – Collegare cuffie stereo da 1/8" a questa uscita. Si può regolare il livello di questa uscita servendosi
     della manopola VOLUME MASTER.
6.   USCITE MAIN – Collegare un sistema di altoparlanti o altri dispositivi di uscita a queste uscite servendosi del cavo
     stereo RCA in dotazione. Regolare il livello di queste uscite servendosi della manopola VOLUME MASTER.

                                 *iPhone e iPod sono marchi di fabbrica di Apple, Inc., registrati negli Stati Uniti e in altri Paesi.

PANORAMICA PANNELLO SUPERIORE
1.   DOCK – Collegare l’iPhone o l’iPod
     touch     a    questo    livello. Far
     ondeggiare       delicatamente      il
     dispositivo in avanti e indietro sul
     connettore al momento di collegarlo
     o di staccarlo.                                                                         1
2.   TASTIERA – Questa tastiera a 25                  3        4                                                7 7 7 7
     tasti è sensibile alla velocità e,
     unitamente ai tasti OCTAVE –/+ , è                                                                         6 6 5 5
     in grado di controllare una gamma di
     otto ottave.
     Nota bene: le prestazioni alla
     TASTOERA sono indipendenti dalla
     tastiera illustrate alla pagina Perform
     in SynthStation Studio, che ti
     consente di esibirti in tre ottave
     contemporaneamente:           una     in
                                                                                         2
     SynthStation Studio e la TASTIERA
     da due ottave sul SynthStation 25.
3.   ROTELLA BEND DEL PITCH – Trasmette le informazioni relative al bend del pitch MIDI per alzare o abbassare
     temporaneamente il pitch della TASTIERA.
4.   ROTELLA MOD – Trasmette dati continui del controller (CC #1 o Modulation Depth).
5.   OCTAVE –/+ – Questi tasti possono essere utilizzati per alzare o abbassare la gamma della TASTIERA di tre ottave in
     ciascuna direzione, consentendo una gamma di otto ottave. Quando ci si trova più in alto o più in basso dell’ottava
     centrale, il corrispondente tasto OTTAVE si accende. Per far tornare la TASTIERA alle ottave centrali, premere entrabi i
     tasti OTTAVE simultaneamente.
6.   PROGRAM –/+ – Questi tasti possono essere utilizzati per cambiare il programma (il set di Suoni in SynthStation
     Studio).
7.   DRUM / SYNTH – Questi tasti selezionano una di tre parti Synth o la parte di batteria per le prestazioni in SynthStation
     Studio. La TASTIERA riprodurrà i suoni della parte selezionata.


                                                                7
RISOLUZIONE DI PROBLEMI
In caso di problemi al momento dell’accensione del SynthStation 25, provare una delle seguenti
soluzioni:

     •        Se si utilizza l’alimentazione a batterie, assicurarsi di inserire 4 batterie nuove AAA nello
              scomparto batterie a livello del lato inferiore del SynthStation 25.
     •        Se si alimenta il SynthStation 25 tramite il collegamento USB al computer (servendosi di un cavo
              mini-USB non in dotazione), scollegarlo e ricollegarlo al computer. Inoltre, si consiglia di provare
              a collegare il SynthStation 25 ad una porta USB sul computer anziché ad un hub USB.
     •        Se si alimenta il SynthStation 25 con un adattatore di alimentazione (non in dotazione),
              assicurarsi che l’adattatore sia collegato ad una presa elettrica funzionante. Assicurarsi inoltre
              che la tensione dell’adattatore e l’amperaggio siano corretti (in questo caso, 6V CC, 1A).

In caso di problemi dovuti ad una risposta ritardata, scorretta o assente del software, provare una
delle seguenti soluzioni:

     •        Chiudere e riaprire l’applicazione SynthStation Studio.
     •        Scollegare e ricollegare l’iPhone o l’iPod touch al SynthStation 25.
     •        Assicurarsi che l’iPhone o l’iPod sia adeguatamente collegato al SynthStation 25. Per fare ciò,
              recarsi su Settings    General     About nell’iPhone o iPod touch, quindi scorrere fino in fondo
              alla pagina. Deve comparire "SynthStation 25".
     •        Spegnere e riaccendere l’iPhone o l’iPod touch e riaprire l’app. SynthStation Studio.
     •        Spegnere e riaccendere il SynthStation 25. (Se lo si alimenta tramite il suo collegamento mini-
              USB, scollegarlo e ricollegarlo al computer. Inoltre, si consiglia di provare a collegare il
              SynthStation 25 ad una porta USB sul computer anziché ad un hub USB.)
     •        Cancellare l’app. SynthStation Studio dall’iPhone o dall’iPod e quindi riscaricarla. (Assicurarsi di
              effettuare il back up dell’app sul computer prima di cancellarla dall’iPhone o dall’iPod touch.)


SPECIFICHE TECNICHE
Tasti nota:              25 (sensibili alla velocità)                   L’app, Akai SynthStation Studio, non è
Ingressi e uscite:       1 uscita stereo RCA                            inclusa. Per acquistarla, recarsi all’iTunes
                                                                        App Store e cercare "SynthStation Studio".
                         1 uscita cuffie stereo da 1/8”
                         1 porta mini-USB
Alimentazione:           Adattatore di alimentazione (non incluso) 6V CC, 1A, polo centrale positivo,
                                                                    diametro del polo 2,1mm,
                                                                    diametro del cilindro 5,5 mm
                         Cavo mini-USB (non in dotazione) collegato al computer: 6V CC, 1A
                         Batterie: 4 AAA
Dimensioni:              310 mm x 203 mm x 40 mm (L x P x H)
Peso:                    1,7 lb / 7,7 kg


                                                          8
SCHACHTELINHALT
     SynthStation 25                                                   Die App Akai SynthStation Studio ist nicht im
     4 AAA Batterien                                                   Lieferumfang enthalten. Um sie zu kaufen,
     Schnellstart-Anleitung                                            besuchen Sie den iTunes App Store und geben
                                                                       den Suchbegriff "SynthStation Studio" ein.
     Sicherheitshinweise und Garantieinformationen


ÜBERSICHT RÜCKSEITE
1.   NETZEINGANG - Verbinden Sie
     ein 6V DC - 1A Netzteil (mittlerer
     Pin mit positiver Polarität, Pin-     2
     Durchmesser         2,1       mm,             4 6 5                                                   1 3
     Zylinderdurchmesser 5,5 mm -
     nicht im Lieferumfang enthalten) mit dieser Buchse und einer Steckdose. Wahlweise können Sie die SynthStation 25
     mit 4 AAA-Batterien (welche in das Batteriefach an der Unterseite des Gerätes eingelegt werden) oder über den USB-
     ANSCHLUSS betreiben, welcher sich an der Seite des Geräts befindet und via Standard-Mini-USB-Kabel (nicht im
     Lieferumfang enthalten) mit Ihrem Computer verbunden wird. Wenn Sie jedoch ein Netzteil verwenden, können Sie Ihr
     iPhone® oder Ihren iPod Touch® * aufladen, während Sie die SynthStation 25 verwenden.
2.   MINI-USB-ANSCHLUSS - Stecken Sie ein Standard-Mini-USB-Kabel (nicht im Lieferumfang enthalten) in diese Buchse
     und in den USB-Anschluss Ihres Computers. Der USB-Anschluss Ihres Computers versorgt die SynthStation 25 mit
     Strom. Wenn Sie die SynthStation 25 mit Ihrem Mac oder PC verbinden, kann sie als USB-MIDI-Controller verwendet
     werden. Die SynthStation 25 ist klassenkonform und kann ohne separate Treiberinstallation verwendet werden.
3.   NETZSCHALTER - Schaltet die SynthStation 25 ein oder aus.
4.   MASTER-LAUTSTÄRKE - Regelt die Lautstärke der HAUPTAUSGÄNGE und des KOPFHÖRERAUSGANGS. Dieser
     Master-Ausgang schließt die Wiedergabe über iPhone oder iPod Touch mit ein.
5.   KOPFHÖRERAUSGANG - Schließen Sie 1/8" Stereo-Kopfhörer an diesen Ausgang an. Sie können die Lautstärke
     dieses Ausgangs mit dem MASTER-LAUTSTÄRKEREGLER einstellen.
6.   HAUPTAUSGÄNGE - Schließen Sie ein Lautsprechersystem oder ein anderes Ausgabegerät mithilfe des mitgelieferten
     Stereo-Cinch-Kabels an diese Ausgänge an. Sie können die Lautstärke dieser Ausgänge mit dem MASTER-
     LAUTSTÄRKEREGLER einstellen.

                    * iPhone und iPod Touch sind Marken der Apple Inc. und in den USA und anderen Ländern eingetragen.


ÜBERSICHT OBERSEITE
1.   DOCK – Hier verbinden Sie Ihr
     iPhone oder Ihren iPod Touch.
     Bewegen Sie das Gerät beim
     Anbringen oder Entfernen einige
     Male     vorsichtig über    die
     Anschlussstelle.                                                              1
2.   KEYBOARD - Das 25-Tasten-                  3       4                                           7 7 7 7
     Keyboard ist anschlagdynamisch
     und       kann     mit    den                                                                  6 6 5 5
     OKTAVENTASTEN - / + acht
     Oktaven ansteuern.
     Hinweis:      Ihr   Spiel  auf    der
     KLAVIATUR ist unabhängig vom
     Keyboard, das auf der Perform-Seite
     im SynthStation Studio angezeigt
     wird, so dass Sie auf drei Oktaven
     gleichzeitig spielen können - eine im
                                                                               2
     SynthStation Studio und eine auf der
     Zwei-Oktaven-KLAVIATUR            der
     SynthStation 25.
3.   PITCH BEND RAD - Überträgt die Pitch Bend MIDI-Informationen zum vorübergehenden Anheben oder Absenken der
     Tonhöhe des KEYBOARDS.
4.   MOD-RAD - Überträgt Continuous Controller Daten (CC # 1 oder Modulationsgrad).
5.   OKTAVE - / + - Mit diesen Tasten kann der KEYBOARD-Bereich drei Oktaven nach oben oder nach unten verlagert
     werden und einen Bereich von acht Oktaven ermöglichen. Wenn Sie Oktaven gewählt haben, die höher oder tiefer als
     die mittlere Oktave sind, wird die entsprechende OKTAVEN-Taste leuchten. Um in den mittleren Oktavenbereich des
     KEYBOARDS zurückzukehren, drücken Sie beide OKTAVEN-Tasten gleichzeitig.
6.   PROGRAMM - / + - Diese Tasten können verwendet werden, um das Programm zu wechseln (das Sound-Set im
     SynthStation Studio).
7.   DRUM / SYNTH – Mit diesen Tasten wählen Sie eine von drei Synth-Parts oder den Drum-Part für Ihr Spiel im
     SynthStation Studio aus. Das KEYBOARD spielt die Sounds des ausgewählten Parts.


                                                         9
FEHLERBEHEBUNG
Wenn Sie Probleme beim Einschalten der SynthStation 25 haben, versuchen Sie eine der folgenden
Lösungen:

     •     Wenn Sie Batteriestrom verwenden, stellen Sie sicher, dass 4 neue AAA-Batterien
           ordnungsgemäß in das Batteriefach an der Unterseite der SynthStation 25 eingelegt wurden.
     •     Wenn Sie die SynthStation 25 per USB-Verbindung zu Ihrem Computer mit Strom versorgen
           (mithilfe eines Mini-USB-Kabels - nicht im Lieferumfang enthalten), ziehen Sie es wieder heraus
           und schließen Sie es dann wieder an den Computer an. Versuchen Sie auch die SynthStation 25
           an einen USB-Anschluss Ihres Computers anzuschließen – nicht an einen USB-Hub.
     •     Wenn Sie die SynthStation 25 mit einem Netzteil mit Strom versorgen (nicht im Lieferumfang
           enthalten), stellen Sie sicher, dass der Adapter mit einer spannungsführenden Steckdose
           verbunden ist. Stellen Sie außerdem sicher, dass Spannung und Stromstärke des Netzteils
           korrekt sind (in diesem Fall 6V DC, 1A).

Wenn Sie irgendwelche Probleme im Zusammenhang mit einer verzögerten, fehlerhaften oder gar
fehlenden Reaktion der Software haben, versuchen Sie eine der folgenden Lösungen:

     •     Schließen Sie die SynthStation Studio App und öffnen Sie sie anschließend wieder.
     •     Trennen Sie die Verbindung mit Ihrem iPhone oder iPod Touch zur SynthStation 25 und
           schließen Sie sie danach erneut an.
     •     Stellen Sie sicher, dass Ihr iPhone oder Ihr iPod Touch ordnungsgemäß mit der SynthStation 25
           verbunden ist. Um dies zu tun, wählen Sie Einstellungen Allgemein Info auf Ihrem iPhone
           oder iPod Touch und scrollen anschließend zum unteren Rand der Seite. "SynthStation 25"
           sollte nun aufscheinen.
     •     Schalten Sie Ihr iPhone oder Ihren iPod Touch zuerst aus und anschließend wieder an und
           öffnen dann die SynthStation Studio App.
     •     Schalten Sie die SynthStation 25 zuerst aus und danach wieder ein. (Wenn Sie das Gerät über
           ihren Mini-USB-Anschluss mit Strom versorgen, trennen Sie das Gerät und schließen es danach
           wieder an Ihren Computer an. Versuchen Sie auch die SynthStation 25 an einen USB-Anschluss
           Ihres Computers anzuschließen – nicht an einen USB-Hub.)
     •     Löschen Sie die SynthStation Studio App von Ihrem iPhone oder iPod Touch und laden Sie sie
           danach erneut herunter. (Vergewissern Sie sich, dass Sie eine Sicherungskopie der App auf
           Ihrem Computer gespeichert haben bevor Sie sie von Ihrem iPhone oder iPod Touch löschen.)


TECHNISCHE DATEN
Keyboard-Tasten:      25 (anschlagdynamisch)                        Die App Akai SynthStation Studio ist nicht im
                                                                    Lieferumfang enthalten. Um sie zu kaufen,
Eingänge/Ausgänge: 1 Cinch-Stereo-Ausgang                           besuchen Sie den iTunes App Store und geben
                      1 1/8 " Stereo-Kopfhörerausgang               den Suchbegriff "SynthStation Studio" ein.
                      1 USB-Mini-Anschluss
Stromversorgung:      Netzteil (nicht im Lieferumfang enthalten):
                                   6V DC, 1A, mittlerer Pin mit positiver Polarität,
                                   Pin-Durchmesser 2,1mm, Zylinderdurchmesser 5,5mm
                      Mini-USB-Kabel (nicht im Lieferumfang enthalten) an Computer angeschlossen:
                                   6V DC, 1A
                      Batterien:
                                   4 AAA
Abmessungen:          310mm x 203mm x 40mm (B x T x H)
Gewicht:              1,7 lb / 7,7kg


                                                     10
MIDI IMPLEMENTATION CHART
Manufacturer: Akai Professional          Model: SynthStation 25             Version: 1.0          Date: 2010.06.11
                                                          Transmit/Export      Recognize/Import          Remarks
1. Basic Information
MIDI channels                                                      1-16                1-16
Note numbers                                                      0-127               0-127
Program change                                                    0-127               0-127
Bank Select response? (Yes/No)
                                                                   No                  No
    If yes, list banks utilized in remarks column
Modes supported: Mode 1: Omni-On, Poly (Yes/No)
                     Mode 2: Omni-On, Mono (Yes/No)
                     Mode 3: Omni-Off, Poly (Yes/No)               No                  No
                     Mode 4: Omni-Off, Mono (Yes/No)
                     Multi Mode (Yes/No)
Note-On Velocity (Yes/No)                                         Yes                  No
Note-Off Velocity (Yes/No)                                        No                   No
Channel Aftertouch (Yes/No)                                       No                   No
Poly (Key) Aftertouch (Yes/No)                                    No                   No
Pitch Bend (Yes/No)                                               Yes                  No
MIDI CC (Yes/No)                                                  Yes                  No
Active Sensing (Yes/No)                                           No                   No
System Reset (Yes/No)                                             Yes                  No
Tune Request (Yes/No)                                             No                   No
Universal System Exclusive:
                     Sample Dump Standard (Yes/No)
                     Device Inquiry (Yes/No)
                     File Dump (Yes/No)
                     MIDI Tuning (Yes/No)
                     Master Volume (Yes/No)
                     Master Balance (Yes/No)
                     Notation Information (Yes/No)
                     Turn GM1 System On (Yes/No)                   No                  No
                     Turn GM2 System On (Yes/No)
                     Turn GM System Off (Yes/No)
                     DLS-1 (Yes/No)
                     File Reference (Yes/No)
                     Controller Destination (Yes/No)
                     Key-based Instrument Ctrl (Yes/No)
                     Master Fine/Coarse Tune (Yes/No)
                     Other Universal System Exclusive
Manufacturer or Non-Commercial System Exclusive                   Yes                  Yes
NRPNs (Yes/No)                                                    No                   No
RPN 00 (Pitch Bend Sensitivity) (Yes/No)
RPN 01 (Channel Fine Tune) (Yes/No)
RPN 02 (Channel Coarse Tune) (Yes/No)
                                                                   No                  No
RPN 03 (Tuning Program Select) (Yes/No)
RPN 04 (Tuning Bank Select) (Yes/No)
RPN 05 (Modulation Depth Range) (Yes/No)
2. MIDI Timing and Synchronization
MIDI Clock (Yes/No)                                                No                  Yes
Song Position Pointer (Yes/No)                                     No                  Yes
Song Select (Yes/No)                                               No                  No
Start (Yes/No)
Continue (Yes/No)                                                  No                  Yes
Stop (Yes/No)
MIDI Time Code (Yes/No)                                            No                  No
MIDI Machine Control (Yes/No)                                      No                  No
MIDI Show Control (Yes/No)
                                                                   No                  No
    If yes, MSC Level supported
3. Extensions Compatibility
General MIDI compatible? (Level(s)/No)
                                                                   No                  No
    Is GM default power-up mode? (Level/No)
DLS compatible? (Levels(s)/No)
                                                                   No                  No
   (DLS File Type(s)/No)
Standard MIDI Files (Type(s)/No)                                   No                  No
XMF Files (Type(s)/No)                                             No                  No
SP-MIDI compatible? (Yes/No)                                       No                  No


                                                          11
WWW.AKAIPRO.COM
7-51-0314-B

Más contenido relacionado

Destacado

2024 State of Marketing Report – by Hubspot
2024 State of Marketing Report – by Hubspot2024 State of Marketing Report – by Hubspot
2024 State of Marketing Report – by HubspotMarius Sescu
 
Everything You Need To Know About ChatGPT
Everything You Need To Know About ChatGPTEverything You Need To Know About ChatGPT
Everything You Need To Know About ChatGPTExpeed Software
 
Product Design Trends in 2024 | Teenage Engineerings
Product Design Trends in 2024 | Teenage EngineeringsProduct Design Trends in 2024 | Teenage Engineerings
Product Design Trends in 2024 | Teenage EngineeringsPixeldarts
 
How Race, Age and Gender Shape Attitudes Towards Mental Health
How Race, Age and Gender Shape Attitudes Towards Mental HealthHow Race, Age and Gender Shape Attitudes Towards Mental Health
How Race, Age and Gender Shape Attitudes Towards Mental HealthThinkNow
 
AI Trends in Creative Operations 2024 by Artwork Flow.pdf
AI Trends in Creative Operations 2024 by Artwork Flow.pdfAI Trends in Creative Operations 2024 by Artwork Flow.pdf
AI Trends in Creative Operations 2024 by Artwork Flow.pdfmarketingartwork
 
PEPSICO Presentation to CAGNY Conference Feb 2024
PEPSICO Presentation to CAGNY Conference Feb 2024PEPSICO Presentation to CAGNY Conference Feb 2024
PEPSICO Presentation to CAGNY Conference Feb 2024Neil Kimberley
 
Content Methodology: A Best Practices Report (Webinar)
Content Methodology: A Best Practices Report (Webinar)Content Methodology: A Best Practices Report (Webinar)
Content Methodology: A Best Practices Report (Webinar)contently
 
How to Prepare For a Successful Job Search for 2024
How to Prepare For a Successful Job Search for 2024How to Prepare For a Successful Job Search for 2024
How to Prepare For a Successful Job Search for 2024Albert Qian
 
Social Media Marketing Trends 2024 // The Global Indie Insights
Social Media Marketing Trends 2024 // The Global Indie InsightsSocial Media Marketing Trends 2024 // The Global Indie Insights
Social Media Marketing Trends 2024 // The Global Indie InsightsKurio // The Social Media Age(ncy)
 
Trends In Paid Search: Navigating The Digital Landscape In 2024
Trends In Paid Search: Navigating The Digital Landscape In 2024Trends In Paid Search: Navigating The Digital Landscape In 2024
Trends In Paid Search: Navigating The Digital Landscape In 2024Search Engine Journal
 
5 Public speaking tips from TED - Visualized summary
5 Public speaking tips from TED - Visualized summary5 Public speaking tips from TED - Visualized summary
5 Public speaking tips from TED - Visualized summarySpeakerHub
 
ChatGPT and the Future of Work - Clark Boyd
ChatGPT and the Future of Work - Clark Boyd ChatGPT and the Future of Work - Clark Boyd
ChatGPT and the Future of Work - Clark Boyd Clark Boyd
 
Getting into the tech field. what next
Getting into the tech field. what next Getting into the tech field. what next
Getting into the tech field. what next Tessa Mero
 
Google's Just Not That Into You: Understanding Core Updates & Search Intent
Google's Just Not That Into You: Understanding Core Updates & Search IntentGoogle's Just Not That Into You: Understanding Core Updates & Search Intent
Google's Just Not That Into You: Understanding Core Updates & Search IntentLily Ray
 
Time Management & Productivity - Best Practices
Time Management & Productivity -  Best PracticesTime Management & Productivity -  Best Practices
Time Management & Productivity - Best PracticesVit Horky
 
The six step guide to practical project management
The six step guide to practical project managementThe six step guide to practical project management
The six step guide to practical project managementMindGenius
 
Beginners Guide to TikTok for Search - Rachel Pearson - We are Tilt __ Bright...
Beginners Guide to TikTok for Search - Rachel Pearson - We are Tilt __ Bright...Beginners Guide to TikTok for Search - Rachel Pearson - We are Tilt __ Bright...
Beginners Guide to TikTok for Search - Rachel Pearson - We are Tilt __ Bright...RachelPearson36
 

Destacado (20)

2024 State of Marketing Report – by Hubspot
2024 State of Marketing Report – by Hubspot2024 State of Marketing Report – by Hubspot
2024 State of Marketing Report – by Hubspot
 
Everything You Need To Know About ChatGPT
Everything You Need To Know About ChatGPTEverything You Need To Know About ChatGPT
Everything You Need To Know About ChatGPT
 
Product Design Trends in 2024 | Teenage Engineerings
Product Design Trends in 2024 | Teenage EngineeringsProduct Design Trends in 2024 | Teenage Engineerings
Product Design Trends in 2024 | Teenage Engineerings
 
How Race, Age and Gender Shape Attitudes Towards Mental Health
How Race, Age and Gender Shape Attitudes Towards Mental HealthHow Race, Age and Gender Shape Attitudes Towards Mental Health
How Race, Age and Gender Shape Attitudes Towards Mental Health
 
AI Trends in Creative Operations 2024 by Artwork Flow.pdf
AI Trends in Creative Operations 2024 by Artwork Flow.pdfAI Trends in Creative Operations 2024 by Artwork Flow.pdf
AI Trends in Creative Operations 2024 by Artwork Flow.pdf
 
Skeleton Culture Code
Skeleton Culture CodeSkeleton Culture Code
Skeleton Culture Code
 
PEPSICO Presentation to CAGNY Conference Feb 2024
PEPSICO Presentation to CAGNY Conference Feb 2024PEPSICO Presentation to CAGNY Conference Feb 2024
PEPSICO Presentation to CAGNY Conference Feb 2024
 
Content Methodology: A Best Practices Report (Webinar)
Content Methodology: A Best Practices Report (Webinar)Content Methodology: A Best Practices Report (Webinar)
Content Methodology: A Best Practices Report (Webinar)
 
How to Prepare For a Successful Job Search for 2024
How to Prepare For a Successful Job Search for 2024How to Prepare For a Successful Job Search for 2024
How to Prepare For a Successful Job Search for 2024
 
Social Media Marketing Trends 2024 // The Global Indie Insights
Social Media Marketing Trends 2024 // The Global Indie InsightsSocial Media Marketing Trends 2024 // The Global Indie Insights
Social Media Marketing Trends 2024 // The Global Indie Insights
 
Trends In Paid Search: Navigating The Digital Landscape In 2024
Trends In Paid Search: Navigating The Digital Landscape In 2024Trends In Paid Search: Navigating The Digital Landscape In 2024
Trends In Paid Search: Navigating The Digital Landscape In 2024
 
5 Public speaking tips from TED - Visualized summary
5 Public speaking tips from TED - Visualized summary5 Public speaking tips from TED - Visualized summary
5 Public speaking tips from TED - Visualized summary
 
ChatGPT and the Future of Work - Clark Boyd
ChatGPT and the Future of Work - Clark Boyd ChatGPT and the Future of Work - Clark Boyd
ChatGPT and the Future of Work - Clark Boyd
 
Getting into the tech field. what next
Getting into the tech field. what next Getting into the tech field. what next
Getting into the tech field. what next
 
Google's Just Not That Into You: Understanding Core Updates & Search Intent
Google's Just Not That Into You: Understanding Core Updates & Search IntentGoogle's Just Not That Into You: Understanding Core Updates & Search Intent
Google's Just Not That Into You: Understanding Core Updates & Search Intent
 
How to have difficult conversations
How to have difficult conversations How to have difficult conversations
How to have difficult conversations
 
Introduction to Data Science
Introduction to Data ScienceIntroduction to Data Science
Introduction to Data Science
 
Time Management & Productivity - Best Practices
Time Management & Productivity -  Best PracticesTime Management & Productivity -  Best Practices
Time Management & Productivity - Best Practices
 
The six step guide to practical project management
The six step guide to practical project managementThe six step guide to practical project management
The six step guide to practical project management
 
Beginners Guide to TikTok for Search - Rachel Pearson - We are Tilt __ Bright...
Beginners Guide to TikTok for Search - Rachel Pearson - We are Tilt __ Bright...Beginners Guide to TikTok for Search - Rachel Pearson - We are Tilt __ Bright...
Beginners Guide to TikTok for Search - Rachel Pearson - We are Tilt __ Bright...
 

MIDI Keyboard Synthesizer Controller for iPhone and iPod SynthStation25 Quickstart Guide

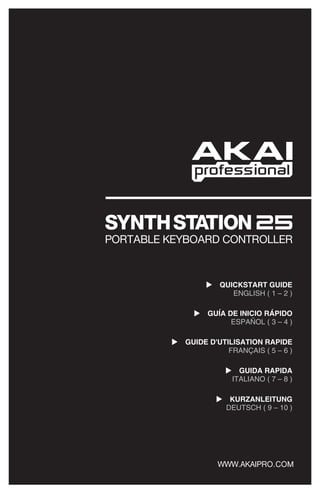
  • 1. QUICKSTART GUIDE ENGLISH ( 1 – 2 ) GUÍA DE INICIO RÁPIDO ESPAÑOL ( 3 – 4 ) GUIDE D'UTILISATION RAPIDE FRANÇAIS ( 5 – 6 ) GUIDA RAPIDA ITALIANO ( 7 – 8 ) KURZANLEITUNG DEUTSCH ( 9 – 10 ) WWW.AKAIPRO.COM
  • 2.
  • 3. BOX CONTENTS SynthStation 25 The app, Akai SynthStation Studio, is not 4 AAA batteries included. To purchase it, go to the iTunes Quickstart Guide App Store and search for "SynthStation Safety Instructions & Warranty Information Booklet Studio." REAR PANEL OVERVIEW 1. POWER INPUT – Connect a 6V DC – 1A power adapter (center pin positive, 2.1mm pin diameter, 2 5.5mm barrel diameter, not 4 6 5 1 3 included) to this jack then into an electrical outlet. Alternatively, you can power SynthStation 25 with 4 AAA batteries (inserted into the battery compartment underneath the unit) or via the USB PORT on the side of the unit with a standard mini-USB cable (not included) connected to your computer. However, using a power adapter will let you charge your ® ® iPhone or iPod touch * while using SynthStation 25. 2. MINI-USB PORT – Plug a standard mini-USB cable (not included) into this port and into the USB port of your computer. The computer's USB port will provide power to SynthStation 25. When connected to your Mac or PC, SynthStation 25 can be used as a USB-MIDI controller. SynthStation 25 is class-compliant, so it is "plug-and-play" – no separate driver installation is necessary. 3. POWER SWITCH – Turns SynthStation 25 on or off. 4. MASTER VOLUME – Adjusts the volume of the MAIN OUTPUTS and HEADPHONE OUTPUT. This master output includes iPhone or iPod touch playback. 5. HEADPHONE OUTPUT – Connect 1/8" stereo headphones to this output. You can adjust level of this output with the MASTER VOLUME knob. 6. MAIN OUTPUTS – Connect a speaker system or other output device to these outputs using the included stereo RCA cable. Adjust the level of these outputs with the MASTER VOLUME knob. * iPhone and iPod touch are trademarks of Apple Inc., registered in the U.S. and other countries. TOP PANEL OVERVIEW 1. DOCK – Connect your iPhone or iPod touch here. Gently rock the device back and forth over the connector when attaching or removing it. 2. KEYBOARD – This 25-note 1 keyboard is velocity-sensitive and, in 3 4 7 7 7 7 conjunction with the OCTAVE –/+ buttons, can control an eight-octave 6 6 5 5 range. Note: Your performance on the KEYBOARD is independent from the keyboard shown on the Perform Page in SynthStation Studio, allowing you perform in three octaves at a time – one in SynthStation Studio and the two- 2 octave KEYBOARD on SynthStation 25. 3. PITCH BEND WHEEL – Transmits MIDI Pitch Bend information to raise or lower the pitch of the KEYBOARD temporarily. 4. MOD WHEEL – Transmits continuous controller data (CC #1 or Modulation Depth). 5. OCTAVE –/+ – These buttons can be used to shift the KEYBOARD's Note for Gen 1 (original) iPhone users: range up or down three octaves in either direction allowing for an When using SynthStation 25, use the eight-octave range. When you are higher or lower than the center following steps to connect your iPhone: octaves, the corresponding OCTAVE button will light. To return the put your iPhone in Airplane Mode, turn on KEYBOARD to the center octaves, press both OCTAVE buttons SynthStation 25, then lastly, connect your simultaneously. iPhone to the dock. You are now ready to use SynthStation 25. 6. PROGRAM –/+ – These buttons can be used to change the Program (the set of Sounds in SynthStation Studio). 7. DRUM / SYNTH – These buttons select one of three Synth parts or the Drum part for performance in SynthStation Studio. The KEYBOARD will play the sounds of the selected part. 1
  • 4. TROUBLESHOOTING If you are encountering issues while powering on SynthStation 25, try one of the following solutions: • If you are using battery power, make sure 4 new AAA batteries are properly inserted in the battery compartment on the underside of SynthStation 25. • If you are powering SynthStation 25 via USB connection to your computer (using a mini-USB cable, not included), disconnect then reconnect it to your computer. Also, try connecting SynthStation 25 to a USB port on your computer rather than a USB hub. • If you are powering SynthStation 25 with a power adapter (not included), ensure the adapter is plugged into a live power outlet. Also make sure the power adapter's voltage and amperage are correct (in this case, 6V DC, 1A). Note for Gen 1 (original) iPhone users: When using SynthStation 25, use the following steps to connect your iPhone: put your iPhone in Airplane Mode, turn on SynthStation 25, then lastly, connect your iPhone to the dock. You are now ready to use SynthStation 25. If you encounter any issues related to delayed, incorrect, or lack of software response, try one of the following solutions: • Close then reopen the SynthStation Studio app. • Disconnect then reconnect your iPhone or iPod touch to SynthStation 25. • Confirm that your iPhone or iPod touch is properly connected to SynthStation 25. To do this, go to Settings General About in your iPhone or iPod touch, then scroll to the bottom of the page. "SynthStation 25" should be shown. • Turn your iPhone or iPod touch off then on again and reopen the SynthStation Studio app. • Turn SynthStation 25 off then on again. (If you are powering it via its mini-USB connection, disconnect then reconnect it to your computer. Also, try connecting SynthStation 25 to a USB port on your computer rather than a USB hub.) • Delete the SynthStation Studio app from your iPhone or iPod touch then re-download it. (Be sure you have backed up the app on your computer before deleting it from your iPhone or iPod touch.) SPECIFICATIONS Note keys: 25 (velocity-sensitive) The app, Akai SynthStation Studio, is not Inputs/outputs: 1 RCA stereo output included. To purchase it, go to the iTunes App Store and search for "SynthStation 1 1/8" stereo headphone output Studio." 1 USB-mini port Power: Power adapter (not included): 6V DC, 1A, center pin positive, 2.1mm pin diameter, 5.5mm barrel diameter Mini-USB cable (not included) connected to computer: 6V DC, 1A Batteries: 4 AAA Dimensions: 310mm x 203mm x 40mm (W x D x H) Weight: 1.7 lb / 7.7kg THIS DEVICE COMPLIES WITH PART 15 OF THE FCC RULES. OPERATION IS SUBJECT TO THE FOLLOWING TWO CONDITIONS: (1) THIS DEVICE MAY NOT CAUSE HARMFUL INTERFERENCE, AND (2) THIS DEVICE MUST ACCEPT ANY INTERFERENCE RECEIVED, INCLUDING INTERFERENCE THAT MAY CAUSE UNDESIRED OPERATION. 2
  • 5. CONTENIDO DE LA CAJA SynthStation 25 La aplicación, Akai SynthStation Studio, no 4 Baterías AAA está incluida. Para comprarla, visite la tienda Guía de inicio rápido de aplicaciones (App Store) de iTunes App y Folleto de instrucciones de seguridad e información sobre la busque "SynthStation Studio". garantía VISTA DEL PANEL TRASERO 1. ENTRADA DE ALIMENTACIÓN – Conecte a este jack un adaptador de alimentación de 6 V 2 CC – 1 A (pin central positivo, 4 6 5 1 3 diámetro del pin 2.1 mm, diámetro del tubo 5.5 mm, no incluido) y luego enchufe el adaptador a un tomacorriente. Como alternativa, puede alimentar el SynthStation 25 con 4 baterías AAA (insertadas en el compartimiento de baterías debajo de la unidad) o por el PUERTO USB del costado de la unidad con un cable mini-USB (no incluido) conectado a la computadora. No obstante, si usa un adaptador de alimentación puede cargar su iPhone® o iPod touch® * mientras usa el SynthStation 25. 2. PUERTO MINI-USB – Enchufe a este puerto un cable mini-USB estándar (no incluido) y luego enchúfelo al puerto USB de la computadora. Este puerto de la computadora suministra alimentación al SynthStation 25. Cuando se conecta a su Mac o PC, el SynthStation 25 se puede usar como controlador USB-MIDI. SynthStation 25 cumple la clase 25, de modo que es "plug-and-play" —no es necesario instalar ningún driver por separado. 3. INTERRUPTOR DE ENCENDIDO – Enciende y apaga el SynthStation 25. 4. VOLUMEN MAESTRO – Ajusta el volumen de las SALIDAS PRINCIPALES y la SALIDA PARA AURICULARES. Esta salida maestra incluye la reproducción de iPhone o iPod touch. 5. SALIDA PARA AURICULARES – Conecte a esta entrada los auriculares estéreo de 1/8”. Puede ajustar el nivel de esta salida con la perilla de VOLUMEN MAESTRO. 6. SALIDAS PRINCIPALES – Conecte a estas salidas un sistema de altavoces u otro dispositivo de salida mediante el cable RCA estéreo incluido. Ajuste el nivel de estas salidas con la perilla de VOLUMEN MAESTRO. * iTunes e iPod Touch son marcas registradas de Apple, Inc., registradas en EE.UU. y otros países. VISTA DEL PANEL SUPERIOR 1. ESTACIÓN DE ACOPLAMIENTO – Conecte aquí su iPhone o iPod touch. Balancee delicadamente el dispositivo en uno y otro sentido sobre el conector cuando lo conecte o lo retire. 1 2. TECLADO – Este teclado de 25 3 4 7 7 7 7 notas es sensible a la velocidad y, en conjunto con los botones 6 6 5 5 OCTAVE –/+, pueden controlar un rango de ocho octavas. Nota: Su ejecución en el TECLADO es independiente del teclado que se muestra en la Página de ejecución de SynthStation Studio, lo que le permite tocar en tres octavas a la vez —una en SynthStation Studio y 2 el TECLADO de dos octavas en SynthStation 25. 3. RUEDA DE INFLEXIÓN DE PITCH – Transmite información de inflexión de pitch MIDI para elevar o bajar el pitch del TECLADO temporalmente. 4. RUEDA DE MODULACIÓN – Transmite datos de controlador continuo (CC Nº 1 o profundidad de modulación). 5. OCTAVA –/+ – Estos botones se pueden usar para desplazar la gama del TECLADO hacia arriba o abajo tres octavas en cada sentido, permitiendo así una gama de ocho octavas. Cuando esté más arriba o más abajo que las octavas centrales, se enciende el botón OCTAVE correspondiente. Para llevar nuevamente el TECLADO a las octavas centrales, pulse ambos botones OCTAVE simultáneamente. 6. PROGRAMA –/+ – Estos botones se pueden usar para cambiar el programa (conjunto de sonidos de SynthStation Studio). 7. BATERÍA / SINTETIZADOR – Estos botones seleccionan una de las tres partes de sintetizador o la parte de batería de SynthStation Studio. El TECLADO reproduce los sonidos de la parte seleccionada. 3
  • 6. SOLUCIÓN DE PROBLEMAS Si tiene problemas al encender el SynthStation 25, pruebe una de las siguientes soluciones: • Si usa alimentación por baterías, asegúrese de insertar correctamente 4 baterías AAA nuevas en el compartimiento de baterías del lado inferior del SynthStation 25. • Si alimenta el SynthStation 25 por la conexión USB a la computadora (mediante un cable mini- USB, no incluido), desconéctelo y luego vuelva a conectarlo a la misma. Asimismo, trate de conectar el SynthStation 25 a un puerto USB de la computadora en lugar de un concentrador (hub) USB. • Si alimenta el SynthStation 25 con un adaptador de alimentación (no incluido), asegúrese de que dicho adaptador esté enchufado a un tomacorriente activo. Además, asegúrese de que el voltaje y el amperaje del adaptador de alimentación sean los correctos (en este caso, 6 V CC, 1 A). Si tiene problemas relacionados con la respuesta retardada, incorrecta o falta de respuesta del software, intente una de las siguientes soluciones: • Cierre y vuelva a abrir la aplicación SynthStation Studio. • Desconecte y vuelva a conectar el iPhone o iPod touch al SynthStation 25. • Confirme que el iPhone o iPod touch esté conectado correctamente al SynthStation 25. Para hacerlo, vaya a Settings General About en su iPhone o iPod touch y desplácese hasta el pie de la página. Debe aparecer "SynthStation 25". • Apague el iPhone o iPod touch y luego enciéndalo nuevamente y vuelva a abrir la aplicación SynthStation Studio. • Apague y encienda nuevamente el SynthStation 25. (Si lo alimenta por la conexión mini-USB, desconéctelo y vuelva a conectarlo a la computadora. Asimismo, trate de conectar el SynthStation 25 a un puerto USB de la computadora en lugar de un concentrador (hub) USB.) • Elimine la aplicación SynthStation Studio del iPhone o iPod touch y vuelva a cargarla. (Asegúrese de hacer una copia de seguridad de la aplicación en la computadora antes de eliminarla del iPhone o iPod touch.) ESPECIFICACIONES Teclas de nota: 25 (sensibles a la velocidad) Entradas/salidas: 1 salida RCA estéreo 1 salida estéreo para auriculares de 1/8" 1 puerto USB-mini Alimentación: Adaptador de alimentación (no incluido): 6 V CC, 1 A, pin central positivo, diámetro del pin 2.1 mm, diámetro del tubo 5.5 mm Cable Mini-USB (no incluido) conectado a la computadora: 6 V CC, 1 A Baterías: 4 AAA Dimensiones: 310 x 203 x 40 mm (ancho x prof. x altura) Peso: 7.7 kg (1.7 lb) La aplicación, Akai SynthStation Studio, no está incluida. Para comprarla, visite la tienda de aplicaciones (App Store) de iTunes App y busque "SynthStation Studio". 4
  • 7. CONTENU DE LA BOÎTE SynthStation 25 L’application Akai SynthStation Studio 4 piles de format AAA n’est pas incluse. Pour vous la procurer, Guide d’utilisation simplifié visitez le iTune App Store et recherchez Consignes de sécurité et informations concernant la « SynthStation Studio ». garantie CARACTÉRISTIQUES DU PANNEAU ARRIÈRE 1. POWER – Branchez un adaptateur d'alimentation de 6 V c.c., 1 A (fiche creuse de 5,5 mm 2 à centre positif de 2,1 mm de 4 6 5 1 3 diamètre, non inclus) à cette entrée, puis à une prise secteur. Vous pouvez également alimenter le SynthStation 25 avec 4 piles AAA (le compartiment pour piles est situé sur le dessous de l’appareil) ou encore, via le port USB situé sur le côté de l’appareil à l’aide d’un câble mini-USB (non inclus) branché à votre ordinateur. Cependant, l’utilisation d’un adaptateur d’alimentation vous permet de recharger la pile de votre iPhone® ou iPod touch® * tout en utilisant le SynthStation 25. 2. PORT MINI-USB – Branchez un câble mini-USB standard (non inclus) dans cette entrée et l'autre extrémité dans le port USB d'un ordinateur. Le port USB de l'ordinateur permet d’alimenter le SynthStation 25. Lorsqu’il est branché à votre Mac ou à votre PC, le SynthStation 25 peut être utilisé comme contrôleur USB-MIDI. Le SynthStation 25 est doté d’une connexion USB prête à l’utilisation et ne requiert donc pas l’installation de pilotes. 3. L'INTERRUPTEUR D'ALIMENTATION (POWER) – Cette touche permet de mettre le SynthStation 25 sous tension et hors tension. 4. VOLUME – Ce bouton permet d'ajuster le niveau du volume des sorties principales (MAIN RIGHT et MAIN LEFT) et de la sortie casque d’écoute (PHONES). Cette sortie inclut le signal de lecture du iPhone ou iPod. 5. PHONES – Un casque d'écoute peut être branché à cette sortie de 1/8 po. Le niveau du signal de cette sortie est commandé par le bouton VOLUME. 6. SORTIES MAIN – Ces entrées permettent de brancher un système de sonorisation ou d’autres appareils de sortie à l’aide du câble RCA inclus. Le niveau du signal de ces sorties est commandé par le bouton VOLUME. * iPhone et iPod sont des marques de commerce déposées de Apple, inc., enregistrées aux États-Unis et dans d'autres pays. CARACTÉRISTIQUES DU PANNEAU SUPÉRIEUR 1. SOCLE – Branchez un iPhone ou un iPod ici. Insérez le bas du iPhone ou du iPod sur le connecteur en effectuant doucement un mouvement d'avant arrière, procédez de même pour le retirer. 1 2. CLAVIER – Ce clavier doté de 25 3 4 7 7 7 7 touches sensibles à la dynamique peut commander une plage de neuf 6 6 5 5 octaves à l’aide des touches OCTAVE DOWN/UP. Remarque : Votre performance sur le clavier est indépendante du clavier indiqué sur Perform Page dans SynthStation Studio, vous permettant de jouer en trois octaves à la fois, une sur SynthStation Studio 2 et les deux autres sur le SynthStation 25. 3. MOLETTE DE MODULATION DE LA HAUTEUR TONALE – Cette molette permet d’envoyer des données MIDI concernant l’augmentation ou la réduction temporaire de la hauteur tonale du clavier. 4. MOLETTE DE MODULATION – Cette molette peut être utilisée pour transmettre des données de contrôleur en continu (CC no. 1 ou Modulation Depth). 5. OCTAVE UP/DOWN – Ces touches vous permettent d'augmenter ou de diminuer la plage d’octaves du clavier de trois octaves dans les deux directions, permettant une plage de huit octaves. Lorsque vous dépassez en plus ou en moins l’octave du milieu, la touche OCTAVE correspondante s’allume. Appuyez sur les deux touches OCTAVE simultanément afin de remettre le clavier à l’octave du milieu par défaut. 6. PROGRAM PREV/NEXT – Appuyez sur ces touches afin de changer l’ensemble des sons de batterie du SynthStation Studio). 7. DRUMS/SYNTH 1 à 3 – Ces touches permettent de sélectionner une des trois sections synthé ou la section batterie du SynthStation Studio. Le clavier jouera les sons de la section sélectionnée. 5
  • 8. GUIDE DE DÉPANNAGE Si vous éprouvez des difficultés lors de la mise sous tension du SynthStation 25, essayez une des solutions suivantes : • Si vous utilisez l’alimentation par piles, assurez-vous que les 4 piles AAA sont correctement insérées dans le compartiment des piles sur le dessous du SynthStation 25. • Si vous utilisez l’alimentation via la connexion USB de votre ordinateur à l’aide d’un câble mini- USB (non inclus), débranchez le câble mini-USB puis rebranchez-le de nouveau. Essayez également de brancher le SynthStation 25 à un port USB de votre ordinateur plutôt que dans un répéteur USB. • Si vous utilisez un adaptateur d’alimentation (non inclus), veuillez vous assurer qu’il est branché dans une prise de courant sous tension. Veuillez également vous assurer que la tension et l’intensité de courant électrique de l’adaptateur d’alimentation sont d’adéquates (6 V c.c., 1 A). Si vous éprouvez un retard ou une erreur dans la réponse du logiciel, essayez une des solutions suivantes : • Fermez l’application SynthStation Studio, puis relancez-la. • Débranchez le iPhone ou le iPod touch du SynthStation 25, puis rebranchez-le de nouveau. • Confirmez que le iPhone ou le iPod touch est correctement branché au SynthStation 25. Pour ce faire, cliquez sur Réglages Général Informations sur le iPhone ou le iPod touch, puis parcourrez jusqu’au bas de la page, « SynthStation 25 » devrait être affiché. • Fermez et rouvrez le iPhone ou le iPod touch, puis lancez l’application SynthStation Studio. • Fermez et rouvrez le SynthStation 25. (Si vous utilisez l’alimentation via la connexion mini-USB, débranchez le câble mini-USB puis rebranchez-le de nouveau. Essayez également de brancher le SynthStation 25 à un port USB de votre ordinateur plutôt que dans un répéteur USB.) • Supprimez l’application SynthStation Studio du iPhone ou du iPod touch, puis téléchargez-la de nouveau. (Assurez-vous d’avoir fait une copie de sauvegarde de l’application avant de la supprimer du iPhone ou du iPod touch.) SPÉCIFICATIONS Touches : 25 (sensibles à la dynamique) Entrées/sorties : Sortie audio stéréo RCA 1 Sortie casque d'écoute 1/8 po 1 Port mini-USB Alimentation électrique : Adaptateur d’alimentation (non inclus) : 6 V c.c., 1 A (fiche creuse de 5,5 mm à centre positif de 2,1 mm de diamètre) Câble mini-USB (non inclus) branché à un ordinateur : 6 V c.c., 1 A Piles : 4 AAA Dimensions : 310 mm x 203 mm x 40 mm (L x P x H) Poids : 1,7 lb / 7,7 kg L’application Akai SynthStation Studio n’est pas incluse. Pour vous la procurer, visitez le iTune App Store et recherchez « SynthStation Studio ». 6
  • 9. CONTENUTI DELLA CONFEZIONE SynthStation 25 L’app, Akai SynthStation Studio, non è 4 batterie AAA inclusa. Per acquistarla, recarsi all’iTunes Guida rapida App Store e cercare "SynthStation Studio". Istruzioni di sicurezza e garanzia PANORAMICA PANNELLO POSTERIORE 1. INGRESSO DI ALIMENTAZIONE – Collegare un adattatore di alimentazione 6V CC – 1A (polo 2 centrale positivo, di diametro 2,1 4 6 5 1 3 mm, diametro del cilindro 5,5 mm, non in dotazione) a questo jack, quindi inserirlo in una presa elettrica. Alternativamente, è possible alimentare il SynthStation 25 servendosi di 4 batterie AAA (inserite nelo scomparto batterie al di sotto dell'apparecchio) oppure tramite la porta USB posta lateralmente all’apparecchio servendosi di un cavo mini-USB standard (non in dotazione) collegato al computer. Tuttavia, l’utilizzo di un adattatore di alimentazione consentirà di caricare l’iPhone® o l’iPod touch® * durante l’uso del SynthStation 25. 2. PORTA MINI-USB – Collegare un cavo standard mini-USB (non in dotazione) a questa porta e a livello della porta USB del computer. La porta USB del computer garantisce l’alimentazione del SynthStation 25. Se collegato al Mac o al PC, il SynthStation 25 può essere utilizzato come controller USB-MIDI. SynthStation 25 è un dispositivo compatibile, quindi è "plug-and-play": non richiede l’installazione di driver a parte. 3. INTERRUTTORE DI ALIMENTAZIONE (POWER) – Accende e spegne il SynthStation 25. 4. VOLUME MASTER – Regola il volume delle USCITE PRINCIPALI e dell’USCITA CUFFIE. Questa uscita master include la riproduzione di iPhone o iPod touch. 5. USCITA CUFFIE – Collegare cuffie stereo da 1/8" a questa uscita. Si può regolare il livello di questa uscita servendosi della manopola VOLUME MASTER. 6. USCITE MAIN – Collegare un sistema di altoparlanti o altri dispositivi di uscita a queste uscite servendosi del cavo stereo RCA in dotazione. Regolare il livello di queste uscite servendosi della manopola VOLUME MASTER. *iPhone e iPod sono marchi di fabbrica di Apple, Inc., registrati negli Stati Uniti e in altri Paesi. PANORAMICA PANNELLO SUPERIORE 1. DOCK – Collegare l’iPhone o l’iPod touch a questo livello. Far ondeggiare delicatamente il dispositivo in avanti e indietro sul connettore al momento di collegarlo o di staccarlo. 1 2. TASTIERA – Questa tastiera a 25 3 4 7 7 7 7 tasti è sensibile alla velocità e, unitamente ai tasti OCTAVE –/+ , è 6 6 5 5 in grado di controllare una gamma di otto ottave. Nota bene: le prestazioni alla TASTOERA sono indipendenti dalla tastiera illustrate alla pagina Perform in SynthStation Studio, che ti consente di esibirti in tre ottave contemporaneamente: una in 2 SynthStation Studio e la TASTIERA da due ottave sul SynthStation 25. 3. ROTELLA BEND DEL PITCH – Trasmette le informazioni relative al bend del pitch MIDI per alzare o abbassare temporaneamente il pitch della TASTIERA. 4. ROTELLA MOD – Trasmette dati continui del controller (CC #1 o Modulation Depth). 5. OCTAVE –/+ – Questi tasti possono essere utilizzati per alzare o abbassare la gamma della TASTIERA di tre ottave in ciascuna direzione, consentendo una gamma di otto ottave. Quando ci si trova più in alto o più in basso dell’ottava centrale, il corrispondente tasto OTTAVE si accende. Per far tornare la TASTIERA alle ottave centrali, premere entrabi i tasti OTTAVE simultaneamente. 6. PROGRAM –/+ – Questi tasti possono essere utilizzati per cambiare il programma (il set di Suoni in SynthStation Studio). 7. DRUM / SYNTH – Questi tasti selezionano una di tre parti Synth o la parte di batteria per le prestazioni in SynthStation Studio. La TASTIERA riprodurrà i suoni della parte selezionata. 7
  • 10. RISOLUZIONE DI PROBLEMI In caso di problemi al momento dell’accensione del SynthStation 25, provare una delle seguenti soluzioni: • Se si utilizza l’alimentazione a batterie, assicurarsi di inserire 4 batterie nuove AAA nello scomparto batterie a livello del lato inferiore del SynthStation 25. • Se si alimenta il SynthStation 25 tramite il collegamento USB al computer (servendosi di un cavo mini-USB non in dotazione), scollegarlo e ricollegarlo al computer. Inoltre, si consiglia di provare a collegare il SynthStation 25 ad una porta USB sul computer anziché ad un hub USB. • Se si alimenta il SynthStation 25 con un adattatore di alimentazione (non in dotazione), assicurarsi che l’adattatore sia collegato ad una presa elettrica funzionante. Assicurarsi inoltre che la tensione dell’adattatore e l’amperaggio siano corretti (in questo caso, 6V CC, 1A). In caso di problemi dovuti ad una risposta ritardata, scorretta o assente del software, provare una delle seguenti soluzioni: • Chiudere e riaprire l’applicazione SynthStation Studio. • Scollegare e ricollegare l’iPhone o l’iPod touch al SynthStation 25. • Assicurarsi che l’iPhone o l’iPod sia adeguatamente collegato al SynthStation 25. Per fare ciò, recarsi su Settings General About nell’iPhone o iPod touch, quindi scorrere fino in fondo alla pagina. Deve comparire "SynthStation 25". • Spegnere e riaccendere l’iPhone o l’iPod touch e riaprire l’app. SynthStation Studio. • Spegnere e riaccendere il SynthStation 25. (Se lo si alimenta tramite il suo collegamento mini- USB, scollegarlo e ricollegarlo al computer. Inoltre, si consiglia di provare a collegare il SynthStation 25 ad una porta USB sul computer anziché ad un hub USB.) • Cancellare l’app. SynthStation Studio dall’iPhone o dall’iPod e quindi riscaricarla. (Assicurarsi di effettuare il back up dell’app sul computer prima di cancellarla dall’iPhone o dall’iPod touch.) SPECIFICHE TECNICHE Tasti nota: 25 (sensibili alla velocità) L’app, Akai SynthStation Studio, non è Ingressi e uscite: 1 uscita stereo RCA inclusa. Per acquistarla, recarsi all’iTunes App Store e cercare "SynthStation Studio". 1 uscita cuffie stereo da 1/8” 1 porta mini-USB Alimentazione: Adattatore di alimentazione (non incluso) 6V CC, 1A, polo centrale positivo, diametro del polo 2,1mm, diametro del cilindro 5,5 mm Cavo mini-USB (non in dotazione) collegato al computer: 6V CC, 1A Batterie: 4 AAA Dimensioni: 310 mm x 203 mm x 40 mm (L x P x H) Peso: 1,7 lb / 7,7 kg 8
  • 11. SCHACHTELINHALT SynthStation 25 Die App Akai SynthStation Studio ist nicht im 4 AAA Batterien Lieferumfang enthalten. Um sie zu kaufen, Schnellstart-Anleitung besuchen Sie den iTunes App Store und geben den Suchbegriff "SynthStation Studio" ein. Sicherheitshinweise und Garantieinformationen ÜBERSICHT RÜCKSEITE 1. NETZEINGANG - Verbinden Sie ein 6V DC - 1A Netzteil (mittlerer Pin mit positiver Polarität, Pin- 2 Durchmesser 2,1 mm, 4 6 5 1 3 Zylinderdurchmesser 5,5 mm - nicht im Lieferumfang enthalten) mit dieser Buchse und einer Steckdose. Wahlweise können Sie die SynthStation 25 mit 4 AAA-Batterien (welche in das Batteriefach an der Unterseite des Gerätes eingelegt werden) oder über den USB- ANSCHLUSS betreiben, welcher sich an der Seite des Geräts befindet und via Standard-Mini-USB-Kabel (nicht im Lieferumfang enthalten) mit Ihrem Computer verbunden wird. Wenn Sie jedoch ein Netzteil verwenden, können Sie Ihr iPhone® oder Ihren iPod Touch® * aufladen, während Sie die SynthStation 25 verwenden. 2. MINI-USB-ANSCHLUSS - Stecken Sie ein Standard-Mini-USB-Kabel (nicht im Lieferumfang enthalten) in diese Buchse und in den USB-Anschluss Ihres Computers. Der USB-Anschluss Ihres Computers versorgt die SynthStation 25 mit Strom. Wenn Sie die SynthStation 25 mit Ihrem Mac oder PC verbinden, kann sie als USB-MIDI-Controller verwendet werden. Die SynthStation 25 ist klassenkonform und kann ohne separate Treiberinstallation verwendet werden. 3. NETZSCHALTER - Schaltet die SynthStation 25 ein oder aus. 4. MASTER-LAUTSTÄRKE - Regelt die Lautstärke der HAUPTAUSGÄNGE und des KOPFHÖRERAUSGANGS. Dieser Master-Ausgang schließt die Wiedergabe über iPhone oder iPod Touch mit ein. 5. KOPFHÖRERAUSGANG - Schließen Sie 1/8" Stereo-Kopfhörer an diesen Ausgang an. Sie können die Lautstärke dieses Ausgangs mit dem MASTER-LAUTSTÄRKEREGLER einstellen. 6. HAUPTAUSGÄNGE - Schließen Sie ein Lautsprechersystem oder ein anderes Ausgabegerät mithilfe des mitgelieferten Stereo-Cinch-Kabels an diese Ausgänge an. Sie können die Lautstärke dieser Ausgänge mit dem MASTER- LAUTSTÄRKEREGLER einstellen. * iPhone und iPod Touch sind Marken der Apple Inc. und in den USA und anderen Ländern eingetragen. ÜBERSICHT OBERSEITE 1. DOCK – Hier verbinden Sie Ihr iPhone oder Ihren iPod Touch. Bewegen Sie das Gerät beim Anbringen oder Entfernen einige Male vorsichtig über die Anschlussstelle. 1 2. KEYBOARD - Das 25-Tasten- 3 4 7 7 7 7 Keyboard ist anschlagdynamisch und kann mit den 6 6 5 5 OKTAVENTASTEN - / + acht Oktaven ansteuern. Hinweis: Ihr Spiel auf der KLAVIATUR ist unabhängig vom Keyboard, das auf der Perform-Seite im SynthStation Studio angezeigt wird, so dass Sie auf drei Oktaven gleichzeitig spielen können - eine im 2 SynthStation Studio und eine auf der Zwei-Oktaven-KLAVIATUR der SynthStation 25. 3. PITCH BEND RAD - Überträgt die Pitch Bend MIDI-Informationen zum vorübergehenden Anheben oder Absenken der Tonhöhe des KEYBOARDS. 4. MOD-RAD - Überträgt Continuous Controller Daten (CC # 1 oder Modulationsgrad). 5. OKTAVE - / + - Mit diesen Tasten kann der KEYBOARD-Bereich drei Oktaven nach oben oder nach unten verlagert werden und einen Bereich von acht Oktaven ermöglichen. Wenn Sie Oktaven gewählt haben, die höher oder tiefer als die mittlere Oktave sind, wird die entsprechende OKTAVEN-Taste leuchten. Um in den mittleren Oktavenbereich des KEYBOARDS zurückzukehren, drücken Sie beide OKTAVEN-Tasten gleichzeitig. 6. PROGRAMM - / + - Diese Tasten können verwendet werden, um das Programm zu wechseln (das Sound-Set im SynthStation Studio). 7. DRUM / SYNTH – Mit diesen Tasten wählen Sie eine von drei Synth-Parts oder den Drum-Part für Ihr Spiel im SynthStation Studio aus. Das KEYBOARD spielt die Sounds des ausgewählten Parts. 9
  • 12. FEHLERBEHEBUNG Wenn Sie Probleme beim Einschalten der SynthStation 25 haben, versuchen Sie eine der folgenden Lösungen: • Wenn Sie Batteriestrom verwenden, stellen Sie sicher, dass 4 neue AAA-Batterien ordnungsgemäß in das Batteriefach an der Unterseite der SynthStation 25 eingelegt wurden. • Wenn Sie die SynthStation 25 per USB-Verbindung zu Ihrem Computer mit Strom versorgen (mithilfe eines Mini-USB-Kabels - nicht im Lieferumfang enthalten), ziehen Sie es wieder heraus und schließen Sie es dann wieder an den Computer an. Versuchen Sie auch die SynthStation 25 an einen USB-Anschluss Ihres Computers anzuschließen – nicht an einen USB-Hub. • Wenn Sie die SynthStation 25 mit einem Netzteil mit Strom versorgen (nicht im Lieferumfang enthalten), stellen Sie sicher, dass der Adapter mit einer spannungsführenden Steckdose verbunden ist. Stellen Sie außerdem sicher, dass Spannung und Stromstärke des Netzteils korrekt sind (in diesem Fall 6V DC, 1A). Wenn Sie irgendwelche Probleme im Zusammenhang mit einer verzögerten, fehlerhaften oder gar fehlenden Reaktion der Software haben, versuchen Sie eine der folgenden Lösungen: • Schließen Sie die SynthStation Studio App und öffnen Sie sie anschließend wieder. • Trennen Sie die Verbindung mit Ihrem iPhone oder iPod Touch zur SynthStation 25 und schließen Sie sie danach erneut an. • Stellen Sie sicher, dass Ihr iPhone oder Ihr iPod Touch ordnungsgemäß mit der SynthStation 25 verbunden ist. Um dies zu tun, wählen Sie Einstellungen Allgemein Info auf Ihrem iPhone oder iPod Touch und scrollen anschließend zum unteren Rand der Seite. "SynthStation 25" sollte nun aufscheinen. • Schalten Sie Ihr iPhone oder Ihren iPod Touch zuerst aus und anschließend wieder an und öffnen dann die SynthStation Studio App. • Schalten Sie die SynthStation 25 zuerst aus und danach wieder ein. (Wenn Sie das Gerät über ihren Mini-USB-Anschluss mit Strom versorgen, trennen Sie das Gerät und schließen es danach wieder an Ihren Computer an. Versuchen Sie auch die SynthStation 25 an einen USB-Anschluss Ihres Computers anzuschließen – nicht an einen USB-Hub.) • Löschen Sie die SynthStation Studio App von Ihrem iPhone oder iPod Touch und laden Sie sie danach erneut herunter. (Vergewissern Sie sich, dass Sie eine Sicherungskopie der App auf Ihrem Computer gespeichert haben bevor Sie sie von Ihrem iPhone oder iPod Touch löschen.) TECHNISCHE DATEN Keyboard-Tasten: 25 (anschlagdynamisch) Die App Akai SynthStation Studio ist nicht im Lieferumfang enthalten. Um sie zu kaufen, Eingänge/Ausgänge: 1 Cinch-Stereo-Ausgang besuchen Sie den iTunes App Store und geben 1 1/8 " Stereo-Kopfhörerausgang den Suchbegriff "SynthStation Studio" ein. 1 USB-Mini-Anschluss Stromversorgung: Netzteil (nicht im Lieferumfang enthalten): 6V DC, 1A, mittlerer Pin mit positiver Polarität, Pin-Durchmesser 2,1mm, Zylinderdurchmesser 5,5mm Mini-USB-Kabel (nicht im Lieferumfang enthalten) an Computer angeschlossen: 6V DC, 1A Batterien: 4 AAA Abmessungen: 310mm x 203mm x 40mm (B x T x H) Gewicht: 1,7 lb / 7,7kg 10
  • 13. MIDI IMPLEMENTATION CHART Manufacturer: Akai Professional Model: SynthStation 25 Version: 1.0 Date: 2010.06.11 Transmit/Export Recognize/Import Remarks 1. Basic Information MIDI channels 1-16 1-16 Note numbers 0-127 0-127 Program change 0-127 0-127 Bank Select response? (Yes/No) No No If yes, list banks utilized in remarks column Modes supported: Mode 1: Omni-On, Poly (Yes/No) Mode 2: Omni-On, Mono (Yes/No) Mode 3: Omni-Off, Poly (Yes/No) No No Mode 4: Omni-Off, Mono (Yes/No) Multi Mode (Yes/No) Note-On Velocity (Yes/No) Yes No Note-Off Velocity (Yes/No) No No Channel Aftertouch (Yes/No) No No Poly (Key) Aftertouch (Yes/No) No No Pitch Bend (Yes/No) Yes No MIDI CC (Yes/No) Yes No Active Sensing (Yes/No) No No System Reset (Yes/No) Yes No Tune Request (Yes/No) No No Universal System Exclusive: Sample Dump Standard (Yes/No) Device Inquiry (Yes/No) File Dump (Yes/No) MIDI Tuning (Yes/No) Master Volume (Yes/No) Master Balance (Yes/No) Notation Information (Yes/No) Turn GM1 System On (Yes/No) No No Turn GM2 System On (Yes/No) Turn GM System Off (Yes/No) DLS-1 (Yes/No) File Reference (Yes/No) Controller Destination (Yes/No) Key-based Instrument Ctrl (Yes/No) Master Fine/Coarse Tune (Yes/No) Other Universal System Exclusive Manufacturer or Non-Commercial System Exclusive Yes Yes NRPNs (Yes/No) No No RPN 00 (Pitch Bend Sensitivity) (Yes/No) RPN 01 (Channel Fine Tune) (Yes/No) RPN 02 (Channel Coarse Tune) (Yes/No) No No RPN 03 (Tuning Program Select) (Yes/No) RPN 04 (Tuning Bank Select) (Yes/No) RPN 05 (Modulation Depth Range) (Yes/No) 2. MIDI Timing and Synchronization MIDI Clock (Yes/No) No Yes Song Position Pointer (Yes/No) No Yes Song Select (Yes/No) No No Start (Yes/No) Continue (Yes/No) No Yes Stop (Yes/No) MIDI Time Code (Yes/No) No No MIDI Machine Control (Yes/No) No No MIDI Show Control (Yes/No) No No If yes, MSC Level supported 3. Extensions Compatibility General MIDI compatible? (Level(s)/No) No No Is GM default power-up mode? (Level/No) DLS compatible? (Levels(s)/No) No No (DLS File Type(s)/No) Standard MIDI Files (Type(s)/No) No No XMF Files (Type(s)/No) No No SP-MIDI compatible? (Yes/No) No No 11
  • 14.
  • 15.