SlideShare una empresa de Scribd logo
1 de 28
Descargar para leer sin conexión
ASSEMBLY INSTRUCTIONS                                                              GABLE ROOF 88 DD
REVISION A


 NOTES
BEFORE COMMENCING SHED ASSEMBLY, CHECK ALL PARTS. IF THERE IS A DISCREPANCY, PLEASE CONTACT
GARDENSHEDS.COM.AU (SEE REAR OF INSTRUCTION BOOK)

DO NOT ASSEMBLE IN WINDY CONDITIONS                              READ INSTRUCTIONS FIRST   2 PERSON ASSEMBLY


                                                                         1ST
THE MANUFACTURERS CANNOT BE HELD RESPONSIBLE FOR ANY CONSEQUENCES DUE TO SHEDS THAT ARE NOT
INSTALLED PER INSTRUCTIONS OR FOR DAMAGE DUE TO WEATHER CONDITIONS, ACTS OF GOD OR FOR SHEDS THAT
ARE LEFT PARTIALLY ASSEMBLED OVERNIGHT. PARTS MAY CONTAIN SHARP EDGES & CORNERS. CARE MUST BE TAKEN
WHEN HANDLING VARIOUS PIECES TO AVOID A MISHAP, FOR SAFETY SAKE, PLEASE USE A PAIR OF WORK GLOVES, EYE
PROTECTION & PROTECTIVE CLOTHING WHEN ASSEMBLING OR PERFORMING ANY MAINTENANCE ON THE BUILDING.

Subject to changes © Versatile Buildings (Australia) Pty. Ltd.
TOOLS REQUIRED


                                               Measuring Tape
    Electric Drill       Cordless Drill                            Screwdrivers           8mm Masonry
                                                                                            Drill Bit


 Shifting Spanner                                                  Rubber Mallet
                        Builders Pencil                                                  Sturdy Ladder
                                                  Tin Snips
                                                                                        (two if possible)
                                                (some models
                                                    only)


      Gloves          Protective Eyewear


HANDY HINTS FOR CONSTRUCTION


 Read instructions and check parts carefully         Please wear safety gloves and glasses at all
 before assembling the shed.                         times to protect against sharp metal edges.


 Do not assemble in windy conditions as panels       Do not back fill against the shed as this will
 may be difficult to handle and damage may result.   result in corrosion. Allow drainage from the site.


                         MOST PILOT HOLES ARE PRE-PUNCHED AND IN THIS CASE DRILLING
                         HOLES IS NOT NECESSARY, HOWEVER SOME PILOT HOLES NEED TO BE
                         DRILLED WITH THE INCLUDED 2.5MM DRILL BIT WHERE INDICATED


                                                                                                 PAGE 2
PARTS LIST

PRODUCT NUMBERS                                        J
                                    PRODUCT ID
   A1          A2          A3       Length             1586mm
   A4          A5          A6
                                    Quantity                4
   A7          A8
Quantity (total)                8   Description:
                                    Door Boxing
Description:
Left Gable Wall Panel

PRODUCT NUMBERS                                        K
                                    PRODUCT ID
   B1          B2          B3       Length             995mm
   B4          B5          B6
                                    Quantity               2
                                                           4
   B7          B8
Quantity (total)                8   Description:
                                    Door Bracing
Description:
Right Gable Wall Panel

                                                       L
                                    PRODUCT ID
                       C
PRODUCT ID
                                    Length
Length                                                 1591mm
                      1680mm
                                    Quantity
Quantity                                                    1
                           12
                                    Description:
Description:
                                    Door Seal
Wall Panel


                                                       M, N
                                    PRODUCT ID
                       E
PRODUCT ID
                                    Length (spliced) 2785mm
Length                1484mm
                                    Quantity
Quantity                                                  6
                           16
                                    Description:
Description:
                                    Top/Bottom Front/Rear
Roof Panel
                                    Channel,
                                    Side Channel Bottom

                       F
PRODUCT ID                                             O
                                    PRODUCT ID
Length                              Length
                      1620mm                           1441mm
Quantity                            Quantity
                           4                                2
Description:                        Description:
Door Panel Side (partially slit)    Side Channel Top


                       H
PRODUCT ID                                             P
                                    PRODUCT ID
Length                              Length
                       674mm                           1441mm
Quantity                            Quantity
                           4                                2
Description:                        Description:
Door Frame Top/Bottom               Side Channel Top


                       I                               Q
PRODUCT ID                          PRODUCT ID
Length                              Length
                      1622mm                           1680mm
Quantity                            Quantity
                           4                                2
Description:                        Description:
Door Frame Side                     Door Jamb


                                                                PAGE 3
PARTS LIST

                     R
PRODUCT ID
                              Quantity
Length                                                 400
                     1367mm
Quantity                  1   Description:
                              Self Tapping Screws - Silver
Description:
Bottom Door Spacer


                     S
PRODUCT ID
                              Quantity
Length                                                       1
                     1367mm
Quantity                  1   Description:
                              2.5mm Drill Bit
Description:
Top Door Spacer


                     T
PRODUCT ID
Length                        Quantity                       1
                     1364mm
Quantity                  2   Description:
                              Clip Nut
Description:
Ridge Beam


                     T
PRODUCT ID
Length                        Quantity
                     1710mm                                  4
Quantity                  2   Description:
                              Hinges (offset)
Description:
Ridge Beam


                     U
PRODUCT ID
Length                        Quantity
                     708mm                                   2
Quantity                 4    Description:
                              Door Plate
Description:
Ridge Cap


                     V
PRODUCT NO
Length (spliced)              Quantity
                     2785mm                                  3
Quantity                  2   Description:
                              Padbolt
Description:
Gutter Trim


                     W
PRODUCT ID
Length                        Quantity
                     1488mm                                  3
Quantity                  4   Description:
                              Keeper
Description:
Roof Angle


                                                                 PAGE 4
PARTS LIST


Quantity                        Quantity             2
                            2
                                Description:
Description:
                                Ridge Beam Bracket
Plastic Washer and Screw
Cap Sheet


Quantity                        Quantity
                            4                        10
Description:                    Masonry Anchor
Plastic Edge Protector


Quantity                    4
Description:
Corner Bracket


Quantity                    1
Phillips Head Bit


Quantity                    6
Description:
55mm Bracket


Quantity                   12
Description:
Bolt 3/16”


Quantity                   12
Description:
Nut 3/16”


                                                          PAGE 5
FOUNDATION


                                                                    75


                                                75mm
                                                                      m
                                                                       m


                          Recommended
                          edge thickening


                                                                                 130mm
                                                                                         150mm
                                                                 15
                                                                   0m
                                                                     m

 Recommended slab rebate detail
 Although not required, it is strongly recommended that, to avoid water leakage around the base of your
 shed, a rebate be cast into the slab. This will allow the shed to sit below the slab level and prevent water
 from reaching the upper level of the slab.


                                       TH
                                  ID
                              W


                               DE
                                   PT
                                        H


                                                                             Front side of shed
 Slab Details

 Your garden shed must be erected on a solid, level and square foundation. We strongly recommend you
 pour a concrete slab 75mm thick, reinforced with SL62 mesh (minimum) using dimensions from the
 table below.
                                                                      *Masonry anchors are supplied*

         SHED CODE                             OUTER SLAB SIZE                                   ANCHORS
                                                 width x depth                                   M8 x 40mm

                                            2885mm x 2885mm                                         10
                88

                                                                                                      PAGE 6
FRONT WALL PANEL


                                                                 M
                                                                                              M


      If you are having trouble
      screwing the channel to
     the sheets, chock behind
              the hole .

                                             Large Rib


                                                                                                               Large Rib
                                                                     Q                    Q
                    Wall t Outside
                       e
                    She

                     l
                   ne
                 an
               Ch

                                                         C   C                                    C      C
      Ensure that the small lip
      of the channel is to the
        outside of the shed.                                     M
                                                                                              M
                                      Overlap the top and bottom M channels by 130mm. Fit the top and bottom
       Large Rib          Small Rib
                                      channel and door jambs to the wall panels. Ensure the large rib on the
                                      sheets is to the left on the left side of the door and to the right on the right
                                      side of the door. Also ensure the channel is flush with the edge of the
                                      sheets. Do not screw the ends of the channel to the sheets at this point


    Notched ends are orientated to the                                        Large Lip overlaps Small
    outer edges of the panel                                                  Lip when fastening sheet
                                                                                      to sheet
1
                                                                   Do not
                                                                 screw here
                          M                                                                   M
                                                                     yet


                   Top and bottom door jamb connection.
           M                                                         M
2


                    Q                                                           Q


                                                                                                             PAGE 7
FRONT WALL PANEL


                                           3
                                                                S


                                                                R


                                           4


    Fit the top door spacer and the bottom door spacer to the front wall panel as shown. Some pilot holes
    may need to be drilled with the included 2.5mm drill bit


            M
3
                                                               M


                Q                                                   Q
                                       S                                                      S


                    M
4
                                                               M


                                                                                       R
                    Q                                                   Q

                                               R


                                                                                                  PAGE 8
FRONT WALL PANEL


5
7


    Drill pilot holes through the door jambs and top door spacers with the 2.5mm drill bit and fasten with self
    tapping screws spaced as shown above.


                                                                                                     PAGE 9
REAR WALL PANEL


                                                                M
                                                                                            M

       If you are having trouble
       screwing the channel to
      the sheets, chock behind
               the hole .

                                            Large Rib


                                                                                                          Small Rib
                   Wall t Outside
                      e
                   She

                     l
                   ne
                 an
               Ch


                                                        C   C       C     C      C      C       C     C
      Ensure that the small lip
      of the channel is to the
        outside of the shed.
                                                                M
                                                                                            M
       Large Rib         Small Rib
                                     Overlap top and bottom channel by 130mm. Fit the top and bottom
                                     channel to the wall panels. Ensure the channel is flush with the edge of
                                     the sheets. Do not screw the ends of the channel to the sheets at this
                                     point.


1


    Lay the wall panels out with the large rib                  Screw the wall panels in the centre
    overlapping the small.                                      of the rib as shown.


    Notched ends are orientated to the
    outer edges of the panel
2
                                                                  Do not
                                                                screw here
                                                                    yet


                                                                                                      PAGE 10
GABLE WALL PANELS


                                                                  P                         O


       If you are having trouble
       screwing the channel to
      the sheets, chock behind
               the hole .


                   Wall t Outside
                      e
                   She
                                                       A1    A3       A5   A7   A8     A6       A4   A2
                     l
                   ne
                 an
               Ch                                                                               B4
                                                       B1    B3       B5   B7   B8     B6            B2

      Ensure that the small lip
      of the channel is to the
                                                                  N
        outside of the shed.                                                                N

                                                     Left Gable Panel Labels,       Right Gable Panel Labels
                                                 A                              B
       Large Rib         Small Rib

                                     Overlap bottom channel by 130mm. Fit the top and bottom channel to the
                                     wall panels. Ensure the channel is flush with the edge of the sheets. Do
                                     not screw the ends of the channel to the sheets at this point.


1


    Lay the wall panels out with the large rib                Screw the wall panels in the centre
    overlapping the small.                                    of the rib as shown.


    Notched ends are orientated to the
    outer edges of the panel
2
                                                                Do not
                                                              screw here
                                                                  yet


                                                                                                     PAGE 11
FIT RIDGE BEAM BRACKETS

    NOTE: The diagram below shows a 66 gable wall. The assembly process is the same for all gable sizes.


    Fix the ridge beam brackets to the top of the gables using six (6) screws as shown below.


                                                               View from inside the shed.
    Secure brackets with six (6) screws as
    shown on both gable walls.
1


                                                                                                           PAGE 12
STAND AND JOIN WALL PANELS

    NOTE: The diagram below shows a 66 gable roof shed. The assembly process is the same for all gable roof sizes.


     Overlap corners of panels
    as shown and drill pilot hole
     midway along the corner
     and fix with self tap screw


    Once the four wall panels are assembled, they can now be stood and fixed together. Fix using the
    corner brackets and screws as shown below. Fix the front panel last. N.B when assembling large wall
    models, eg. 7 panels width and above, extra care should be taken, with person two providing adequate
    support to stop the wall from distorting.


1


    Screw the wall panels together at the
    base and top as shown.


                                        Screw corner
                                        joins at the mid
                                        point of the
2                                       shed as shown.


                                                                      Drill pilot holes and screw corner
                                                                 brackets into all four corners inside the shed.


                                                                                                         PAGE 13
ASSEMBLE AND FIT RIDGE BEAM

    NOTE: The diagram below shows a 66 gable roof shed. The assembly process is the same for all gable roof sizes.


                                                                                                    The pre punched
                                                                                                    roof holes must
                                                                                                    be to the top of
                                                                                                    the assmebled
                                                                                                    ridge beam


    Assemble the ridge beam on the ground as shown below.


                                                                             9 Panel - 3094mm
1
                                                                                 8 Panel - 2748mm


                                        T
                                                                                     7 Panel - 2402mm


                       T
                                                                                          6 Panel - 2056mm


                                                               T


                                               T


    Overlap the two sides of the ridge beam securing them with six (6) screws per side. Ensure the
    pre-drilled roof panel holes are to the top. Screw the two sides together using the diagram top right as a
    guide. Note: The two halves of the ridge beam should be fixed at 346mm intervals.


                                                                                                             PAGE 14
ASSEMBLE AND FIT RIDGE BEAM

    NOTE: The diagram below shows a 66 gable roof shed. The assembly process is the same for all gable roof sizes.


    Fit the ridge beam to the two brackets as shown below.


2


    Fit the ridge beam to the two brackets using three (3) screws on either side of the bracket.


                                                                                                         PAGE 15
FIT ROOF AND TRIMS

    Screw the door side of the roof on first (do not start the rear side yet). Work from right to left ensuring
    the large rib is over the small rib.
1


                                                                             b
                                                                           Ri
                                                                         e
                                                                       rg
                                                                     La
              Screw the bottom of the sheet to the
              front top frame using two (2) screws


    Fix the first two (2) sheets of the rear side then
    place the first ridge cap (do not screw at this
    stage).
2


                                                                                                      PAGE 16
FIT ROOF AND TRIMS

    Fix the next two (2) sheets then fit the second   Pilot holes need to be drilled to secure the ridge
    ridge cap. Fix this as shown to the right.        cap to the lips of the roof sheets.
3                                                     Finish the roof in the same manner. (N.B. some
                                                      pilot holes need to be drilled into the ridge caps)


    Fit gutter trim

4
                                 V
                                                        Do not                        V
                                                      screw here
                                                          yet


    Push the roof trim into one end
    first and then manipulate the roof
    trim to fit into the other.
2
                                                                        tors
                                                                   otec
                                                                pr
                                                            dge
                          W
                                                       Fit e
                                         V

                                                                                   Fix the trim using
    Trim the corner of                                                             screws as shown. Use
    the trim if desired                                                            one screw per panel
                                                      Drill pilot holes first


                                                                                              PAGE 17
ASSEMBLE DOOR


                                 H

                                                                  I

                                                         F


                                                   F

                                             I


                                                                            H
                 Small Lip


                                                                                       X2
                 Large Lip


1
                                                                       F
                    F


                                                                                          F
                                         F


    Both of the door sheets come with one rib
       h fh d            h                                   Screw the sheets in the centre.
    partially slit. Break them off and discard them.


    Frames slide under the sheet as shown. Ensure      Fix door frames with a screw in each corner.
    the small lip of the frame is to the top.          Ensure that the big hole sits over the small.
2
                                     H                                                   H


                                                                       I


                                                                                               PAGE 18
ASSEMBLE DOOR


                                               2
                                                    H                     J
                    1                                                                    I
                                                                      J


                                                                  I
         H                      J          I                  L
                            J                                                                            H


                        I

                                                         H


                                                                                                 J
                                                                                                             H
    Fix the frame H to the sheeting with screws through the small channel lips               L
    into the large sheeting ribs. Door boxing must be fitted to the door frames
                                                                                                     I
    and a door seal fitted on the second door. The seal fits in between the frame
    and boxing as shown to the right.


                                                          Leave an even gap at
                                                          both ends of the
                                                          boxing.
3                                                                                    I

                                                                                                 J


                                                          Place large lip        H
                                                          of J over the small
                                                          lip of I as shown


                                                             use the pre-punched
                                                             holes in the door boxing
                                                             as a guide to drill pilot
                                                             holes in the door seal
                        J
          I


    Fix each of the door boxing in place
    using six (6) screws.
                                                          Fix door seal on door number 2


                                                                                                     PAGE 19
ASSEMBLE DOOR


                                          K


                                                                                     K

                        K


                                                                 K


    Flip the door assembly’s over and fix the door frames with screws evenly spaced as shown above. Door
    bracing will also need to be fitted to the doors to ensure sturdiness.


                                                          Drill pilot hole for top and bottom bracing joint,
                    K                                     and fix with self tapping screw.
4
                                                                  H
                                          K
             I


    Drill pilot holes for
    door bracing centre joint                                     K
    and fix with self tapping screw                                                                   I


5
                                                        Use the 2.5mm drill bit to drill pilot holes through
                                                        the door bracing into the door sheeting.
                                                        DO NOT FASTEN BRACING YET


                                                                                                 PAGE 20
ASSEMBLE DOOR


                                                                            73
                                                                              m
                                                                               m

                                                                                           2

                                                                                                            73
                                                                                                              m
                                                                                                               m


         73
           m
            m


                       1
                                   73
                                     m
                                      m


    Flip the door back over to the front side facing up. Using the pilot holes drilled before, fix the door
    bracing from the front with self tapping screws.


                                Drill a 2.5mm pilot hole
                                 through the door plate
                              and into the sheeting and
6                              channel at the mid point
                                   and secure with self
                                         tapping screws


                                                             Fix the padbolt onto door 1 in the same manner


7
                                           J

                                       I
                                                                                                        J
                                                       H


                                                                                                    I
    Hinges are fitted to the pre-punched holes
    on the door frames.                                      Fit using two self tapping screws.


                                                                                                        PAGE 21
HANG DOOR

    NOTE: The diagram below shows a 64 flat roof shed. The assembly process is the same for all sheds.


         Fit the doors by fixing the hinges to the pre-drilled holes in
         the door jambs. Fit the padbolt and keeper to the front of
         the doors. To finish, fix padbolts to the inside, top and
         bottom of the door with the seal attached.


1


2

                                                                              Drill pilot holes to accommodate
                                                                              the padbolt keeper and then fix
                                                                              with self tapping screws


    Drill pilot holes                                          Drill pilot holes into the
    into the inside of                                         inside of the front wall
    the door frame of                                          bottom channel to
3   the second door                                            accommodate the
    next to the door                                           padbolt keeper and
    seal and then fix                                          then fix with self
    with self tapping                                          tapping screws
    screws.


                                                                                                         PAGE 22
BOLT DOWN


    Bolt the shed down through the four corner brackets as shown. Ensure the shed is square.


1
                                                                 50mm


2
                M8 x 40


                                                                                               PAGE 23
BOLT DOWN


    Bolt the shed down through the angle brackets as shown.


                               Drill the hole for the
                               anchor to 50mm
                               depth and then using
1                              a 5mm drill bit, drill
                               the holes through the
                               sheeting to attach
                               the bracket to the
                               shed.
                                                                50mm


                                                                                  Tighten the anchor
                                                                                  then use the two M4.7
                                                                                  bolts provided to fix
2                  M8 x 40
                                                                                  the bracket to the
                                                                                  shed.


                                                        Fix the brackets to the
                                                        panels using the
                                                        supplied nuts and bolts


                                                                                            PAGE 24
NOTES


        PAGE 25
NOTES


        PAGE 26
NOTES


        PAGE 27
ENQUIRIES & TECHNICAL ASSISTANCE
      info@gardensheds.com.au

Más contenido relacionado

Último

WSMM Media and Entertainment Feb_March_Final.pdf
WSMM Media and Entertainment Feb_March_Final.pdfWSMM Media and Entertainment Feb_March_Final.pdf
WSMM Media and Entertainment Feb_March_Final.pdfJamesConcepcion7
 
Strategic Project Finance Essentials: A Project Manager’s Guide to Financial ...
Strategic Project Finance Essentials: A Project Manager’s Guide to Financial ...Strategic Project Finance Essentials: A Project Manager’s Guide to Financial ...
Strategic Project Finance Essentials: A Project Manager’s Guide to Financial ...Aggregage
 
Fordham -How effective decision-making is within the IT department - Analysis...
Fordham -How effective decision-making is within the IT department - Analysis...Fordham -How effective decision-making is within the IT department - Analysis...
Fordham -How effective decision-making is within the IT department - Analysis...Peter Ward
 
20200128 Ethical by Design - Whitepaper.pdf
20200128 Ethical by Design - Whitepaper.pdf20200128 Ethical by Design - Whitepaper.pdf
20200128 Ethical by Design - Whitepaper.pdfChris Skinner
 
Technical Leaders - Working with the Management Team
Technical Leaders - Working with the Management TeamTechnical Leaders - Working with the Management Team
Technical Leaders - Working with the Management TeamArik Fletcher
 
The McKinsey 7S Framework: A Holistic Approach to Harmonizing All Parts of th...
The McKinsey 7S Framework: A Holistic Approach to Harmonizing All Parts of th...The McKinsey 7S Framework: A Holistic Approach to Harmonizing All Parts of th...
The McKinsey 7S Framework: A Holistic Approach to Harmonizing All Parts of th...Operational Excellence Consulting
 
Horngren’s Financial & Managerial Accounting, 7th edition by Miller-Nobles so...
Horngren’s Financial & Managerial Accounting, 7th edition by Miller-Nobles so...Horngren’s Financial & Managerial Accounting, 7th edition by Miller-Nobles so...
Horngren’s Financial & Managerial Accounting, 7th edition by Miller-Nobles so...ssuserf63bd7
 
Guide Complete Set of Residential Architectural Drawings PDF
Guide Complete Set of Residential Architectural Drawings PDFGuide Complete Set of Residential Architectural Drawings PDF
Guide Complete Set of Residential Architectural Drawings PDFChandresh Chudasama
 
How To Simplify Your Scheduling with AI Calendarfly The Hassle-Free Online Bo...
How To Simplify Your Scheduling with AI Calendarfly The Hassle-Free Online Bo...How To Simplify Your Scheduling with AI Calendarfly The Hassle-Free Online Bo...
How To Simplify Your Scheduling with AI Calendarfly The Hassle-Free Online Bo...SOFTTECHHUB
 
Types of Cyberattacks - ASG I.T. Consulting.pdf
Types of Cyberattacks - ASG I.T. Consulting.pdfTypes of Cyberattacks - ASG I.T. Consulting.pdf
Types of Cyberattacks - ASG I.T. Consulting.pdfASGITConsulting
 
Church Building Grants To Assist With New Construction, Additions, And Restor...
Church Building Grants To Assist With New Construction, Additions, And Restor...Church Building Grants To Assist With New Construction, Additions, And Restor...
Church Building Grants To Assist With New Construction, Additions, And Restor...Americas Got Grants
 
Driving Business Impact for PMs with Jon Harmer
Driving Business Impact for PMs with Jon HarmerDriving Business Impact for PMs with Jon Harmer
Driving Business Impact for PMs with Jon HarmerAggregage
 
trending-flavors-and-ingredients-in-salty-snacks-us-2024_Redacted-V2.pdf
trending-flavors-and-ingredients-in-salty-snacks-us-2024_Redacted-V2.pdftrending-flavors-and-ingredients-in-salty-snacks-us-2024_Redacted-V2.pdf
trending-flavors-and-ingredients-in-salty-snacks-us-2024_Redacted-V2.pdfMintel Group
 
1911 Gold Corporate Presentation Apr 2024.pdf
1911 Gold Corporate Presentation Apr 2024.pdf1911 Gold Corporate Presentation Apr 2024.pdf
1911 Gold Corporate Presentation Apr 2024.pdfShaun Heinrichs
 
EUDR Info Meeting Ethiopian coffee exporters
EUDR Info Meeting Ethiopian coffee exportersEUDR Info Meeting Ethiopian coffee exporters
EUDR Info Meeting Ethiopian coffee exportersPeter Horsten
 
WSMM Technology February.March Newsletter_vF.pdf
WSMM Technology February.March Newsletter_vF.pdfWSMM Technology February.March Newsletter_vF.pdf
WSMM Technology February.March Newsletter_vF.pdfJamesConcepcion7
 
Interoperability and ecosystems: Assembling the industrial metaverse
Interoperability and ecosystems:  Assembling the industrial metaverseInteroperability and ecosystems:  Assembling the industrial metaverse
Interoperability and ecosystems: Assembling the industrial metaverseSiemens
 
TriStar Gold Corporate Presentation - April 2024
TriStar Gold Corporate Presentation - April 2024TriStar Gold Corporate Presentation - April 2024
TriStar Gold Corporate Presentation - April 2024Adnet Communications
 
business environment micro environment macro environment.pptx
business environment micro environment macro environment.pptxbusiness environment micro environment macro environment.pptx
business environment micro environment macro environment.pptxShruti Mittal
 
Memorándum de Entendimiento (MoU) entre Codelco y SQM
Memorándum de Entendimiento (MoU) entre Codelco y SQMMemorándum de Entendimiento (MoU) entre Codelco y SQM
Memorándum de Entendimiento (MoU) entre Codelco y SQMVoces Mineras
 

Último (20)

WSMM Media and Entertainment Feb_March_Final.pdf
WSMM Media and Entertainment Feb_March_Final.pdfWSMM Media and Entertainment Feb_March_Final.pdf
WSMM Media and Entertainment Feb_March_Final.pdf
 
Strategic Project Finance Essentials: A Project Manager’s Guide to Financial ...
Strategic Project Finance Essentials: A Project Manager’s Guide to Financial ...Strategic Project Finance Essentials: A Project Manager’s Guide to Financial ...
Strategic Project Finance Essentials: A Project Manager’s Guide to Financial ...
 
Fordham -How effective decision-making is within the IT department - Analysis...
Fordham -How effective decision-making is within the IT department - Analysis...Fordham -How effective decision-making is within the IT department - Analysis...
Fordham -How effective decision-making is within the IT department - Analysis...
 
20200128 Ethical by Design - Whitepaper.pdf
20200128 Ethical by Design - Whitepaper.pdf20200128 Ethical by Design - Whitepaper.pdf
20200128 Ethical by Design - Whitepaper.pdf
 
Technical Leaders - Working with the Management Team
Technical Leaders - Working with the Management TeamTechnical Leaders - Working with the Management Team
Technical Leaders - Working with the Management Team
 
The McKinsey 7S Framework: A Holistic Approach to Harmonizing All Parts of th...
The McKinsey 7S Framework: A Holistic Approach to Harmonizing All Parts of th...The McKinsey 7S Framework: A Holistic Approach to Harmonizing All Parts of th...
The McKinsey 7S Framework: A Holistic Approach to Harmonizing All Parts of th...
 
Horngren’s Financial & Managerial Accounting, 7th edition by Miller-Nobles so...
Horngren’s Financial & Managerial Accounting, 7th edition by Miller-Nobles so...Horngren’s Financial & Managerial Accounting, 7th edition by Miller-Nobles so...
Horngren’s Financial & Managerial Accounting, 7th edition by Miller-Nobles so...
 
Guide Complete Set of Residential Architectural Drawings PDF
Guide Complete Set of Residential Architectural Drawings PDFGuide Complete Set of Residential Architectural Drawings PDF
Guide Complete Set of Residential Architectural Drawings PDF
 
How To Simplify Your Scheduling with AI Calendarfly The Hassle-Free Online Bo...
How To Simplify Your Scheduling with AI Calendarfly The Hassle-Free Online Bo...How To Simplify Your Scheduling with AI Calendarfly The Hassle-Free Online Bo...
How To Simplify Your Scheduling with AI Calendarfly The Hassle-Free Online Bo...
 
Types of Cyberattacks - ASG I.T. Consulting.pdf
Types of Cyberattacks - ASG I.T. Consulting.pdfTypes of Cyberattacks - ASG I.T. Consulting.pdf
Types of Cyberattacks - ASG I.T. Consulting.pdf
 
Church Building Grants To Assist With New Construction, Additions, And Restor...
Church Building Grants To Assist With New Construction, Additions, And Restor...Church Building Grants To Assist With New Construction, Additions, And Restor...
Church Building Grants To Assist With New Construction, Additions, And Restor...
 
Driving Business Impact for PMs with Jon Harmer
Driving Business Impact for PMs with Jon HarmerDriving Business Impact for PMs with Jon Harmer
Driving Business Impact for PMs with Jon Harmer
 
trending-flavors-and-ingredients-in-salty-snacks-us-2024_Redacted-V2.pdf
trending-flavors-and-ingredients-in-salty-snacks-us-2024_Redacted-V2.pdftrending-flavors-and-ingredients-in-salty-snacks-us-2024_Redacted-V2.pdf
trending-flavors-and-ingredients-in-salty-snacks-us-2024_Redacted-V2.pdf
 
1911 Gold Corporate Presentation Apr 2024.pdf
1911 Gold Corporate Presentation Apr 2024.pdf1911 Gold Corporate Presentation Apr 2024.pdf
1911 Gold Corporate Presentation Apr 2024.pdf
 
EUDR Info Meeting Ethiopian coffee exporters
EUDR Info Meeting Ethiopian coffee exportersEUDR Info Meeting Ethiopian coffee exporters
EUDR Info Meeting Ethiopian coffee exporters
 
WSMM Technology February.March Newsletter_vF.pdf
WSMM Technology February.March Newsletter_vF.pdfWSMM Technology February.March Newsletter_vF.pdf
WSMM Technology February.March Newsletter_vF.pdf
 
Interoperability and ecosystems: Assembling the industrial metaverse
Interoperability and ecosystems:  Assembling the industrial metaverseInteroperability and ecosystems:  Assembling the industrial metaverse
Interoperability and ecosystems: Assembling the industrial metaverse
 
TriStar Gold Corporate Presentation - April 2024
TriStar Gold Corporate Presentation - April 2024TriStar Gold Corporate Presentation - April 2024
TriStar Gold Corporate Presentation - April 2024
 
business environment micro environment macro environment.pptx
business environment micro environment macro environment.pptxbusiness environment micro environment macro environment.pptx
business environment micro environment macro environment.pptx
 
Memorándum de Entendimiento (MoU) entre Codelco y SQM
Memorándum de Entendimiento (MoU) entre Codelco y SQMMemorándum de Entendimiento (MoU) entre Codelco y SQM
Memorándum de Entendimiento (MoU) entre Codelco y SQM
 

Destacado

2024 State of Marketing Report – by Hubspot
2024 State of Marketing Report – by Hubspot2024 State of Marketing Report – by Hubspot
2024 State of Marketing Report – by HubspotMarius Sescu
 
Everything You Need To Know About ChatGPT
Everything You Need To Know About ChatGPTEverything You Need To Know About ChatGPT
Everything You Need To Know About ChatGPTExpeed Software
 
Product Design Trends in 2024 | Teenage Engineerings
Product Design Trends in 2024 | Teenage EngineeringsProduct Design Trends in 2024 | Teenage Engineerings
Product Design Trends in 2024 | Teenage EngineeringsPixeldarts
 
How Race, Age and Gender Shape Attitudes Towards Mental Health
How Race, Age and Gender Shape Attitudes Towards Mental HealthHow Race, Age and Gender Shape Attitudes Towards Mental Health
How Race, Age and Gender Shape Attitudes Towards Mental HealthThinkNow
 
AI Trends in Creative Operations 2024 by Artwork Flow.pdf
AI Trends in Creative Operations 2024 by Artwork Flow.pdfAI Trends in Creative Operations 2024 by Artwork Flow.pdf
AI Trends in Creative Operations 2024 by Artwork Flow.pdfmarketingartwork
 
PEPSICO Presentation to CAGNY Conference Feb 2024
PEPSICO Presentation to CAGNY Conference Feb 2024PEPSICO Presentation to CAGNY Conference Feb 2024
PEPSICO Presentation to CAGNY Conference Feb 2024Neil Kimberley
 
Content Methodology: A Best Practices Report (Webinar)
Content Methodology: A Best Practices Report (Webinar)Content Methodology: A Best Practices Report (Webinar)
Content Methodology: A Best Practices Report (Webinar)contently
 
How to Prepare For a Successful Job Search for 2024
How to Prepare For a Successful Job Search for 2024How to Prepare For a Successful Job Search for 2024
How to Prepare For a Successful Job Search for 2024Albert Qian
 
Social Media Marketing Trends 2024 // The Global Indie Insights
Social Media Marketing Trends 2024 // The Global Indie InsightsSocial Media Marketing Trends 2024 // The Global Indie Insights
Social Media Marketing Trends 2024 // The Global Indie InsightsKurio // The Social Media Age(ncy)
 
Trends In Paid Search: Navigating The Digital Landscape In 2024
Trends In Paid Search: Navigating The Digital Landscape In 2024Trends In Paid Search: Navigating The Digital Landscape In 2024
Trends In Paid Search: Navigating The Digital Landscape In 2024Search Engine Journal
 
5 Public speaking tips from TED - Visualized summary
5 Public speaking tips from TED - Visualized summary5 Public speaking tips from TED - Visualized summary
5 Public speaking tips from TED - Visualized summarySpeakerHub
 
ChatGPT and the Future of Work - Clark Boyd
ChatGPT and the Future of Work - Clark Boyd ChatGPT and the Future of Work - Clark Boyd
ChatGPT and the Future of Work - Clark Boyd Clark Boyd
 
Getting into the tech field. what next
Getting into the tech field. what next Getting into the tech field. what next
Getting into the tech field. what next Tessa Mero
 
Google's Just Not That Into You: Understanding Core Updates & Search Intent
Google's Just Not That Into You: Understanding Core Updates & Search IntentGoogle's Just Not That Into You: Understanding Core Updates & Search Intent
Google's Just Not That Into You: Understanding Core Updates & Search IntentLily Ray
 
Time Management & Productivity - Best Practices
Time Management & Productivity -  Best PracticesTime Management & Productivity -  Best Practices
Time Management & Productivity - Best PracticesVit Horky
 
The six step guide to practical project management
The six step guide to practical project managementThe six step guide to practical project management
The six step guide to practical project managementMindGenius
 
Beginners Guide to TikTok for Search - Rachel Pearson - We are Tilt __ Bright...
Beginners Guide to TikTok for Search - Rachel Pearson - We are Tilt __ Bright...Beginners Guide to TikTok for Search - Rachel Pearson - We are Tilt __ Bright...
Beginners Guide to TikTok for Search - Rachel Pearson - We are Tilt __ Bright...RachelPearson36
 

Destacado (20)

2024 State of Marketing Report – by Hubspot
2024 State of Marketing Report – by Hubspot2024 State of Marketing Report – by Hubspot
2024 State of Marketing Report – by Hubspot
 
Everything You Need To Know About ChatGPT
Everything You Need To Know About ChatGPTEverything You Need To Know About ChatGPT
Everything You Need To Know About ChatGPT
 
Product Design Trends in 2024 | Teenage Engineerings
Product Design Trends in 2024 | Teenage EngineeringsProduct Design Trends in 2024 | Teenage Engineerings
Product Design Trends in 2024 | Teenage Engineerings
 
How Race, Age and Gender Shape Attitudes Towards Mental Health
How Race, Age and Gender Shape Attitudes Towards Mental HealthHow Race, Age and Gender Shape Attitudes Towards Mental Health
How Race, Age and Gender Shape Attitudes Towards Mental Health
 
AI Trends in Creative Operations 2024 by Artwork Flow.pdf
AI Trends in Creative Operations 2024 by Artwork Flow.pdfAI Trends in Creative Operations 2024 by Artwork Flow.pdf
AI Trends in Creative Operations 2024 by Artwork Flow.pdf
 
Skeleton Culture Code
Skeleton Culture CodeSkeleton Culture Code
Skeleton Culture Code
 
PEPSICO Presentation to CAGNY Conference Feb 2024
PEPSICO Presentation to CAGNY Conference Feb 2024PEPSICO Presentation to CAGNY Conference Feb 2024
PEPSICO Presentation to CAGNY Conference Feb 2024
 
Content Methodology: A Best Practices Report (Webinar)
Content Methodology: A Best Practices Report (Webinar)Content Methodology: A Best Practices Report (Webinar)
Content Methodology: A Best Practices Report (Webinar)
 
How to Prepare For a Successful Job Search for 2024
How to Prepare For a Successful Job Search for 2024How to Prepare For a Successful Job Search for 2024
How to Prepare For a Successful Job Search for 2024
 
Social Media Marketing Trends 2024 // The Global Indie Insights
Social Media Marketing Trends 2024 // The Global Indie InsightsSocial Media Marketing Trends 2024 // The Global Indie Insights
Social Media Marketing Trends 2024 // The Global Indie Insights
 
Trends In Paid Search: Navigating The Digital Landscape In 2024
Trends In Paid Search: Navigating The Digital Landscape In 2024Trends In Paid Search: Navigating The Digital Landscape In 2024
Trends In Paid Search: Navigating The Digital Landscape In 2024
 
5 Public speaking tips from TED - Visualized summary
5 Public speaking tips from TED - Visualized summary5 Public speaking tips from TED - Visualized summary
5 Public speaking tips from TED - Visualized summary
 
ChatGPT and the Future of Work - Clark Boyd
ChatGPT and the Future of Work - Clark Boyd ChatGPT and the Future of Work - Clark Boyd
ChatGPT and the Future of Work - Clark Boyd
 
Getting into the tech field. what next
Getting into the tech field. what next Getting into the tech field. what next
Getting into the tech field. what next
 
Google's Just Not That Into You: Understanding Core Updates & Search Intent
Google's Just Not That Into You: Understanding Core Updates & Search IntentGoogle's Just Not That Into You: Understanding Core Updates & Search Intent
Google's Just Not That Into You: Understanding Core Updates & Search Intent
 
How to have difficult conversations
How to have difficult conversations How to have difficult conversations
How to have difficult conversations
 
Introduction to Data Science
Introduction to Data ScienceIntroduction to Data Science
Introduction to Data Science
 
Time Management & Productivity - Best Practices
Time Management & Productivity -  Best PracticesTime Management & Productivity -  Best Practices
Time Management & Productivity - Best Practices
 
The six step guide to practical project management
The six step guide to practical project managementThe six step guide to practical project management
The six step guide to practical project management
 
Beginners Guide to TikTok for Search - Rachel Pearson - We are Tilt __ Bright...
Beginners Guide to TikTok for Search - Rachel Pearson - We are Tilt __ Bright...Beginners Guide to TikTok for Search - Rachel Pearson - We are Tilt __ Bright...
Beginners Guide to TikTok for Search - Rachel Pearson - We are Tilt __ Bright...
 

Gable Roof 88 DD Assembly Instructions

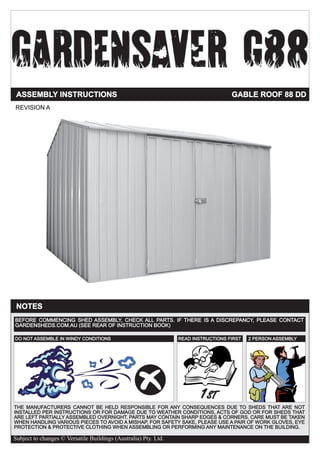
  • 1. ASSEMBLY INSTRUCTIONS GABLE ROOF 88 DD REVISION A NOTES BEFORE COMMENCING SHED ASSEMBLY, CHECK ALL PARTS. IF THERE IS A DISCREPANCY, PLEASE CONTACT GARDENSHEDS.COM.AU (SEE REAR OF INSTRUCTION BOOK) DO NOT ASSEMBLE IN WINDY CONDITIONS READ INSTRUCTIONS FIRST 2 PERSON ASSEMBLY 1ST THE MANUFACTURERS CANNOT BE HELD RESPONSIBLE FOR ANY CONSEQUENCES DUE TO SHEDS THAT ARE NOT INSTALLED PER INSTRUCTIONS OR FOR DAMAGE DUE TO WEATHER CONDITIONS, ACTS OF GOD OR FOR SHEDS THAT ARE LEFT PARTIALLY ASSEMBLED OVERNIGHT. PARTS MAY CONTAIN SHARP EDGES & CORNERS. CARE MUST BE TAKEN WHEN HANDLING VARIOUS PIECES TO AVOID A MISHAP, FOR SAFETY SAKE, PLEASE USE A PAIR OF WORK GLOVES, EYE PROTECTION & PROTECTIVE CLOTHING WHEN ASSEMBLING OR PERFORMING ANY MAINTENANCE ON THE BUILDING. Subject to changes © Versatile Buildings (Australia) Pty. Ltd.
  • 2. TOOLS REQUIRED Measuring Tape Electric Drill Cordless Drill Screwdrivers 8mm Masonry Drill Bit Shifting Spanner Rubber Mallet Builders Pencil Sturdy Ladder Tin Snips (two if possible) (some models only) Gloves Protective Eyewear HANDY HINTS FOR CONSTRUCTION Read instructions and check parts carefully Please wear safety gloves and glasses at all before assembling the shed. times to protect against sharp metal edges. Do not assemble in windy conditions as panels Do not back fill against the shed as this will may be difficult to handle and damage may result. result in corrosion. Allow drainage from the site. MOST PILOT HOLES ARE PRE-PUNCHED AND IN THIS CASE DRILLING HOLES IS NOT NECESSARY, HOWEVER SOME PILOT HOLES NEED TO BE DRILLED WITH THE INCLUDED 2.5MM DRILL BIT WHERE INDICATED PAGE 2
  • 3. PARTS LIST PRODUCT NUMBERS J PRODUCT ID A1 A2 A3 Length 1586mm A4 A5 A6 Quantity 4 A7 A8 Quantity (total) 8 Description: Door Boxing Description: Left Gable Wall Panel PRODUCT NUMBERS K PRODUCT ID B1 B2 B3 Length 995mm B4 B5 B6 Quantity 2 4 B7 B8 Quantity (total) 8 Description: Door Bracing Description: Right Gable Wall Panel L PRODUCT ID C PRODUCT ID Length Length 1591mm 1680mm Quantity Quantity 1 12 Description: Description: Door Seal Wall Panel M, N PRODUCT ID E PRODUCT ID Length (spliced) 2785mm Length 1484mm Quantity Quantity 6 16 Description: Description: Top/Bottom Front/Rear Roof Panel Channel, Side Channel Bottom F PRODUCT ID O PRODUCT ID Length Length 1620mm 1441mm Quantity Quantity 4 2 Description: Description: Door Panel Side (partially slit) Side Channel Top H PRODUCT ID P PRODUCT ID Length Length 674mm 1441mm Quantity Quantity 4 2 Description: Description: Door Frame Top/Bottom Side Channel Top I Q PRODUCT ID PRODUCT ID Length Length 1622mm 1680mm Quantity Quantity 4 2 Description: Description: Door Frame Side Door Jamb PAGE 3
  • 4. PARTS LIST R PRODUCT ID Quantity Length 400 1367mm Quantity 1 Description: Self Tapping Screws - Silver Description: Bottom Door Spacer S PRODUCT ID Quantity Length 1 1367mm Quantity 1 Description: 2.5mm Drill Bit Description: Top Door Spacer T PRODUCT ID Length Quantity 1 1364mm Quantity 2 Description: Clip Nut Description: Ridge Beam T PRODUCT ID Length Quantity 1710mm 4 Quantity 2 Description: Hinges (offset) Description: Ridge Beam U PRODUCT ID Length Quantity 708mm 2 Quantity 4 Description: Door Plate Description: Ridge Cap V PRODUCT NO Length (spliced) Quantity 2785mm 3 Quantity 2 Description: Padbolt Description: Gutter Trim W PRODUCT ID Length Quantity 1488mm 3 Quantity 4 Description: Keeper Description: Roof Angle PAGE 4
  • 5. PARTS LIST Quantity Quantity 2 2 Description: Description: Ridge Beam Bracket Plastic Washer and Screw Cap Sheet Quantity Quantity 4 10 Description: Masonry Anchor Plastic Edge Protector Quantity 4 Description: Corner Bracket Quantity 1 Phillips Head Bit Quantity 6 Description: 55mm Bracket Quantity 12 Description: Bolt 3/16” Quantity 12 Description: Nut 3/16” PAGE 5
  • 6. FOUNDATION 75 75mm m m Recommended edge thickening 130mm 150mm 15 0m m Recommended slab rebate detail Although not required, it is strongly recommended that, to avoid water leakage around the base of your shed, a rebate be cast into the slab. This will allow the shed to sit below the slab level and prevent water from reaching the upper level of the slab. TH ID W DE PT H Front side of shed Slab Details Your garden shed must be erected on a solid, level and square foundation. We strongly recommend you pour a concrete slab 75mm thick, reinforced with SL62 mesh (minimum) using dimensions from the table below. *Masonry anchors are supplied* SHED CODE OUTER SLAB SIZE ANCHORS width x depth M8 x 40mm 2885mm x 2885mm 10 88 PAGE 6
  • 7. FRONT WALL PANEL M M If you are having trouble screwing the channel to the sheets, chock behind the hole . Large Rib Large Rib Q Q Wall t Outside e She l ne an Ch C C C C Ensure that the small lip of the channel is to the outside of the shed. M M Overlap the top and bottom M channels by 130mm. Fit the top and bottom Large Rib Small Rib channel and door jambs to the wall panels. Ensure the large rib on the sheets is to the left on the left side of the door and to the right on the right side of the door. Also ensure the channel is flush with the edge of the sheets. Do not screw the ends of the channel to the sheets at this point Notched ends are orientated to the Large Lip overlaps Small outer edges of the panel Lip when fastening sheet to sheet 1 Do not screw here M M yet Top and bottom door jamb connection. M M 2 Q Q PAGE 7
  • 8. FRONT WALL PANEL 3 S R 4 Fit the top door spacer and the bottom door spacer to the front wall panel as shown. Some pilot holes may need to be drilled with the included 2.5mm drill bit M 3 M Q Q S S M 4 M R Q Q R PAGE 8
  • 9. FRONT WALL PANEL 5 7 Drill pilot holes through the door jambs and top door spacers with the 2.5mm drill bit and fasten with self tapping screws spaced as shown above. PAGE 9
  • 10. REAR WALL PANEL M M If you are having trouble screwing the channel to the sheets, chock behind the hole . Large Rib Small Rib Wall t Outside e She l ne an Ch C C C C C C C C Ensure that the small lip of the channel is to the outside of the shed. M M Large Rib Small Rib Overlap top and bottom channel by 130mm. Fit the top and bottom channel to the wall panels. Ensure the channel is flush with the edge of the sheets. Do not screw the ends of the channel to the sheets at this point. 1 Lay the wall panels out with the large rib Screw the wall panels in the centre overlapping the small. of the rib as shown. Notched ends are orientated to the outer edges of the panel 2 Do not screw here yet PAGE 10
  • 11. GABLE WALL PANELS P O If you are having trouble screwing the channel to the sheets, chock behind the hole . Wall t Outside e She A1 A3 A5 A7 A8 A6 A4 A2 l ne an Ch B4 B1 B3 B5 B7 B8 B6 B2 Ensure that the small lip of the channel is to the N outside of the shed. N Left Gable Panel Labels, Right Gable Panel Labels A B Large Rib Small Rib Overlap bottom channel by 130mm. Fit the top and bottom channel to the wall panels. Ensure the channel is flush with the edge of the sheets. Do not screw the ends of the channel to the sheets at this point. 1 Lay the wall panels out with the large rib Screw the wall panels in the centre overlapping the small. of the rib as shown. Notched ends are orientated to the outer edges of the panel 2 Do not screw here yet PAGE 11
  • 12. FIT RIDGE BEAM BRACKETS NOTE: The diagram below shows a 66 gable wall. The assembly process is the same for all gable sizes. Fix the ridge beam brackets to the top of the gables using six (6) screws as shown below. View from inside the shed. Secure brackets with six (6) screws as shown on both gable walls. 1 PAGE 12
  • 13. STAND AND JOIN WALL PANELS NOTE: The diagram below shows a 66 gable roof shed. The assembly process is the same for all gable roof sizes. Overlap corners of panels as shown and drill pilot hole midway along the corner and fix with self tap screw Once the four wall panels are assembled, they can now be stood and fixed together. Fix using the corner brackets and screws as shown below. Fix the front panel last. N.B when assembling large wall models, eg. 7 panels width and above, extra care should be taken, with person two providing adequate support to stop the wall from distorting. 1 Screw the wall panels together at the base and top as shown. Screw corner joins at the mid point of the 2 shed as shown. Drill pilot holes and screw corner brackets into all four corners inside the shed. PAGE 13
  • 14. ASSEMBLE AND FIT RIDGE BEAM NOTE: The diagram below shows a 66 gable roof shed. The assembly process is the same for all gable roof sizes. The pre punched roof holes must be to the top of the assmebled ridge beam Assemble the ridge beam on the ground as shown below. 9 Panel - 3094mm 1 8 Panel - 2748mm T 7 Panel - 2402mm T 6 Panel - 2056mm T T Overlap the two sides of the ridge beam securing them with six (6) screws per side. Ensure the pre-drilled roof panel holes are to the top. Screw the two sides together using the diagram top right as a guide. Note: The two halves of the ridge beam should be fixed at 346mm intervals. PAGE 14
  • 15. ASSEMBLE AND FIT RIDGE BEAM NOTE: The diagram below shows a 66 gable roof shed. The assembly process is the same for all gable roof sizes. Fit the ridge beam to the two brackets as shown below. 2 Fit the ridge beam to the two brackets using three (3) screws on either side of the bracket. PAGE 15
  • 16. FIT ROOF AND TRIMS Screw the door side of the roof on first (do not start the rear side yet). Work from right to left ensuring the large rib is over the small rib. 1 b Ri e rg La Screw the bottom of the sheet to the front top frame using two (2) screws Fix the first two (2) sheets of the rear side then place the first ridge cap (do not screw at this stage). 2 PAGE 16
  • 17. FIT ROOF AND TRIMS Fix the next two (2) sheets then fit the second Pilot holes need to be drilled to secure the ridge ridge cap. Fix this as shown to the right. cap to the lips of the roof sheets. 3 Finish the roof in the same manner. (N.B. some pilot holes need to be drilled into the ridge caps) Fit gutter trim 4 V Do not V screw here yet Push the roof trim into one end first and then manipulate the roof trim to fit into the other. 2 tors otec pr dge W Fit e V Fix the trim using Trim the corner of screws as shown. Use the trim if desired one screw per panel Drill pilot holes first PAGE 17
  • 18. ASSEMBLE DOOR H I F F I H Small Lip X2 Large Lip 1 F F F F Both of the door sheets come with one rib h fh d h Screw the sheets in the centre. partially slit. Break them off and discard them. Frames slide under the sheet as shown. Ensure Fix door frames with a screw in each corner. the small lip of the frame is to the top. Ensure that the big hole sits over the small. 2 H H I PAGE 18
  • 19. ASSEMBLE DOOR 2 H J 1 I J I H J I L J H I H J H Fix the frame H to the sheeting with screws through the small channel lips L into the large sheeting ribs. Door boxing must be fitted to the door frames I and a door seal fitted on the second door. The seal fits in between the frame and boxing as shown to the right. Leave an even gap at both ends of the boxing. 3 I J Place large lip H of J over the small lip of I as shown use the pre-punched holes in the door boxing as a guide to drill pilot holes in the door seal J I Fix each of the door boxing in place using six (6) screws. Fix door seal on door number 2 PAGE 19
  • 20. ASSEMBLE DOOR K K K K Flip the door assembly’s over and fix the door frames with screws evenly spaced as shown above. Door bracing will also need to be fitted to the doors to ensure sturdiness. Drill pilot hole for top and bottom bracing joint, K and fix with self tapping screw. 4 H K I Drill pilot holes for door bracing centre joint K and fix with self tapping screw I 5 Use the 2.5mm drill bit to drill pilot holes through the door bracing into the door sheeting. DO NOT FASTEN BRACING YET PAGE 20
  • 21. ASSEMBLE DOOR 73 m m 2 73 m m 73 m m 1 73 m m Flip the door back over to the front side facing up. Using the pilot holes drilled before, fix the door bracing from the front with self tapping screws. Drill a 2.5mm pilot hole through the door plate and into the sheeting and 6 channel at the mid point and secure with self tapping screws Fix the padbolt onto door 1 in the same manner 7 J I J H I Hinges are fitted to the pre-punched holes on the door frames. Fit using two self tapping screws. PAGE 21
  • 22. HANG DOOR NOTE: The diagram below shows a 64 flat roof shed. The assembly process is the same for all sheds. Fit the doors by fixing the hinges to the pre-drilled holes in the door jambs. Fit the padbolt and keeper to the front of the doors. To finish, fix padbolts to the inside, top and bottom of the door with the seal attached. 1 2 Drill pilot holes to accommodate the padbolt keeper and then fix with self tapping screws Drill pilot holes Drill pilot holes into the into the inside of inside of the front wall the door frame of bottom channel to 3 the second door accommodate the next to the door padbolt keeper and seal and then fix then fix with self with self tapping tapping screws screws. PAGE 22
  • 23. BOLT DOWN Bolt the shed down through the four corner brackets as shown. Ensure the shed is square. 1 50mm 2 M8 x 40 PAGE 23
  • 24. BOLT DOWN Bolt the shed down through the angle brackets as shown. Drill the hole for the anchor to 50mm depth and then using 1 a 5mm drill bit, drill the holes through the sheeting to attach the bracket to the shed. 50mm Tighten the anchor then use the two M4.7 bolts provided to fix 2 M8 x 40 the bracket to the shed. Fix the brackets to the panels using the supplied nuts and bolts PAGE 24
  • 25. NOTES PAGE 25
  • 26. NOTES PAGE 26
  • 27. NOTES PAGE 27
  • 28. ENQUIRIES & TECHNICAL ASSISTANCE info@gardensheds.com.au