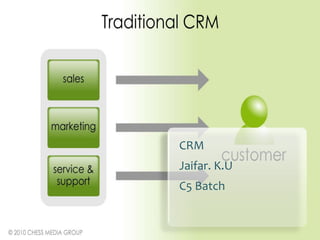
Frankfinn - CRM
•Download as PPTX, PDF•
4 likes•5,968 views

The document summarizes the author's experiences visiting two clothing shops, Raymond and Van Heusen, to purchase a suit. At Raymond, the author was dissatisfied with the sales assistants' lack of communication, product knowledge, and customer service. However, at Van Heusen, the author found the staff to be well-groomed, knowledgeable, and able to meet their needs through good communication and service, leaving the author fully satisfied with their experience.

Recommended
More Related Content
What's hot
What's hot (20)
Viewers also liked
Similar to Frankfinn - CRM
Similar to Frankfinn - CRM (20)
Recently uploaded
Recently uploaded (20)
Frankfinn - CRM
- 2. The shops which I visited is Raymond and Van Heusen. I had a different experience from these two shops. I had some basic expectations, which every customers has. But the shop Raymond couldn’t reach up to my expectations. I wasn’t much satisfied from this shop.
- 3. My Expectations Cost Courtesy Communication Honest Selection
- 5. • He was in a well uniform and he gave me a warm welcome as I expected. He transferred me to the 1st sales man . For the security Welcome guard I give 7 out of 10. Hostess • First i asked him about the Formal suit and all. He showed the way to the Shirt section, there had a communication problem. They were not attentive, dint pay courtesy. The sales mans were busy with 1st Sales talking. I went to him and asked about the Suit. He shown me the Assistant way to the top floor. I felt disappointed. There were Time barrier. For him I give 3 out of 10. • As I went to the top floor, the 2nd assistant were there, he showed some suits which I liked it. But the suit hand length is not enough for me, I asked him whether u can fix it or not. Actually he doesn’t know anything about that. First he told me that its possible, later on he 2nd sales told me that it isn’t. He was lack in product information's, not a good assistant attitude, lacking in communication skills, he wasn’t honest at all. I was so dissatisfied. For him I give 2 out of 10.
- 6. Observation For the Security guard I’ll recommend to change the uniform to some other color. He’s good at everything but uniform. For the 1st sales man, he’ll have to improve his communication skills. He is not a good listener. He doesn’t have any customer handling skills. He must have a training. Get some product information’s. Be attentive when customers come. For the 2nd sales man, he needs serious training in this field. He doesn’t have any customer handling skill. No communication skills. He is not showing modest. No product information. Whenever I ask a doubt he simply goes to his senior and asking him. There were a serious time barrier. Not well groomed also.
- 8. • Well groomed, greets with a pleasant smile, pleasing personality, he immediately Welcome Hostess transferred me to the first sales man. I give him 7 out of 10. • I asked about the latest type of suit he explained to me in a detailed manner ,he has good communication skills, good in customer 1st sales man handling skills, respect the customer which I more like it. He followed with me to the Suit section, and introduced me to the 2nd sales man. I give him 7 out of 10. • He has a pleasing personality he’s good in communication, good knowledge about the products. Even I had to face the same problem 2nd sales man & which I faced in the previous shop. The suit Cashier length wasn’t much suitable for me, he said they could fix it within one day. I was so satisfied with the services they provided. I give him 8 out of 10.
- 9. Observation Welcome hostess: I completely satisfied with his service. He was empathetic too. I told why I’m there, he immediately transferred me to the sales man who handling the Suit section. 1st sales man: He was little bit faster while he communicate, which I couldn’t follow. He was handling more than 2 customers at a time. But he managed to get time ask my needs and all. He followed me to the 1st floor which suit section located. 2nd sales man: He was good at what he was doing. He has a high proficiency in customer handling. Good communication skills. I got the perfect suit which he suggested me first. He knows the customer needs. Well groomed with professional attire.
- 10. Conclusion After visiting both shops, I personally recommend Van heusen shop, than Raymond. Its completely dependable and reliable shop. Even the cost is comparatively lower than Raymond’s. I’m completely satisfied with Van Heusen shop. I got everything what I expected.
Editor's Notes
- Custom animation effects: descending text levels(Basic)To reproduce the rectangleon this slide, do the following:On the Home tab, in theSlides group, click Layout, and then click Blank.On the Home tab, in the Drawing group, click Shapes, and then under Rectangle click Rounded Rectangle (second option from the left). On the slide, drag to draw a rectangle.Select the rectangle. Under Drawing Tools, on the Format tab, in the Size group, do the following:In the Shape Height box, enter 3.08”. In the Shape Width box, enter 4.33”.Under Drawing Tools, on the Format tab, in the Shapes Styles group, click the arrow next to Shape Outline, and then click No Outline.Under DrawingTools, on the Format tab, in the bottom right corner in the Shapes Styles group, click the Format Shape dialog box launcher. In the Format Shape dialog box, click Fill in the left pane, select Gradient fill in the Fill pane, and then do the following:In the Type list, select Linear.Click the button next to Direction, and then click Linear Down (first row, second option from the left).Under Gradient stops, click Add or Remove until two stops appear in the drop-down list.Also under Gradient stops, customize the gradient stops that you added as follows:Select Stop 1 from the list, and then do the following:In the Stop position box, enter 0%.Click the button next to Color, and then under Theme Colors click White, Background 1 (first row, first option from the left).In the Transparency box, enter 25%.Select Stop 2 from the list, and then do the following: In the Stop position box, enter 20%.Click the button next to Color, and then under Theme Colors click White, Background 1 (first row, first option from the left).In the Transparency box, enter 69%.Also in the Format Shape dialog box, click Shadow in the left pane. In the Shadow pane, click the button next to Presets, under Outer click Offset Diagonal Bottom Left (first row, third option from the left), and then do the following:In the Transparency box, enter 72%.In the Size box, enter 100%.In the Blur box, enter 11.81 pt.In the Angle box, enter 141°.In the Distance box, enter 19.7 pt. Also in the Format Shape dialog box,click 3-D Format in the left pane, and then do the following in the 3-D Format pane:Under Bevel, click the button next to Top, and then under Bevel click Circle (first row, first option from the left). Next to Top, in the Width box, enter 7 pt, in the Height box, enter 7 pt.Under Surface, click the button next to Material, and then under Standard clickMetal (fourth option from the left). Click the button next to Lighting, and then under Neutral click Contrasting (second row, second option from the left). In the Angle box, enter 75°.On the slide, drag the rectangle into the bottom right corner. To reproduce the rectangle animation effects on this slide, do the following:On the Animations tab, in the Animations group, click Custom Animation.On the slide, select the rectangle. In the CustomAnimation task pane, do the following:Click AddEffect, point to Entrance,and then click More Effects. In the Add Entrance Effect dialog box, under Moderate,click Ascend. Select the animation effect (ascend effect for the rectangle). Under Modify: Ascend,do the following:In theStart list, selectWith Previous. In theSpeed list, selectMedium. To reproduce the text effects on this slide, do the following:On the Insert tab, in the Text group, click Text Box, and then on the slide, drag to draw the text box. Enter three lines of text with paragraph breaks in the text box. Select the text, and then on the Home tab, in the Font group, do the following:In the Font list, select Candara.In the Font Size list, select 28. Click the arrow next to Font Color,and then under Theme Colors click Aqua, Accent 5; Darker 50% (sixth row, ninth option from the left). On the Home tab, in the Paragraph group, click Align TextLeft to position the text left in the text box.On the slide, drag the text box onto the rectangle. To reproduce the text animation effects on this slide, do the following:On the Animations tab, in the Animations group, click Custom Animation.On the slide, select the text box. In the CustomAnimation task pane, do the following:Click AddEffect, point to Entrance,and then click More Effects. In the Add Entrance Effect dialog box, under Moderate,click Descend. Select the second animation effect (descend effect for the text box). Click the arrow to the right of the selected effect, and then click Effect Options. In the Descend dialog box, do the following:On the Timing tab, do the following:In theStart box, selectWith Previous. In theSpeed box, select1 seconds (Fast). On the Text Animation tab, in the Group text list, select By 1st Level Paragraphs.Also in the Custom Animation task pane, click the double arrow under the second animation effect to expand the list of effects, and then do the following:Select the new second animation effect in the list (descend effect for the first line of text). Click the arrow to the right of the selected effect, and then click Timing. In the Descend dialog box, on the Timing tab, in the Delay box, enter 1.Select the third animation effect (descend effect for the second line of text). Click the arrow to the right of the selected effect, and then click Timing. In the Descend dialog box, on the Timing tab, do the following:In the Start list select WithPrevious.In the Delay box, enter 1.5.Select the fourth animation effect (descend effect for the second line of text). Click the arrow to the right of the selected effect, and then click Timing. In the Descend dialog box, on the Timing tab, do the following:In the Start list select WithPrevious.In the Delay box, enter 2.To reproduce the background effects on this slide, do the following: On the Design tab, in the bottom right corner of the Background group, click the Format Background dialog box launcher.In the Format Background dialog box, click Fill in the left pane, select Picture or texture fill in the Fill pane, and then under Insert from click File.In the Insert Picture dialog box, select a picture, and then click Insert.
- Clear disk with floating text(Advanced)To reproduce the shape effects on this slide, do the following:On the Home tab, in theSlides group, click Layout, and then click Blank.On the Home tab, in the Drawing group, click Shapes, and then under Basic Shapes click Oval (first row, second option from the left). Press and hold SHIFT to constrain the shape to a circle, and then on the slide, drag to draw a circle. Select the circle. Under DrawingTools, on the Format tab, in the Size group, do the following:In the Shape Height box, enter 4.07”.In the Shape Width box, enter 4.54”.Under Drawing Tools, on the Format tab, in the Shape Styles group, click Shape Fill, clickMore Fill Colors, and then in the Colors dialog box, on the Custom tab, enter values for Red: 204, Green: 255, Blue: 153.Under Drawing Tools, on the Format tab, in the Shape Styles group, clickShape Outline, and then click No Outline. Under Drawing Tools, on the Format tab, in the Shape Styles group, clickShape Effects, and then do the following:Point to Bevel, and then under Bevel click Convex (second row, third option from the left). Point to 3-D Rotation, and then under Perspective click Perspective Relaxed (second row, third option from the left). On the Home tab, in the bottom right corner of the Drawing group, click the Format Shape dialog box launcher. In the Format Shape dialog box, click 3-D Rotationin the left pane, and then do the following in the right pane under Rotation:In the Y box, enter 289.6°.In the Perspective box, enter 30°.Also in the Format Shape dialog box, click 3-D Formatin the left pane, and then do the following in the right pane:Under Bevel, click the button next to Bottom, and then under Bevel click Circle (first row, first option from the left). Under Depth, in the Depth box, enter 25 pt. Under Surface, click the button next to Material, and then under Translucent click Clear (third option from the left). Click the button next to Lighting, and then under Neutral click Balance (first row, second option from the left). Also in the Format Shape dialog box, click Shadow in the left pane, and then do the following in the right pane:In the Transparency box, enter 85%.In the Size box, enter 100%. In the Blur box, enter 21 pt.In the Angle box, enter 90%.In the Distance box, enter 27 pt. To reproduce the text effects on this slide, do the following:On the Insert tab, in the Text group, click Text Box, and then on the slide, drag to draw the text box.Enter text in the text box, select the text, and then on the Home tab, in the Font group, select Gill Sans MT Condensedfrom the Font list, select 80 from the Font Size list, click the arrow next to Font Color,and then under Theme Colors click White, Background 1, Darker 50% (sixth row, first option from the left).On the Home tab, in the Paragraph group, click Center to center the text in the text box. Under Drawing Tools, on the Format tab, in the WordArt Styles group, click Text Effects, and then do the following:Point to Reflection, and then under Reflection Variations click Tight Reflection, 4 pt offset (second row, first option from the left). Point to 3-D Rotation, and then under Parallel click Off Axis 2 Left (second row, fourth option from the left). Under Drawing Tools, on the Format tab, in the bottom right corner of the WordArt Styles group, click the Format Text Effects dialog box launcher. In the Format Text Effects dialog box, click 3-D Format in the left pane, and then do the following in the right pane:Under Depth, click the button next to Color and under Theme Colorsthen click White, Background 1 (first row, first option from the left). In the Depth box, enter 6.5 pt. Under Surface, click the button next to Material and then under Standard click Warm Matte (second option from the left). Click the button next to Lighting, and then under Neutral click Soft (first row, third option from the left). To reproduce the background effects on this slide, do the following:Right-click the slide background area, and then clickFormat Background.In the Format Background dialog box, click Fill in the left pane, select Gradient fill in the right pane, and then do the following:In the Type list, select Linear.Click the button next to Direction, and then clickLinear Down (first row, second option from the left).Under Gradient stops, click Add or Remove until two stops appear in the drop-down list.Also under Gradient stops, customize the gradient stops that you added as follows:Select Stop 1 from the list, and then do the following:In the Stop position box, enter46%.Click the button next to Color, and then under Theme Colorsclick White, Background 1 (first row, first option from the left).Select Stop 2 from the list, and then do the following:In the Stop position box, enter100%.Click the button next to Color, click More Colors, and then in the Colors dialog box, on the Custom tab, enter values for Red: 228, Green: 245, Blue: 193.
- Clear disk with floating text(Advanced)To reproduce the shape effects on this slide, do the following:On the Home tab, in theSlides group, click Layout, and then click Blank.On the Home tab, in the Drawing group, click Shapes, and then under Basic Shapes click Oval (first row, second option from the left). Press and hold SHIFT to constrain the shape to a circle, and then on the slide, drag to draw a circle. Select the circle. Under DrawingTools, on the Format tab, in the Size group, do the following:In the Shape Height box, enter 4.07”.In the Shape Width box, enter 4.54”.Under Drawing Tools, on the Format tab, in the Shape Styles group, click Shape Fill, clickMore Fill Colors, and then in the Colors dialog box, on the Custom tab, enter values for Red: 204, Green: 255, Blue: 153.Under Drawing Tools, on the Format tab, in the Shape Styles group, clickShape Outline, and then click No Outline. Under Drawing Tools, on the Format tab, in the Shape Styles group, clickShape Effects, and then do the following:Point to Bevel, and then under Bevel click Convex (second row, third option from the left). Point to 3-D Rotation, and then under Perspective click Perspective Relaxed (second row, third option from the left). On the Home tab, in the bottom right corner of the Drawing group, click the Format Shape dialog box launcher. In the Format Shape dialog box, click 3-D Rotationin the left pane, and then do the following in the right pane under Rotation:In the Y box, enter 289.6°.In the Perspective box, enter 30°.Also in the Format Shape dialog box, click 3-D Formatin the left pane, and then do the following in the right pane:Under Bevel, click the button next to Bottom, and then under Bevel click Circle (first row, first option from the left). Under Depth, in the Depth box, enter 25 pt. Under Surface, click the button next to Material, and then under Translucent click Clear (third option from the left). Click the button next to Lighting, and then under Neutral click Balance (first row, second option from the left). Also in the Format Shape dialog box, click Shadow in the left pane, and then do the following in the right pane:In the Transparency box, enter 85%.In the Size box, enter 100%. In the Blur box, enter 21 pt.In the Angle box, enter 90%.In the Distance box, enter 27 pt. To reproduce the text effects on this slide, do the following:On the Insert tab, in the Text group, click Text Box, and then on the slide, drag to draw the text box.Enter text in the text box, select the text, and then on the Home tab, in the Font group, select Gill Sans MT Condensedfrom the Font list, select 80 from the Font Size list, click the arrow next to Font Color,and then under Theme Colors click White, Background 1, Darker 50% (sixth row, first option from the left).On the Home tab, in the Paragraph group, click Center to center the text in the text box. Under Drawing Tools, on the Format tab, in the WordArt Styles group, click Text Effects, and then do the following:Point to Reflection, and then under Reflection Variations click Tight Reflection, 4 pt offset (second row, first option from the left). Point to 3-D Rotation, and then under Parallel click Off Axis 2 Left (second row, fourth option from the left). Under Drawing Tools, on the Format tab, in the bottom right corner of the WordArt Styles group, click the Format Text Effects dialog box launcher. In the Format Text Effects dialog box, click 3-D Format in the left pane, and then do the following in the right pane:Under Depth, click the button next to Color and under Theme Colorsthen click White, Background 1 (first row, first option from the left). In the Depth box, enter 6.5 pt. Under Surface, click the button next to Material and then under Standard click Warm Matte (second option from the left). Click the button next to Lighting, and then under Neutral click Soft (first row, third option from the left). To reproduce the background effects on this slide, do the following:Right-click the slide background area, and then clickFormat Background.In the Format Background dialog box, click Fill in the left pane, select Gradient fill in the right pane, and then do the following:In the Type list, select Linear.Click the button next to Direction, and then clickLinear Down (first row, second option from the left).Under Gradient stops, click Add or Remove until two stops appear in the drop-down list.Also under Gradient stops, customize the gradient stops that you added as follows:Select Stop 1 from the list, and then do the following:In the Stop position box, enter46%.Click the button next to Color, and then under Theme Colorsclick White, Background 1 (first row, first option from the left).Select Stop 2 from the list, and then do the following:In the Stop position box, enter100%.Click the button next to Color, click More Colors, and then in the Colors dialog box, on the Custom tab, enter values for Red: 228, Green: 245, Blue: 193.