Slit lamp biomicroscopy and illumination techniques
•Download as PPTX, PDF•
96 likes•14,538 views

The document provides a history of the development of the slit-lamp biomicroscope from the early 19th century to modern versions. It describes the key parts of the slit-lamp including the observation system, magnification system, illumination system, and mechanical support system. Finally, it outlines various techniques for illumination using the slit-lamp such as diffuse, direct, indirect, retroillumination, specular reflection, and oscillating illumination and their uses in examining different structures of the eye.

Recommended
More Related Content
What's hot
What's hot (20)
Similar to Slit lamp biomicroscopy and illumination techniques
Similar to Slit lamp biomicroscopy and illumination techniques (20)
More from Loknath Goswami
Recently uploaded
Recently uploaded (20)
Slit lamp biomicroscopy and illumination techniques
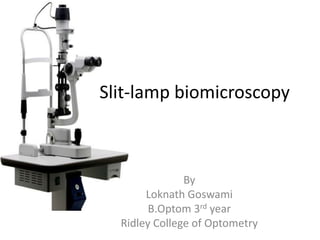
- 1. Slit-lamp biomicroscopy By Loknath Goswami B.Optom 3rd year Ridley College of Optometry
- 2. Presentation layout • History • Parts of slit-lamp • Technique of biomicroscopy • Methods of illumination • References
- 3. HISTORY
- 4. History • 1823: Purkinje, attempted to develop a type of slit lamp by using one hand-held lens to focus strong illumination
- 5. History • 1863: De Wecker, devised a portable ophthalmomicroscope that combined a small monocular microscope which rested against the face of the patient with an attached condenser lens
- 6. History • 1891: Albert and Greenough, developed a binocular microscope which provided streoscopic view • 1897: Czapski modified the binocular corneal microscope, which is still found in many modern slit-lamps Czapski
- 7. History • 1911: Gullstrand introduced the illumination system which had for the first time a slit diaphragm in it • 1916: Henker developed the prototype of the modern biomicroscopy by combining the Gullstrand’s slit illumination system with the Czapski’s binocular corneal microscope Gullstrand Large Gullstrand Ophthalmomicroscope
- 8. History • 1933: Hans Goldmann improvised the biomicroscope in which all the vertical and horizontal adjustments for both the lamp and the slit- beam were placed on a single mechanical stage
- 9. History • 1950: Littmann incorporated the rotatory magnification changer based on the principle of Galilean telescope
- 11. Observation system • The observation system is essentially a compound microscope which is composed of two optical elements – An objective and – An eyepiece Also it have prism housing here
- 12. Observation system • Objective lens consists of two planoconvex lenses with their convexities put together, providing a composite power of +22.00 D • Eyepiece has a lens of +10.00 D to provide a good stereopsis, the tubes are converged at an angle of 10-15˚ To overcome the problem of inverted image produced by the compound microscope, slit-lamp microscope uses a pair of prisms between the objective and the eyepiece to reinvert the image
- 13. Magnification system • Most slit-lamps provide a range of magnification from 6X to 40X • The modern slit-lamps use one of the following three systems to produce a range of magnification – Czapskiscope with rotating objectives – The Littmann-Galilean telescope principle – Zoom System
- 14. Illumination system • The Gullstrand’s illumination system is designed to provide a bright, evenly illuminated, finely focused adjustable slit of light at the eye
- 15. Light source • Originally a Nernst lamp was used as a light source which was followed by Nitra lamp, arc lamp, mercury vapour lamp and finally halogen lamps • Halogen lamps provides an illumination of 2 X 10⁵ to 4 X 10⁵ lux
- 16. Light source
- 17. Condenser lens system • It consists of a couple of planoconvex lenses with their convex surfaces in apposition
- 18. Slit and other diaphragms • The height and width of the slit can be varied using two knobs provided for this purpose Width control Height control
- 19. Variations
- 20. Filters • Different filters can be inserted into the illumination beam • Cobalt blue and red-free filters are provided in most of the models
- 22. Cobalt blue filter • Cobalt blue filter produce light of the wavelength 450 to 500nm • This filter is useful for looking for problems in the eye once it has been stained with fluorescein • Dye pods in area where the corneal epithelium is broken or absent • The dye absorbs blue light and emits green
- 24. Fluorescein stain highlighting dendritiform lesions in herpetic keratitis
- 25. • Obscure any thing that is red hence the red free light , thus blood vessels or haemorrhages appears black • This increases contrast, revealing the path and pattern of inflammed blood vessels. Red free(green)filter
- 26. Red free(green)filter • Fleischer ring can also be viewed satisfactorily with the red free filter.
- 27. Neutral density filter • Decreases maximum brightness for photosensitive patients
- 28. Yellow filter • For good contrast enhancement when using fluorescein and the cobalt blue filter
- 29. Diffuser • For general overall observations of the eye and adnexa
- 30. Projection lens • It forms an image of the slit at the eye • The diameter of the projection lens is usually fairly small • This has two advantages – It keeps the aberrations of the lens down, which results in a better quality image – It increases the depth of focus of the slit and thereby produces a better optical section of the eye
- 31. Reflecting mirror or prism • The illumination system of a slit-lamp has to be able to pass relatively easily from one side of the microscope to the other • To allow this, the projection system is normally arranged along a vertical axis, with either a mirror or prism finally reflecting the light along a horizontal axis • The use of a narrow prism or mirror means that when necessary, such as in examination of the fundus, the illumination axis can be made to, without obstructing the field of view, almost coincide with the viewing axis
- 32. Mechanical support system • Joystick arrangement • Up and down movement • Patient support arrangement • Fixation target
- 33. Joystick arrangement • Movement of the microscope and illumination system towards or away from the eye and from side to side is usually achieved via a joystick arrangement
- 34. Up and down movement • The up and down movement is obtained via some sort of screw device that moves the whole illumination and viewing system up and down relative to the chin rest
- 35. Patient support arrangement • A vertically moves chin rest and the provision to adjust the height of the table has been made to accommodate the persons of all sizes
- 36. Fixation target • A movable fixation target greatly facilitates the examination under some conditions
- 37. Mechanical coupling • The mechanical system not only provides a support but also a coupling of the microscope and the illumination system along a common axis of rotation that coincides their focal planes • This arrangement ensures that light falls on the point where microscope is focused • It allows either the microscope or the illumination system to be rotated around the axis without changing the focus
- 38. Technique of biomicroscopy Patient adjustment Instrument adjustment Beginning slit lamp
- 39. Patient adjustment • The patient should be positioned comfortably in front of the slit lamp with his or her chin resting on the chin rest and forehead opposed to head rest
- 40. Instrument adjustment • The height of the chair should be adjusted according to table housing the slit-lamp • The microscope and illumination system should be aligned with the patient’s eye to be examined • Fixation target should be placed at the required position
- 41. Beginning slit lamp • Examination should be carried out in a semidark room so that the examiner’s eyes are partially dark-adapted to ensure sensitivity to low intensities of light • There should be a minimum exposure of retina to light • Medications like ointments and anaesthetic eyedrops produce corneal surface disturbances which can be mistaken for pathology • Low magnification should be first used to locate the pathology and higher magnification should then be used to examine it
- 42. Diffuse Direct Indirect Retro Specular reflection Sclerotic scatter Oscillating Methods of illumination Berliner described 7 basic methods of illumination using the slit-lamp
- 43. Diffuse illumination • Angle between the microscope and illumination system should be 30-40˚ • Slit width should be widest • Diffusing filter should be used • Magnification used is low to medium • Illumination should be medium to high
- 44. Diffuse illumination • General view of the anterior eye and the palpebral conjunctiva • Contact lens fitting
- 45. Direct focal illumination • In this technique, the slit-beam is regulated until it coincides with the exact focus of the microscope • Light is directed as a narrow slit at an oblique angle • Heterogenous tissue like cornea and lens disperse light and become visible as bright objects against a dark background
- 46. Setup for direct illumination
- 48. Optical section • It is produced by a very narrow slit-beam focused obliquely • The whole tissue can be examined by moving the slit-beam and simultaneous focus of the microscope across the surface
- 49. Cornea • Corneal optical section consists of a segment of arc with following concentric zones : • Tear layer is seen as a bright anterior most zone • Epithelium is seen as dark line immediately behind the tear layer • Bowman’s membrane is seen as a bright line • Stroma is focused as a wider granular and greyer zone • Descemet’s membrane and endothelial layers are seen as posterior most bright zone
- 50. Significance Changes in corneal curvature and thickness Depth of the corneal pathologies Anterior chamber angle grading
- 51. OPTICAL SECTION OF LENS Optical section of the lens seen with slit-lamp microscope shows stratification of the lens into following layers(front to back) Anterior capsule 1st cortical clear zone 1st zone of disjunction 2nd cortical clear zone Light scattering zone of deep cortex Clear zone of deep cortex nucleus
- 52. Parallelopiped • Parallelopiped of the cornea is observed using a 2-3 mm wide focused slit • Pathologies of epithelium are better studied under this illumination
- 53. Parallelopiped • Corneal scars or infiltrates appear brighter than surroundings because they have more density • Cells and flare in the anterior chamber can be graded by using a parallelopiped 2 mm wide X 4 mm high
- 54. Conical beam • Conical beam is observe using small and circular pattern beam, light source 45-60˚ temporally from the microscope and directed into the pupil • Biomicroscope is in front of the eye • Magnification - high
- 55. Conical beam • It is used to examine the presence of aqueous flare • Beam is focused between the cornea and the anterior the lens surface, and the dark zone between the cornea and the lens is observed. This zone is normally optically empty and appears black. Flare appears grey or milky and cells may be facilitated by gently oscillating the illuminator
- 56. Aqueous cells • The “cell” are individual cells, such as WBCs • It is an early feature of iridocyclitis • The cells should be counted in an oblique slit- lamp beam, 1mm long and 1mm wide, with maximal light intensity and magnification
- 57. Aqueous cells • It is graded as per ‘Standardization of Uveitis Nomenclature (SUN)’ - = < 1 cells ± = 1-5 cells +1 = 6-15 cells +2 = 16-25 cells +3 = 26-50 cells +4 = Over 50 cells
- 58. Aqueous flare • It is due to leakage of protein particles into the aqueous humour from damaged bllod vessels • It is demonstrated on the slit lamp examination by a point beam of light passed obliquely of the plane of iris • In the beam of light, protein particles are seen as suspended and moving dust particles. This is based on the ‘Brownian movements’ or ‘Tyndall phenomenon’
- 59. Aqueous flare
- 60. Aqueous flare • The flare is graded from 0 to +4. Grade as per SUN working group grading scheme: • 0 = no aqueous flare • +1 = faint i.e., just detectable • +2 = moderate flare with clear iris and lens details • +3 = marked flare (iris and lens details hazy) • +4 = intense flare (Fibrin or plastic aqueous)
- 61. Indirect illumination • The slit-beam is focused on a position just beside the area to be examined • The set-up required is – Angle between slit-lamp and microscope should be 30-45˚ – Beam width used is moderate – Illumination used is low, medium or high – Slit-lamp can be offset
- 63. Retroillumination • Light is reflected off the iris or fundus, while the microscope is focused on the cornea Retro illumination Direct Indirect
- 64. Direct
- 65. Indirect
- 66. Retroillumination from the fundus • This technique is used to observe media clarities and opacities • The pupil is dilated and the slit-beam and microscope are made coaxial • The light is directed so that it strikes the fundus and creates a glow behind the opacity in the media • The media opacity creates a shadow in the glow • The microscope is then focused on the pathology directly and 10-16X magnification is used.
- 67. Retroillumination from the fundus
- 68. Specular reflection • Reflection of light occurs when a beam of light is incident on an optical surface, which is called zone of discontinuity • Such zones may be found in cornea and lens • When an observer is placed in the pathway of reflected light, a dazzling reflex will be seen which is called specular reflection. The surface from which reflection is obtained is called zone of specular reflection • Surface pathologies will scatter the light irregularly and, therefore, create dark areas in the reflex
- 70. Specular reflection • To get the specular reflection, the patient is asked to look 30˚ temporally • Light beam is directed from the opposite side • Towards the side of the light source, a shining reflex is seen on the cornea • When the angle between the microscope and the slit-beam is about 60˚ ,i.e. when the angle of incidence becomes equal to the angle of reflection at this point, dazzling reflex which is coming from tear meniscus will show the meniscus irregularities.
- 71. Specular reflection • At the same time, a deeper less luminous glow will be seen which when focused will show the endothelial mosaic • A parallelopiped beam with high illumination and high magnification is used in this technique
- 72. Sclerotic scatter • Light beam is focused at the limbus • Rays of light pass through the cornea and illuminate the opposite side of the limbus • If there is any pathology like corneal opacity, it becomes visible because it scatters the rays of light • A magnification of 6-10X is used and microscope is directed straight ahead
- 74. Oscillating illumination of Koeppe • In this, the slit-beam is given an oscillatory movement by which it is often possible to see minute objects or filaments especially in the aqueous which would otherwise escape detection
- 76. Diffuse illumination • Used to observe contact lens fitting performance
- 77. Broad beam illumination • Used to observe debris beneath the contact lens
- 78. Specular reflection • Used to observe lens front surface wetting
- 79. Retroillumination • Used to observe contact lens front and back surface deposits
- 80. References • A K khurana, Theory and practice of optics and refraction, 3rd edition, page no. 351-61 • Monica Chaudhry, Contact lens primer, 1st edition, page no. 28-40 • A K Khurana, Comprehensive Ophthalmology, 6th edition, page no. 154-55 • http://www.healthline.com/health/slit-lamp- exam#results5 • https://www.aao.org/young-ophthalmologists/yo- info/article/how-to-use-slit-lamp • https://www.youtube.com/watch?v=YTbYX51zGu8 • https://www.youtube.com/watch?v=p2nK9BKpBT0
Editor's Notes
- Therefore gullstrand is credited with the invetion of the slit lamp
- The slit-lamp designed by Goldmann was marketed in 1937 as the Haag-Streit model 360 slitlamp
- The slit-lamp designed by Littmann is the forerunner of the current Zeiss slit-lamp series
- It comprises following components
- In addition, there are some stenopaic slits of 2.0 and 0.5 mm to provide conical beam There is a facility to rotate the slit away from the vertical meridian and also the ability to tilt the projection system about a horizontal axis that is provided. These two additional degrees of freedom are included to assist in the examination of the fundus and the angle of anterior chamber