Risk Management in Engineering Construction Project
Modern Marine Radar and ARPA Operating Instructions
1. 191
CHAPTER 5 — AUTOMATIC RADAR PLOTTING AIDS (ARPA)
INTRODUCTION
The availability of low cost microprocessors and the development of
advanced computer technology during the 1970s and 1980s have made it
possible to apply computer techniques to improve commercial marine radar
systems. Radar manufactures used this technology to create the Automatic
Radar Plotting Aids (ARPA). ARPAs are computer assisted radar data
processing systems which generate predictive vectors and other ship
movement information.
The International Maritime Organization (IMO) has set out certain
standards amending the International Convention of Safety of Life at Sea
requirements regarding the carrying of suitable automated radar plotting aids
(ARPA). The primary function of ARPAs can be summarized in the
statement found under the IMO Performance Standards. It states a
requirement of ARPAs....“in order to improve the standard of collision
avoidance at sea: Reduce the workload of observers by enabling them to
automatically obtain information so that they can perform as well with
multiple targets as they can by manually plotting a single target”. As we can
see from this statement the principal advantages of ARPA are a reduction in
the workload of bridge personnel and fuller and quicker information on
selected targets.
A typical ARPA gives a presentation of the current situation and uses
computer technology to predict future situations. An ARPA assesses the risk
of collision, and enables operator to see proposed maneuvers by own ship.
While many different models of ARPAs are available on the market, the
following functions are usually provided:
1. True or relative motion radar presentation.
2. Automatic acquisition of targets plus manual acquisition.
3. Digital read-out of acquired targets which provides course, speed, range,
bearing, closest point of approach (CPA, and time to CPA (TCPA).
4. The ability to display collision assessment information directly on the
PPI, using vectors (true or relative) or a graphical Predicted Area of
Danger (PAD) display.
5. The ability to perform trial maneuvers, including course changes, speed
changes, and combined course/speed changes.
6. Automatic ground stabilization for navigation purposes.
ARPA processes radar information much more rapidly than conventional
radar but is still subject to the same limitations. ARPA data is only as
accurate as the data that comes from inputs such as the gyro and speed log.
STAND-ALONE AND INTEGRAL ARPA’s
Over the past 10 years, the most significant changes to the ARPA systems
has been in their design. The majority of ARPAs manufactured today
integrate the ARPA features with the radar display.
The initial development and design of ARPAs were Stand-alone units.
That is they were designed to be an addition to the conventional radar unit.
All of the ARPA functions were installed on board as a separate unit but
needed to interfaced with existing equipment to get the basic radar data. The
primary benefits were cost and time savings. This of course was not the most
ideal situation and eventually it was the integral ARPA that gradually
replaced the stand-alone unit.
The modern integral ARPA combines the conventional radar data with the
computer data processing systems into one unit. The main operational
advantage is that both the radar and ARPA data are readily comparable.
2. 192
ARPA DISPLAY
From the time radar was first introduced to the present day the radar
picture has been presented on the screen of a cathode ray tube. Although the
cathode ray tube has retained its function over the years, the way in which
the picture is presented has changed considerably. From about the mid-1980s
the first raster-scan displays appeared. The radial-scan PPI was replaced by a
raster-scan PPI generated on a television type of display. The integral ARPA
and conventional radar units with a raster-scan display will gradually replace
the radial-scan radar sets.
The development of commercial marine radar entered a new phase in the
1980s when raster-scan displays that were compliant with the IMO
Performance Standards were introduced.
The radar picture of a raster-scan synthetic display is produced on a
television screen and is made up of a large number of horizontal lines which
form a pattern known as a raster. This type of display is much more complex
than the radial-scan synthetic display and requires a large amount of
memory. there are a number of advantages for the operator of a raster-scan
display and concurrently there are some deficiencies too. The most obvious
advantage of a raster-scan display is the brightness of the picture. This
allows the observer to view the screen in almost all conditions of ambient
light. Out of all the benefits offered by a raster-scan radar it is this ability
which has assured its success. Another difference between the radial-scan
and raster-scan displays is that the latter has a rectangular screen. The screen
size is specified by the length of the diagonal and the width and height of the
screen with an approximate ratio of 4:3. The raster-scan television tubes
have a much longer life than a traditional radar CRT. Although the tubes are
cheaper over their counterpart, the complexity of the signal processing
makes it more expensive overall.
Raster-scan PPI
The IMO Performance Standards for radar to provide a plan display with
an effective display diameter of 180mm, 250mm, or 340mm depending upon
the gross tonage of the vessel. With the diameter parameters already chosen,
the manufacturer has then to decide how to arrange the placement of the
digital numerical data and control status indicators. The raster-scan display
makes it easier for design engineers in the way auxiliary data can be written.
Monochrome and Color CRT
A monochrome display is one which displays one color and black. The
general monochrome television uses white as the color. This however is not
an appropriate color for the conditions under which a commercial marine
radar is viewed. Unlike a television screen, marine radar displays tend to be
viewed from the shorter distance and the observer has a greater
concentration on the details of the screen and therefore is subject to
eyestrain. For this reason the color most common to monochrome raster-
scan applications was green. The green phosphor provides comfortable
viewing by reducing eye strain and stress.
The color tube CRT differs from its monochrome counterpart in that it has
three electron guns, which are designated as red, green, and blue.
3. 193
FEATURES AND OPERATING INSTRUCTIONS FOR A MODERN RASTER SCAN RADAR AND ARPA
INTRODUCTION
The following paragraphs describe the features and operating instructions
of the Furuno Heavy-Duty High Performance Raster Scan Radar and ARPA
Model FR/FAR-28x5 series. Only selected portions of the Furuno operating
instructions are presented in this manual. For the complete operating
instructions you should contact a Furuno dealer or representative.
The purpose of this section is to provide a sample of the technical
instructions that should be available to the officer. As a radar observer you
should thoroughly read and understand the operating instructions for the
radar units that you will be using. Operating instructing will of course differ
not only between different radar manufactures’ but also with different
models for the same manufacturer.
As with all equipment, the operator should be completely familiar with
the safety instructions prior to turning on the radar. There are a number of
dangers, warnings and cautions that should be followed by those operating
these radars. Failure to follow the appropriate safety instructions could result
in serious injury or death.
FEATURES
The FR-2805 and FAR-2805 series of Radar and ARPAs are designed to
fully meet the exacting rules of the International Maritime Organization
(IMO) for installations on all classes of vessels.
The display unit employs a 28 inch diagonal multicolored CRT. It
provides an effective radar picture of 360 mm diameter leaving sufficient
space for on screen alpha-numeric data.
Target detection is enhanced by the sophisticated signal processing
technique such as multi-level quantization (MLQ), echo stretch, echo
average, and a built-in radar interference rejector. Audible and visual guard
zone alarms are provided as standard. Other ship’s movement is assessed by
trails of target echoes or by electronic plotting. The FAR-2805 series ARPA
further provides target assessment by historical plots, vectors and target data
table.
On screen data readouts include CPA, TCPA, range, bearing, speed/course
on up to 3 targets at a time. The ARPA functions include automatic
acquisition of up to 20 targets, or manual acquisition of 40 targets. In
addition, the ARPA features display of a traffic lane, buoys, dangerous
points, and other important reference points.
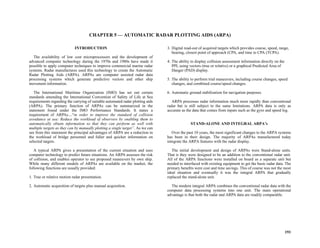
Figure 5.1 - FR-2805 Series Radar Display Unit Overview
4. 194
General Features
• Daylight-bright high-resolution display
• 28 inch diagonal CRT presents radar picture of 360 mm effective diameter
with alphanumeric data area around it
• User friendly operation by combination of tactile backlit touchpads, a
trackball and rotary controls
• Audio-visual alert for targets in guard zone
• Echo trail to assess targets’ speed and course by simulated afterglow
• Electronic plotting of up to 10 targets in different symbols (This function
is disabled when ARPA is activated)
• Electronic parallel index lines
• Interswitch (optional) built in radar or ARPA display unit
• Enhanced visual target detection by Echo Average, Echo Stretch,
Interference Rejector, and multi-level quantization
• Stylish display
• Choice of 10, 25 or 50 KW output for X-band; 30 KW output for S-band,
either in the transceiver aloft (gearbox) or RF down (transceiver in bridge)
• Exclusive FURUNO MIC low noise receiver
ARPA Features
• Acquires up to 20 targets automatically
• Movement of tracked targets shown by true or relative vectors (Vector
length 1 to 99 min. selected in 1 min steps)
• Setting of nav lines, buoy marks and other symbols to enhance navigation
safety
• On-screen digital readouts of range, bearing, course, speed, CPA, TCPA,
BCR (Bow Crossing Range) and BCT (Bow Crossing Time) of two targets
out of all tracked targets.
• Audible and visual alarms against threatening targets coming into
operator-selected CPA/TCPA limits, lost targets, two guard rings, visual
alarm against system failure and target full situation
• Electronic plotting of up to 10 targets in different symbols (This function
is disabled when ARPA is activated)
• Electronic parallel index lines
• Interswitching (optional) built in radar or ARPA display unit
• Enhanced visual target detection by Echo Average, Echo Stretch,
Interference Rejector, and multi-level quantization
• Stylish display
• Choice of 10,25 or 50 kW output for X-band; 30kw output for S-band,
either in the transceiver aloft (gearbox) or RF down (transceiver in bridge)
• Exclusive FURUNO MIC low noise receiver
6. 196
DISPLAY CONTROLS - MODE PANEL
HM OFF
Temporarily erases the heading marker.
ECHO TRAILS
Shows trails of target echoes in the form of simulated afterglow.
MODE
Selects presentation modes: Head-up, Head-up/TB, North-up, Course-up,
and True Motion.
GUARD ALARM
Used for setting the guard alarm.
EBL OFFSET
Activates and deactivates off-centering of the sweep origin.
BKGR COLOR
Selects the background color.
INDEX LINES
Alternately shows and erases parallel index lines.
X2 ZOOM
enlarges a user selected portion of picture twice as large as normal. (R-type
only)
CU, TM RESET
Resets the heading line to 000 in course-up mode; moves own ship position
50% radius in stern direction in the true motion mode.
INT REJECT
Reduces mutual radar interference
RANGE RINGS
Adjusts the brightness of range rings.
Figure 5.3 - Mode Panel
7. 197
DISPLAY CONTROLS - PLOTTING KEYPAD
ORIGIN MARK
Show and erases the origin mark (a reference point).
VECTOR TRUE/REL
Selects true or relative vector.
VECTOR TIME
Sets vector length in time.
RADAR MENU
Opens and closes RADAR menus.
E-PLOT, AUTO PLOT MENU
Opens and closes E-plot and AUTO PLT menus.
NAV MENU
Opens and closes NAV menu.
KEYS 0-9
Select plot symbols. Also used for entering numeric data.
CANCEL
Terminates plotting of a specified target or all tracked targets.
ENTER
Used to save settings on menu screen.
TARGET DATA
Displays the acquired target data.
TARGET BASED DATA
Own ship’s speed is measured relative to a fixed target.
AUTO PLOT
Activates and deactivates the Auto Plotter.
TRIAL
Initiates a trial maneuver.
LOST TARGET
Silences the lost target audible alarm and erases the lost target symbol.
HISTORY
Shows and erases past positions of tracked targets.
MARK
Enter/erase mark.
CHART ALIGN
Used to align chart data.
VIDEO PLOT
Turns the video plotter on/off.
Figure 5.4 - Plotting keypad and tuning compartment
8. 198
OPERATION
TURNING ON POWER
The POWER switch is located at the lower right corner of the display.
Push it to switch on the radar set. To turn off the radar, push it again; the
switch will extend. The screen shows the bearing scale and digital timer
approximately 15 seconds after power-on. The timer counts down three
minutes of warm-up time. During this period the magnetron, or the
transmitter tube, is warmed for transmission. When the timer has reached
0:00, the legend STBY appears indicating that the radar is now ready to
transmit pulses.
In warm-up and standby condition, you will see the message BRG SIG
MISSING. This is normal because a bearing signal is not yet generated when
the antenna is not rotating. ON TIME and TX TIME values shown at the
bottom of the screen are the time counts in hours and tenths of hour when the
radar has been powered on and transmitted.
TRANSMITTER ON
When the STANDBY status is displayed on the screen, press the Transmit
switch labeled ST-BY/TX on the control panel of the display unit.
The radar is initially set to previously used range and pulse width. Other
settings such as brilliance levels, VRMs, ELBs and menu option selections
are also set to previous settings.
The Transmit switch toggles the radar between STANDBY and
TRANSMIT status. The antenna stops in STANDBY status and rotates in
TRANSMIT status.
Notes:
1. If the antenna does not rotate in TRANSMIT status, check whether the
antenna switch in the tuning compartment is in the OFF position.
2. The magnetron ages with time resulting in a reduction of output power. It
is highly recommended that the radar be set to STANDBY status when not
used for an extended period of time.
CRT BRILLIANCE
Operate the BRILL control on the control panel of the display unit to
adjust the entire screen brightness. Note that the optimum point of
adjustment varies with ambient light conditions, especially between daytime
and nighttime.
Note: The CRT brilliance should be adjusted before adjusting relative
brilliance levels on the BRILLIANCE menu to be explained later.
9. 199
TUNING THE RECEIVER
Auto tune
The radar receiver is tuned automatically each time the power is turned
on, thus there is no front panel control for tuning purpose. The tuning
indicator and the label AUTO TUNE at the top right corner of the display
unit show the tuning circuit is working. If the label AUTO TUNE is not
displayed, check that the TUNE selector in tuning compartment is the AUTO
position.
Manual tune
If you are not satisfied with the current auto tune setting, follow these
steps to fine-tune the receiver:
1. Push the tune control so that it pops up.
2. Set the TUNE selector in the tuning compartment to MAN for manual
tuning.
3. While observing the picture on the 48 mile scale, slowly adjust TUNE
control and find the best tuning point.
4. So the TUNE selector to AUTO and wait for about 10 seconds or four
scanner rotations.
5. Make sure that the radar has been set to the best tuning point. This
condition is where the tuning indicator lights to about 80% of its total
length.
6. Push the TUNE control into the retracted position.
Video Lockup Recovery
Video lockup, or picture freeze, can occur unexpectedly on digital
rasterscan radars. This is mainly caused by heavy spike noise in the power
line and can be noticed by carefully watching the nearly invisible sweep line.
If you suspect that the picture is not updated every scan of the antenna or no
key entry is accepted notwithstanding the apparently normal picture, do
Quick Start to restore normal operation:
1. Turn off the power switch and turn it on again within five seconds.
2. Push the ST-BY switch in the tuning compartment.
3. Push the Transmit switch labeled ST-BY/TX for Transmit status.
12. 202
DEGAUSSING THE CRT SCREEN
Each time the radar is turned on, the degaussing circuit automatically
demagnetizes the CRT screen to eliminate color contamination caused by
earth’s magnetism or magnetized ship structure.
The screen is also degaussed automatically when own ship has made a
significant course change. While being degaussed, the screen may be
disturbed momentarily with vertical lines. If you wish to degauss by manual
operation at an arbitrary time, open and press the Degauss switch in the
tuning compartment.
INITIALIZING THE GYRO READOUT
Provided that your radar is interfaced with a gyrocompass, ship’s heading
is displayed at the top of the screen. Upon turning on the radar, align the on-
screen GYRO readout with the gyrocompass reading by the procedure
shown below. Once you have set the initial heading correctly, resetting is not
usually required. However, if the GYRO readout goes wrong for some
reason, repeat the procedure to correct it.
1. Open the tuning compartment and press the HOLD button. The Gyro
LED lights.
2. Press the UP or DOWN button to duplicate the gyrocompass reading at
the on screen GYRO readout. Each press of these buttons changes the
readout by 0.1-degree steps. To change the readout quickly, hold the UP
or DOWN button for over two seconds.
3. Press the HOLD switch when the on screen GYRO readout has matched
the gyrocompass reading. The Gyro LED goes out.
Note: The HOLD button is used to disengage the built-in gyro interface from
the gyrocompass input in the event that you have difficulty in fine-adjusting
the GYRO readout due to ship’s yawing, for example. When initializing the
GYRO readout at a berth (where the gyrocompass reading is usually stable),
you may omit steps 1 and 3 above.
PRESENTATION MODES
This radar has the following presentation modes:
Relative Motion (RM)
Head-up: Unstabilized
Head-up TB: Head-up with compass-stabilized bearing scale (True
Bearing)
Course-up: Compass-stabilized relative to ship’s intended course
North-up: Compass-stabilized with reference to north)
True Motion (TM)
North-up: Ground or sea stabilized with compass and speed inputs
SELECTING PRESENTATION MODE
Press the MODE key on the mode panel. Each time the MODE key is
pressed, the presentation mode and mode indication at the upper-left corner
of the screen change cyclically.
Loss of Gyro Signal: When the gyro signal is lost, the presentation mode
automatically becomes head-up and the GYRO readout at the screen top
shows asterisks(***.*). The message SET HDG appears at the upper of the
screen. This warning stays on when the gyro signal is restored, to warn the
operator that the readout may be unreadable. Press the MODE key to select
another presentation mode (the asterisks are erased at this point). Then, align
the GYRO readout with the gyrocompass reading and press the CANCEL
key to erase the message SET HDG.
13. 203
Head-up Mode (Figure 5.7)
A display without azimuth stabilization in which the line connecting the
center with the top of the display indicates own ship’s heading.
The target pips are painted at their measured distances and in their
directions relative to own ship’s heading.
A short line on the bearing scale is the north marker indicating compass
north. A failure of the gyro input will cause the north marker to disappear
and the GYRO readout to show asterisks (***.*) and the message SET HDG
appears on the screen.
Course-up Mode (Figure 5.8)
An azimuth stabilized display in which a line connecting the center with
the top of the display indicates own ship’s intended course (namely, own
ship’s previous heading just before this mode has been selected). Target pips
are painted at their measured distances and in their directions relative to the
intended course which is maintained at the 0 position while the heading
marker moves in accordance with ship’s yawing and course changes. This
mode is useful to avoid smearing of picture during course change. After a
course change, press the (CU, TM RESET) key to reset the picture
orientation if you wish to continue using the course up mode.
Figure 5.7 - Head-up Mode Figure 5.8 - Course-up Mode
14. 204
Head-up TB (True Bearing) Mode (Figure 5.9)
Radar echoes are shown in the same way as in the head-up mode. The
difference from normal head-up presentation lies in the orientation of the
bearing scale. The bearing scale is compass stabilized, that is, it rotates in
accordance with the compass signal, enabling you to know own ship’s
heading at a glance.
This mode is available only when the radar in interfaced with a
gyrocompass.
North-up Mode (Figure 5.10)
In the north-up mode, target pips are painted at their measured distances
and in their true (compass) directions from own ship, north being maintained
UP of the screen. The heading marker changes its direction according to the
ship’s heading.
If the gyrocompass fails, the presentation mode changes to head-up and
the north marker disappears. Also, the GYRO readout shows asterisks
(***.*) and the message SET HDG appears on the screen.
Figure 5.9 - Head-up TB (True Bearing) Mode Figure 5.10 - North-up Mode
15. 205
True Motion Mode (Figure 5.11)
Own ship and other moving objects move in accordance with their true
courses and speeds. All fixed targets, such as landmasses, appear as
stationary echoes.
When own ship reaches a point corresponding to 75% of the radius of the
display, the own ship is automatically reset to a point of 50% radius opposite
to the extension of the heading marker passing through the display center.
Resetting can be made at any moment before the ship reaches the limit by
pressing the (CU, TM RESET) key. Automatic resetting is preceded by a
beep sound.
If the gyrocompass fails, the presentation mode is changed to the head-up
mode and the north marker disappears. The GYRO readout at the top of the
screen shows asterisks (***.*) and the message SET HDG appears on the
screen.
Figure 5.11 - True Motion Mode
16. 206
SELECTING THE RANGE SCALE
The display range scale is changed in 13 steps on the R-type (11 steps on
the IMO-type) by pressing the (+) and (-) keys. The selected range scale and
range ring interval are shown at the upper left corner on the screen.
The display range can be expanded by 75% (100% in R-type) in any
direction by using the off-centering control.
SELECTING THE PULSEWIDTH
The pulse width in use is displayed at the upper-left position of the screen
using the abbreviations shown in the table above.
Appropriate pulse widths are present to individual range scales and
function keys. Therefore, you are not usually required to select them. If you
are not satisfied with the current pulsewidth settings, however, it is possible
to change them by the radar menu operation shown below.
You can choose the pulsewidth 1 or 2 on the scales 0.5 to 24 nm ranges on
X-band models and 0.75 to 24 nm ranges on S-band models.
The display range can be expanded by 75% (100% in R-type) in any
direction by using the off-centering control.
Selecting Pulsewidth 1 or 2
1. Press the RADAR MENU key on the plotting keypad to show the
FUNCTION menu.
2. Press the (1) key to select (or highlight) PLUSEWIDTH 1 or 2 as
appropriate.
3. Press the (1) key to select menu item 1 PULSEWIDTH.
4. Press the ENTER key to conclude your selection followed by the RADAR
MENU key to close the FUNCTION menu.
Presetting Pulsewidths 1 and 2
Pulsewidth 1 and 2 can be preset on the Pulsewidth 1 and 2 menus. Shown
below are examples of the pulsewidth setup procedure:
1. To enable selection of S1 (0.07 microseconds) and S2 (0.15
microseconds) pulsewidth on the 0.5 nm range on an X-band model,
select S1 at 0.5 nm on the PULSEWIDTH 1 menu and M1 at 3 nm on the
PULSEWIDTH 2 menu.
2. To enable selection of S2 (0.15 microseconds) and M1 (0.3 microseconds)
pulsewidth on the 3 nm range on an X-band model, select S2 at 3 nm in
the PULSEWIDTH 1 menu and M1 at 3 nm in the PULSEWIDTH 2
menu.
A longer pulse provides an increased detection range, but with reduced
discrimination. If you need discrimination in preference to detection, choose
a shorter pulse.
Example: To select S1 (0.07us) as Pulsewidth 1 for the 0.5 nm range, display
the PULSEWIDTH 1 menu following the steps shown above and hit the (2)
key to choose “2 0.5 NM>” Further hit the (2) key until the menu option
“S1” is highlighted to the right of “2 0.5” NM.”
ADJUSTING THE SENSITIVITY
The GAIN control (see Figure 5.14) is used to adjust the sensitivity of the
receiver, and thus the intensity of echoes as they appear on the screen. It
should be adjusted so that speckled background noise is just visible on the
screen.
To become acquainted with the way the GAIN control works, try rotating
it between fully counterclockwise and clockwise positions while observing
the radar picture. You will notice that clockwise rotation increases the echo
intensity level. A low gain setting results in the loss of weak echoes and a
reduced detection range. If you turn the GAIN control too far clockwise for
an excessive gain setting, desired echoes will be masked in the strong
background noise.
17. 207
SUPPRESSING SEA CLUTTER
In rough weather conditions returns from the sea service are received over
several miles around own ship and mask close targets. This situation can be
improved by properly adjusting the A/C SEA (Anti-clutter sea) control (see
Figure 5.15).
Automatic anti-clutter control
The easiest way to suppress the service clutter is to use the automatic
control. Press the A/C AUTO key (see Figure 5.15) next to the EBL rotary
control at the left corner on the control panel. Use of a function key is also a
good method for reducing sea clutter. For this purpose, presetting is required.
Consult a Furuno representative.
Manual anti-clutter control
From the fully counterclockwise position, slowly turn the A/C SEA
control clockwise. For optimum target detection, you should leave speckles
of the surface return slightly visible.
The ant-clutter sea control is often referred to as STC (Sensitivity Time
Control) which decreases the amplification of the receiver immediately after
a radar pulse id transmitted, and progressively increases the sensitivity as the
range increases.
A common mistake is to over adjust the A/C SEA control so that the
surface clutter is completely removed. By rotating the control fully
clockwise, you see how dangerous this can be; a dark zone is created near
the center of the screen and close-in targets can be lost. This dark zone is
even more dangerous if the gain has not been properly adjusted. Always
leave a little surface clutter visible on the screen. If no surface clutter is
observed (on very calm water), set the control at the fully counterclockwise
position.
SUPPRESSING PRECIPITATION CLUTTER
In adverse weather conditions, clouds, rain, or snow produce a lot of
spray-like spurious echoes and impairs target detection over a long distance.
This situation can be improved by using a function key provided that it is
programmed. If the function key fails to offer a favorable suppression of the
rain clutter, adjust the A/C RAIN control (see Figure 5.16) on the front
control panel.
The A/C RAIN control adjusts the receiver sensitivity as the A/C SEA
control does but rather in a longer time period (longer range). Clockwise
rotation of this control increases the anti-clutter effect.
INTERFERENCE REJECTOR
Mutual radar interference may occur in the vicinity of another shipborne radar
operating in the same frequency band (9GHz for X-band, 3 GHz for S-band). It
is seen on the screen as a number of bright spikes either in irregular patterns or in
the form of usually curved spoke-like dotted lines extending from the center to
the edge of the picture. The type of interference can be reduced by activating the
interference rejector circuit.
The interference rejector is a kind of signal correlation circuit. It
compares the received signals over successive transmissions and suppresses
randomly occurring signals. There are three levels of interference rejection
depending on the number of transmissions that are correlated. These are
indicated by the legends lR1, lR2 and lR3 at the upper left position of the
screen.
Press the INT REJECT key to activate the interference rejector circuit.
Successive presses of the key increase the effect of interference rejection, up
to level 3. A fourth press deactivates the interference rejector. Switch off the
interference rejector when no interference exists; otherwise weak targets
may be lost.
Note: For stable reception of certain types of radar beacons (racons) or
SART (Search and Rescue Radar Transponder) as required by SOLAS 1974
as amended 1988 (GMDSS), it is recommended to turn the interference
rejector off.
18. 208
MEASURING THE RANGE (FIGURE 5.12)
Use the fixed range rings to obtain a rough estimate of the range to the
target. They are concentric solid circles about own ship, or the sweep origin.
The number of rings is automatically determined by the selected range scale
and their interval is displayed at the upper left position of the screen. Press
the RINGS key on the mode panel to show the fixed range rings if they are
not displayed. Successive presses of the RINGS key gradually increase their
brightness in 4 steps and fifth press erases the range rings.
Use the Variable Range Markers (VRM) for more accurate measurement
of the range of the target. There are two VRMs, No.1 and No.2, which
appear as dashed rings so that you can discriminate them from the fixed
range rings. The two VRMs can be distinguished from each other by
different lengths of dashes.
Press the VRM ON key to display either of the VRMs. Successive presses
of the VRM ON key toggle the active VRM between No.1 and No.2 and the
currently active VRM readout is circumscribed by >.....<.
Align the active VRM with the inner edge of the target of interest and read
its distance at the lower right corner of the screen. Each VRM remains at the
same geographical distance when you operate the RANGE+ or RANGE-
key. This means that the apparent radius of the VRM ring changes in
proportion to the selected range scale. Press the VRM OFF key to erase each
VRM.
MEASURING THE BEARING (FIGURE 5.13)
Use the Electronic Bearing Lines (EBL) to take bearings of a target. There
are two EBLs, No.1 and No.2 which are toggled by successive presses of the
EBL ON key. Each EBL is a straight dashed line extending out from the own
ship position up to the circumference of the radar picture. The fine dashed
line is the No.1 EBL and the course dashed one is the No.2 EBL.
Press the ELB ON key to display either of the EBLs. Successive presses
of the EBL ON key toggle the active ELB between No.1 and No.2 and the
currently active EBL readout is circumscribed by >... <.
Rotate the EBL rotary control clockwise or counterclockwise until the
active EBL bisects the target of interest, and read its bearing at the lower left
corner of the screen. The EBL readout is affixed by “R” (relative) if it is
relative to own ship’s heading, T (true) if it is referenced to the north, as
determined by RADAR 2 menu settings.
Each EBL carries a range marker, or a short line crossing the EBL at right
angles and its distance from the EBL origin is indicated at the VRM readout
whether or not the corresponding VRM is displayed. The range marker
changes its position along the EBL with the rotation of the VRM control.
Press the EBL OFF key to erase each EBL.
Figure 5.12 - Measuring the range Figure 5.13 - Measuring the bearing
19. 209
COLLISION ASSESSMENT BY OFFSET EBL
The origin of the EBL can be placed anywhere with the trackball to enable
measurement of range and bearing between any targets. This function is also
useful for assessment of the potential risk of collision. To assess possibility
of collision:
1. Press the EBL ON key to display or activate an EBL (No.1 or 2).
2. Place the cursor (+) on a target of interest (A in the illustrated example) by
operating the trackball.
3. Press the EBL OFFSET key on the mode panel, and the origin of the
active EBL shifts to the cursor position. Press the EBL OFFSET key again
to anchor the EBL origin.
4. After waiting for a few minutes (at least 3 minutes), operate the EBL
control until the EBL bisects the target at the new position (A’). The EBL
readout shows the target ship’s course, which may be true or relative
depending on the settings on the RADAR 2 menu.
If relative motion is selected, it is also possible to read CPA by using a
VRM as shown in figure 5.14. If the EBL passes through the sweep origin
(own ship) as illustrated in figure 5.15, the target ship is on a collision
course.
5. To return the EBL origin to the own ship’s position, press the EBL
OFFSET key again.
Figure 5.14 - Evaluating target ship’s course and CPA in relative motion mode Figure 5.15 - Target ship on collision course
20. 210
MEASURING RANGE AND BEARING BETWEEN TWO TARGETS
Press the EBL OFFSET key, and place the origin of No.1 EBL, for
example, on a target of interest (target 1 in figure 5.16) by operating the
trackball.
Turn the EBL control until the EBL passes through another target of
interest (target 2).
Turn the VRM control until the range marker aligns with target 2. The
active VRM readout at the lower right corner of the screen indicates the
distance between the two targets.
You can repeat the same procedure on third and fourth targets (targets 3
and 4) by using No.2 EBL and No. 2 VRM.
Bearing is shown relative to own ship with suffix “R” or as a true bearing
with suffix “T” depending on EBL relative/true settings on the RADAR 2
menu. To return the EBL origin to the own ship position, press the EBL
OFFSET key again.
SETTING A GUARD ZONE (GUARD ALARM)
The guard zone (guard alarm) feature should never be relied upon as the
sole means for detecting the risk of potential collision. The operator of a ship
is not relieved of the responsibility to keep visual lookout for avoiding
collisions, whether or not the radar is in use.
A guard zone (guard alarm) may be set to alert the navigator to targets
(ships, landmasses, etc.) entering a certain area with visual and audible
alarms.
The guard zone (guard alarm) has a fixed width of 0.5 nm in the radial
direction and is adjustable only within 3.0 to 6.0 nm from own ship. The
guard zone (guard alarm) can be set to any sector angle between 0 and 360 in
any direction.
To set the guard zone (guard alarm):
1. Place the cursor (+) at point “A” using the trackball and press the GUARD
ALARM key on the mode panel (left key group). The message SET
GUARD appears at the bottom right corner of the screen.
2. Move the cursor (+) to point “B” and press the GUARD ALARM key.
Then, a guard zone (guard alarm) as illustrated is created and the label
GUARD appears instead of SET GUARD at the lower right corner of the
screen.
Note: If you wish to create a guard zone (guard alarm) having a 360
coverage around own ship, set point “B” in almost the same direction
(approx. +/-3 ) as point “
A” and press the GUARD ALARM key.
SILENCING AUDIBLE ALARM, REACTIVATING GUARD
ALARM
A target entering the guard zone produces both visual (flashing) and
audible (beeping) alarms. To silence the audible alarm, press the GUARD
ALARM key, and the label GUARD ACK replaces GUARD on the display.
This will deactivate the audible alarm but will not stop the flashing of the
target in the guard zone. To reactivate the audible alarm, press the GUARD
ALARM key again.
Figure 5.16 - Measuring range and bearing between two targets
21. 211
DISABLING GUARD ZONE (GUARD ALARM)
Hold the GUARD ALARM key depressed for at least 3 seconds.
Note: The guard alarm is given to targets having a certain level of echo
strength. This level does not always imply a landmass, reef, ships or other
surface objects but can mean returns from the sea surface or precipitation.
Properly adjust the GAIN, A/C SEA, and A/C RAIN controls to reduce
noise to avoid generation of guard alarm against false target detection.
INWARD AND OUTWARD GUARD ALARMS
On the R-type, an inward or outward guard alarm can be selected on the
RADAR 2 menu. On the IMO type, only the inward guard alarm is available.
The inward guard alarm generates visual and audible warnings when a target
enters the guard zone from any direction. The outward guard alarm is
produced when a target leaves the guard zone.
OFF-CENTERING
Own ship position, or sweep origin, can be displaced to expand the view
field without switching to a larger range scale. On the R-type, the sweep
origin can be off centered to a point specified by the cursor, up to 100% of
the range in use in any direction. On the IMO type, the sweep origin can be
off centered to the cursor position, but not more than 75% of the range in
use; if the cursor is set beyond 75% of the range scale, the sweep origin will
be off centered to the point of 75% of the limit. This feature is not available
on the longest range scale.
To off center the radar picture:
1. Place the cursor at a position where you wish to move the sweep origin by
operating the trackball.
2. Press the OFF CENTER key. Then, the sweep origin is off centered to the
cursor position.
3. To cancel off centering, press the OFF CENTER key again.
The picture cannot be off centered in the true motion mode.
ECHO STRETCH
On long ranges target echoes tend to shrink in the bearing direction,
making them difficult to see. On short and medium ranges such as 1.5, 3 and
6 nautical mile scales, the same size targets get smaller on the screen as they
approach the own ship. These are due to inherent property of the radiation
pattern produced by the antenna. To enhance target video, use the echo
stretch function. There are two types: echo stretch 1 for long range detection
and echo stretch 2 on 1.5-6 nautical mile scales.
To activate the echo stretch:
1. Press the RADAR MENU key on the plotting keypad to show the
FUNCTIONS menu.
2. Press the (2) key to select 2 ECHO STRETCH.
3. Press (2) until Echo Stretch option 1, 2 or OFF as desired is highlighted.
4. Press the ENTER key to conclude your selection followed by the RADAR
MENU key to close the FUNCTIONS menu.
Notes:
1. If the 1.5 nm range is preset for pulsewidth of S1 (0.08 microseconds) or
S2 (0.2 microseconds), and the 3nm scale for S2 (0.2), the echo stretch
function is not available on these range scales.
2. The echo stretch function magnifies not only small target pips but also
returns from sea surface, rain and radar interference. For this reason make
sure these types of interference have been sufficiently suppressed before
activating this function.
ECHO AVERAGING
The echo average feature effectively suppresses sea clutter. Echoes
received from stable targets such as ships appear on the screen at almost the
same position every rotation of the antenna. On the other hand, unstable
echoes such as sea clutter appear at random positions.
To distinguish real target echoes from sea clutter, this radar performs
scan-to-scan correlation. Correlation is made by storing and averaging echo
signals over successive picture frames.If an echo is solid and stable, it is
presented in its normal intensity. Sea clutter is averaged over successive
22. 212
scans resulting in the reduced brilliance, making it easier to discriminate real
targets from sea clutter.
To properly use the echo average function, it is recommended to first
suppress sea clutter with the A/C SEA control and then to do the following:
1. Press the RADAR MENU key on the plotting keypad to show the
functions menu.
2. Press the (3) key to select 3 ECHO STRETCH.
3. Press (3) until echo average option 1, 2 or OFF as desired is highlighted.
OFF: No averaging effect
• Helps distinguish targets from sea clutter and suppresses brilliance of
unstable echoes
• Distinguishes small stationary targets such as navigation buoys
• Stably displays distant targets
4. Press the ENTER key to conclude your selection followed by the RADAR
MENU key to close the FUNCTIONS menu.
Echo averaging uses scan to scan signal correlation technique based on
the true motion over the ground of each target. Thus, small stationary targets
such as buoys will be shown while suppressing random echoes such as sea
clutter. True echo average is not however effective for picking up small
targets running at high speeds over the ground.
Echo average is inoperable when a gyrocompass signal is not available. If
you wish to use this feature without a gyrocompass signal, consult a Furuno
representative.
Manual speed entry is done at menu item 6 SHIP’S SPEED on the
FUNCTIONS menu which is accessed by pressing the RADAR MENU key.
CAUTION: Do not use the Echo Average feature under heavy pitching and
rolling; loss of true targets can result.
ELECTRONIC PLOTTING AID (E-PLOT)
A maximum of 10 operator selected targets can be plotted electronically
(manually) to assess their motion trend. Five past positions can be displayed
for each of the plotted targets. If you enter a 6th plot on a certain target, the
oldest plot (past position) will be erased.
A vector appears when you enter a second plot for the target and is
updated each time a new plot is entered. The vector shows the target motion
trend based on its latest two plots.
Alphanumeric readouts at the upper right hand corner of the screen show
range, bearing, course, speed, CPA, and TCPA of the last plotted target.
It should be noted that the vector and alphanumeric data are not updated
in real time, but only when you enter a new plot.
Note: EPA requires own speed input (automatic or manual) and a compass
signal. The vector and data are updated on real time between plot entries, but
do not neglect to plot a new position over a long period of time. Otherwise,
the accuracy will be reduced. Note that the plots will be lost when the
compass fails; start the plotting exercise again.
Plotting a target
To perform electronic plotting:
1. Place the cursor (+) on a target of interest by operating the trackball.
2. Select a desired plot symbol by pressing one of the plot symbol keys on
the plotting keypad.
3. Press the ACQ key on the operator control panel, and the selected plot
symbol is marked at the cursor position.
4. Watching the EPA time (TIM xx:xx) shown at the upper right margin of
the screen, wait for at least 30 seconds. Place the cursor (+) on the target
at its new location, select the same plot symbol for the target and press the
ACQ key. The plot symbol moves to the new target position and previous
position is marked by a small dot.
5. To acquire other targets, repeat the above steps selecting different plot
symbols.
23. 213
Note: If a target once plotted is not plotted again within 10 minutes, the
warming “UPDATE PLOT NO” will appear on the upper right margin of the
screen and the plot symbol of the target flashes. If you want to continue
plotting this target, reacquire it within five minutes. Otherwise, the target
will be regarded as a “lost target” and its plot symbol and target data will be
erased. The larger the plotting interval, the less accurate the plotted target
data. Plotting of each target should normally be made every 3 or 6 minutes as
far as possible.
When a target has been plotted more than once, the radar calculates its
motion rend and automatically displays a vector on the target.
True or relative vector
True vectors can be displayed relative to own ship’s heading (Relative) or
with reference to the north (True). Press the VECTOR TRUE/REL key to
select the proper indication. This feature is available in all presentation
modes (gyrocompass must be working correctly). The current vector mode is
indicated at the upper right corner of the screen.
Vector time
Vector time (or the length of vectors) can be set to 30 sec, 1, 2, 3, 6, 12, 15
or 30 minutes and the selected vector time is indicated at the upper right
corner of the screen. Press the VECTOR TIME key until the desired vector
time is reached. The vector tip shows an estimated position of the target after
the selected vector time elapses. It can be valuable to extend the vector
length to evaluate the risk of collision with any target.
Target data
The radar calculates motion trends (range, bearing, course, speed, CPA,
and TCPA) of all plotted targets.
In head up and head up true bearing modes, target bearing, course and
speed shown in the upper right target data field become true (suffix “T”) or
relative (suffix “R”) to own ship in accordance with true/relative vector
setting. In north up, course up, and true motion modes, the target data field
always displays true bearing, true course and speed over the ground or
through the water.
Reading the target data
Press the corresponding plot symbol key, and the following target data is
displayed.
RNG/BRG: (Range/Bearing): Range and bearing from own ship to last
plotted target with suffix “T” or “R” plot symbol.
CSE/SPD: (Course/Speed): Course and speed are displayed for the last
plotted target with suffix “T” or “R” plot symbol.
CPA/TCPA: CPA is a closest range the target will approach to own ship.
TCPA is the time to CPA. Both are automatically calculated. TCPA is
counted up to 99.9 minutes and beyond this., it is indicated as TCPA >*99.9
MIN.
BCR/BCT: BCR (Bow Cross Range) is the range at which target will cross
own ship’s bow. BCT (Bow Cross Time) is the estimated time at which target
will cross own
Terminating target plotting
With E-plot you can plot up to 10 targets. You may wish to terminate
plotting of less important targets to newly plot other threatening targets.
By Symbol: To terminate plotting of a certain target, press the corresponding
plot symbol key. Then press the CANCEL key.
With Trackball: Place the cursor (+) on a target which you do not want to be
tracked any longer by operating the trackball and press the CANCEL key.
All Targets: To terminate plotting of all targets at once, press and hold the
CANCEL key until all plot symbols and marks disappear in about 3 seconds.
Entering own ship’s speed
EPA requires an own ship speed input and compass signal. The speed can
be entered from a speed log (automatic) or through the plotting keypad
(manual).
24. 214
Automatic speed input
1. Press the RADAR MENU key on the plotting keypad to show the
functions menu,
2. Press the (6) key to select menu item 6 SHIP’S SPEED.
3. Press the (6) key to select (or Highlight) LOG option.
4. Press the ENTER key to confirm your selection followed by the RADAR
MENU key to close the FUNCTIONS menu. The ship’s speed readout at
the screen top shows own ship’s speed fed from the speed log preceded by
the label “LOG”.
Notes:
1. IMO Resolution A.823(19) for ARPA recommends that a speed log to be
interfaced with an ARPA should be capable of providing through-the-water
speed data.
2. Be sur not to select LOG when a speed log is not connected. If the log
signal is not provided, the ship’s speed readout at the screen top will be
blank.
Manual speed input
If the radar is not interfaced with a speed log, or the speed log does not
feed correct speed enter the ship’s speed as follows:
1. Press the RADAR MENU key on plotting keypad to show the
FUNCTIONS menu.
2. Press the (6) key to select menu 6 SHIP’S SPEED.
3. Press the (6) key to select menu 6 SHIP’s SPEED.
4. Press the ENTER key to confirm selection. At this point, “MAN+XX.KT”
appears at the bottom of the FUNCTIONS menu.
5. Enter the ship speed by hitting corresponding numeric keys followed by
the ENTER without omitting leading zeros, if any. As an example, if the
ship speed is 8 knots, punch (0) (8) (ENTER).
6. Press the RADAR MENU key to close FUNCTIONS menu. The ship
speed displayed at the screen top shows own ship speed entered by the
label “MAN”.
25. 215
TARGET TRAILS (ECHO TRAILS)
Echo trails are simulated afterglow of target echoes that represent their
movements relative to own ship or true movements with respect to true north
in a single tone or gradual shading depending on the settings on the RADAR
1 menu.
True or relative trails
You may display echo trails in true or relative motion. Relative trails show
relative movements between targets and own ship. True motion trails require
a gyrocompass signal and own ship speed input to cancel out own ship’s
movement and present true target movements in accordance with their over
the ground speeds and courses.
Refer to the automatic and manual speed input procedures for entering
own ship’s speed information.
Note: When true trail is selected on the RM mode, the legend TRUE TRAIL
appears in red. No true relative selection on TM, it is only TRUE TRAIL on
TM mode.
To select true or relative echo trail presentation:
1. Press the RADAR MENU key on the plotting keypad to show the
FUNCTIONS menu.
2. Press the (0) key to show the SYSTEM SETTING 1 menu.
3. Press the (2) key to show the RADAR 1 menu.
4. Press the (6) key to select menu item 6 TRAIL REF.
5. Press the (6) key to select (or highlight) REL (Relative) or TRUE option.
6. Press the ENTER key to confirm your selection followed by the RADAR
MENU key to close the menu.
Trail gradation
Echo trails may be shown in monotone or gradual shading. Gradual
shading paints the trails getting thinner with time just like the afterglow on
an analog PPI radar.
Selection of monochrome or gradual shading requires almost the same
operation as for true or relative trails setup procedure described above except
that you should:
• Press the (7) key to select menu item 7 TRAIL GRAD (graduation) in
step 4, and
• Press the (7) key to select (or highlight) GGL (single tone) or MULT
(multiple shading) option in step 5.
Displaying and erasing echo trails
Press the ECHO TRAILS key to activate or deactivate the echo trails
feature.
Each press of the ECHO TRAILS key within 5 seconds cyclically
changes echo trail length (time) to 30 seconds, 1, 3, 6, 15, and 30 minutes,
continuous echo trailing and OFF. The current echo trail setting is displayed
at the lower right corner of the screen.
Suppose that “3 MIN” has just been selected. If the ECHO TRAILS key is
hit more than 5 seconds later, echo trails are removed from the display
(memory) still alive with echo trail timer count going on). Next hitting of the
key calls out the echo trails on the screen. To proceed to longer plot intervals,
successively push the ECHO TRAILS key with a hit and release action. The
larger the echo trail length, the larger the larger the echo trail plot interval.
Note: Holding the ECHO TRAILS key depressed for about 3 seconds will
cause a loss of echo trail data so far stored in an in memory.
Resetting echo trails
To reset (or clear) the echo trail memory, hold the ECHO TRAILS key
depressed for about 3 seconds. Echo trails are cleared and the trailing
process restarts from time count zero at current echo trail plot interval. When
memory assigned to echo trailing becomes the echo trail timer at the lower
right corner of the screen freezes and the oldest trails are erased to show the
latest trails.
26. 216
PARALLEL INDEX LINES
Parallel index lines are useful for keeping a constant distance between
own ship and coastline or a partner ship when navigating. Index lines are
drawn in parallel with the No. 2 EBL (no. 2 EBL must be active). The
orientation of the index lines is controlled with the EBL control and the
intervals between the lines adjusted with the VRM rotary control (provided
that No. 2 VRM is active).
Maximum number of the index line can be set the initial Setting menu: 2,
3, or 6.
Displaying and erasing the index lines
1. Press the INDEX LINES key if the index lines are not already shown.
2. Make sure that the No. 2 EBL is active and orient the index lines in a
desired direction with the EBL rotary control.
3. To erase the index lines, press the INDEX LINES key again.
Adjusting index line intervals
1. Press the RADAR MENU key on the plotting keypad to show the
FUNCTIONS menu.
2. Press the (7) key to select menu item 7 INDEX LINES.
3. Press the (7) key to select or (highlight) No. 2 VRM or MAN (manual)
option.
4. Press the ENTER key to conclude your selection.
5. If you have selected MAN in step 3 above, “MAN=XX.XX NM” appears
at the bottom of the functions menu. Enter a desired line interval by
hitting numeric keys followed by the ENTER key without omitting
leading zeroes, if any. There are six index lines but the number of lines
visible on the screen may be less than six depending on the line setting
interval.
6. If you have selected NO. 2 VRM in step 3 above, make sure that the No. 2
VRM is active and adjust the spacing between the index lines by
operating the VRM control.
7. Press the RADAR MENU key to close the functions menu.
ANCHOR WATCH
The anchor watch feature helps you monitor whether own ship is dragged
by wind and/or tide while at anchor. This feature requires ship position data
from a suitable radio navigational aid. Provided that own ship’s physical data
has been entered, an own ship mark can be displayed when the anchor watch
feature is activated. The message “ANCHOR WATCH ERR” appears in red
when position data is not inputted.
Notes:
1. The own ship mark is available on the R-type radar only; unavailable on
the IMO type.
2. The own ship mark is created with data on own ship’s length, width, radar
antenna location, etc. To display an own ship mark, ask your nearest Furuno
representative.
Activating anchor watch
To set up the anchor watch feature:
1. On the ANCHOR WATCH menu, press the (2) key to select menu item 2
ANCHOR WATCH OFF/ON.
2. Further press the (2) key to select (or highlight) ON, followed by the
ENTER key to conclude your selection. The label WATCH appears at the
lower left corner of the screen.
3. Press the (3) key to select menu item 3 ALARM OFF/ON. Further press
the (3) key to select (or highlight) ON or OFF, followed by the ENTER
key to conclude your selection. (This operation determines whether to
activate the anchor watch audible alarm).
Alarm range setting
Press the (4) key to select menu item 4 ALARM RANGE on the
ANCHOR WATCH menu. Enter a desired alarm range between 0.1 and
9.999 nautical miles with numeric keys and press the ENTER key to
conclude your key input.
An anchor watch alarm circle thus established shows up as a red circle on
the screen. When own ship is dragged out of this alarm circle, an audible
alarm is generated and the on screen label ANCHOR WATCH turns red.
To silence the audible alarm, press the AUDIO OFF key on the control
panel.
27. 217
Showing drag line
Press the (5) key to select menu item 5 HISTORY on the ANCHOR
WATCH menu. Further press the (5) key to select ON, followed by the
ENTER key to conclude your selection.
A drag line, or a series of dots along which own ship was carried by wind
and water current, appears as illustrated below. During the first 50 minute
period, dots or own ship’s past positions are plotted every minute. When 50
dots have been plotted in 50 minutes, the plot interval becomes 2 minutes
and up to 25 dots are plotted during the succeeding 50 minute period. Next,
the dot interval becomes 4 minutes and the maximum number of dots will be
12.
Anchor watch in standby or transmit status
On the R-type the anchor watch feature is available in either STANDBY
or TRANSMIT status.
On the IMO type the anchor watch feature is available only in STANDBY
status.
Origin Mark
You can mark any dangerous point, prominent target or a particular
reference point using the origin mark feature. This mark is geographically
fixed.
To use the origin mark:
1. Place the cursor (+) at a point where you want to place a reference mark
by operating the trackball.
2. Press the ORIGIN MARK key on the plotting keypad. The origin mark
appears at the cursor position of which range and bearing are indicated at
the lower left section of the screen.
3. To measure the range and bearing to a target of interest from the origin
mark, move the cursor to the target of interest. Then, the range and
bearing from the origin mark to the target are shown at the target data
display.
4. To erase the origin mark, press the ORIGIN MARK key once again.
Zoom
The zoom function is available on the R-type radar only to enlarge an area
of interest.
1. Place the cursor (+) close to the point of interest by operating the
trackball.
2. Press the X2 ZOOM key. The area around the cursor and own ship is
enlarged twice as large as the original size and the label ZOOM appears at
the lower left corner of the screen.
3. To cancel zoom, press the X2 ZOOM key again.
Note: The zoom feature is inoperative when the display is off centered.
28. 218
MARKERS
Heading marker
The heading marker indicates the ship’s heading in all presentation
modes. It appears at zero degrees on the bearing scale in head up mode, in
any direction depending on the ship orientation in north up and true motion
modes.
Temporarily erasing heading marker
To temporarily extinguish the heading marker to look at targets existing
dead ahead of own ship, press the HM OFF key on the mode panel. This
heading marker reappears when the key is released.
North marker
The north marker appears as a short dashed line. In the head up mode, the
north marker moves around the bearing scale in accordance with the
compass signal.
Stern marker
The stern marker (a dot-and-dash line) appears opposite to the heading
marker. This marker can be displayed on the R type only provided that the
STERN MARK ON is selected on the RADAR 2 menu.
Menu Keys
Three menu keys are provided on the plotting keypad: RADAR MENU,
E-AUTO PLOT MENU and NAV MENU keys.
RADAR MENU: Permits setting of basic radar parameters.
E, AUTO PLOT MENU: Provides a choice of standard or large size of
plotting symbols for plot.
NAV MENU: Provides a choice of navigation data for on screen display.
Also select display for the Video Plotter.
29. 219
FUNCTION KEYS
The four function keys (#1-4) on the control panel (figure 5.17) work like
the auto dialing feature of a telephone, instantly calling out desired settings
to perform specially assigned functions. The function keys provide optimum
radar settings for a specific purpose with a single key operation.
Each function key can be assigned a combination of particular radar
settings that will be most suited to your specific navigating purpose, and an
adhesive label (such as BUOY, HARBOR, COAST or the like) is usually
attached to the key top for easy identification of the assigned purpose.
The individual function keys are preset, or programed, for the following
purposes by qualified service personnel at the time of installation using the
procedures described in the succeeding paragraphs;
Function key #1: Picture setup
Function keys #2 and #3: Picture setup and specific operation
Function key #4: Specific operation or watch alarm
Suppose that you have been navigating along a coast for hours and now
you are approaching a harbor, your final destination. You will have to adjust
your radar to change from the settings for coastal navigation to those for
harbor approach. Every time your navigating environment or task changes,
you must adjust the radar, which can be a nuisance in a busy situation.
Instead of changing radar settings case by case, it is possible to assign the
function keys to provide optimum settings for often encountered situations.
The radar’s internal computer offers several picture setup options to be
assigned to each function key for your specific navigating requirements. For
instance, one of the functions keys may be assigned the buoy detecting
function and labeled BUOY on the key top. If you press this key, the radar
will be instantly set for optimum detection of navigation buoys and similar
objects and the label BUOY is shown at the left margin of the screen. If you
re-press the same key, the radar returns to the previous settings.
Figure 5.17 - Function keys
30. 220
The radar’s internal computer offers several picture setup options to be
assigned to each function key for your specific navigating requirements. For
instance, one of the functions keys may be assigned the buoy detecting
function and labeled BUOY on the key top. If you press this key, the radar
will be instantly set for optimum detection of navigation buoys and similar
objects and the label BUOY is shown at the left margin of the screen. If you
re-press the same key, the radar returns to the previous settings.
The picture setup options assignable to any of the function keys are shown
in the table below.
LABEL DESCRIPTION
RIVER Optimum setting for navigation on river.
BUOY Optimum setting for detecting navigation buoys, small
vessels and other small surface objects.
SHIP Optimum setting for detecting vessels.
SHORT Optimum setting for short range detection using a range
scale of 6 nm or larger.
CRUISING For cruising using a range scale of 1.5 nm or larger.
HARBOR Optimum setting for short range navigation in a harbor area
using a range scale of 1.5 nm or less.
COAST For coastal navigation using a range of 12 nm or less.
OCEAN Transoceanic voyage using a range scale of 12nm or larger.
ROUGH SEA Optimum setting for rough weather or heavy rain.
Each picture setup option defines a combination of several radar settings
for achieving optimum setup for a particular navigating situation. Those
involved are interference rejector, echo stretch, echo average, automatic ant
clutter, pulsewidth and noise rejector settings.
Adjusting these features on a function key menu changes the original
function key settings. To restore the original settings for a particular function
key, it is necessary to display the relevant function key menu and select
appropriate menu options.
Note: Function key presetting requires a good knowledge of optimum radar
settings. If you want to change the original function key settings, consult
your Furuno representative or dealer.
Watch alarm
The watch alarm sounds an external buzzer selected time intervals to help
you keep regular watch of the radar picture for safety or other purposes. This
feature can be assigned to function key #4 with a choice of alarm intervals of
3, 6, 10, 12, 15 and 20 minutes.
Provided that function key #4 is assigned the watch alarm feature, just
press function key #4 to activate the feature. The label WATCH appears at
the lower left corner of the screen associated with a watch alarm timer
counts down from the initial value (namely, “12:00”).
When an audible watch alarm is released the preset time interval has
elapsed, the screen label WATCH turns red and the watch alarm timer
freezes at “0:00”.
To silence the alarm, press the AUDIO key. The label WATCH turns to
normal color and the watch alarm timer is reset to the initial value and starts
the count down sequence again.
If you press the AUDIO OFF key before the selected time interval is
reached, the watch alarm timer is reset to the initial value and starts the
countdown sequence again.
EPA Menu
EPA menu appears by pressing the E, AUTO PLOT MENU key. You can
set the following items.
1. COLLISION ALARM: You can set CPA and TCPA for the tracked target.
Refer to 2.12 setting CPA/TCPA alarm range. Note that TCPA setting is
available over one minute.
2. MARK SIZE: Change the size of the plotting.
3. PLOT NO.: Displays or hides plot number inside of the plot symbol
(circle and square).
4. TARGET DATA: Selects target vector mode between TRUE or REL.
Selection of REL provides the target mode in REL on HU and HU TB.
31. 221
NAVIGATION INFORMATION
Menu and Navigation Data Display
Various navigation data can be displayed on the radar screen. The data
includes, depending on whether appropriate information is fed into the radar,
own ship position, cursor position, waypoint data, wind data, water current
data, depth data, water temperature, rudder angle, rate of turn and navigation
lane.
Note that data not directly related with the radar presentation is not
available. Shown below id a typical navigational data display.
1. Press the NAV MENU key on the plotting keypad to show the NAV
INFORMATION menu.
2. Select navigation data input device and press the ENTER key to confirm
your selection.
3. Also, set other nav data parameters as appropriate referring to the
operation flow diagram (not shown).
4. Press the NAV MENU key to close the NAV INFORMATION menu.
Notes:
1. Own ship position display requires an input from an EPFS (elest rouis
position fixing system) such as a GPS receiver or a Loran-C receiver. Such
an EPFS should be of the type which provides output data in accordance
with IEC 1162.
2. When the sensor in use changes (ex. from GPS or DGPS), the name of
sensor in the own ship call turns red, and EPFS label appears. To erase, press
the CANCEL key.
Suppressing Second-trace Echoes
In certain situations, echoes from very distant targets may appear as false
echoes (second trace echoes) on the screen. This occurs when the return
echo is received one transmission cycle later, that is, after a next radar pulse
has been transmitted.
To activate or deactivate the second trace echo rejector:
1. Press the RADAR MENU key on the plotting keypad to show the
FUNCTIONS menu.
2. Press the (8) key to select menu item 8: 2ND ECHO REJ.
3. Further press the (8) key to activate (ON) or deactivate (OFF) the second
trace echo rejector.
4. Press the ENTER key to conclude selection followed by the RADAR
MENU key to close the FUNCTIONS menu.
32. 222
Adjusting Relative Brilliance Levels of Screen Data
You can adjust relative brilliance levels of various marks and
alphanumeric readouts displayed on the screen by following the steps shown
below:
1. Press the RADAR MENU key on the plotting keypad to show the
FUNCTIONS menu.
2. Press the (9) key to show the BRILLIANCE menu.
3. Select a desired menu item by pressing the corresponding numeric key. As
an example, press (4) if you want to change the brilliance of echo trails.
4. Further press the same numeric key as you pressed in step 3 above to
select or highlight a desired brilliance level.
5. Press the ENTER key to conclude your selection followed by the RADAR
MENU key to close the FUNCTIONS menu.
Set and Drift (Set and Rate)
Set the direction in which a water current flows, can be manually entered
on 0.1 - degree steps. Drift (rate), the speed of the tide, can also be entered
manually in 0.1 knot steps.
Set and drift corrections are beneficial for increasing the accuracy of the
vectors and target data. The correction is best made in the head up mode with
true vector, watching landmasses, or other stationary targets. If they have
vectors, set and drift values should be adjusted until they lose vectors.
Note: Set and drift correction is available on selecting the water tracking
mode only.
Proceed as follows to enter set and drift (rate):
1. Press the RADAR MENU key on the plotting keyboard to show the
FUNCTIONS 1 menu.
2. Press the (8) key to select menu item 8; SET, DRIFT.
3. Further press the (8) key to select OFF or MAN option.
OFF: No correction against set and drift.
MAN: Manual entry of set and drift data.
4. If OFF is selected, press the ENTER key.
5. If you have selected MAN in step 3 above, the highlight cursor will
advance one line down requesting you to enter SET xxx.x .Enter the value
of set in degrees by hitting numeric keys without omitting leading zeroes,
if any, and press the ENTER key.
6. The highlight cursor will then advance to the next line DRIFT xx.x KT.
Enter the value of drift in knots by hitting numeric keys without omitting
leading zeroes, if any, and press the ENTER key. Set and drift have the
same effect on own ship and all targets.
7. Press the RADAR MENU key to close the menu.
33. 223
OPERATION OF ARPA
GENERAL
The FAR-2805 series with ARP-25 board provide the full ARPA
functions complying with IMO A. 823 and IEC-60872-1 as well as
complying with the radar performance MSC.64(67) Annex 4.
PRINCIPAL SPECIFICATIONS
Acquisition and tracking
Automatic acquisition of up to 20 targets plus manual acquisition of 20
targets, or fully manual acquisition of 40 targets between 0.1 and 32 nm (0.1
and 24 nm depending on initial setting)
Automatic tracking of all acquired targets between 0.1 and 32 nm (0.1 and
24 nm depending on initial setting)
Vectors
Vector length: 30 sec, 1, 2, 3, 6, 12, 15, 30 min.
Orientation: True velocity or relative velocity
Motion trend: Displayed within 20 scans, full accuracy within 60 scans
after acquisition.
Past positions: Choice of 5 or 10 past positions at intervals of 30 sec,
1,2,3 or 6 min.
Alarms: Visual and audible alarms against targets violating CPA/
TCPA limits, lost targets, targets crossing guard zone
(guard ring), system failure and target full status.
Trial maneuver: Predicted situation appears in 1 min after selected delay
(1-60 minutes).
KEYS USED FOR ARPA
The Auto Plotter uses the keys on the plotting keypad on the right side of
the radar screen and two keys on the control panel. Below is a brief
description of these keys.
CANCEL: Terminates tracking of a single target specified by the trackball if
the key is pressed with a hit-and-release action. If the key is held depressed
for about 3 seconds, tracking of all targets is terminated.
ENTER: Registers menu options selected.
VECTOR TRUE/REL: Selects a vector length of 30s 1, 2, 3, 6, 12, 15 or
30min.
TARGET DATA: Displays data on one of tracked targets selected by the
trackball.
TARGET BASED SPEED: Own ship’s speed is measured relative to a fixed
target.
AUTO PLOT: Activates and deactivates the ARPA functions.
TRIAL: Shows consequences of own ship’s speed and course against all
tracked targets.
LOST TARGET: Silences the lost target aural alarm and erases the lost target
symbol.
HISTORY: shows and erases pat positions of tracked targets.
ACQ: (on control panel): Manually acquires a target.
AUDIO OFF: (on control panel): Silences aural alarm.
34. 224
ARPA MENU OPERATION
Various parameters or the Auto Plotter are set on the ARPA 1 and ARPA 2
menus. To do this, follow the steps shown below:
1. Press the AUTO PLOT key if the Auto Plotter is not yet activated. Note
that the label ARPPA appears in the upper right box on the screen.
2. Press the E, AUTO PLOT MENU key to show the ARPA 1 menu.
3. Press the (0) key once if you wish to go to the ARPA 2 menu.
4. Select a desired menu item by pressing the corresponding numeric key.
5. Select a menu option by pressing the same numeric key as pressed in step
3 above. If there is more than one option on the current menu item, you
may need to press the numeric key several times. Press it until the desired
option is highlighted. (Note that certain menu items will prompt you to
enter numeric data or to define points on the radar screen with the
trackball).
6. Press the ENTER key to register settings.
7. Press the E, AUTO PLOT MENU key to close the menu.
START UP PROCEDURE
Activating the ARPA
To activate the ARPA:
1. Adjust the A/C RAIN, A/C SEA and GAIN controls for proper radar
picture.
2. Press the AUTO PLOT key. The label ARPA appears in the box at the
upper right on the screen.
Entering own ship’s speed
The ARPA requires own ship’s speed and heading data. Of these, the
speed data can be entered automatically from a speed log, navaid, or
manually through the numeric keys or based on a selected reference target
(such as a buoy or other prominent stationary target).
Automatic Speed Input
1. Press the RADAR MENU key on the plotting keypad to show the
FUNCTIONS menu.
2. Press the (6) key to select menu item 6 SHIP’S SPEED.
3. Press the (6) key to select (or highlight) LOG option.
4. Press the ENTER key to conclude your selection followed by the RADAR
MENU key to close the FUNCTIONS menu. The ship’s speed readout at
the top of the screen shows own ship’s speed fed from the speed log
preceded by the label “LOG”.
5. When the speed log is used, select speed reference to either of SEA or
GND (ground) on the ARPA 2 menu.
Notes:
1. IMO Resolution A.823:1995 for ARPA recommends that a speed log to be
interfaced with an ARPA should be capable of providing through the water
speed data rather than over the ground speed.
2. Be sure not to select LOG when a speed log is not connected. If the log
signal is not provided, the ship speed readout at the top of the screen will be
blank. In the event of a log error, you can continue plotting by entering a
manual speed.
3. If a log signal interval becomes more than 30 seconds with the ship’s
speed 5 knots or more, the radar regards the speed log is in trouble and LOG
FAIL appears, reading xx.xKT. For R-type, if no speed input is present for 3
minutes at below 0.1 knots, the radar regards the log is in failure.
35. 225
Manual Speed Input
To manually enter the ship’s speed with the numeric keys:
1. Press the RADAR MENU key on the plotting keypad to show the
FUNCTIONS menu.
2. Press the key (6) to select menu item 6 SHIP’S SPEED.
3. Press the key (6) to select (or highlight) MAN option.
4. Press the ENTER key to conclude your selection. At this point,
“MAN=xx.xKT” appears at the bottom of the FUNCTIONS menu.
5. Enter the ship speed by hitting corresponding numeric keys followed by
the ENTER key without omitting leading zeroes, if any. As an example, if
the ship speed is 8 knots, press (0)(8) ENTER. For 4.5 knots, (0)(4)(5)
ENTER.
6. Press the RADAR MENU key to close the FUNCTIONS menu. The ship
speed readout at the screen top shows own ship’s speed you entered
preceded by the label “MANU”.
Target based speed
The use of target based speed is recommended when:
1. The speed log is not operating properly. or not connected to the radar.
2. The vessel has no device which can measure ship’s leeward movement
(doppler sonar, speed log, etc.) though leeward movement cannot be
disregarded.
If you select target based speed, the Auto Plotter calculates own ship’s
speed relative to a fixed reference target.
Note: When the target based speed is adopted, automatically or manually
entered ship’s speed is disregarded.
To establish target based speed:
1. Select a small fixed island or any radar prominent point located at 0.2 to
24 nm from own ship.
2. Place the cursor (+) on the target by operating the trackball.
3. Press the TARGET BASED SPEED key. the reference target mark
appears at the cursor position and the own ship data label changes from
“LOG”, “NAV” or “MENU” to “REF”. Note that it takes one minute
before a new speed is displayed.
Notes:
1. When the reference target is lost or goes out of the acquisition range, the
reference target mark blinks and the speed reads “xx.x.”
2. When all targets are deleted, the reference target mark is also deleted and
the target based speed becomes invalid. the speed is indicated in KTBT
where BT means Bottom Track (speed over ground).
3. The vector of the reference target can be displayed by menu operation
(Auto Plot 1 menu).
Cancelling target based speed
To cancel the target based speed, just press the TARGET BASED SPEED
key. The speed is shown by LOG, NAV* or MANUAL as selected
previously. (NAV only on R-type).
Deactivating the ARPA
To deactivate the ARPA, just press the AUTO PLOT key. Target plotting
symbols and the on-screen label ARPA will disappear.
Note: Even when the ARPA is turned off, target tracking still goes on until
the radar id turned off.
AUTOMATIC ACQUISITION
The ARPA can acquire up to 40 targets (20 automatically and 20
manually or all 40 manually). If AUTO ACQ is selected after more than 20
targets have been manually acquired, only the remaining capacity of targets
can be automatically acquired. For example, when 30 targets have been
acquired manually, then the ARPA is switched to AUTO ACQ. Only 10
36. 226
targets can be acquired automatically. A target just acquired automatically is
marked with a broken square and a vector appears about one minute after
acquisition indicating the target’s motion trend. Three minutes after
acquisition, the initial tracking stage is finished and the target becomes ready
for stable tracking. At this point, the broken square mark changes to a solid
circle. (Targets automatically acquired are distinguished from those acquired
manually, displayed by bold symbol).
Enabling and disabling auto acquisition
1. Press the E, AUTO PLOT key if the ARPA is not yet activated. Note that
the label ARPA appears in the box at the upper right on the screen.
2. Press the E, AUTO PLOT MENU key to show the ARPA 1 menu.
3. Press the (1) key to select menu item 1 AUTO ACQ.
4. Further press the (1) key to select (or highlight) ON (enable auto
acquisition) or OFF (disable auto acquisition) as appropriate.
5. Press the ENTER key to conclude your selection followed by the E,
AUTO PLOT MENU key to close the AUTO PLOT 1 menu. Note that the
label AUTO+MAN is displayed in the box at the upper right on the screen
when auto acquisition is enabled; MAN when auto acquisition is disabled.
Note: When the ARPA has acquired 20 targets automatically, the message
AUTO TARGET FULL is displayed in the box at the right hand side of the
screen.
Setting auto acquisition areas
Instead of limits lines, auto acquisition areas are provided in the system.
There are two setting methods:
3, 6 Nautical Miles: Two predefined auto acquisition areas; one between
3.0 and 3.5 nautical miles and the other between 5.5 and 6.0 nautical miles.
SET: Two sector shaped or full circle auto acquisition areas set by using
the trackball.
To activate two predefined auto acquisition areas (3 & 6 NM):
1. Press the E, AUTO PLOT MENU key to show the ARPA 1 menu.
2. Press the (2) key to select menu item 2 AUTO ACQ AREA.
3. Further press the (2) key to select (or highlight) menu option 3, 6 nautical
miles.
4. Press the ENTER key to confirm your selection followed by the E, AUTO
PLOT MENU key to close the ARPA 1 menu.
To set auto acquisition areas with trackball:
1. Press the E, AUTO PLOT MENU key to show the ARPA 1 menu.
2. Press the (2) key to select menu item 2 AUTO ACQ AREA.
3. Further press the (2) key to select (or highlight) SET option.
4. Press the ENTER key to conclude your selection. At this point the AUTO
ACQ SETTING menu is displayed at the screen bottom.
5. Press the (2) key to select menu item 2 1/2 and press the ENTER key.
6. Place the cursor at the outer counterclockwise corner of the area and press
the ENTER key.
7. Place the cursor at the clockwise edge of the area and press the ENTER
key.
Note: If you wish to create an auto acquisition area having a 360 degree
coverage around own ship, set point B in almost the same direction (approx.
+/-3) as point A and press the ENTER key.
8. Repeat steps 5 and 7 above if you want to set another auto acquisition area
with the trackball.
9. Press the (1) key followed by the E, AUTO PLOT MENU key to close the
ARPA 1 menu.
An auto acquisition area like the example shown above appears on the
display. Note that each auto acquisition area has a fixed radial extension
width of 0.5 nautical miles.
Note that the auto acquisition areas are preserved in an internal memory
of the ARPA even when auto acquisition is disabled or the ARPA is turned
off.
37. 227
Terminating tracking of targets
When the ARPA has acquired 20 targets automatically, the message
AUTO TARGET FULL is displayed in the box at right hand side of the
screen and no more auto acquisition occurs unless targets are lost. You may
find this message before you set an auto acquisition area. Should this
happen, cancel tracking of less important targets or perform manual
acquisition.
Individual targets
Place the cursor (+) on a target to cancel tracking by operating the
trackball. Press the CANCEL key.
All targets
Press and hold the CANCEL key down more than 3 seconds. In the
automatic acquisition mode, acquisition begins again.
Discrimination between landmass and true targets
A target is recognized as a landmass and thus not acquired if it is 800
meters or more in range or bearing direction.
MANUAL ACQUISITION
In auto acquisition mode (AUTO ACQ ON), up to 20 targets can be
manually acquired in addition to 20 auto acquired targets. When auto
acquisition is disabled (AUTO ACQ OFF), up to 40 targets can be manually
acquired and automatically tracked.
To manually acquire a target:
1. Place the cursor (+) on a target of interest by operating the trackball.
2. Press the ACQ key on the control panel. The selected plot symbol is
marked at the cursor position.
Note that the plot symbol is drawn by broken lines during the initial
tracking stage. A vector appears in about one minute after acquisition
indicating the target’s motion trend. If the target is consistently detected for
three minutes, the plot symbol changes to a solid mark. If acquisition fails,
the target plot symbol blinks and disappears shortly.
Notes:
1. For successful acquisition, the target to be acquired should be within 0.1
to 32 nautical miles from own ship and not obscured by sea or rain clutter.
2. When you have acquired 40 targets manually, the message MAN
TARGET FULL is displayed at the screen bottom. Cancel tracking of non
threatening targets if you wish to acquire additional targets manually.
CHANGING PLOT SYMBOL SIZE
You may also choose plot symbol size. To choose a large or standard size
for all plot symbols:
1. Press the E, AUTO PLOT MENU key on the plotting keypad followed by
the keys (0) to show the ARPA 2 menu.
2. Press the (3) key to select 3 MARK SIZE.
3. Further press the (3) key to select (or highlight) STANDARD or LARGE
as appropriate.
4. Press the ENTER key to conclude your selection followed by the E,
AUTO PLOT MENU key to close the ARPA 2 menu.
ADJUSTING BRILLIANCE OF PLOT MARKS
1. Press the RADAR MENU key on the plotting keypad to show the
FUNCTIONS menu.
2. Press the (9) key to show the BRILLIANCE menu.
3. Press the (7) key to select 7 PLOT BRILL.
4. Further press the (7) key to select (or highlight) a desired brilliance level.
5. Press the ENTER key to confirm your selection followed by the RADAR
MENU key to close the FUNCTION menu.
40. 230
DISPLAYING TARGET DATA
The Auto Plotter calculates motion trends (range, bearing, course, speed,
CPA and TCPA) of all plotted targets
In head up and head up true bearing modes, target bearing, course and
speed shown in the upper right target data field become true (suffix “T”) or
relative (suffix “R”) to own ship in accordance with the true/relative vector
setting. In north up, course up and true motion modes, the target data field
always displays true bearing, true course and speed over the ground.
Place the cursor on the desired target and press the TARGET DATA key
on the plotting keypad. Data on the selected target is displayed at the upper
right corner of the screen. A typical target data display is shown in figure
5.20.
RNG/BRG: Range and bearing from own ship to the selected target with
suffix “T” (True) or “R” (Relative).
CSE/SPD: Course and speed are displayed for the selected target with suffix
“T” or “R”.
CSE/SPD: CPA (Closest Point of Approach) is the closest range a target will
approach to own ship. TCPA is the time to CPA. Both CPA and TCPA are
automatically calculated. When a target ship has passed clear of own ship,
CPA is prefixed with an asterisk such as, CPA * 1.5NM. TCPA is counted to
99.9 min and beyond this, it reads TCPA.*99.9MIN.
BCR/BCT: Bow crossing range is a range of a target which will pass dead
ahead of own ship at a calculated distance. BCT is the time when BCR
occurs.
Figure 5.20 - Target Data
41. 231
MODE AND LENGTH OF VECTORS
True or relative vector
Target vectors can be displayed relative to own ship’s heading (relative) or
with reference to the north (true).
Press the VECTOR TRUE/REL key to select true or relative vectors. This
feature is available in all presentation modes (gyrocompass must be working
correctly). The current vector mode is indicated at the upper right corner of
the screen.
True vector
In the true motion mode, all fixed targets such as land, navigational marks
and ships at anchor remain stationary on the radar screen with vector length
zero. But in the presence of wind and/or current, true vectors appear on fixed
targets representing the reciprocal of set and drift affecting own ship unless
set and drift values are properly entered (see figure 5.21).
Relative vector
Relative vectors on targets which are not moving over the ground such as
land, navigational marks and ships at anchor will represent the reciprocal of
own ship’s ground track. A target of which vector extension passes through
own ship is on the collision course. (See figure 5.22 - dotted lines are for
explanation only).
Vector time
Vector time (or length of vectors) can be set to 30 seconds, 1, 2, 3, 6, 12,
15 or 30 minutes and the selected vector time is indicated at the upper right
corner of the screen.
Press the VECTOR TIME key to select desired vector time. The vector tip
shows an estimated position of the target after the selected vector time
elapses. It can be valuable to extend the vector length to evaluate the risk of
collision with any target.
PAST POSITIONS
The ARPA displays equally time spaced dots marking the past positions
of any targets being tracked.
A new dot is added every minute (or at preset time intervals) until the
present number is reached. If a target changes it speed, the spacing will be
uneven. If it changes the course, its plotted course will not be a straight line.
Displaying and erasing past positions
To display past positions, press the HISTORY key to display past
positions of targets being tracked. The label HISTORY appears at the upper
right corner of the screen.
To erase past positions, press the HISTORY key again.
Figure 5.21 - True vectors in head-up mode
Figure 5.22 - Relative vectors in head-up mode
42. 232
Selecting the number of dots and past position intervals
1. Press the E, AUTO PLOT MENU key on the plotting keyboard to show
the ARPA 1 menu.
2. Press the (7) key to select menu item 7 HISTORY POINTS.
3. Further press the (7) key to select a desired number of past positions (5,
10, 20, 30, 100, 150 or 200). The IMO-type has the selection of only 5 or
10.
4. Press the ENTER key to confirm your selection.
5. Press the (8) key to select menu item 8 HISTORY INTERVAL.
6. Further press the (8) key to select a desired past position plot interval (30
seconds, 1, 2, 3 or 6 minutes).
7. Press the ENTER key to conclude your selection.
8. Press the E, AUTO PLOT MENU key to close the menu.
SETTING CPA/TCPA ALARM RANGES
The ARPA continuously monitors the predicted range at the CPA and
predicted time to CPA (TCPA) of each tracked target to own ship.
When the predicted CPA of any target becomes smaller than a preset CPA
alarm range and its predicted TCPA less than a preset TCPA alarm limit, the
ARPA releases an aural alarm and displays the warning label COLLISION
on the screen. In addition, the ARPA symbol changes to a triangle and
flashes together with its vector.
Provided that this feature is used correctly, it will help prevent the risk of
collision by alerting you to threatening targets. It is important that GAIN, A/
C SEA, A/C RAIN and other radar controls are properly adjusted.
CPA/TCPA alarm ranges must be set up properly taking into
consideration the size, tonnage, speed, turning performance and other
characteristics of own ship.
CAUTION: The CPA/TCPA alarm feature should never be relied upon as the
sole means for detecting the risk of collision. The navigator is not relieved of
the responsibility to keep visual lookout for avoiding collisions, whether or
not the radar or other plotting aid is in use.
To set the CPA/TCPA alarm ranges:
1. Press the E, AUTO PLOT MENU key on the plotting keypad to show the
ARPA 1 menu.
2. Press the (6) key to select menu item 6 CPA, TCPA SET. At this point, a
highlight cursor appears at the “CPAx.xNM” field.
3. Enter the CPA alarm range in nautical miles (max 9.9 min) without
omitting leading zeroes, if any, and press the ENTER key. The highlight
cursor now moves to the:TCPAxx.xMIN” field.
4. Enter the TCPA alarm limit in minutes (max.99.0 min) without omitting
leading zeroes, if any, and press the ENTER key.
5. Press the E, AUTO PLOT MENU key to close the menu.
Silencing CPA/TCPA aural alarm
Press the AUDIO OFF key to acknowledge and silence the CPA/TCPA
aural alarm.
The warning label COLLISION and the flashing of the triangle plot
symbol and vector remain on the screen until the dangerous situation is gone
or you intentionally terminate tracking of the target by using the CANCEL
key.
Setting a Guard Zone
When a target transits the operator-set guard zone, the buzzer sounds and
the indication GUARD RING appears at the screen bottom. The target
causing the warning is clearly indicated with an inverted flashing triangle.
CAUTION: The Guard Zone (Guard Ring) should never be relied upon as a
sole means for detecting the risk of collision. The navigator is not relieved of
the responsibility to keep a visual lookout for avoiding collisions, whether or
not the radar or other plotting aid is in use.
43. 233
Activating the guard zone
No. 1 Guard Zone is available between 3 and 6 nm with a fixed range
depth of 0.5 nm. No. 2 GZ may be set anywhere when No. 1 GZ is valid.
To set and activate the guard zone:
1. Press the E, AUTO PLOT MENU key on the plotting keyboard to show
the ARPA 1 menu.
2. Press the (3) key to select menu item 3 GUARD RING.
3. Further press the (3) key to select (or highlight) ON to activate the guard
zone.
4. Press the ENTER key to conclude your selection.
5. Press the (4) key to select menu item 4 GUARD RING SET. At this point
the GUARD SETTING menu is displayed at the screen bottom.
6. Press the (2) key and enter key. (2) (2) (ENTER) when setting the no. 2
ring.
7. Place the cursor at the outer left corner of the area (point 1) and press the
ENTER key.
8. Place the cursor at the right edge of the area (point 2) and press the
ENTER key.
Note: If you wish to create a guard zone having a 360-degree coverage
around own ship, set point 2 in almost the same direction (approx. +/- 3 ) as
point 1 and press the ENTER key.
9. Press the (1) key followed by the E, AUTO PLOT MENU key to close the
ARPA 1 menu.
Deactivating the guard zone (guard ring)
1. Press the E, AUTO PLOT MENU key on the plotting keyboard to show
the ARPA 1 menu.
2. Press the (3) key to select menu item 3 GUARD RING.
3. Further press the (3) key to select (or highlight) OFF to deactivate the
guard zone.
4. Press the ENTER key to conclude your selection followed by the E,
AUTO PLOT MENU key to close the ARPA 1 menu.
Silencing the guard zone (guard ring) audible alarm
Press the AUDIO OFF key to acknowledge and silence the guard zone
audible alarm.
Operational Warnings
There are six main situations which cause the Auto Plotter to trigger
visual and aural alarms:
• CPA/TCPA alarm
• Guard zone alarm
• Lost target alarm
• Target full alarm for manual acquisition
• Target full alarm for automatic acquisition
• System failures
The audible alarm can be set to OFF through the AUTO PLOT 2 menu.
44. 234
CPA/TCPA alarm
Visual and aural alarms are generated when the predicted CPA and TCPA
of any target become less than their preset limits. Press the AUDIO OFF key
to acknowledge and silence the CPA/TCPA aural alarm.
Guard zone (guard ring) alarm
Visual and audible alarms are generated when a target transmits the
operator-set guard zone. Press the AUDIO OFF key to acknowledge and
silence the guard zone audible alarm.
Lost target alarm
When the system detects a loss of a tracked target, the target symbol
becomes a flashing diamond. and the label “LOST” appears at the screen
bottom. At the same time, an aural alarm is produced for one second.
Press the LOST TARGET key to acknowledge the lost target alarm. Then,
the lost target mark disappears.
Target full alarm
When the memory becomes full, the memory full status is indicated and
the relevant indication appears on the screen and a short beep sounds.
Manually acquired targets
The indication “MAN TARGET FULL” appears at the screen bottom and
a short beep tone sounds when the number of manually acquired targets
reaches 20 or 40 depending on whether auto acquisition is activated or not.
Automatically acquired targets
The indication “AUTO TARGET FULL” appears at the screen bottom and
a short beep tone sounds when the number of automatically acquired targets
reaches 20.
System failure alarm
When the ARP board receives no signal input from the radar or external
equipment, the screen shows both “SYSTEM FAIL” associated with an
indication denoting offending equipment, also releasing an aural alarm. The
missing signals are denoted as shown below:
45. 235
TRIAL MANEUVER
Trial simulates the effect on all tracked targets against own ship’s
maneuver without interrupting the updating of target information.
There are two types of trial maneuvers: STATIC and DYNAMIC.
Dynamic trial maneuver
A dynamic trial maneuver displays predicted positions of the tracked
targets and own ship. You enter own ship’s intended speed and course with a
certain “delay time”. Assuming that all tracked targets maintain their present
speeds and courses, the targets’ and own ship’s future movements are
simulated in one second increments indicating their predicted positions in
one minute intervals.
The delay time represents the time lag from the present time to the time
when own ship will actually start to change her speed and/or course. You
should therefore take into consideration own ship’s maneuvering
characteristics such as rudder delay, turning delay and acceleration delay.
This is particularly important on large vessels. How much the delay is set the
situation starts immediately and ends in a minute.
Note that once a dynamic trial maneuver is initiated, you cannot alter own
ship’s trial speed, course or delay time until the trial maneuver is terminated.
Static trial maneuver
A static trial maneuver displays only the final situation of the simulation.
If you enter the same trial speed, course and delay time under the same
situation as in the aforementioned example of dynamic trial maneuver, the
screen will instantly show position OS7 for own ship, position A7 for target
A and position B7 for target B, omitting the intermediate positions. Thus, the
static trial maneuver will be convenient when you wish to know the
maneuver result immediately.
Note: For accurate simulation of ship movements in a trial maneuver, own
ship’s characteristics such as acceleration and turning performance should be
properly set in initial settings at the time of installation.
To perform a trial maneuver:
1. Press the E, AUTO PLOT MENU key on the plotting keypad followed by
the (0) key to show the ARPA 2 menu.
2. Press the (2) key to select 2 TRIAL MANEUVER.
3. Further press the (2) key to select (or highlight) STATIC or DYNAMIC
trial maneuver option as appropriate.
4. Press the ENTER key to conclude your selection followed by the E,
AUTO PLOT MENU key to close the ARPA 2 menu.
5. Press the VECTOR TRUE/REL key to select true or relative vector.
6. Press the TRIAL key. The TRIAL DATA SETTING menu appears at the
screen bottom associated with the current own ship’s speed and course
readouts.
Note: The second line reads (STATIC MODE) in the event of a static trial
maneuver.
7. Enter own ship’s intended speed, course and delay time in the following
manner:
Speed: Set with the VRM control.
Course: Set with the EBL control.
Delay time: Enter in minutes by hitting numeral keys. This is the
time after which own ship takes a new situation, not the
time the simulation begins. Change the delay time
according to own ship loading condition, etc.
8. Press the TRIAL key again to start a trial maneuver.
Trial maneuver takes place in three minutes with the letter “T” displayed
at the bottom of the screen. If any tracked target is predicted to be on a
collision course with own ship (that is, the target ship comes within preset
CPA/TCPA limits), the target plot symbol changes to a triangle and flashes.
If this happens, change own ship’s trial speed, course or delay time to obtain
a safe maneuver. The trial maneuver is automatically terminated and the
normal radar picture is restored three minutes later.
Terminating trial maneuver
Press the TRIAL key again at any time.
46. 236
CRITERIA FOR SELECTING TARGETS FOR TRACKING
The FURUNO ARPA video processor detects targets in midst of noise
and discriminates radar echoes on the basis of their size. Target whose echo
measurements are greater than those of the largest ship in range or tangential
extent are usually land and are displayed only as normal radar video. All
smaller ship sized echoes which are less than this dimension are further
analyzed and regarded as ships and displayed as small circles superimposed
over the video echo.
When a target is first displayed, it is shown as having zero true speed but
develops a course vector as more information is collected. In accordance
with the International Maritime Organization Automatic Radar Plotting Aid
requirements, an indication of the motion trend should be available in 1
minute and full vector accuracy in 3 minutes of plotting. The FURUNO
ARPAs comply with these requirements.
Acquisition and tracking
A target which is hit by 5 consecutive radar pulses is detected as a radar
echo. Manual acquisition is done by designing a detected echo with the
trackball. Automatic acquisition is done in the acquisition areas when a
target is detected 5-7 times continuously depending upon the congestion.
Tracking is achieved when the target is clearly distinguishable on the display
for 5 out of 10 consecutive scans whether acquired automatically or
manually. Targets not detected in 5 consecutive scans become “lost targets”.
Quantization
The entire picture is converted to a digital from called “Quantized Video”.
A sweep range is divided into small segments and each range elements is “1”
if there is radar echo return above a threshold level, or “0” if there is no
return.
The digital radar signal is then analyzed by a ship sized echo
discriminator. As the antenna scans, if there are 5 consecutive radar pulses
with l’s indicating an echo presence at the exact same range, a target “start”
is initiated. Since receiver noise is random, it is not three bang correlated,
and it is filtered out and not classified as an echo.