Performance of three Intel-based SMB servers running Web, email, and database applications
•
0 recomendaciones•475 vistas

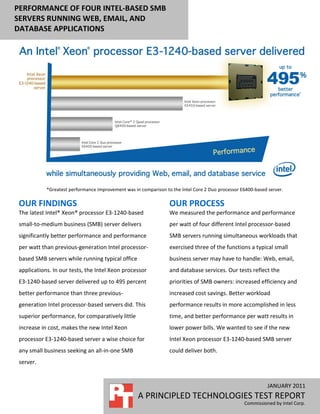
The latest Intel® Xeon® processor E3-1240-based small-to-medium business (SMB) server delivers significantly better performance and performance per watt than previous-generation Intel processor-based SMB servers while running typical office applications. In our tests, the Intel Xeon processor E3-1240-based server delivered up to 495 percent better performance than three previous-generation Intel processor-based servers did. This superior performance, for comparatively little increase in cost, makes the new Intel Xeon processor E3-1240-based server a wise choice for any small business seeking an all-in-one SMB server.

Recomendados
Recomendados
Más contenido relacionado
La actualidad más candente
La actualidad más candente (20)
Destacado
Destacado (11)
Similar a Performance of three Intel-based SMB servers running Web, email, and database applications
Similar a Performance of three Intel-based SMB servers running Web, email, and database applications (20)
Más de Principled Technologies
Más de Principled Technologies (20)
Performance of three Intel-based SMB servers running Web, email, and database applications
- 1. PERFORMANCE OF FOUR INTEL-BASED SMB SERVERS RUNNING WEB, EMAIL, AND DATABASE APPLICATIONS *Greatest performance improvement was in comparison to the Intel Core 2 Duo processor E6400-based server. OUR FINDINGS OUR PROCESS The latest Intel® Xeon® processor E3-1240-based We measured the performance and performance small-to-medium business (SMB) server delivers per watt of four different Intel processor-based significantly better performance and performance SMB servers running simultaneous workloads that per watt than previous-generation Intel processor- exercised three of the functions a typical small based SMB servers while running typical office business server may have to handle: Web, email, applications. In our tests, the Intel Xeon processor and database services. Our tests reflect the E3-1240-based server delivered up to 495 percent priorities of SMB owners: increased efficiency and better performance than three previous- increased cost savings. Better workload generation Intel processor-based servers did. This performance results in more accomplished in less superior performance, for comparatively little time, and better performance per watt results in increase in cost, makes the new Intel Xeon lower power bills. We wanted to see if the new processor E3-1240-based server a wise choice for Intel Xeon processor E3-1240-based SMB server any small business seeking an all-in-one SMB could deliver both. server. JANUARY 2011 A PRINCIPLED TECHNOLOGIES TEST REPORT Commissioned by Intel Corp.
- 2. PROJECT OVERVIEW Hardware ages out. As workloads become more demanding, older servers, and older desktop systems acting as servers, are increasingly unable to run them efficiently. SMB owners find their servers becoming bottlenecks to productivity, and even liabilities as they start to break down. Nonetheless, small businesses that are outgrowing their servers still question the performance benefits of newer servers. Can they continue to use their older desktop systems as servers? Were they to invest in a new server, how substantial would the performance gains in Web, email, and database applications be; how substantial would the power savings be; and what would the price differences be? In our tests, we address these questions by comparing a new Intel Xeon processor E3-1240-based server with that of several older Intel processor-based servers. The Intel Core 2 Quad processor Q8400-based server and Intel Core 2 Duo processor E6400-based server are intended to represent desktop systems acting as servers. We tested four one-socket servers with the following processors: Intel Xeon processor E3-1240-based server (3.30 GHz, 8MB L3 cache) Intel Xeon processor X3450-based server (2.66 GHz, 8MB L3 cache) Intel Core 2 Quad processor Q8400-based server (2.66 GHz, 4MB L2 cache) Intel Core 2 Duo processor E6400-based server (2.13 GHz, 2MB L2 cache) We used WebBench to simulate Web traffic, Average normalized performance 7.00 Microsoft® Exchange Load Intel Xeon processor 6.00 E3-1240-based server Generator (LoadGen) to Normalized performance 5.00 Intel Xeon processor simulate email activity, and X3450-based server 4.00 DVD Store Version 2 (DS2) to Intel Core 2 Quad 3.00 simulate database activity. All processor Q8400- 2.00 based server servers ran Microsoft Intel Core 2 Duo 1.00 processor E6400- Windows Server® 2008 R2 based server Standard Edition with 0.00 Servers Microsoft Exchange 2010 and Figure 1: Performance of the Intel processor-based servers across the three benchmarks Microsoft SQL Server® 2008 R2 relative to the Intel Core 2 Duo processor E6400-based server. Higher numbers are better. Enterprise Edition. Performance of four Intel-based SMB servers running Web, A Principled Technologies test report 2 email, and database applications
- 3. WHAT WE FOUND Figure 1 presents averaged results for the four Intel processor-based servers running the three workloads relative to the lowest-performing server, the Intel Core 2 Duo processor E6400-based server. While running the three benchmarks, the Intel Xeon processor E3-1240-based server delivered the following performance increases: 33.8 percent better than the Intel Xeon processor X3450-based server, 203.3 percent better than the Intel Core 2 Quad processor Q8400-based server, and 494.9 percent better than the Intel Core 2 Duo processor E6400-based server. For each benchmark, we assigned a value of 100 percent to that server’s results and then calculated the percentage performance improvement. This approach makes each data point a comparative number, with higher numbers indicating better performance. Finally, we took the percentage performance improvement over the Intel Core 2 Duo processor E6400-based server for the three benchmarks and averaged them. We also measured power consumption during the workload run. We took the averaged relative performance results and divided them by the active power consumption. We normalized those results to those of the Intel Core 2 Duo processor E6400-based server. As Figure 2 illustrates, the Intel Xeon processor E3-1240-based server produced the following performance-per-watt increase: 61.1 percent better than the Intel Xeon processor X3450-based server, 215.7 percent better than the Intel Core 2 Quad processor Q8400-based server, and 550.3 percent better than the Intel Core 2 Duo processor E6400-based server. Normalized performance/watt 7.00 As of February 15, Intel Xeon processor Normalized performance/watt 6.00 E3-1240-based 2011, the prices for each Intel- server 5.00 Intel Xeon processor processor based server are as X3450-based server 4.00 follows: 3.00 Intel Core 2 Quad Intel Xeon processor processor Q8400- E3-1240-based server: 2.00 based server $1,383.60 Intel Core 2 Duo 1.00 processor E6400- Intel Xeon processor based server X3450-based server: 0.00 Servers $1,344.09 Intel Core 2 Quad Figure 2: Normalized performance-per-watt results of the Intel processor-based servers processor Q8400-based across the three benchmarks relative to the Intel Core 2 Duo processor E6400-based server. Higher numbers are better. server: $985.26 Performance of four Intel-based SMB servers running Web, A Principled Technologies test report 3 email, and database applications
- 4. Intel Core 2 Duo processor E6400-based server: $926.86 Figure 3 presents a comparison of price and performance increase of the Intel Xeon processor E3-1240- based server relative to the other Intel processor-based servers. The Intel Xeon processor E3-1240-based server’s 33.8 percent performance increase over the Intel Xeon processor X3450-based represents a substantial performance increase for a small increase in price. We present more detailed price listings in Appendix B. Price Performance Comparison increase increase Intel Xeon processor E3-1240-based server vs. Xeon processor X3450- $39.51 33.8% based server Intel Xeon processor E3-1240-based server vs. Core 2 Quad processor $398.34 203.3% Q8400-based server Intel Xeon processor E3-1240-based server vs. Core 2 Duo processor $456.74 494.9% E6400-based server Figure 3: Price and performance increase for the Intel Xeon processor E3-1240-based server relative to the other Intel processor- based servers. WHAT WE TESTED We ran the following three workloads simultaneously, as a typical small business server might. WebBench WebBench 5.0 (128-bit US version) is an industry-standard benchmark for Web server software and hardware. It uses PC clients to send Web requests to a server under test. It generates performance results by incrementally increasing the number of clients making HTTP 1.0 GET requests to the Web server; the result is a curve showing the server’s performance under increasing load. The peak of that curve represents the peak throughput of the server. WebBench reports both the total number of requests per second the server handled and the server’s total throughput in bytes per second. We ran the WebBench default ecommerce CGI test suite, which generates both secure and non-secure static and dynamic HTTP 1.0 GET requests. While running the ecommerce suite, the clients must negotiate to a secure Web server port using the Secure Socket Layer (SSL) protocol. A default WebBench test suite incrementally increases the number of clients making the HTTP 1.0 GET requests to the Web server. As the workload increases the number of clients, the Web server’s processor utilization also increases, until the clients saturate the processor in the Web server with work. Each workload point with a fixed number of clients is a WebBench “mix.” The ecommerce CGI test suite begins with a mix that involves one client; the next mix involves four clients; and each subsequent mix increases the number of clients by four. We modified the test Performance of four Intel-based SMB servers running Web, A Principled Technologies test report 4 email, and database applications
- 5. suite so it would run the same number of clients, with 10 engines per client for the entire test. This allowed us to keep a constant Web load on the server. We used 45 clients on the Intel Xeon processor E3-1240-based server and the Intel Xeon processor X3450-based server, and scaled back to 30 clients on the Intel Core 2 Quad processor Q8400-based server and the Intel Core 2 Duo processor E6400-based server because these processors were unable to manage the greater workload. We performed only nine mixes for testing to limit the amount of time WebBench ran. To avoid any bottlenecks in the network cards, we used a ratio of 15 WebBench clients per NIC and added network adapters to the server hardware configuration as needed. We ran this workload on the four servers for 45 minutes each. DVD Store DVD Store Version 2 is an open-source application with a back-end database component, a front-end Web application layer, and a driver layer that operates as the middle tier and actually executes the workload. Because our goal was to isolate and test database server and storage, we did not use the Web application layer. Instead, we ran the driver application on client machines directly via its command-line interface. DS2 models an online DVD store. Simulated customers log in; browse movies by actor, title, or category; and purchase movies. The workload also creates new customers. Browsing movies involves select operations, some of which use SQL Server 2008 R2 full-text search and some of which do not. The purchase, login, and new customer stored procedures involve update and insert statements, as well as select statements. The workload’s main reporting metric is orders per minute (OPM). For the client machine, we used a desktop class system running Windows Server 2008 R2 Standard. The client machine ran a single instance of DS2, which spawned 32 threads on the Intel Xeon E3-1240 and Intel Xeon processor X3450-based servers, and scaled back to 16 threads on the Intel Core 2 Quad Q8400 and Intel Core 2 Duo processor E6400-based servers because these processors were unable to manage the greater workload, and ran 10 searches per order on all servers. This simulated a realistic business environment. We used the default DS2 parameters and setup configuration, with the exceptions we note above and in the DVD Store setup section in the How we tested section of this report. The DS2 driver application creates an orders-per-minute performance counter on the client machine. While the DVD Store client application visually outputs OPM at 10-second intervals, we chose to collect this OPM metric via a performance monitor counter on each client machine at 1-second intervals. We ran this workload on the four servers for 40 minutes each. Performance of four Intel-based SMB servers running Web, A Principled Technologies test report 5 email, and database applications
- 6. For more details about the DS2 tool, see http://www.delltechcenter.com/page/DVD+Store. Microsoft Exchange Load Generator Microsoft Exchange Load Generator (LoadGen) is an industry-standard tool for benchmarking a Microsoft Exchange 2003, 2007 or 2010 mail server. LoadGen performs tasks to simulate a standard user generating mail activity. While the workload was ongoing, we measured response time, or the time in milliseconds necessary for the Exchange mail server to complete a request, using a remote procedure call (RPC) performance counter. Specifically, we used the RPC Averaged Latency counter, which records the average time it takes the server to process the last 1,024 packets. In other words, the counter provides data about the shortest period that client computers wait for a response from the server. LoadGen measures the impact that various clients (MAPI, OWA, IMAP, POP, and SMTP) have on Exchange servers. This allows users to test how effectively a server running Exchange responds to email loads. The simulator uses a client machine to send multiple message requests to the server running Exchange, resulting in a mail load. We created a custom workload and adjusted it for 75 that LoadGen distributed across a single storage group with one mailbox database. We ran the Microsoft Exchange Load Generator benchmark for 30 minutes on the servers. For the client machine, we used a server running Microsoft Windows Server 2008 R2 Standard for testing the servers. For more details about LoadGen, see http://www.microsoft.com/downloads/en/details.aspx?FamilyID=cf464be7-7e52-48cd-b852-ccfc915b29ef. Performance of four Intel-based SMB servers running Web, A Principled Technologies test report 6 email, and database applications
- 7. SYSTEM COMPARISON Figure 4 shows a side-by-side comparison of the key hardware differences among the four servers. Appendix A provides detailed configuration information for the servers. Intel Xeon Intel Xeon Intel Core 2 Quad Intel Core 2 Duo Hardware processor E3-1240- processor X3450- processor Q8400- processor E6400- specifications based server based server based server based server Intel Xeon E3-1240 Intel Xeon X3450 Intel Core 2 Quad Intel Core 2 Duo CPU processor processor Q8400 processor E6400 processor CPU speed (GHz) 3.30 2.66 2.66 2.13 Number of 1 1 1 1 processor packages Number of cores per processor 4 4 4 2 package Number of hardware threads 2 2 1 1 per core Memory type PC3-10600E PC3-10600E PC2-5300 PC2-4200 Total memory (GB) 8 8 4 4 Figure 4: System configuration information for the four Intel processor-based servers. DETAILED FINDINGS For testing, we staggered the starting times of the benchmarks to allow each server to ramp up slowly. We began the benchmarks in the following order: WebBench, DVD Store, and LoadGen. Figure 5 shows a timeline for the benchmark runs. To obtain the final results, we removed the first parts of the WebBench run, and computed the results based on the 30 minutes of peak performance during the LoadGen run. We identified the median run based on the LoadGen score. To make sure each server achieved its optimum results, we allowed each to sit idle for 5 minutes before starting the workload. Performance of four Intel-based SMB servers running Web, A Principled Technologies test report 7 email, and database applications
- 8. Figure 5: The timeline we followed when starting the benchmarks for the multiple-benchmark runs on all Intel processor-based servers. The shaded areas from 00:15 to 00:45 represent the period during which we measured performance. Figure 6 presents results for the servers on the three benchmarks relative to the lowest-performing server, the Intel Core 2 Duo processor E6400-based server. For each benchmark, we assigned a value of 100 percent to that server’s results and then calculated the percentage performance improvement. This approach makes each data point a comparative number, with higher numbers indicating better performance. Finally, we took the percentage performance improvement over the Intel Core 2 Duo processor E6400-based server for the three benchmarks and averaged them. As Figure 6 shows, the Intel Xeon processor E3-1240-based server provided better performance than the other servers did, across all workloads. Performance of four Intel-based SMB servers running Web, A Principled Technologies test report 8 email, and database applications
- 9. Average Web, Percentage Web requests Email response email, and Server OPM CPU per second time database utilization scores Intel Xeon processor E3- 2.97 1.58 13.30 5.95 85.88 1240-based server Intel Xeon processor 2.54 1.47 9.33 4.45 85.73 X3450-based server Intel Core 2 Quad processor Q8400-based 1.99 1.42 2.47 1.96 96.79 server Intel Core 2 Duo processor E6400-based 1.00 1.00 1.00 1.00 99.90 server Figure 6: Performance for the Intel processor-based servers on the three benchmarks, relative to the Intel Core 2 Duo processor E6400-based server. With the exception of CPU utilization, higher numbers are better. WebBench results A WebBench run reports the total requests per second a server can perform and the total throughput, in bytes per second, that the server delivered. WebBench reports these results for each mix. To obtain the results, we averaged the requests per second and throughput from the mixes that ran during the peak performance of the benchmark run, as Figure 4 illustrates. Figure 7 shows the WebBench peak results in requests per second and in throughput (bytes per second) for the servers. Each result is the median of three runs. Throughput Requests per second Server Requests per second* (bytes per second) (raw) Intel Xeon processor E3-1240-based 161,752,123.72 16,572.55 2.97 server Intel Xeon processor X3450-based 138,421,163.50 14,179.48 2.54 server Intel Core 2 Quad processor Q8400- 108,265,654.10 11,090.45 1.99 based server Intel Core 2 Duo processor E6400- 54,509,923.03 5,580.24 1.00 based server Figure 7: Median WebBench results for the four Intel processor-based servers. Higher numbers are better. * Relative to the Intel Core 2 Duo processor E6400-based server Performance of four Intel-based SMB servers running Web, A Principled Technologies test report 9 email, and database applications
- 10. DVD Store results Figure 8 shows the number of OPM each server achieved during our measurement period of the DVD Store test on the median run. We determined the scores by taking the OPM value 30 minutes into the test period. Server Orders per minute (raw) Orders per minute* Intel Xeon processor E3-1240-based server 32,364 13.30 Intel Xeon processor X3450-based server 22,715 9.33 Intel Core 2 Quad processor Q8400-based server 6,022 2.47 Intel Core 2 Duo processor E6400-based server 2,434 1.00 Figure 8: Median DVD Store results for the four Intel processor-based servers. Higher numbers are better. * Relative to the Intel Core 2 Duo processor E6400-based server LoadGen results LoadGen results show the response time each for each server, which is the time in milliseconds it took to complete a request. Because the object of the server is to handle as many requests as possible, lower scores, which show a server able to handle more requests in a given time, are better. For testing, we used 75 Microsoft Exchange mailboxes; all four servers could handle the load while performing other tasks. Figure 9 shows the average Exchange 2010 Mail Server RPC average latency for the four servers. Each result is the median of three runs. RPC average latency RPC average latency Server in milliseconds (raw) in milliseconds* Intel Xeon processor E3-1240-based server 2.81 1.58 Intel Xeon processor X3450-based server 3.57 1.47 Intel Core 2 Quad processor Q8400-based server 3.87 1.42 Intel Core 2 Duo processor E6400-based server 6.70 1.00 Figure 9: Median LoadGen results for the four Intel processor-based servers. Lower response time is better. * Relative to the Intel Core 2 Duo processor E6400-based server To simulate the typical activity of a mail server, we created a custom workload using the average with a custom task distribution. Each of the 75 users had a mailbox of approximately 100 MB and used the average action profile. Figure 10 shows the configured distribution we used in our custom workload. Configured Configured Task name Task name distribution distribution BrowseCalendar 12 BrowseContacts 10 Logon 1 CreateContact 0 Logoff 0 BrowseTasks 0 SendMail 17 CreateTask 0 ReadAndProcessMessages 59 EditRules 0 Performance of four Intel-based SMB servers running Web, A Principled Technologies test report 10 email, and database applications
- 11. Configured Configured Task name Task name distribution distribution MoveMail 0 DownloadOab 0 DeleteMail 0 EditSmartFolders 0 ExportMail 0 SynchronizeFolders 0 CreateFolder 0 Search 0 PublicFolderPost 0 InitializeMailbox 1 BrowsePublicFolder 0 UserInit 0 PostFreeBusy 0 UserTerm 0 RequestMeeting 0 ModuleInit 0 MakeAppointment 0 ModuleTerm 0 Total 100 Figure 10: Configured distribution for LoadGen tasks. Figure 11 shows the power results during the median run of the four servers. Lower numbers are better. Server Workload power Intel Xeon processor E3-1240-based server 140.74 Intel Xeon processor X3450-based server 169.49 Intel Core 2 Quad processor Q8400-based server 146.49 Intel Core 2 Duo processor E6400-based server 153.83 Figure 11: Average workload power results, in watts, for the four Intel processor-based servers during the median run. Lower numbers are better. To calculate the power, we average the power we recorded during our workload measurement period. We allowed the system to sit for 10 minutes after booting to the desktop and then started the test. HOW WE TESTED Setting up the new server We used the BIOS RAID configuration utility to create one RAID 10 volume on the test servers. Following the operating system installation, we installed all important Windows® updates through January 14, 2011. Installing Windows Server 2008 R2 1. Insert the installation DVD for Windows Server 2008 R2 into the DVD drive. 2. Choose the language, time and currency, and keyboard input. Click Next. 3. Click Install Now. 4. Choose Windows Server Standard (Full Installation). Click Next. 5. Accept the license terms, and click Next. 6. Click Custom. 7. Click the Disk, and click Drive options (advanced). 8. Click New, Apply, Format, and click Next. 9. After the installation completes, click OK to set the Administrator password. Performance of four Intel-based SMB servers running Web, A Principled Technologies test report 11 email, and database applications
- 12. 10. Enter the administrator password twice, and click OK. General OS settings 1. Turn off User Account Control: a. Click Start, type Change User Account Control Settings and press Enter. b. In the User Account Control Settings window, move the slider on the left down to Never notify. c. Click OK. d. Reboot the system. 2. Edit power settings: a. Click Start, type change power-saving settings and press Enter. b. Click Change plan settings next to the selected power plan (Balanced). c. Set Turn off the display to Never. d. Set Put the computer to sleep to Never. e. Click Save changes, and close the Power Options window. 3. Turn off Windows Firewall: a. Click Start, type Windows Firewall with Advanced Security and press Enter. b. In the center pane under Overview, click Windows Firewall Properties. c. Under the Domain Profile, Private Profile, and Public Profile tabs, set the Firewall state to Off. d. Click OK. 4. Set static IP addresses: a. Right-click the network icon in the quick-launch bar, and choose Open Network and Sharing Center. b. Click Change adapter settings. c. Right-click the local area connection, and choose Properties. d. Click Internet Protocol Version 4 (TCP/IPv4), and click Properties. e. Select Use the following IP Address, and input the following numbers: IP Address: 192.168.1.1 Subnet mask: 255.255.255.0 f. In the Internet Protocol (TCP/IP) Properties, click Advanced. g. In IP addresses, click Add. h. Input the following numbers: IP Address: 10.1.5.1 Subnet mask: 255.255.255.0 i. Click OK. j. Click OK. k. Repeat steps c through e for Local Area Connection 2 and Local Area Connection 3 using the following IP information for each: Local Area Connection 2: IP Address: 10.1.1.250 Subnet mask: 255.255.255.0 Local Area Connection 3: IP Address: 10.1.2.250 Subnet mask: 255.255.255.0 5. Give the computer a name: a. Click Start, right-click Computer, and click Properties. Performance of four Intel-based SMB servers running Web, A Principled Technologies test report 12 email, and database applications
- 13. b. Click Change Settings. c. Click Change. d. Type a name (e.g. new-server) in the Computer name field, and click OK. e. In the Computer Name/Domain Changes pop-up window, click OK. f. Click OK. g. Click Close. h. In the Microsoft pop-up window, click Restart Now. Installing Active Directory® and the domain controller Promote the mail server to domain controller by following these steps: 1. Select StartCommand Prompt. 2. Type dcpromo 3. At the Welcome pop-up window, click Next. 4. At the Operating System Compatibility screen, click Next. 5. At the Choose a Deployment Configuration screen, select the Create a new domain in a new forest radio button, and click Next. 6. At the Name the Forest Root Domain screen, type a domain name (i.e., test.local), and click Next. 7. At the Set Forest Functional Level screen, choose Windows Server 2003 from the drop-down menu, and click Next. 8. At the Set Domain Functional Level screen, choose Windows Server 2003 from the drop-down menu, and click Next. 9. At the Additional Domain Controller Options screen, accept the defaults, and click Next. 10. When the Static IP assignment window pops up, click Yes, the computer will use a dynamically assigned IP address. 11. When the Active Directory domain Services Installation Wizard window pops up, click Yes. 12. At the Location for Database, Log Files, and SYSVOL screen, click Next. 13. At the Directory Services Restore Mode Administrator Password screen, enter and confirm a password, and click Next. 14. At the Summary screen, review the selections, and click Next. 15. If the installation software prompts you to do so, insert the OS CD, and click OK. 16. At the Completing the Active Directory Installation Wizard screen, click Finish. 17. When the system prompts you to reboot the server, click Restart Now. 18. After the server reboots, log into the system. Setting up the Application Server 1. Click StartAdministrative ToolsServer Manager. 2. Click Roles on the left side. 3. Click Add Roles. 4. At the Before You Begin screen, click Next. 5. Click the Application Server check box. 6. When the Add features required for Application Server? screen appears, click Add Required Features. 7. Click Next. 8. Click Next. 9. At the Select Role Services page for Application Server, click the Web Server (IIS) Support check box. 10. When the Add features required for Web Server (IIS) Support? screen appears, click Add Required Features. Performance of four Intel-based SMB servers running Web, A Principled Technologies test report 13 email, and database applications
- 14. 11. Click Next. 12. Click Next. 13. At the Select Role Services page for Web Server (IIS), click IIS 6 Management Compatibility, ASP, and CGI check boxes. Click Next. 14. Click Install. 15. Click Close. Installing .NET Framework 3.5.1 Features and Internet Information Services 1. Select StartAdministrative ToolsServer Manager. 2. Click Features. 3. Click Add Features. 4. Select .NET Framework 3.5.1 Features. 5. Click Next. 6. Click Install. 7. At the Installation Results screen, click Close. Installing Microsoft Filter Pack 1.0 1. Download the Microsoft Filter Pack 1.0. (http://www.microsoft.com/downloads/en/details.aspx?familyid=60c92a37-719c-4077-b5c6- cac34f4227cc&displaylang=en) 2. Run FilterPackx64.EXE. 3. Click Next. 4. Click I accept the terms in the License Agreement, and click Next. 5. Click OK once installation is complete. Installing Exchange Server 2010 1. Click StartAdministrative ToolsServices. 2. Right-click the Net.Tcp Port Sharing service, and click Properties. 3. Change the Net.Tcp Port Sharing startup type to Automatic, and click OK. 4. Insert the Exchange Server 2010 DVD. 5. When the Autoplay window appears, click Run Setup.EXE. 6. The installer should consider steps 1 and 2 complete, and gray them out. 7. Click the link to Step 3: Choose Exchange Language Option. 8. Click Install only languages from the DVD. 9. Click the link to Step 4: Install Microsoft Exchange Server 2010. 10. Click Next to go past the introduction screen. 11. Accept the license agreement, and click Next. 12. Select No for error reporting, and click Next. 13. Select Custom Exchange Server Installation, and click Next. 14. Select Mailbox Role, Client Access Role and Hub Transport Role (Exchange will automatically select Management Tools as well). Click Next. 15. Leave the organization name at default (First Organization), and click Next. 16. At the question about client computers running Outlook 2003 or Entourage, select Yes, and click Next. 17. Click Next to accept defaults for Configure Client Access server external domain. 18. At the Customer Experience Improvement Program screen, select I don’t wish to join the program at this time, and click Next. Performance of four Intel-based SMB servers running Web, A Principled Technologies test report 14 email, and database applications
- 15. 19. If a warning about a lack of SMTP appears after the check finishes, ignore it. 20. Click Install to start the installation process. 21. Once installation is complete, click Finish. Exchange should automatically open the Exchange Management Console. Configuring Exchange Server 2010 roles 1. If Exchange does not automatically open the Exchange Management Console, click StartAll ProgramsMicrosoft Exchange Server 2010Exchange Management Console. 2. In the left pane, expand Microsoft Exchange On-Premises, expand Organization Configuration, and select Hub Transport. 3. In the Actions pane on the far right, select New Send Connector. 4. Name the send connector SMTP, select the intended use as Internet, and click Next. 5. In the Address space window, click Add. 6. In the SMTP Address Space window, type * as the address, ensure that the installer has checked Include all subdomains, and click OK. 7. Click Next. 8. On the Network settings page, select Use domain name system (DNS) “MX” records to route mail automatically, and click Next. 9. Accept the defaults in the Source Server window, and click Next. 10. At the New Connector page, click New to create the connector. 11. Click Finish to close the New SMTP Send Connector wizard. Configuring the Exchange Server 2010 Mailbox role Creating a new user 1. Click StartAdministrative ToolsActive Directory Users and Computers. 2. In the Active Directory Users and Computers window, select the server in the left pane, and open Users in the right pane. 3. Right-click a blank area in the Users folder, and select NewUser. 4. In the New Object - User window, complete the name fields as you wish (we used first name: test, last name: tester, logon name: tester), and select Next. 5. Enter a secure password (we used Password1), and check Password never expires. 6. In the pop-up information window, click OK. 7. Click Next and click Finish to close the New Object - User window. 8. Double-click the new user to bring up the Properties window. 9. Under the Member Of tab, click Add. 10. In the Enter the object names to select dialog box, type Domain Admins; Enterprise Admins; Organization Management select Check Names to verify, and click OK. 11. Click OK to close the User Properties window and close the Active Directory Users and Computers window. Configuring the Mailbox role 1. Click StartAll ProgramsMicrosoft Exchange Server 2010Exchange Management Console. 2. In the left pane of the Exchange Management Console window, expand Microsoft Exchange On- Premises, and select Recipient Configuration; in the right pane, select New Mailbox. 3. In the New Mailbox window, select User Mailbox, and click Next. 4. In the User Type page, select Existing users, and click Add. 5. Select the new account you created earlier, and click OK to add it to selection box. Performance of four Intel-based SMB servers running Web, A Principled Technologies test report 15 email, and database applications
- 16. 6. Click Next. 7. In the Mailbox Settings page, type tester in the Alias textbox, check the box next to Specify the mailbox database rather than using a database automatically selected, and select Browse in the Mailbox database selection spot. 8. In the Select Mailbox database window, select Mailbox Database, and click OK. 9. Click Next. 10. Click New. 11. Click Finish. 12. In the left windowpane, expand Organization Configuration and click Mailbox so Database Management tab is visible. 13. Right-click Mailbox Database, and select Properties. 14. Select the Maintenance tab. 15. Check the Enable circular logging box. 16. Check the box beside This database can be overwritten by a restore. 17. Click Customize next to Maintenance interval. 18. Remove all blue from the boxes so the system will not perform maintenance, and click OK. 19. Click OK. 20. Click OK to any warnings about circular logging being applied after the database is remounted. 21. Click Move Database Path on the far right panel. 22. Change the Database file and Log folder path locations to C:Loadgen[filename] and C:Loadgen respectively, and click Move. 23. Click Yes if the application prompts you to dismount. 24. Click Finish. 25. In the Database Management tab, right-click Public Folder Database, and select Properties. 26. Check the Enable circular logging box. 27. Check the This database can be overwritten by a restore box. 28. Click Customize next to Maintenance interval. 29. Remove all blue from the boxes so the system will not perform maintenance, and click OK. 30. Click OK. 31. Click OK to any warnings about circular logging being applied after the database is remounted. 32. Click Move Database on the far right panel. 33. Change the Database file and Log folder path locations to C:LoadgenPublic Folder Database[filename] and C:LoadgenPublic Folder Database respectively, and click Move. 34. Click Yes if the application prompts you to dismount. 35. Click Finish. Installing and configuring the Web server (WebBench) Deploying WebBench data WebBench includes data that must reside on the server and that the Web server must use. We used the following procedure to load that data, and set the Web server to use it: 1. Copy the file wbtree.exe from the WebBench CD to the wwwroot directory on the server under test. (The wbtree.exe file is on the WebBench CD at wb50workload. The wwwroot directory is located at C:inetpubwwwroot.) 2. On the server, execute the wbtree.exe file. This program copies the WebBench workload to the server. Performance of four Intel-based SMB servers running Web, A Principled Technologies test report 16 email, and database applications
- 17. 3. In the wwwroot folder on the server, create a new folder with the name CGI-BIN 4. Copy the files simcgi.exe and simisapi.dll to the CGI-BIN folder. 5. Click StartProgramsAdministrative ToolsComputer Management to open the management console. 6. Go to Services and ApplicationInternet Information Services (IIS) Manager[server name]. 7. Under IIS double-click ISAPI and CGI Restrictions. 8. Click Add. 9. Enter the path for the simccgi.exe, and click the check box saying Allow extension path to execute. 10. Click OK. Configuring Internet Information Services (IIS) We configured the Windows Internet Information Services Web server as follows: 1. Open Computer Management. 2. Go to Services and ApplicationsInternet Information Services (IIS) Manager[server name]. 3. Under IIS, double-click MIME Types. 4. Under the Actions pane, click Add. 5. In the Extension field, type * 6. In the MIME Type field, type application/octet-stream and click OK. 7. Click the server name on the left side of the window. 8. Under IIS, double-click ISAPI and CGI Restrictions. 9. Click Edit Feature Settings. 10. Click the check boxes beside Allow unspecified CGI module and Allow unspecified ISAPI modules. 11. Click OK. 12. Click the server name on the left side of the window. 13. Under IIS, double-click Logging. 14. Click Disable. Installing certificate services Because WebBench includes tests that involve security, we installed Windows Certificate Services as follows: 1. Go to Services and ApplicationsInternet Information Services (IIS) Manager[server name]. 2. Under IIS, double-click Server Certificates. 3. Click Create Self-Signed Certificate. 4. Name it Performance and click OK. 5. In the left side of the window, expand [server name], expand Sites, and select Default Web Site. 6. Under the Actions pane, click Bindings... 7. Click the https entry, and click Edit. 8. Set the SSL Certificate to Performance, and click OK. 9. Click Add. 10. Set the type to http, and set the IP address to 192.168.1.1 11. Set the Port to 81, and click OK. 12. Click Add. 13. Set the type to https, and set the IP address to 192.168.1.1 14. Set the Port to 444 Performance of four Intel-based SMB servers running Web, A Principled Technologies test report 17 email, and database applications
- 18. 15. Set the SSL Certificate to Microsoft Exchange, and click OK. 16. If a warning pops up, click Yes. 17. Click Close. 18. Under IIS, double-click SSL settings. 19. Uncheck the Require SSL check box. 20. In the Actions pane, click Apply. Creating SSL Communication We enabled SSL communication as follows: 1. Go to Services and ApplicationsInternet Information Services (IIS) Manager[server name]. 2. Expand the Default Web site. 3. Expand wbtree. 4. Click Wbssl. 5. Double-click SSL Settings. 6. Check Require SSL. 7. In the Actions pane, click Apply. We then set the following operating system tuning parameters for optimum WebBench performance. When creating the following parameters, ensure that they are DWORD files, with decimal coding (rather than hexadecimal): HKLMSYSTEMCurrentControlSetservicesInetinfoParametersMaxCachesFileSize to 1048576 HKLMSYSTEMCurrentControlSetservicesHTTPParametersUriMaxUriBytes to 1048576 HKLMSYSTEMCurrentControlSetControlFileSystemNtfsDisableLastAccess to 1 HKLMSYSTEMCurrentControlSetservicesTcpipParametersMaxHashTableSize to 65535 Installing and configuring SQL Server 2008 R2 Enterprise Installing SQL Server 2008 R2 on the server 1. Insert the DVD. 2. At the AutoPlay menu, click Run SETUP.EXE. 3. Click Installation in the left pane. 4. Click New installation or add features to an existing installation. 5. At the Setup Support Rules screen, wait for the check to complete. If there are no failures or relevant warnings, click OK. 6. Select the Specify a free edition radio button, and choose Evaluation from the drop down menu. Click Next. 7. Click the checkbox next to I accept the license terms. Click Next. 8. Click Install to install the setup support files. 9. If there are no failures displayed, click Next. You may see a Computer domain controller warning and a Windows Firewall warning. For now, ignore these. 10. At the Setup Role screen, choose SQL Server Feature Installation, and click Next. 11. At the Feature Selection screen, select Database Engine Services, Full-Text Search, Client Tools Connectivity, Client Tools Backwards Compatibility, Management Tools –Basic, and Management Tools – Complete. Click Next. 12. At the Installation Rules screen, click Next once the check completes. Performance of four Intel-based SMB servers running Web, A Principled Technologies test report 18 email, and database applications
- 19. 13. At the Instance configuration screen, leave the default selection of default instance, and click Next. 14. At the Disk space requirements screen, click Next. 15. At the Server configuration screen, choose NT AUTHORITYSYSTEM in the Account Name column for both SQL Server Agent and SQL Server Database Engine. Click Next. 16. At the Database Engine Configuration screen, select Mixed Mode. 17. Enter and confirm a password for the system administrator account. 18. Click Add Current user. This may take several seconds. 19. Click Next. 20. At the Error Reporting screen, click Next. 21. At the Installation Configuration rules screen, check that there are no failures or relevant warnings, and click Next. 22. At the Ready to Install screen, click Install. 23. After installation completes, click Close. Configuring SQL Server 1. Create a SQL Server login for the ds2user (use the following steps or see the Configuring the database server (DVD Store) section for the specific script to use): a. Click StartAll ProgramsMicrosoft SQL Server 2008 R2SQL Server Management Studio. b. In the Connect to Server window, enter the Server name, and click Connect. c. In the left hand pane, expand [server name], expand Security, right-click Logins, and click New Login. d. In the Login – New window, type ds2user for the Login name. e. Select the SQL Server authentication radio button, and leave the password fields blank. If you receive a warning, click Yes. f. Uncheck the box next to Enforce password policy. g. For Default language, select English from the dropdown menu. h. Click OK. 2. Click StartAll ProgramsMicrosoft SQL Server 2008 R2Configuration ToolsSQL Server Configuration Manager. 3. Expand the SQL Server Network Configuration node, and select Protocols for MSSQLSERVER. 4. In the right pane, right-click TCP/IP, and choose Enable. At the warning, click OK. 5. In the left pane, click SQL Server Services. 6. In the right pane, right-click SQL Server (MSSQLSERVER), and click Restart. 7. Click StartAdministrative ToolsLocal Security Policy. 8. In the left pane, expand Local Policies, and click User Rights Assignment. 9. In the right pane, double-click Perform volume maintenance tasks. 10. In the window that opens, click Add User or Group under the Local Security Setting tab. 11. Type System as the object name to select, click Check Names to verify, and choose SYSTEM in the Multiple Names Found window. 12. Click OK. 13. Click OK. 14. Place the DVD Store backup file you prepared in the default location for SQL Server: C:Program FilesMicrosoft SQL ServerMSSQL10.MSSQLSERVERMSSQLBackup. 15. Run Windows Updates one more time and get all critical updates through 1-14-2011. Performance of four Intel-based SMB servers running Web, A Principled Technologies test report 19 email, and database applications
- 20. Installing and configuring the Exchange 2010 mail test client (LoadGen) To create the mail client, you must install several software components. Before following these instructions, make sure to statically assign an IP address for the client, and to then plug that port into the system under test. This allows the client to join the Active Directory domain. We followed this process for each installation: Installing Windows Server 2008 R2 1. Insert the installation DVD for Windows Server 2008 R2 into the DVD drive. 2. Choose the language, time and currency, and keyboard input. Click Next. 3. Click Install Now. 4. Choose Windows Server Standard (Full Installation). Click Next. 5. Accept the license terms, and click Next. 6. Click Custom. 7. Click the Disk, and click Drive options (advanced). 8. Click New, Apply, Format, and click Next. 9. After the installation completes, click OK to set the Administrator password. 10. Enter the administrator password twice, and click OK. 11. Click Start, type change power-saving settings and press Enter. 12. Click Change plan settings. 13. Change the Turn off the display drop-down menu to Never. 14. Click Save changes, and close the Power Options, Screen Saver Settings, and Personalization windows. Joining the domain 1. Select StartControl PanelNetwork ConnectionsLocal Area Connection. 2. Click Properties. 3. Highlight Internet Protocol (TCP/IP), and click Properties. 4. Select the Use the following DNS server addresses radio button, and enter the IP of the DNS server in the Preferred DNS server field. Click OK. 5. Right-click My Computer, and select Properties. 6. Under the Computer Name tab, click Change. 7. In the Computer Name Changes window, under the Member of section, select the Domain radial box, and type the appropriate domain name. 8. Select OK to start joining the domain. 9. When the window appears asking for a person qualified on the domain, type Tester as the username and Password1 as the password. 10. At the welcome pop-up window and the window warning that you must reset the computer for the changes to take effect, click OK. 11. At the System Properties window, click OK. 12. When a pop-up appears asking if you want to restart now, click Yes to restart your computer. Installing Internet Information Services 1. Click StartAdministrative ToolsServer Manager. 2. Click Roles on the left-side window pane. 3. Click Add Roles. Performance of four Intel-based SMB servers running Web, A Principled Technologies test report 20 email, and database applications
- 21. 4. Click the Application Server check box. 5. When the Add features required for Application Server? screen appears, click Add Required Features. 6. Click Next. 7. Click Next. 8. At the Select Role Services page for Application Server, click the Web Server (IIS) Support check box. 9. Click Next. 10. Click Next. 11. At the Select Role Services page for Web Server (IIS), click IIS 6 Management Compatibility, ASP, and CGI check boxes; and click Next. 12. Click Install. 13. Click Close. Installing Load Generator Download and install Load Generator using all defaults. Preparing Load Generator 1. Log into the MailClient using the tester account. 2. Select StartAll ProgramsMicrosoft ExchangeExchange Load Generator 2010. 3. When the Load Generator window appears, select Start a new test. 4. Select Create a new test configuration, and click Continue. 5. Change total length of simulation to 30 minutes. 6. Verify that tester is the account name. 7. In the Specify test settings window, type Password1 as the Directory Access Password and Mailbox Account Master Password, and click Continue with recipient management. 8. Make 75 users in each Mailbox Database, and click Continue. 9. To accept defaults for Advanced recipient settings, click Continue. 10. In the Specify test user groups window, select the plus sign to add a user group. 11. Change the Client Type to Outlook 2007 Cached, the Action Profile to Average, and the Mailbox size to 100MB. 12. Check the PreTestLogon check box, and click Continue. 13. Leave defaults in Remote configurations, and click Continue. 14. Click Save the configuration file as, and name it averagecfg.xml 15. After saving the configuration file, check the Initialize public store as well checkbox and click Start the initialization phase (recommended before running the test). Backing up the mail database On the test server, once you have set up LoadGen and created its initial mail database, you need to back up the database so you can have clean copies for each test. 1. Select StartAll ProgramsMicrosoft Exchange Server 2010Exchange Management Console in the mail server. 2. In the left pane, expand Organization Configuration and Mailbox. 3. In the right pane, right-click Mailbox Database, and select Dismount Database from the menu. 4. At the Do you want to continue? pop-up message, click Yes. 5. Right-click Public Folder Database, and select Dismount Database from the menu. Performance of four Intel-based SMB servers running Web, A Principled Technologies test report 21 email, and database applications
- 22. 6. At the Do you want to continue? pop-up message, click Yes. The red arrow appears when you have dismounted the Public Folder Store. 7. Using Windows Explorer, create two new folders: C:backupmailstore and C:backuppublicstore 8. With Windows Explorer, copy all database and public folder files from F: to C:backup. This process may take several minutes. 9. Close Windows Explorer. 10. In Exchange Management Console, right-click Mailbox Database, and select Mount Database from the menu. 11. Right-click the Public Folder Database, and select Mount Database from the menu. 12. Close Exchange System Manager. Measuring power To record each solution’s power consumption during each test, we used an Extech Instruments (www.extech.com) 380803 Power Analyzer/Datalogger. We connected the power cord from the server under test to the Power Analyzer’s output load power outlet. We then plugged the power cord from the Power Analyzer’s input voltage connection into a power outlet. We used the Power Analyzer’s Data Acquisition Software (version 2.11) to capture all recordings. We installed the software on a separate Intel processor-based PC, which we connected to the Power Analyzer via an RS-232 cable. We captured power consumption at one-second intervals. We then recorded the power usage (in watts) for each system during the testing at 1-second intervals. To compute the average power usage, we averaged the power usage during the time the system was producing its peak performance results. See Figure 11 for the results of these measurements. Performance of four Intel-based SMB servers running Web, A Principled Technologies test report 22 email, and database applications
- 23. APPENDIX A – TEST SYSTEM CONFIGURATION INFORMATION Figure 12 provides detailed configuration information about each of the four servers, which we list in order of newest to oldest. Intel Xeon processor Intel Xeon processor Intel Core 2 Quad Intel Core 2 Duo Servers E3-1240-based X3450-based processor Q8400- processor E6400- server server based server based server Power supplies Total number 1 1 1 1 Wattage of 460 1,000 350 600 each (W) Cooling fans Total number 2 3 2 2 First fan Dimensions 4.75” x 4.75” 4.75” x 4.75” 4.75” x 4.75” 4.75” x 4.75” (h x w) Voltage (V) 12 12 12 12 Amps (A) 1.6 3.3 1.6 0.8 Second fan Dimensions 3” x 3” 4.75” x 4.75” 3” x 3” 4.75” x 4.75” (h x w) Voltage (V) 12 12 12 12 Amps (A) 0.4 1.6 1.5 0.8 Third fan Dimensions N/A 3” x 3” N/A N/A (h x w) Voltage (V) N/A 12 N/A N/A Amps (A) N/A 0.4 N/A N/A General processor setup Number of processor 1 1 1 1 packages Number of cores per 4 4 4 2 processor package Number of hardware 2 2 1 1 threads per core Performance of four Intel-based SMB servers running Web, A Principled Technologies test report 23 email, and database applications
- 24. Intel Xeon processor Intel Xeon processor Intel Core 2 Quad Intel Core 2 Duo Servers E3-1240-based X3450-based processor Q8400- processor E6400- server server based server based server System power management Balanced Balanced Balanced Balanced policy CPU Vendor Intel Intel Intel Intel Xeon processor E3- Intel Xeon processor Core 2 Quad Core 2 Duo processor Name 1240 X3450 processor Q8400 E6400 Stepping D2 B1 R0 B2 Socket type LGA 1155 LGA 1156 LGA 775 LGA 775 Core frequency 3.30 2.66 2.66 2.13 (GHz) 32 KB + 32 KB (per 32 KB + 32 KB (per 32 KB + 32 KB (per 32 KB + 32 KB (per L1 cache core) core) core) core) L2 cache 256 KB (per core) 256 KB (per core) 4 MB (shared) 2 MB (shared) L3 cache 8 MB 8 MB N/A N/A Platform Vendor and Intel S1200BTL1 Intel S3420GP Intel S3200SH Intel S3000AH model number Motherboard Intel C200 Intel 3400 Intel 3200/3210 Intel 3000 chipset Intel Corp. Intel Corp. Intel Corp. Intel Corp. BIOS name and S1200BT.86B.01.00.0 S3420GP.86B.01.00.0 S3200X38.86B.00.00. S3000.86B.02.00.005 version 012 047 0051 4 (11/21/2010) (11/16/2010) (05/11/2010) (06/11/2009) Intel Rapid Storage Intel Matrix Storage Intel Matrix Storage Intel Matrix Storage BIOS settings Technology Technology Technology Technology Memory module(s) Total RAM in 8 8 4 4 system (GB) Number of types of 1 1 1 1 memory modules Vendor and Hynix Hynix Kingston Kingston model number HMT125U7BFR8C-H9 HMT125U7BFR8C-H9 KVR667D2E5/1G KVR533D2E4/2G Type PC3-10600E PC3-10600E PC2-5300 PC2-4200 1 Intel® Server Board S1200BT (Beartooth Pass) – Overview http://www.intel.com/products/server/motherboards/S1200BT/S1200BT-overview.htm. Performance of four Intel-based SMB servers running Web, A Principled Technologies test report 24 email, and database applications
- 25. Intel Xeon processor Intel Xeon processor Intel Core 2 Quad Intel Core 2 Duo Servers E3-1240-based X3450-based processor Q8400- processor E6400- server server based server based server Speed (MHz) 1,333 1,333 667 533 Speed in the system currently 1,333 1,333 667 533 running @ (MHz) Timing/latency (tCL-tRCD-iRP- 9-9-9-24 9-9-9-24 5-5-5-15 4-4-4-12 tRASmin) Size (MB) 2,048 2,048 1,024 2,048 Number of 4 4 4 2 RAM modules Chip Double-sided Double-sided Double-sided Double-sided organization Channel Triple Triple Dual Dual Hard disk Vendor and Hitachi Hitachi Hitachi Hitachi model number HDP725050GLA360 HDP725050GLA360 HDP725050GLA360 HDP725050GLA360 Number of 4 4 4 4 disks in system Size (GB) 500 500 500 500 Buffer size 16 16 16 16 (MB) RPM 7,200 7,200 7,200 7,200 Type SATA SATA SATA SATA Intel Intel Intel ICH8R/ICH9R/ICH10R ICH8R/ICH9R/ICH10R ICH8R/ICH9R/ICH10R Intel ICH7R/DH SATA Controller /DO SATA RAID /DO SATA RAID /DO SATA RAID RAID Controller Controller Controller Controller Intel Intel Intel Intel Controller 8.6.2.1012 8.6.2.1012 8.6.2.1012 8.6.2.1012 driver (4/08/2009) (4/08/2009) (4/08/2009) (4/8/2009) Operating system Windows Server Windows Server Windows Server Windows Server Name 2008 R2 Standard 2008 R2 Standard 2008 R2 Standard 2008 R2 Standard Build number 7600 7600 7600 7600 Service Pack N/A N/A N/A N/A File system NTFS NTFS NTFS NTFS Kernel ACPI x64-Based PC ACPI x64-Based PC ACPI x64-Based PC ACPI x64-Based PC Performance of four Intel-based SMB servers running Web, A Principled Technologies test report 25 email, and database applications
- 26. Intel Xeon processor Intel Xeon processor Intel Core 2 Quad Intel Core 2 Duo Servers E3-1240-based X3450-based processor Q8400- processor E6400- server server based server based server Language English English English English Microsoft DirectX® 11 11 11 11 version Graphics Vendor and Matrox® G200e Matrox G200e Matrox G200e ATI ES1000 model number Type Integrated Integrated Integrated Integrated Resolution 1,024 x 768 1,024 x 768 1,024 x 768 1024 x 768 Microsoft Matrox Graphics Matrox Graphics Microsoft Driver 6.1.7600.16385 2.0.9.0 2.0.9.0 6.1.7600.16385 (6/21/2006) (8/12/2010) (8/12/2010) (6/21/2006) Network card/subsystem Network adapter 1 Vendor and Intel 82574L Gigabit Intel 82574L Gigabit Intel PRO/1000 MT Intel PRO/1000 MT model number Network Adapter Network Adapter Network Adapter Network Adapter Type Integrated Integrated Integrated Integrated Intel Intel Intel 8.3.15.0 Intel 8.3.15.0 Driver 11.7.32.0 11.7.32.0 (9/23/2008) (09/23/2008) (9/29/2010) (7/8/2010) Network adapter 2 Intel 82579LM Intel 82578DM Vendor and Intel PRO/1000 PT Intel PRO/1000 PM Gigabit Network Gigabit Network model number Server Adapter Network Adapter Adapter Adapter Type Integrated Integrated PCIe Integrated Intel Intel Intel Intel 9.3.41.0 Driver 11.8.81.0 11.6.92.0 9.13.41.0 (03/26/2010) (10/28/2010) (4/12/2010) (3/26/2010) Network adapter 3 Vendor and Intel PRO/1000 PT Intel PRO/1000 Intel PRO/1000 PT Intel PRO/1000 PT model number Server Adapter PT Server Adapter Server Adapter Server Adapter Type PCIe PCIe PCIe PCIe Intel Intel Intel Intel Driver 9.13.41.0 9.13.41.0 9.13.41.0 9.13.41.0 (3/26/2010) (3/26/2010) (3/26/2010) (3/26/2010) Network adapter 4 Vendor and Intel PRO/1000 PT Intel PRO/1000 N/A N/A model number Server Adapter PT Server Adapter Type PCIe PCIe N/A N/A Performance of four Intel-based SMB servers running Web, A Principled Technologies test report 26 email, and database applications
- 27. Intel Xeon processor Intel Xeon processor Intel Core 2 Quad Intel Core 2 Duo Servers E3-1240-based X3450-based processor Q8400- processor E6400- server server based server based server Intel Intel Driver 9.13.41.0 9.13.41.0 N/A N/A (3/26/2010) (3/26/2010) USB ports Number of 6 6 4 2 ports Type of ports (USB 1.1, USB 2.0 2.0 2.0 2.0 2.0) Figure 12: Detailed system configuration information for the four Intel processor-based servers. Performance of four Intel-based SMB servers running Web, A Principled Technologies test report 27 email, and database applications
- 28. APPENDIX B – TEST SYSTEM CONFIGURATION INFORMATION Figure 13 provides the price information for the Intel processor-based servers as of February 15, 2011. Prices do not include shipping costs or tax. Intel Xeon Intel Core 2 Quad Intel Core 2 Duo Intel Xeon processor Servers processor E3-1240- processor Q8400- processor E6400- X3450-based server based server based server based server Price as of February 15, 2011 Motherboard $215.001 $175.004 $199.994 $330.002 Processor $265.001 $265.494 $168.234 $70.002 Drives $240.002 $240.002 $240.002 $240.002 Memory $363.123 $363.123 $76.564 $74.124 Case $125.002 $125.002 $125.002 $125.002 NICs5 $175.484 $175.484 $175.484 $87.744 Total price $1,383.60 $1,344.09 $985.26 $926.86 Figure 13: Price information for the for Intel processor-based servers. Notes 1 Obtained from Intel. 2 Price from www.serversupply.com. 3 Price from www.upgradebay.com. 4 Price from www.amazon.com. 5 For the Intel Core 2 Duo processor E6400-based server, we used a single PCIe NIC, which accounts for the lower price. Performance of four Intel-based SMB servers running Web, A Principled Technologies test report 28 email, and database applications
- 29. ABOUT PRINCIPLED TECHNOLOGIES We provide industry-leading technology assessment and fact-based marketing services. We bring to every assignment extensive experience with and expertise in all aspects of technology testing and analysis, from researching new technologies, to developing new methodologies, to testing with existing and new tools. Principled Technologies, Inc. 1007 Slater Road, Suite 300 When the assessment is complete, we know how to present the results to a Durham, NC, 27703 www.principledtechnologies.com broad range of target audiences. We provide our clients with the materials they need, from market-focused data to use in their own collateral to custom sales aids, such as test reports, performance assessments, and white papers. Every document reflects the results of our trusted independent analysis. We provide customized services that focus on our clients’ individual requirements. Whether the technology involves hardware, software, Web sites, or services, we offer the experience, expertise, and tools to help our clients assess how it will fare against its competition, its performance, its market readiness, and its quality and reliability. Our founders, Mark L. Van Name and Bill Catchings, have worked together in technology assessment for over 20 years. As journalists, they published over a thousand articles on a wide array of technology subjects. They created and led the Ziff-Davis Benchmark Operation, which developed such industry-standard benchmarks as Ziff Davis Media’s Winstone and WebBench. They founded and led eTesting Labs, and after the acquisition of that company by Lionbridge Technologies were the head and CTO of VeriTest. Principled Technologies is a registered trademark of Principled Technologies, Inc. All other product names are the trademarks of their respective owners. Disclaimer of Warranties; Limitation of Liability: PRINCIPLED TECHNOLOGIES, INC. HAS MADE REASONABLE EFFORTS TO ENSURE THE ACCURACY AND VALIDITY OF ITS TESTING, HOWEVER, PRINCIPLED TECHNOLOGIES, INC. SPECIFICALLY DISCLAIMS ANY WARRANTY, EXPRESSED OR IMPLIED, RELATING TO THE TEST RESULTS AND ANALYSIS, THEIR ACCURACY, COMPLETENESS OR QUALITY, INCLUDING ANY IMPLIED WARRANTY OF FITNESS FOR ANY PARTICULAR PURPOSE. ALL PERSONS OR ENTITIES RELYING ON THE RESULTS OF ANY TESTING DO SO AT THEIR OWN RISK, AND AGREE THAT PRINCIPLED TECHNOLOGIES, INC., ITS EMPLOYEES AND ITS SUBCONTRACTORS SHALL HAVE NO LIABILITY WHATSOEVER FROM ANY CLAIM OF LOSS OR DAMAGE ON ACCOUNT OF ANY ALLEGED ERROR OR DEFECT IN ANY TESTING PROCEDURE OR RESULT. IN NO EVENT SHALL PRINCIPLED TECHNOLOGIES, INC. BE LIABLE FOR INDIRECT, SPECIAL, INCIDENTAL, OR CONSEQUENTIAL DAMAGES IN CONNECTION WITH ITS TESTING, EVEN IF ADVISED OF THE POSSIBILITY OF SUCH DAMAGES. IN NO EVENT SHALL PRINCIPLED TECHNOLOGIES, INC.’S LIABILITY, INCLUDING FOR DIRECT DAMAGES, EXCEED THE AMOUNTS PAID IN CONNECTION WITH PRINCIPLED TECHNOLOGIES, INC.’S TESTING. CUSTOMER’S SOLE AND EXCLUSIVE REMEDIES ARE AS SET FORTH HEREIN. Performance of four Intel-based SMB servers running Web, A Principled Technologies test report 29 email, and database applications