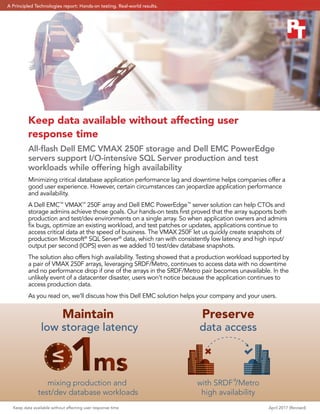
Keep data available without affecting user response time

A company’s success depends on critical application performance and availability. Upgrades and patches can improve application efficiency and user experience, but making the necessary changes requires resource intensive environments to test updates before deploying them. What’s more, these applications need to continue accessing data even in the event of an on-premises crisis. Our Dell EMC VMAX 250F and PowerEdge server solution supported test/dev environments and production database applications simultaneously without affecting the production applications’ performance. Storage latency for the VMAX 250F peaked at a millisecond in our testing while IOPS stayed within an acceptable range. The solution also kept data highly available with no downtime or performance drop when we initiated a lost host connection for the primary storage. Consider the Dell EMC VMAX 250F array for your datacenter to support the critical database applications that drive your company.

Recommended
Recommended
More Related Content
What's hot
What's hot (20)
Similar to Keep data available without affecting user response time
Similar to Keep data available without affecting user response time (20)
More from Principled Technologies
More from Principled Technologies (20)
Recently uploaded
Recently uploaded (20)
Keep data available without affecting user response time
- 1. Keep data available without affecting user response time April 2017 (Revised) data accesslow storage latency Maintain mixing production and test/dev database workloads with SRDF® /Metro high availability Preserve Keep data available without affecting user response time All-flash Dell EMC VMAX 250F storage and Dell EMC PowerEdge servers support I/O-intensive SQL Server production and test workloads while offering high availability Minimizing critical database application performance lag and downtime helps companies offer a good user experience. However, certain circumstances can jeopardize application performance and availability. A Dell EMC™ VMAX™ 250F array and Dell EMC PowerEdge™ server solution can help CTOs and storage admins achieve those goals. Our hands-on tests first proved that the array supports both production and test/dev environments on a single array. So when application owners and admins fix bugs, optimize an existing workload, and test patches or updates, applications continue to access critical data at the speed of business. The VMAX 250F let us quickly create snapshots of production Microsoft® SQL Server® data, which ran with consistently low latency and high input/ output per second (IOPS) even as we added 10 test/dev database snapshots. The solution also offers high availability. Testing showed that a production workload supported by a pair of VMAX 250F arrays, leveraging SRDF/Metro, continues to access data with no downtime and no performance drop if one of the arrays in the SRDF/Metro pair becomes unavailable. In the unlikely event of a datacenter disaster, users won’t notice because the application continues to access production data. As you read on, we’ll discuss how this Dell EMC solution helps your company and your users. A Principled Technologies report: Hands-on testing. Real-world results.
- 2. Keep data available without affecting user response time April 2017 (Revised) | 2 Automated production-data snapshots with Dell EMC AppSync AppSync® offers integrated copy data management for Dell EMC storage. Storage admins can create storage-based or application-aware snapshots of data for business and datacenter operations such as data repurposing, operational recovery, and disaster recovery. AppSync automates the process of creating a snapshot of production data, which can thus become a simpler process.1 Preserve low latency with and without test/dev environments Due to its all-flash storage and powerful storage processing, the Dell EMC VMAX 250F delivered latency of less than 1 millisecond in our test configuration. We saw an average of 0.6 milliseconds in our testing, with average writes of 0.3 milliseconds and average reads of 0.9 milliseconds. We started our analysis of the Dell EMC VMAX 250F array and Dell EMC PowerEdge servers with four SQL Server VMs each supporting a single online transaction processing (OLTP) workload. After running the workloads for two hours, we added a test/dev VM. Every hour thereafter, we added another. By the end of our 12-hour test, the Dell EMC solution supported 14 VMs: four for the original production workloads and 10 VMs (from snapshots created by using AppSync) that ran smaller OLTP workloads. Storage latency for both reads and writes stayed at or under a millisecond during the 12 hours. For a detailed breakdown of the storage latency, see Appendix C.
- 3. Keep data available without affecting user response time April 2017 (Revised) | 3 Sustain production-level performance while increasing storage IOPS We used the performance evaluation tool DVD Store 2 (DS2) to create our production database environment. We configured two servers to each support two 250GB SQL database VMs, mimicking an environment with four active production databases. During our 12-hour test, the production environment averaged over 60,000 orders per minute (OPM) per VM for an average of 240,000 total OPM. The average degradation from peak OPM to the ending OPM for the production environment was less than one percent. Each of the 10 snapshots that we mounted during testing ran DS2 as well. We sized the snapshots to generate roughly 2,000 input/output operations per second (IOPS) per snapshot, which would be typical of test/dev copy environments. Despite this increased activity for the VMAX 250F, the original four production databases maintained their intended performance level. For a detailed breakdown of the storage IOPS, see Appendix C. Ensure peaceful cohabitation for production applications and test/dev environments Staying competitive in the global economy requires meeting 24/7 demand. Consider a large-scale manufacturing company that runs customer relationship management (CRM), supply chain management (SCM), or other essential data applications backed by the relational database management system Microsoft SQL Server. These critical applications require strong, continuous access to a SQL Server database for customer care, order processing, and logistics. Frequent updates to these applications can reduce the risk of supply chain disruption and business efficiency, and can improve the company’s bottom line. Updates and patches can be resource-intensive though— organizations traditionally have had to duplicate production environments. Sustaining an efficient production- level workload as well as test/dev environments often requires terabytes or petabytes of storage in the form of multiple storage arrays. The manufacturing company can spend a lot of time and money managing, powering, and cooling the arrays in its datacenter. The Dell EMC VMAX 250F could back live applications and test/dev environments simultaneously for this manufacturing company without sacrificing performance or storage space. With these SQL databases existing together and functioning optimally, the manufacturing company could reap a full range of business growth-oriented benefits, including a reduction in storage hardware.2 STEADY PERFORMANCE less than 1% average degradation from peak OPM to the ending OPM even while increasing IOPS
- 4. Keep data available without affecting user response time April 2017 (Revised) | 4 Keep critical data available without disrupting users Without a highly available server and storage solution for data, a company runs the risk of a critical application going down. Customers could become frustrated or employees could be less productive. We set up two VMAX 250F arrays in SRDF/Metro configurations to test high availability for a production database. We stressed the database, which was active/active and residing on both arrays, with an I/O-intensive workload. Then, we initiated a lost host connection on the primary array. The workload continued to perform at virtually the same level, averaging more than 224,000 OPM before the non-disruptive disaster recovery and more than 227,000 after. If something unfortunate were to happen to your on-site VMAX 250F array, using an off-site array for disaster recovery could bolster your data protection plans and ensure that critical applications stay available to users in times of crisis. Protect critical applications with SRDF/Metro The VMAX array family offers disaster recovery and data protection with remote replication technology called Symmetrix Remote Data Facility (SRDF). The SRDF/Metro (SRDF/M) configuration extends core SRDF functionality to offer active/active access of storage devices by presenting devices on local and remote VMAX systems with the same identity to the clustered hosts at synchronous distances. Standalone, virtualized, and clustered SQL application hosts can leverage SRDF/M for load balancing by running on either array or by spreading the I/O load from a single instance to either device. Additionally, by synchronously changing data on each array, the primary array can fail without data loss as the host can access the same data on the second array. This active/active access to storage can potentially lower the application recovery time objective in the event of failover.3
- 5. Keep data available without affecting user response time April 2017 (Revised) | 5 Conclusion: The Dell EMC VMAX 250F helps critical application users stay happy and productive A company’s success depends on critical application performance and availability. Upgrades and patches can improve application efficiency and user experience, but making the necessary changes requires resource- intensive environments to test updates before deploying them. What’s more, these applications need to continue accessing data even in the event of an on-premises crisis. Our Dell EMC VMAX 250F and PowerEdge server solution supported test/dev environments and production database applications simultaneously without affecting the production applications’ performance. Storage latency for the VMAX 250F peaked at a millisecond in our testing while IOPS stayed within an acceptable range. The solution also kept data highly available with no downtime or performance drop when we initiated a lost host connection for the primary storage. Consider the Dell EMC VMAX 250F array for your datacenter to support the critical database applications that drive your company. Fast and vast storage: The Dell EMC VMAX 250F all-flash array The Dell EMC VMAX 250F is part of the VMAX all-flash, enterprise storage family. The foundation of each VMAX all-flash array is the V-Brick, which encompasses a single VMAX engine. Each 250F can house either one or two V-Bricks and features up to 1.1 petabytes effective flash capacity. The array can use the latest 7.6TB and 15TB enterprise flash drives. The array we used had 10.25 TB of usable storage capacity.4 1 For more information on AppSync, please visit https://www.emc.com/storage/data-replication/appsync.htm. 2 For more information on SQL Server deployment on VMAX All Flash, see https://www.emc.com/collateral/white-papers/ h15019-vmax-all-flash-storage-for-sql-server-wp.pdf. 3 We tested standalone virtualized instances, but for more information on SQL Server and Windows Failover Clustering Ser- vices deployment with SRDF/M, see https://www.emc.com/collateral/white-paper/h15529-vmax-all-flash-sql-srdf-wp.pdf. 4 For more information on the Dell EMC VMAX all-flash enterprise storage family, please visit https://www.emc.com/en-us/ storage/vmax-all-flash.htm.
- 6. Keep data available without affecting user response time April 2017 (Revised) | 6 On December 8, 2016, we finalized the hardware and software configurations we tested. Updates for current and recently released hardware and software appear often, so unavoidably these configurations may not represent the latest versions available when this report appears. For older systems, we chose configurations representative of typical purchases of those systems. We concluded hands-on testing on March 10, 2017. Appendix A: Testing configurations and benchmark About our SQL database configuration We created four new VMs, installed Microsoft SQL 2016 on the VMs, and configured the VMs with 8GB RAM and 8 vCPUs. Each VM had a 40GB virtual disk, on which we installed Windows Server® 2012 R2 and the database software. We then added two 250GB VMDKs to each VM to hold the database data files, and one 100GB VMDK to store the database log files. Like each of the four initial VMs, each snapshot VM had two 250GB data LUNs and a 100GB log LUN. Finally, we used DVD Store’s data generation tool to create the initial database schema. We used a database size parameter of 250GB in DS2’s workload generator to create approximately 250GB of data, and we imported the database into a Microsoft SQL server VM to create the indexes. For details, including the DS2 configuration file, see Appendix B. About DVD Store Version 2.1 To create our real-world ecommerce workload, we used the DVD Store Version 2.1 benchmarking tool. DS2 models an online DVD store, where customers log in, search for movies, and make purchases. DS2 reports these actions in orders per minute that the system could handle, to show what kind of performance you could expect for your customers. The DS2 workload also performs other actions, such as adding new customers, to exercise the wide range of database functions you would need to run your ecommerce environment. For more details about the DS2 tool, see www.delltechcenter.com/page/DVD+Store. Hardware configurations Server configuration information 2 x Dell EMC PowerEdge R730 BIOS name and version Dell EMC 2.1.7 Non-default BIOS settings Virtualization enabled Operating system name and version VMware ESXi™ 6.0.0 build-4192238 Date of last OS updates/patches applied 09/15/2016 Power management policy Performance Processor Number of processors 2 Vendor and model Intel® Xeon® E5-2699 v4 Core count (per processor) 22 Core frequency (GHz) 2.20 Stepping 1
- 7. Keep data available without affecting user response time April 2017 (Revised) | 7 Server configuration information 2 x Dell EMC PowerEdge R730 Memory module(s) Total memory in system (GB) 256 Number of memory modules 8 Vendor and model Samsung™ M393A4K0BB1-CRC0Q Size (GB) 32 Type PC4-2400P Speed (MHz) 1,600 Speed running in the server (MHz) 1,600 Storage controller Vendor and model Dell EMC PERC H730p Cache size (GB) 2 Firmware version 25.4.1.0004 Driver version 6.903.82.00 Local storage Number of drives 2 Drive vendor and model Seagate® ST9146852SS Drive size (GB) 146 Drive information (speed, interface, type) 15K, 6Gb SAS, HDD Network adapter Vendor and model Intel Ethernet Converged Network Adapter X520-2 Number and type of ports 2 x 10GbE Driver version 4.1.1.1-iov Network adapter Vendor and model QLogic QLE2692 16Gb FC Adapter Number and type of ports 2 x 16Gb Driver version 2.1.24.0-1OEM.600.0.0.2768847 Cooling fans Vendor and model NMB 06038DA-12S-EWH Number of cooling fans 6 Power Supplies Vendor and model Dell EMC D750E-S6 Number of power supplies 2 Wattage of each (W) 750 Table 1: Detailed configuration information for the server under test
- 8. Keep data available without affecting user response time April 2017 (Revised) | 8 Table 2: Detailed configuration information for the storage solution Storage configuration information Dell EMC VMAX 250F Controller firmware revision Hypermax OS 5977.945.890 Number of storage controllers 2 (1 V-Brick) Number of storage shelves 2 Number of drives per shelf 8, 9 Drive vendor and model number Samsung MZ-ILS9600 Drive size (GB) 960 Drive information (speed, interface, type) RAID5 (3+1), SSD
- 9. Keep data available without affecting user response time April 2017 (Revised) | 9 Appendix B: Detailed test procedure We used the following steps to configure each server and our SQL environment. Installing VMware ESXi™ 6 Update 2 1. Attach the installation media. 2. Boot the Dell EMC PowerEdge R730 server. 3. At the VMware Installer screen, press Enter. 4. At the EULA screen, to Accept and Continue, press F11. 5. Under Storage Devices, select the appropriate virtual disk, and press Enter. 6. As the keyboard layout, select US, and press Enter. 7. Enter the root password twice, and press Enter. 8. To start installation, press F11. 9. After the server reboots, press F2, and enter root credentials. 10. Select Configure Management Network, and press Enter. 11. Select the appropriate network adapter, and select OK. 12. Select IPv4 settings, and enter the desired IP address, subnet mask, and gateway for the server. 13. Select OK, and restart the management network. 14. Repeat steps 1-13 on the second R730. Deploying the VMware vCenter Server® 6 Update 2 We used a client server running VMware ESXi to host our clients and virtualized management servers. For the VMware vCenter Server VM, we installed Windows Server 2012 R2 and performed the following steps to install and configure vCenter® . 1. Log into the vCenter VM. 2. From the VMware vCenter Server 6.0 install media, to start the install wizard, click Run. 3. Select vCenter Server, and click Install. 4. At the Install wizard welcome screen, click Next. 5. Agree to the License Agreement, and click Next. 6. Select the Embedded Deployment option and click Next. 7. Enter the system IP address. 8. Enter and confirm the password you wish to use with the Administrator account for vCenter Single Sign On, and click Next. 9. Click Next. 10. Accept the default database settings, and click Next. 11. Accept the default https port, and click Next. 12. Accept the default installation path, and click Next. 13. Uncheck Join the VMware Customer Experience Improvement Program, and click Next. 14. Click Install. 15. To exit the wizard, click Finish. 16. On the installer, click Exit. 17. Restart the server. 18. Once completed, log into the first vCenter’s web client at https://vcenter-ip-address/vsphere-client/?csp. 19. Add all the necessary ESXi and vCenter licenses to the vCenter. Creating the cluster and adding the hosts and storage to VMware vCenter We used the following steps to create the R730 cluster and add the desired servers and storage to vCenter. 1. Once logged into vCenter, navigate to Hosts and Clusters. 2. Select the primary site management vCenter. 3. Right-click the vCenter object, and select New Datacenter… 4. Enter a name for the new datacenter, and click OK. 5. Right-click the new datacenter, and click New Cluster… 6. Enter a name for the new cluster. 7. Click OK.
- 10. Keep data available without affecting user response time April 2017 (Revised) | 10 8. Once the cluster has been created, right-click the cluster, and click Add Host. 9. Enter the IP address for the first PowerEdge R730 server, and click Next. 10. Enter the root credentials for the server, and click Next. 11. To accept the server’s certificate, click Yes. 12. Review the server details, and click Next. 13. Assign the desired license, and click Next. 14. Disable Lockdown mode, and click Next. 15. Click Finish. 16. Repeat steps 8-15 for the remaining PowerEdge R730 servers. 17. Once all the hosts are added to vCenter, use Update Manager to update the hosts, and install the latest Dell EMC® PowerPath® . 18. Once all the servers are added to the cluster, right click a host, and click Storage[Symbol]New Datastore. 19. Select VMFS, and click Next. 20. Enter a name for the new datastore as “OS”, select the appropriate Dell EMC VMAX 250F OS LUN, and click Next. 21. Accept the defaults for the partition configuration, and click Next. 22. Click Finish. 23. Once the create datastore task is complete, ensure that all the hosts in the cluster are mounted on the new datastore. 24. Repeat steps 18-23 for the remaining eight data and four log LUNs. Creating the VMs We created four gold image VMs for SQL using the following steps. 1. In VMware vCenter, navigate to Virtual Machines. 2. To create a new VM, click the icon. 3. Leave Create a new virtual machine selected, and click Next. 4. Enter a name for the virtual machine, and click Next. 5. Place the VM on the desired host with available CPUs, and click Next. 6. Select the Dell EMC VMAX 250F LUN for the 40GB OS VMDK, and click next. 7. Select the guest OS as Windows Server 2012 R2, and click Next. 8. In the Customize Hardware section, use the following settings: a. Set the vCPU count to 8. b. Set the Memory to 8GB, and check the Reserve all guest memory box. c. Add 2 x 250GB VMDKs for data and 1 x 100GB VMDKs for log. Set all VMDKs to thick provision eager zeroed. d. Create 2 additional SCSI controllers, and assign all data VMDKs to one and all log VMDKs to the other. e. Attach a Windows Server 2012 R2 ISO to the CD/DVD drive. 9. Click Next. 10. Click Finish. 11. Power on the VMs, and follow the steps outlined in the next section to install and configure the workload. Installing Windows Server 2012 R2 1. Attach the Windows Server 2012 R2 ISO to the virtual machine. 2. Open the VM console, and start the VM. 3. When prompted to boot from DVD, press any key. 4. When the installation screen appears, leave language, time/currency format, and input method as default, and click Next. 5. Click Install now. 6. When the installation prompts you, enter the product key. 7. Select Windows Server 2012 Datacenter Edition (Server with a GUI), and click Next. 8. Check I accept the license terms, and click Next. 9. Click Custom: Install Windows only (advanced). 10. Select Drive 0 Unallocated Space, and click Next. This starts Windows automatically, and Windows will restart automatically after completing. 11. When the Settings page appears, fill in the Password and Reenter Password fields with the same password. 12. Log in with the password you set up previously.
- 11. Keep data available without affecting user response time April 2017 (Revised) | 11 Installing .NET Framework 3.5 1. In the VM, open Server Manager. 2. Click Manage Add Roles and Features. 3. Select Role-based or feature-based installation, and click Next. 4. Under Server pool, select the local server, and click Next. Click Next. 5. Under Features, select .NET Framework 3.5 Features, and click Next. 6. Click Install. 7. Upon completion, click Close. Installing SQL Server 2016 1. Attach the installation media ISO for SQL Server 2016 to the VM. 2. Click Run SETUP.EXE. If Autoplay does not begin the installation, navigate to the SQL Server 2016 DVD, and double-click it. 3. In the left pane, click Installation. 4. Click New SQL Server stand-alone installation or add features to an existing installation. 5. Specify Evaluation as the edition you are installing, and click Next. 6. To accept the license terms, click the checkbox, and click Next. 7. Click Use Microsoft Update to check for updates, and click Next. 8. At the Feature Selection screen, select Database Engine Services, Full-Text and Semantic Extractions for Search, Client Tools Connectivity, and Client Tools Backwards Compatibility. 9. Click Next. 10. At the Instance configuration screen, leave the default selection of default instance, and click Next. 11. At the Server Configuration screen, accept defaults, and click Next. 12. At the Database Engine Configuration screen, select the authentication method you prefer. For our testing purposes, we selected Mixed Mode. 13. Enter and confirm a password for the system administrator account. 14. Click Add Current user. This may take several seconds. 15. Click Next. 16. At the Ready to Install screen, click Install. 17. Close the installation window. 18. In the SQL Server Installation Center, click on Install SQL Server Management Tools. 19. Click Download SQL Server Management Studio. 20. Click Run. 21. When the Microsoft SQL Server Management Studio screen appears, click Install. 22. When the installation completes, click Close. Configuring SQL Server 2016 We configured log file backups both as standard policy and to prevent the log file from expanding to larger than the size of the provided disk for the SQL VMs. We used the following steps to do so. 1. Create a directory in your VM’s log drive, and name it “ds2”. 2. Start the Microsoft SQL Server Management Studio. 3. Log in with your username and password. 4. In the Management Studio, right-click SQL Server Agent, and click Start. 5. Click Yes to confirm you want to start the SQL Server Agent. 6. Right-click on Jobs, and select New Job. 7. Name your job tlog-backup, and click Steps. 8. In the Steps view, click New.
- 12. Keep data available without affecting user response time April 2017 (Revised) | 12 9. Name your step BACKUP, set type to Transact-SQL script (T-SQL), make sure the selected database is DS2, and put the following script into the Command field: --DECLARE DECLARE @DateTimeStr varchar(100) DECLARE @backupSetId as int DECLARE @MyFileName varchar(200) DECLARE @BackupName varchar(200) --SET VARIABLES SET @DateTimeStr = REPLACE(convert(nvarchar(20),GetDate(),120),’:’,’-’) SET @MyFileName = ‘f:ds2ds2log _ ’ + @DateTimeStr + ‘.bak’ SET @BackupName = ‘ds2-log Database Backup ‘ + @DateTimeStr --BACKUP DB BACKUP log [ds2] TO DISK = @MyFileName WITH NOFORMAT, NOINIT, NAME = @BackupName , SKIP, NOREWIND, NOUNLOAD, STATS = 10 10. Click OK. 11. Click New. 12. Name your step DELETE, set type to Operating system (CmdExec), and put the following command into the Command field: del f:ds2* /F /Q 13. Click OK. 14. Go to the Schedules view. 15. Click New. 16. Name the schedule Every minute, change the Schedule type to Recurring, and make it occur once every minute starting at midnight. On the second VM set it to start at 12:00:15 AM, the third 12:00:30 AM, and the fourth 12:00:45 AM. Configuring the DVD Store 2 benchmark Data generation overview We generated the data using the Install.pl script included with DVD Store version 2.1 (DS2), providing the parameters for our 20GB database size and the Microsoft SQL Server 2016 platform. We ran the Install.pl script on a utility system running Linux® . The Install.pl script also generated the database schema. After processing the data generation, we transferred the data files and schema creation files to a Windows-based system running SQL Server 2005. We built the 20GB database in SQL Server 2005, then performed a full backup, storing the backup file on the C: drive for quick access. We used that backup file to restore the server between test runs. In the SQL Server 2005 database build, we did not include the WITH(FORCESEEK) clause in the BROWSE_BY_ACTOR and BROWSE_BY_TITLE stored procedures, as the feature did not exist in SQL Server 2005. When we restored the backups for use in SQL Server 2016, we added those clauses back to the stored procedures. The only modification we made to the schema creation scripts were the specified file sizes for our database. We explicitly set the file sizes higher than necessary to ensure that no file-growth activity would affect the outputs of the test. Apart from this file size modification, we created and loaded the database schema according to the DVD Store documentation. Specifically, we followed the steps below: 1. Generate the data and create the database and file structure using database creation scripts in the DS2 download. Make size modifications specific to 20GB database and the appropriate changes to drive letters. 2. Transfer the files from the Linux data generation system to a Windows system running SQL Server 2005. 3. Create database tables, stored procedures, and objects using the provided DVD Store scripts. 4. Set the database recovery model to bulk-logged to prevent excess logging. 5. Load the data you generated into the database. For data loading, use the import wizard in SQL Server Management Studio. Where necessary, retain options from the original scripts, such as Enable Identity Insert. 6. Create indexes, full-text catalogs, primary keys, and foreign keys using the database-creation scripts. 7. Update statistics on each table according to database-creation scripts, which sample 18 percent of the table data. 8. On the SQL Server instance, create a ds2user SQL Server login using the following Transact-SQL (T-SQL) script: USE [master]GOCREATE LOGIN [ds2user] WITH PASSWORD=N’’, DEFAULT _ DATABASE=[master], DEFAULT _ LANGUAGE=[us _ english], CHECK _ EXPIRATION=OFF, CHECK _ POLICY=OFFGO 9. Set the database recovery model back to full. 10. Create the necessary full text index using SQL Server Management Studio. 11. Create a database user and map this user to the SQL Server login.
- 13. Keep data available without affecting user response time April 2017 (Revised) | 13 12. Perform a full backup of the database. Note: This backup allowed us to restore the databases to a pristine state relatively quickly between tests. Note: We used the backup created in Step 12 in the legacy environment, as SQL Server 2005 does not support FORCESEEK. To enable FORCESEEK on the database used in the Dell PowerEdge R730 environment, we restored the backup from Step 12 in a SQL Server 2016 instance. We then edited the stored procedures BROWSE_BY_ACTOR and BROWSE_BY_TITLE to use FORCESEEK. We then made a new backup of the database in SQL Server 2016. Logical name Filegroup Initial size (MB) Database files primary PRIMARY 4 cust1 DS_CUST_FG 50,776 cust2 DS_CUST_FG 50,776 cust3 DS_CUST_FG 50,776 cust4 DS_CUST_FG 50,776 ind1 DS_IND_FG 35,414 ind2 DS_IND_FG 35,414 ind3 DS_IND_FG 35,414 ind4 DS_IND_FG 35,414 ds_misc DS_MISC_FG 520 orders1 DS_ORDERS 25,000 orders2 DS_ORDERS 25,000 orders3 DS_ORDERS 25,000 orders4 DS_ORDERS 25,000 Log files ds_log Not applicable 102,150 Table 3: Our initial file size modifications
- 14. Keep data available without affecting user response time April 2017 (Revised) | 14 Configuring the database workload client For our testing, we used a virtual client for the Microsoft SQL Server client. To create this client, we installed Windows Server 2008 R2, assigned a static IP address, and installed .NET 3.5. Running the DVD Store tests We created a series of batch files, SQL scripts, and shell scripts to automate the complete test cycle. DVD Store outputs an orders-per- minute metric, which is a running average calculated through the test. In this report, we report the last OPM that each client/target pair reported. Each complete test cycle consisted of general steps: 1. Clean up prior outputs from the target system and the client driver system. 2. Drop the database from the target. 3. Restore the database on the target. 4. Shut down the target. 5. Reboot the host and client system. 6. Wait for a ping response from the server under test and the client system. 7. Let the test server idle for 10 minutes. 8. Start the DVD Store driver on the four clients. 9. After an hour, perform the steps in “Running the AppSync copy test”. 10. Repeat “Running the AppSync copy test” each hour until there are 10 snapshots running. We used the following DVD Store parameters for testing the four baseline VMs: ds2sqlserverdriver.exe --target=<target _ IP> --ramp _ rate=10 --run _ time=720 --n _ threads=32 --db _ size=20GB --think _ time=0.01 --detailed _ view=Y --warmup _ time=15 --report _ rate=1 --csv _ output=<drivepath> Creating the AppSync VM We created a base Windows Server 2012 R2 VM on our vCenter host to configure AppSync on. We used the following steps to install and configure AppSync for our environment. 1. Download the AppSync install package from the Dell EMC support website. 2. Open the AppSync install package, and run AppSync-3.1.0.0-win-x64.exe. 3. In the Introduction, click Next. 4. In License Agreement, accept the terms of the license agreement and click Next. 5. In Choose Install Folder, accept defaults and click Next. 6. In AppSync Administrator, write your admin password and click Next. 7. In AppSync Ports, accept defaults and click Next. 8. In Pre-Installation Summary, look over your choices to make sure you didn’t make a mistake and click Install. 9. In Installation Complete, click Next to complete the install. 10. When the information pops up, click Done, and your default web browser will open to AppSync. 11. In the AppSync login, type your username and password, and click Login. 12. Click Settings Storage Infrastructure. 13. Click Add VMAX. 14. In SMI-S Provider, type the IP address, username, and password, and click Next. 15. In Select VMAX, select the array you are trying to add, and click Next. 16. In Groups and Pools, select the Storage Group and the Storage Pools you made for AppSync, then click Finish. 17. Click Settings VMware vCenter Servers. 18. Click Add. 19. In Add vCenter Server, type the hostname, username, and password for your vCenter server, then click OK. 20. Click Service Plans VMware Datacenters. 21. Click Create. 22. In the Create New Plan window, select Bronze as your template AppSync service plan, name your service plan, and click OK. 23. Click on your new service plan. 24. In Plan Startup, select On demand. 25. In Create local copy, select Crash Consistent.
- 15. Keep data available without affecting user response time April 2017 (Revised) | 15 26. Check Mount copy. 27. In Mount Copy, select your host, change Mount Signature to Use new signature, and keep Cluster Mount at Yes, then click Apply. 28. Click Copy Management VMware Datacenters. 29. Click on your VMware Datacenter you added earlier. 30. Highlight the LUNs you wish to protect, and click Protect Subscribe to Plan Your plan name. Running the AppSync copy test 1. Open a web browser and navigate to your AppSync address. 2. In the AppSync login, type your username and password, and click Login. 3. Click Service Plans VMware Datacenters. 4. Select the service plan you made previously, and click Run. 5. After the service plan has finished running, open a connection to your vCenter. 6. Click Hosts & Clusters. 7. Select the host on which you intend to add a VM. 8. Select Related Objects Datastores. 9. Right-click on the new datastore that has your VM OS, and click Register VM. 10. Navigate to the directory containing your VM address, and click OK. 11. In Name and location, give your VM a different name from the original VM, select the datacenter, and click Next. 12. In Host / Cluster, select your relevant cluster, and click Next. 13. In Specify a Specific Host, select your host, and click Next. 14. In Ready to Complete, click Finish. 15. Power on the snapshot VM. Creating SRDF/Metro witnesses 1. Log into the Unisphere® for VMAX of the array you wish to use as a witness. 2. Select All Symmetrix your witness storage array 3. Select Data Protection Create SRDF Group 4. In the Create SRDF Group pop-up, choose the following options: • Communication Protocol: FC • SRDF Group Label: Your choice • SRDF Group Number: Your choice (make sure to choose a number not already chosen, though) • Director: Choose all available RDF directors • Remote Symmetrix ID: Your site A storage array • Remote SRDF Group Number: the same number as SRDF Group Number • Remote Director: Choose all available remote RDF directors • SRDF/Metro Witness Group: Checked 5. Click OK. 6. Select Data Protection Create SRDF Group 7. In the Create SRDF Group pop-up, choose the following options: • Communication Protocol: FC • SRDF Group Label: Your choice • SRDF Group Number: Your choice (make sure to choose a number not already chosen, though) • Director: Choose all available RDF directors • Remote Symmetrix ID: Your site B storage array • Remote SRDF Group Number: the same number as SRDF Group Number • Remote Director: Choose all available remote RDF directors • SRDF/Metro Witness Group: Checked 8. Click OK.
- 16. Keep data available without affecting user response time April 2017 (Revised) | 16 Creating the SRDF/Metro connection 1. Log into the Unisphere for VMAX of the site A storage array. 2. Select All Symmetrix your site A storage array. 3. Select Data Protection Create SRDF Group 4. In the Create SRDF Group pop-up, choose the following options: • Communication Protocol: FC • SRDF Group Label: Your choice • SRDF Group Number: Your choice (make sure to choose a number not already chosen, though) • Director: Choose all available RDF directors • Remote Symmetrix ID: Your site B storage array • Remote SRDF Group Number: the same number as SRDF Group Number • Remote Director: Choose all available remote RDF directors 5. Click OK. 6. Select Data Protection Protection Dashboard. 7. In the Protection Dashboard, click on Unprotected. 8. Select the storage group you wish to protect, and click Protect. 9. In the Protect Storage Group window, select High Availability Using SRDF/Metro and click Next. 10. In the Select SRDF/Metro Connectivity step, select your site B storage, make sure that your SRDF group is protected via Witness and compression is enabled, and click Next. 11. In the Finish step, click the dropdown list beside Add to Job List and select Run Now. 12. Select Data Protection SRDF. 13. Select SRDF/Metro. 14. Monitor the state of the SRDF metro pair you made, and proceed to the next step once the pair reads as ActiveActive. 15. Select All Symmetrix your site B storage array. 16. Select Storage Storage Groups Dashboard. 17. Double-click the newly-synced SRDF storage group. 18. Select Provision Storage to Host. 19. In Select Host/Host Group, select your site A server. 20. In Select Port Group, allow a new port group to be automatically created. 21. In Review, click the down arrow beside Add to Job List and click Run Now. Running the SRDF/Metro test 1. Clean up prior outputs from the target system and the client driver system. 2. Drop the database from the target. 3. Restore the database on the target. 4. Shut down the target. 5. Reboot the host and client system. 6. Wait for a ping response from the server under test and the client system. 7. Let the test server idle for 10 minutes. 8. Start the DVD Store driver on each of the four clients. 9. After an hour, disconnect the ports from the site A storage, and continue the test for another hour.
- 17. Keep data available without affecting user response time April 2017 (Revised) | 17 Appendix C: Detailed findings Storage snapshot testing We pulled latency and IOPS data from the performance tracking tools provided by Dell EMC Unisphere® for VMAX. Figure 1: Storage latency during the 12-hour test Figure 2: Storage IOPS during the 12-hour test
- 18. Keep data available without affecting user response time April 2017 (Revised) | 18 SRDF/Metro high availability testing Figure 4: Total orders per minute as reported by DS2 from the two-hour SRDF/Metro test Figure 3: Average orders per minute per VM as reported by DS2 from the 12-hour test
- 19. Keep data available without affecting user response time April 2017 (Revised) | 19 Principled Technologies is a registered trademark of Principled Technologies, Inc. All other product names are the trademarks of their respective owners. DISCLAIMER OF WARRANTIES; LIMITATION OF LIABILITY: Principled Technologies, Inc. has made reasonable efforts to ensure the accuracy and validity of its testing, however, Principled Technologies, Inc. specifically disclaims any warranty, expressed or implied, relating to the test results and analysis, their accuracy, completeness or quality, including any implied warranty of fitness for any particular purpose. All persons or entities relying on the results of any testing do so at their own risk, and agree that Principled Technologies, Inc., its employees and its subcontractors shall have no liability whatsoever from any claim of loss or damage on account of any alleged error or defect in any testing procedure or result. In no event shall Principled Technologies, Inc. be liable for indirect, special, incidental, or consequential damages in connection with its testing, even if advised of the possibility of such damages. In no event shall Principled Technologies, Inc.’s liability, including for direct damages, exceed the amounts paid in connection with Principled Technologies, Inc.’s testing. Customer’s sole and exclusive remedies are as set forth herein. This project was commissioned by Dell Technologies. Principled Technologies® Facts matter.® Figure 5: Storage IOPS in SRDF/Metro configuration during the two-hour SRDF/Metro test