3. Inspiration Sea organisms
The subtle movement of these sea organisms and their physical reaction to external influences. Some of them are
able to transform their appearance by swelling or changing colors. I wanted to implement this as well in my project.
4. Inspiration Pneumatic structures
I thought the idea of using a wood stove instead of fan was very clever.
The combination of light and air in one system interests me.
The Roof That Goes Up in Smoke | Overtreders W
5. Inspiration Pneumatic structures
In previous design phases I wanted to play the ecological card by reusing plastic
bags, since we are using way to much plastic bags for shopping, packaging, etc.
One Hundred and Eight | Nils Voelker
6. Inspiration Pneumatic structures
This project also reuses plastic bags and creates a beautiful sculpture, combined with nice lighting elements.
Plastic Bag Installation | Robert Janson
7. Inspiration Pneumatic structures
Cloud | Max Streicher
By seeing his projects, I decided to do something involving a pneumatic structure. I also learned about his construction methods and ordered a package of tyvek to make my own sculpture. Max Streicher always wants to
create the notion that his sculptures are really breathing. I want to accomplish that as well.
Romulus & Remus | Max Streicher
8. Design process
PHASE 1
Emergent Surface | Hoberman’s joint venture with Buro Happold
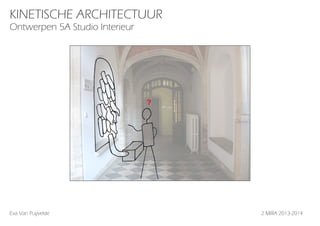
In the beginning I wanted to design something involving privacy, so I was working mostly with the
idea of shutters that would create a private zone obstructing disturbing influences from outside. Prof.
Vande Moere noted that privacy can also be linked to relaxation and he gave the example of a situation were you would sit and a pneumatic matras would unfold, creating a calm break.
PHASE 2
My little piece of privacy | Niklas
After that, I was really interested in interactive systems that followed people when they passed by.
I devised a system whereby a lamp would follow you in the hall, enlighting your passage. The lamp
was inspried on the Globlow floor lamp. It was a cool idea, but not really realistic to succeed concerning needed equipment and materials. I only kept the idea of the lamp, which blows when it ‘s on.
Globlow floor lamp | David Design
9. PHASE 3
Romulus & Remus | Max Streicher
tn this stage I discovered Max Streicher and i was fascinated by his art installations with a precise
detailing of all the small parts of his sculptures. Just like Romulus and Remus I wanted to use two volumes connected to each other, while one would be drained of air, filling the other one with its extracted
air. The two volumes acted like a living organism, symbolizing “breathing”. When you came close to
one volume, it would swell while the other was being drained. When touching one volume, the whole
proces would shut down. After a consult I dropped the idea of two volumes to just one. I wanted the
shape to be like a big carambola hanging down from one of the vaults.
PHASE 4
breath in
After a consult, I got the message that it should be more complex so then I came up with the idea to fill
up the niche in the wall by flattening the surface and letting the sculpture rise from the surface. I was
inspired by coral structures and their responses to exterior influences such as shutting down, swelling,
changing colors, etc.
breath out
10. Design process
plastic bags
Materiality Research
old parachute (= nylon)
old curtain (=cotton fabric)
tyvek
First I wanted to recycle plastic bags because of the ecological thougth behind it, but they were not strong enough to resist large pressures. Afterwards I had the idea to
use our old parachute, but I didn’t like the color and it seemed too difficult to cut decent shapes out of it. Then I made a prototype in fabric, but that was not a great success, the air went through it too fast. At that moment I decided to use the same material as Max Streicher uses in his pneumatic designs: tyvek. It’s a vert strong material.
11. Design process
Selection of the type of tubes
Selection of shapes, arrangement
Selection of the different shapes. These templates were
cut in fablab to easily draw the shape onto the fabric
The tubes + surface arranged on the 6m long tyvek paper using the templates to
draw the shap onto the fabric to be easily cut out with scissors afterwards
The arrangement of (31) tubes on the surface, trying to draw
the attention to the touch sensor (one of te green circles).
The one at the bottom is the inlet for the fan.
13. Location & set-up
What’s behind the canvas?
a lamp to illuminate the structure, simultaneously with the
breathing, revealing the nerves in the tyvek fabric
touch sensor
the cable connecting the arduino board and the sensor
leaves the box and reaches to the end of the tube where
the touch sensor is attached to a piece of red fabric.
Attachement
The tyvek canvas will be attached to the niche using
tape, in order not to damage the existing structure
Power point
what’s in the box?
the fan
the arduino board+tinkerkit & tinkerkit modules
extension cables
14. Concept
The system behaves like a living organism, there are three possible states:
1 |
It will simply ’breathe’ when it is at ease and not disturbed or threatened by human beings
ON
2 |
OFF
When someone is less than 1 m away from the system, it will feel threatened/ agitated and remain motionless by ‘constantly blowing’
ON
3 |
When someone touches the end of the tube with the red end, it will defend itself by pretending to be dead --> ‘system off’
?
ON
OFF
15. Concept
Initial state
‘breathe’ = alternately on and off
Is someone at a distance < 1m?
JA
‘constantly blowing’
Is someone touching the end of the tube
with the touch sensor?
JA
‘system off’
NEE
‘constantly blowing’
NEE
‘breathe’
16. Concept use of light to strenghten the breathing
When the fan is on, the light will be on. This can simply be done by plugging the fan and the lamp into
the extension cable that has been cut and connected to the tinkerkit Relay