O Futuro Dos Compras Coletivas
•Transferir como PPTX, PDF•
2 gostaram•482 visualizações

O documento discute o modelo de negócios de compras coletivas, analisando números, desafios e lições aprendidas. As compras coletivas cresceram rapidamente, porém oferecem pouca rentabilidade aos comerciantes e não garantem fidelização de clientes. É preciso melhor segmentar as ofertas e campanhas para tornar o modelo sustentável.

Recomendados
Recomendados
Mais conteúdo relacionado
Mais procurados
Mais procurados (17)
Destaque
Semelhante a O Futuro Dos Compras Coletivas
Semelhante a O Futuro Dos Compras Coletivas (20)
Mais de Solange Oliveira
O Futuro Dos Compras Coletivas
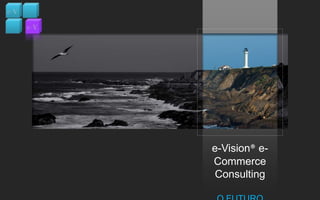
- 1. e-Vision® e-Commerce Consulting O FUTURO COMPRAS COLETIVAS
- 2. 3 2 1
- 4. Beleza, Spa e Massagem (19%),
- 5. Fitness e nutrição (7%),
- 6. Esporte e Lazer (7%)
- 7. Home Produtos & Serviços (5%). As maiores cidades de ofertas diárias são Chicago (onde Groupon é baseado), New York, San Francisco, Boston e Los Angeles.
- 9. + de 4.000 queixas no Procon
- 10. As Mulheres imperam nos Compras Coletivas!
- 11. Ofertas com mais de 60% de desconto ( independente do preço original ) vendem muito!
- 12. Produtos com valor maior que R$ 200,00 tem mais dificuldades de venda.
- 13. PARA CONSUMIDOR ATÉ 90% DE DESCONTO? OBAAAAAA!!!
- 15. MEUS CUSTOS SÃO: MANTER A BASE E FAZER UM ÓTIMO MARKETING DE MASSA?
- 16. MEU NEGÓCIO CRESCENDO A 36% AO MÊS??OBAAAAAAAA!!!!
- 17. PARA COMERCIANTE Hum.... Meu produto é vendido por R$ 100,00 Compra Coletivas disse que TEM que ter pelo menos 50% de desconto... Então o Cupom será vendido a R$ 50,00 Minha matéria prima custa R$ 20,00 mas como vou ter grande volume posso negociar a R$ 15,00 ( puxa... Que descontão ). Meus custo fixos não consigo mudar... São rateados R$ 8,00 por produto! A Mão de Obra é R$ 5,00... Isso dá... R$ 28,00 !!! Oba vou ganhar R$ 22,00 em cada produto... Mas pera ai.... 50% de cada cupom é do Compras Coletivas.... Xiiii......
- 18. Não existe fidelização em Compras Coletivas
- 21. ESCOAMENTO DE PRODUTOS ENCALHADOS OU SERVIÇOS COM POUCO INTERESSE DO CONSUMIDORLIÇÃO 2 LIÇÃO 1 DESCONTOS NÃO GARANTEM FIDELIZAÇÃO, BONS SERVIÇOS SIM!. COMPRAS COLETIVAS É PARA USAR A CAPACIDADE OCIOSA DE UM NEGOCIO. PORQUE A RENTABILIDADE VAI SER POUCA OU QUASE NENHUMA
- 23. Mas clientes que não adquiriram os cupons se sentem prejudicados com a qualidade dos serviços caindo .
- 24. Não é incomum em lugares como por exemplo salão de beleza terem área exclusiva para cupons.
- 25. A Base de EMAILS de todo Compras Coletivas tem que ser imensa para que a oferta chegue no maior numero de pessoas.
- 26. Com isso muitos serviços de download mascaram a assinatura de um serviço pelo cadastro em um compra coletivas, essa base é vendida para varias empresas gerando um caminhão de SPAMs
- 28. CASE 2 Durante todo o dia 24/fev, o Twitter vinculou um “promotedtrend” com a hashtag#promodopeixe. Esta é uma das várias modalidades de anúncio “patrocinado” do Twitter. Peixe Urbano anunciou um passeio de trem para o Pantanal, Vitória ou Curitiba. Foram mais de 10 mil cupons vendidos em menos de 24 horas, se tornando a oferta de compra coletiva mais vendida da história da compra coletiva no país Lição: Ações promocionais diferenciadas podem fazer diferença em Compras Coletivas. 10.000 cupons vendidos em 24 horas!!!! ( até hoje apenas 32% das pessoas conseguiram usar o cupom)
- 29. CASE 3 Procedimentos Médicos em Compras Coletivas ? É preciso reavaliar. Como fazer oferta de procedimentos médicos? Lição: Existem limites que precisam ser respeitados. Para Saúde não tem leilão Como é possível baratear seringas , agulhas, medicamentos?
- 30. ComoSalvar o Modelo de C.C.?
- 31. SEGMENTAÇÃO Orientar melhor o comerciante Campanhas de Fidelização Campanhas diferenciadas para as ofertas ( além do e-mail )
- 33. Só San Francisco – Portland e NYC
- 34. Só Atlanta, Austin, Dallas, San Diego e São Francisco
- 35. ? S Ú V D A D I
- 36. E-Commerce Parceria Colaborativa Consultoria Selo Qualidade Projetos Contatos e-Vision®e-Commerce Consulting Solange Oliveira E-Commerce expert @ecommerce_girl 55 11 4272 0844 55 11 7046 3868 Solange.oliveira@e-visionconsulting.com.br www.e-visionconsulting.com.br
Notas do Editor
- To reproduce the picture effects on this slide, do the following:On the Home tab, in the Slides group, click Layout and then click Blank. On the Insert tab, in the Illustrations group, click Picture. In the Insert Picture dialog box, select a picture, and then click Insert. Select the picture. Under Picture Tools, on the Format tab, in the bottom right corner of the Size group, click the Size and Position dialog box launcher. In the Size and Position dialog box, on the Size tab, resize or crop the picture as needed so that under Size and rotate, the Height box is set to 3.58” and the Width box is set to 8”. Resize the picture under Size and rotate by entering values into the Height and Width boxes. Crop the picture under Crop from by entering values into the Left, Right, Top, and Bottom boxes. Under Picture Tools, on the Format tab, in the Adjust group, click Recolor, and then under Dark Variations click Text color 2 Dark (first option from the left). Under Picture Tools, on the Format tab, in the Picture Styles group, click Picture Effects, point to Shadow, and then under Inner click Inside Diagonal Top Left (first row, first option from the left).Drag the picture so that it is positioned above the middle of the slide. On the Home tab, in the Clipboard group, click the arrow next to Paste, and then click Duplicate.Press and hold CTRL and select both pictures on the slide. On the Home tab, in the Drawing group, click Arrange, point to Align, and then do the following:Click Align to Slide.Click Align Center. Click Align Selected Objects. Click Align Middle. Click the slide background area to cancel the selection of both pictures. Select the duplicate (top) picture. Under Picture Tools, on the Format tab, in the bottom right corner of the Size group, click the Size and Position dialog box launcher. In the Size and Position dialog box, on the Size tab, under Crop from,enter valuesinto the Left andRight boxes so that under Size and rotate, and the Width box is set to 2.33”. (Note: For best results, crop the duplicate picture to tightly focus on a single element in the original picture.)Under Picture Tools, on the Format tab, in the Adjust group, click Recolor, and then under No Recolor click No Recolor. On the Home tab, in the Drawing group, click Shapes, and then under Rectangles click Rectangle (first option from the left). On the slide, drag to draw a rectangle. Select the rectangle. Under Drawing Tools, on the Format tab, in the Size group, do the following:In the Shape Height box, enter 7.5”.In the Shape Width box, enter 2.33”.Under Drawing Tools, on the Format tab, in the Shape Styles group, click the arrow next to Shape Fill, point to Gradient, and then click More Gradients. In the Format Shape dialog box, click Fill in the left pane, select Gradient fill in the Fill pane, and then do the following:In the Type list, select Linear.Click the button next to Direction, and then click Linear Down (first row, second option from the left).Under Gradient stops, click Add or Remove until two stops appear in the drop-down list.Also under Gradient stops, customize the gradient stops that you added as follows:Select Stop 1 from the list, and then do the following:In the Stop position box, enter 0%.Click the button next to Color, then under Theme Colors click White, Background 1 (first row, first option from the left).In the Transparency box, enter 55%.Select Stop 2 from the list, and then do the following: In the Stop position box, enter 100%.Click the button next to Color, and then under Theme Colors click White, Background 1 (first row, first option from the left).In the Transparency box, enter 100%.On the slide, drag the rectangle to cover the duplicate picture. Select the rectangle. On the Home tab, in the Drawing group, click Arrange, and then do the following:Point to Align, and then click Align to Slide.Point to Align, and then click Align Middle. Click Send Backward. On the Home tab, in the Drawing group, click Shapes, and then under Rectangles click Rectangle (first option from the left). On the slide, drag to draw another rectangle. Select the rectangle. Under Drawing Tools, on the Format tab, in the Size group, do the following:In the Shape Height box, enter 4”.In the Shape Width box, enter 2.67”.Under Drawing Tools, on the Format tab, in the Shape Styles group, click the arrow next to Shape Fill, point to Gradient, and then click More Gradients. In the Format Shape dialog box, click Fill in the left pane. In the Fill pane, select No fill. Also in the Format Shape dialog box, click Line Color in the left pane, select Solid line in the Line Color pane, and then do the following:Click the button next to Color, and then under Theme Colors click White, Background 1 (first row, first option from the left). In the Transparency box, enter 70%.Also in the Format Shape dialog box, click Line Style in the left pane, and then do the following in the Line Style pane:In the Width box, enter 0.75 pt. Click the button next to Dash type, and then click Square Dot (third option from the top).Drag the dotted rectangle on top of the small, full-color picture. Press and hold SHIFT and select the dotted rectangle, the small picture, and the large picture on the slide. On the Home tab, in the Drawing group, click Arrange, point to Align, and then do the following:Click Align Selected Objects. Click Align Middle. On the Insert tab, in the Text group, click Text Box, and then on the slide, drag to draw the text box.Enter text in the text box, select the text, and then on the Home tab, in the Font group, select Gill Sans MT Condensedfrom the Font list, select 24 from the Font Size list, click the button next to Font Color, and then under Theme Colors click White, Background 1 (first row, first option from the left).On the Home tab, in the Paragraph group, click Center to center the text within the text box.On the slide, drag the text box below the dotted rectangle.To reproduce the background effects on this slide, do the following:Right-click the slide background area, and then click Format Background. In the Format Background dialog box, click Fill in the left pane, and then select Solid fill in the Fill pane. Also in the Fill pane, click the button next to Color, and then under Theme Colors click Black, Text 1, Lighter 15% (fifth row, second option from the left).To reproduce the animation effects on this slide, do the following:To view the area beyond the slide, on the View tab, click Zoom, and then in the Zoom dialog box, in the Percent box, enter 70%. (Note: Make sure that Fit is not selected in the Zoom dialog box.)On the Animations tab, in the Animations group, click Custom Animation. On the slide, select the dotted rectangle. In the Custom Animation task pane, click Add Effect, point to Motion Paths, point to Draw Custom Path, and then click Freeform. Press and hold SHIFT to conform the path to a straight, horizontal line, and then do the following on the slide:Click the center of the dotted rectangle to create the first motion-path point.Click approximately ½” beyond the right edge of the rectangle to create the second motion-path point. Double-click approximately 2” beyond the left edge of the slide to create the third and final motion-path point. On the slide, right-click the freeform motion path, and then click Reverse Path Direction. On the slide, select the freeform motion path. In the Custom Animation task pane, under Modify: Custom Path, in the Start list, select With Previous. On the slide, select the gradient-filled rectangle. In the Custom Animation task pane, do the following:Click Add Effect, point to Entrance, and then click More Effects. In the Add Entrance Effect dialog box, under Subtle, click Fade, and then click OK. Under Modify: Fade, in the Start list, select With Previous.Under Modify: Fade, in the Speed list, select Very Fast.Click Add Effect, point to Motion Paths, and then click Down.Under Modify: Down, in the Start list, select With Previous. Under Modify: Down, in the Speed list, select Medium. On the slide, right-click the down motion path and click ReversePathDirection.On the slide, select the smaller, full-color picture. In the Custom Animation task pane, do the following:Click Add Effect, point to Entrance, and then click More Effects. In the Add Entrance Effect dialog box, under Subtle, click Fade, and then click OK. Under Modify: Fade, in the Start list, select With Previous.Under Modify: Fade, in the Speed list, select Very Fast.Right-click the picture fade effect in the pane, and then click Timing. In the Fade dialog box, on the Timing tab, in the Delay box, enter 1.5.On the slide, select the text box. In the Custom Animation task pane, do the following:Click Add Effect, point to Entrance, and then click More Effects. In the Add Entrance Effect dialog box, under Moderate, click Descend, and then click OK. Under Modify: Descend, in the Start list, select With Previous. Under Modify:Descend, in the Speed list, select Fast.
- Animated countdown timer on textured background(Difficult)Tip: Some shape effects on this slide are created with the Combine Shapes commands. To access this command, you must add it to the Quick Access Toolbar, located above the File tab. To customize the Quick Access Toolbar, do the following:Click the arrow next to the Quick Access Toolbar, and then under CustomizeQuickAccessToolbar click MoreCommands.In the PowerPointOptions dialog box, in the Choose commands from list, select All Commands. In the list of commands, click CombineShapes, and then click Add.To reproduce the donut shape effects on this slide, do the following:On the Home tab, in the Slides group, click Layout, and then click Blank.On the Insert tab, in the Illustrations group, click Shapes, and then under Basic Shapes click Donut.On the slide, drag to draw a donut. Drag the yellow sizing handle so that the donut is roughly 0.25” in thickness.Select the donut. Under Drawing Tools, on the Format tab, in the Size group, in the Height box enter 5” and in the Width box enter 5”.Also under Drawing Tools, on the Format tab, in the Shape Styles group, click Shape Outline and then click No Outline.On the Insert tab, in the Illustrations group, click Shapes, and then under Rectangles click Rectangle.On the slide, drag to draw a rectangle.Select the rectangle. Under Drawing Tools, on the Format tab, in the Size group, in the Height box enter 5.5” and in the Width box enter 0.08”.Also under Drawing Tools, on the Format tab, in the Shape Styles group, click Shape Outline and then click No Outline.Select the rectangle. On the Home tab, in the Clipboard group, click the arrow to the right of Copy, and then click Duplicate. Repeat this process this process 7 times for a total of 9 thin rectangles.Select a duplicate rectangle. Under DrawingTools, on the Format tab, in the Size group, click the Size and Position dialog box launcher. In the Format Shape dialog box, click Size in the left pane, and in the Size pane, under Size and rotate, in the Rotation box enter 10. Select another duplicate rectangle. Under DrawingTools, on the Format tab, in the Size group, click the Size and Position dialog box launcher. In the Format Shape dialog box, click Size in the left pane, and in the Size pane, under Size and rotate, in the Rotation box enter 20. Select another duplicate rectangle. Under DrawingTools, on the Format tab, in the Size group, click the Size and Position dialog box launcher. In the Format Shape dialog box, click Size in the left pane, and in the Size pane, under Size and rotate, in the Rotation box enter 30. Select another duplicate rectangle. Under DrawingTools, on the Format tab, in the Size group, click the Size and Position dialog box launcher. In the Format Shape dialog box, click Size in the left pane, and in the Size pane, under Size and rotate, in the Rotation box enter 40. Select another duplicate rectangle. Under DrawingTools, on the Format tab, in the Size group, click the Size and Position dialog box launcher. In the Format Shape dialog box, click Size in the left pane, and in the Size pane, under Size and rotate, in the Rotation box enter 50. Select another duplicate rectangle. Under DrawingTools, on the Format tab, in the Size group, click the Size and Position dialog box launcher. In the Format Shape dialog box, click Size in the left pane, and in the Size pane, under Size and rotate, in the Rotation box enter 60. Select another duplicate rectangle. Under DrawingTools, on the Format tab, in the Size group, click the Size and Position dialog box launcher. In the Format Shape dialog box, click Size in the left pane, and in the Size pane, under Size and rotate, in the Rotation box enter 70. Select the last duplicate rectangle. Under DrawingTools, on the Format tab, in the Size group, click the Size and Position dialog box launcher. In the Format Shape dialog box, click Size in the left pane, and in the Size pane, under Size and rotate, in the Rotation box enter 80. Press and hold CTRL, and then select all of the small thin rectangles. On the Quick Access Toolbar, click Combine Shapes, and then click ShapeUnion.Also on the Home tab, in the Clipboard group, click Copy, and then click Duplicate.Select the duplicate group of rectangles. On the Home tab, in the Drawing group, click Arrange, point to Rotate, and then click Rotate Right 90°.On the Home tab, in the Edit group, click Select, and then click Select All.Also on the Home tab, in the Drawing group, click Arrange, point to Align, and then do the following:Click Align to Slide.Click Align Middle.Click Align Center.Press and hold CTRL, select the donut shape, and then select the first group of rectangles. On the Quick Access Toolbar, click Combine Shapes, and then click ShapeSubtract.Press and hold CTRL, select the donut shape, and then select the second group of rectangles. On the Quick Access Toolbar, click Combine Shapes, and then click ShapeSubtract.On the Insert tab, in the Illustrations group, click Shapes, and then under Basic Shapes click Donut.On the slide, drag to draw a donut. Drag a sizing handle so that the donut is roughly 0.5” in thickness.Select the second donut. Under Drawing Tools, on the Format tab, in the Size group, in the Height box enter 5.21” and in the Width box enter 5.21”.Also under Drawing Tools, on the Format tab, in the Shape Styles group, click Shape Outline, and then click No Outline.Press and hold CTRL, select the second donut, and then select the first, segmented donut. On the Quick Access Toolbar, click Combine Shapes, and then click ShapeSubtract.Select the remaining donut. Under Drawing Tools, on the Format tab, in the Shape Styles group, click the Format Shape dialog box launcher. In the Format Shape dialog box, click Fill in the left pane, in the Fill pane, click Gradient fill, and then do the following:Click the button next to Preset colors and then click Silver.In the Type list, select Linear.Also in the Format Shape dialog box, click Line Color in the left pane, and then in the Line Color pane click No line.Also in the Format Shape dialog box, click Shadow in the left pane, in the Shadow pane, click the button next to Presets, and then under Outer click Offset Center. Also in the Format Shape dialog box, click 3-D Format in the left pane, in the 3-D Format pane, under Bevel, click the button next to Top and then click Slope.On the Insert tab, in the Illustrations group, click Shapes, and then under Basic Shapes click Donut.On the slide, drag to draw a donut. Drag a sizing handle so that the donut is roughly 0.25” in thickness.Select the new donut. Under Drawing Tools, on the Format tab, in the Shape Styles group, click the Format Shape dialog box launcher. In the Format Shape dialog box, click Fill in the left pane, in the Fill pane, click the button next to Color, click More Colors, and then in the Colors dialog box, on the Custom tab, enter values for Red: 194, Green: 10, and Blue: 6.Also in the Format Shape dialog box, click Line Color in the left pane, and then in the Line Color pane click No line.Also in the Format Shape dialog box, click Size in the left pane, in the Size pane, under Size and rotate, in the Height box enter 5.14” and in the Width box enter 5.14”.Select the new donut. On the Home tab, in the Drawing group, click Arrange, and then click Send Backward.Press and hold CTRL, and then select the two donuts. On the Home tab, in the Drawing group, click Arrange, point to Align, and then do the following:Click Align Selected Objects.Click Align Center.Click Align Middle.With both donuts selected, drag the donuts so that the top edge is roughly 1” from the top edge of the slide.To reproduce the other shape effects on this slide, do the following:On the Insert tab, in the Illustrations group, click Shapes, and then under Rectangles click Rectangle.On the slide, drag to draw a rectangle.Select the rectangle. On the Home tab, in the Drawing tab, click the Format Shape dialog box launcher. In the Format Shape dialog box, click Fill in the left pane, in the Fill pane, click Gradient fill, and then do the following:In the Type list, select Linear.In the Angle box, enter 90.Under Gradient stops, click Add gradient stop or Remove gradient stop until three stops appear in the slider, then customize the gradient stops as follows:Select the first stop in the slider, and then do the following: In the Position box, enter 0%.Click the button next to Color, and then under Theme Colors click Black, Text 1 (first row, first option from the left).In the Transparency box, enter 75%.Select the next stop in the slider, and then do the following: In the Position box, enter 35%.Click the button next to Color, and then under Theme Colors click Black, Text 1 (first row, first option from the left).In the Transparency box, enter 0%.Select the last stop in the slider, and then do the following: In the Position box, enter 100%.Click the button next to Color, and then under Theme Colors click Black, Text 1 (first row, first option from the left).In the Transparency box, enter 100%.Also in the Format Shape dialog box, click Line Color in the left pane, and then in the Line Color pane click No line.Also in the Format Shape dialog box, click Size, and in the Height box enter 7.5, and in the Width box enter 2.83.On the slide, select the rectangle. On the Home tab, in the Drawing group, click Arrange, and then click Send Backward.Also on the Home tab, in the Drawing group, click Arrange, point to Align, and then click AlignMiddle and Align Center.To reproduce the text effects on this slide, do the following:On the Insert tab, in the Text group, click Text Box.On the slide, drag to draw a text box.Type “3” in the text box, and then select the text. On the Home tab, in the Font group, select Lucida Bright from the Font list, select White, Background 1 from the Font Color list, and then select 96 pt. from the FontSize list.Select the text box. On the Home tab, in the Clipboard group, click the arrow next to Copy, and then click Duplicate.Select the second text box. Change the text to “2.”Select the text box. On the Home tab, in the Clipboard group, click the arrow next to Copy, and then click Duplicate.Select the third text box. Change the text to “1.”Press and hold CTRL, and then select all three text boxes. On the Home tab, in the Drawing group, click Arrange, point to Align, and then do the following:Click Align Selected Objects.Click Align Middle.Click Align Center.With all three text boxes selected, position the text boxes in the center of the two donuts.To reproduce the animation effects on this slide, do the following:On the Home tab, in the Editing group, click Select, and then click Selection Pane.On the slide, select the silver, segmented donut. On the Animations tab, in the Advanced Animation group, click Add Animation, and then under Entrance click Grow & Turn.Also on the Animations tab, in the Timing group, do the following:In the Start list, select With Previous.In the Duration box, enter 1.00.On the slide, select the gradient-fill rectangle. On the Animations tab, in the Advanced Animation group, click Add Animation, and then click More Entrance Effects. In the Add Entrance Effect dialog box, under Subtle, click Expand.Also on the Animations tab, in the Timing group, do the following:In the Start list, select With Previous.In the Duration box, enter 1.00.On the slide, select the red, solid donut. On the Animations tab, in the Advanced Animation group, click Add Animation, and then under Entrance click Fade.Also on the Animations tab, in the Timing group, do the following:In the Start list, select After Previous.In the Duration box, enter 0.25.In the Selection and Visibility pane, select the “3” text box. On the Animations tab, in the Advanced Animation group, click Add Animation, and then under Entrance click Fade.Also on the Animations tab, in the Timing group, in the Duration box enter 0.50.Select the red, solid donut. On the Animations tab, in the Advanced Animation group, click Add Animation, and then under Exit click Wheel.Also on the Animations tab, in the Timing group, do the following:In the Start list, select With Previous.In the Duration box, enter 1.00.In the Selection and Visibility pane, select the “3” text box. On the Animations tab, in the Advanced Animation group, click Add Animation, and then under Exit click Fade.Also on the Animations tab, in the Timing group, do the following:In the Start list, select With Previous.In the Duration box, enter 0.50.In the Delay box, enter 0.50.In the Selection and Visibility pane, select the solid red donut. On the Animations tab, in the Advanced Animation group, click Add Animation, and then under Entrance click Fade.Also on the Animations tab, in the Timing group, do the following:In the Start list, select With Previous.In the Duration box, enter 0.25.In the Delay box, enter 1.00.In the Selection and Visibility pane, select the “2” text box. On the Animations tab, in the Advanced Animation group, click Add Animation, and then under Entrance click Fade.Also on the Animations tab, in the Timing group, do the following:In the Start list, select With Previous.In the Duration box, enter 0.50.In the Delay box, enter 1.00.Select the red, solid donut. On the Animations tab, in the Advanced Animation group, click Add Animation, and then under Exit click Wheel.Also on the Animations tab, in the Timing group, do the following:In the Start list, select With Previous.In the Duration box, enter 1.00.In the Selection and Visibility pane, select the “2” text box. On the Animations tab, in the Advanced Animation group, click Add Animation, and then under Exit click Fade.Also on the Animations tab, in the Timing group, do the following:In the Start list, select With Previous.In the Duration box, enter 0.50.In the Delay box, enter 1.50.In the Selection and Visibility pane, select the “1” text box. On the Animations tab, in the Advanced Animation group, click Add Animation, and then under Entrance click Fade.Also on the Animations tab, in the Timing group, do the following:In the Start list, select With Previous.In the Duration box, enter 0.50.In the Delay box, enter 1.50.In the Selection and Visibility pane, select the solid red donut. On the Animations tab, in the Advanced Animation group, click Add Animation, and then under Entrance click Fade.Also on the Animations tab, in the Timing group, do the following:In the Start list, select With Previous.In the Duration box, enter 0.25.In the Delay box, enter 1.00.In the Selection and Visibility pane, select the “1” text box. On the Animations tab, in the Advanced Animation group, click Add Animation, and then under Exit click FadeAlso on the Animations tab, in the Timing group, do the following:In the Start list, select With Previous.In the Duration box, enter 0.50.In the Delay box, enter 2.00.Select the red, solid donut. On the Animations tab, in the Advanced Animation group, click Add Animation, and then under Exit click Wheel.Also on the Animations tab, in the Timing group, do the following:In the Start list, select With Previous.In the Duration box, enter 2.00.To reproduce the background effects on this slide, do the following:On the Insert tab, in the Illustrations group, click Shapes, and then under Rectangles click Rectangle.On the slide, drag to draw a rectangle.Select the rectangle. Under Drawing Tools, on the Format tab, in the Shape Styles group, click the Format Shape dialog box. In the Format Shape dialog box, click Fill in the left pane, in the Fill pane, click Picture or texture fill, and then do the following:Click the button next to Texture and select Brown Marble (fourth row, first option from the left).Clear the Tile picture as texture box.Also in the Format Picture dialog box, click Line Color in the left pane, and in the Line Color pane, click No line.Also in the Format Picture dialog box, click Picture Corrections in the left pane, and in the Picture Corrections pane, under Brightness and contrast, do the following:In the Brightness box, enter -42%.In the Contrast Box, enter -28%.Also in the Format Picture dialog box, click Picture Color in the left pane, and in the Picture Color pane, under Recolor, click the button next to Presets and then click Grayscale.Also in the Format Picture dialog box, click Artistic Effects in the left pane, and in the Artistic Effects pane, do the following:Click the button next to Artistic Effects and then click Blur.In the Radius box, enter 7.Also in the Format Picture dialog box, click Size in the left pane, and then under Size and rotate do the following:In the Height box, enter 7.5.In the Width box, enter 10.On the slide, select the rectangle. On the Home tab, in the Drawing group, click Arrange, point to Align, and then click Align Middle and Align Center.On the Home tab, in the Clipboard group, click the arrow to the right of Copy, and then click Duplicate. Select the second, duplicate rectangle. Under Drawing Tools, on the Format tab, in the Shape Styles group, click the Format Shape dialog box launcher. In the Format Shape dialog box, click Fill in the left pane, in the Fill pane, in the Transparency box, enter 90%.Also in the Format Picture dialog box, click Picture Corrections in the left pane, and in the Picture Corrections pane, under Brightness and contrast, do the following:In the Brightness box, enter 12%.In the Contrast Box, enter 44%.Also in the Format Picture dialog box, click Artistic Effects in the left pane, and in the Artistic Effects pane, do the following:Click the button next to Artistic Effects and then click Blur.In the Radius box, enter 9.On the slide, select the rectangle. On the Home tab, in the Drawing group, click Arrange, point to Align, and then click Align Middle and Align Center.On the Home tab, in the Clipboard group, click the arrow to the right of Copy, and then click Duplicate.Select the third, duplicate rectangle. Under Picture Tools, on the Format tab, in the Adjust group, click Reset Picture.Also under Picture Tools, on the Format tab, in the Picture Styles group, click the Format Picture dialog box launcher. In the Format Picture dialog box, click Fill in the left pane, and then in the Fill pane, do the following:Click the button next to Texture and then click Granite.Select Tile picture as texture.In the Transparency box, enter 94%.Also in the Format Picture dialog box, click Picture Corrections in the left pane, in the Picture Corrections pane, under Brightness and contrast, do the following:In the Brightness box, enter 2%.In the Contrast box, enter 70%.Also in the Format Picture dialog box, click Artistic Effects in the left pane, and then in the Artistic Effects pane, do the following:Click the button next to Artistic Effect and then click Photocopy.In the Detail box, enter 9.On the slide, select the third rectangle. On the Home tab, in the Drawing group, click Arrange, point to Align, and then click Align Middle and Align Center.On the Home tab, in the Clipboard group, click the arrow to the right of Copy, and then click Duplicate.Select the fourth, duplicate rectangle. On the Home tab, in the Drawing group, click the FormatShape dialog box launcher. In the Format Picture dialog box, click Fill in the left pane, in the Fill pane, click Gradient fill, and then do the following:In the Type list, select Radial. In the Direction list, select From Center.Under Gradient stops, click Add gradient stop or Remove gradient stop until two stops appear on the slider. Customize the gradient stops as follows:Select the first stop in the slider, and then do the following: In the Position box, enter 0%.Click the button next to Color, and then under Theme Colors click Black, Text 1 (first row, second option from the left).In the Transparency box, enter 100%.Select the last stop in the slider, and then do the following: In the Position box, enter 100%.Click the button next to Color, and then under Theme Colors click Black, Text 1 (first row, second option from the left).In the Transparency box, enter 50%.On the slide, select the fourth rectangle. On the Home tab, in the Drawing group, click Arrange, point to Align, and then click Align Middle and Align Center.Also on the Home tab, in the Editing group, click Select, and then click Select All.Also on the Home tab, in the Drawing group, click Arrange, and then click Group.On the slide, select the grouped rectangles. Also on the Home tab, in the Clipboard group, click Cut.Also on the Home tab, in the Clipboard group, click the arrow below Paste, and select Paste Special. In the Paste Special dialog box, select Paste, and then under As, select Picture (PNG).Also on the Home tab, in the Drawing group, click Arrange, point to Align and then click Align Middle and Align Center.
- Transition effect for split picture, slide 1(Basic)Tip: Use this template with a cropped picture and reveal the rest of the picture on the next slide.To reproduce the picture and text effects on this slide, do the following:On the Home tab, in theSlides group, click Layout, and then click Blank.On the Insert tab, in the Illustrations group, click Picture, select a picture, and then click Insert.Under Picture Tools, on the Format tab, in the bottom right corner of the Size group, click the Size and Position dialog box launcher. In the Size and Position dialog box, on the Size tab, under Crop from, enter a value into the Right box tocrop the picture so that under Size and rotate, the value in the Width box changes to 5”. On the Home tab, in the Drawing group, click Arrange, point to Align, and then do the following:Click Align to Slide.Click Align Right. On the Insert tab, in the Text group, click Text Box, and then on the slide, drag to draw the text box.Enter text in the text box, select the text, and then on the Home tab, in the Font group, select Calibrifrom the Font list, select 24 from the Font Size list, click the arrow next to Font Color, and then under Theme Colors click White, Background 1, Darker 35% (fifth row, first option from the left).On the Home tab, in the Paragraph group, click Center to center the text in the text box.Drag the text box to the left of the picture. Select the text box. On the Home tab, in the Drawing group, click Arrange, point to Align, and then do the following:Click Align to Slide.Click Align Middle. To reproduce the transition and background effects on this slide, do the following:On the Animations tab, in the Transition to This Slide group, click More, and then under Wipes, click Split Vertical In.Right-click the slide background area, and then click Format Background. In the Format Background dialog box, in the left pane, click Fill. In the Fill pane, select Solid fill, click the button next to Color, and then under Theme Colors clickDarkBlue, Text 2, Darker 50% (sixth row, fourth option from the left).
- Transition effect for split picture, slide 2(Basic)Tip: Use this template with a cropped picture to reveal the rest of the picture from the previous slide.To reproduce the picture and text effects on this slide, do the following:On the Home tab, in theSlides group, click Layout, and then click Blank.On the Insert tab, in the Illustrations group, click Picture, select a picture, and then click Insert.Under Picture Tools, on the Format tab, in the bottom right corner of the Size group, click the Size and Position dialog box launcher. In the Size and Position dialog box, on the Size tab, under Crop from, enter a value into the Left box tocrop the picture so that under Size and rotate, the value in the Width box changes to 5”. On the Home tab, in the Drawing group, click Arrange, point to Align, and then do the following:Click Align to Slide.Click Align Left. On the Insert tab, in the Text group, click Text Box, and then on the slide, drag to draw the text box.Enter text in the text box, select the text, and then on the Home tab, in the Font group, select Calibrifrom the Font list, select 24 from the Font Size list, click the arrow next to Font Color, and then under Theme Colors click White, Background 1, Darker 35% (fifth row, first option from the left).On the Home tab, in the Paragraph group, click Center to center the text in the text box.Drag the text box to the right of the picture. Select the text box. On the Home tab, in the Drawing group, click Arrange, point to Align, and then do the following:Click Align to Slide.Click Align Middle. To reproduce the transition and background effects on this slide, do the following:On the Animations tab, in the Transition to This Slide group, click More, and then under Push and Cover, click PushLeft.Right-click on the slide background area, and then click Format Background. In the Format Background dialog box, in the left pane, click Fill. In the Fill pane, select Solid fill, click the button next to Color, and then under Theme Colors clickDarkBlue, Text 2, Darker 50% (sixth row, fourth option from the left).
- Stacked, exploded 3-D text (Intermediate)To reproduce the text effects on this slide, do the following:On the Home tab, in theSlides group, click Layout, and then click Blank.On the Insert tab, in the Text group, click Text Box, and then on the slide, drag to draw the text box.Enter text in the text box, select the text, and then on the Home tab, in the Font group, select Impactfrom the Font list, and then change the font size of each line so that the text is approximately the same width. For example, if you entered “FIRST” on one line, “SECOND” on the next line, and “THIRD” on the last line (as shown on the slide), do the following:Select the first line of text, and then on the Home tab, in the Font group, enter 92 in the Font Size box. Select the second line of text, and then on the Home tab, in the Font group, enter 65 in the Font Size box. Select the third line of text, and then on the Home tab, in the Font group, enter 92 in the Font Size box. Select all of the text. On the Home tab, in the Font group, click Character Spacing, and then click More Spacing. In the Font dialog box, on the Character Spacingtab, in the Spacing list, select Expanded. In the By box, enter 2.On the Home tab, in the Paragraph group, click Center to center the text in the text box.Under Drawing Tools, on the Format tab, in the bottom right corner of the WordArt Styles group, click the Format Text Effects dialog box launcher. In the Format Text Effects dialog box, click Text Fill in the left pane, and then do the following in the right pane:Select Solid fill.Click the button next to Color, and then under Theme Colors click Black, Text 1, Lighter 15% (fifth row, second option from the left). Also in the Format Text Effects dialog box, click 3-D Rotation in the left pane, click the button next to Presets in the right pane, and then under Perspective click Perspective Front (first row, first option from the left). Also in the Format Text Effects dialog box, click 3-D Format in the left pane, and then do the following in the right pane:Under Depth, click the button next to Color, and then under Theme Colors click White, Background 1 (first row, first option from the left). In the Depth box, enter 300 pt. Under Surface, click the button next to Material, and then under Standard click Matte (first row, first option from the left). Click the button next to Lighting, and then under Neutral click Balance (first row, second option from the left). To reproduce the lines behind the text, do the following:On the Home tab, in the Drawing group, click Shapes, and then under Rectangles, click Rectangle (first option from the left). On the slide, drag to draw a rectangle.On the Home tab, in the Drawing group, click the arrow next toShape Fill, and then click No Fill.On the Home tab, in the Drawing group, click the arrow next toShape Outline, and then under Theme Colors click White, Background 1 (first row, first option from the left). On the Home tab, in the Drawing group, click the arrow next toShape Outline, point to Weight, and then click More Lines.In the Format Shape dialog box, click Line Style in the left pane. In the right pane, in the Width box, enter 2 pt.On the Home tab, in the Drawing group, click Arrange, and then click Send to Back.To reproduce the background on this slide, do the following:Right-click the slide background area, and then clickFormat Background.In the Format Background dialog box, click Fill in the left pane, select Gradient fill in the right pane, and then do the following:In the Type list, select Radial.Click the button next to Direction, and then click From Center (third option from the left).Under Gradient stops, click Add gradient stop or Remove gradient stop until two stops appear in the slider.Also under Gradient stops, customize the gradient stops that you added as follows:Select the first stop in the slider, and then do the following:In the Position box, enter10%.Click the button next to Color, and then under Theme Colorsclick White, Background 1 (first row, first option from the left).Select the last stop in the slider, and then do the following:In the Position box, enter100%.Click the button next to Color, and then under Theme Colorsclick Black, Text 1(first row, second option from the left).
- Stacked, 3-D text at dramatic angle(Intermediate)To reproduce the text on this slide, do the following:On the Home tab, in theSlides group, click Layout, and then click Blank.On the Insert tab, in the Text group, click Text Box, and then on the slide, drag to draw the text box.Enter text in the text box and select the text. On the Home tab, in the Font group, select Impact from the Font list, and then change the font size of each line so that the text is approximately the same width. For example, if you entered “FIRST” on one line, “SECOND” on the next line, and so on (as shown on the slide), do the following:Select the first line of text, and then on the Home tab, in the Font group, enter 100 in the Font Size box. Select the second line of text, and then on the Home tab, in the Font group, enter 70 in the Font Size box. Select the third line of text, and then on the Home tab, in the Font group, enter 94 in the Font Size box. Select the fourth line of text, and then on the Home tab, in the Font group, enter 75.5 in the Font Size box. Select all of the text. On the Home tab, in the Font group, click Character Spacing, and then click More Spacing. In the Font dialog box, on the Character Spacingtab, in the Spacing list, select Expanded. In the By box, enter 2.On the Home tab, in the Paragraph group, click Center to center the text in the text box.Under Drawing Tools, on the Format tab, in the bottom right corner of the WordArt Styles group, click the Format Text Effects dialog box launcher. In the Format Text Effects dialog box, click Text Fill in the left pane, select Gradient fill in the right pane, and then do the following:In the Type list, select Radial.Click the button next to Direction, and then click From Corner (second option from the left).Under Gradient stops, click Add gradient stop or Remove gradient stop until two stops appear in the slider.Also under Gradient stops, customize the gradient stops that you added as follows:Select the first stop in the slider, and then do the following:In the Positionbox, enter0%.Click the button next to Color, and then under Theme Colorsclick White, Background 1, Darker 15%(third row, first option from the left).Select the last stop in the slider, and then do the following:In the Position box, enter100%.Click the button next to Color, and then under Theme Colorsclick White, Background 1, Darker 50%(sixth row, first option from the left).Also in the Format Text Effects dialog box, click 3-D Rotation in the left pane. In the right pane, click the button next to Presets, and then under Perspectiveclick Perspective Heroic Extreme Left (third row, second option from the left).Also in the Format Text Effects dialog box, click 3-D Format in the left pane, and then do the following in the right pane: Under Bevel, click the button next to Top, and then under Bevel click Cool Slant (first row, fourth option from the left). Under Depth, in the Depth box, enter 70 pt. Also in the Format Text Effects dialog box, click Shadowin the left pane. In the right pane, click the button next to Presets, and then under Perspectiveclick Perspective Diagonal Upper Right (first row, second option from the left). To reproduce the background on this slide, do the following:Right-click the slide background area, and then clickFormat Background.In the Format Background dialog box, click Fill in the left pane, select Gradient fill in the right pane, and then do the following:In the Type list, select Linear.Click the button next to Direction, and then click Linear Down (first row, second option from the left).Under Gradient stops, click Add gradient stop or Remove gradient stop until two stops appear in the slider.Also under Gradient stops, customize the gradient stops that you added as follows:Select the first stop in the slider, and then do the following:In the Position box, enter64%.Click the button next to Color, and then under Theme Colorsclick Black, Text 1(first row, second option from the left).Select the last stop in the slider, and then do the following:In the Position box, enter100%.Click the button next to Color, and then under Theme Colorsclick Black, Text 1, Lighter 35% (third row, second option from the left).
- Rotating numbers on a curved path(Advanced)Tip: To draw the curved line on this slide, you will need to use the ruler and the drawing guides.To display the ruler and the drawing guides, do the following:On the View tab, in the Show/Hide group, select Ruler. Right-click the slide background area, and then click Grid and Guides. In the Grid and Guides dialog box, under Guide settings, select Display drawing guides on screen. (Note: One horizontal and one vertical guide will display on the slide at 0.00, the default position.)To reproduce the curved line on this slide, do the following:On the Insert tab, in the Illustrations group, click Shapes, and then under Lines click Curve (10th option from the left). To draw the curved line on the slide, do the following:Click the first point 0.25” to the left of the left edge of the slide and 0.75” below the horizontal drawing guide.Click the second point 3” to the left of the vertical drawing guide and 1” above the horizontal drawing guide.Click the third point 1.5” to the right of the vertical drawing guide and 0.5” below the horizontal drawing guide.Double-click the fourth and final point 0.25” to the right of the right edge of the slide and 1.5” above the horizontal drawing guide. Select the curved line. UnderDrawing Tools, on the Format tab, in the Shape Styles group, click Shape Outline, and then do the following: Under Theme Colors,clickWhite, Background 1, Darker 35% (fifth row, first option from the left). Point to Dashes, and then click Square Dot (third option from the top).Point to Weight, and then click 1 ½ pt. To reproduce the “1” on this slide, do the following:On the Home tab, in theSlides group, click Layout, and then click Blank.On the Insert tab, in the Text group, click Text Box, and then on the slide, drag to draw the text box.Enter 1 in the text box, and then select the text. On the Home tab, in the Font group, do the following:In the Font list, select Impact.In the Font Size box, enter 140.On the Home tab, in the Paragraph group, click Align Text Left to align the text left in the text box. Select the text box. Under Drawing Tools, on the Format tab, in the bottom right corner of the WordArt Styles group, click the Format Text Effects dialog box launcher. In the Format Text Effects dialog box, click Text Fill in the left pane, select Gradient fill in the Text Fill pane, and then do the following:In the Type list, select Linear.Click the button next to Direction, and then click Linear Down (first row, second option from the left).Under Gradient stops, click Add gradient stops or Remove gradient stops until two stops appear in the slider.Also under Gradient stops, customize the gradient stops that you added as follows:Select the first stop in the slider, and then do the following:In the Position box, enter 0%.Click the button next to Color, and then under Theme Colors click White, Background 1 (first row, first option from the left).In the Transparency box, enter 50%.Select the last stop in the slider, and then do the following:In the Position box, enter 85%.Click the button next to Color, and then under Theme Colors click White, Background 1 (first row, first option from the left).In the Transparency box, enter 0%.Also in the Format Text Effects dialog box, click Text Outline in the left pane. In the Text Outline pane, select Solid line, click the button next to Color, and then click More Colors. In the Colors dialog box, on the Custom tab, enter values for Red: 49, Green: 133, Blue: 156.Also in the Format Text Effects dialog box, click Outline Style in the left pane. In the Outline Style pane, in the Width box, enter 2.5 pt. Also in the Format Text Effects dialog box, click Shadow in the left pane. In the Shadow pane, click the button next to Presets, under Outer click Offset Diagonal Bottom Left (first row, third option from the left), and then do the following:In the Transparency box, enter 82%.In the Size box, enter 100%.In the Blur box, enter 8 pt.In the Angle box, enter 135°.In the Distance box, enter 30 pt. Also in the Format Text Effects dialog box, click 3-D Rotation in the left pane. In the 3-D Rotation pane, under Rotation, in the Z box, enter 15°.Also in the Format Text Effects dialog box, click Glow and Soft Edges in the left pane, and in the Glow and Soft Edges pane, do the following:In the Size box, enter 8 pt.Click the button next to Color, and then click More Colors. In the Colors dialog box, on the Custom tab, enter values for Red: 29, Green: 199, Blue: 244.Drag the text box onto the left part of the curved line, slightly to the right of the peak of the curve. To reproduce the animation effects for the “1” on this slide, do the following:On the slide, select the text box. On the Animations tab, in the Advanced Animation group, click Add Animation, and then under Entrance, click Fade.Also on the Animations tab, in the Timing group, do the following:In theStart list, selectWith Previous. In the Duration box, enter 1.00.Also on the Animations tab, in the Advanced Animation group, click Add Animation, and then under Emphasis click Spin.Also on the Animations tab, in the Animation group, click the Effect Options dialog box launcher. In the Spin dialog box, do the following:On the Effect tab, under Settings, do the following:In the Amount list, in the Custom box, enter 30°, and then press ENTER.Select Clockwise.Select Auto-Reverse.On the Timing tab, do the following:In theStart list, selectWith Previous. In the Duration list, select 1 seconds (Fast).On the Animations tab, in the Advanced Animation group, click Add Animation, and then click More Motion Paths. In the Add Motion Path dialog box, under Lines & Curves, click Arc Down.Also on the Animations tab, in the Timing group, do the following:In the Start list, select With Previous.In the Duration box, enter 2.00.On the slide, right-click the motion path and then click Edit Points. In Edit Points mode, do the following: Right-click the line and then click Add Point. Repeat until the line has five points.Select the second, third, and fourth points individually. Drag each point so that it is along the dashed curved line. Drag the end point off the right side of the slide. (Note: Click at least 1.5” off the right edge of the slide so that the text and its shadow exit completely.)On the slide, right-click the motion path, and then click Reverse Path Direction.On the View tab, in the Show/Hide group, clear Ruler.Right-click the slide background area, and then click Grid and Guides. In the Grid and Guides dialog box, under Guide settings, clear Display drawing guides on screen. To reproduce the animated “2” on this slide, do the following:Select the first text box. On the Home tab, in the Clipboard group, click the arrow to the right of Copy, and then click Duplicate.Click in the second text box, delete 1, and then enter 2.Select the second text box. UnderDrawing Tools, on the Format tab, in the bottom right corner of the WordArt Styles group, click the FormatTextEffects dialog box launcher. In the Format Text Effects dialog box, click Text Fill in the left pane, select Gradient fill in the Text Fill pane, and then do the following:In the Type list, select Linear.Click the button next to Direction, and then click Linear Down (first row, second option from the left).Under Gradient stops, click Add gradient stop or Remove gradient stop until two stops appear in the slider.Also under Gradient stops, customize the gradient stops that you added as follows:Select the first stop in the slider, and then do the following:In the Position box, enter 0%.Click the button next to Color, and then under Theme Colors click White, Background 1 (first row, first option from the left).In the Transparency box, enter 50%.Select the last stop in the slider, and then do the following:In the Position box, enter 85%.Click the button next to Color, click More Colors, and then in the Colors dialog box, on the Custom tab, enter values for Red: 198, Green: 217, Blue: 241.In the Transparency box, enter 0%.Also in the Format Text Effects dialog box, click Text Outline in the left pane. In the Text Outline pane, select Solid line, click the button next to Color, and then click More Colors. In the Colors dialog box, on the Custom tab, enter values for Red: 228, Green: 108, Blue: 10.Also in the Format Text Effects dialog box, click 3-D Rotation in the left pane. In the 3-D Rotation pane, under Rotation, in the Z box, enter 350°.Also in the Format Text Effects dialog box, click Glow and Soft Edges in the left pane, in the Glow and Soft Edges pane, click the button next to Color, and then click More Colors. In the Colors dialog box, on the Custom tab, enter values for Red: 255, Green: 144, Blue: 4.Drag the second text box onto the curved line, to the right of the “1” text box and approximately in the middle of the slide. On the Animations tab, in the Advanced Animation group, click Animation Pane.Press and hold CTRL, and then in the Animation Pane, select the fourth and fifth animation effects (fade and spin effects for the second text box). On the Animations tab, in the Timing group, do the following:In the Delay box, enter 0.5.In the Duration box, enter 0.9 seconds. In the Animation Pane, select the sixth animation effect (motion path for the second text box). On the Animations tab, in the Timing group, do the following:In the Delay box, enter 0.5.In the Duration box, enter 1.8 seconds. In the Animation Pane, select the sixth animation effect. On the slide, right-click the selected motion path, and then click Edit Points. Drag the points on the path to match the path to the curved line. (Note: The starting point will be further to the right of the right edge of the slide than the starting point for the first motion path.)To reproduce the animated “3” on this slide, do the following:On the slide, select the second text box. On the Home tab, in the Clipboard group, click the arrow to the right of Copy, and then click Duplicate.Drag the third text box away from the second text box.Click in the third text box, delete 2, and then enter 3. Select the third text box. UnderDrawing Tools, on the Format tab, in the bottom right corner of the WordArt Styles group, click the FormatTextEffects dialog box launcher. In the Format Text Effects dialog box, click Text Fill in the left pane, select Gradient fill in the Text Fill pane, and then do the following:In the Type list, select Linear.Click the button next to Direction, and then click Linear Down (first row, second option from the left).Under Gradient stops, click Add gradient stop or Remove gradient stop until two stops appear in the slider.Also under Gradient stops, customize the gradient stops that you added as follows:Select the first stop in the slider, and then do the following:In the Position box, enter 0%.Click the button next to Color, and then under Theme Colors click White, Background 1 (first row, first option from the left).In the Transparency box, enter 50%.Select the last stop in the slider,and then do the following:In the Position box, enter 85%.Click the button next to Color, click More Colors, and then in the Colors dialog box, on the Custom tab, enter values for Red: 198, Green: 217, Blue: 241.In the Transparency box, enter 0%.Also in the Format Text Effects dialog box, click Text Outline in the left pane. In the Text Outline pane, select Solid line, click the button next to Color, and then click More Colors. In the Colors dialog box, on the Custom tab, enter values for Red: 119, Green: 147, Blue: 60.Also in the Format Text Effects dialog box, click 3-D Rotation in the left pane. In the 3-D Rotation pane, under Rotation, in the Z box, enter 5°.Also in the Format Text Effects dialog box, click Glow and Soft Edges in the left pane, and in the Glow and Soft Edges pane, under Glow, click the button next to Color, and then click More Colors. In the Colors dialog box, on the Custom tab, enter values for Red: 168, Green: 224, Blue: 52.Drag the third text box to the right of the second text box, above the curve.In the Animation Pane, select the seventh animation effect (fade effect for the third text box). On the Animations tab, in the Timing group, do the following:In the Delay box, enter 0.9.In the Duration box, enter 0.7 seconds. In the Animation Pane, select the eighth animation effect (spin effect for the third text box). On the Animations tab, in the Timing group, do the following:In the Delay box, enter 0.9.In the Duration box, enter 0.75 seconds. In the Animation Pane, select the ninth animation effect (motion path for the third text box). On the Animations tab, in the Timing group, do the following:In the Delay box, enter 0.9.In the Duration box, enter 1.5 seconds. In the Animation Pane, select the ninth animation effect (motion path for the third text box). On the slide, right-click the selected motion path, and then click Edit Points. Drag the points on the path to match the path to the curved line. (Note: The endpoint will be above the curved line and the path will eventually meet the curve. The starting point will be further to the right of the right edge of the slide than the starting point for the first motion path.)To reproduce the background on this slide, do the following: Right-click the slide background area, and then click Format Background. In the Format Background dialog box, click Fill in the left pane, select Gradient fill in the Fill pane, and then do the following:In the Type list, select Radial.Click the button next to Direction, and then click From Corner (fifth option from the left).Under Gradient stops, click Add gradient stop or Remove gradient stop until two stops appear in the slider.Also under Gradient stops, customize the gradient stops that you added as follows:Select the first stop in the slider, and then do the following:In the Position box, enter 0%.Click the button next to Color, and then under Theme Colors click White, Background 1 (first row, first option from the left).Select the last stop in the slider, and then do the following: In the Position box, enter 100%.Click the button next to Color, and then under Theme Colors click White, Background 1, Darker 35% (fifth row, first option from the left).
- Timeline graphic with pictures(Intermediate)To reproduce the picture effects on this slide, do the following:On the Home tab, in theSlides group, click Layout, and then click Blank.On the Insert tab, in the Illustrations group, click Picture. In the Insert Picture dialog box, select a picture and then click Insert. Select the picture. Under Picture Tools, on the Format tab, in the bottom right corner of the Size group, click the Size and Position dialog box launcher.In the Size and Position dialog box, on the Size tab, resize or crop the picture as needed so that under Size and rotate, the Height box is set to 2.65” and the Width box is set to 9”. Resize the picture under Size and rotate by entering values into the Height and Width boxes. Crop the picture under Crop from by entering values into the Left, Right, Top, and Bottom boxes. Under Picture Tools, in the Format tab, in the Picture Styles group, click Picture Shape, and then under Rectangles click Round Same Side Corner Rectangle (eighth option from the left).Drag the top yellow diamond adjustment handle slightly to the right to decrease the amount of rounding on the corners. Under Picture Tools, in the Format tab, in the Picture Styles group, click Picture Effects, point to Shadow, and then under Inner click Inside Center (second row, second option from the left).To reproduce the timeline effects on this slide, do the following:On the Home tab, in the Drawing group, click Shapes, and then under Rectangles click Rectangle (first option from the left). On the slide, drag to draw a rectangle.Select the rectangle. Under Drawing Tools, on the Format tab, in the Size group, do the following:In the Shape Height box, enter 0.73”.In the Shape Width box, enter 9”.On the Home tab, in the bottom right corner of the Drawing group, click the Format Shape dialog box launcher. In the Format Shape dialog box, click Fill in the left pane, select Solid fill in the Fill pane, and then do the following:Click the button next to Color, and then under Theme Colors click Black, Text 1, Lighter 35%(third row, second option from the left).In the Transparency box, enter 20%.Also in the Format Shape dialog box, click Line Color in the left pane, and then in the right pane, select No line. Also in the Format Shape dialog box, click Shadow in the left pane. In the right pane, click the button next to Presets, and then under Inner click Inside Center (second row, second option from the left). Drag the rectangle onto the bottom of the picture. Press and hold SHIFT and select the rectangle and the picture. On the Home tab, in the Drawing group, click Arrange, point to Align, and then do the following: Click Align Selected Objects. Click Align Center.Click Align Top.Click Align to Slide.Click Align Center. To reproduce the month labels for the timeline, do the following:On the Insert tab, in the Text group, click Text Box, and then on the slide, drag to draw the text box.Enter text in the text box (in this example the text is “JAN”), select the text, and then on the Home tab, in the Font group, select Gil Sans MT Condensed from the Font list, select 18 from the Font Size list, click the arrow next to Font Color, and then under Theme Colors click White, Background 1, Darker 35% (fifth row, first option from the left).On the Home tab, in the Paragraph group, click Center to center the text in the text box. Select the text box. On the Home tab, in the Clipboard group, click the arrow under Paste, and then click Duplicate. Repeat the process until there is a total of six text boxes. On the slide, drag the text boxes onto the rectangle to form a timeline. On the Home tab, in the Editing group, click Select, and then click Selection Pane. In the Selection and Visibility pane, press and hold CTRL and select all six text boxes and the rectangle.On the Home tab, in the Drawing group, click Arrange, point to Align, and then do the following:Click Align Selected Objects.Click Align Middle. In the Selection and Visibility pane, press and hold CTRL and cancel the selection of the rectangle, keeping the text boxes selected. On the Home tab, in the Drawing group, click Arrange, point to Align, and then do the following:Click Align to Slide.Click Distribute Horizontally. To change the text in the duplicate text boxes, click in each text box and edit the text.To change the color of the second text box from the left, select the text box, and then on the Home tab, in the Font group, click the arrow next to Font Color, and then under Theme Colors click White, Background 1 (first row, first option from the left). To reproduce the vertical line with text effects on this slide, do the following:On the Home tab, in the Drawing group, click Shapes, and then under Lines click Line (first option from the left).Press and hold SHIFT, and then drag on the slide to draw a straight, vertical line. Select the line. Under Drawing Tools, on the Format tab, in the Size group, in the Shape Width box, enter 1.2”.On the Home tab, in the bottom right corner of the Drawing group, click the Format Shape dialog box launcher. In the Format Shape dialog box, click Line Color in the left pane, and then do the following in the right pane:Select Solid line.Click the button next to Color, and then under Theme Colors click White, Background 1, Darker 25% (fourth row, first option from the left).Also in the Format Shape dialog box, click Line Style in the left pane, and then do the following in the right pane:In the Width box, enter 0.75 pt.Under Arrow Settings, click the button next to Begin type, and then click Oval Arrow (second row, third option from the left).Click the button next to Begin size, and then click Arrow L Size 1 (first row, first option from the left).Click the button next to End type, and then enter Oval Arrow (second row, third option from the left).Click the button next to End size, and then enter Arrow R Size 1 (first row, first option from the left).On the Home tab, in the Clipboard group, click the arrow under Paste, and then click Duplicate. Select the duplicate line. Under Drawing Tools, on the Format tab, in the Size group, in the Shape Width box, enter 2.6”.Press and hold SHIFT and select both lines. On the Home tab, in the Drawing group, click Arrange, and then do the following:Point to Align, and then click Align Selected Objects.Point to Align, and then click Align Center.Drag both lines together on the slide to position them under one of the timeline month labels. Press and hold SHIFT and select both lines and the text box they are under. On the Home tab, in the Drawing group, click Arrange, and then do the following:Click Align Selected Objects.Click Align Center.On the Insert tab, in the Text group, click Text Box, and then on the slide, drag to draw the text box.Enter text in the text box, select the text, and then on the Home tab, in the Font group, select Gill Sans MT from the Font list, select 20 from the Font Size list, and then click the arrow next to Font Color and click White, Background 1 (first row, first option from the left).On the Home tab, in the Paragraph group, click Align Text Left to align the text left in the text box. On the slide, drag the text box to position it to the right of the vertical line. To reproduce the background on this slide, do the following:Right-click the slide background area, and then clickFormat Background.In the Format Background dialog box, click Fill in the left pane, select Gradient fill in the Fill pane, and then do the following:In the Type list, select Linear.Click the button next to Direction, and then clickLinear Down (first row, second option from the left).Under Gradient stops, click Add or Remove until two stops appear in the drop-down list.Also under Gradient stops, customize the gradient stops that you added as follows:Select Stop 1 from the list, and then do the following:In the Stop position box, enter50%.Click the button next to Color, and then under Theme Colorsclick Black, Text 1(first row, second option from the left).Select Stop 2 from the list, and then do the following:In the Stop position box, enter99%.Click the button next to Color, and then under Theme Colorsclick Black, Text 1, Lighter 35% (third row, second option from the left).