AIS WatchMate 670 Display & 750 Receiver Introduction
•
1 recomendación•23,121 vistas

This is a nice quick introduction and overview of the AIS WatchMate 670 Display & 750 Receiver from Vesper Marine

Recomendados
Más contenido relacionado
Último
Último (20)
Destacado
Destacado (20)
AIS WatchMate 670 Display & 750 Receiver Introduction
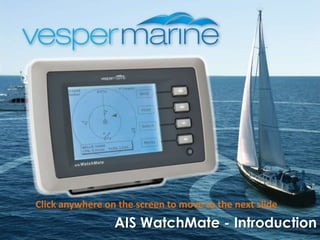
- 1. AIS WatchMate - Introduction Click anywhere on the screen to move to the next slide
- 2. The WatchMate Product Set Slide 2 Three products that encapsulate the best in AIS collision avoidance systems. This slide show focuses on the WatchMate 670 Display and the WatchMate 750 AIS Receiver
- 4. WatchMate is also a very low powered device that conserves valuable battery energy."Exceptional customer feedback supports the WatchMate's ease of use ... confirming our design and safety goals, and validating our efforts.” Jeff Robbins, CEO
- 5. The Home Screen Slide 4 Situation Display The home screen displays targets using a graphical situation display similar to a radar. The display is oriented either Heading-Up or North-Up depending on profile and settings.
- 7. Listing of vessels by target priority,
- 8. Multiple profiles based on location,
- 9. Plot future crossing positions,
- 11. Displays lat/long GPS position,
- 12. Friends list
- 13. and of course WatchMate is a dedicated AIS safety instrument independent of all other equipment. WatchMate has been designed to simplify the display of other ships AIS location and course information. As required WatchMate filters out non priority targets and only displays the vessels that may be on a collision course, removing the uncertainty and stress related to navigating in highly congested and isolated waterways. The WatchMate installation is designed to be easy with multiple mounting options and IPx7 rated water proofing. AISWatchMate 670 & 750 Dedicated display with the WatchMate 670 or use a WatchMate 750 to have a display and an AIS Receiver Introducing WatchMate 670 Display and 750 RX
- 15. The scale for a chart versus useful AIS viewing is often different.
- 16. WatchMate provides all AIS data at a glance.
- 17. Focus is on the most important targets.
- 18. Installation is simple, no interfacing and often no need for a separate GPS antenna.
- 19. Others don’t have WatchMate’s sophisticated Alarms, Filtering, or Multiple Profiles.…. most chart plotters, and all laptops, will use way more power than a WatchMate. Why a WatchMate Slide 6 Why not just buy a “black box” AIS transponder and wire it into a chart plotter? Clutter on PC charting software How can you make quick and accurate decisions when all you are told is “Dangerous Target”?
- 20. The Advantage of a Dedicated WatchMate Display Slide 7 Filters reduce clutter By using the WatchMate Filters… …the clutter of irrelevant ships… …is removed from the display… …and the display continues to provide a reminder of the 81 filtered ships.
- 21. Focus on the Most Important Targets Slide 8 Identify Priority Traffic The ship that creates the highest risk of collision is prioritized… …and shown on the display in list order of priority
- 22. The unique Course Crossing feature Slide 9 Closest Point of Approach - Rolling time forward using Course Crossing When a target is converging the Closest Point of Approach (CPA) button can be used to show the crossing situation that will occur and when it will occur in the future. This display is represented in the diagram to the right. This is a unique feature of the WatchMate series of products. It has been designed to make it very easy for users to quickly see what the situation will be and enable them to judge the risk ahead of time, removing the stress from a potentially hazardous situation. This example tells us that in 7 minutes and 56 seconds Pacific Pearl will pass behind us with 0.3nm clearance.
- 24. The distance between your vessel and the marked anchor location.
- 25. The periodic position of your vessel shown as dots indicating how your vessel has been moving while anchored.Anchor Watch is available on all WatchMate 850 Transponders and new WatchMate 670 or 750’s. A firmware upgrade is available for existing WatchMate 750 or 670 from our website Support page www.vespermarine.com/firmware-upgrades. Sorry this feature is not available for the older WatchMate 650 product.
- 26. See WatchMate in action Click video clips - WatchMate going through its key functions The problems WatchMate solves for customer – An overview WatchMate Dedicated Marine Collision Warning www.youtube.com/watch?v=LdmF0BaBz2U WatchMate - Identify Priority Traffic www.youtube.com/watch?v=ckalPExyn4I&feature=channel How WatchMate software functions – A more detailed view WatchMate Introduction User Interface Software introduction / Describing the Closets Point of Approach www.youtube.com/watch?v=zYlZfnMjN2M&playnext=1&videos=ymhj2dkLsvQ&feature=rec-LGOUT-exp_rn-1r-7-HM Watchmate video 2 Target Lists / Filtering & decluttering unwanted targets / Alarms www.youtube.com/watch?v=T4i2oyN1Xm4&playnext=1&videos=qwdQiMkLiHI&feature=rec-LGOUT-exp_rn-1r-4-HM Watchmate video 3 Selecting vessels / Displaying CPA / Using Fleet List www.youtube.com/watch?v=fSidXPjxY_Y&feature=related Slide 11
- 27. Easy to Use as Well as Easy to Install Slide 12 WatchMate 670 Display and WatchMate 750 RX Step 1. Flush or bracket mount WatchMate Step 2. Connect to Power Step 3. Connect a to separate VHF Antenna Installation Complete! Or optional VHF Splitter to connect into an existing VHF Antenna Step 4: Connect External GPS Sensor & Antenna
- 28. Slide 13 Thanks for taking the time to review this introduction to the WatchMate Display and the WatchMate Receiver - End