SlideShare una empresa de Scribd logo
1 de 36
LABORATORY MANAGEMENT AND SAFETY
1. INTRODUCTION
Improper utilization of laboratory equipment and chemicals has been observed in most of our
senior secondary schools and laboratory running sectors. The equipment and chemicals have
not been organized and stored to their respective places. In addition, pictures, charts and
collections of plant and animal specimens are not organized properly.
Inventory of chemicals and equipment have several advantage in checking the loss and
misplacement of items used up and /or lost etc. but inventory is not a common phenomenon in
most of our school laboratories. Many of the laboratory assistants in our schools are not in a
position of preparing reagents, handling instruments, performing activities by themselves.
Careless behavior in the laboratory can result in serious injury, health hazard and damage to
property. Recognizing potential hazards and to avoid accidents from happening and to abide
by the rules of the laboratory expected from the users of the labs, every person is expected to
do their part to ensure a safe laboratory environment for themselves and others in the
laboratory.
GOALS:
The goals of the laboratory are:1. Provide the services of a general lab, with basic equipment and chemicals for standard
analytical and biological tests.
2. Ensure access to basic and safe working spaces for all users of the laboratory facility.
3. Provide access to workplace/desk space to researchers that need them.
4. Provide the services of a library.
5. Facilitate the tools and services required by the researchers to do their studies.

Laboratory Safety Symbols and Rules

1.
Electrical Hazard
 This symbol indicates the area or materials which can cause electric
shock.

Laboratory Management And Safety

Page 1
2.
Combustible Materials
 This symbol indicates material or chemical (may be solid, liquid or gas)
which can be combustible in fire.

3.
No Open Flames
 This is the symbol which express a material which cannot create flame.

4.
Corrosive Materials
 Indicates materials which are contaminated with corrosive chemicals and
which can be affect human if contacted with skin.

Laboratory Management And Safety

Page 2
5.

or
Flammable Symbol
 Chemicals (solid, liquid or gas) and materials which can be flammable if burnt.

Laboratory Management And Safety

Page 3
6.
Fire Extinguisher
 This is the symbol of fire extinguisher which has to be posted on fire
extinguisher.

7.
Toxic Chemical
 Indicates chemicals which can be toxic to human body.

Laboratory Management And Safety

Page 4
8.
Non-potable water
 Indicates water pipe which cannot give function.

Laboratory Management And Safety

Page 5
9.
Environment Hazard
 Chemicals which can affect environment if exposed or etc…

10.
Eyewash Sign
 Indicates the position of eye wash where to wash eye while the contamination
of eye with chemicals occurred.

11.
Recycling Sign
Laboratory Management And Safety

Page 6
12.
Toxic Materials Sign
 Indicates the materials which can be toxic because of chemicals or etc…

13.
Explosive Materials Sign

Laboratory Management And Safety

Page 7
14.
Radioactive Sign

15.
Biohazard Sign

16.
Chemistry Hazard Label

Laboratory Management And Safety

Page 8
General Safety Rules:
1. Read all directions for an experiment and follow the directions exactly as they are
written. If in doubt, ask the teacher.
2. Never perform experiments that are not authorized by your teacher. Always obtain
permission before experimenting on your own.
3. Never handle any equipment unless you have specific permission.
4. Take care not to spill any materials in the lab. If a spill occurs, ash your teacher
immediately about the proper clean-up procedure.
5. Dispose of all material according to the teacher’s instructions. Never empty materials
into the sink or trash can.
6. Never eat in the laboratory. Wash your hands before and after each experiment.
7. Never horse play or run in the laboratory. This will earn you a zero and dismissal from
the lab.
8. Know the location and function of all laboratory safety equipment.

Laboratory Management And Safety

Page 9
Laboratory Dress Code:
1. Always wear goggles anytime sharp instruments or chemicals are used in the
laboratory.
2. Tie back long hair and loose clothing when performing laboratory experiments
involving open flames.
3. Remove jewelry before lab activities.
4. Always wear closed-toed shoes in the laboratory.
First Aid:
1.
2.
3.
4.

Report all accidents to the teacher immediately.
Apply direct pressure to any severe cuts to stop the bleeding
Know the location of the first aid kit
Know the location and use of the fire blanket.

Heating and Fire Safety:
1. Never reach across an open flame.
2. Know how to light and extinguish the Bunsen burner, never leave a burner unattended.
3. Point the test tube or bottle away from you and others when being heated; chemicals
can rapidly boil out of the container.
4. Never heat a liquid in a closed container.
5. Always use a clamp or tongs when handling hot containers.
Chemical Safety:
1. Never touch, taste, or smell, any questionable chemicals in the laboratory without the
teacher’s permission.
2. Only as instructed by the teacher, gently wave your hand over the opening of a
container toward your nose. Do not inhale fumes directly from the container.
3. Keep all lids to chemicals closed.
4. Dispose of all chemicals as instructed by your teacher.
5. Pour acids and bases over a sink incase of spillage.
6. Never pour water into an acid, pour the acid into the water.
7. Never eat or drink from any laboratory glassware.
8. Never use chipped or broken glassware cuts and scratches can occur.
Electrical Safety:
1. Make sure electronic equipment is OFF when plugging or unplugging from an
outlet.
Laboratory Management And Safety

Page 10
2.
3.
4.
5.

Make sure the work area for electrical equipment is clean and dry.
Do not “daisy-chain” electrical power cords.
Inspect power cords for cuts or abrasions that revel bare copper wire.
Be very aware of the location of power cords to avoid tripping and damage to
persons.

End of Laboratory activity rules:
1. Clean all laboratory equipment and return to their locations
2. Unplug and store properly any electrical device.
3. Wash your hands after every experiment.
4. Extinguish all candles and burners and the conclusion of the lab activity.
5. Turn off all gas lines to the Bunsen burners.
Be safe, enjoy, and follow the lab rules!

2. LABORATORY MANAGEMENT
The Science Laboratory is a place where classroom teaching is further strengthened. The new
facts and ideas lectured in the class will be confirmed in the laboratory through the use of
equipment, chemicals and specimens. It provides an opportunity to studyorganisms closely
and to examine the various structures, processes, relationships, etc. which are characteristics
of these organisms. It is here, therefore, that students develop skills, abilities and attitudes
through the practical activities they carry out. Therefore, all laboratory facility should have
to be managed to strengthen the classroom teaching.
The science teacher should make certain that the theoretical lesson is supplemented with the
necessary practical work. Otherwise, the work is considered to be done partially, because the
knowledge students are expected to gain along with the development of the required skills and
abilities cannot be materialized. So the teacher must not consider laboratory activities as
something additional that could be omitted, but as an integral part of the subject matter.
Some schools have separate laboratories for biology, chemistry and physics. Others have two
labs for the three subjects. And there are still others that have only one laboratory. Variations
also exist in water and electricity services, material distribution and storage facilities. This is
partly because the schools have been constructed and equipped under different projects, public
contribution and government budget. Being aware of these differences, which could only be
solved step by step in the process of development, teachers have to put much effort and be
creative enough to effectively use the resources at hand.
2.1. GENERAL LABORATORY MANAGEMENT RULES

Laboratory Management And Safety

Page 11
1. Environmental protection is one objective of the labs. For this reason, a complete
treatment of chemical wastes and biological wastes are required when possible. The
Lab manager/assistant should know about chemical management, disposal and storage.
Fungal and bacterial cultures should be autoclaved before they are disposed.
2. Turn off the lights and equipments when they are not in use including the extractor
hoods.
3. When working in the lab, goggles and lab coats must be used. Gloves and masks
appropriate for procedure must be used when necessary (i.e. Acid resistant gloves or
asbestos gloves for hot objects).Vapor hoods, with the air extraction on, are to be used
when working with hazardous volatile materials with the fume shield partially closed
to protect against splashes. Safety goggles must always be used when working in the
vapor hood. All safety materials (goggles and masks) should be provided for the Lab.
4. Classify your garbage (glass, paper, plastic bottles and aluminum cans) and put it in
the proper containers located outside the lab.
5. All solutions and samples should be labeled with the identification of their nature.
6. Balances, pH-meters are calibrated every day by the lab assistants.
7. Refrigerator and freezer space is provided to store solutions or samples. All solutions
and samples must be properly labeled. Solutions must be stored in their own
containers, not in lab glassware. Stored material that is not properly labeled can be
discarded without warning.
2.2. ARRANGEMENT OF EQUIPMENT AND CHEMICALS
Laboratory equipment andchemicals are sent to schools in accordance with the curriculum
demand. They are part of the essentials to fulfill the specific objectives of each portion in the
course. Hence, they have to be used at the right time. The timely use of these materials
however, can only be possible if there is a systematic approach to their arrangement and
storage in the laboratory. Keeping materials according to their use and nature is time saving
and is essential for safety and guarantees their prolonged use.
1. ARRANGING AND STORING EQUIPMENT
 Materials having similar and related functions are kept together or in adjacent shelves.
For example, Microscopes, Microscopic Slides, Cavity Slides, Cover Slides and
Magnifying lenses should be placed together or should take adjacent shelves.
Similarly, materials used for dissection such as scissors, needles, forceps, razors, etc.
should have their own separate places.
 It is always preferable to have closed storage space. When equipment and supplies are
stored in closed cabinets, they are not exposed to dust, fumes or fluctuations in
humidity and temperature.

Laboratory Management And Safety

Page 12
 Microscopes can be stored and easily counted in a cabinet made up of individual
sections. This type of storage cabinet reduces the change for tumbling or knocking of
the microscopes.
 The wooden slide box, which is available in most of the schools, has to be effectively
used for storing prepared slides. All the slides contained in the sections of the slide
box should be indicated by writing on the corresponding serially arranged lines,
printed on the inner surface of the slide box covering.
 Once equipment is arranged, the specific place for each item should be indicated by
labeling. If the materials are kept in cabinets and shelves with glass covers, the printed
labels could be attached to the inner surface of the glass cover. However, if the
containers have opaque covering, the printed labels should be placed on the outer
surface of the covering and may be protected by a layer of transparent plastic sheeting.
 After moving equipment from its place for actual use, return it immediately to its
specific (labeled) place. Do not leave apparatus out after use!
 Manage and use the Laboratory instruments and equipment according to their nature.
 Analytical Equipment: The Laboratory has basic lab equipment such as scales,
microscopes, magnetic stirrers, centrifuges, water baths, etc. The user must know
the equipment function, operation, care and maintenance. If not, the user must request
help from the Lab Assistant.
 Any equipment or instrument used should be returned clean and in good shape.
 Some instruments such as the gas chromatographs, the lyophylizer, and the
spectrophotometer, are of limited use and are to be used only by persons who have
previous experience with them.
 Refrigerators and freezers:
 The refrigerators and freezers are used to store samples and reagents. They are
not allowed for food storage.
 The user should ask the Lab Assistant for assigning space in them.
 If the refrigerators and freezers are intended to be used only during the
researcher’s stay at the Station, any stored material must be clearly labeled with
the following information: Researcher’s name
 Project name
 Content (Name of the reagent, sample, etc.)
 Preparation date
 Expiration date (if applicable)
 Date in which it will be taken out of the refrigerator or freezer
 If anybody needs to keep things in refrigerators and freezers after leaving the
station, the Lab Assistant must be informed.
 Regularly, the lab personnel will review the contents of refrigerators and
freezers. If there objects that do not contain the above information, if the owner

Laboratory Management And Safety

Page 13
is not at the station any more, or if the storing date has expired, they will be
disposed.
 When using an oven, temperature should be checked periodically as a safety
measure for fire.After using it, the oven should be turned off and cleaned.
 The laboratory maintains basic glassware available for researcher use. After using
glassware, it must be cleaned and dried. Any broken material must be reported to the
Lab Assistant and disposed off in the appropriate container.
2. ARRANGING AND STORING CHEMICALS
 The arrangement and storage of chemicals should be done based on the nature of
the substances.
 Certain chemicals react when placed close to each other. Glycerin and nitric acid,
potassium chloride and organic compounds, cyanides and acids, etc. are among such
chemicals.
 Combustible and dangerous materials such as poisons should be securely locked in
metal cabinets.
 Acids, strong bases and substances like chloroform, ether, iodine and hormones should
be stored in facilities, which can be locked.
 Large storage bottles of acids, alkalies and other dangerous chemicals, if on shelves,
are to be no more than two feet above the floor. If possible, they should be kept on
the floor.
 If there are metallic sodium, potassium, and calcium and calcium carbide in the lab,
they should not be kept near or above containers containing water or water solution.
Metallic sodium and potassium, after the original container has been opened, must
thereafter be kept under kerosene.
 The containers of chemicals that absorb moisture and change their chemical nature
should never be left open. For example, Sodium Hydroxide, Sodium Carbonate and
Sodium bicarbonate are hygroscopic. They absorb water from the atmosphere; as a
result, their volume increases. The nature of the chemicals also changes.
3. ARRANGEMENTS AND STORAGE OF OTHER TEACHING AIDS: Pictures and
Charts
 A drawer or filing cabinet filled with unclassified picture is practically worthless
(valueless). To be effective, pictures must be put into some kind of order classification
may be by topic, process, activity, or any other meaningful system.
 Pictures may be mounted for longer use. When mounted they should be laminated
between plastic sheets to ensure a longer life and to give a better appearance.
 Many charts can be stored conveniently, and they are not exposed to wear and tear,
when stored in hanging position. Each chart can be wired at one end and hooked on to
Laboratory Management And Safety

Page 14








the sliding arms of the cabinet. If each arm holds the charts dealing with a given topic
in biology, teachers or students can find the charts quickly when they are needed. The
teacher may hang the charts according to his filing system.
Models, skeletons, jar mounts and other specimens may be stored in cabinets that
many drawers (if the school is equipped with such cabinets). They may also be kept
in a storage cabinet that has a glass cover. The later also serves as a display case. If
you are using open shelf storage space, you may cover it with transparent plastic
sheeting to avoid the accumulation of dust.
If cabinets are not available, specimens and models can be stored and found most
easily if they are kept in some uniform kind of container. Plastic boxes, polythene
bags, match and shoe boxes, tin lids, plates, etc. may be used. There is no rule. You
can choose what you get cheaply and easily in your area. However, classification
should be done.
When arranging models, skeleton and other specimens in cabinets, similarity and
relations regarding structure and function should be considered. Finally, the
materials should be properly labeled for identification.
Sometimes, to avoid smearing, printed labels can be placed inside a jar-containing
specimen preserved in alcohol. The procedure is as follows:Print labels with India ink and set aside to dry until the ink no longer
glistens.
Dip them into a jar containing 5 to 10% glacial acetic acid (use
forceps).
Then drain the labels on blotting paper and insert into the specimen
jars containing 70% ethyl alcohol.

NB. Strong paper should be used for labels because glacial acetic acid tends to soften the
paper.
2.2. LABORATORY ETIQUETTE (RULE)
A. Your responsibility includes keeping your workstation properly. You will use
equipment and parts stored in trays or drawers in an orderly fashion. Keep it in that
order, for your own convenience.
B. Keep your work area uncluttered (organized). Store all instruments and components
not actively in use in their proper place, away from your work area, or in the specials
storage cabinets.
C. You may need other equipment and components stored in a different area from your
workstation, perhaps in drawers or bins, or on shelves in the stockroom. Return these
to their proper place immediately when you have finished with them.
D. Do not make unauthorized modifications to the equipment.
2.3. DUTIES AND RESPONSIBILITIES OF LABORATORY ASSISTANTS
Laboratory Management And Safety

Page 15
The idea of assigning a lab assistant originate from the need to effectively utilize the
laboratory and facilitate conditions, so that teachers and students can carry out all the
compulsory practical activities which are necessary to attain the defined objectives of the
lesson.
After a certain lab session, equipments and other materials may be found scattered in the
laboratory. Plant specimens, soil samples and the like, brought to the laboratory by
students, may be left to cover and spoil the benches and the floor. Used glassware’s may be
found unwashed and need cleaning. Apparatus set up for experimentation need to be
dismantled. Students may leave forgetting to return equipment and chemicals to their
shelves. These and similar others, which affect the neatness and the readiness of the
laboratory for next session, should be given careful attention by the laboratory assistant.
Sometimes the teacher may not have enough time to collect all the necessary materials and
set-up an apparatus for an experiment or demonstration. The practical activity he wanted to
perform may also require materials that need to be prepared ahead of time. For instance, if
the teacher wants germinating seeds, he asks him to germinate seeds for him. He should get
seeds soaked in water 4 to 8 days before the laboratory session. A reagent that can be prepared
in the laboratory may also be needed for a particular experiment. This should be made ready
for use whenever needed. Occasionally, equipment necessary to carry out an experiment may
not be available in the laboratory. Under this condition, alternative method and
improvisation will be found to be highly essential. The laboratory assistant in collaboration
with the teachers is therefore expected to deal with the above and other related cases.
With this in mind, the following points are some of the duties and responsibilities of a
laboratory assistant:-

this in mind, the following points are some of the duties and responsibilities of a laboratory
1. The laboratory assistant will take charge of laboratory equipment,
assistan

apparatus and chemicals.
2. Will keep the laboratories open for use during class hours.
3. Takes proper measures in the arrangement, organization and storage
of equipment, chemicals, specimens, charts, models, pictures, etc.
regarding the laboratory, provides guide to pupils whenever
necessary.
Laboratory Management And Safety
Page 16
4. Controls the neatness and proper handling of laboratory rooms.
5. Prepare necessary materials and set-up an apparatus for an
ሩ

For efficient and smooth functioning of the laboratory, good understanding and close
cooperation between teachers and the lab assistant is essential.
They (teachers) are expected to brief him on the use and handling of chemicals and sensitive
instruments. Under no condition should the lab assistant be ordered to mix or treat chemicals
he does not know. A planned and programmed utilization of the lab will be necessary for
maximum efficiency. Depending on the number of teachers and sections that make use of the
lab, teachers along with the lab assistant should arrange a convenient timetable and work
according it. This time table, which should enable each section to use the lab at least once in a
week; helps avoid program clashing and ensures that all teachers using the laboratory.
2.4. FORMATS IN THE LABORATORY
The laboratory assistant may prepare different kinds of formats to help him in his work. Some
of the formats, if they are properly documented, serve as a source of information and give
necessary data accurately. Among such formats, the following three are recommended to be
used.
1. Requisition Format

Laboratory Management And Safety

Page 17
Sometimes a teacher wants to take a model, chart or a specimen from the laboratory to show
his students in the classroom. Another teacher may ask for certain equipment and chemicals
for a class demonstration. It is part of the duty of the lab assistant to supply them with the
needed materials. It is also his responsibility to see that the materials have been returned.
In entertaining such cases, using requisition formats will be of much help. It allows safe and
timely return of materials borrowed from the lab.
Sample
BIOLOGICAL ITEM REQUISITION FORM
Date_______________
Name of the school______________
Teacher’s Name_________________
Grade and Section_______________
Unit_____________
Type of Activity_______________
Item Requested
Chemicals

_______________

________________________________
________________
Equipment

_______________

________________

_____________

_____________
________________

________________
________________

Condition

_____________

________________

________________
________________

Quantity

______________

_____________
_____________

Others___________________________________________________
Date of performance_________________________
Department Head Remark_________________________
Teacher’s Signature_________________________
Signature of the Dep. Head___________________
2. Format for Registering Materials Lost and Broken
Laboratory Management And Safety

Page 18
One of the reasons why teachers refrain from effectively using the laboratory is the fear
associated with the losing and breaking of the materials. Materials are kept in the lab to be
used whenever needed. In fact, they may be lost for broken while in use. The important
thing is to use them carefully. In case the materials are lost or broken while using them, the
case should be immediately reported to the person who is in charge (the lab assistant or any
other person assigned).
A form should always be ready to register the item lost or broken. The condition should be
specified this then should be reported to the concerned committee for decision.
The committee is usually formed from people representing the administration, the laboratory
assistant and teacher’s representative. Such a procedure allows avoiding the unnecessary
arguments that arise between teachers and store keepers at the end of the academic year.
Sample
BIOLOGY LABORATORY FORM FOR REGISTERING MATERIALS
LOST OR BROKEN

Date

Name of the school____________________
Item
Lost Quantity
Orbroken

Specific
Condition

Person In Signature
Charge

Remark

By the end of the year, the form will be containing list of materials lost during the academic
year, and hence helps as a reference for making all replacements and necessary
preparations for the coming year.
3. Format for Recording Practical Activities Performed
In this form, experiments and demonstrations done are recorded along with the materials used.
From among the compulsory experiments, those that cannot be done are also indicated and the
reasons f
or not doing are also specified.

Laboratory Management And Safety

Page 19
An experiment might have been omitted due to lack of materials. Another might have been
found to be difficult to perform. A teacher might have also neglected an experiment which he
thought was irrelevant to the subject matter. Whatever the reason may be, the teacher is
expected to state it clearly in the form. This enables to know how many of the compulsory
practical activities have been carried out in the year and how many of them have not been
conducted. The reasons stated (for not performing some of the experiments) also enable
teachers to be in a position to give constructive comments on the use of the laboratory, the
practical activities listed in the lab manuals and the curriculum as a whole.
Sample
BIOLOGY LABORATORY FORM FOR RECORDING PRACTICAL
ACTIVITIES PERFORMED
Name of the School_______________________

Remark

Reason
In
Case
Not
Performed
Sig.

Section

Grade

Unit

Date

Topic
Of
Practical
Activity

Material
Used

Name of the teacher______________________

2.5. INVENTORY
In some schools, materials supplied at different timeswere found kept in the store for many
years. In such schools, since yearly inventory is not done it is not possible even to know what
materials are available.
The word inventory refers to the counting and listing of materials in the school store,
laboratory etc. available, broken or lost. A properly carried out yearly inventory enables:




To check the loss and misplacement of equipment
To cross check with the previous counting
To take corrective measures if difference are observed and find the reason
why the difference are seen
To replace items used up and/or lost and maintenance.

Laboratory Management And Safety

Page 20
For the proper handling and use of materials, the yearly inventory is very essential. The
following points may be considered when carrying out the counting.
 If materials in the lab are found to be unknown to the storekeeper or lab
assistant, it will be necessary to ask the help of teachers for identification. If
this does not solve the problem, instead of giving vague and irrelevant
description, it is better to identify them using code (item) numbers.
 A short description about the condition of the material will be helpful.
 Registering quantities of the same item separately (under different serial
numbers) will not be convenient for counting.
 The list should include materials bought by the school, those prepared by
teachers and students and materials obtained from organizations and
individuals.
 Separate lists should be prepared for materials in the three science
laboratories.
2. LABORATORY SAFETY
2.1. Laboratory Safety Rules
Careless behavior in the laboratory can result in serious injury, health hazards and damage to
property. Learn to recognize potential hazards, to avoid accidents from happening and to
abide by the rules of the laboratory. Every person is expected to do their part to ensure a safe
laboratory environment for themselves and others in the laboratory.
Some of the main rules that all individuals using the laboratory must abide by are:o No smoking, eating, and drinking in the laboratory.
o Horseplay is not allowed in the laboratory.
o Lab users must become familiar with the location and operation of the fire
extinguisher and other safety devices.
o If an individual has a question about the operation of a certain laboratory device, the
lab supervisor should be consulted. Equipment that you are not familiar with should
not be used.
o Be aware of the biological and/or chemical agents are used in the laboratory. Even if
you are not performing experiments using hazardous agent, you should take
appropriate precautions to keep yourself safe. Always wash your hands before leaving
the laboratory and remove any gloves you are wearing.
General Laboratory Safety Rules
1. Smoking, eating, drinking

Laboratory Management And Safety

Page 21
No smoking, eating, drinking, chewing, or applying cosmetics in laboratory areas. No food or
drink is to be stored in laboratories (including refrigerators and freezers).
2. Disposable Laboratory Gloves
Disposable laboratory gloves are not to be worn in communal areas. Door handles,
telephones, computer keyboards (except in clearly labeled circumstances), lift buttons, etc. are
not to be touched with gloves. If needle, wear one glove and use the un-gloved hand to open
doors, operate lift etc.
Rubber or disposable gloves should be worn when handling/working with:
 Human blood or other body fluids
 Dangerous chemicals
 Potentially infectious material
3. Laboratory Gowns or Lab Coats
Laboratory gowns or lab coats must always be worn in laboratories, and they must be
removed before entering “clean areas”, e.g. the tea room, stores, toilets, library, office areas,
etc. The gowns or coats must be of sufficient length to protect the worker (i.e. down to about
the wearer’s knees). They must close at the back or, if front-closing, have enough overlap at
the front to prevent gaping.
4. Clothing, Footwearand Hair
Clothing and footwear must be suitable for laboratory conditions, i.e. clothing must not
present any hazards by being too loose, accessories must not present a hazard during
laboratory work, etc. and footwear must be fully enclosed. If you want to wear other shoes to
and from work, etc. you might want to keep a pair of fully enclosed shoes at work to wear in
the lab. Thongs, or barebacked sandals or shoes, or very high heels must not be worn in the
laboratory. Bare feet are also prohibited. Long hair must be tied back to avoid contact with
microorganisms and equipment.
5. Safety Glasses
Full-face shields must be worn for all work involving corrosive or toxic liquids, ultra-violet
light.
6. Avoiding Ingesting Microorganisms
The best protection to ingesting microorganisms is not to put them in mouth. Pencils and pens
must not be placed in the mouth. Chewing of fingernails, playing with hair, applying lipstick,
drinking, etc. are not allowed. Wash your hands when leaving the laboratory togoto lunch, etc.

Laboratory Management And Safety

Page 22
7. Pipetting
Do not pipette by mouth. The use of pipettes with cotton plugs to reduce contamination is
preferable place pipettes in disinfectant solution tip-first to minimize aerosol production.
Submerge for 18-24 hours. Residual volumes from pipettes create aerosols; use mechanical
devices that are calibrated to deliver.
8. Syringes and Needles
Restrict the use of “sharps” to a minimum. Avoid using syringes to mix infectious liquids (if
essential, hold the tip of the needle under the surface of the fluid and avoid excessive force).
Discard used syringes and needles into an approved container.
9. Hazardous Chemical/Biological Spills
Hazards chemical and biological spills and blood spills on floors, benches or equipment
should be cleaned up immediately. Special treatment is required for spills of a bio hazardous
nature.
10. Hand Washing
Hands should be washed after completing each task and always before leaving the laboratory.
11. Faulty Equipment
Any faulty equipment should be removed from service for repair or disposal.
12. Corridors and Exits
Corridors and exits must not be obstructed by equipment or stored items.
13. Bench Work
Minimize aerosol production when carrying out on an open bench. Place bench coat or a
similar absorbent paper over working surfaces. Replace this regularly. Decontaminate
workbenches after spills and after work has been completed.
14. Fungal Spores
Petri dish cultures of fungi should be sealed and incubated with the lid uppermost to prevent
the dispersal of fungal spores. Recognize fungi as potential pathogens and be aware of the
ability of some species to produce mycotoxins.
15. Petri Dishes

Laboratory Management And Safety

Page 23
Take care when handling petri dishes that contain condensate. This may contain viable
microorganisms that can be spread via droplets or aerosols when the plates are opened or
dropped.
16. General Behavior
No running or “horse play” in the lab.
` Before You Attend Any Biology Lab
DO’s:
Read your lab manual “Safety” section
Know the work procedures for each day.

DON’T’s:
Think that ignorance is bliss.
Forget your lab manual and rely on your
memory.
Know the dangers.
Have a casual attitude.
Plan to wear a lab coat.
Wear your best clothes.
Be well rested and alert.
Sleep-in and arrive late.
Notify the lab instructor of any relevant Hide a medical condition that might
medical condition.
jeopardize your safety or the safety of others.
NO ONE SHOULD EVER ADOPT A COMLACENT ATTITUDE TOWARDS LAB
SAFETY.

2.2. Other Safety Rules When Working In Biological or Chemical Laboratory
1. Personal Safety
The highest priority in the laboratory is personal safety. Therefore you must be sure to:
Wear eye protection in the laboratory when handling any chemical or
biological agents. Tie your hair back, if you have long hair.
Wear protective gloves when handling corrosive chemicals or biological
agents. These are not to be worn in non-lab areas. (i.e. remove them before
going to the washroom).
Wear a lab coat and closed-toed shoes, when in the lab.
o Lab coats used in labs should not be worn in non-laboratory areas.
Laboratory coats are to be worn INSIDE the laboratory BUT
have to be removed when leaving the work area.
2. Chemical Hazards Safety
When performing experiments:
Wear protective gloves.
Read the lab before using any reagent.
Laboratory Management And Safety

Page 24
Never pipette by mouth (even water); use a device such as a pipettor.
Never taste chemicals and smell them only cautiously.
Never use the biological and safety cabinets as fume hoods.
Never pour chemicals down the sink without first consulting Supervisor.
3. Biological Hazards Safety
Although you may not be working with pathogenic organisms, you should be aware of safety
procedures in dealing with biological agents in general.
All persons working with biological agents must observe the following rules:
Wear a lab coat. Clothing coming in contact with biological agents should
be removed and washed.
Keep the laboratory doors closed.
Wash your hands thoroughly with soap and water before leaving the
laboratory.
Place any non-sharp implements that you used to handle biological agents
into appropriatecontainers.
Place all used microscope slides in disinfectant.
Never place cell culture vessels close to the edge of the lab bench and in
areas where they could be knocked over.
Never leave cultures open to the air: keep them covered at all times. Many
biological agents can become airborne and inhalated.
No mouth pipetting at any time.
No smoking, eating or drinking in the laboratory.
A lab coat must be worn whenever work involving biological material is
being carried out and must be taken off before visiting non-laboratory
areas (coffee rooms, shops, libraries, etc.).
All contaminated glassware must be disinfected before being placed for
washing up.
All spillages must be wiped up with either disinfectant or ethanol
including spillages in centrifuge rotors.
All materials which are potentially infectious should be inactivated (by
disinfection or by autoclaving) before leaving the lab for incineration.
Care must be taken when using any procedure which generates aerosol, to
minimize exposure to potentially infectious agents.
Wash your hands before you leave the laboratory.
Potentially hazardous biological specimens:
1. Human cell line (including non-human primates).
Laboratory Management And Safety

Page 25
2.
3.
4.
5.
6.
7.

Non-human cell line.
Human or other primate sample (fluid, tissue, etc.).
Non-primate sample (fluid, tissue, etc.).
Bacteria.
Virus.
Fungus, parasite, or other live material.

Potential Causes:
1.
2.
3.
4.
5.
6.
7.
8.

Oral aspiration through pipettes.
Accidental syringes.
Animal bites.
Spray from syringes.
Centrifuges accidentals.
Cuts and scratches.
Animal wastes.
Direct contact with pathogenic cultures.

2.3. Safety Considerations Associated With Some Specific Instruments/Equipments
A. Biological Safety Cabinets
Biological safety cabinets have been installed in some laboratories for two reasons:
1. To maintain sterility in your experiments.
2. To protect the user from the experiment, so that the user has minimal contact
with the biological and chemical agents.
For maximum safety and experimental success, use the biological safety cabinet as much as
possible when using biological media.
Techniques for the use of biological safety cabinets:
1. The use and limitations of biological safety cabinets should be explained to
all potential users, with reference to national standards and relevant literature.
2. The cabinet must not be used unless it is working properly.
3. The glass-viewing panel must not opened when the cabinet is in use.
4. Apparatus and materials in the cabinet must be kept to a minimum and at the
rear of the working area.
5. All work must be done in the middle or rear part of the working surface and
should be visible through the viewing panel.
6. The operator should not disturb the airflow by repeated removal and
reintroduction of his or her arms.

Laboratory Management And Safety

Page 26
7. The cabinet fan should be run for at least 5 minutes before and after
completion of work in the cabinet.
B. Centrifuge
Centrifuges can be a hazard for two reasons:
1. The components remove at extremely high speeds and if they are not
balanced, there is a possibility for a mechanical hazard.
2. Usually the centrifuge is used for potentially bio-hazardous media, so care
must be taken to avoid spillage of the media. If spillage occurs, proper
decontamination must take place.
Techniques for the use of centrifuges:
1. Satisfactory mechanical performance is a prerequisite of microbiological
safety in the use of laboratory centrifuges.
2. Centrifuges should be operated according the manufactures’’ instructions.
3. Centrifuges should be placed at such a level that workers of less than
average height can see into the bowl to place trunnions and buckets
correctly.
4. Centrifuge rotors and buckets should be inspected daily for signs of
corrosion and for hairline cracks.
5. Buckets and trunnions should be paired by weight and, with tubes in place,
correctly balance.
6. Alcohol (70%) should be used for balancing buckets. Saline or hypochlorite
solution should not be used as both corrode metals.
7. Securely capped tubes and seal able centrifuge buckets offer adequate
protection against infectious aerosols and dispersed particles of
microorganisms.
C. Autoclaving for Sterilization
Individuals responsible for autoclaving glassware and other lab ware will be responsible for
preparing the materials for sterilization.
Refrigerators and Freezers
Techniques for the care and use of refrigerators and freezers:
1. Refrigerators, deep-freezers should be defrosted and cleaned periodically and
any ampoules, tubes, etc. that have broken during storage removed. Face
protection and heavy-duty rubber gloves should be worn. After cleaning, the
inner surface of the cabinet should be disinfected.
Laboratory Management And Safety

Page 27
2. All containers stored in refrigerators, etc. should be clearly labeled with the
scientific name of the contents, the date stored and the name of the individual
who stored them. Unlabeled and obsolete materials should be autoclaved.
E.Pipetting
1. Pipetting by mouth should be prohibited. A pipetting aid always is used.
2. All pipetters should have cotton plug to reduce contamination of pipetting
devices.
3. Infectious materials should not be mixed by alternate suction and expulsion
through a pipette.
4. Liquids should not be forcibly expelled from pipettes.
5. To avoid dispersion of infectious material if it is accidentally dropped from a
pipette, a disinfectant-soaked cloth or absorbent paper should be placed on
the working surface; this should be autoclaved after use.
6. Contaminated pipettersshould be completely submerged in a suitable
disinfectant contained in an unbreakable container. They should be left for
18-24 hours before disposal.
7. Glassware and Sharps Handling:
Protect your hands when assembling glassware equipment.
Place all sharps, glassware and contaminated items (glass pipettes, needle,
etc.) into designated containers for disposal. Sharps and glassware need to be
decontaminated before disposal.
Clean all broken glassware promptly and dispose of properly into the proper
container. Use a brush and not your bare hands.
Ensure that needle and blade sharps are separately and carefully collected in
sharps waste container. When full, these containers are to be disposed of
properly.
2.4. Other Safety Considerations
A. Chemical or biological media spills
Chemical/Biological spill kits are to be used only for very small spill. Clean up kits should be
in every lab.
Fire Safety
When working in the laboratory, read the chemical label and determine if a
substance is dangerous (flammable, corrosive or toxic) before using it.

Laboratory Management And Safety

Page 28
Keep all bottles of flammable, toxic and corrosive chemicals closed and in
the appropriate cabinet unless they are in use.
Keep open vessels of solvent away from source of heat or sparks.
If your clothing is on fire: stop, drop and roll on the floor to smother the
flames.
Know where the fire extinguisher is located.
Know where the fire exits are.
Check all electrical equipment before you turn the power on.
General Housekeeping
 The best way to avoid accidents is to develop good housekeeping. Keep your
workplace clean and tidy. Clean up spills, broken equipment, floods and general
clutter promptly.
WASTE DISPOSAL
A.BIOLOGICAL WASTE
Biological waste includes:
 Liquids such as used cell culturing media, supernatant, blood or blood fractions
(serum),etc. which contain viable biological agents;
 Materials considered pathological, any part of the human body, tissues and bodily
fluids.
 Any part of an animal infected [or suspected to be infected] with a communicable
disease;
 Non-sharp, solid laboratory waste (empty plastic cell culture flasks and petri dishes,
empty plastic tube, gloves, wrappers, absorbent tissues, etc.) which may be, or is
known to be, contaminated with viable biological agents;
 All sharp and pointed items used in medical care, diagnosis, and research, including
the manipulation and care of laboratory animals, which should be considered
potentially infectious;
 Laboratory glassware, which is known or suspected to be contaminated with
hazardous biological agents.
Packaging and Treatment
Materials contaminated with hazardous biological agents must be collected in the
appropriate containers and sterilized or disinfected before disposal.

a) Liquids containing bio hazardous agents
Collect liquids in leak-proof containers such as flasks or bottles.
Liquid waste containers designers to withstand autoclaving temperatures
must be used when steam sterilization is utilized.
Laboratory Management And Safety

Page 29
b) Solids containing bio hazardous agents
Non-sharp, solid laboratory waste (empty plastic cell culture flasks and
petridishes, empty plastic tubes, gloves, wrappers, absorbent tissues, etc.)
which may be, or is known to be, contaminated with viable biological
agents should be collected in autoclavable bags. These plastic bags
display the biohazard-warning symbol.

Note: Autoclavable bags should be used for solid, non-sharp, hazardous biological
waste only and disposed of appropriately. They should not be used for the collection
of other solid hazardous or nonhazardous waste that may require other treatment or
disposal methods.

For laboratories generating large volumes of agar gel in disposable Petridishes and tubes requiring sterilization, such waste should be collected
and sterilized.
c) Sterilization and Disinfections
Inactivate the biological agents by employing either chemical
disinfection or steam sterilization procedures.
Autoclaving (steam sterilization) is the preferred (and generally regarded
as the most reliable) method of sterilizing biological waste. Depending
on the volume of waste to be sterilized, it may be necessary to extend the
duration of exposure to high temperature steam under pressure. or
Plastic disposable pipettes are disposed into appropriate container and
then soaked in disinfectant for a period of several hours.
Contaminated glassware should be thoroughly soaked in disinfectant for
a period of several hours before placing in the washing up.
All contaminated glass or plastic should be washed and thoroughly
decontaminated.
Following steam sterilization or chemical disinfections, innocuous
liquids may be disposed of via the laboratory drainage system. Flush
with sufficient clean water to purge the drain immediately after disposal
of all liquids.
Do not pour melted agar into sink or floor drains. All it to cool and
solidify for disposal as a solid waste.
B.CHEMICAL WASTE
Laboratory Management And Safety

Page 30
1. Improper Labeling of Waste
Typical examples include:
a. Failing to label a waste bottle. If the contents of the bottle are not listed, the
next person to use the bottle could accidentally combine incompatible
chemicals, causing a fire and explosion. All bottles of chemical waste must
have information on it.
b. If something isn’t really waste, don’t pit the word “waste” on the bottle.
c. Scratching out the former label of the bottle and writing “waste” on the
bottle. You must remove or totally deface the old so there is no confusion
over the contents.
2. Improper Segregation of Waste
Typical examples include:
a. Storing acids and bases in the same cabinet. Leaking containers or a spill
could cause a violent reaction, which would release large quantities of
toxic gases.
b. Storing acids and organic waste in the same cabinet. In the event of
accidental mixing, a catastrophic fire or explosion could result.
c. Mixing incompatible chemicals in a waste container. For example, nitric
acid and ethanol can form an explosive mixture.
3. Improper Storage of Waste
Typical examples include:
a. Using metal cans for waste. Even near neutral pH, solids and liquids can
easily corrode through metal cans in a surprisingly short period of time.
Use only glass or polyethylene containers for waste.
b. Storing waste bottles in or near a sink or floor drain. This could allow
toxic chemicals to enter the sewer.
4. Taking Waste to the Stockroom
1. Bring your waste to the stockroom
o All waste containers must have a proper “hazardous waste” label with start
date here’s an example:
HAZARDOUS WASTE
ACCUMULATION
Laboratory Management And Safety

START DATE MAY 29, 1997
CONTENTS acetone, diethyl ether
HANDLE WITH CARE!

Page 31
o
o
o
o









All contents are listed.
The bottle or jar has a cap that fits tightly.
There are no or extraneous labels on the container.
The outside of the bottle is clean and dry.
Chemical containers that have been empties (generally this means drained
their contents by normal methods including pouring, pumping, aspirating,
etc.) are not regulated as hazardous waste; however they should not
necessarily be disposed of in the regular solid waste dumpsters. Generally,
the primary container (the container that actually held the chemical, as
opposed to a container that the primary chemical was packed in), must be
triple rinsed with water or other suitable solvent and air-dried before
disposal. For volatile organic solvents (e.g. acetone, ethanol, ethyl acetate,
ethyl ether, hexane, methanol, methylene chloride, petroleum ether, toluene,
xylene, etc.) the emptied container can be air-dried in a ventilated area
without triple rising.
Glass containers must be triple-rinsed with water or other suitable solvent
and air-dried to ensure that it free of liquid or other visible chemical residue.
If the glass container has visible residue and this residue is hazardous, the
container should be disposed with appropriate care. If the residue is not
hazardous, the intact container should be placed in regular lab trash.
Broken glass containers that are free of chemical residue should be placed
in broken glass receptacles or placed in a puncture resistant container, such
as a rigid plastic container. The plastic container or box should be sealed
and placed in regular laboratory trash.
Metal containers must be triple-rinsed with water or other suitable solvent
and air-dried. If the container is free of hazardous chemical residues, it may
be placed in the regular laboratory trash. Otherwise, it should be disposed
with an appropriate care.

Controlling practices for infectious agents
The control of biological hazards in the laboratory shall be maintained by:

Laboratory Management And Safety

Page 32





Limiting the handling of material to the minimum amount
Ensuring proper disposal of material after usage
Ensuring proper precautions and procedures when handling the materials
Maintaining appropriate levels of identification (universal bio-hazard
warning label) warning and security in storage of the material.

2.7. Emergency Procedures
There are many types of emergencies that could occur in a laboratory, including fires,
chemical/biological contaminants spills, injuries, accidents, explosions and others.
1. Fire
In the event of a fire:
1. Individuals are not required to fight fires; but that those who choose to do so may fight
small, incipient stage fires ( No bigger than a waste paper basket) as long as have been
trained in theproper use of fire extinguishers.
If you have been trained in the use of a fire extinguisher, fight the fire from
a position where you can escape, only if you are confident that you will be
successful.
A fire contained in a small vessel can usually be suffocated by covering the
vessel with a lid of some sort.
2. If your clothing catches fire, drop to the floor and roll to smother the fire. If a coworker’s clothing catches fire, knock the person to the floor and roll him or her to
smother the flames. Use a safety shower immediately thereafter.
3. If the fire is larger or spreading inform the building occupants by fire alarm or notify
the building occupants verbally of the need to evacuate. If possible, shut down any
equipment, which may add fuel to the fire. Close the door behind you to prevent the
fire’s spread.
2. Chemical Exposures
The following procedures should be followed in the event of chemical exposure.
 Chemicals on Skin or Clothing
Immediately flush with water for no less than 15 minutes. For larger spills, the safety shower
should be used.
1. While rinsing, quick remove all contaminated clothing.
2. Use caution when removing sweaters to prevent contamination of the
eyes.

Laboratory Management And Safety

Page 33
3. Discard contaminated clothing or launder them separately from other
cloth.
 Chemicals in Eyes
1. Immediately flush eye(s) with water for at least fifteen minutes. The
eyes must be forcibly held open to wash, and the eyeballs must be
rotated so all surface area is rinsed. The use of an eye wash fountain is
desirable so hands are free to hold the eyes open. If eyewash is not
available, pour water on the eye, rinsing from the nose outward to avoid
contamination of the unaffected eye.
2. Seek medical attention.
 Chemical Inhalation
Close containers, open windows or otherwise increase ventilation, and move to fresh air.
1. If symptoms, such as headaches, nose or throat irritation, dizziness,
persist, seek medical attention.
 Accidental Injection of Chemicals
Wash the area with soap and water and seek medical attention.
 Biological hazards spills
If potentially hazardous biological material is spilled in the laboratory:
Avoid inhaling any airborne material by holding your breath and leaving the
laboratory
Close the door to the laboratory and warn others in the area go to a wash or
change room area. Wash all potentially contaminated area as well as the
arms, face, and hands.Shower if facilities are available
If clothing is known or suspected to be contaminated, remove the clothing
with care, folding the contaminated area inward. Discard the clothing into a
bag or autoclave
Reentry into the laboratory should be delayed for a period of 30 minutes to
allow reduction of the aerosol generated by the spill.
NB.Contaminated gloves, wiping cloth, and sponges should be discarded into an
autoclave pan and autoclaved.
Emergency services: whom to contact
The telephone numbers and address of the following should be prominently displayed near all
telephones:
The institution or laboratory itself
Laboratory Management And Safety

Page 34
Safety officer
Fire services
Hospital/ambulance service
Police
Director or institution or laboratory
Engineer
Water, gas and electricityservices.
Emergency equipment
The following emergency equipment must be available:
First aid kit
Stretcher
2.8. Laboratory design and facilities
1. The laboratory should be separated from the areas that are open to unrestricted
traffic flow within the building. Additional separation may be achieved by
placing the laboratory at the blind end of a corridor
2. Access to the laboratory area must be designed to prevent entrance of arthropods
and other vermin.
3. Access doors must be self-closing and lockable.
4. The surface of walls, floors and ceilings should be water-resistant and easy to
clean. Opening in these surface (e.g. for service pipes) should be sealed to
facilitate decontamination of the room(s).
5. A foot-or elbowoperated hand-washbasin should be provided near to each exit
door.
6. Exhaust air form the laboratory must be discharged directly to the outside of the
building so that it is dispersed away from occupied buildings and air intakes. It is
recommended that this air is discharged through high-efficiency particulate air
(HEPA) filters.
Definition:
A potentially hazardous biological specimen may be any one type or combination of the
following types of specimens, when such a specimen consists of live, frozen or lyophilized
material that may possess the potential to produce an infection or genetic alternation in
humans, animals or plants.
Potentially hazardous biological specimens do not include live animals that are healthy and
pressure to be non-infectious, but do include unhealthyanimals that are known or suspected to
be infectious.
Laboratory Management And Safety

Page 35
Biological specimens are not considered to be potentially hazardous when the specimens have
been chemically, thermally, or otherwise treated to render the specimens, or component
thereof, permanently non-viable, permanently inactivated, or permanently incapable of
insertion or infection into living cells.
Hazards in bio labs are principally due to infections. Additional Hazards Include:
Chemical
Mechanical
Fire
Electrical
Radiation

= The End =

Laboratory Management And Safety

Page 36

Más contenido relacionado

La actualidad más candente

Laboratory Hazards, Accidents and Safety Rules
Laboratory Hazards, Accidents and Safety RulesLaboratory Hazards, Accidents and Safety Rules
Laboratory Hazards, Accidents and Safety RulesTapeshwar Yadav
 
Laboratory organization, management and safety methods - LABORATORY DESIGN ​-...
Laboratory organization, management and safety methods - LABORATORY DESIGN ​-...Laboratory organization, management and safety methods - LABORATORY DESIGN ​-...
Laboratory organization, management and safety methods - LABORATORY DESIGN ​-...EqraBaig
 
Laboratory errors in medical practice
Laboratory  errors in medical practiceLaboratory  errors in medical practice
Laboratory errors in medical practiceMedicineBSMMU
 
Quality assurance is necessary in blood banking
Quality assurance is necessary in blood bankingQuality assurance is necessary in blood banking
Quality assurance is necessary in blood bankingDr Shahida Baloch
 
Clinical Laboratory Biosafety
Clinical Laboratory BiosafetyClinical Laboratory Biosafety
Clinical Laboratory BiosafetyTapeshwar Yadav
 
Safety measures in clinical laboratory powerpoint
Safety measures in clinical laboratory powerpointSafety measures in clinical laboratory powerpoint
Safety measures in clinical laboratory powerpointSamita Shrestha
 
Ideal Medical laboratory lab
Ideal Medical laboratory labIdeal Medical laboratory lab
Ideal Medical laboratory labVamsi kumar
 
Specimen collection for clinical microbiology laboratory
Specimen collection for clinical microbiology laboratorySpecimen collection for clinical microbiology laboratory
Specimen collection for clinical microbiology laboratorySITI HAWA HAMZAH
 
Safety precautions in laboratories
Safety precautions in laboratoriesSafety precautions in laboratories
Safety precautions in laboratoriesCaissa Joyce Dasco
 
Health safety laws and regulations (laboratory)
Health safety laws and regulations (laboratory)Health safety laws and regulations (laboratory)
Health safety laws and regulations (laboratory)Saad Farooqi
 

La actualidad más candente (20)

Laboratory Hazards, Accidents and Safety Rules
Laboratory Hazards, Accidents and Safety RulesLaboratory Hazards, Accidents and Safety Rules
Laboratory Hazards, Accidents and Safety Rules
 
Laboratory organization, management and safety methods - LABORATORY DESIGN ​-...
Laboratory organization, management and safety methods - LABORATORY DESIGN ​-...Laboratory organization, management and safety methods - LABORATORY DESIGN ​-...
Laboratory organization, management and safety methods - LABORATORY DESIGN ​-...
 
Laboratory errors in medical practice
Laboratory  errors in medical practiceLaboratory  errors in medical practice
Laboratory errors in medical practice
 
Quality assurance is necessary in blood banking
Quality assurance is necessary in blood bankingQuality assurance is necessary in blood banking
Quality assurance is necessary in blood banking
 
Clinical Laboratory Biosafety
Clinical Laboratory BiosafetyClinical Laboratory Biosafety
Clinical Laboratory Biosafety
 
Safety measures in clinical laboratory powerpoint
Safety measures in clinical laboratory powerpointSafety measures in clinical laboratory powerpoint
Safety measures in clinical laboratory powerpoint
 
Ideal Medical laboratory lab
Ideal Medical laboratory labIdeal Medical laboratory lab
Ideal Medical laboratory lab
 
Laboratory safety
Laboratory safetyLaboratory safety
Laboratory safety
 
lab safety ppt
lab safety pptlab safety ppt
lab safety ppt
 
Lab saftey
Lab saftey Lab saftey
Lab saftey
 
Laboratory management
Laboratory managementLaboratory management
Laboratory management
 
Specimen collection for clinical microbiology laboratory
Specimen collection for clinical microbiology laboratorySpecimen collection for clinical microbiology laboratory
Specimen collection for clinical microbiology laboratory
 
Laboratory ethics
Laboratory ethicsLaboratory ethics
Laboratory ethics
 
Microbiology lab QC
Microbiology lab QCMicrobiology lab QC
Microbiology lab QC
 
Safety precautions in laboratories
Safety precautions in laboratoriesSafety precautions in laboratories
Safety precautions in laboratories
 
Health safety laws and regulations (laboratory)
Health safety laws and regulations (laboratory)Health safety laws and regulations (laboratory)
Health safety laws and regulations (laboratory)
 
Laboratory safety
Laboratory safetyLaboratory safety
Laboratory safety
 
Blood bank equipments ss
Blood bank equipments ssBlood bank equipments ss
Blood bank equipments ss
 
Laboratory safety
Laboratory safetyLaboratory safety
Laboratory safety
 
Laboratory errors.pdf
Laboratory errors.pdfLaboratory errors.pdf
Laboratory errors.pdf
 

Destacado

Lab management
Lab managementLab management
Lab managementlogumca
 
Laboratory Management
Laboratory ManagementLaboratory Management
Laboratory ManagementMae Bonto
 
The importance of a laboratory information management system in a research se...
The importance of a laboratory information management system in a research se...The importance of a laboratory information management system in a research se...
The importance of a laboratory information management system in a research se...ILRI
 
Laboratory management
Laboratory  managementLaboratory  management
Laboratory managementSatish Kamboj
 
Quality control in clinical laboratory
Quality control in clinical laboratoryQuality control in clinical laboratory
Quality control in clinical laboratorydrgomi basar
 
Lab safety and regulations by dr.brahmesh, PG BIOCHEMISTRY, AMC, VIZAG, AP, I...
Lab safety and regulations by dr.brahmesh, PG BIOCHEMISTRY, AMC, VIZAG, AP, I...Lab safety and regulations by dr.brahmesh, PG BIOCHEMISTRY, AMC, VIZAG, AP, I...
Lab safety and regulations by dr.brahmesh, PG BIOCHEMISTRY, AMC, VIZAG, AP, I...Guntamukkala Brahmayesu
 
Advanced techniques and laborotory equipments for biologists
Advanced techniques and laborotory equipments for biologistsAdvanced techniques and laborotory equipments for biologists
Advanced techniques and laborotory equipments for biologistsNawfal Aldujaily
 
Ab ipc on medical &lab waste (2)
Ab  ipc on medical &lab waste (2)Ab  ipc on medical &lab waste (2)
Ab ipc on medical &lab waste (2)Bruno Mmassy
 
Importance of physics in 21st
Importance of physics in 21stImportance of physics in 21st
Importance of physics in 21stfelna00
 
Fundamentals of modern physics by imran aziz
Fundamentals of modern physics  by imran azizFundamentals of modern physics  by imran aziz
Fundamentals of modern physics by imran azizDr.imran aziz
 
LIMS Implementation
LIMS ImplementationLIMS Implementation
LIMS ImplementationRobin Emig
 
Teaching Physics Practically
Teaching Physics PracticallyTeaching Physics Practically
Teaching Physics Practicallycoyley
 
Laboratory Safety, Biomedical Waste & Its Management
Laboratory  Safety, Biomedical Waste & Its ManagementLaboratory  Safety, Biomedical Waste & Its Management
Laboratory Safety, Biomedical Waste & Its ManagementArun Babu
 
Trends In Physics Teaching
Trends In Physics TeachingTrends In Physics Teaching
Trends In Physics TeachingRick. Bahague
 
Specimen collection and handling
Specimen collection and handlingSpecimen collection and handling
Specimen collection and handlingSymon Nayupe
 
Laboratory Information Management System (LIMS)
Laboratory Information Management System (LIMS)Laboratory Information Management System (LIMS)
Laboratory Information Management System (LIMS)mariam1020
 
Automation in haematology bernard
Automation in haematology   bernardAutomation in haematology   bernard
Automation in haematology bernardBosco Mbonimpa
 

Destacado (20)

Lab management
Lab managementLab management
Lab management
 
Lab management
Lab managementLab management
Lab management
 
Laboratory Management
Laboratory ManagementLaboratory Management
Laboratory Management
 
The importance of a laboratory information management system in a research se...
The importance of a laboratory information management system in a research se...The importance of a laboratory information management system in a research se...
The importance of a laboratory information management system in a research se...
 
Laboratory management
Laboratory  managementLaboratory  management
Laboratory management
 
Quality control in clinical laboratory
Quality control in clinical laboratoryQuality control in clinical laboratory
Quality control in clinical laboratory
 
Lab safety and regulations by dr.brahmesh, PG BIOCHEMISTRY, AMC, VIZAG, AP, I...
Lab safety and regulations by dr.brahmesh, PG BIOCHEMISTRY, AMC, VIZAG, AP, I...Lab safety and regulations by dr.brahmesh, PG BIOCHEMISTRY, AMC, VIZAG, AP, I...
Lab safety and regulations by dr.brahmesh, PG BIOCHEMISTRY, AMC, VIZAG, AP, I...
 
Advanced techniques and laborotory equipments for biologists
Advanced techniques and laborotory equipments for biologistsAdvanced techniques and laborotory equipments for biologists
Advanced techniques and laborotory equipments for biologists
 
Ss7
Ss7Ss7
Ss7
 
Ab ipc on medical &lab waste (2)
Ab  ipc on medical &lab waste (2)Ab  ipc on medical &lab waste (2)
Ab ipc on medical &lab waste (2)
 
Importance of physics in 21st
Importance of physics in 21stImportance of physics in 21st
Importance of physics in 21st
 
Fundamentals of modern physics by imran aziz
Fundamentals of modern physics  by imran azizFundamentals of modern physics  by imran aziz
Fundamentals of modern physics by imran aziz
 
LIMS Implementation
LIMS ImplementationLIMS Implementation
LIMS Implementation
 
Teaching Physics Practically
Teaching Physics PracticallyTeaching Physics Practically
Teaching Physics Practically
 
Laboratory Safety, Biomedical Waste & Its Management
Laboratory  Safety, Biomedical Waste & Its ManagementLaboratory  Safety, Biomedical Waste & Its Management
Laboratory Safety, Biomedical Waste & Its Management
 
Trends In Physics Teaching
Trends In Physics TeachingTrends In Physics Teaching
Trends In Physics Teaching
 
Specimen collection and handling
Specimen collection and handlingSpecimen collection and handling
Specimen collection and handling
 
Laboratory Information Management System (LIMS)
Laboratory Information Management System (LIMS)Laboratory Information Management System (LIMS)
Laboratory Information Management System (LIMS)
 
Modern Physics
Modern PhysicsModern Physics
Modern Physics
 
Automation in haematology bernard
Automation in haematology   bernardAutomation in haematology   bernard
Automation in haematology bernard
 

Similar a Laboratory management and safety best book

Labortty techinque
Labortty techinqueLabortty techinque
Labortty techinqueZAHID RASOOL
 
Unit 1 - The scientific method and the laboratory work
Unit 1 - The scientific method and the laboratory workUnit 1 - The scientific method and the laboratory work
Unit 1 - The scientific method and the laboratory workPablo León Cruz
 
Zewail safety in_the_chem_lab090810
Zewail safety in_the_chem_lab090810Zewail safety in_the_chem_lab090810
Zewail safety in_the_chem_lab090810abdul rajak
 
Lab 0-A Handout - Lab Safety
Lab 0-A Handout - Lab SafetyLab 0-A Handout - Lab Safety
Lab 0-A Handout - Lab SafetyCreativityProject
 
Laboratory safety and regulations
Laboratory safety and regulationsLaboratory safety and regulations
Laboratory safety and regulationsJude Remso Labajo
 
Laboratory Rules And Safety Guidelines For Students
Laboratory Rules And Safety Guidelines For StudentsLaboratory Rules And Safety Guidelines For Students
Laboratory Rules And Safety Guidelines For Studentslavadoods Masta
 
Guidelines for Laboratory safety
Guidelines  for Laboratory safetyGuidelines  for Laboratory safety
Guidelines for Laboratory safetySedireng Ndolo
 
SAFETY RULE AND REGULATION IN MICROBIOLOGICAL LABOURATORY
SAFETY RULE AND REGULATION IN  MICROBIOLOGICAL LABOURATORYSAFETY RULE AND REGULATION IN  MICROBIOLOGICAL LABOURATORY
SAFETY RULE AND REGULATION IN MICROBIOLOGICAL LABOURATORYvivek kumar
 
Quality control in Biochemistry by Pradip Hamal
Quality control in Biochemistry by Pradip HamalQuality control in Biochemistry by Pradip Hamal
Quality control in Biochemistry by Pradip HamalPradip Hamal
 
Laboratory hazard
Laboratory hazard Laboratory hazard
Laboratory hazard Pradip Hamal
 
Biochemistry.pdf
Biochemistry.pdfBiochemistry.pdf
Biochemistry.pdfradhoffic
 
Unit 1, Lesson 1.6 - Safety in the Laboratory
Unit 1, Lesson 1.6 - Safety in the LaboratoryUnit 1, Lesson 1.6 - Safety in the Laboratory
Unit 1, Lesson 1.6 - Safety in the Laboratoryjudan1970
 
Short laboratory Hand Book MANIK
Short laboratory Hand Book MANIKShort laboratory Hand Book MANIK
Short laboratory Hand Book MANIKImran Nur Manik
 
Reglas De Seguridad En La Sala De Clases
Reglas De Seguridad En La Sala De ClasesReglas De Seguridad En La Sala De Clases
Reglas De Seguridad En La Sala De ClasesEMILY CARRERAS
 
Common safety-precautions-in-the-laboratory-group-1
Common safety-precautions-in-the-laboratory-group-1Common safety-precautions-in-the-laboratory-group-1
Common safety-precautions-in-the-laboratory-group-1Kristel kwen Ramas
 
BIOLOGY Laboratory and Safety Rules.docx
BIOLOGY Laboratory and Safety Rules.docxBIOLOGY Laboratory and Safety Rules.docx
BIOLOGY Laboratory and Safety Rules.docxJinkyAydalla
 
A Manual On Analytical Techniques A. GOOD LABORATORY PRACTICES (GLP
A Manual On Analytical Techniques A. GOOD LABORATORY PRACTICES (GLPA Manual On Analytical Techniques A. GOOD LABORATORY PRACTICES (GLP
A Manual On Analytical Techniques A. GOOD LABORATORY PRACTICES (GLPKimberly Pulley
 

Similar a Laboratory management and safety best book (20)

Labortty techinque
Labortty techinqueLabortty techinque
Labortty techinque
 
Unit 1 - The scientific method and the laboratory work
Unit 1 - The scientific method and the laboratory workUnit 1 - The scientific method and the laboratory work
Unit 1 - The scientific method and the laboratory work
 
Zewail safety in_the_chem_lab090810
Zewail safety in_the_chem_lab090810Zewail safety in_the_chem_lab090810
Zewail safety in_the_chem_lab090810
 
Lab 0-A Handout - Lab Safety
Lab 0-A Handout - Lab SafetyLab 0-A Handout - Lab Safety
Lab 0-A Handout - Lab Safety
 
Laboratory safety and regulations
Laboratory safety and regulationsLaboratory safety and regulations
Laboratory safety and regulations
 
Laboratory Rules And Safety Guidelines For Students
Laboratory Rules And Safety Guidelines For StudentsLaboratory Rules And Safety Guidelines For Students
Laboratory Rules And Safety Guidelines For Students
 
Guidelines for Laboratory safety
Guidelines  for Laboratory safetyGuidelines  for Laboratory safety
Guidelines for Laboratory safety
 
SAFETY RULE AND REGULATION IN MICROBIOLOGICAL LABOURATORY
SAFETY RULE AND REGULATION IN  MICROBIOLOGICAL LABOURATORYSAFETY RULE AND REGULATION IN  MICROBIOLOGICAL LABOURATORY
SAFETY RULE AND REGULATION IN MICROBIOLOGICAL LABOURATORY
 
Lab Safety.
Lab Safety.Lab Safety.
Lab Safety.
 
Quality control in Biochemistry by Pradip Hamal
Quality control in Biochemistry by Pradip HamalQuality control in Biochemistry by Pradip Hamal
Quality control in Biochemistry by Pradip Hamal
 
Laboratory hazard
Laboratory hazard Laboratory hazard
Laboratory hazard
 
Lab 0-A Lab Safety Training
Lab 0-A Lab Safety TrainingLab 0-A Lab Safety Training
Lab 0-A Lab Safety Training
 
Science lab
Science labScience lab
Science lab
 
Biochemistry.pdf
Biochemistry.pdfBiochemistry.pdf
Biochemistry.pdf
 
Unit 1, Lesson 1.6 - Safety in the Laboratory
Unit 1, Lesson 1.6 - Safety in the LaboratoryUnit 1, Lesson 1.6 - Safety in the Laboratory
Unit 1, Lesson 1.6 - Safety in the Laboratory
 
Short laboratory Hand Book MANIK
Short laboratory Hand Book MANIKShort laboratory Hand Book MANIK
Short laboratory Hand Book MANIK
 
Reglas De Seguridad En La Sala De Clases
Reglas De Seguridad En La Sala De ClasesReglas De Seguridad En La Sala De Clases
Reglas De Seguridad En La Sala De Clases
 
Common safety-precautions-in-the-laboratory-group-1
Common safety-precautions-in-the-laboratory-group-1Common safety-precautions-in-the-laboratory-group-1
Common safety-precautions-in-the-laboratory-group-1
 
BIOLOGY Laboratory and Safety Rules.docx
BIOLOGY Laboratory and Safety Rules.docxBIOLOGY Laboratory and Safety Rules.docx
BIOLOGY Laboratory and Safety Rules.docx
 
A Manual On Analytical Techniques A. GOOD LABORATORY PRACTICES (GLP
A Manual On Analytical Techniques A. GOOD LABORATORY PRACTICES (GLPA Manual On Analytical Techniques A. GOOD LABORATORY PRACTICES (GLP
A Manual On Analytical Techniques A. GOOD LABORATORY PRACTICES (GLP
 

Más de Chala Dandessa

Biology laboratory technique best edited by Chala Dandessa
Biology laboratory technique best edited by Chala DandessaBiology laboratory technique best edited by Chala Dandessa
Biology laboratory technique best edited by Chala DandessaChala Dandessa
 
Biol. 321 manual Afaan Oromoo
Biol. 321 manual Afaan OromooBiol. 321 manual Afaan Oromoo
Biol. 321 manual Afaan OromooChala Dandessa
 
Laboratory safety manual fantastic
Laboratory safety manual fantasticLaboratory safety manual fantastic
Laboratory safety manual fantasticChala Dandessa
 
Biology laboratory technique best22
Biology laboratory technique best22Biology laboratory technique best22
Biology laboratory technique best22Chala Dandessa
 
Alleviating student teachers report
Alleviating student teachers reportAlleviating student teachers report
Alleviating student teachers reportChala Dandessa
 
Alleviating student teachers proposal
Alleviating student teachers proposalAlleviating student teachers proposal
Alleviating student teachers proposalChala Dandessa
 

Más de Chala Dandessa (8)

Biology laboratory technique best edited by Chala Dandessa
Biology laboratory technique best edited by Chala DandessaBiology laboratory technique best edited by Chala Dandessa
Biology laboratory technique best edited by Chala Dandessa
 
Biol. 321 manual Afaan Oromoo
Biol. 321 manual Afaan OromooBiol. 321 manual Afaan Oromoo
Biol. 321 manual Afaan Oromoo
 
Laboratory safety manual fantastic
Laboratory safety manual fantasticLaboratory safety manual fantastic
Laboratory safety manual fantastic
 
Boqonnaa tokko
Boqonnaa tokkoBoqonnaa tokko
Boqonnaa tokko
 
Acoelomates boq. 6
Acoelomates boq. 6Acoelomates boq. 6
Acoelomates boq. 6
 
Biology laboratory technique best22
Biology laboratory technique best22Biology laboratory technique best22
Biology laboratory technique best22
 
Alleviating student teachers report
Alleviating student teachers reportAlleviating student teachers report
Alleviating student teachers report
 
Alleviating student teachers proposal
Alleviating student teachers proposalAlleviating student teachers proposal
Alleviating student teachers proposal
 

Último

Inclusivity Essentials_ Creating Accessible Websites for Nonprofits .pdf
Inclusivity Essentials_ Creating Accessible Websites for Nonprofits .pdfInclusivity Essentials_ Creating Accessible Websites for Nonprofits .pdf
Inclusivity Essentials_ Creating Accessible Websites for Nonprofits .pdfTechSoup
 
ANG SEKTOR NG agrikultura.pptx QUARTER 4
ANG SEKTOR NG agrikultura.pptx QUARTER 4ANG SEKTOR NG agrikultura.pptx QUARTER 4
ANG SEKTOR NG agrikultura.pptx QUARTER 4MiaBumagat1
 
MULTIDISCIPLINRY NATURE OF THE ENVIRONMENTAL STUDIES.pptx
MULTIDISCIPLINRY NATURE OF THE ENVIRONMENTAL STUDIES.pptxMULTIDISCIPLINRY NATURE OF THE ENVIRONMENTAL STUDIES.pptx
MULTIDISCIPLINRY NATURE OF THE ENVIRONMENTAL STUDIES.pptxAnupkumar Sharma
 
How to Add Barcode on PDF Report in Odoo 17
How to Add Barcode on PDF Report in Odoo 17How to Add Barcode on PDF Report in Odoo 17
How to Add Barcode on PDF Report in Odoo 17Celine George
 
Earth Day Presentation wow hello nice great
Earth Day Presentation wow hello nice greatEarth Day Presentation wow hello nice great
Earth Day Presentation wow hello nice greatYousafMalik24
 
4.16.24 21st Century Movements for Black Lives.pptx
4.16.24 21st Century Movements for Black Lives.pptx4.16.24 21st Century Movements for Black Lives.pptx
4.16.24 21st Century Movements for Black Lives.pptxmary850239
 
Integumentary System SMP B. Pharm Sem I.ppt
Integumentary System SMP B. Pharm Sem I.pptIntegumentary System SMP B. Pharm Sem I.ppt
Integumentary System SMP B. Pharm Sem I.pptshraddhaparab530
 
Concurrency Control in Database Management system
Concurrency Control in Database Management systemConcurrency Control in Database Management system
Concurrency Control in Database Management systemChristalin Nelson
 
Student Profile Sample - We help schools to connect the data they have, with ...
Student Profile Sample - We help schools to connect the data they have, with ...Student Profile Sample - We help schools to connect the data they have, with ...
Student Profile Sample - We help schools to connect the data they have, with ...Seán Kennedy
 
HỌC TỐT TIẾNG ANH 11 THEO CHƯƠNG TRÌNH GLOBAL SUCCESS ĐÁP ÁN CHI TIẾT - CẢ NĂ...
HỌC TỐT TIẾNG ANH 11 THEO CHƯƠNG TRÌNH GLOBAL SUCCESS ĐÁP ÁN CHI TIẾT - CẢ NĂ...HỌC TỐT TIẾNG ANH 11 THEO CHƯƠNG TRÌNH GLOBAL SUCCESS ĐÁP ÁN CHI TIẾT - CẢ NĂ...
HỌC TỐT TIẾNG ANH 11 THEO CHƯƠNG TRÌNH GLOBAL SUCCESS ĐÁP ÁN CHI TIẾT - CẢ NĂ...Nguyen Thanh Tu Collection
 
Grade 9 Quarter 4 Dll Grade 9 Quarter 4 DLL.pdf
Grade 9 Quarter 4 Dll Grade 9 Quarter 4 DLL.pdfGrade 9 Quarter 4 Dll Grade 9 Quarter 4 DLL.pdf
Grade 9 Quarter 4 Dll Grade 9 Quarter 4 DLL.pdfJemuel Francisco
 
Barangay Council for the Protection of Children (BCPC) Orientation.pptx
Barangay Council for the Protection of Children (BCPC) Orientation.pptxBarangay Council for the Protection of Children (BCPC) Orientation.pptx
Barangay Council for the Protection of Children (BCPC) Orientation.pptxCarlos105
 
Global Lehigh Strategic Initiatives (without descriptions)
Global Lehigh Strategic Initiatives (without descriptions)Global Lehigh Strategic Initiatives (without descriptions)
Global Lehigh Strategic Initiatives (without descriptions)cama23
 
Influencing policy (training slides from Fast Track Impact)
Influencing policy (training slides from Fast Track Impact)Influencing policy (training slides from Fast Track Impact)
Influencing policy (training slides from Fast Track Impact)Mark Reed
 
Field Attribute Index Feature in Odoo 17
Field Attribute Index Feature in Odoo 17Field Attribute Index Feature in Odoo 17
Field Attribute Index Feature in Odoo 17Celine George
 
Transaction Management in Database Management System
Transaction Management in Database Management SystemTransaction Management in Database Management System
Transaction Management in Database Management SystemChristalin Nelson
 
GRADE 4 - SUMMATIVE TEST QUARTER 4 ALL SUBJECTS
GRADE 4 - SUMMATIVE TEST QUARTER 4 ALL SUBJECTSGRADE 4 - SUMMATIVE TEST QUARTER 4 ALL SUBJECTS
GRADE 4 - SUMMATIVE TEST QUARTER 4 ALL SUBJECTSJoshuaGantuangco2
 
What is Model Inheritance in Odoo 17 ERP
What is Model Inheritance in Odoo 17 ERPWhat is Model Inheritance in Odoo 17 ERP
What is Model Inheritance in Odoo 17 ERPCeline George
 
USPS® Forced Meter Migration - How to Know if Your Postage Meter Will Soon be...
USPS® Forced Meter Migration - How to Know if Your Postage Meter Will Soon be...USPS® Forced Meter Migration - How to Know if Your Postage Meter Will Soon be...
USPS® Forced Meter Migration - How to Know if Your Postage Meter Will Soon be...Postal Advocate Inc.
 
Difference Between Search & Browse Methods in Odoo 17
Difference Between Search & Browse Methods in Odoo 17Difference Between Search & Browse Methods in Odoo 17
Difference Between Search & Browse Methods in Odoo 17Celine George
 

Último (20)

Inclusivity Essentials_ Creating Accessible Websites for Nonprofits .pdf
Inclusivity Essentials_ Creating Accessible Websites for Nonprofits .pdfInclusivity Essentials_ Creating Accessible Websites for Nonprofits .pdf
Inclusivity Essentials_ Creating Accessible Websites for Nonprofits .pdf
 
ANG SEKTOR NG agrikultura.pptx QUARTER 4
ANG SEKTOR NG agrikultura.pptx QUARTER 4ANG SEKTOR NG agrikultura.pptx QUARTER 4
ANG SEKTOR NG agrikultura.pptx QUARTER 4
 
MULTIDISCIPLINRY NATURE OF THE ENVIRONMENTAL STUDIES.pptx
MULTIDISCIPLINRY NATURE OF THE ENVIRONMENTAL STUDIES.pptxMULTIDISCIPLINRY NATURE OF THE ENVIRONMENTAL STUDIES.pptx
MULTIDISCIPLINRY NATURE OF THE ENVIRONMENTAL STUDIES.pptx
 
How to Add Barcode on PDF Report in Odoo 17
How to Add Barcode on PDF Report in Odoo 17How to Add Barcode on PDF Report in Odoo 17
How to Add Barcode on PDF Report in Odoo 17
 
Earth Day Presentation wow hello nice great
Earth Day Presentation wow hello nice greatEarth Day Presentation wow hello nice great
Earth Day Presentation wow hello nice great
 
4.16.24 21st Century Movements for Black Lives.pptx
4.16.24 21st Century Movements for Black Lives.pptx4.16.24 21st Century Movements for Black Lives.pptx
4.16.24 21st Century Movements for Black Lives.pptx
 
Integumentary System SMP B. Pharm Sem I.ppt
Integumentary System SMP B. Pharm Sem I.pptIntegumentary System SMP B. Pharm Sem I.ppt
Integumentary System SMP B. Pharm Sem I.ppt
 
Concurrency Control in Database Management system
Concurrency Control in Database Management systemConcurrency Control in Database Management system
Concurrency Control in Database Management system
 
Student Profile Sample - We help schools to connect the data they have, with ...
Student Profile Sample - We help schools to connect the data they have, with ...Student Profile Sample - We help schools to connect the data they have, with ...
Student Profile Sample - We help schools to connect the data they have, with ...
 
HỌC TỐT TIẾNG ANH 11 THEO CHƯƠNG TRÌNH GLOBAL SUCCESS ĐÁP ÁN CHI TIẾT - CẢ NĂ...
HỌC TỐT TIẾNG ANH 11 THEO CHƯƠNG TRÌNH GLOBAL SUCCESS ĐÁP ÁN CHI TIẾT - CẢ NĂ...HỌC TỐT TIẾNG ANH 11 THEO CHƯƠNG TRÌNH GLOBAL SUCCESS ĐÁP ÁN CHI TIẾT - CẢ NĂ...
HỌC TỐT TIẾNG ANH 11 THEO CHƯƠNG TRÌNH GLOBAL SUCCESS ĐÁP ÁN CHI TIẾT - CẢ NĂ...
 
Grade 9 Quarter 4 Dll Grade 9 Quarter 4 DLL.pdf
Grade 9 Quarter 4 Dll Grade 9 Quarter 4 DLL.pdfGrade 9 Quarter 4 Dll Grade 9 Quarter 4 DLL.pdf
Grade 9 Quarter 4 Dll Grade 9 Quarter 4 DLL.pdf
 
Barangay Council for the Protection of Children (BCPC) Orientation.pptx
Barangay Council for the Protection of Children (BCPC) Orientation.pptxBarangay Council for the Protection of Children (BCPC) Orientation.pptx
Barangay Council for the Protection of Children (BCPC) Orientation.pptx
 
Global Lehigh Strategic Initiatives (without descriptions)
Global Lehigh Strategic Initiatives (without descriptions)Global Lehigh Strategic Initiatives (without descriptions)
Global Lehigh Strategic Initiatives (without descriptions)
 
Influencing policy (training slides from Fast Track Impact)
Influencing policy (training slides from Fast Track Impact)Influencing policy (training slides from Fast Track Impact)
Influencing policy (training slides from Fast Track Impact)
 
Field Attribute Index Feature in Odoo 17
Field Attribute Index Feature in Odoo 17Field Attribute Index Feature in Odoo 17
Field Attribute Index Feature in Odoo 17
 
Transaction Management in Database Management System
Transaction Management in Database Management SystemTransaction Management in Database Management System
Transaction Management in Database Management System
 
GRADE 4 - SUMMATIVE TEST QUARTER 4 ALL SUBJECTS
GRADE 4 - SUMMATIVE TEST QUARTER 4 ALL SUBJECTSGRADE 4 - SUMMATIVE TEST QUARTER 4 ALL SUBJECTS
GRADE 4 - SUMMATIVE TEST QUARTER 4 ALL SUBJECTS
 
What is Model Inheritance in Odoo 17 ERP
What is Model Inheritance in Odoo 17 ERPWhat is Model Inheritance in Odoo 17 ERP
What is Model Inheritance in Odoo 17 ERP
 
USPS® Forced Meter Migration - How to Know if Your Postage Meter Will Soon be...
USPS® Forced Meter Migration - How to Know if Your Postage Meter Will Soon be...USPS® Forced Meter Migration - How to Know if Your Postage Meter Will Soon be...
USPS® Forced Meter Migration - How to Know if Your Postage Meter Will Soon be...
 
Difference Between Search & Browse Methods in Odoo 17
Difference Between Search & Browse Methods in Odoo 17Difference Between Search & Browse Methods in Odoo 17
Difference Between Search & Browse Methods in Odoo 17
 

Laboratory management and safety best book

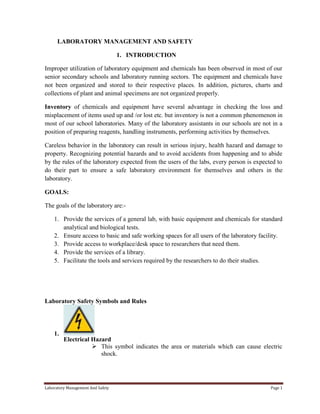
  • 1. LABORATORY MANAGEMENT AND SAFETY 1. INTRODUCTION Improper utilization of laboratory equipment and chemicals has been observed in most of our senior secondary schools and laboratory running sectors. The equipment and chemicals have not been organized and stored to their respective places. In addition, pictures, charts and collections of plant and animal specimens are not organized properly. Inventory of chemicals and equipment have several advantage in checking the loss and misplacement of items used up and /or lost etc. but inventory is not a common phenomenon in most of our school laboratories. Many of the laboratory assistants in our schools are not in a position of preparing reagents, handling instruments, performing activities by themselves. Careless behavior in the laboratory can result in serious injury, health hazard and damage to property. Recognizing potential hazards and to avoid accidents from happening and to abide by the rules of the laboratory expected from the users of the labs, every person is expected to do their part to ensure a safe laboratory environment for themselves and others in the laboratory. GOALS: The goals of the laboratory are:1. Provide the services of a general lab, with basic equipment and chemicals for standard analytical and biological tests. 2. Ensure access to basic and safe working spaces for all users of the laboratory facility. 3. Provide access to workplace/desk space to researchers that need them. 4. Provide the services of a library. 5. Facilitate the tools and services required by the researchers to do their studies. Laboratory Safety Symbols and Rules 1. Electrical Hazard  This symbol indicates the area or materials which can cause electric shock. Laboratory Management And Safety Page 1
  • 2. 2. Combustible Materials  This symbol indicates material or chemical (may be solid, liquid or gas) which can be combustible in fire. 3. No Open Flames  This is the symbol which express a material which cannot create flame. 4. Corrosive Materials  Indicates materials which are contaminated with corrosive chemicals and which can be affect human if contacted with skin. Laboratory Management And Safety Page 2
  • 3. 5. or Flammable Symbol  Chemicals (solid, liquid or gas) and materials which can be flammable if burnt. Laboratory Management And Safety Page 3
  • 4. 6. Fire Extinguisher  This is the symbol of fire extinguisher which has to be posted on fire extinguisher. 7. Toxic Chemical  Indicates chemicals which can be toxic to human body. Laboratory Management And Safety Page 4
  • 5. 8. Non-potable water  Indicates water pipe which cannot give function. Laboratory Management And Safety Page 5
  • 6. 9. Environment Hazard  Chemicals which can affect environment if exposed or etc… 10. Eyewash Sign  Indicates the position of eye wash where to wash eye while the contamination of eye with chemicals occurred. 11. Recycling Sign Laboratory Management And Safety Page 6
  • 7. 12. Toxic Materials Sign  Indicates the materials which can be toxic because of chemicals or etc… 13. Explosive Materials Sign Laboratory Management And Safety Page 7
  • 8. 14. Radioactive Sign 15. Biohazard Sign 16. Chemistry Hazard Label Laboratory Management And Safety Page 8
  • 9. General Safety Rules: 1. Read all directions for an experiment and follow the directions exactly as they are written. If in doubt, ask the teacher. 2. Never perform experiments that are not authorized by your teacher. Always obtain permission before experimenting on your own. 3. Never handle any equipment unless you have specific permission. 4. Take care not to spill any materials in the lab. If a spill occurs, ash your teacher immediately about the proper clean-up procedure. 5. Dispose of all material according to the teacher’s instructions. Never empty materials into the sink or trash can. 6. Never eat in the laboratory. Wash your hands before and after each experiment. 7. Never horse play or run in the laboratory. This will earn you a zero and dismissal from the lab. 8. Know the location and function of all laboratory safety equipment. Laboratory Management And Safety Page 9
  • 10. Laboratory Dress Code: 1. Always wear goggles anytime sharp instruments or chemicals are used in the laboratory. 2. Tie back long hair and loose clothing when performing laboratory experiments involving open flames. 3. Remove jewelry before lab activities. 4. Always wear closed-toed shoes in the laboratory. First Aid: 1. 2. 3. 4. Report all accidents to the teacher immediately. Apply direct pressure to any severe cuts to stop the bleeding Know the location of the first aid kit Know the location and use of the fire blanket. Heating and Fire Safety: 1. Never reach across an open flame. 2. Know how to light and extinguish the Bunsen burner, never leave a burner unattended. 3. Point the test tube or bottle away from you and others when being heated; chemicals can rapidly boil out of the container. 4. Never heat a liquid in a closed container. 5. Always use a clamp or tongs when handling hot containers. Chemical Safety: 1. Never touch, taste, or smell, any questionable chemicals in the laboratory without the teacher’s permission. 2. Only as instructed by the teacher, gently wave your hand over the opening of a container toward your nose. Do not inhale fumes directly from the container. 3. Keep all lids to chemicals closed. 4. Dispose of all chemicals as instructed by your teacher. 5. Pour acids and bases over a sink incase of spillage. 6. Never pour water into an acid, pour the acid into the water. 7. Never eat or drink from any laboratory glassware. 8. Never use chipped or broken glassware cuts and scratches can occur. Electrical Safety: 1. Make sure electronic equipment is OFF when plugging or unplugging from an outlet. Laboratory Management And Safety Page 10
  • 11. 2. 3. 4. 5. Make sure the work area for electrical equipment is clean and dry. Do not “daisy-chain” electrical power cords. Inspect power cords for cuts or abrasions that revel bare copper wire. Be very aware of the location of power cords to avoid tripping and damage to persons. End of Laboratory activity rules: 1. Clean all laboratory equipment and return to their locations 2. Unplug and store properly any electrical device. 3. Wash your hands after every experiment. 4. Extinguish all candles and burners and the conclusion of the lab activity. 5. Turn off all gas lines to the Bunsen burners. Be safe, enjoy, and follow the lab rules! 2. LABORATORY MANAGEMENT The Science Laboratory is a place where classroom teaching is further strengthened. The new facts and ideas lectured in the class will be confirmed in the laboratory through the use of equipment, chemicals and specimens. It provides an opportunity to studyorganisms closely and to examine the various structures, processes, relationships, etc. which are characteristics of these organisms. It is here, therefore, that students develop skills, abilities and attitudes through the practical activities they carry out. Therefore, all laboratory facility should have to be managed to strengthen the classroom teaching. The science teacher should make certain that the theoretical lesson is supplemented with the necessary practical work. Otherwise, the work is considered to be done partially, because the knowledge students are expected to gain along with the development of the required skills and abilities cannot be materialized. So the teacher must not consider laboratory activities as something additional that could be omitted, but as an integral part of the subject matter. Some schools have separate laboratories for biology, chemistry and physics. Others have two labs for the three subjects. And there are still others that have only one laboratory. Variations also exist in water and electricity services, material distribution and storage facilities. This is partly because the schools have been constructed and equipped under different projects, public contribution and government budget. Being aware of these differences, which could only be solved step by step in the process of development, teachers have to put much effort and be creative enough to effectively use the resources at hand. 2.1. GENERAL LABORATORY MANAGEMENT RULES Laboratory Management And Safety Page 11
  • 12. 1. Environmental protection is one objective of the labs. For this reason, a complete treatment of chemical wastes and biological wastes are required when possible. The Lab manager/assistant should know about chemical management, disposal and storage. Fungal and bacterial cultures should be autoclaved before they are disposed. 2. Turn off the lights and equipments when they are not in use including the extractor hoods. 3. When working in the lab, goggles and lab coats must be used. Gloves and masks appropriate for procedure must be used when necessary (i.e. Acid resistant gloves or asbestos gloves for hot objects).Vapor hoods, with the air extraction on, are to be used when working with hazardous volatile materials with the fume shield partially closed to protect against splashes. Safety goggles must always be used when working in the vapor hood. All safety materials (goggles and masks) should be provided for the Lab. 4. Classify your garbage (glass, paper, plastic bottles and aluminum cans) and put it in the proper containers located outside the lab. 5. All solutions and samples should be labeled with the identification of their nature. 6. Balances, pH-meters are calibrated every day by the lab assistants. 7. Refrigerator and freezer space is provided to store solutions or samples. All solutions and samples must be properly labeled. Solutions must be stored in their own containers, not in lab glassware. Stored material that is not properly labeled can be discarded without warning. 2.2. ARRANGEMENT OF EQUIPMENT AND CHEMICALS Laboratory equipment andchemicals are sent to schools in accordance with the curriculum demand. They are part of the essentials to fulfill the specific objectives of each portion in the course. Hence, they have to be used at the right time. The timely use of these materials however, can only be possible if there is a systematic approach to their arrangement and storage in the laboratory. Keeping materials according to their use and nature is time saving and is essential for safety and guarantees their prolonged use. 1. ARRANGING AND STORING EQUIPMENT  Materials having similar and related functions are kept together or in adjacent shelves. For example, Microscopes, Microscopic Slides, Cavity Slides, Cover Slides and Magnifying lenses should be placed together or should take adjacent shelves. Similarly, materials used for dissection such as scissors, needles, forceps, razors, etc. should have their own separate places.  It is always preferable to have closed storage space. When equipment and supplies are stored in closed cabinets, they are not exposed to dust, fumes or fluctuations in humidity and temperature. Laboratory Management And Safety Page 12
  • 13.  Microscopes can be stored and easily counted in a cabinet made up of individual sections. This type of storage cabinet reduces the change for tumbling or knocking of the microscopes.  The wooden slide box, which is available in most of the schools, has to be effectively used for storing prepared slides. All the slides contained in the sections of the slide box should be indicated by writing on the corresponding serially arranged lines, printed on the inner surface of the slide box covering.  Once equipment is arranged, the specific place for each item should be indicated by labeling. If the materials are kept in cabinets and shelves with glass covers, the printed labels could be attached to the inner surface of the glass cover. However, if the containers have opaque covering, the printed labels should be placed on the outer surface of the covering and may be protected by a layer of transparent plastic sheeting.  After moving equipment from its place for actual use, return it immediately to its specific (labeled) place. Do not leave apparatus out after use!  Manage and use the Laboratory instruments and equipment according to their nature.  Analytical Equipment: The Laboratory has basic lab equipment such as scales, microscopes, magnetic stirrers, centrifuges, water baths, etc. The user must know the equipment function, operation, care and maintenance. If not, the user must request help from the Lab Assistant.  Any equipment or instrument used should be returned clean and in good shape.  Some instruments such as the gas chromatographs, the lyophylizer, and the spectrophotometer, are of limited use and are to be used only by persons who have previous experience with them.  Refrigerators and freezers:  The refrigerators and freezers are used to store samples and reagents. They are not allowed for food storage.  The user should ask the Lab Assistant for assigning space in them.  If the refrigerators and freezers are intended to be used only during the researcher’s stay at the Station, any stored material must be clearly labeled with the following information: Researcher’s name  Project name  Content (Name of the reagent, sample, etc.)  Preparation date  Expiration date (if applicable)  Date in which it will be taken out of the refrigerator or freezer  If anybody needs to keep things in refrigerators and freezers after leaving the station, the Lab Assistant must be informed.  Regularly, the lab personnel will review the contents of refrigerators and freezers. If there objects that do not contain the above information, if the owner Laboratory Management And Safety Page 13
  • 14. is not at the station any more, or if the storing date has expired, they will be disposed.  When using an oven, temperature should be checked periodically as a safety measure for fire.After using it, the oven should be turned off and cleaned.  The laboratory maintains basic glassware available for researcher use. After using glassware, it must be cleaned and dried. Any broken material must be reported to the Lab Assistant and disposed off in the appropriate container. 2. ARRANGING AND STORING CHEMICALS  The arrangement and storage of chemicals should be done based on the nature of the substances.  Certain chemicals react when placed close to each other. Glycerin and nitric acid, potassium chloride and organic compounds, cyanides and acids, etc. are among such chemicals.  Combustible and dangerous materials such as poisons should be securely locked in metal cabinets.  Acids, strong bases and substances like chloroform, ether, iodine and hormones should be stored in facilities, which can be locked.  Large storage bottles of acids, alkalies and other dangerous chemicals, if on shelves, are to be no more than two feet above the floor. If possible, they should be kept on the floor.  If there are metallic sodium, potassium, and calcium and calcium carbide in the lab, they should not be kept near or above containers containing water or water solution. Metallic sodium and potassium, after the original container has been opened, must thereafter be kept under kerosene.  The containers of chemicals that absorb moisture and change their chemical nature should never be left open. For example, Sodium Hydroxide, Sodium Carbonate and Sodium bicarbonate are hygroscopic. They absorb water from the atmosphere; as a result, their volume increases. The nature of the chemicals also changes. 3. ARRANGEMENTS AND STORAGE OF OTHER TEACHING AIDS: Pictures and Charts  A drawer or filing cabinet filled with unclassified picture is practically worthless (valueless). To be effective, pictures must be put into some kind of order classification may be by topic, process, activity, or any other meaningful system.  Pictures may be mounted for longer use. When mounted they should be laminated between plastic sheets to ensure a longer life and to give a better appearance.  Many charts can be stored conveniently, and they are not exposed to wear and tear, when stored in hanging position. Each chart can be wired at one end and hooked on to Laboratory Management And Safety Page 14
  • 15.     the sliding arms of the cabinet. If each arm holds the charts dealing with a given topic in biology, teachers or students can find the charts quickly when they are needed. The teacher may hang the charts according to his filing system. Models, skeletons, jar mounts and other specimens may be stored in cabinets that many drawers (if the school is equipped with such cabinets). They may also be kept in a storage cabinet that has a glass cover. The later also serves as a display case. If you are using open shelf storage space, you may cover it with transparent plastic sheeting to avoid the accumulation of dust. If cabinets are not available, specimens and models can be stored and found most easily if they are kept in some uniform kind of container. Plastic boxes, polythene bags, match and shoe boxes, tin lids, plates, etc. may be used. There is no rule. You can choose what you get cheaply and easily in your area. However, classification should be done. When arranging models, skeleton and other specimens in cabinets, similarity and relations regarding structure and function should be considered. Finally, the materials should be properly labeled for identification. Sometimes, to avoid smearing, printed labels can be placed inside a jar-containing specimen preserved in alcohol. The procedure is as follows:Print labels with India ink and set aside to dry until the ink no longer glistens. Dip them into a jar containing 5 to 10% glacial acetic acid (use forceps). Then drain the labels on blotting paper and insert into the specimen jars containing 70% ethyl alcohol. NB. Strong paper should be used for labels because glacial acetic acid tends to soften the paper. 2.2. LABORATORY ETIQUETTE (RULE) A. Your responsibility includes keeping your workstation properly. You will use equipment and parts stored in trays or drawers in an orderly fashion. Keep it in that order, for your own convenience. B. Keep your work area uncluttered (organized). Store all instruments and components not actively in use in their proper place, away from your work area, or in the specials storage cabinets. C. You may need other equipment and components stored in a different area from your workstation, perhaps in drawers or bins, or on shelves in the stockroom. Return these to their proper place immediately when you have finished with them. D. Do not make unauthorized modifications to the equipment. 2.3. DUTIES AND RESPONSIBILITIES OF LABORATORY ASSISTANTS Laboratory Management And Safety Page 15
  • 16. The idea of assigning a lab assistant originate from the need to effectively utilize the laboratory and facilitate conditions, so that teachers and students can carry out all the compulsory practical activities which are necessary to attain the defined objectives of the lesson. After a certain lab session, equipments and other materials may be found scattered in the laboratory. Plant specimens, soil samples and the like, brought to the laboratory by students, may be left to cover and spoil the benches and the floor. Used glassware’s may be found unwashed and need cleaning. Apparatus set up for experimentation need to be dismantled. Students may leave forgetting to return equipment and chemicals to their shelves. These and similar others, which affect the neatness and the readiness of the laboratory for next session, should be given careful attention by the laboratory assistant. Sometimes the teacher may not have enough time to collect all the necessary materials and set-up an apparatus for an experiment or demonstration. The practical activity he wanted to perform may also require materials that need to be prepared ahead of time. For instance, if the teacher wants germinating seeds, he asks him to germinate seeds for him. He should get seeds soaked in water 4 to 8 days before the laboratory session. A reagent that can be prepared in the laboratory may also be needed for a particular experiment. This should be made ready for use whenever needed. Occasionally, equipment necessary to carry out an experiment may not be available in the laboratory. Under this condition, alternative method and improvisation will be found to be highly essential. The laboratory assistant in collaboration with the teachers is therefore expected to deal with the above and other related cases. With this in mind, the following points are some of the duties and responsibilities of a laboratory assistant:- this in mind, the following points are some of the duties and responsibilities of a laboratory 1. The laboratory assistant will take charge of laboratory equipment, assistan apparatus and chemicals. 2. Will keep the laboratories open for use during class hours. 3. Takes proper measures in the arrangement, organization and storage of equipment, chemicals, specimens, charts, models, pictures, etc. regarding the laboratory, provides guide to pupils whenever necessary. Laboratory Management And Safety Page 16 4. Controls the neatness and proper handling of laboratory rooms. 5. Prepare necessary materials and set-up an apparatus for an
  • 17. ሩ For efficient and smooth functioning of the laboratory, good understanding and close cooperation between teachers and the lab assistant is essential. They (teachers) are expected to brief him on the use and handling of chemicals and sensitive instruments. Under no condition should the lab assistant be ordered to mix or treat chemicals he does not know. A planned and programmed utilization of the lab will be necessary for maximum efficiency. Depending on the number of teachers and sections that make use of the lab, teachers along with the lab assistant should arrange a convenient timetable and work according it. This time table, which should enable each section to use the lab at least once in a week; helps avoid program clashing and ensures that all teachers using the laboratory. 2.4. FORMATS IN THE LABORATORY The laboratory assistant may prepare different kinds of formats to help him in his work. Some of the formats, if they are properly documented, serve as a source of information and give necessary data accurately. Among such formats, the following three are recommended to be used. 1. Requisition Format Laboratory Management And Safety Page 17
  • 18. Sometimes a teacher wants to take a model, chart or a specimen from the laboratory to show his students in the classroom. Another teacher may ask for certain equipment and chemicals for a class demonstration. It is part of the duty of the lab assistant to supply them with the needed materials. It is also his responsibility to see that the materials have been returned. In entertaining such cases, using requisition formats will be of much help. It allows safe and timely return of materials borrowed from the lab. Sample BIOLOGICAL ITEM REQUISITION FORM Date_______________ Name of the school______________ Teacher’s Name_________________ Grade and Section_______________ Unit_____________ Type of Activity_______________ Item Requested Chemicals _______________ ________________________________ ________________ Equipment _______________ ________________ _____________ _____________ ________________ ________________ ________________ Condition _____________ ________________ ________________ ________________ Quantity ______________ _____________ _____________ Others___________________________________________________ Date of performance_________________________ Department Head Remark_________________________ Teacher’s Signature_________________________ Signature of the Dep. Head___________________ 2. Format for Registering Materials Lost and Broken Laboratory Management And Safety Page 18
  • 19. One of the reasons why teachers refrain from effectively using the laboratory is the fear associated with the losing and breaking of the materials. Materials are kept in the lab to be used whenever needed. In fact, they may be lost for broken while in use. The important thing is to use them carefully. In case the materials are lost or broken while using them, the case should be immediately reported to the person who is in charge (the lab assistant or any other person assigned). A form should always be ready to register the item lost or broken. The condition should be specified this then should be reported to the concerned committee for decision. The committee is usually formed from people representing the administration, the laboratory assistant and teacher’s representative. Such a procedure allows avoiding the unnecessary arguments that arise between teachers and store keepers at the end of the academic year. Sample BIOLOGY LABORATORY FORM FOR REGISTERING MATERIALS LOST OR BROKEN Date Name of the school____________________ Item Lost Quantity Orbroken Specific Condition Person In Signature Charge Remark By the end of the year, the form will be containing list of materials lost during the academic year, and hence helps as a reference for making all replacements and necessary preparations for the coming year. 3. Format for Recording Practical Activities Performed In this form, experiments and demonstrations done are recorded along with the materials used. From among the compulsory experiments, those that cannot be done are also indicated and the reasons f or not doing are also specified. Laboratory Management And Safety Page 19
  • 20. An experiment might have been omitted due to lack of materials. Another might have been found to be difficult to perform. A teacher might have also neglected an experiment which he thought was irrelevant to the subject matter. Whatever the reason may be, the teacher is expected to state it clearly in the form. This enables to know how many of the compulsory practical activities have been carried out in the year and how many of them have not been conducted. The reasons stated (for not performing some of the experiments) also enable teachers to be in a position to give constructive comments on the use of the laboratory, the practical activities listed in the lab manuals and the curriculum as a whole. Sample BIOLOGY LABORATORY FORM FOR RECORDING PRACTICAL ACTIVITIES PERFORMED Name of the School_______________________ Remark Reason In Case Not Performed Sig. Section Grade Unit Date Topic Of Practical Activity Material Used Name of the teacher______________________ 2.5. INVENTORY In some schools, materials supplied at different timeswere found kept in the store for many years. In such schools, since yearly inventory is not done it is not possible even to know what materials are available. The word inventory refers to the counting and listing of materials in the school store, laboratory etc. available, broken or lost. A properly carried out yearly inventory enables:    To check the loss and misplacement of equipment To cross check with the previous counting To take corrective measures if difference are observed and find the reason why the difference are seen To replace items used up and/or lost and maintenance. Laboratory Management And Safety Page 20
  • 21. For the proper handling and use of materials, the yearly inventory is very essential. The following points may be considered when carrying out the counting.  If materials in the lab are found to be unknown to the storekeeper or lab assistant, it will be necessary to ask the help of teachers for identification. If this does not solve the problem, instead of giving vague and irrelevant description, it is better to identify them using code (item) numbers.  A short description about the condition of the material will be helpful.  Registering quantities of the same item separately (under different serial numbers) will not be convenient for counting.  The list should include materials bought by the school, those prepared by teachers and students and materials obtained from organizations and individuals.  Separate lists should be prepared for materials in the three science laboratories. 2. LABORATORY SAFETY 2.1. Laboratory Safety Rules Careless behavior in the laboratory can result in serious injury, health hazards and damage to property. Learn to recognize potential hazards, to avoid accidents from happening and to abide by the rules of the laboratory. Every person is expected to do their part to ensure a safe laboratory environment for themselves and others in the laboratory. Some of the main rules that all individuals using the laboratory must abide by are:o No smoking, eating, and drinking in the laboratory. o Horseplay is not allowed in the laboratory. o Lab users must become familiar with the location and operation of the fire extinguisher and other safety devices. o If an individual has a question about the operation of a certain laboratory device, the lab supervisor should be consulted. Equipment that you are not familiar with should not be used. o Be aware of the biological and/or chemical agents are used in the laboratory. Even if you are not performing experiments using hazardous agent, you should take appropriate precautions to keep yourself safe. Always wash your hands before leaving the laboratory and remove any gloves you are wearing. General Laboratory Safety Rules 1. Smoking, eating, drinking Laboratory Management And Safety Page 21
  • 22. No smoking, eating, drinking, chewing, or applying cosmetics in laboratory areas. No food or drink is to be stored in laboratories (including refrigerators and freezers). 2. Disposable Laboratory Gloves Disposable laboratory gloves are not to be worn in communal areas. Door handles, telephones, computer keyboards (except in clearly labeled circumstances), lift buttons, etc. are not to be touched with gloves. If needle, wear one glove and use the un-gloved hand to open doors, operate lift etc. Rubber or disposable gloves should be worn when handling/working with:  Human blood or other body fluids  Dangerous chemicals  Potentially infectious material 3. Laboratory Gowns or Lab Coats Laboratory gowns or lab coats must always be worn in laboratories, and they must be removed before entering “clean areas”, e.g. the tea room, stores, toilets, library, office areas, etc. The gowns or coats must be of sufficient length to protect the worker (i.e. down to about the wearer’s knees). They must close at the back or, if front-closing, have enough overlap at the front to prevent gaping. 4. Clothing, Footwearand Hair Clothing and footwear must be suitable for laboratory conditions, i.e. clothing must not present any hazards by being too loose, accessories must not present a hazard during laboratory work, etc. and footwear must be fully enclosed. If you want to wear other shoes to and from work, etc. you might want to keep a pair of fully enclosed shoes at work to wear in the lab. Thongs, or barebacked sandals or shoes, or very high heels must not be worn in the laboratory. Bare feet are also prohibited. Long hair must be tied back to avoid contact with microorganisms and equipment. 5. Safety Glasses Full-face shields must be worn for all work involving corrosive or toxic liquids, ultra-violet light. 6. Avoiding Ingesting Microorganisms The best protection to ingesting microorganisms is not to put them in mouth. Pencils and pens must not be placed in the mouth. Chewing of fingernails, playing with hair, applying lipstick, drinking, etc. are not allowed. Wash your hands when leaving the laboratory togoto lunch, etc. Laboratory Management And Safety Page 22
  • 23. 7. Pipetting Do not pipette by mouth. The use of pipettes with cotton plugs to reduce contamination is preferable place pipettes in disinfectant solution tip-first to minimize aerosol production. Submerge for 18-24 hours. Residual volumes from pipettes create aerosols; use mechanical devices that are calibrated to deliver. 8. Syringes and Needles Restrict the use of “sharps” to a minimum. Avoid using syringes to mix infectious liquids (if essential, hold the tip of the needle under the surface of the fluid and avoid excessive force). Discard used syringes and needles into an approved container. 9. Hazardous Chemical/Biological Spills Hazards chemical and biological spills and blood spills on floors, benches or equipment should be cleaned up immediately. Special treatment is required for spills of a bio hazardous nature. 10. Hand Washing Hands should be washed after completing each task and always before leaving the laboratory. 11. Faulty Equipment Any faulty equipment should be removed from service for repair or disposal. 12. Corridors and Exits Corridors and exits must not be obstructed by equipment or stored items. 13. Bench Work Minimize aerosol production when carrying out on an open bench. Place bench coat or a similar absorbent paper over working surfaces. Replace this regularly. Decontaminate workbenches after spills and after work has been completed. 14. Fungal Spores Petri dish cultures of fungi should be sealed and incubated with the lid uppermost to prevent the dispersal of fungal spores. Recognize fungi as potential pathogens and be aware of the ability of some species to produce mycotoxins. 15. Petri Dishes Laboratory Management And Safety Page 23
  • 24. Take care when handling petri dishes that contain condensate. This may contain viable microorganisms that can be spread via droplets or aerosols when the plates are opened or dropped. 16. General Behavior No running or “horse play” in the lab. ` Before You Attend Any Biology Lab DO’s: Read your lab manual “Safety” section Know the work procedures for each day. DON’T’s: Think that ignorance is bliss. Forget your lab manual and rely on your memory. Know the dangers. Have a casual attitude. Plan to wear a lab coat. Wear your best clothes. Be well rested and alert. Sleep-in and arrive late. Notify the lab instructor of any relevant Hide a medical condition that might medical condition. jeopardize your safety or the safety of others. NO ONE SHOULD EVER ADOPT A COMLACENT ATTITUDE TOWARDS LAB SAFETY. 2.2. Other Safety Rules When Working In Biological or Chemical Laboratory 1. Personal Safety The highest priority in the laboratory is personal safety. Therefore you must be sure to: Wear eye protection in the laboratory when handling any chemical or biological agents. Tie your hair back, if you have long hair. Wear protective gloves when handling corrosive chemicals or biological agents. These are not to be worn in non-lab areas. (i.e. remove them before going to the washroom). Wear a lab coat and closed-toed shoes, when in the lab. o Lab coats used in labs should not be worn in non-laboratory areas. Laboratory coats are to be worn INSIDE the laboratory BUT have to be removed when leaving the work area. 2. Chemical Hazards Safety When performing experiments: Wear protective gloves. Read the lab before using any reagent. Laboratory Management And Safety Page 24
  • 25. Never pipette by mouth (even water); use a device such as a pipettor. Never taste chemicals and smell them only cautiously. Never use the biological and safety cabinets as fume hoods. Never pour chemicals down the sink without first consulting Supervisor. 3. Biological Hazards Safety Although you may not be working with pathogenic organisms, you should be aware of safety procedures in dealing with biological agents in general. All persons working with biological agents must observe the following rules: Wear a lab coat. Clothing coming in contact with biological agents should be removed and washed. Keep the laboratory doors closed. Wash your hands thoroughly with soap and water before leaving the laboratory. Place any non-sharp implements that you used to handle biological agents into appropriatecontainers. Place all used microscope slides in disinfectant. Never place cell culture vessels close to the edge of the lab bench and in areas where they could be knocked over. Never leave cultures open to the air: keep them covered at all times. Many biological agents can become airborne and inhalated. No mouth pipetting at any time. No smoking, eating or drinking in the laboratory. A lab coat must be worn whenever work involving biological material is being carried out and must be taken off before visiting non-laboratory areas (coffee rooms, shops, libraries, etc.). All contaminated glassware must be disinfected before being placed for washing up. All spillages must be wiped up with either disinfectant or ethanol including spillages in centrifuge rotors. All materials which are potentially infectious should be inactivated (by disinfection or by autoclaving) before leaving the lab for incineration. Care must be taken when using any procedure which generates aerosol, to minimize exposure to potentially infectious agents. Wash your hands before you leave the laboratory. Potentially hazardous biological specimens: 1. Human cell line (including non-human primates). Laboratory Management And Safety Page 25
  • 26. 2. 3. 4. 5. 6. 7. Non-human cell line. Human or other primate sample (fluid, tissue, etc.). Non-primate sample (fluid, tissue, etc.). Bacteria. Virus. Fungus, parasite, or other live material. Potential Causes: 1. 2. 3. 4. 5. 6. 7. 8. Oral aspiration through pipettes. Accidental syringes. Animal bites. Spray from syringes. Centrifuges accidentals. Cuts and scratches. Animal wastes. Direct contact with pathogenic cultures. 2.3. Safety Considerations Associated With Some Specific Instruments/Equipments A. Biological Safety Cabinets Biological safety cabinets have been installed in some laboratories for two reasons: 1. To maintain sterility in your experiments. 2. To protect the user from the experiment, so that the user has minimal contact with the biological and chemical agents. For maximum safety and experimental success, use the biological safety cabinet as much as possible when using biological media. Techniques for the use of biological safety cabinets: 1. The use and limitations of biological safety cabinets should be explained to all potential users, with reference to national standards and relevant literature. 2. The cabinet must not be used unless it is working properly. 3. The glass-viewing panel must not opened when the cabinet is in use. 4. Apparatus and materials in the cabinet must be kept to a minimum and at the rear of the working area. 5. All work must be done in the middle or rear part of the working surface and should be visible through the viewing panel. 6. The operator should not disturb the airflow by repeated removal and reintroduction of his or her arms. Laboratory Management And Safety Page 26
  • 27. 7. The cabinet fan should be run for at least 5 minutes before and after completion of work in the cabinet. B. Centrifuge Centrifuges can be a hazard for two reasons: 1. The components remove at extremely high speeds and if they are not balanced, there is a possibility for a mechanical hazard. 2. Usually the centrifuge is used for potentially bio-hazardous media, so care must be taken to avoid spillage of the media. If spillage occurs, proper decontamination must take place. Techniques for the use of centrifuges: 1. Satisfactory mechanical performance is a prerequisite of microbiological safety in the use of laboratory centrifuges. 2. Centrifuges should be operated according the manufactures’’ instructions. 3. Centrifuges should be placed at such a level that workers of less than average height can see into the bowl to place trunnions and buckets correctly. 4. Centrifuge rotors and buckets should be inspected daily for signs of corrosion and for hairline cracks. 5. Buckets and trunnions should be paired by weight and, with tubes in place, correctly balance. 6. Alcohol (70%) should be used for balancing buckets. Saline or hypochlorite solution should not be used as both corrode metals. 7. Securely capped tubes and seal able centrifuge buckets offer adequate protection against infectious aerosols and dispersed particles of microorganisms. C. Autoclaving for Sterilization Individuals responsible for autoclaving glassware and other lab ware will be responsible for preparing the materials for sterilization. Refrigerators and Freezers Techniques for the care and use of refrigerators and freezers: 1. Refrigerators, deep-freezers should be defrosted and cleaned periodically and any ampoules, tubes, etc. that have broken during storage removed. Face protection and heavy-duty rubber gloves should be worn. After cleaning, the inner surface of the cabinet should be disinfected. Laboratory Management And Safety Page 27
  • 28. 2. All containers stored in refrigerators, etc. should be clearly labeled with the scientific name of the contents, the date stored and the name of the individual who stored them. Unlabeled and obsolete materials should be autoclaved. E.Pipetting 1. Pipetting by mouth should be prohibited. A pipetting aid always is used. 2. All pipetters should have cotton plug to reduce contamination of pipetting devices. 3. Infectious materials should not be mixed by alternate suction and expulsion through a pipette. 4. Liquids should not be forcibly expelled from pipettes. 5. To avoid dispersion of infectious material if it is accidentally dropped from a pipette, a disinfectant-soaked cloth or absorbent paper should be placed on the working surface; this should be autoclaved after use. 6. Contaminated pipettersshould be completely submerged in a suitable disinfectant contained in an unbreakable container. They should be left for 18-24 hours before disposal. 7. Glassware and Sharps Handling: Protect your hands when assembling glassware equipment. Place all sharps, glassware and contaminated items (glass pipettes, needle, etc.) into designated containers for disposal. Sharps and glassware need to be decontaminated before disposal. Clean all broken glassware promptly and dispose of properly into the proper container. Use a brush and not your bare hands. Ensure that needle and blade sharps are separately and carefully collected in sharps waste container. When full, these containers are to be disposed of properly. 2.4. Other Safety Considerations A. Chemical or biological media spills Chemical/Biological spill kits are to be used only for very small spill. Clean up kits should be in every lab. Fire Safety When working in the laboratory, read the chemical label and determine if a substance is dangerous (flammable, corrosive or toxic) before using it. Laboratory Management And Safety Page 28
  • 29. Keep all bottles of flammable, toxic and corrosive chemicals closed and in the appropriate cabinet unless they are in use. Keep open vessels of solvent away from source of heat or sparks. If your clothing is on fire: stop, drop and roll on the floor to smother the flames. Know where the fire extinguisher is located. Know where the fire exits are. Check all electrical equipment before you turn the power on. General Housekeeping  The best way to avoid accidents is to develop good housekeeping. Keep your workplace clean and tidy. Clean up spills, broken equipment, floods and general clutter promptly. WASTE DISPOSAL A.BIOLOGICAL WASTE Biological waste includes:  Liquids such as used cell culturing media, supernatant, blood or blood fractions (serum),etc. which contain viable biological agents;  Materials considered pathological, any part of the human body, tissues and bodily fluids.  Any part of an animal infected [or suspected to be infected] with a communicable disease;  Non-sharp, solid laboratory waste (empty plastic cell culture flasks and petri dishes, empty plastic tube, gloves, wrappers, absorbent tissues, etc.) which may be, or is known to be, contaminated with viable biological agents;  All sharp and pointed items used in medical care, diagnosis, and research, including the manipulation and care of laboratory animals, which should be considered potentially infectious;  Laboratory glassware, which is known or suspected to be contaminated with hazardous biological agents. Packaging and Treatment Materials contaminated with hazardous biological agents must be collected in the appropriate containers and sterilized or disinfected before disposal. a) Liquids containing bio hazardous agents Collect liquids in leak-proof containers such as flasks or bottles. Liquid waste containers designers to withstand autoclaving temperatures must be used when steam sterilization is utilized. Laboratory Management And Safety Page 29
  • 30. b) Solids containing bio hazardous agents Non-sharp, solid laboratory waste (empty plastic cell culture flasks and petridishes, empty plastic tubes, gloves, wrappers, absorbent tissues, etc.) which may be, or is known to be, contaminated with viable biological agents should be collected in autoclavable bags. These plastic bags display the biohazard-warning symbol. Note: Autoclavable bags should be used for solid, non-sharp, hazardous biological waste only and disposed of appropriately. They should not be used for the collection of other solid hazardous or nonhazardous waste that may require other treatment or disposal methods. For laboratories generating large volumes of agar gel in disposable Petridishes and tubes requiring sterilization, such waste should be collected and sterilized. c) Sterilization and Disinfections Inactivate the biological agents by employing either chemical disinfection or steam sterilization procedures. Autoclaving (steam sterilization) is the preferred (and generally regarded as the most reliable) method of sterilizing biological waste. Depending on the volume of waste to be sterilized, it may be necessary to extend the duration of exposure to high temperature steam under pressure. or Plastic disposable pipettes are disposed into appropriate container and then soaked in disinfectant for a period of several hours. Contaminated glassware should be thoroughly soaked in disinfectant for a period of several hours before placing in the washing up. All contaminated glass or plastic should be washed and thoroughly decontaminated. Following steam sterilization or chemical disinfections, innocuous liquids may be disposed of via the laboratory drainage system. Flush with sufficient clean water to purge the drain immediately after disposal of all liquids. Do not pour melted agar into sink or floor drains. All it to cool and solidify for disposal as a solid waste. B.CHEMICAL WASTE Laboratory Management And Safety Page 30
  • 31. 1. Improper Labeling of Waste Typical examples include: a. Failing to label a waste bottle. If the contents of the bottle are not listed, the next person to use the bottle could accidentally combine incompatible chemicals, causing a fire and explosion. All bottles of chemical waste must have information on it. b. If something isn’t really waste, don’t pit the word “waste” on the bottle. c. Scratching out the former label of the bottle and writing “waste” on the bottle. You must remove or totally deface the old so there is no confusion over the contents. 2. Improper Segregation of Waste Typical examples include: a. Storing acids and bases in the same cabinet. Leaking containers or a spill could cause a violent reaction, which would release large quantities of toxic gases. b. Storing acids and organic waste in the same cabinet. In the event of accidental mixing, a catastrophic fire or explosion could result. c. Mixing incompatible chemicals in a waste container. For example, nitric acid and ethanol can form an explosive mixture. 3. Improper Storage of Waste Typical examples include: a. Using metal cans for waste. Even near neutral pH, solids and liquids can easily corrode through metal cans in a surprisingly short period of time. Use only glass or polyethylene containers for waste. b. Storing waste bottles in or near a sink or floor drain. This could allow toxic chemicals to enter the sewer. 4. Taking Waste to the Stockroom 1. Bring your waste to the stockroom o All waste containers must have a proper “hazardous waste” label with start date here’s an example: HAZARDOUS WASTE ACCUMULATION Laboratory Management And Safety START DATE MAY 29, 1997 CONTENTS acetone, diethyl ether HANDLE WITH CARE! Page 31
  • 32. o o o o      All contents are listed. The bottle or jar has a cap that fits tightly. There are no or extraneous labels on the container. The outside of the bottle is clean and dry. Chemical containers that have been empties (generally this means drained their contents by normal methods including pouring, pumping, aspirating, etc.) are not regulated as hazardous waste; however they should not necessarily be disposed of in the regular solid waste dumpsters. Generally, the primary container (the container that actually held the chemical, as opposed to a container that the primary chemical was packed in), must be triple rinsed with water or other suitable solvent and air-dried before disposal. For volatile organic solvents (e.g. acetone, ethanol, ethyl acetate, ethyl ether, hexane, methanol, methylene chloride, petroleum ether, toluene, xylene, etc.) the emptied container can be air-dried in a ventilated area without triple rising. Glass containers must be triple-rinsed with water or other suitable solvent and air-dried to ensure that it free of liquid or other visible chemical residue. If the glass container has visible residue and this residue is hazardous, the container should be disposed with appropriate care. If the residue is not hazardous, the intact container should be placed in regular lab trash. Broken glass containers that are free of chemical residue should be placed in broken glass receptacles or placed in a puncture resistant container, such as a rigid plastic container. The plastic container or box should be sealed and placed in regular laboratory trash. Metal containers must be triple-rinsed with water or other suitable solvent and air-dried. If the container is free of hazardous chemical residues, it may be placed in the regular laboratory trash. Otherwise, it should be disposed with an appropriate care. Controlling practices for infectious agents The control of biological hazards in the laboratory shall be maintained by: Laboratory Management And Safety Page 32
  • 33.     Limiting the handling of material to the minimum amount Ensuring proper disposal of material after usage Ensuring proper precautions and procedures when handling the materials Maintaining appropriate levels of identification (universal bio-hazard warning label) warning and security in storage of the material. 2.7. Emergency Procedures There are many types of emergencies that could occur in a laboratory, including fires, chemical/biological contaminants spills, injuries, accidents, explosions and others. 1. Fire In the event of a fire: 1. Individuals are not required to fight fires; but that those who choose to do so may fight small, incipient stage fires ( No bigger than a waste paper basket) as long as have been trained in theproper use of fire extinguishers. If you have been trained in the use of a fire extinguisher, fight the fire from a position where you can escape, only if you are confident that you will be successful. A fire contained in a small vessel can usually be suffocated by covering the vessel with a lid of some sort. 2. If your clothing catches fire, drop to the floor and roll to smother the fire. If a coworker’s clothing catches fire, knock the person to the floor and roll him or her to smother the flames. Use a safety shower immediately thereafter. 3. If the fire is larger or spreading inform the building occupants by fire alarm or notify the building occupants verbally of the need to evacuate. If possible, shut down any equipment, which may add fuel to the fire. Close the door behind you to prevent the fire’s spread. 2. Chemical Exposures The following procedures should be followed in the event of chemical exposure.  Chemicals on Skin or Clothing Immediately flush with water for no less than 15 minutes. For larger spills, the safety shower should be used. 1. While rinsing, quick remove all contaminated clothing. 2. Use caution when removing sweaters to prevent contamination of the eyes. Laboratory Management And Safety Page 33
  • 34. 3. Discard contaminated clothing or launder them separately from other cloth.  Chemicals in Eyes 1. Immediately flush eye(s) with water for at least fifteen minutes. The eyes must be forcibly held open to wash, and the eyeballs must be rotated so all surface area is rinsed. The use of an eye wash fountain is desirable so hands are free to hold the eyes open. If eyewash is not available, pour water on the eye, rinsing from the nose outward to avoid contamination of the unaffected eye. 2. Seek medical attention.  Chemical Inhalation Close containers, open windows or otherwise increase ventilation, and move to fresh air. 1. If symptoms, such as headaches, nose or throat irritation, dizziness, persist, seek medical attention.  Accidental Injection of Chemicals Wash the area with soap and water and seek medical attention.  Biological hazards spills If potentially hazardous biological material is spilled in the laboratory: Avoid inhaling any airborne material by holding your breath and leaving the laboratory Close the door to the laboratory and warn others in the area go to a wash or change room area. Wash all potentially contaminated area as well as the arms, face, and hands.Shower if facilities are available If clothing is known or suspected to be contaminated, remove the clothing with care, folding the contaminated area inward. Discard the clothing into a bag or autoclave Reentry into the laboratory should be delayed for a period of 30 minutes to allow reduction of the aerosol generated by the spill. NB.Contaminated gloves, wiping cloth, and sponges should be discarded into an autoclave pan and autoclaved. Emergency services: whom to contact The telephone numbers and address of the following should be prominently displayed near all telephones: The institution or laboratory itself Laboratory Management And Safety Page 34
  • 35. Safety officer Fire services Hospital/ambulance service Police Director or institution or laboratory Engineer Water, gas and electricityservices. Emergency equipment The following emergency equipment must be available: First aid kit Stretcher 2.8. Laboratory design and facilities 1. The laboratory should be separated from the areas that are open to unrestricted traffic flow within the building. Additional separation may be achieved by placing the laboratory at the blind end of a corridor 2. Access to the laboratory area must be designed to prevent entrance of arthropods and other vermin. 3. Access doors must be self-closing and lockable. 4. The surface of walls, floors and ceilings should be water-resistant and easy to clean. Opening in these surface (e.g. for service pipes) should be sealed to facilitate decontamination of the room(s). 5. A foot-or elbowoperated hand-washbasin should be provided near to each exit door. 6. Exhaust air form the laboratory must be discharged directly to the outside of the building so that it is dispersed away from occupied buildings and air intakes. It is recommended that this air is discharged through high-efficiency particulate air (HEPA) filters. Definition: A potentially hazardous biological specimen may be any one type or combination of the following types of specimens, when such a specimen consists of live, frozen or lyophilized material that may possess the potential to produce an infection or genetic alternation in humans, animals or plants. Potentially hazardous biological specimens do not include live animals that are healthy and pressure to be non-infectious, but do include unhealthyanimals that are known or suspected to be infectious. Laboratory Management And Safety Page 35
  • 36. Biological specimens are not considered to be potentially hazardous when the specimens have been chemically, thermally, or otherwise treated to render the specimens, or component thereof, permanently non-viable, permanently inactivated, or permanently incapable of insertion or infection into living cells. Hazards in bio labs are principally due to infections. Additional Hazards Include: Chemical Mechanical Fire Electrical Radiation = The End = Laboratory Management And Safety Page 36